To avoid these ads, REGISTER NOW!

Reorganization, it's like a renovation.

Status
Not open for further replies.
OP
G

GirlnAgarage

Well-known member
Joined
Jan 21, 2011
Messages
4,671
Location
Texas
Darn right boys, GJers have their priorities :D


It is back to the real world after that wonderful vacation. I wish we were doing it again soon. Or maybe I can get a beach installed in my backyard. Yeah, that's what I'll do, install a beach.

Out our balcony
57560731.jpg


So before vacation my aCar reminder kept pinging me for my oil change. It's reminder is set for 5k but I put it off as much as I could to see if I could get to the 7500ml interval. Old gasser habits die hard. As you can see up there I have been fooling with getting my truck into the garage. I really needed to try as that area is the only level ground I have to work on. Today I figured was as good as any to try it nose in instead of back in. After scooting my bench and a few things to the side I made enough to room for the truck to fit and slowly brought it in.


51874908.jpg


99881580.jpg


96771629.jpg


Wheels at the garage bump is a good marker
16583663.jpg


61765521.jpg


I can get the hood open without interference. However I have no useable ceiling light under the hood. *Noted for setting future florescents.
66539349.jpg


55359762.jpg


51145980.jpg


Junk on the side that still needs attention
97631954.jpg


Oil change tools
oilchangetools.jpg


Working perch view
usingworkspace.jpg


I think this is the first time ever to work on my truck in my garage. I must say, it was nice. Privacy and not worrying about the whole neighborhood watching me work. Flat, smooth cement that made sliding around under there really easy. Immediate access to my tools, no running back and forth or sockets/things rolling down the slanted driveway. Needless to say, I liked working there.

The next year and a half might strike the second part of making the garage mine. While I originally set out to make a place for DHs car, we've had news roll down the line that changes all that. For the most part the entire, house, garage and yard will be mine and mine alone. Giddyup!

Well I better drive over to Oreilly's and dump the old oil. It really is easy draining with the Fumoto straight into the jugs. I just toss them in the truck and take them down.
 
Last edited:
To avoid these ads, REGISTER NOW!
OP
G

GirlnAgarage

Well-known member
Joined
Jan 21, 2011
Messages
4,671
Location
Texas
Awesome! I take it you had a great time? More photos?

Jim :cool:


Jim we had a great time :thumbup: And your tips about the small bills and tips were spot on. We've yet to upload all our pics but I'll post some up once I do. It was beautiful scenery and I miss it already.
 

Wingnut65

Well-known member
Joined
Apr 21, 2010
Messages
3,170
Location
Tampa Bay, FL
Its pictures like that that make it worth going to work, knowing each day gets a little closer to a vacation. Glad to hear you had suuch a great time.

Glad to hear it was only Uncle Sam calling. And thank DH for his service and your's for supporting him! :thumbup:
 
OP
G

GirlnAgarage

Well-known member
Joined
Jan 21, 2011
Messages
4,671
Location
Texas
Its pictures like that that make it worth going to work, knowing each day gets a little closer to a vacation. Glad to hear you had suuch a great time.

Glad to hear it was only Uncle Sam calling. And thank DH for his service and your's for supporting him! :thumbup:
DH says thank you :thumbup:


Wow...makes me want to go to the beach...and I am not a beach person!

Shaun
Oh man I can't live without water nearby. I've always lived on a coast, except for now. But the saving grace is the lake just half mile from here. I can sit at the ocean and just watch, listen, think for hours. I'm at peace there.

Glad you hear you got away for a while. Anything new going on in the shop?

Howdy RL :) The most recent thing going on is getting the truck in the garage for maintenance work. I'm really enjoying that (never had a garage to work in before), though it is still a little tight space and height wise. I'm trying to see exactly what kind of work I can get done in there before DH leaves since I'll be on my own then. We're planning on selling his car so I won't have a vehicle to fall back on if mine is down. The truck doesn't fit in there length wise so I definitely can't have it inoperable in the garage. I'd have to sleep out there.

The best way to describe it is we're having a convergence of situations, I guess basically coming to the crossroads. It isn't unwelcome though. I'm kind of excited and looking forward to what those roads will bring.

I'm anticipating now having the entire garage instead of just the half. I am also getting the go ahead to look for a contractor to discuss the carport, new man door and shed for the outside. Not certain if this will/can get done before DH leaves but we'll see how it develops. The most unappealing part of this project is dealing with the in ground sprinkler system. I'd need to remove an entire zone. Makes my hands and back hurt just thinking about it.

Another situation is I think I'm going to shut down my leather business. I'm just not in it anymore. I need a change. So I'll be selling off the extra materials but I plan to maintain supplies for my personal use and tinkering. Things like the basic hand tools, stitching machine, 12T modified press, 1T arbor press, 4" Cman vise, not to mention the 12'x2' of 3/4" birchtop work bench in there. I'm thinking of mostly clearing the room out and bringing the bench and 12T press to the garage. Will have to wait and see until I get in there and start moving stuff around.

The most immediate thing I should be doing is painting the last two drawers on my tool box. Since they became functional I haven't wanted to take them down for prep and paint :eek:
 
Last edited:
OP
G

GirlnAgarage

Well-known member
Joined
Jan 21, 2011
Messages
4,671
Location
Texas
The most immediate thing I should be doing is painting the last two drawers on my tool box. Since they became functional I haven't wanted to take them down for prep and paint :eek:


Make that one last drawer to prep and paint. Did the top one yesterday.


Today I walked myself through building a wooden frame with some of the scrap I had laying around. My frame was terrible because my miters were terrible. Figured I better true up my miter saw so I worked on that until I couldn't take the heat anymore. Still got a few things to work on but it's progressing. I got this fancy saw and it doesn't even cut straight :eek:

Anyway no pics as I wasn't working on anything new. Maybe soon.
 

luvit

Well-known member
Joined
Jul 11, 2011
Messages
1,580
like i said when you just got started.. i love your drawers! can't wait to see your updated pics.
i desire to make'um like you did.. but i think i'm doing more projects than garage updating right now.. it still feels good, though.
.
 
OP
G

GirlnAgarage

Well-known member
Joined
Jan 21, 2011
Messages
4,671
Location
Texas
like i said when you just got started.. i love your drawers! can't wait to see your updated pics.
i desire to make'um like you did.. but i think i'm doing more projects than garage updating right now.. it still feels good, though.
.


Thanks :) I'm definitely still glad I built them. When I look at them all finished and in use it is hard to believe I did it from scratch. Still haven't filled them all up either. Guess I need to go shopping :D
 
OP
G

GirlnAgarage

Well-known member
Joined
Jan 21, 2011
Messages
4,671
Location
Texas
Yeah, kinda ho-hum work around here. Been spending a lot of time as the groundskeeper. I'm not much of a green thumb but it's nice to see the result of changing up the flower beds. I'd like to get the back deck more comfortable too. The motivation for getting working on my miter saw is building new patio furniture. It would be the most ambitious wood project I've undertaken. It seems that cheap, flimsy furniture is expensive and the expensive furniture is kinda flimsy. We'll see.
 

Red Leader

Well-known member
Joined
May 15, 2011
Messages
2,689
Location
Denver, CO
Yeah, kinda ho-hum work around here. Been spending a lot of time as the groundskeeper. I'm not much of a green thumb but it's nice to see the result of changing up the flower beds. I'd like to get the back deck more comfortable too. The motivation for getting working on my miter saw is building new patio furniture. It would be the most ambitious wood project I've undertaken. It seems that cheap, flimsy furniture is expensive and the expensive furniture is kinda flimsy. We'll see.

Glad to see this thread back on the front page:) Let's see that miter saw in action!:rocker:
 
OP
G

GirlnAgarage

Well-known member
Joined
Jan 21, 2011
Messages
4,671
Location
Texas
Thanks RL.

Truing this thing up is a bit of a task. It is a Rage 3 compound miter saw. It is my first compound miter saw so there's a little bit of a learning curve.

So far I've got the blade trued up to perpendicular to the table and set by adjusting the stop screw for the head angle. Then finished by adjusting the indicator dial to zero. I did discover a table problem. More on that later.

Next I trued up the fence to the blade. That was easy, just adjusting the sides, tap by tap. I got that pretty spot on and I did check square on both sides of the blade. It is a one piece fence.


Now the table problem...

The right three sides are level
10923354.jpg


However the very left side is lower than the rest
27110219.jpg


The gap is .029" at it's largest
98467420.jpg


Wouldn't be that big a deal except when I clamp a workpiece piece, the clamp tightens to the lower table and tilts the piece upward. Which then causes the cut to be crooked.
51074908.jpg


97718521.jpg


If I switch the work piece and clamp to the right side where it is level, the clamp hits the motor in both the chop motion and the sliding motion.
28026992.jpg


76986145.jpg


I'm considering making a longer horizontal arm out of steel stock so the threaded clamp can snug the workpiece down to the level part of the table. Anyone have ideas for a different type of clamp I might be able to use? I would love to be able to clamp the workpiece on both sides of the blade.


Next up I am trying to true the bevel but I'm not certain how I need to do that. Going to read more tutorials tonight.

Anyhow, not much going on but I got to post a few pics, and everybody likes pics right? :eek:
 

machine_punk

Well-known member
Joined
May 14, 2011
Messages
2,540
Location
Napa Valley, California
FABULOUS job of troubleshooting! I know that saw has been a bit frustrating for you.

I'm just throwing ideas out, as I think of them...

- That left side looks like it screws on (machine screws) to another 'base' piece. If that is so, can you get some shim stock (or washers, sanded down to the right thickeness, or playing cards, with holes punched in them, or aluminum foil with holes punched...any material with consistent thickness) and put shims under the connection of the 'off kilter' top left table and the lower section? this might take a few tries to get right, but should be a one-shot deal.

- If the left base is not 'removable' or adjustable in any way, perhaps a material like Bondo on top...sand it down to level and call it done. Won't be pretty, but will cut much more accurately.

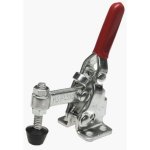
- If you just want to replace the clamp, any of the generic toggle clamps oughta work (see attached picture). Just find a place to attach it to whichever side of the table you want...

- Here is one from Amazon. If you just want to try it out quickly, HF does sell these, but I haven't tried theirs for myself yet...
http://www.amazon.com/dp/B0000224BF/?tag=atomicindus08-20

- Or, you could get a shorter piece of threaded rod and make your own shorter clamp for that side (weld a metal handle on one end of the threaded rod, drill and tap a straight piece of steel for the size of threaded rod you have, drill the other end of the steel for a new metal rod, drill and tap the end for a new (well, you get the idea...you are a fabricator now, so break each part of the clamp down into a sub-assembly and make a shorter/smaller version of the clamp which is already on the machine)

M_P
 

Attachments

  • 71EP2196Y1L._SL500_AA300_.gif.jpg
    71EP2196Y1L._SL500_AA300_.gif.jpg
    9.6 KB · Views: 16
Last edited:
OP
G

GirlnAgarage

Well-known member
Joined
Jan 21, 2011
Messages
4,671
Location
Texas
Thanks MP. Yeah, the saw is versatile but I've got to get it dialed in. She's a finicky thing....don't know anyone like that. :lol:

That left side of the table is not removable. The black painted part is the cast one piece base. Then the round table is bolted in the center from underneath. So, that makes the options pretty limited. The bondo sounds like the easiest method, albeit a little unsightly lol I'm going to think on it. I wonder if laying a little piece of sheet would work? At the very least take up the space. Man if I had a milling machine and knew how to use it....:evil:


I'll check out those clamps.
 

Outlawmws

Well-known member
Joined
Aug 9, 2011
Messages
39,324
Location
The Badlands
Girl,

I'm thinking the issue may not be on the side tables, (assuming those are both all one casting...) :dunno:

Try this: Get two flat spacers that are the same thickness, one on each side (they don't need to be thick, just enough to clear the rotting table...), And THEN run straightedge across those two. Are they flat & paralleled to each other? if so, I'm of the opinion the middle table is up a bit and maybe not flat?
 
OP
G

GirlnAgarage

Well-known member
Joined
Jan 21, 2011
Messages
4,671
Location
Texas
Girl,

I'm thinking the issue may not be on the side tables, (assuming those are both all one casting...) :dunno:

Try this: Get two flat spacers that are the same thickness, one on each side (they don't need to be thick, just enough to clear the rotting table...), And THEN run straightedge across those two. Are they flat & paralleled to each other? if so, I'm of the opinion the middle table is up a bit and maybe not flat?

Yes it is all one casting. I'll try the spacers out and see what happens.

I wish I could take credit for figuring out the table wasn't flat. I was googling around and I found a review on Amazon and there was a pic if a similar problem. HERE

That's why I double checked mine. Turns out my table has less gap than that guy's. And about the ruler on the right side fence, mine is off about 1/16-3/32".

61836419.jpg


Don't know why I didn't see that review earlier. I was blinded by lust :eyecrazy:
 
To avoid these ads, REGISTER NOW!

mdbeck1

Well-known member
Joined
Mar 7, 2010
Messages
2,297
Location
Norman, OK
Anyone have ideas for a different type of clamp I might be able to use? I would love to be able to clamp the workpiece on both sides of the blade.

If what you are wanting is a second clamp similar to the first one why not just order a "replacement" from the manufacturer?
 
OP
G

GirlnAgarage

Well-known member
Joined
Jan 21, 2011
Messages
4,671
Location
Texas
If what you are wanting is a second clamp similar to the first one why not just order a "replacement" from the manufacturer?


Because it doesn't work on both sides because it hits the motor. Check out my pics. Unfortunately the factory clamps aren't that great. I did know that when I was saw shopping. But I'd like to improve that if I can.
 

mdbeck1

Well-known member
Joined
Mar 7, 2010
Messages
2,297
Location
Norman, OK
Because it doesn't work on both sides because it hits the motor. Check out my pics. Unfortunately the factory clamps aren't that great. I did know that when I was saw shopping. But I'd like to improve that if I can.

Okay, I looked a little bit closer at the pictures... It looks like there are castings for the factory mount on each side. You should be able to find a solid rod the same diameter as the factory upright (or use a bolt). The cross piece will be the tricky part. You can use a piece of solid steel stock and drill holes in it (thread one of them). The bolt that pushed down can be shortened and either rewelded or use a bolt and a wrench. ...or use a carriage bolt with the head pushing down.

I use regular woodworking clamps on mine but that might not work as well for you.

If the description is too confusing let me know and I'll try to put some pictures together.
 

Red Leader

Well-known member
Joined
May 15, 2011
Messages
2,689
Location
Denver, CO
I recall you having to take one of these back, right. Is this that saw's replacement?

If so, any chance they'll take it back and you can exchange for something different? Course, that's if you want to - sounds like your up to the challenge of figuring this one out, just hate to see ya struggle with it.

-RL
 
OP
G

GirlnAgarage

Well-known member
Joined
Jan 21, 2011
Messages
4,671
Location
Texas
Outlaww, your suspicion was correct that the table is higher than the outside surfaces. I pulled off that dang sticker and I could see the gap on the right side as well. I haven't put feeler gauges under it yet (getting ready to head out for Saturday running around). I'm curious to find out though.


Okay, I looked a little bit closer at the pictures... It looks like there are castings for the factory mount on each side. You should be able to find a solid rod the same diameter as the factory upright (or use a bolt). The cross piece will be the tricky part. You can use a piece of solid steel stock and drill holes in it (thread one of them). The bolt that pushed down can be shortened and either rewelded or use a bolt and a wrench. ...or use a carriage bolt with the head pushing down.

I use regular woodworking clamps on mine but that might not work as well for you.

If the description is too confusing let me know and I'll try to put some pictures together.


Your description is pretty similar to what I have been thinking about. :thumbup:


I recall you having to take one of these back, right. Is this that saw's replacement?

If so, any chance they'll take it back and you can exchange for something different? Course, that's if you want to - sounds like your up to the challenge of figuring this one out, just hate to see ya struggle with it.

-RL

Yup, took it back once for lots of play and got this one. Least it doesn't have play :lol:

I'm thinking I might need to invest in one of those big belt sanders. I'll get my cut close and finish off with sanding for final dimension. I'm half joking but mostly considering the option :eek:
 

Shoottx

Well-known member
Joined
Jan 30, 2011
Messages
314
Location
Plano Tx
Girl

You may want to stop and rethink this problem. While like me, your instinct is to dig in and fix the problem, this saw may not be worth the effort. I have on several occasions spent way more time on trying to re-engineer a tool that started as a bad design or with less than adequate quality control in manufacturing, only to end up with a tool that does not perform and then cannot be returned. The cost of such a lesson is always bitter. And this comes from a guy that is rebuilding or has in queue for rebuild 8 vintage woodworking machines.

With the available choices in miter saws or SCMS there are several out there that out of the box will perform. My suggestion would be take this one back and get a refund, then shop for a better quality machine than both will require little tuning and has functional work hold downs for your applications. While they may cost a little more the lack of frustration would be worth it.
 

Mat Mobile

Well-known member
Joined
Nov 23, 2010
Messages
88
Location
Montreal, Québec
I did not want to say it first but this is pretty much the quality you will get for this type of saw.

I used to work at a distributor that had these types of tools. This type of saw is made in a huge factory who manufactures their products for several different companies that brand it as their own. They'll change colors, accessories, quality of knobs, etc.. But they are all the same.

These saws are built for weekend warriors to build decks, picnic tables, sheds, etc... The most precision you will get is for moldings and crown moldings. And usually, since walls are crooked, you will need to put painters caulk to finish the joints (or try to get the perfect cut and loose your mind).

I've seen many customers trying to get the perfect fence or table. Usually, the defect is common to most of them. I suggest you either live with it as is (a few tweaks to make it square is fine) or save up for a better, usually much more expensive, saw.

BTW, you're garage looks great and your craftsmanship is inspiring. Good luck with the saw.
 

mdbeck1

Well-known member
Joined
Mar 7, 2010
Messages
2,297
Location
Norman, OK
I did not want to say it first but this is pretty much the quality you will get for this type of saw.

I used to work at a distributor that had these types of tools. This type of saw is made in a huge factory who manufactures their products for several different companies that brand it as their own. They'll change colors, accessories, quality of knobs, etc.. But they are all the same.

These saws are built for weekend warriors to build decks, picnic tables, sheds, etc... The most precision you will get is for moldings and crown moldings. And usually, since walls are crooked, you will need to put painters caulk to finish the joints (or try to get the perfect cut and loose your mind).

I've seen many customers trying to get the perfect fence or table. Usually, the defect is common to most of them. I suggest you either live with it as is (a few tweaks to make it square is fine) or save up for a better, usually much more expensive, saw.

BTW, you're garage looks great and your craftsmanship is inspiring. Good luck with the saw.

Interesting point of view and might I add:
These type saws (from what I remember) were designed for framers. Most of the framers I've been around (with the exception of my cousin when I was a kid) are good if the cut comes within about 1/8" to 3/32". A little bit of angle doesn't matter.

My cousin can still make Norm look like an amateur. I've seen him frame walls one day and finish up on a china hutch when he gets home. I've even seen him steam bend wood for the Model A coup he rebuilt (he built the steamer too). He's an amazing craftsman.
 
OP
G

GirlnAgarage

Well-known member
Joined
Jan 21, 2011
Messages
4,671
Location
Texas
Thanks guys. The thought did cross my mind about taking it back and getting another saw (though I don't know if taking it back really is an option. The saw was bought in Dec '11, but I get the idea). The catch is, I can't buy another saw that is rated for both wood and steel for the same price. I'd have to buy two saws instead, a metal saw and a wood saw, in order to keep the same capabilities. I guess I'm coming to find out that accuracy (quality?) might be the trade-off for basic capabilities. Maybe rough cutting materials might be all the saw will do and the belt sander might actually be the best "fix" for the saw?

I don't know - just thinking out loud. I won't be buggering up the saw in irreparable ways, least not in haste. If the largest hurdle to cutting as square as I can is the table, I'll figure a way around that.

Right now I'll getting everything as close to square off the table as I can and working from there. The key is for me to know how the saw will cut and adjust from there. I really do like the saw, though I am embarrassed to admit I've never gone this in depth to true it up. I use it for everything - steel, pvc, conduit, wood, body parts (hmm maybe that last femur I chopped knocked it out of square). It cuts things in the fraction of time it would take me with a hacksaw, and much much less work effort as well (which saves me energy). Just wish some of these details on the saw were polished. I'm a perfectionist, mostly in expectations. My execution falls short :lol:

I appreciate the ideas and advise :beer:
 
Last edited:

Thedoc14

Well-known member
Joined
Mar 4, 2012
Messages
259
Location
Melb, Australia
The other option is to build a bench or put a drop down in the bench so the saw bed is flush with each side of the bench. You then plumb up the saw so that it is sitting level and flush with the bench sides. Then you have more surface area supporting your work piece, so it doesn't flop over when it is cut and hit the blade.
 

Shoottx

Well-known member
Joined
Jan 30, 2011
Messages
314
Location
Plano Tx
One more thought, while not trying to beat a dead horse, for wood you can pick up a vintage miter box. They are readily available and great for trim and light work, not so much for framing. But as discussed earlier most framing is not that precise. If you want to follow that direction, drop me a PM, and I will point you in the direction to accomplish the acquisition
 

Leyenda30

Active member
Joined
Jun 5, 2011
Messages
44
Location
NE Florida
This might sound like a bandaide but how about pouring a thin coat of epoxy or devcon and file it flat. It isn't that big of an area and probably wouldn't look too odd. Just a thought to make it useable. JP
 
OP
G

GirlnAgarage

Well-known member
Joined
Jan 21, 2011
Messages
4,671
Location
Texas
Sorr you are having tomtroubleshoot that...I really like the idea of the rage saw too.

Shaun


Thanks Shaun. The motor and the blade do a great job. It does what they advertise. Unfortunately the QC is hurting their reputation.


The other option is to build a bench or put a drop down in the bench so the saw bed is flush with each side of the bench. You then plumb up the saw so that it is sitting level and flush with the bench sides. Then you have more surface area supporting your work piece, so it doesn't flop over when it is cut and hit the blade.

This is an option. I have thrown around the idea of building a miter saw bench on the south wall. This might give me the final push to get going on it. Soon as DH gets his motorcycle gone. We're a step closer, he washed it and ran it yesterday. Next step, craigslist.


One more thought, while not trying to beat a dead horse, for wood you can pick up a vintage miter box. They are readily available and great for trim and light work, not so much for framing. But as discussed earlier most framing is not that precise. If you want to follow that direction, drop me a PM, and I will point you in the direction to accomplish the acquisition

I have considered picking up one of these. My neighbor uses his all the time and puts up some great projects.

It would not be out of the question to keep one of those around.


This might sound like a bandaide but how about pouring a thin coat of epoxy or devcon and file it flat. It isn't that big of an area and probably wouldn't look too odd. Just a thought to make it useable. JP

If I went that way, a fill and level would be the method. Appreciate the idea.
 

Red Leader

Well-known member
Joined
May 15, 2011
Messages
2,689
Location
Denver, CO
Ohh! Were there plans to get rid of the bike?


You make is sound as if it is a good thing!


:bounce:

Just givin' ya a hard time. As one to has recently felt the huge weight come off when space opened up in the shop, I celebrate with you! :beer:
 
OP
G

GirlnAgarage

Well-known member
Joined
Jan 21, 2011
Messages
4,671
Location
Texas
Ohh! Were there plans to get rid of the bike?


You make is sound as if it is a good thing!


:bounce:

Just givin' ya a hard time. As one to has recently felt the huge weight come off when space opened up in the shop, I celebrate with you! :beer:


Haha Thanks RL :) Sadly I haven't been able to do anything in there with that long awaited space. I've been inside painting the living rooms and bedroom. But I've about got that wrapped up - thank goodness, I'm brain fried.

I'm starting to feel the urge to get going on the miter saw bench. We'll see.
 
OP
G

GirlnAgarage

Well-known member
Joined
Jan 21, 2011
Messages
4,671
Location
Texas
Yesterday I decided to take care of a few smaller projects. Not hard, just a more than a few steps.

First project - fab up some brackets and get curtains on the shelves to hide our ****, look less cluttered.
curtain1.jpg


Last week we painted a few rooms inside the house and we picked up some of those canvas drop cloths. <In the voice of Gru> Light bulb.
curtain2.jpg


I had conduit left over from when I added outlets, now I got curtain rods.
curtain3.jpg


Now to fab up the curtain rod brackets. I decided to do the most work intensive, stupid little brackets ever. Ehh, I was happy to goof around on something, a chance to practice skills

I cut up scrap tube...
curtain4.jpg


curtain5.jpg


Then cut up some strap...
curtain6.jpg


To get these
curtain7.jpg


Now those these needs holes, first big enough for the screws
curtain8.jpg


Then countersunk
curtain9.jpg


curtain91.jpg


Now I got these
curtain92.jpg


After welding, grinding, prepping and painting the brackets are done
curtain93.jpg


curtain94.jpg


And we'll break....
 
Status
Not open for further replies.
To avoid these ads, REGISTER NOW!
Top Bottom