
You are using an out of date browser. It may not display this or other websites correctly.
You should upgrade or use an alternative browser.
You should upgrade or use an alternative browser.
Reorganization, it's like a renovation.
- Thread starter GirlnAgarage
- Start date
- Status
- Not open for further replies.
elguappo
Well-known member
Comparatively narrow, like 9".
They are for the top section of an old Mac tool chest, see attached images.
I only have 2 of the upper, small drawers, and the middle deep drawer.
I need to make 4 more of the shallow ones.
The real issue I see is the drawer slide.
The existing drawers have 1/2 of the slide welded to the drawer, the opposite side is welded to the chest.
machine_punk
Well-known member
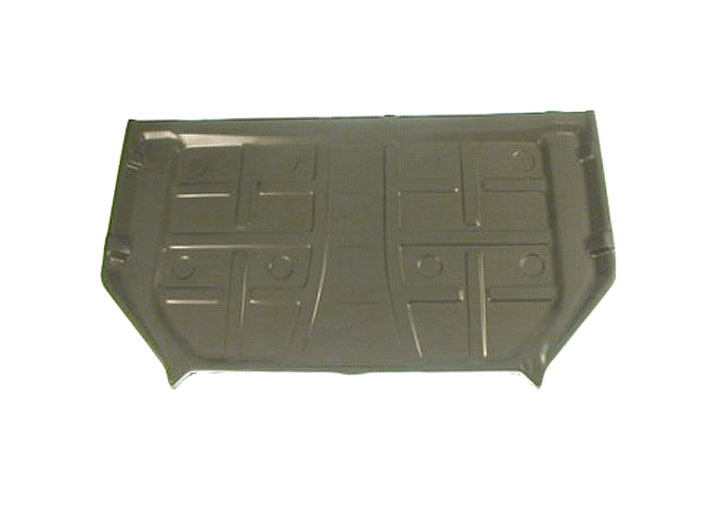
You can use several tricks to stiffen large areas of sheet metal. Pretty much anything with a bend (like bending the edges up to make sides, or putting beads (essentially 'running bends') in the bottom of the drawer, like they do on car floor pans, or aircraft wing ribs, will significantly stiffen the flat sheet metal...
Your other option, is to build stiffeners, which can either be an 'L' shape, or a 'hat channel shape,' to RIVET to the bottom of the panel and stiffen it...
View media item 22347
These aircraft ribs use bending up the edges, beads, and even flanged lightening holes (cut out a circular opening, to reduce material weight and then flange that edge (bend it) to stiffen the part even more).
View media item 20813
The trick with airplanes is to make them as light as possible, and retain the strength. These are a few tools in the sheet metal craftsman's toolbox for stiffening large areas of sheet metal. Pick the one which works for you and conserve materials and costs (use a lighter gauge of base material). You are going to put a drawer liner in there anyway, which will hide some of these options.
M_P
Last edited:
elguappo
Well-known member
Thats all well and good, but well outside of my tooling/machining capabilities adn facilities.
I would have to buy/make a brake just for this project, I have never done anything with sheet metal other than cladding things in thin galvanized sheet.
But bending some drawers 9x18 and then having a friend weld the corners should be within my neophite abilities.
I would have to buy/make a brake just for this project, I have never done anything with sheet metal other than cladding things in thin galvanized sheet.
But bending some drawers 9x18 and then having a friend weld the corners should be within my neophite abilities.
mdbeck1
Well-known member
Thats all well and good, but well outside of my tooling/machining capabilities adn facilities.
I would have to buy/make a brake just for this project, I have never done anything with sheet metal other than cladding things in thin galvanized sheet.
But bending some drawers 9x18 and then having a friend weld the corners should be within my neophite abilities.
Reread MP's post...
Pick up some aluminum angle bracket and rivet some (or bolt or pop rivet) it to the bottom (or inside). That will stiffen the drawer up quite a bit. If you put the angle bracket inside you could use them for screwdriver holders, or wrench holders, or ....
machine_punk
Well-known member
Pop rivets are cheap...and I even like the look of them...I incorporated them into a recent project, just for the look...
View media item 21985
If you don't have a brake, how are you going to bend the sides up? (You can clamp the sheet down to a straight edge and hammer over the side, or use a pair of hand benders, for VERY thin sheet. You could also buy a piece of heavy angle iron, leave one piece long, cut the other piece to the length of the second side you are going to bend, then clamp the piece in place and bend/hammer the sides up.)
If you cut the pattern correctly, you can make sure there are tabs at each corner, which will make it easy enough to fasten the corners with pop rivets (like my box above,) instead of relying on your friend to weld the corners.
The bead can be routed into a piece of MDF (just route one, fairly long 'negative mold' into the top of a piece of MDF and use a hammer, could even be a ball pein hammer, to hammer the metal down into the bead. Keep moving and clamping, to get the length you want) (this is called Flow Forming).
The EAA website has some GREAT sheet metal videos...usually how to do things on the cheap...since people building their own planes usually don't have a lot of cash left over after buying the kit...
http://www.eaavideo.org/video.aspx?v=71057176001
http://www.eaavideo.org/video.aspx?v=820371239001
Lightening holes are just holes...you can cut them with the simplest, through the most complex, tools. (you may not want to use lightening holes on a toolbox...but, then again, you are going to use a liner anyway...a few small holes would not be a problem).
You can use blind rivets (commonly called 'POP' rivets) with a lot less tooling than solid rivets.
It is certainly faster and easier to do all this with the 'right tools,' but it can be done, quite accurately, with hand tools.
Take a look at DOZERBUILDER's threads...while he has an advantage, with a welder, but he rarely goes out and buys 'the right tool' to do a job...he usually just makes a simple tool to fabricate his parts.
I applaud you for trying to make your own drawers! Please start a thread and keep us posted on how it turns out. I'm looking forward to seeing how they turn out.
M_P
Last edited:
OP
GirlnAgarage
Well-known member
Yesterday I picked up an old Craftsman drill press from CL. That thread HERE
I used this thread Craftsman 150 drill press head unit disassembly (pic heavy). to break the DP down. Once you get going it's really pretty easy. I left the main pulley in the head because like others who've done this disassembly I don't have snap ring pliers to reach in there. No worries though, I cleaned out inside the casting as well as I could. I'm not intending to do a full resto and that means no paint. Though it's hard not too having the DP torn down this far. I'm going to sleep on it and take my time. I have all the small pieces, handles and knobs to pretty up. By the time I get them done I might change my mind on the paint.
This is all there is to these old machines. Simple and effective.

The light blue is the original color. The dark blue is all the dirty and light rust that has collected over the last 60 some odd years.

Finally separated. Had trouble with the column but didn't work too hard on it. I had PB blaster sitting on it for the morning. I moved the head and pole to the floor so I could disassemble. I had the head upside down and I leaned on the pole to take a rest and the thing slipped through and hit the floor. Hah! Cool. So I laid it down and pulled the pole out the top since the area I have already cleaned up just slipped right through.

I'm eager to put it all back together but I can't. Otherwise I can't pretty it all up. All in good time.
I must give credit to the POs and whoever put this together. Everything came of with such ease. A real testament to the pratice of take care of your stuff and it will last a LONG time.
I used this thread Craftsman 150 drill press head unit disassembly (pic heavy). to break the DP down. Once you get going it's really pretty easy. I left the main pulley in the head because like others who've done this disassembly I don't have snap ring pliers to reach in there. No worries though, I cleaned out inside the casting as well as I could. I'm not intending to do a full resto and that means no paint. Though it's hard not too having the DP torn down this far. I'm going to sleep on it and take my time. I have all the small pieces, handles and knobs to pretty up. By the time I get them done I might change my mind on the paint.
This is all there is to these old machines. Simple and effective.
The light blue is the original color. The dark blue is all the dirty and light rust that has collected over the last 60 some odd years.
Finally separated. Had trouble with the column but didn't work too hard on it. I had PB blaster sitting on it for the morning. I moved the head and pole to the floor so I could disassemble. I had the head upside down and I leaned on the pole to take a rest and the thing slipped through and hit the floor. Hah! Cool. So I laid it down and pulled the pole out the top since the area I have already cleaned up just slipped right through.
I'm eager to put it all back together but I can't. Otherwise I can't pretty it all up. All in good time.
I must give credit to the POs and whoever put this together. Everything came of with such ease. A real testament to the pratice of take care of your stuff and it will last a LONG time.
OP
GirlnAgarage
Well-known member
The new belt came in yesterday. It'll be ready to go once it goes back together. Haven't done any further work. Been too busy around here to get dirty in the garage. But I'm trying to draw this out and go OCD on it.

OP
GirlnAgarage
Well-known member
Proud of your footwear choice. I guess you save the flipflops for welding.
Or maybe you just read the poster over the work bench...
 Thanks.
I totally wear work stuff when working. My dad was a farm boy and that's how we grew up. Even on the hottest days it was boots 'n jeans.
Funny about the flip flops, I put my hatchet to toe a couple days ago when I was prepping some mesquite for a batch of ribs I was doing. That voice in my head as I agonized from the pain and ice on my toe..."You see, you see! THAT'S why you DON'T wear flip flips when working." And of course me talking back to myself, "I was just doing ribs"
mdbeck1
Well-known member
I totally wear work stuff when working. My dad was a farm boy and that's how we grew up. Even on the hottest days it was boots 'n jeans.
Funny about the flip flops, I put my hatchet to toe a couple days ago when I was prepping some mesquite for a batch of ribs I was doing. That voice in my head as I agonized from the pain and ice on my toe..."You see, you see! THAT'S why you DON'T wear flip flips when working." And of course me talking back to myself, "I was just doing ribs"
...and I was just going to make "one quick cut" on the tablesaw before we headed out to dinner. I didn't use the guard and ended up taking a chunk out of my finger (down to the bone
 ). We ended up sitting at the minor emergency clinic for an hour BEFORE we got dinner.
SAFETY... always think SAFETY....
OP
GirlnAgarage
Well-known member
...and I was just going to make "one quick cut" on the tablesaw before we headed out to dinner. I didn't use the guard and ended up taking a chunk out of my finger (down to the bone
SAFETY... always think SAFETY....
Bet yall were really hungry for waiting so long

Those little things will jump up and getcha when you're not looking. My wood was already split in the stack but I wanted a few smaller pieces to regulate the temp a little easier on the grill. AaAAAyyeeeeeeee! I had a beer after that. Up to that point I had only been drinking ginger ale. Maybe that was my problem, I wasn't loose

Dan in Pasadena
Well-known member
...A real testament to the pratice of take care of your stuff and it will last a LONG time.
Very sorry to hear about the table saw attacking you, lol. Hope you'll recover fast.
I too have the same Craftsman drill press and I even traded progress reports with Evintho in the thread you linked. Mine is all apart and has been for (embarassed to admit) 3 years! I got frustrated with trying to get the base & post apart so I set it aside and other projects came and went while it was forgotten.
To make matters worse, there is a tight crack in my base. I have the floor standing version of this DP and I was afraid of breaking the casting so I didn't take a hammer to it, etc. Now I think I'll give up on trying to get them apart. I'll polish the pole as best I can, mask and paint the base. What color will you use if you go "the full monty" on this tool?
ckadams00
Well-known member
Hi haven't checked you thread in a couple of weeks, very happy to see your lucky DP purchase! That is a good one I have had two of those and two 150s and I love them to death. From the looks of it it wan't used a lot, and usually the bases have more rust. Not sure if you have progressed further than your last photo, but when you do I'd be happy to share some details I learned rebuilding 4 of these beasts. Outlaw provided some really good tips. I installed an internal light in mind and would be happy to send you some pictures - it was very easy.
BTW you lucked out on the table - rarely seen one in that good of shape!
Cheers!
BTW you lucked out on the table - rarely seen one in that good of shape!
Cheers!
OP
GirlnAgarage
Well-known member
Very sorry to hear about the table saw attacking you, lol. Hope you'll recover fast.
I too have the same Craftsman drill press and I even traded progress reports with Evintho in the thread you linked. Mine is all apart and has been for (embarassed to admit) 3 years! I got frustrated with trying to get the base & post apart so I set it aside and other projects came and went while it was forgotten.
To make matters worse, there is a tight crack in my base. I have the floor standing version of this DP and I was afraid of breaking the casting so I didn't take a hammer to it, etc. Now I think I'll give up on trying to get them apart. I'll polish the pole as best I can, mask and paint the base. What color will you use if you go "the full monty" on this tool?
Three years? lol no worries. You should give it a shot and mask it off and go from there since the pole won't come out. On my pole I did tap around with my mallet. On yours though I wouldn't risk it. I was reading through a recent 150 floor model restore on OWWM and the guy had the same problem that he couldn't get the pole out. He cleaned the pole, masked it and painted it and the results were just fine. Most importantly he's got functioning dp and nice piece of old iron.
When I did a little gunsmithing I would polish the cylindrical parts/barrel with sandpaper. What I did was take a sheet of paper and cut a strip about an inch wide down the long side of the sheet. So I ended up with an 11" x 1" strip of sand paper. Then I'd get a flat wooden strap, like the tongue depressor size. I'd attach each end of the paper to each end of the stick (like a bow from a bow and arrow), and the grit of the paper facing inward. That would give me a good tool to easily polish the barrel/cylindrical parts. I'd hold the handle and slip it over the part and use a seesaw type motion to pull the paper over the part. It did great for conforming around the piece. For a larger tool to fit around the 2-3" dp column I'd look to use a strip of sandpaper for a belt/round table top sander (so you have a good long piece) and then use a big wooden stir stick from the paint department (like the 5gal big stick). This hand tool will make sanding down to the very bottom of the column that sits again the base a bit easier.
I've got a little Rigid Mouse hand sander that I'm using on my column for the major clean up. I plan to finish it up by hand sanding vertical to get rid of the squiggly sander marks. A polish finish would be nice but I'll decide as I go.
I'm not certain what color I'd go with. I've recently been playing with my boomsticks again. I have always been in love with the deep Colt blue. I have been thinking about finishing with the same shade on the DP. I don't know why. But I'm still running ideas so no paint decision is set in stone yet.
Hi haven't checked you thread in a couple of weeks, very happy to see your lucky DP purchase! That is a good one I have had two of those and two 150s and I love them to death. From the looks of it it wan't used a lot, and usually the bases have more rust. Not sure if you have progressed further than your last photo, but when you do I'd be happy to share some details I learned rebuilding 4 of these beasts. Outlaw provided some really good tips. I installed an internal light in mind and would be happy to send you some pictures - it was very easy.
BTW you lucked out on the table - rarely seen one in that good of shape!
Cheers!
Thanks! Yeah this one fell in my lap even after I tried to get others to go get it. The last photo is exactly where it sits right now. I won't be doing too much to it yet. We've got a few things going on over here so when things slow down again I'll spend my time on it. But I see each day as I go in and out of the garage and think "Oh yeah I gotta work on that".
I think a light would be pretty helpful. My Delta has the mounting lug for the light but there's not a lug on the Cman. From what I've seen folks put a bulb inside the head casting. I don't think I want to go that route as it seems like the location would produce shadows and not be as flexible as an arm mounted light.
On my stitching machine it's got a light and I've been pleased with it. They sell the lights separately for about $50. It's a little pricey as a DP add on but I can easily source it from my machine supply guy and I know how it works. Anyway, there are plenty of ideas, this was just the first one I had since I work with one already.
Do you have a write up on your restos?
racingtadpole
Well-known member
I totally wear work stuff when working. My dad was a farm boy and that's how we grew up. Even on the hottest days it was boots 'n jeans.
Funny about the flip flops, I put my hatchet to toe a couple days ago when I was prepping some mesquite for a batch of ribs I was doing. That voice in my head as I agonized from the pain and ice on my toe..."You see, you see! THAT'S why you DON'T wear flip flips when working." And of course me talking back to myself, "I was just doing ribs"
Here they are called thongs, but that paints things in a totally different light...
my work here is done.
OP
GirlnAgarage
Well-known member
Here they are called thongs, but that paints things in a totally different light...
hehe
Around here thongs aren't worn on your feet
Weekend_warrior
Well-known member
Yes, thongs are lacy and look good on women. I wouldn't own any other kind of shoe if I could get away with flip flops all the time, but I think "thongs" would look mighty funny on my feet... Just sayin!
JimVonBaden
Well-known member
hehe
Around here thongs aren't worn on your feet
We called the flip-flops thongs where I grew up in Surthern Arizona. I didn't know what a G-string was, or was called until I moved to Oregon at 18.
Jim
Dan in Pasadena
Well-known member
Three years? lol no worries.
See, I KNEW I shouldn't have admitted it!

I'm kidding (kinda!). I've done a ton of other projects since then and the DP has been sitting in a pile in the corner. Now that I've ALMOST got my shop put back togetehr the way I want I have been eyeing it.
I'm not certain what color I'd go with. I've recently been playing with my boomsticks again. I have always been in love with the deep Colt blue.
Well, at least your comment about possibly going with blue makes me feel better. Originally, I was going to put it back in the sort of beige/gold color it seemed to have been originally. But later I was thinking of going with red (VERY non-original) just because I like red and all the tool boxes, accessories in my garage are red. It'll be a last minute decision after looking through my stash of rattle cans.

OP
GirlnAgarage
Well-known member
Yes, thongs are lacy and look good on women. I wouldn't own any other kind of shoe if I could get away with flip flops all the time, but I think "thongs" would look mighty funny on my feet... Just sayin!
Flip flops are excellent, especially in summer. It's just too hot to wear shoes. And if thongs are on someone's foot, uhm, something was going on there

We called the flip-flops thongs where I grew up in Surthern Arizona. I didn't know what a G-string was, or was called until I moved to Oregon at 18.
Jim
lol I shoulda said that in our house "flip flop"was predated by the "chancla". You know, the sandal that doubles as a disciplinary device.

See, I KNEW I shouldn't have admitted it!
I'm kidding (kinda!). I've done a ton of other projects since then and the DP has been sitting in a pile in the corner. Now that I've ALMOST got my shop put back togetehr the way I want I have been eyeing it.
Ah I'm right there with you. Some times you work a little bit on the space, some times you work on the stuff in the space.
Well, at least your comment about possibly going with blue makes me feel better. Originally, I was going to put it back in the sort of beige/gold color it seemed to have been or.iginally. But later I was thinking of going with red (VERY non-original) just because I like red and all the tool boxes, accessories in my garage are red. It'll be a last minute decision after looking through my stash of rattle cans.
I've seen some great restos and they stick with the original colors. I've seen some great restos that use a totally off the wall non original and they looked great too. It seems that no matter what camp you're in, the fact that you took the time to pull one of these legendary machines to the safety of a good working life instead of the scrap yard, it'll get respect. I say go with a color you think will look nice for your place.
Here is the link from OWWM wit the 150 resto I mentioned. This guy did go with a red paint scheme. Have a look: http://www.owwm.org/viewtopic.php?f=1&t=117633&hilit=craftsman+drill+press I think the fire engine comment makes some sense (you'll know it when you run through it)
Alchymist
Well-known member
Lets see -
South Bend lathe- waiting 5 years
John Deere 855 - 3 years
PowerKraft band saw - 1 year
Craftsman 8: circular saw - 5 years
(Some work done on the lathe and the tractor, no where near complete).
To my credit, though, I did restore a Craftsman scroll saw, a Panzer tractor,
and refurbished 2 riding lawnmowers. Not to mention renovating a fixer-upper farm house and several woodworking projects. Does that count?
Outlawmws
Well-known member
My worst (Oldest) long term project (at least 35 years..) is/was an Atlas Horizontal milling machine base, with the X-Y-Z table intact. I even rebuilt that part of it, with the intention back then of making it into a mini Vertical mill. Ten years ago I bought a small Clausius Vertical, and since then I acquired most of the top half housings and some of the shafting for the original purpose Horizontal mill. All of the parts sit in my little work room awaiting some attention, but my current project is a perfectly working Rockwell DP that is getting a motor transplant to get more and slower speeds than the 4 speeds it came with, and then it replaces my old Taiwan made DP.
I only "wish" I was in the middle of only "one" project.. I get to a point where I need a part for one machine then start on another while waiting on that part....and so on...and so on...
Then there's that thing where shiny objects distract me...
Then there's that thing where shiny objects distract me...
ckadams00
Well-known member
Thanks! Yeah this one fell in my lap even after I tried to get others to go get it. The last photo is exactly where it sits right now. I won't be doing too much to it yet. We've got a few things going on over here so when things slow down again I'll spend my time on it. But I see each day as I go in and out of the garage and think "Oh yeah I gotta work on that".
I think a light would be pretty helpful. My Delta has the mounting lug for the light but there's not a lug on the Cman. From what I've seen folks put a bulb inside the head casting. I don't think I want to go that route as it seems like the location would produce shadows and not be as flexible as an arm mounted light.
On my stitching machine it's got a light and I've been pleased with it. They sell the lights separately for about $50. It's a little pricey as a DP add on but I can easily source it from my machine supply guy and I know how it works. Anyway, there are plenty of ideas, this was just the first one I had since I work with one already.
Do you have a write up on your restos?
I don't have a writeup, I have lots of step by step photos though I will see if I can dig some up for you. You DP looks really great. I've attached a couple of basic shots of the light, consider it. I have original gooseneck lights on my CMan band saw and scroll saw, and I find they throw more shadows . . .this light just lights the whole table and that's it. It's very basic: I bent a piece of aluminum stock and tapped a screwhole on the upper brace next to the column to screw it in. On the lower part of the aluminum I attached a ceramic bulb socket, then ran the cord to a dual switch that is mounted on the side of the motor bracket. I have one switch for the drill and one for the light - I like the set up because I can change bits, check positions, etc with the light on before I start the drill.
There is a TON of roon inside the head casing, so you might want to consider it. I used a 60w appliance bulb and you can just reach right up and change it.
Let me know if you need better photos or more detail!


Last edited:
OP
GirlnAgarage
Well-known member
ckadams, I appreciate the close ups on the light. I'm reconsidering the bulb in the head and I'll keep it in mind. Thanks!
I'm going crazy over here already. I NEED to dive into projects. Besides, I don't want to end up like you guys with these years long projects
My parents were up here this past weekend so I got to show dad the Cman DP. I thought I had him a little jealous of my find but he was sly. He mentioned his DP back home had a table lift and mine didn'twned: lol
I'm going crazy over here already. I NEED to dive into projects. Besides, I don't want to end up like you guys with these years long projects
My parents were up here this past weekend so I got to show dad the Cman DP. I thought I had him a little jealous of my find but he was sly. He mentioned his DP back home had a table lift and mine didn't
wned: lolI hung a tennis ball from the roof so that it hit the windscreen when car was properly parked...that is deep enough in the garage...wife was grateful...don't know how your partner would vuiew it...maybe as a game to always just hit the ball and not move it.
Al
Al
OP
GirlnAgarage
Well-known member
I hung a tennis ball from the roof so that it hit the windscreen when car was properly parked...that is deep enough in the garage...wife was grateful...don't know how your partner would vuiew it...maybe as a game to always just hit the ball and not move it.
Al
I laughed at this a little bit the other day when I parked the car in the garage. I tapped the wall shelf
I was backing in and don't have a great feel for the edges of the car. Anyway, not much done. Haven't felt like doing much around here. Did a quick trip south for a death in the family. Had the tree service guys come in and remove a few trees. That was great watching them work. Then I got sick for a few days. My niece so graciously provided the cold while back home. But feeling better now. I should work on the DP. But doesn't feel like it means much.
Hope I can get going soon.
1nastynotch
New member
Hello,
I just finished reading through your thread. I really admire your tenacity and determination. The garage looks great, and that tool box you made is great! The drop cloths over the storage shelves is a great idea as well.
I really liked the extension cord storage idea for the bench. I had to steal.... I mean borrow that idea for my work bench. My 100ft 12g cord is kinda unwieldly and a pain to carry around. I saw your idea and I thought it would be a perfect solution. I had some wood scraps & paint left over from previous projects so I put them to use.
Thanks for the inspiration, and can't wait to see whats next!
~Frank~
I just finished reading through your thread. I really admire your tenacity and determination. The garage looks great, and that tool box you made is great!
The drop cloths over the storage shelves is a great idea as well. I really liked the extension cord storage idea for the bench. I had to steal.... I mean borrow that idea for my work bench. My 100ft 12g cord is kinda unwieldly and a pain to carry around. I saw your idea and I thought it would be a perfect solution. I had some wood scraps & paint left over from previous projects so I put them to use.
Thanks for the inspiration, and can't wait to see whats next!
~Frank~
Attachments


Last edited:
Thanks for sharing all the work, documentation and Texan-isms.
I would think that there is a 1 year manuf. warranty on the Evolution saw. If it cost several hundred clams, I wouldn't think twice about taking it back to Lowes again. Now you know at least two items to look for - table flatness and runout when picking another one off their shelf. If all of them are made poorly, it wouldn't be out of the question to ask for store credit. I have a 12" DeWalt SCM and it cuts very square & true. No real tweaking was necessary out of the box. A friend is borrowing it tomorrow. We will see if it comes back in the same condition.
Most importantly - what is the dogs name? Why only one partial x-mas pic of the hound?
Outlawmws
Well-known member
It's been quiet in here, what's been happening?
OP
GirlnAgarage
Well-known member
Thanks for sharing all the work, documentation and Texan-isms.
I would think that there is a 1 year manuf. warranty on the Evolution saw. If it cost several hundred clams, I wouldn't think twice about taking it back to Lowes again. Now you know at least two items to look for - table flatness and runout when picking another one off their shelf. If all of them are made poorly, it wouldn't be out of the question to ask for store credit. I have a 12" DeWalt SCM and it cuts very square & true. No real tweaking was necessary out of the box. A friend is borrowing it tomorrow. We will see if it comes back in the same condition.
Most importantly - what is the dogs name? Why only one partial x-mas pic of the hound?
Thanks Huxley.
re: saw - I have definitely learned a couple thingsto look out for when picking them out. I guess the thing to remember is get into the box of the one I'm taking home. Since tools like this it is only one disply model and the shelf and they pull a box and send you on your way for purchase. I eel uncomfortable asking to open up a box, like I'm asking too much. But considering what some of these items cost, I should make the case to an employee. Lesson learned.
Since I have taken time to true up the blade and the table I am more aware of how it cuts. I am able to compensate for it's faults. I love the saw, the capabilities are nice. I don't have to think twice about cutting any materials other than how I'm clamping it. If I can get that down to a brainless system I'm running this saw until it quits on me
A little while back when Lowes stopped stocking these a few months ao I went and bought several extra blades, for $16 a pop. So I'm stocked for a bit.
It's been quiet in here, what's been happening?
Hey Outlaww. Not too much really. I think I cleaned up and polished the spindle/handle on the Cman DP, and that's about it. I thought about starting stuff again but I have no motivation. Been spending time on some other projects/hobbies. I am actually keeping the car in the garage now, that is how little work I'm doing in there.
Things just aren't the same around here.
OP
GirlnAgarage
Well-known member
Hello,
I just finished reading through your thread. I really admire your tenacity and determination. The garage looks great, and that tool box you made is great!
I really liked the extension cord storage idea for the bench. I had to steal.... I mean borrow that idea for my work bench. My 100ft 12g cord is kinda unwieldly and a pain to carry around. I saw your idea and I thought it would be a perfect solution. I had some wood scraps & paint left over from previous projects so I put them to use.
Thanks for the inspiration, and can't wait to see whats next!
~Frank~
Hy Frank, glad you put an idea to use. The ext. cord idea is very handy for sure. I was wrapping up my ext cord as I had it supplying the Christmas lights & timer. As I wound it back on the holder I marveled how those measly little brackets I pulled off the discarded rail did such a handy job. I'm still glad I caught the idea in time and didn't toss out the brackets.
Take care
Amazingglazier
Member
- Joined
- Jan 9, 2012
- Messages
- 11
Just a thought but if you could find a set of snowplow hydraulic cylinders and pump you could make your bending pretty effortless and much better controlled! Great work by the way!
OP
GirlnAgarage
Well-known member
Just a thought but if you could find a set of snowplow hydraulic cylinders and pump you could make your bending pretty effortless and much better controlled! Great work by the way!
Thanks.
If I go to a permanent setup I think hydraulic cylinders would be the way to go.
OP
GirlnAgarage
Well-known member
Been pretty absent in the garage. Too much time has gone by to recap but as of now it looks like we are moving. Doing a lot of purging around the house. I am not certain I want to do this but thinking I'll need to get the Craftsman DP to a new home. I don't know what my garage space will look like at the next place. Thinking between the Delta floor DP or Cman bench DP, the floor DP will be easier to keep. I don't even know if I will be able to take the workbench I spent forever building.
If anyone here in DFW can give this Cman DP a good home, I'm willing to get it go for the dollar value I put into it, $85. I do have it torn down. I've cleaned up a few pieces but that is it. I will leave it in pieces as it is much easier to transport. I'll send the new belt with it too. If it doesn't go to someone here on GJ, I'm keeping it and will just store it.
If anyone here in DFW can give this Cman DP a good home, I'm willing to get it go for the dollar value I put into it, $85. I do have it torn down. I've cleaned up a few pieces but that is it. I will leave it in pieces as it is much easier to transport. I'll send the new belt with it too. If it doesn't go to someone here on GJ, I'm keeping it and will just store it.
I know moves are a normal part of life, but I also know that when you get a shop set up, it can be pretty disheartening to have to start again at square one. Like a lot of others on the board, your posts have been missed. So I hope the move goes smoothly and you land at a place with a great shop (or great potential for one) and the press brake and other tools (and you) end up in a great place to get things done.
Outlawmws
Well-known member
 on this^^^
Sorry to hear you are losing the workshop you worked so hard on. That bench should be portable enough for the movers to take, and can be stood on end in the moving van so should not be a big space factor.
I do Hope your next stop will at the least be an opportunity for a better working layout. you have learned a lot on this one, and one thing I have figured out is that each shop has it's defects and pluses, and with some effort can be be made to a better layout than you had before, as you know more about what works!
Do keep us posted! You have friends out here that care!
54FordPanel
Well-known member
I just posted in a thread about members who have fallen MIA, and I brought you up. I noticed you haven't been posting & others chimed in.
I hope everything is well with you & yours.
I hope everything is well with you & yours.
- Status
- Not open for further replies.