To avoid these ads, REGISTER NOW!

rust removal

PierceA

Well-known member
Joined
Aug 6, 2020
Messages
471
Location
SE Michigan
I read about the 3M bristle brushes, and decided to give them a try. I wanted ones for my larger buffer/grinders, so I located some 8" versions.. With careful shopping on Ebay, they were available for around $50.
I purchased a Yellow, Red and Blue wheel. each had a set of sleeves to fit various size motor shafts. They are 80g, 220g, and 400g respectively.
In the Yellow wheel, I got one that was really inexpensive that has straight bristles instead of the curved ones. I also have a yellow with the curved bristles.. there is quite a bit of difference in the agressiveness of the different shaped bristles.. The straight ones being more aggressive.

What I've found is that these nylon bristle wheels are nice, and do a great job for some things. but I'm not tossing out any wire wheels, or any of my deburring wheels or scotchbrite wheels.. I have found that I have a use for ALL of them.
For real polishing, I still like a deburring wheel and then a buffing wheel with rouge or other compounds.

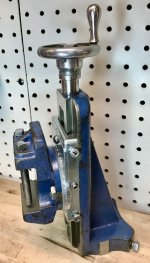
With a rusty mainscrew hub or handle or the dynamic slide, the process still has to start with cleaning, then wirebrushing, then through ever decreasing grit or agression wheels. and if I want the metal to 'glow', I end up at the cloth buffing wheel with various compounds.

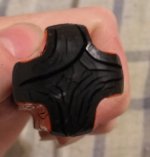
What I REALLY like is that the nylon bristle wheels conform to the odd shapes that some tools and parts have, The bristles can reach into a recess without the other bristles doing damage to the areas outside the recess.. THAT is a great help.

PierceA
 
To avoid these ads, REGISTER NOW!

RTM

Well-known member
Joined
May 13, 2019
Messages
13,061
Location
SF Bay Area
Well, after 6 hours in Evaporust, we aRe making huge strides on the square. Here is the same end, after the soak, scrub, and then a light touch of the radial bristle brush. Closer to the brass there is still some.heavy crud, but it could be my liquid wasn't very fresh there. I Am using a bag submerged in water to limit the volume required. It will go back in again this afternoon.

i-B5L9WNz-X3.jpg
 

Shiftless

Well-known member
Joined
Mar 9, 2014
Messages
14,459
Location
East Bay SFO
RTM:
I think you’ve gone about as far as you can with rust removal in the area shown.
There is obviously heavy pitting and you can’t make that go away unless you grind.
I have had success with cosmetic improvements when faced with dark colored heavy pitting by rubbing in a very thin coat of Rustoleum aluminum paint. Sure, it’s just a cover up but it makes your part look a bit better and more importantly, less likely to rust in the future.
 

royudc

Well-known member
Joined
Jul 15, 2015
Messages
116
Location
Toronto, Ontario, Canada area
Mac: just a quick note to say thanks for telling me about the 3M radials, I've just cleaned up my 40 year collection of punches and chisels and I'm completely impressed with the 220 grit wheel that I bought.

It's really a very impressive tool, leaves a nice finish and it feels so much safer than a wire wheel. There's no "grabbing" action from the 3M wheels.
:rocker:

I'm sure I'll be getting more of these in all the different grits soon.

Ron
 

d42jeep

Well-known member
Joined
Oct 22, 2014
Messages
16,484
Location
Northern California
Mac: just a quick note to say thanks for telling me about the 3M radials, I've just cleaned up my 40 year collection of punches and chisels and I'm completely impressed with the 220 grit wheel that I bought.

It's really a very impressive tool, leaves a nice finish and it feels so much safer than a wire wheel. There's no "grabbing" action from the 3M wheels.
:rocker:

I'm sure I'll be getting more of these in all the different grits soon.

Ron

I couldn’t agree more. I picked up this unmarked rusty cross pein with a loose handle this morning. After tightening up the handle, I hit it with the 220 wheel and some Fluid Film and now it’s ready to go back to work.
-Don6865F817-4BB7-40C2-BB21-A5A413FF3E45.jpg3C163DB2-F3C9-4956-9F44-38E778D9D1D2.jpg14F13F8F-8C72-4E81-A83B-C0FD5B090794.jpg
 
Last edited:

drivesitfar

Well-known member
Joined
Oct 23, 2013
Messages
35,991
Location
Pacific Northwest
I'm loving this thread. I really appreciate all the information i'm learning about ACID (I'm sure i'll have to hear it again a few times, but eventually i'll have learned the good and issues when using it or having it around).

the radial brushes seem to be getting a 2 thumbs up and everyone is liking it.

I probably won't set up a **** VAT cause I live in a neighborhood where there are critters (and OUR CAT) that might fall victim to it if the top gets moved or I forget to put it back on. i'll probably set up a E bath full time once i get my backyard organized.

hope you all had a great MOM'S DAY
 

RTM

Well-known member
Joined
May 13, 2019
Messages
13,061
Location
SF Bay Area
All

Here are final shots of my square. I am going to declare victory on the blade. The little fold out thing still needs a bit of help, but I don't think the blade will get any better. Here is a before shot, of the area I was not happy with, lots of crud on both sides.

IMG_20210509_115340-X2.jpg


Here it is, Evapo Rust, scrub, then radial brush. Not quite perfect on the polish yet, but you can still see the pits top of the blade on both sides. Gonna live with that. It won't be an engineer's square, but good enough, and fancy to put a little joy in my life. Still need to soak the fold out blade a bit, but that's a story for another day.

IMG_20210511_085711-X2.jpg


IMG_20210511_085645-X2.jpg


The brass still needs some work. I accidentally hit is with the brush, so figured to do the whole thing to even it out, but the work bell sounded, so I had to leave some brush marks not completely feathered away. Again, later.

But, big thanks all for the guidance. Been a few years since I've used Evapo Rust, was always put off by the gray residue. I was down to the last few glugs in the jug, barely finished this, it took a 24 hour soak to get the last section done. The radial bristle brush helped to remove the gray that didn't wash off, and made it a decent user now.
 

ray h

Active member
Joined
Nov 20, 2020
Messages
36
Location
back of house
Not rust but another possible use for the Radial Bristle wheel. I opened a box with a bunch of Xcelite spin tights with the normal fungus. I picked up several and hit the shafts with a fine wire wheel to remove some of the corrosion. Then the 220 Bristle, the shafts looked almost new, the handles had the normal fungus. So I tried the 220 grit on one handle. Looked pretty darn good plus it didn't remove the inbedded lettering on the handle. When I ordered my wheels I screwed up and got a 1 Micron by mistake. I mounted the wheel and it cleared most of the slight haze on the plastic left by the 220. Had a great feel to the plastic handle too. Something started to trigger my Asthma so shut everything down and got out of the room. I've got a lot of screwdrivers that look terrible. This weekend I try the Bristle Wheel on them. The first half doz spin tights looked good to me.
 

macgee

Well-known member
Joined
Jan 11, 2014
Messages
2,834
Location
Sepulveda Pass, CA
Mac: just a quick note to say thanks for telling me about the 3M radials, I've just cleaned up my 40 year collection of punches and chisels and I'm completely impressed with the 220 grit wheel that I bought.

It's really a very impressive tool, leaves a nice finish and it feels so much safer than a wire wheel. There's no "grabbing" action from the 3M wheels.
:rocker:

I'm sure I'll be getting more of these in all the different grits soon.

Ron
Hi Ron,

Your welcome and glad they been working for you.

Please be sure to post some pics.

Last week, I picked up a rusty Starrett hardened combination square parts that was lying in a 1$ tool pile at the local saws meet. When I got home, I threw them in a hot ultrasonic bath for 20 mins, then into the evaporust bath for three+ hours, wiped down with rubbing alcohol and then cleaned up on the 3M bristle brush wheels and finally lapped flat and tuned on a surface plate. The blade was a cheap big box pos and tossed into the bin.

Before (AM)
51193237000_cbb9ce3680_b.jpg

After, by the afternoon
51192386013_732c713a46_b.jpg
 
Last edited:

Eric H.

Active member
Joined
Apr 26, 2021
Messages
26
Location
Nor Cal
Hi Ron,

Your welcome and glad they been working for you.

Please be sure to post some pics.

Last week, I picked up a rusty Starrett hardened combination square parts that was lying in a 1$ tool pile at the local saws meet. When I got home, I threw them in a hot ultrasonic bath for 20 mins, then into the evaporust bath for three+ hours, wiped down with rubbing alcohol and then cleaned up on the 3M bristle brush wheels and finally lapped flat and tuned on a surface plate. The blade was a cheap big box pos and tossed into the bin.

Before (AM)
51193237000_cbb9ce3680_b.jpg


After, by the afternoon
51192386013_732c713a46_b.jpg
Wow those look new, nice work.
 

macgee

Well-known member
Joined
Jan 11, 2014
Messages
2,834
Location
Sepulveda Pass, CA
Thanks Eric and Jayman,

Have to say I'm really liking my set up for cleaning rust and restoring tools like this. Also, having good quality oil stones, a flat surface plate and good fine wet/dry sand paper is also really nice to have and makes a big difference in getting the performance back. Here's another piece I recently cleaned up and really happy how it cleaned up and how smooth and well it works. I didn't even realize it was blue until it came out of the ultrasonic cleaner.

PS> Loving the new forum functions and picture loading. So much better
IMG_2578.jpegIMG_2694.jpeg
 

Attachments

  • IMG_2678.jpeg
    IMG_2678.jpeg
    1.4 MB · Views: 94
Last edited:

drivesitfar

Well-known member
Joined
Oct 23, 2013
Messages
35,991
Location
Pacific Northwest
Mac: great work on your rusty neglected gems you found!! WOW!!

I agree this new forum setup was a bit strange at first and i'm still missing a few of my favorite functions (probably just haven't found where Ryan put them yet), but overall it seems to look a lot better. I do like the LIKE BUTTON cause it's nice to see someone liked what we post even if they didn't have time to comment.

I'm gathering up my rusty neglected stuff and buying more as I can find some so when I get my grinder/buffer station set up I can show off a few of them.

PIerce: I usually like your detailed posts and the one you wrote mentioning your new radial brushes was another one. any chance you might have a few pics (before and after) of some things you've rescued or restored back to a usable tool?
 

Lesserstore

Well-known member
Joined
Mar 18, 2020
Messages
863
Location
Texas
I don't know if anybody else found this out or not, but I found out the hard way that you shouldn't put orange and black handled Rosco screwdrivers in Blaster Metal Rescue (their version of evaporust). I put several screwdrivers in there and all came out fine except this Rosco that cracked up really bad.
 

Attachments

  • IMG_20210521_224503296~2.jpg
    IMG_20210521_224503296~2.jpg
    503.9 KB · Views: 70
  • IMG_20210521_224513894~2.jpg
    IMG_20210521_224513894~2.jpg
    167.7 KB · Views: 62

macgee

Well-known member
Joined
Jan 11, 2014
Messages
2,834
Location
Sepulveda Pass, CA
I don't know if anybody else found this out or not, but I found out the hard way that you shouldn't put orange and black handled Rosco screwdrivers in Blaster Metal Rescue (their version of evaporust). I put several screwdrivers in there and all came out fine except this Rosco that cracked up really bad.

Lesser,

I've never had the pleasure of using Blaster Metal Rescue but those pics don't make me feel good about it.

Did you use any heat, making the liquid warm?
Materials used in screwdriver handles were sometimes odd materials, especially in the early days of plastic and other synthetic materials. Maybe the handles already had micro cracks that expanded?

I will say heat is a powerful component to degreasing and de-rusting and I'm now much more careful with it with fragile paint items but I'm a huge believer in it. Evaporust alone can remove paint fairly easily, especially when heated but it also does a phenomenal job when heated.

Something I've been noticing, placing rusting items it a heated ultrasonic degreasing bath can sometimes do an amazing job at removing rust off a tool. It's pretty random with which tool it works on, I would go through the process of degreasing a bunch of new found rusty, grimy and greasy tools in the ultrasonic cleaner to prep for the Evaporust but some came out of shiny and not really needing the evaporust.

In regards to Blaster penetrant, I stopped using it a couple of years ago as the smell totally bothers me and stays in the air in shop for ages after using and makes my hands smell. I now pretty much only use Tri-Flow Super everyday, the stuff is awesome as a penetrant, the Stattett pics above has a coat of it on them to keep rust away; Tri-Flow has been one of the best things in my shop and super happy I found out about it from sewing machine restorers (they swear by it). When I really need a full-on penetrant to soak the impossible for days on end I'll then use SeaFoam Deep Creep, I really like it as well.
 

JoCoSawdust

Well-known member
Joined
Nov 19, 2018
Messages
2,416
Location
Eastern NC
I'm so happy I took Mac's recommendation on the radial brushes that I'm now going to try out Tri-Flow Super. I can't speak highly enough about the radial brushes.
 

drivesitfar

Well-known member
Joined
Oct 23, 2013
Messages
35,991
Location
Pacific Northwest
I agree with Tri flow being an outstanding lubricant. I had a friend tell me about it about 15 years ago and have used it often. Rusty storage padlocks it’s a must. I found that the cyclists love it for lubricating their chains and cables.
I even bought the last of Tri flow red grease that was a bit more spendy than Mobil 1 but easier to apply.
 

Lesserstore

Well-known member
Joined
Mar 18, 2020
Messages
863
Location
Texas
Lesser,

I've never had the pleasure of using Blaster Metal Rescue but those pics don't make me feel good about it.

Did you use any heat, making the liquid warm?
Materials used in screwdriver handles were sometimes odd materials, especially in the early days of plastic and other synthetic materials. Maybe the handles already had micro cracks that expanded?

I will say heat is a powerful component to degreasing and de-rusting and I'm now much more careful with it with fragile paint items but I'm a huge believer in it. Evaporust alone can remove paint fairly easily, especially when heated but it also does a phenomenal job when heated.

Something I've been noticing, placing rusting items it a heated ultrasonic degreasing bath can sometimes do an amazing job at removing rust off a tool. It's pretty random with which tool it works on, I would go through the process of degreasing a bunch of new found rusty, grimy and greasy tools in the ultrasonic cleaner to prep for the Evaporust but some came out of shiny and not really needing the evaporust.

In regards to Blaster penetrant, I stopped using it a couple of years ago as the smell totally bothers me and stays in the air in shop for ages after using and makes my hands smell. I now pretty much only use Tri-Flow Super everyday, the stuff is awesome as a penetrant, the Stattett pics above has a coat of it on them to keep rust away; Tri-Flow has been one of the best things in my shop and super happy I found out about it from sewing machine restorers (they swear by it). When I really need a full-on penetrant to soak the impossible for days on end I'll then use SeaFoam Deep Creep, I really like it as well.
Thanks for the suggestions, I've been meaning to try deep creep for a while but never have gotten around to getting some. A weird thing I noticed was an artificial grape flavor smell emanating from the cracks of that screwdriver.
 
To avoid these ads, REGISTER NOW!

macgee

Well-known member
Joined
Jan 11, 2014
Messages
2,834
Location
Sepulveda Pass, CA
A weird thing I noticed was an artificial grape flavor smell emanating from the cracks of that screwdriver.
Have no idea what those handles are made of but older screwdriver handles with Cellulose Acetate Butyrate or Butyrated plastic can emit a terrible (some say) vomit smell and companies have been known to mix in a pleasant aroma ingredient to offset it. PB Swiss still does this.

Curious to know what you think of Blaster Metal Rescue on its de-rusting performance and ease of use? And if you have compared it to Evaporust?
 
Last edited:

Lesserstore

Well-known member
Joined
Mar 18, 2020
Messages
863
Location
Texas
It worked quite well on rust, about the same as evaporust and it hasn't re-rusted. Evaporust isn't available locally, so on the advice of a neighbor I decided to try this. Here's some before and after pictures: a Plomb PWA cadmium plated 9/16 socket, a 7" vise grip, and a Fuller tack puller.
 

Attachments

  • IMG_20210406_165905892~3.jpg
    IMG_20210406_165905892~3.jpg
    132.3 KB · Views: 44
  • IMG_20210523_150923035~2.jpg
    IMG_20210523_150923035~2.jpg
    157.9 KB · Views: 46
  • IMG_20210327_164855749~2.jpg
    IMG_20210327_164855749~2.jpg
    546.1 KB · Views: 48
  • IMG_20210523_151013342~2.jpg
    IMG_20210523_151013342~2.jpg
    1.4 MB · Views: 45
  • IMG_20210327_165303184~3.jpg
    IMG_20210327_165303184~3.jpg
    448.7 KB · Views: 46
  • IMG_20210523_150839946~2.jpg
    IMG_20210523_150839946~2.jpg
    443.9 KB · Views: 43
  • IMG_20210523_150900829~2.jpg
    IMG_20210523_150900829~2.jpg
    454.9 KB · Views: 47

d42jeep

Well-known member
Joined
Oct 22, 2014
Messages
16,484
Location
Northern California
I had my last order of Evaporust delivered by Amazon on sale if you can’t find it locally.
I found this Plomb DBE on Saturday. It went through the Evaporust treatment and was buffed on the 3M 220 disc. I coated it with Fluid Film to prevent future rusting. Sometimes the results of the treatment are almost magical E0F74A9B-7D84-4DC1-8F2A-CA9FD6C72BBB.jpeg77CE67EE-A442-4C28-A162-EF84047022A9.jpeg2D1E327E-741D-465C-A58E-D35A78FD3D51.jpeg
 

macgee

Well-known member
Joined
Jan 11, 2014
Messages
2,834
Location
Sepulveda Pass, CA
Its been a while since my last post here but had been meaning to post one way of cleaning the 3M Bristle Brush wheels, another GJ member recently asked about how to clean them so I thought I would post it here since many other here also have these wheels. I took these pics last fall.

Like many other cleaning surfaces, these can get dirty, build up and clog up with swarf and grease. The black film is most likely a coat of grime swarf and grease residue on your wheel; its annoying when it happens, it really reduces the effect of the wheels performance and can leave a greasy film on the item you're trying to clean.

Remove the wheel from grinder, separate the two black ends and the separate the layers of bristles. I've cleaned them great success with Goof-Off sticker remover, Simple green also works. I spray them on both sides of each layer wheel and then a little brushing to get the cleaner in there, then soak them overnight and then again brush them with a tooth brush type brush. I brush, then flush with fresh water and then wipe each wheel down with a paper towel, I'll repeat if I notice there's grime still on the paper towel. Then lastly I use rubbing alcohol soaked on towel to wipe them down before putting back together. Putting them in a warm ultrasonic cleaner does an amazing job cleaning them (rotate them in you have a small one). When putting back together, pay attention to organizing the layers so all the bristles are even, left to right and in the right orientation, not shooting off in all directions.

Sounds like a lot of work but not really, I do it maybe every six months after using daily. The key to reducing this issue is to de-grease before wheeling, remove as much grime as possible; I know its not alway possible but it does really help keep the wheels clean. Wire wheels have the same problem but much harder to see and tell and way harder to clean unless you have an ultrasonic cleaner.

Before:
IMG_1756.jpegIMG_1757.jpegIMG_1755.jpegIMG_1761.jpeg

AFTER:
IMG_1758.jpeg
 
Last edited:

d42jeep

Well-known member
Joined
Oct 22, 2014
Messages
16,484
Location
Northern California
That is good information. Thanks for showing the cleanup techniques. Using the wheel has become a regular part of my tool restoration procedure after the evaporust bath. Here are a few before and after pictures.ABC6D3E2-CE89-49EE-8C6E-61028A082DAF.jpeg6BF794F5-E550-4B1A-8999-8FD5B0EFFE1D.jpeg43C0F813-7FCB-41CD-990E-31ABA20828D0.jpeg8F3B21B6-E24A-4728-9514-927F1BCF6854.jpegBFE4BE41-D87F-421B-9B4B-9BDF0A4D104C.jpeg5EFA3ED4-34C5-42FE-8133-308CB9CA831D.jpegA4F246A7-B4CE-46E6-B01C-5EEC57E5D0DE.jpeg
-Don
 

LeonardY

Well-known member
Joined
Apr 16, 2011
Messages
5,020
Location
Southern California
I've used Evaporust for years. Way back in 2004. I wrote a post on another forum.

If your interested.


rust2.jpgClean1.jpg
 

Kscardsfan

Well-known member
Joined
Apr 28, 2020
Messages
1,650
Location
The Little Apple
I keep coming back to this topic, and each time I put the 3M wheels higher on my shopping list. Outstanding results
I’m in the same boat. I’m slowly restoring my wife’s grandpas tools from the farm and I’m tired of wire wheels. I’m about to start restoring the old single bottom plow for the tractor. It might require more than just these wheels though lol.
 

royudc

Well-known member
Joined
Jul 15, 2015
Messages
116
Location
Toronto, Ontario, Canada area
Thanks for that Mac, I was about to ask you about cleaning the 3m discs.
I've enjoyed the 220 so much I ordered an 80 and 400. And another 220 as a spare.
I'm thinking I'll put the 220 and 400 on the 1750 rpm grinder and the 80 on the 3600 rpm.
Thoughts?

D42jeep, nice work on rescuing those tools!

Ron
 

RTM

Well-known member
Joined
May 13, 2019
Messages
13,061
Location
SF Bay Area
Hey gang
Here is a fun save from the rust bucket. I found this at a hoarder's estate sale, a marking gage. I was a bit indecisive as to whether it was a quality find, or cheaply made import. I grabbed it, it was under $1 in aggregate pricing, so no big gamble. Unfortunately, my "before" picture only shows a tiny bit of one of the arms. (Class clown stepped in front of him) You can just barely see it under the yellow bit package in the bottom.

PXL_20210713_210803895-X2.jpg

For this tool, it was locked up tight, the screw would not loosen, the arms would not slide, it felt prickly when holding it. There was some really gross rust (as seen in the photo above), that pitted the arm substantially. I threw it into the Evaporust intact, not wanting to mar the tool by brute forcing anything. When it came out, I wiped it down, and saw the mfg info. Leavitt Mach Co, patented Jun 12 1888. The company was in business from 1872 - 1899, so realized I wanted to be extra careful, now.

Once it was wiped off, I could take the lock screw out, but the arms would not slide. Did a no-no, and used my vise as a press, breaking the tension holding the shorter arm in place. Lots brown goo oozed out as the arm slid. The longer arm slid much easier, but stuck when it got to the gross rust. A quick press on the vise got over the rough spot. Now that I had the pieces apart, I threw the head and the longer arm back into the Evaporust while I continued on the screw, the lock and the shorter arm. The screw head came out of the shorter arm, so it got the black knocked off, then a light trip across the 3M radial bristle brush. Finished up with some Simichrome.

Pulled the other pieces out a few hours later, repeated the process, a little bit of Sandflex block on the grosser areas of rust prior to the 3M. The Simichrome gives a nice even finish after the 3M.
Had trouble removing the one screw, damaged the head just a bit using a Grace Gunsmith screwdriver, so there is some soaking in its future.

So here it is, 120+ years old, and ready to go back to work, once I resharpen the little wheels. It won't pass for a virginal collector's edition tool, but it is ready to work again. The patent listed is 384,413


but it also uses 530,468


PXL_20210720_154525000-X2.jpg

PXL_20210720_154614771-X2.jpg

PXL_20210720_154633646-X2.jpg
 

JatoTheRipper

Well-known member
Joined
Jul 12, 2019
Messages
187
Location
PA
I found this thread while looking for rust inhibitors. I am looking for something to protect the tools I've cleaned with Evapo-Rust. I just wanted to say that Evapo-Rust is great stuff and well worth the money. It's the first time I've used it and I am very impressed. People on here are complaining it costs money. Well yeah it costs money!

This is a forum mostly centered around tools. Tools, at least good tools, are very expensive. Most of us agree that good tools are worth the money. So why is Evapo-Rust, which is only $16 shipped for 1 gallon, treated any differently? Oh by the way, Evapo-Rust is reusable.
 

don long

Well-known member
Joined
Mar 31, 2012
Messages
8,841
Location
southern california
After reading through this thread I decided to tackle this old rusted tight mechanical jackIMG_5182 - Copy.JPG

A little dip in the electrolysis tank (over night) it came apart very easy

IMG_5242 - Copy.JPG

After a session with the blast and a bit of smoothing out the casting marks my pile of parts look great

IMG_5247 - Copy.JPG
 

drivesitfar

Well-known member
Joined
Oct 23, 2013
Messages
35,991
Location
Pacific Northwest
Don: you sir can take any pile of rust almost and make it shine. WOW that is starting to look amazing just like the others you've turned from rust to gems. speaking of E tank can you post up a few pics of yours and is it available 24/7 if you need it or do you just make one and set it up as needed?

Mac: nice to know the radial brushes are able to be cleaned up and i'm sure i'll be buying some this winter after this summer of woodworking projects are finished.
 

UT Man

Member
Joined
Jul 3, 2019
Messages
6
Location
Illinois
I’d just take a 4 1/2” angle grinder with a wire wheel mounted on it and clean the vise up. You should be able to get all of it done in 30 minutes or so. And it should look great. After you get that done I would set up the vise so that it is sitting vertically and inside a plastic bag and pour some evaporust into the slide area to eat away the rust you couldn’t reach. It should be able to clear up a lot of that rust so that you would have an easier time freeing it up.
Best answer so far.....
 

don long

Well-known member
Joined
Mar 31, 2012
Messages
8,841
Location
southern california
Drives
Because of the size of the jack I had to make up a new tank. My 5 gallon home depot is still together for tools but I built this one for bigger stuff and it sits outside my shop for ventilation

17A.jpg

17B.jpg


I took some all thread and heated it up to bend it 90 degrees then put a hole in the trash can and with a washer on both sides of the can tightened up each rod. Then looped bailing wire around each rod and tied them all together creating a circuit. I attached the positive clamp of the battery charger to the rod circuit and the negative clamp to the jack holding wire and turned on the juice.

(don't know why the pictures are turned on the side)
 

RTM

Well-known member
Joined
May 13, 2019
Messages
13,061
Location
SF Bay Area
Here is another victory lap on the rust removal front. I've been hitting a hoarder's garage sale, and some of the tools were quite rusty. Below are some photos of the Record A151 spokshave I grabbed to see just how far I could recover something from (hiding under the drill bits again). As you can see, this thing had quite some gross rust, on almost all surfaces.

PXL_20210724_211834449-X2.jpg

PXL_20210724_211821305-X2.jpg


I didn't even try anything before throwing it into the Evaporust container. Let it soak a while, realized the old stuff was not working, and started with a fresh batch. Used a small tray only slightly larger than the shave, and added another tool to raise the liquid level above the bolts, so I didn't get a bathtub ring on the tool.

Pulled it out after 24 hours, and tried to move the fasteners. The blade adjuster, and the blade holding screw both came loose, the twin blade adjusters did not. I pulled the blade out, used a razor blade to scrape the faces of the blade and the cap, and the working surface. Threw it all back in, pulled it out about 24 hours later, and tried to loosed the twin screws again. Set that piece aside, sprayed it with Liquid Wrench, let it sit a few hours, inverted and repeated. Still not moving by hand, so I wrapped the knurled nut in a piece of scrap leather, and grabbed it with pliers. One moved, one did not. Upped the ante by grabbing it in the vise, still slipped in the leather. Moved to a fresher face of the leather, grabbed it in the vise, and this time it held. Spun it off.

At this point, the cap was pulled back out, wiped clean, and hit the 3M wheel. The blade came out, and got a good wipe down, but the cutting face was pitted, It is as shown in the pictures below. A fresh sharpening is in its future, to see if it is salvageable, if not a new blade will be ordered. You can see the pitting on the left edge in the pic below. The working surface (bottom face) was pretty grossly pitted, and scraping etc wasn't fazing it. I gave it a bit of abrasive work, and it cleaned up to reasonable, 80 grit and 100 micron paper. Not sure if the black will cause problems with the wood, so may have take more metal off after use. Have not simichromed that surface, but the cap was done. All the screws are oiled, and seem to move OK.

Here is as it sits now.

PXL_20210802_204852249-X2.jpg


PXL_20210802_205743884-X2.jpg

Not perfect, but good enough for a user.
 

John Timmins

Well-known member
Joined
Sep 1, 2008
Messages
857
Location
Flagler Beach, FL
I soaked my meat cleaver restoration in a shallow pan of 6% acid cleaning vinegar I bought on the soap isle at the grocery store. Some of you won't agree with this, but that's OK. Eventually I will put the rouge on it and smooth the pitting. It doesn't have to be perfect
 
To avoid these ads, REGISTER NOW!
Top Bottom