You are using an out of date browser. It may not display this or other websites correctly.
You should upgrade or use an alternative browser.
You should upgrade or use an alternative browser.
Show us your welding projects
- Thread starter neonnblack
- Start date


zmotorsports
ALLIANCE MEMBER


MP&C
Well-known member
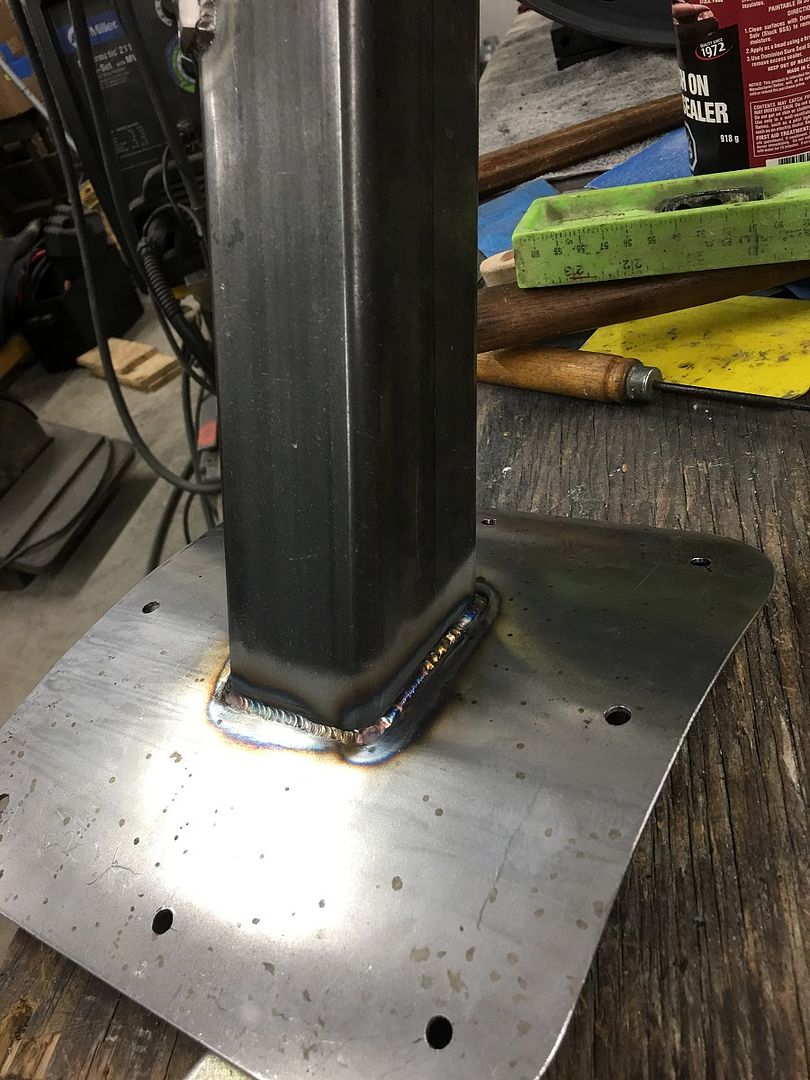
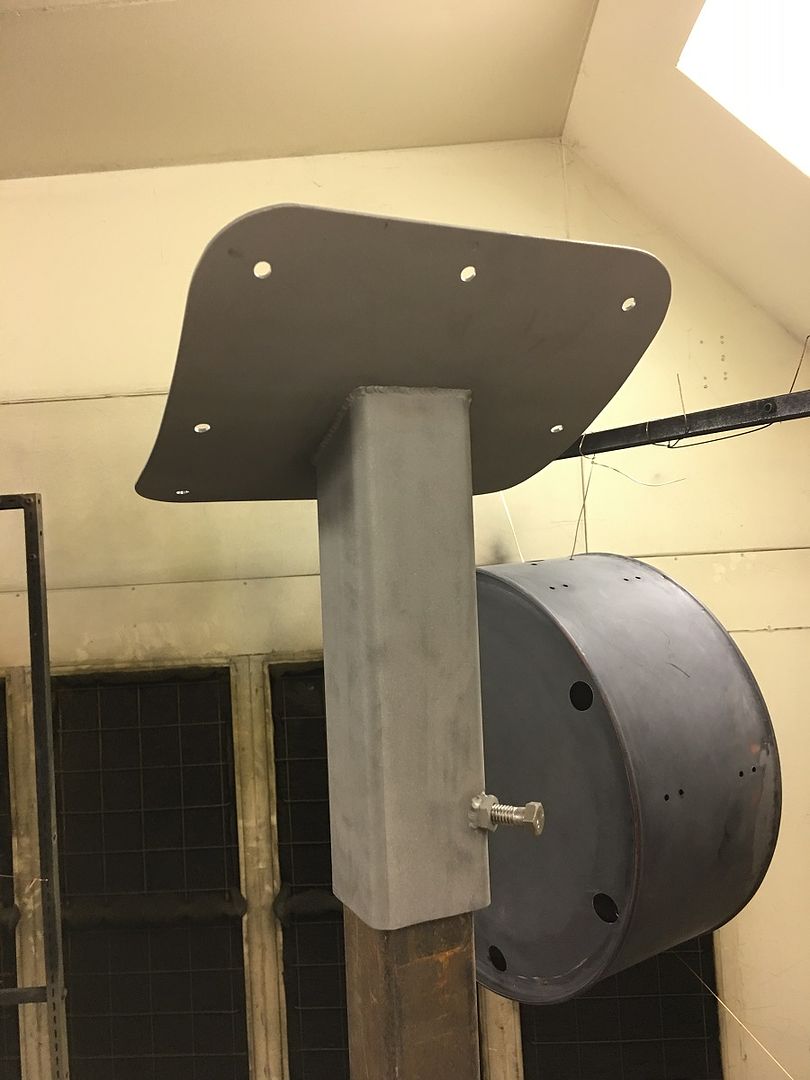
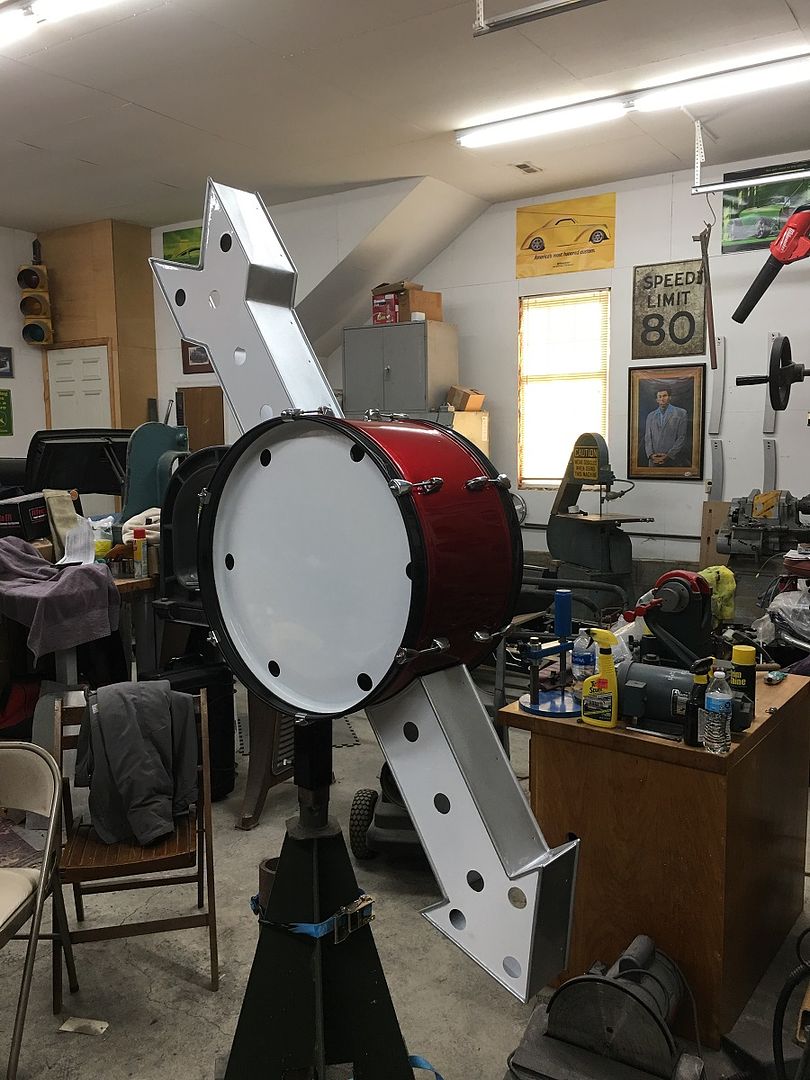
A bracket welded up to support our drum sign on a square tube post..
zmotorsports
ALLIANCE MEMBER
That turned out fantastic Robert.
86turbodsl
Well-known member
Be careful with the load on that. That's a metric **** ton of leverage on that hitch. Most class 4 hitches are only rated about 1000-1500 lbs, but only about 1ft behind the hitch. Without doing the sum of moments on that hitch, your capacity is probably significantly less than the crane before you bend the hitch. I limit myself to about 500lbs on my receiver crane.
Brandon_oma#692
Well-known member
Be careful with the load on that. That's a metric **** ton of leverage on that hitch. Most class 4 hitches are only rated about 1000-1500 lbs, but only about 1ft behind the hitch. Without doing the sum of moments on that hitch, your capacity is probably significantly less than the crane before you bend the hitch. I limit myself to about 500lbs on my receiver crane.
Yep I am curious what will fail when something does. I am debating adding a second receiver where the center tail lights are and having a second mounting point to eliminate the twisting. If I don't I will just add a plate that bolts to the top of the bed and is welded to the pipe.
Also I shortened the part that goes in the truck receiver over a foot. I used a section of square tubing and cut it to length after it was done. During use the vertical pipe is about 2" from the hitch now so the total lever arm is a little shorter, but still long.
Actually the hitch has no rating. I called the bed manufacture before out of curiosity and they did not have a rating for the hitches on the older design beds. They now use a b&w weld in product with a rating.
BajaScout
Well-known member
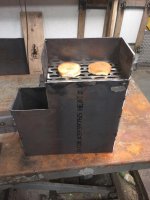
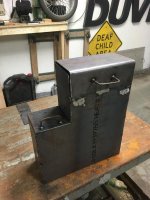
Mini smoker for when I just want something small while having a beer. Not done yet though
Nice. Similar to a rocket stove.
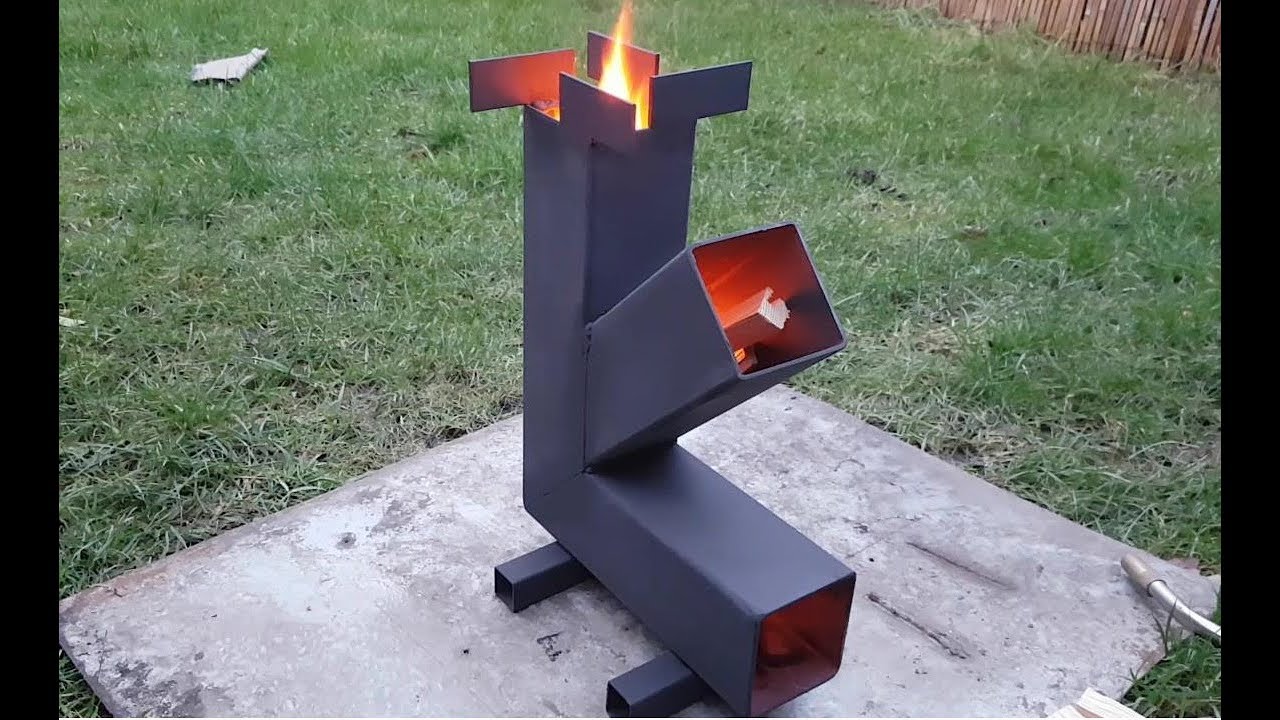
Could double as a heat source for camping trips or on the patio.
Monza Harry
Well-known member
Not 100% happy with how all the weld turned out, but it is done and functional. I ground out some weld and replaced it. Picture on the bench is before I ground out some welds and redid them. I also shortened the part that goes into the truck hitch.
Be careful with the load on that. That's a metric **** ton of leverage on that hitch. Most class 4 hitches are only rated about 1000-1500 lbs, but only about 1ft behind the hitch. Without doing the sum of moments on that hitch, your capacity is probably significantly less than the crane before you bend the hitch. I limit myself to about 500lbs on my receiver crane.
Yep I am curious what will fail when something does. I am debating adding a second receiver where the center tail lights are and having a second mounting point to eliminate the twisting. If I don't I will just add a plate that bolts to the top of the bed and is welded to the pipe.
Also I shortened the part that goes in the truck receiver over a foot. I used a section of square tubing and cut it to length after it was done. During use the vertical pipe is about 2" from the hitch now so the total lever arm is a little shorter, but still long.
Actually the hitch has no rating. I called the bed manufacture before out of curiosity and they did not have a rating for the hitches on the older design beds. They now use a b&w weld in product with a rating.
If I may add to this, shortening your main "platform tube" you did increase strength and torsional resistance. Also I would like to add that weight distributing receiver hitches (from a load/forces point of view this is very similar to what you will be subjecting the "platform tube" to) are usually solid, not tube, and easy(ish) upgrade to your most useful idea, and as for your idea for a second receiver tube that will add exponential strength, you could go to one or both sides, but I see enough room above your center marker for a central one right below the bed, [we may be saying the same thing here] much harder to smack your shin on way up there. You could also add a trailer tongue jack behind that for a little "Squat Control" and "Strength Adding" if you find it necessary, but that will add another SHIN SMASHER back into the picture.
 Now add your favorite singular & and miscellaneous compound four letter words here [and call for Tylenol and bandage delivery about now too if not already on hand, (what were you thinking not bringing those
  )]! Thank You for sharing your project! Harry
Last edited:
Brandon_oma#692
Well-known member
......................... but I see enough room above your center marker for a central one right below the bed, [we may be saying the same thing here].......................... Harry
Yes that is the plan.

Well actually thinking on removing the center light and putting the new receiver tube in that spot and adding 1 light on each side for a total of 4 center lights. But your idea above the lights might be easier.
Either way I will be adding a new crossmember between the bed framerails to support it. I think I have enough 4"sq tube laying around otherwise I will buy some 3"sq tube. The bed framerails are 4" channel.
Crusarius
Well-known member
add a trailer tongue jack to it and support it on the ground. If you really want to get fancy add to to triangulate it.
Brandon_oma#692
Well-known member
add a trailer tongue jack to it and support it on the ground. If you really want to get fancy add to to triangulate it.
I thought about it but don't plan on it because once you swing it over the bed the force is going the other way and no weight will be on the jack. It needs to be strong enough on it's own.
Edit to add. I am mainly using this to self load and unload the truck.
Last edited:
Farmall450
Well-known member
This was last nights welding project completed.

Nice setup turbo
Attachments

zmotorsports
ALLIANCE MEMBER
A few welds from last night.


Completed base.

More pics can be found on my Projects 2.0 thread.
Completed base.
More pics can be found on my Projects 2.0 thread.
Attachments


Last edited:
smalltown
Well-known member
Not knowing how to weld I ask when I see that Blue "rainbow" color adjacent to the weld does that indicate that you have proper heating, and maybe proper penetration ?
zmotorsports
ALLIANCE MEMBER
Not knowing how to weld I ask when I see that Blue "rainbow" color adjacent to the weld does that indicate that you have proper heating, and maybe proper penetration ?
It has more to do with gas coverage. The colors occur as the gas coverage is moving along with the torch. Too little gas coverage and the atmosphere hits the hot weld all at once and doesn't allow the weld to cool properly which ***** in contaminants from the atmosphere. Too hot of a weld can cause the weld to be grey but that will also be evident by how the weld and weld toes wash out into the parent material.
smalltown
Well-known member
Thanks Mike. So what I get from that is when I see that rainbow there was good gas coverage of the area when it was welded, and that my gas regulator was adjusted properly.
zmotorsports
ALLIANCE MEMBER
Thanks Mike. So what I get from that is when I see that rainbow there was good gas coverage of the area when it was welded, and that my gas regulator was adjusted properly.
In part yes, but gas coverage is more than merely what pressure you are running. It has just as much to do with torch angle and cup size as it does with how much volume or pressure of gas coming out of your regulator.
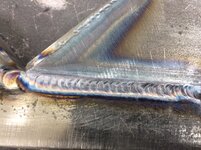
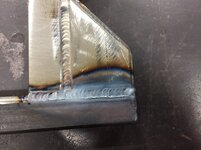
If you look in this picture of my weld you can see that even towards the end (lower right of the weld) the colors are going a bit grey compared to the other weld.

That is because as I was sliding my hand along it was getting too hot as I didn't use my TIG Finger on this weld so I was trying to extend my torch with my wrist rather than slide my hand along the weld. This caused my torch angle to change and therefore gas coverage began to suffer. You can see how grey the end of the weld was becoming. I should have stopped and repositioned my hand to compensate for the heat but I was on a roll and kept pushing forward which wasn't the best option.

You can also see the HAZ (Heat Affected Zone) is growing substantially as I near the lower right or end of the weld. This was due to not only the end of the weld and the heat had nowhere else to go but also because as my torch angle was changing this also caused my arc length to become extended which adds unwanted heat to the weld. The ripples are becoming less defined which told me my heat was becoming more of an issue as I neared the end of this weld.
So you can see that there is much more than merely gas volume/pressure that lends itself to the color.
I hope that helps as these discussion are great for all of us to learn and believe me, there are better welders on this forum than me.
Attachments

joe49
Well-known member
The rainbow is indication of the temperature the steel reached.
https://www.sizes.com/materials/colors_of_heated_metals.htm
In the link tempering chart has color to temps.
As far as gas coverage I don't know about it's affect on the colors.
https://www.sizes.com/materials/colors_of_heated_metals.htm
In the link tempering chart has color to temps.
As far as gas coverage I don't know about it's affect on the colors.
slowtwitch73
Well-known member
Rough rule of thumb, shiny is good as far as gas coverage.
zmotorsports
ALLIANCE MEMBER
The colors are not only indicative of what color the parent material reached but also how effective the shielding gas was at protecting the parent material as it cools. Not covering well enough can draw in contaminants and therefore alter the colors as the weld is cooling.
I don't want to get too off topic on colors because there is so much more that goes into a good (or bad) weld other than what color the weld is when cooled. A good welder/fabricator has to take all of these things into account and make adjustments to either their process or other variables to produce the best outcome. This is why I tell people welding is about 5% theory and 95% practice because even knowing the process and trying to duplicate it each time, variables can change and we must know how to react to correct them when we encounter them.
I don't want to get too off topic on colors because there is so much more that goes into a good (or bad) weld other than what color the weld is when cooled. A good welder/fabricator has to take all of these things into account and make adjustments to either their process or other variables to produce the best outcome. This is why I tell people welding is about 5% theory and 95% practice because even knowing the process and trying to duplicate it each time, variables can change and we must know how to react to correct them when we encounter them.
smalltown
Well-known member
Thanks again. One of these days I will have finished the Home remodel, and intend to make an attempt at welding. Just yesterday while cleaning out an old bed frame the wife thought I was going to toss it. I saved it thinking I could practice welds on the steel.
Old Man Roger
Well-known member
Here's a good read on the subject.
https://www.thefabricator.com/thewelder/blog/arcwelding/colors-in-welds-and-what-they-mean
https://www.thefabricator.com/thewelder/blog/arcwelding/colors-in-welds-and-what-they-mean
smalltown
Well-known member
Thanks Roger it was a good read for me.
bczygan
Well-known member
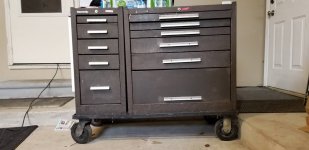
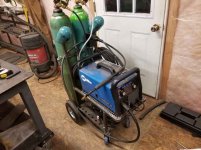
Wanting to make one or two welding carts.
I picked this up today for $70.
Thinking about using it two different ways.
#1 Use as is and put a welder on each cabinet. Add supports for leads as needed.
#2 Separate into two different cabinets, one for each welder.
Either will need modification to hold a full size cylinder (330CF) or two.
Pros....cons.....ideas?
I'm leaning towards separate cabinets. The double cabinet method will end up being a large cart, dragging two cabinets, 2 welders and 2 cylinders around.
Separate cabinets will work out better, with one exception. The smaller cabinet may be too top heavy with a full sized cylinder unless made wider for stability.
Bill
Attachments
Last edited:
AngryBeaver
Well-known member
Wanting to make one or two welding carts.
I picked this up today for $70.
Thinking about using it two different ways.
#1 Use as is and put a welder on each cabinet. Add supports for leads as needed.
#2 Separate into two different cabinets, one for each welder.
Either will need modification to hold a full size cylinder (330CF) or two.
Pros....cons.....ideas?
I'm leaning towards separate cabinets. The double cabinet method will end up being a large cart, dragging two cabinets, 2 welders and 2 cylinders around.
Separate cabinets will work out better, with one exception. The smaller cabinet may be too top heavy with a full sized cylinder unless made wider for stability.
Bill
gets the job done and holds the supplies nicely. wish I would have had more overhang is my only regret....
https://www.garagejournal.com/forum/showthread.php?t=369787
Bighead38
Well-known member
Thanks again. One of these days I will have finished the Home remodel, and intend to make an attempt at welding. Just yesterday while cleaning out an old bed frame the wife thought I was going to toss it. I saved it thinking I could practice welds on the steel.
Iirc most bed frames are pretty ****** to weld with.
smalltown
Well-known member
Is it the coating? I knew I would need to grind it down to bare metal.
slowtwitch73
Well-known member
Bighead has it 100% right. Not the coating, its the metal aka mystery metal. It will be challenging enough starting out.. removing a variable is valuable. I would just get some cold rolled bits.. like 1/8 to 1/4 thick to start.
My experience has been the opposite. I have cut up and welded 3 different frames for a variety of projects using .035" flux core with my Lincoln 180 and have had absolutely no problems or complaints.Iirc most bed frames are pretty ****** to weld with.
Sent from my Moto G (5) Plus using Tapatalk
hawkerxj
Well-known member
hawkerxj
Well-known member
Reminds me of thisThe colors are not only indicative of what color the parent material reached but also how effective the shielding gas was at protecting the parent material as it cools.
impala4speed
Well-known member
Iirc most bed frames are pretty ****** to weld with.
I've not had any issues welding these bed frames using my Miller 130. Drilling them is another matter altogether though.
Old Man Roger
Well-known member
I've never had an issue, just grind off the powder coating and weld away. It's pretty brittle compared to regular angle iron, but it works for most diy projects.
bczygan
Well-known member
Wanting to make one or two welding carts.
I picked this up today for $70.
Thinking about using it two different ways.
#1 Use as is and put a welder on each cabinet. Add supports for leads as needed.
#2 Separate into two different cabinets, one for each welder.
Either will need modification to hold a full size cylinder (330CF) or two.
Pros....cons.....ideas?
I'm leaning towards separate cabinets. The double cabinet method will end up being a large cart, dragging two cabinets, 2 welders and 2 cylinders around.
Separate cabinets will work out better, with one exception. The smaller cabinet may be too top heavy with a full sized cylinder unless made wider for stability.
Bill
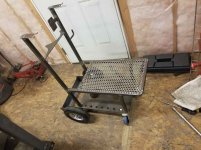
I've decided to make 2 separate carts, even though it would be easier to just use it as is.
So I'll rework the existing rolling frame for the larger cabinet and build a new one for the smaller cabinet.
Small one first. Might use bed frames for it. It will have a low shelf for the cylinder. Might cantilever a shelf above the cabinet for the welder.
Bill
smalltown
Well-known member
Reminds me of this
Interesting video. He makes things easy to follow.
bggrnchvy
Well-known member
Not knowing how to weld I ask when I see that Blue "rainbow" color adjacent to the weld does that indicate that you have proper heating, and maybe proper penetration ?
The coloring indicates how hot the metal was when it was exposed to oxygen. The colors are caused by the thickness of the oxidation layer as the thicker it is, the more of the light spectrum refraction it blocks. Blue correlates to 1000-1200*F.
If you have excellent gas coverage the metal may show little color as it was allowed to cool below the critical temperature (depends on the alloy) before it was exposed to oxygen. If you have bad gas coverage you may have a strong grey color out beyond the weld itself even. There's a balance in there of efficient gas use and what the welded assembly is being used for and made of. With carbon steels, the oxide layer doesn't matter a whole lot. With stainless steels, carbide precipitation means you want to keep the metal in an inert atmosphere until it's below critical temp or you have a surface that will persistently corrode so higher gas use is necessary.
Last edited:
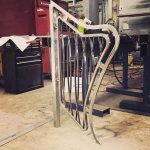
Sample balustrade panel to send off to a client. This will be down the bottom of a straight staircase, and the Mohawk will have a polished timber handrail slotted over it.
Mixture of 25mm square tube and 25mm solid plate I cut the corners out of. 3mm flat bar for the inside. The Mohawk was 50x10mm flat bar, all plasma cut by hand in pieces then joined and linished back. When it comes time to make the rest, all the flat bar will be laser cut. There is no substitute for that kind of precision plus it shortens turn around time. The panels will be powder coated black once finished
This was fun to build but now the real headaches start: these same style panels going up a curved staircase
Will post updates once the job is complete