nonhog
Well-known member
Gerald - I think you are holding out and owe us a build thread!
.
Or keep em coming on this thread.


Gerald - I think you are holding out and owe us a build thread!
.
Gerald that was a mess, glad you put new panels in it looks good now.
Sent from my SM-A102U using The Garage Journal mobile app


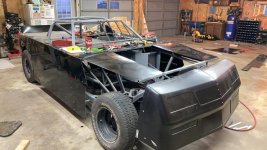
Thanks Jim. Unfortunately the front end was in a similar state, and is now under reconstruction.
Still cutting.
Front frame rail extensions are tweaked. It's going to end up completely disassembled and stripped to bare metal.

New driver side floor got welded in.


This is where I wish I had a MIG. Plug welding with a TIG isn't ideal. Top panel wants to heat up and expand away from the underlying panel making a gap if you're not quick enough.

Actually I did that too on this floor. Every other hole in fact had a self tapper while welding the holes between. Kept the floor really flat overall. Goes fast with a screw gun.I’ve never TIG welded, but doing floor, trunk , tubs etc... I use small self tappers in a few spots to hold the panels tight together when I’m plug welding with the MIG, then just come back and plug those.
Maybe that wasn’t appropriate on your particular project.
That’s ridiculously cool!
What’s it a part of?
Thanks, I knew about the recall. These are about 15 years old and not listed in the recall. It had something to do with the ratchet teeth not having enough angle to hold securely. I examined them and they look better than the ones that were recalled, but I think I'm going to modify them to take a locking pin once I get the car off of them.It appears those Jack stands maybe Harbor Freight ones. There is a recall on them. I returned 2 sets to store even though my numbers didn't match. Harbor Freight says if you aren't comfortable with them return.
I got INSTORE gift card which was current price. You can get cash but it's less money.
https://www.nhtsa.gov/press-releases/consumer-advisory-harbor-freight-jack-stands
Sent from my iPhone using Tapatalk
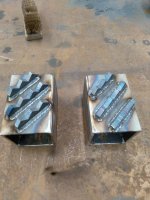
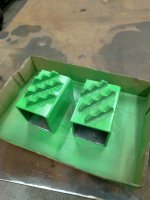
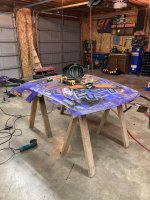
Another set of ICE SHOES for my old boss . The first set worked so good on the tow truck he wanted another set for another truck .
They slide on the rear wheel lift T-BAR and when you put the wheel lift down you bite in and stick much better in the **** road conditions out here in the country area we are in .
I used 4x4x1/4 angle iron to make the square box tube . This truck has a wierd size slider @ 3.5in outside . The angle got me 3.75x3.75 inside . So i ground off 1/16th inch per edge and got 3 5/8th inch . Little slop is fine . Burned them inside and out and then 1in tall x 1/2in thick bar stock for theeth . 1/2in top down for theeth depth @ 45* angle . Cut on porta-band swag offroad table kit . Bevel ground the flats for a good solid burn in with the lincoln power mig 216 .
Then after a cool down i put them in the skat blast box with course black beauty media and shot them in his fav color .
Actually I did that too on this floor. Every other hole in fact had a self tapper while welding the holes between. Kept the floor really flat overall. Goes fast with a screw gun.
Even still, with TIG, the challenge is focusing the heat through the center of the hole onto the back layer quickly before the top layer bulges upward. Often it does anyway and you have to stop and quickly tap it back down with a hammer. I think I made the mistake this time of making the holes too small, and once I got started welding I was committed.
Another set of ICE SHOES for my old boss . The first set worked so good on the tow truck he wanted another set for another truck .
They slide on the rear wheel lift T-BAR and when you put the wheel lift down you bite in and stick much better in the **** road conditions out here in the country area we are in .
I used 4x4x1/4 angle iron to make the square box tube . This truck has a wierd size slider @ 3.5in outside . The angle got me 3.75x3.75 inside . So i ground off 1/16th inch per edge and got 3 5/8th inch . Little slop is fine . Burned them inside and out and then 1in tall x 1/2in thick bar stock for theeth . 1/2in top down for theeth depth @ 45* angle . Cut on porta-band swag offroad table kit . Bevel ground the flats for a good solid burn in with the lincoln power mig 216 .
Then after a cool down i put them in the skat blast box with course black beauty media and shot them in his fav color .

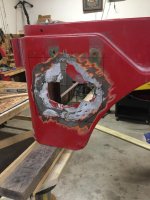
Preparation of the original body sheet metal, where it was to be welded, consisted of stripping to bare metal by means of paint removers, sanding, and wire wheels. Because of the rust, there were some minor specs of contamination here and there that remained in some tiny pits in the metal. I used a rust converter to stop any further rust, but still those small specs can be toublesome when TIG welding. You get an occasional flare up or blow out if you hit a rust spec. Then you may end up with a hole to close up, or get the tungsten contaminated from the spatter and have to stop and redo the tungsten. It's a minor hassle, but doable.Thanks for posting those pics! I'm about to attempt some similar rust repairs. It is looking like 6 pieces I will need to splice in, less than 1 sq ft each, horizontal and vertical positions (basically 2 corner junctions of the body tub). Currently I only have a TIG and I am decent enough with it on nicely prepped steel. However, my main concern is cleanliness of the base metal causing issues with TIG. Did you do any additional weld prep beyond what was shown? Did you have any other issues or advice?
I was seriously considering buying a small MIG, but sacrificing the extra space and money isn't so desirable right now.
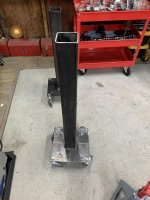
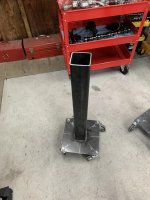
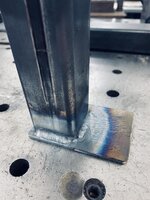
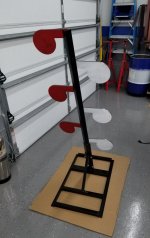
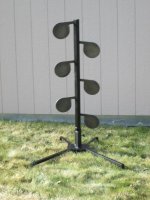
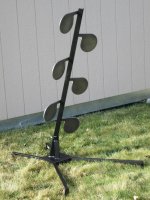
I built this dueling tree over the holiday break. Base is a combination of 1" square tubing and 1" angle. Upright is a 1-1/2" angle 60" tall. Paddles are 1/4" AR 500. It breaks down into 10 pieces for ease of transport to the range I use. I need more (better) pics, but here's one my wife took.


Nice! I built one as well about a year ago, lots of fun

Preparation of the original body sheet metal, where it was to be welded, consisted of stripping to bare metal by means of paint removers, sanding, and wire wheels. Because of the rust, there were some minor specs of contamination here and there that remained in some tiny pits in the metal. I used a rust converter to stop any further rust, but still those small specs can be toublesome when TIG welding. You get an occasional flare up or blow out if you hit a rust spec. Then you may end up with a hole to close up, or get the tungsten contaminated from the spatter and have to stop and redo the tungsten. It's a minor hassle, but doable.
The best way to prepare the metal for TIG welding when there is rust is to abrasive-blast to clean base metal. This will get all the rust out of the pits below the surface that sanding and wire wheel can't reach.
You'll need to use a fingertip switch on your TIG torch rather than the footpedal, and set it to 2t (on while pressed, off when released). Most of this sheetmetal welding is quick small tack welds, and you''l find yourself in awkward positions where a pedal is not practical.
Start your welds by placing the tip of the filler rod on the spot to weld and start your arc on that. The rod will draw the arc more easily and precisely. Melt off a tiny bead of filler and fuse that into the base metal for your tack weld then let it cool completely before doing the next tack weld. The sheet metal heats up rapidly and expands so you have to let it cool to avoid warpage. It's going to shrink at the weld so when doing **** welds in the middle of a panel it will need to be planished to unshrink the weld.
I built this dueling tree over the holiday break. Base is a combination of 1" square tubing and 1" angle. Upright is a 1-1/2" angle 60" tall. Paddles are 1/4" AR 500. It breaks down into 10 pieces for ease of transport to the range I use. I need more (better) pics, but here's one my wife took.

I built this dueling tree over the holiday break. Base is a combination of 1" square tubing and 1" angle. Upright is a 1-1/2" angle 60" tall. Paddles are 1/4" AR 500. It breaks down into 10 pieces for ease of transport to the range I use. I need more (better) pics, but here's one my wife took.
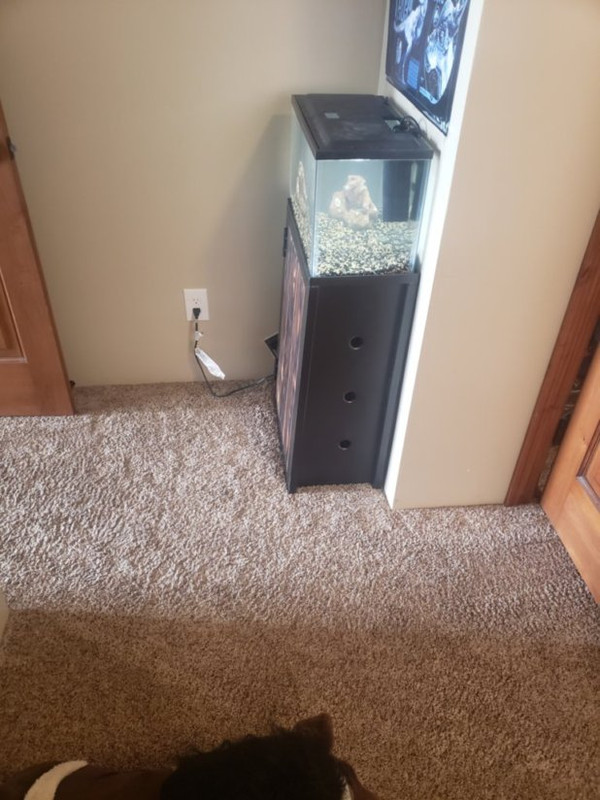
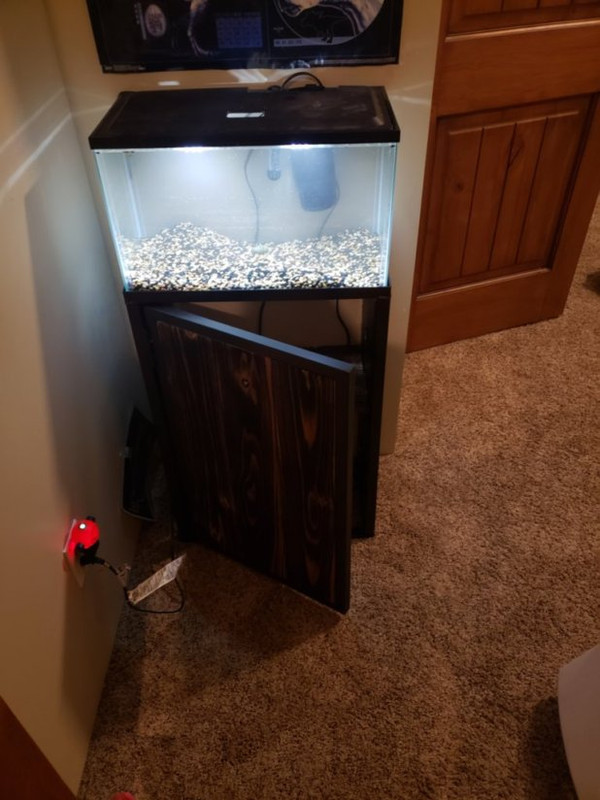
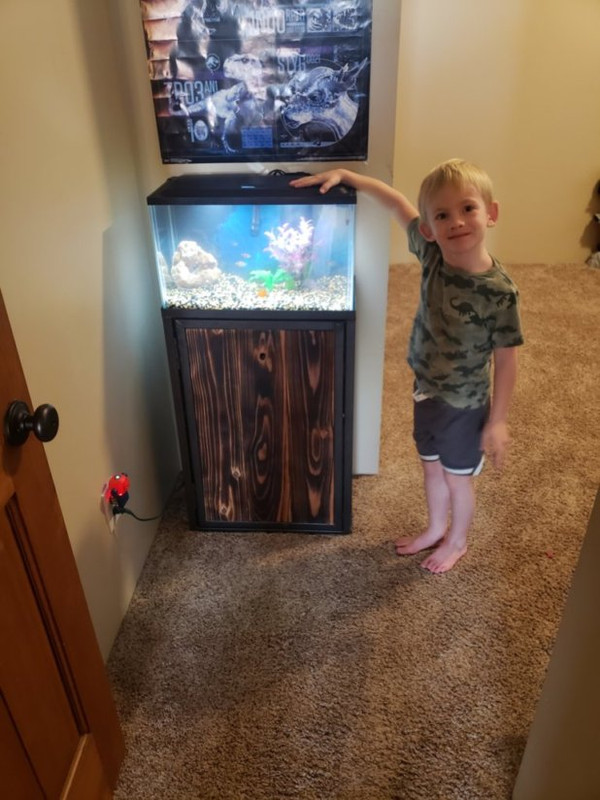
x--just the right height for your son.
I bet he loves that tank! I know my kids are infatuated with fish tanks when we see them.


Five minute project
Kindling for later