harley jim
Well-known member
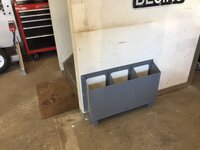
Everyone kept telling me it was cheaper to buy a welding cart.
It's like a mans right of passage to build his own cart, good on you
It's like a mans right of passage to build his own cart, good on you

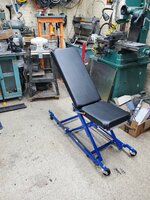
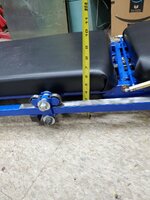
Overbuilt??......nawww, but if you added a roll cage she'd be a class 8 ride fur sure.bought a millermatic few months ago and figured why not make my own cart. some have said i over did it but i didnt want it to be floppy like a noodle


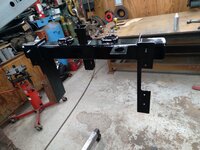
Thanks man! It’s what I had so that drove the design.Dang Larry! you plan on entering that tractor in the pulling circuitthat's one heavy duty hitch
")


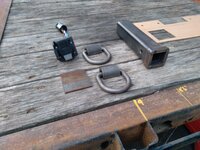
Is that your 2003 Grand Marquis LSE with console shift in the background? That's a rare car.Made a rear hitch for my Husky (MTD) garden tractor.
Hitch hangs from the factory shoulder bolts on the sides that are used to attach factory rear ground engaging attachments. Single bolt at the bottom at the old hitch pin location anchors hitch in place. Added additional hitch pin hole to still be able to pull the small garden trailer. Used some robust angle I had laying around and bought the hitch receiver.
Design was completely by eye and continuous process of cut and removal. Now onwards to blasting, prime, and paint.
Hitch is quite stout!
Yes and no. Its ours but its a 2004 Gran Marquis Ultimate Edition but column shift automatic. It has 70k and change in mileage. Was my mother in law's car but she passed away several months back. Need to get it sold.Is that your 2003 Grand Marquis LSE with console shift in the background? That's a rare car.
In this market, I'd say you could probably get $6,000 for it easily. There's still low mileage cars out there and they seem to sell quick when they're priced under $5,000.


Clearly that hitch is a ploy to get a bigger tractor!Dang Larry! you plan on entering that tractor in the pulling circuit

Nice work! And nice price for material even from a scrap yard. How did you do the legs?I made a bbq pit from 1/8" scrap steel from the scrapyard.... It was rusty and laying on the dirt so the pieces had a slight warp. I bought 3 pieces each was 11" wide and between 94-96" long.... I paid $0.75/lb for it in cdn pesos.
Nice work! And nice price for material even from a scrap yard. How did you do the legs?
...because you just never know when you might need to pull a bulldozer out of a muddy ditch with your lawn tractor----it's always best to over-build.Made a rear hitch for my Husky (MTD) garden tractor.
Hitch hangs from the factory shoulder bolts on the sides that are used to attach factory rear ground engaging attachments. Single bolt at the bottom at the old hitch pin location anchors hitch in place. Added additional hitch pin hole to still be able to pull the small garden trailer. Used some robust angle I had laying around and bought the hitch receiver.
Design was completely by eye and continuous process of cut and removal. Now onwards to blasting, prime, and paint.
Hitch is quite stout!


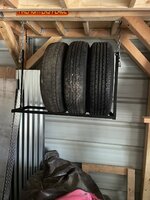
Not bad for the time you have in. Maybe let your puddle wet a little more, looks like kinda like cold lap on the edges of the weld.Making a 8x10 shelter for kids' bikes and a go kart. 16ga 1x1 galvanized. Now just need to pull apart and paint and get some roofing panels.
I think my best weld of the bunch (I have about 4 hours arc time with TIG welding).
Nice looking trailer, but why does such a small trailer need to be so heavy duty? Need to transport solid steel blocks? LolThese are my two utility trailers. The one in the foreground I am most proud of. It is made from stainless scrap. It took 6 months of hunting for the pieces. It's 4'X5' with 18" sides and 15" ten ply tires. It weighs in at 450 pounds empty. It also has a 2000 pound axle.
I had the little 5X12 wheels and tires on it to begin with. I could not see the trailer out the back window of my 78 Bronco. Since I went with the heavy duty on the bigger trailer ,I decided to run the same size on both. It took 2 years of having the smaller wheels on sale at the local gas station, but finally sold them so I did not lose any more there.Nice looking trailer, but why does such a small trailer need to be so heavy duty? Need to transport solid steel blocks? Lol
Well if you ever need to transport some lead ingots, you’ll be ready..lolI had the little 5X12 wheels and tires on it to begin with. I could not see the trailer out the back window of my 78 Bronco. Since I went with the heavy duty on the bigger trailer ,I decided to run the same size on both. It took 2 years of having the smaller wheels on sale at the local gas station, but finally sold them so I did not lose any more there.