To avoid these ads, REGISTER NOW!

Speedy's Garage 3.0

bww_mnm

Well-known member
Joined
Dec 30, 2010
Messages
673
Location
Chicago area
Quick update. They did 3 rounds of finishing on the sheetrock and got that knocked out. Trim guys came by and got all the trim/doors installed this week. Amazing how fast these guys can work and how good the work actually is. They showed up at 4pm and were done including clean up at 7pm.

Paint is next. I had planned to get some buddies to come over and paint it ourselves, but it's getting cold weather and close to the holidays so I'm taking quotes from pros now. Hope to have the paint done next week if I can get it scheduled. Shouldn't be long after that, final electrical, gutters, attic insulation, main door, and the final plumbing are what's left.

speedysgarage_30_46_web.jpg


Solid exterior metal door used on compressor room for sound deadening.

speedysgarage_30_47_web.jpg


Standard interior door used on restroom.

speedysgarage_30_48_web.jpg
Hmmm ... The potty could be louder than the compressor :)
 
To avoid these ads, REGISTER NOW!
OP
S

Speedy!

Well-known member
Joined
Dec 23, 2014
Messages
271
Location
TN
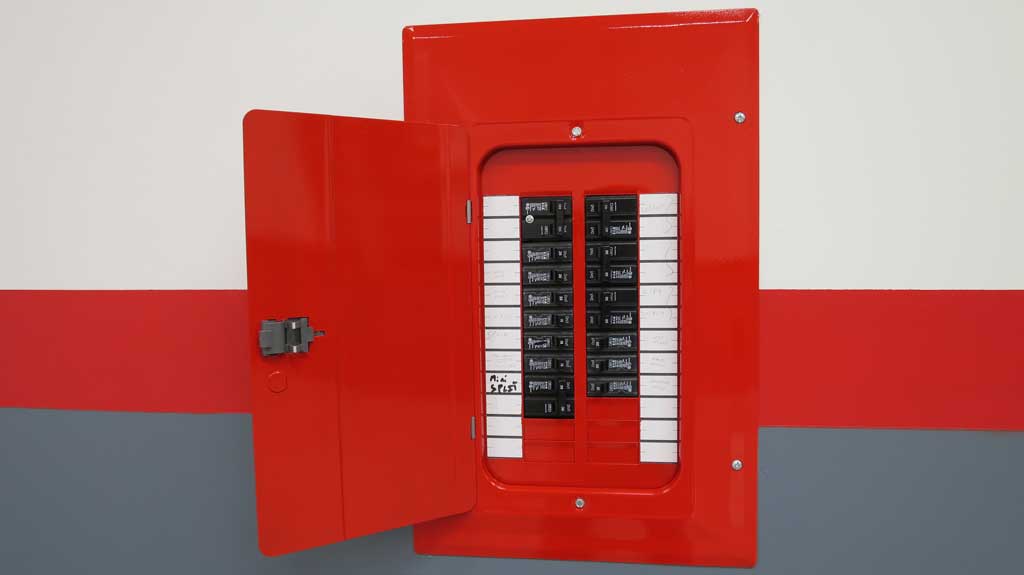
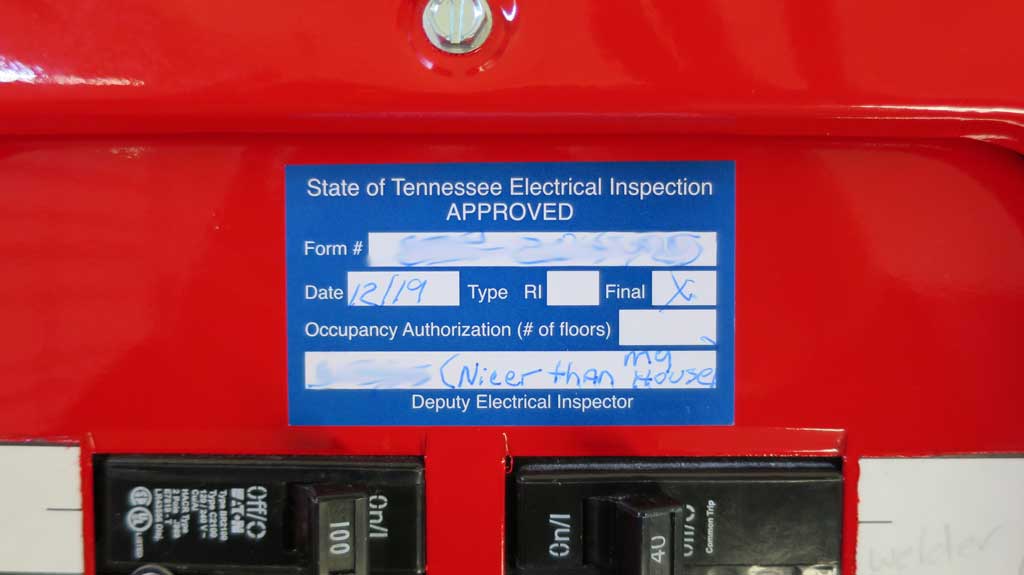
This week's update, electrical work complete, house upgraded to 400A service and a separate panel put in the garage. HVAC mini split installed as well as garage door.

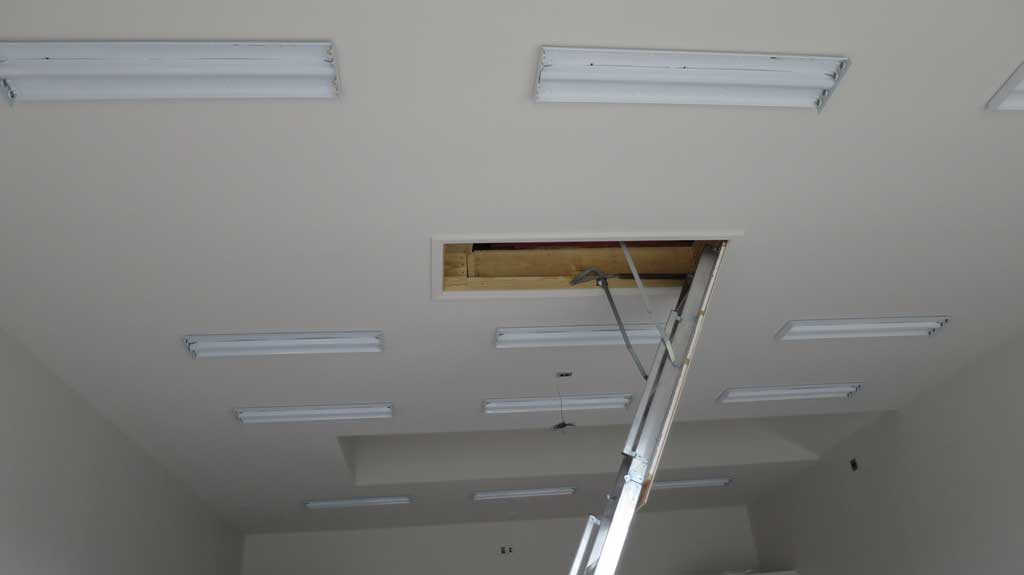
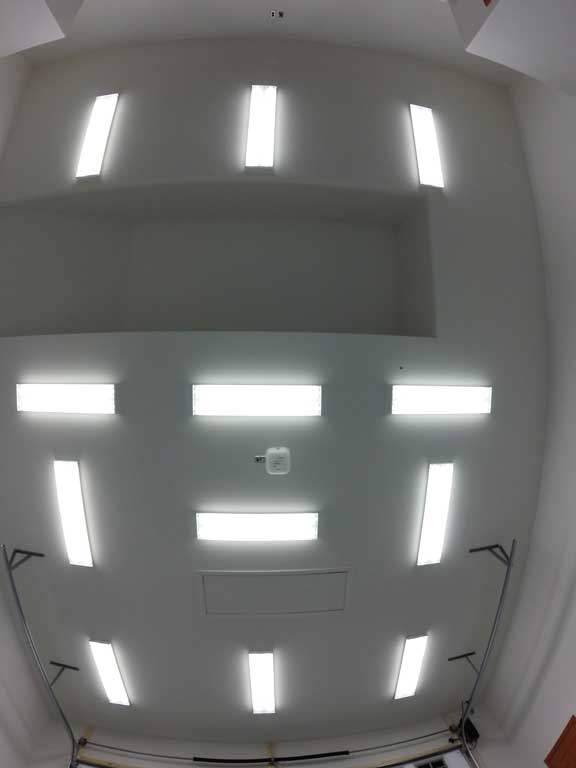
This is why you have to be specific with contractors. They mounted the lights all horizontal when the majority should have been vertical. They simply followed the studs rather than consider light distribution. Superintendent forgot to give them my diagram.

speedysgarage_30_53_web.jpg


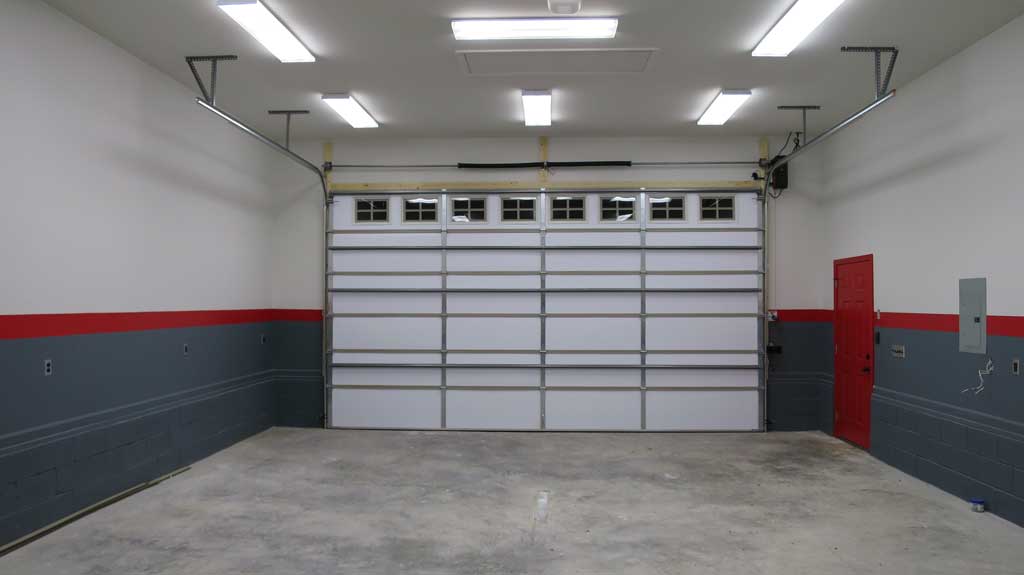
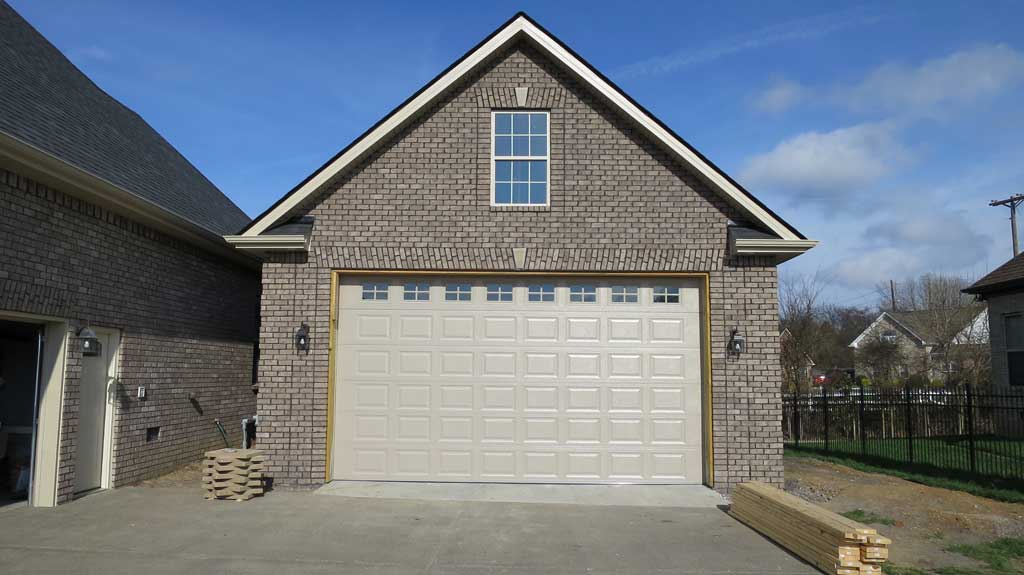
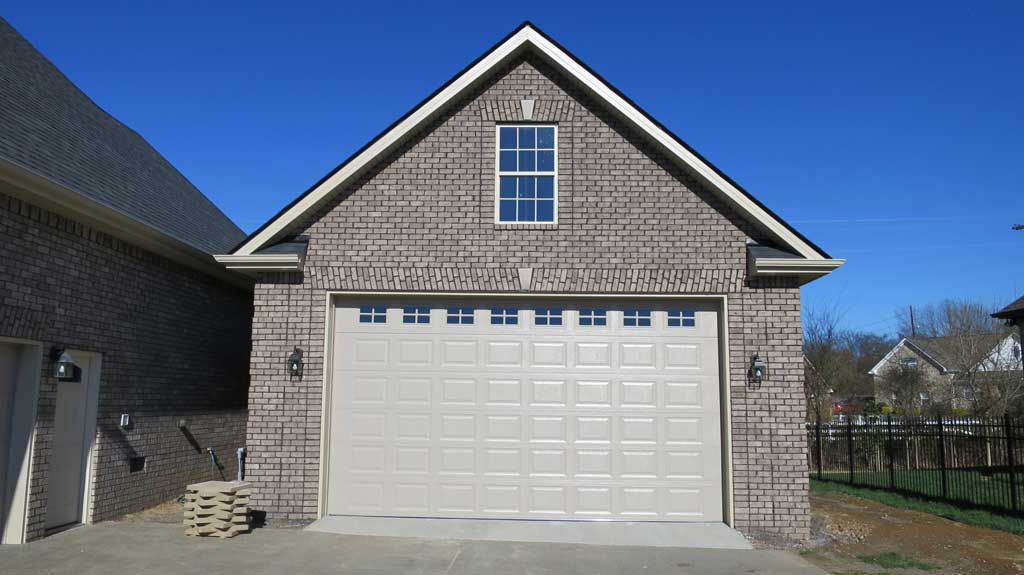
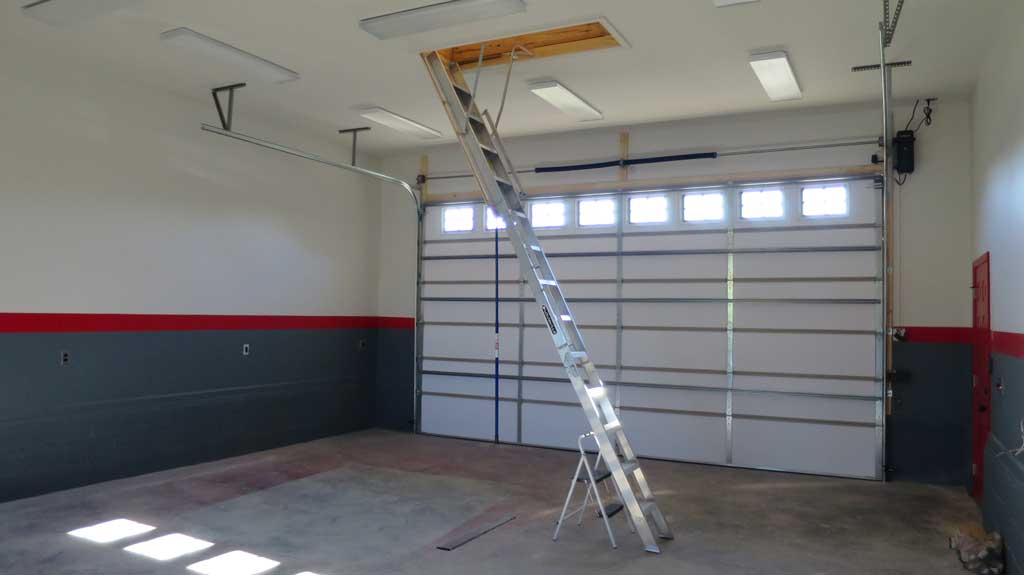
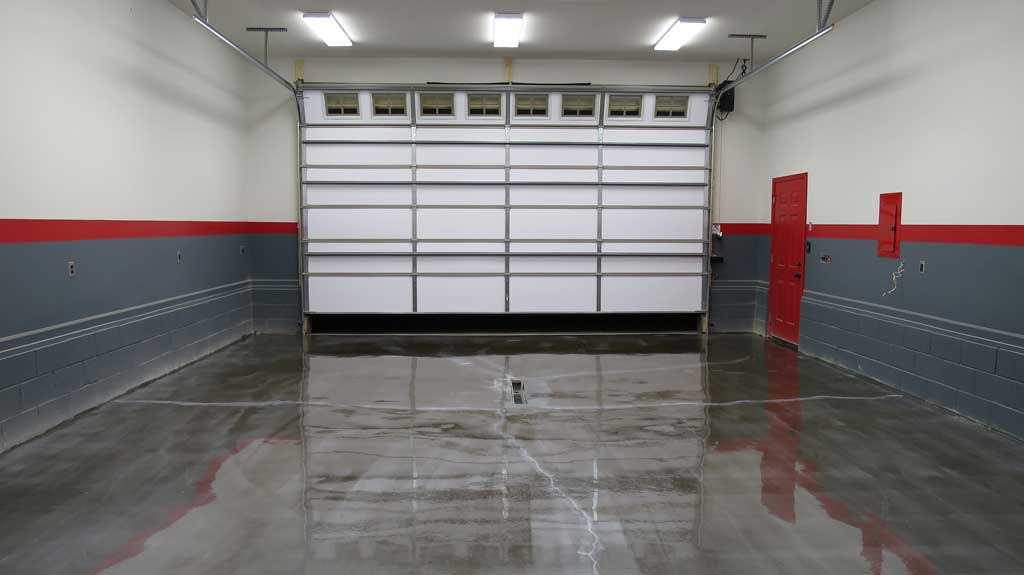
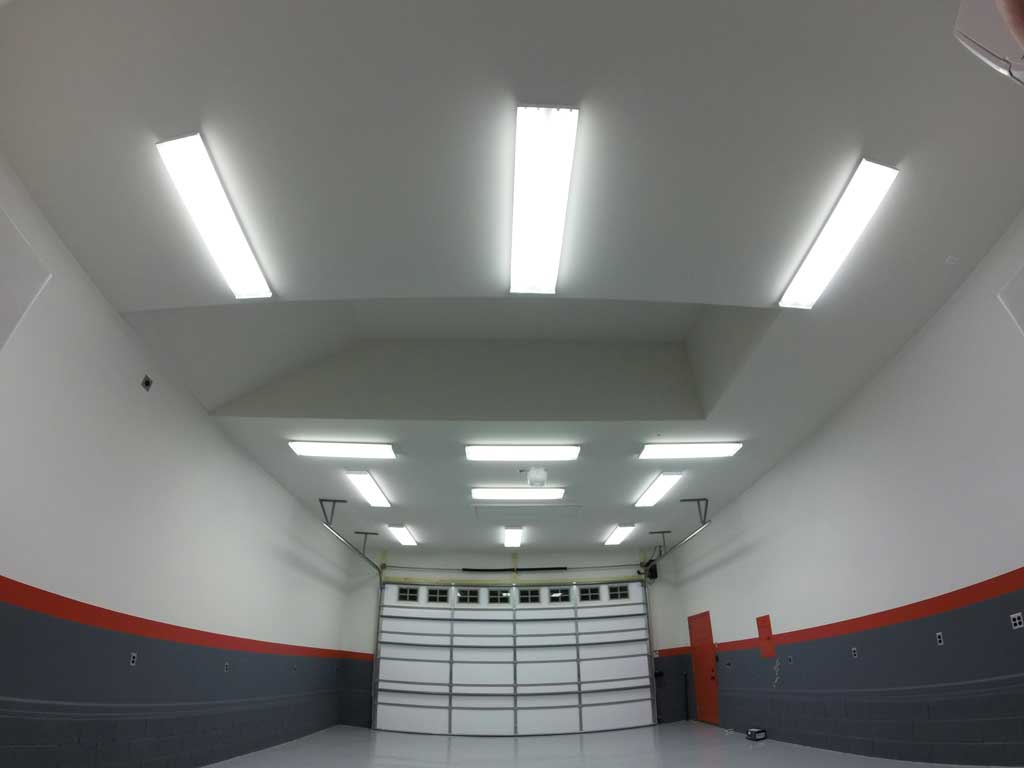
Here they are corrected. This also shows the 18x10 insulated garage door. I had windows added to the top to allow daylight in. That a long with the back window are plenty to work in the garage in the day time without lights if I want.

speedysgarage_30_54_web.jpg


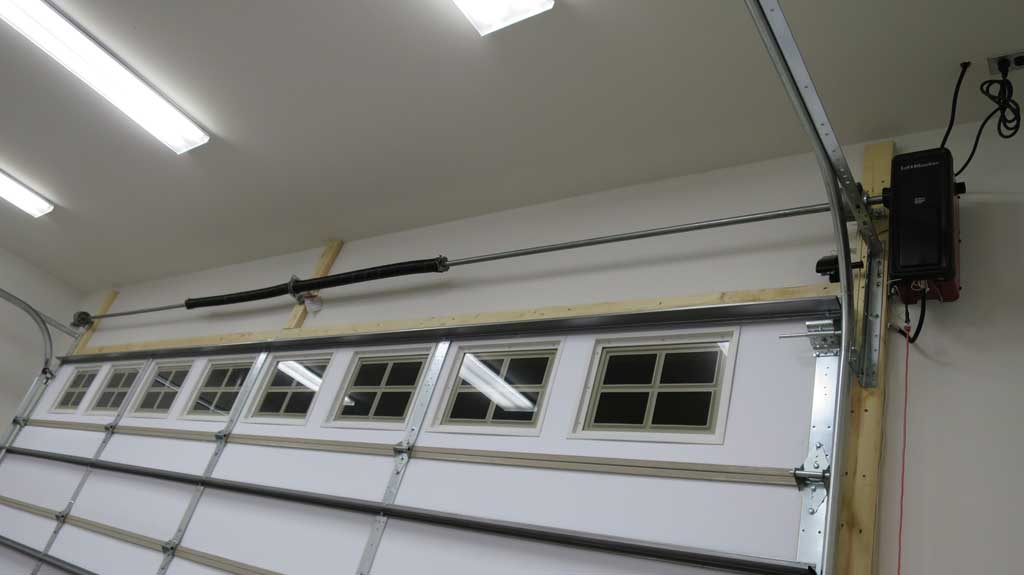
Liftmaster 8500 jackshaft opener is the stuff. Super quiet. It does all the fancy remote control via cell phone and all that, but I don't really see the point in that but whatever. I just wanted something that kept the mechanicals out of the center of the ceiling.

speedysgarage_30_55_web.jpg


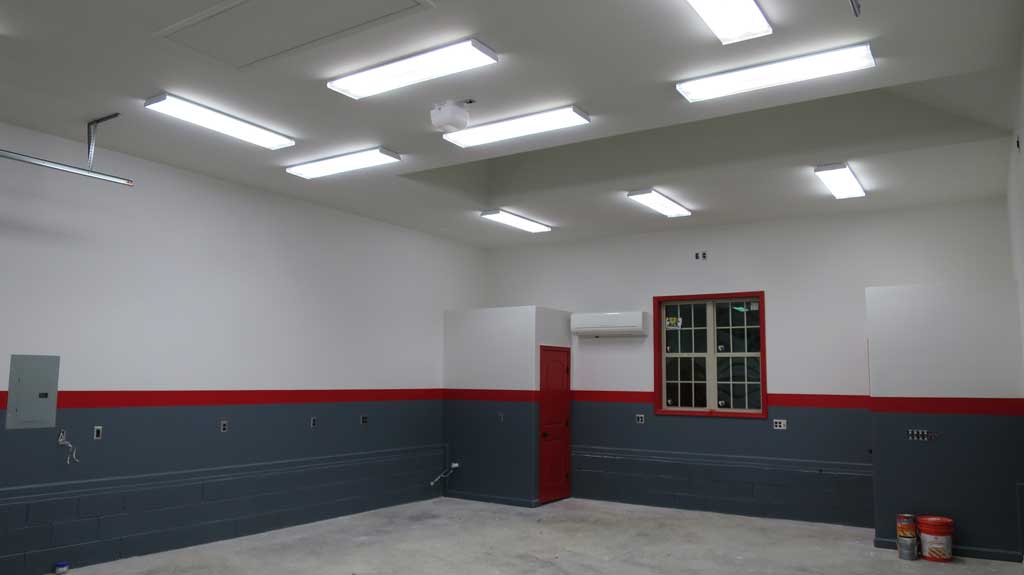
The computer program I used was recommended by folks here for the light layout, quantity, etc and it was spot on. 12 T8 4 bulb fixtures with two banks on separate switches worked out great. I had to turn a few fixtures to clear the attic ladder and space for lift in ceiling.

NOTE: The Lithonia fixture in the program was the closest I could find to the Utilitech I actually used. The Lithonias at Home Depot use a ballast that interferes with radios, and supposedly the Utilitech won't have that issue. I need to test, but fingers crossed.

http://www.visual-3d.com/tools/interior/default.aspx?id=14782

light_layout_diagram.jpg


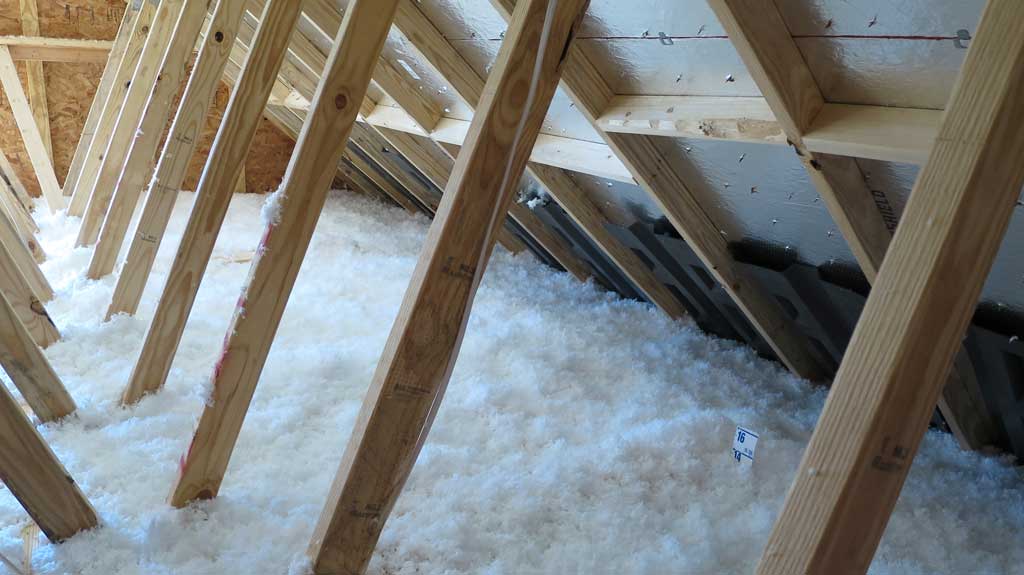
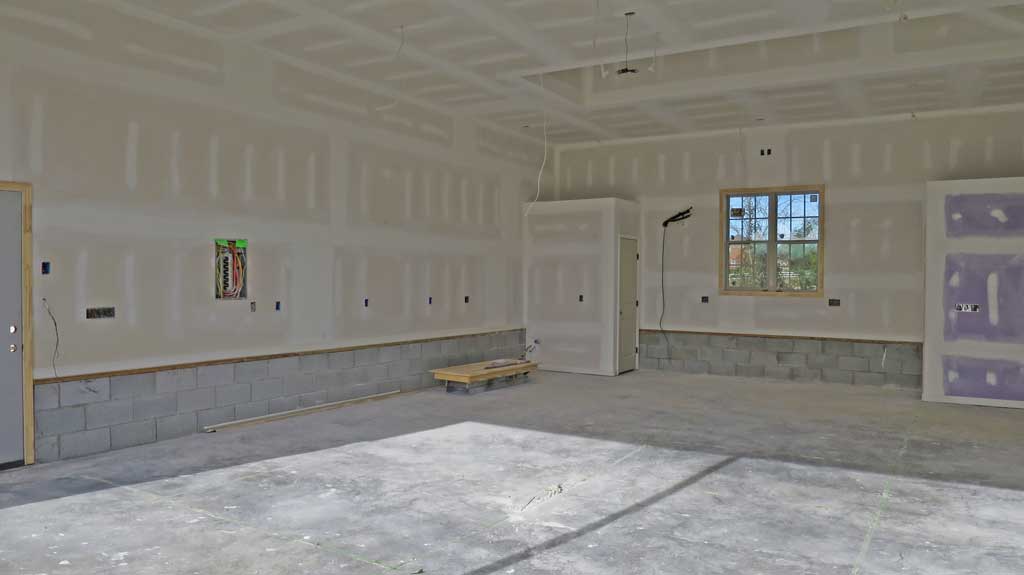
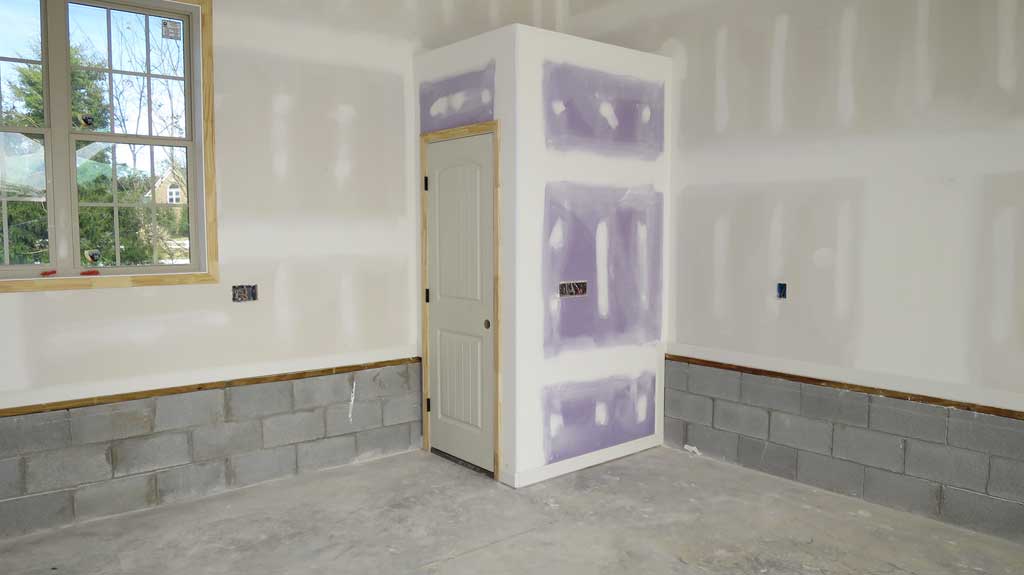
You can also see the mini split air handler back by the restroom door in the below image. It's silent and does a great job keeping the space a comfortable temp and insulation isn't even in the attic yet.

speedysgarage_30_56_web.jpg


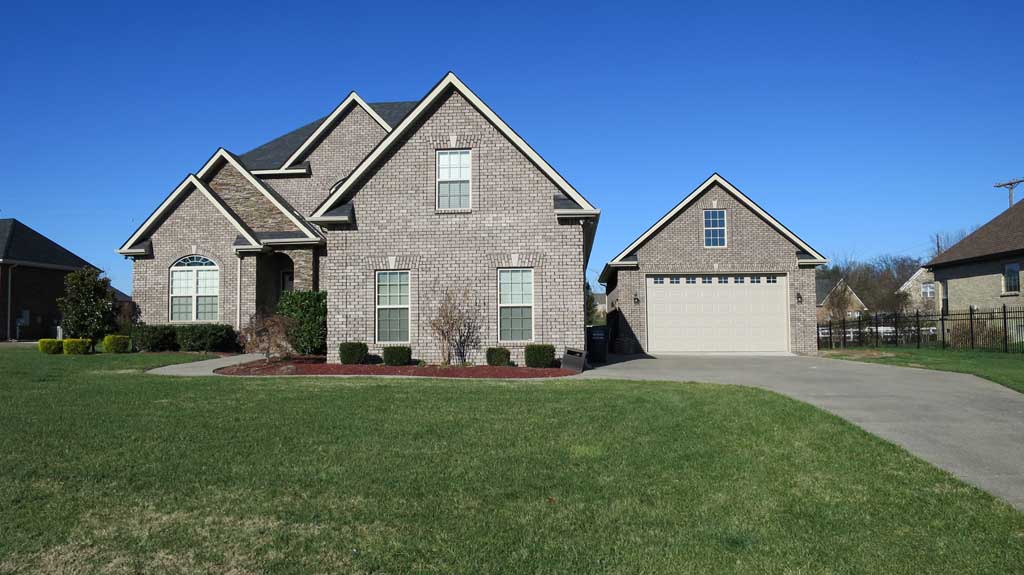
Here's what it looks like from the outside now during the day - trim work around garage door is scheduled for early next week to finish that off.
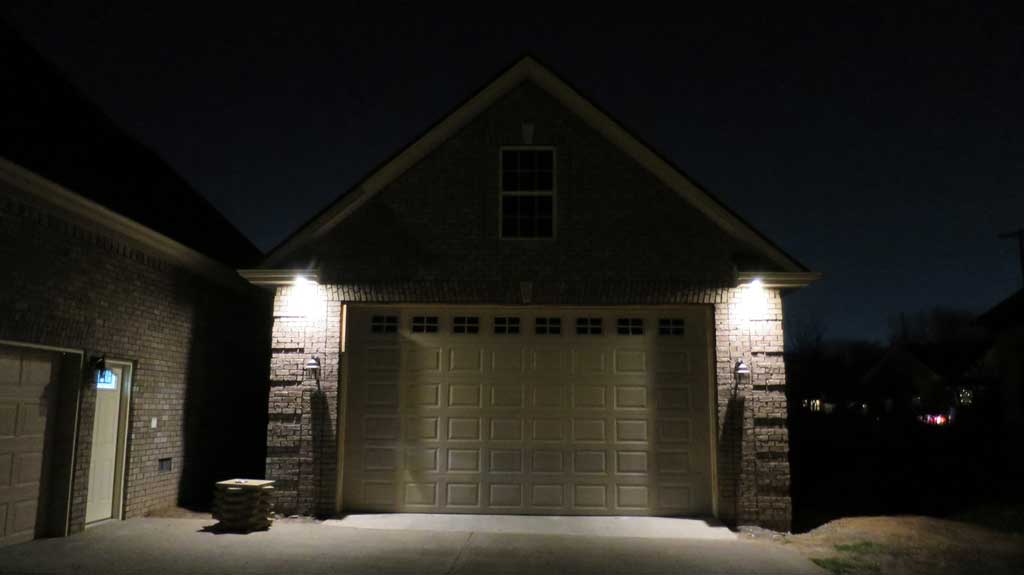
speedysgarage_30_57_web.jpg


And at night:

speedysgarage_30_58_web.jpg


The cans are on a photocell so they come on at dusk and turn off at dawn automatically with LED bulbs. I will set the house up the same so the eve lights all come on and off at the same time for a nice uniform look. The photocell is wired to a switch so I can just turn them off if I choose.

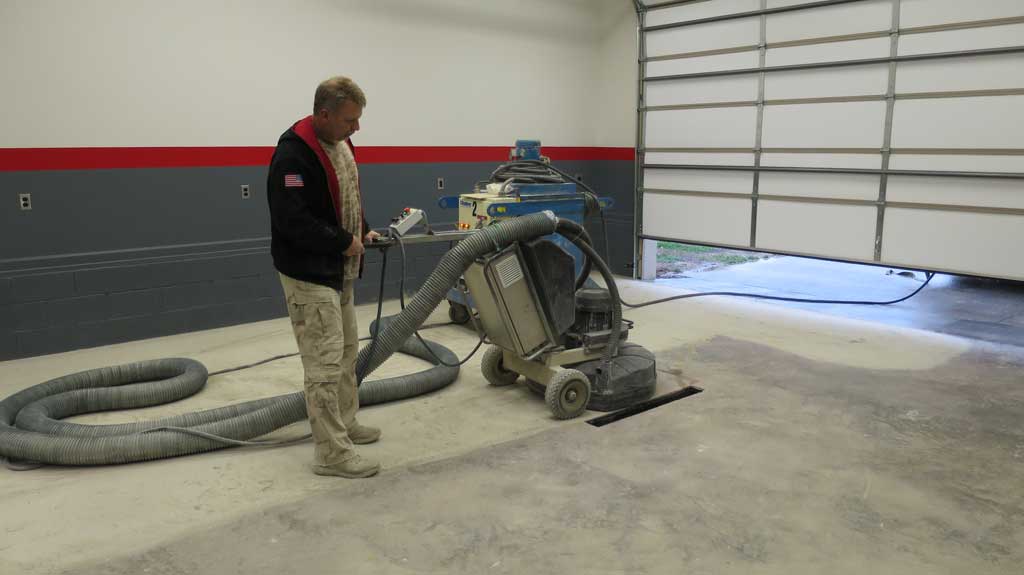
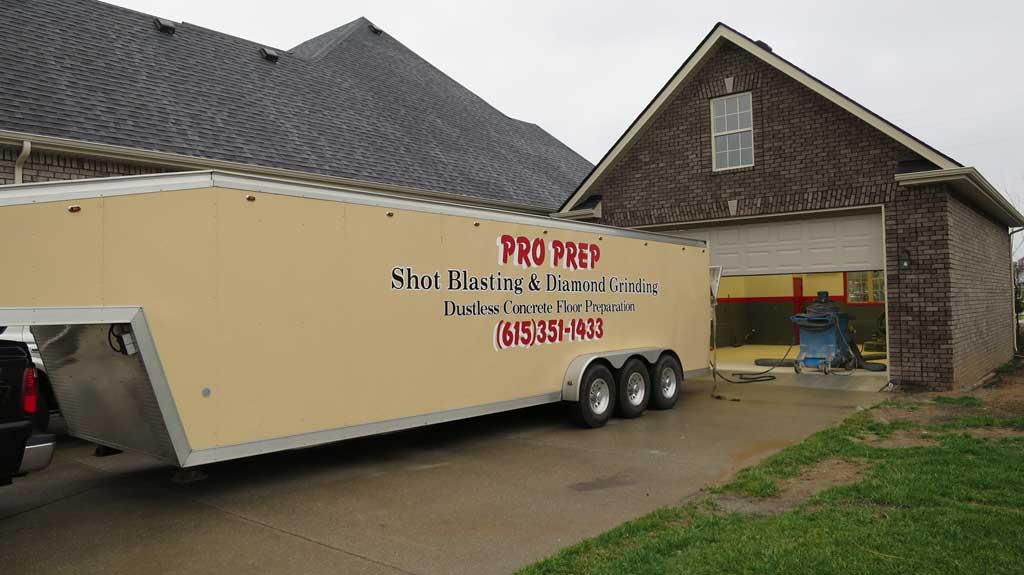
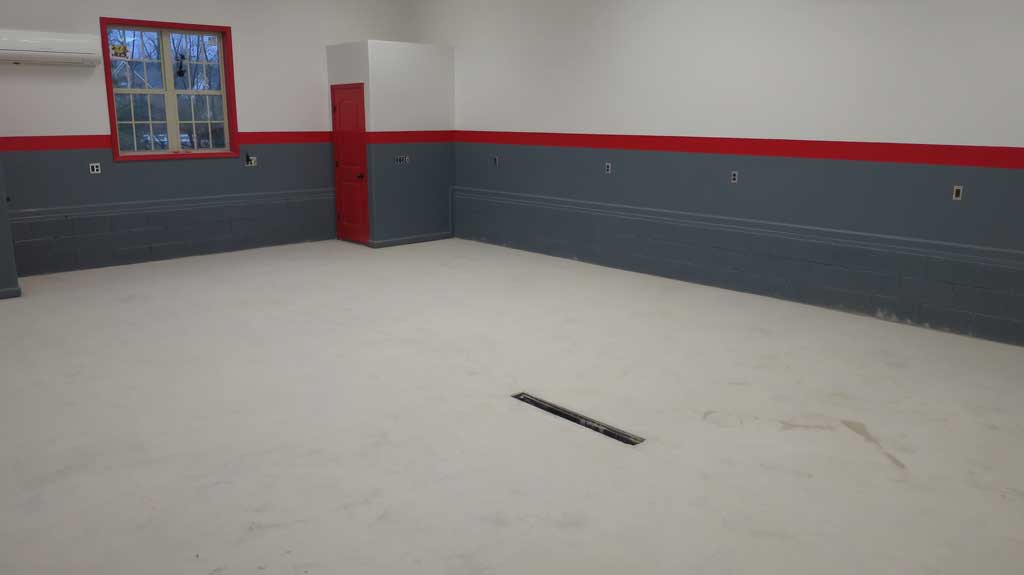
Up next - attic insulation, garage door trim, final touches on electrical, diamond grind and epoxy floor.
 
Last edited:

nevercouldfigureitout

Well-known member
Joined
Dec 6, 2014
Messages
144
Location
Beauty Ky
Wow, it's really coming together sir, glad to see it get so far. Any new videos to come outta the new spot? I've followed your videos an posts since way back on challenger talk (which ***** without you there now). I hope to get my car down to challenger fest this year as well.
 
OP
S

Speedy!

Well-known member
Joined
Dec 23, 2014
Messages
271
Location
TN
Thanks guys, I'm stoked. I'm super OCD so been taking a bit of time to spot patch and touch up a few spots that no one else would likely even see, but I just like spending time out there LOL

NeverCould, you definitely need to come to CF7, it is gonna be awesome. TWO days at the track! You need to come over to ModernMoparForum, its where all the folks went that left CT and the comm hub for ChallengerFest.

I've actually got a couple of projects lined up to shoot in the new shop. I've also been putting together some video of the build I'll publish. Lots of learning experience on this one and I hope I can share some of that with folks who are looking to do something similar. I even have a time lapse of most of the build which should turn out pretty cool when I edit it together.
 
OP
S

Speedy!

Well-known member
Joined
Dec 23, 2014
Messages
271
Location
TN
Thanks guys.

I need some electrical help and I'll start here to keep it with the build before making a separate thread in the electrical sub forum.

I have the 12 T8 fixtures on two separate switches that are 3-way.

Switch 1 = Fixtures 1,3,5,7,9,11
Switch 2 = Fixtures 2,4,6,8,10,12

That means there are two 3-way switches next to each other in the 5 gang panels that control these lights.

I'd like it to be that when both switches are in the "up" position, both banks of lights are ON. When both are down, both banks are OFF.

Right now that is how it works for all but one switch. It seems it's reversed so I always end up with one switch up and one switch down to have all the lights on and my OCD is kicking in.

Builder says it's because they're 3way, but my engineering background tells me they just have one of the 120Vs on the wrong pole of one of the switches. I've googled diagrams but can't find any with two switches controlling separate lights to compare wiring.

The electrician still has to come back out for a few final things and I can ask him, but would like to have enough information to have an intelligent conversation.

Help?
 

toofart

Well-known member
Joined
Sep 27, 2013
Messages
280
Location
Qc
Hey Speedster, nice seeing you over here on GJ. Good on you for posting a thread... I should have done one for my shop build but never got around to it.
 

Bib Overalls

Well-known member
Joined
Dec 4, 2006
Messages
3,318
Location
Jonesboro, Arkansas
You can wire them up so both circuits aligned and all of the switch positions are the same. Then, continue to switch both circuits at the same time. If you get out of sequence you should be able to recover.
 
OP
S

Speedy!

Well-known member
Joined
Dec 23, 2014
Messages
271
Location
TN
You can wire them up so both circuits aligned and all of the switch positions are the same. Then, continue to switch both circuits at the same time. If you get out of sequence you should be able to recover.

I'm no electrician. Do you have a link to a diagram for how to do this? Looking at the switches I just see a red and black wire connected in the back on either the left or right. It "appears" the one that seems to be in the wrong position has the red wire in the opposite position than the switch next to it that is in the right position, but that may not mean a thing.
 

Bigmansm

Member
Joined
Jan 4, 2010
Messages
24

What did you do with your floors? Is that paint? It looks like some color swirled together from the first few pics.
 
OP
S

Speedy!

Well-known member
Joined
Dec 23, 2014
Messages
271
Location
TN
Floors are still raw concrete right now. Will be diamond ground and industrial expoxied next week.
 
OP
S

Speedy!

Well-known member
Joined
Dec 23, 2014
Messages
271
Location
TN
A lot done in the last week:

I actually completed my first project in the new shop. The stale tan circuit breaker box wasn't doing it for me so I painted it cherry red to match the doors and stripe.

speedysgarage_30_59_web.jpg


speedysgarage_30_60_web.jpg


speedysgarage_30_61_web.jpg


Door trim installed which basically finished up the exterior structure.

speedysgarage_30_62_web.jpg


Final electrical inspection passed. Note the comment :)

speedysgarage_30_63_web.jpg


Blown insulation in attic - R38 was spec'd but I think it's more like R44 at 14".

speedysgarage_30_64_web.jpg


A shot of the 12' pull down aluminum attic ladder. I do still have to use a step ladder to get it up and down. Something to consider for high ceilings.

speedysgarage_30_65_web.jpg


A shot of how the garage looks next to the house, which I think looks great. Not too big (which I feared) and matches architecturally.

speedysgarage_30_66_web.jpg


Floor being diamond ground by Prop Prep Shot Blast out of Mt. Juliet, TN. EXCELLENT work. The guy was super careful with the walls and went over it twice because he didn't think it was flat enough the first time. I bet there was 70lbs of dust in the vacuum when he finished.

speedysgarage_30_67_web.jpg


speedysgarage_30_68_web.jpg


speedysgarage_30_69_web.jpg


Floor patched and primered for epoxy.

speedysgarage_30_70_web.jpg


Up next:

Final epoxy and urethane top coat in high gloss with anti slip additive should be done over the next few days. Stainless work table/sink combo delivered. Final plumbing. Cleaning. Punch list. Landscaping will likely be done when the weather improves. Will have to play that by ear but they'll do a paver tile / pea gravel walk way between the house and garage and sod the disturbed yard.
 
Last edited:
To avoid these ads, REGISTER NOW!

keperkey

Well-known member
Joined
Jan 9, 2005
Messages
116
Location
Home
What is the width and height of the attached garage?

As I have commented before I am looking to do a similar set up and am concerned about the relative size of the detached garage compared to the front gable of the attached garage.
 

ssbtech

Well-known member
Joined
May 1, 2012
Messages
420
Location
BC, Canada
Looks great! I can't imagine why the neighbour got all pissy about it. Fits in just fine with the house :)
 
OP
S

Speedy!

Well-known member
Joined
Dec 23, 2014
Messages
271
Location
TN
Merry Christmas!

Thanks everybody. Primer coat for epoxy has been down a couple days and they'll be back tomorrow to do the color coat.

What is the width and height of the attached garage?

As I have commented before I am looking to do a similar set up and am concerned about the relative size of the detached garage compared to the front gable of the attached garage.

Attached garage is 20' deep and 22' tall as you look at it facing the front.
 

Wardy

Member
Joined
Aug 24, 2010
Messages
24
Location
Tennessee
I may have missed it, but who is doing your epoxy work? I've been looking for someone local to do my 2 car.

BTW....garage is is looking amazing!
 
OP
S

Speedy!

Well-known member
Joined
Dec 23, 2014
Messages
271
Location
TN
Specialty Coatings out of Nashville did the floor. They finished it yesterday and it's curing now. I was able to walk on it this morning (24 hours dry time so far) but won't drive on it for a week or two. They finished a day ahead of schedule, patched all cracks and blemishes, primed, sanded, epoxy coat, sanded, and final urethane top coat over a 4 day period. Communication was excellent as they kept me up to date on when they would be there, when I could walk on it, etc.

The floor looks phenomenal. Just the right amount of shark bite in it to make it anti slip but not so much that it'll be hard to keep clean. Very high shine and a medium gray color. Should last a VERY long time. The young guy who was the lead on the job was pretty particular about everything and even offered to touch up the base boards in the 4 or 5 spots they accidentally got product on there. I told them not to worry about it and I'd touch them up myself since it was very few areas.

Amazing how a finished floor really makes a difference in how clean the shop looks. I now want to have the floor in my attached garage done as it just looks like *** compared to the shop.
 
OP
S

Speedy!

Well-known member
Joined
Dec 23, 2014
Messages
271
Location
TN
The floors were epoxied and urethane top coated this week and they turned out great. Amazing how much cleaner and brighter the shop feels now. Makes me want to do the floor in the attached garage but is probably over kill.

speedysgarage_30_71_web.jpg


speedysgarage_30_72_web.jpg


A bit of "shark bite" in the urethane top coat so it's not so slippery when wet.

speedysgarage_30_73_web.jpg


I also had them extend it in to both the bathroom and compressor closet for uniformity.

speedysgarage_30_74_web.jpg


speedysgarage_30_75_web.jpg


Up next:
Plumbing will pretty much wrap up next week. I ordered a 72" x 30" stainless work table with shop sink on the right side and it's having to be built and won't be here until the end of January. The plumber will set it up so that he can just come back and connect the faucet when it gets here.
 

HemiRamOn22s

Well-known member
Joined
Feb 10, 2015
Messages
565
Location
Delaware
Turned out great. I wish i put a little more grip in the top coat of my epoxy floors. They do get slick when its really humid out.
 
OP
S

Speedy!

Well-known member
Joined
Dec 23, 2014
Messages
271
Location
TN
Yeah I'm curious how slick this one will be but it's got a good amount of bite.
 
OP
S

Speedy!

Well-known member
Joined
Dec 23, 2014
Messages
271
Location
TN
With things starting to wrap, I'm shopping for an air compressor. I had really been eyeing a Quincy QT-54 60gal 2 Stage unit, but wonder if that is way overkill for a home based shop. Could I save about $1000 and get a IR, Kobalt, or Husky 60 gal unit and be just fine? The Quincy has a max operating pressure of 175psi, but the other offerings are 155psi, so not a huge difference.

I plan to run air tools as needed, although a lot of mine have switched over to battery powered cordless. I'd like the option to run a plasma cutter sometime in the future if needed, paint gun, and maybe a small blast cabinet.

Thoughts?
 
Last edited:
To avoid these ads, REGISTER NOW!
Top Bottom