draco_1967
Well-known member
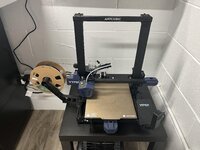
I just got an alert that the Ender3 V2 price dropped. It's currently at $196.79 on Amazon. It's a pretty good price on a decent machine.

If you can get me a picture of the switches, with a ruler or measuring tape above or below them I can print this on my big printer.3-D Masters,
I have a problem that I believe this forum can solve quite easily. I’m on the tail end of an extensive remodel of the main floor of my home. Part of the remodel Required me to move several electrical outlets. What has transpired is that I have placed two three gang electrical switch boxes side-by-side.
This is where the need for a solution comes in. I cannot find a six switch cover plate that spans two 3 gang electrical switch boxes. The spacing between the third switch and the fourth switch is greater than the spacing between the other switches. I have tried connecting 23 switch cover plates but that did not work.
Would it be possible to 3-D print a six switch cover plate with wider spacing between switch three and four for a reasonable amount of money. I believe I assume correctly that using a CAD program It could be designed quite simply but that is a comment from someone who knows nothing of 3-D printing.
What are your thoughts?
Thanks much,
Griff
I agree! I have a first generation Mini Gorilla. I use NordFab quick connect fittings.Recently purchased an Oneida Mini Gorilla for the larger woodshop tools, and it's amazing, but the supplied 5" hose fits absolutely nothing.


I generally liked Solidworks when I started off in CAD programs. Very intuitive and very capable (but gets a bit more problematic with large assemblies).Still working on super basic fusion 360 skills, things like dimensional constraints and rectangular patterns, etc. Printed a sample switch plate including mounting holes using measurements from Blue Sea's data sheet and it fit perfectly.


Mini Solo StoveCool! What's it for?

One of my friends set up a punching nun using a relay and a motor actuator on a GPIO line from the RPi so that in the case of rapid fire multiple prints, they'd get punched off between jobs.Finally dug out the Raspberry Pi I bought last year and installed OctoPi on it. Not sure how lomg before the ~2 hours invested in this make up for the time spent running an SD card back and forth, but it's good to have it operational now.

Finally dug out the Raspberry Pi I bought last year and installed OctoPi on it. Not sure how lomg before the ~2 hours invested in this make up for the time spent running an SD card back and forth, but it's good to have it operational now.
You got a photo of this thing in action?One of my friends set up a punching nun using a relay and a motor actuator on a GPIO line from the RPi so that in the case of rapid fire multiple prints, they'd get punched off between jobs.
Unfortunately, no. He's a friend, but from the internet.You got a photo of this thing in action?


Those are awesome. Do you have them uploaded anywhere? Those could be very useful.My Harbor Freight vacuum pump came with 1/4" I.D. tubing and various fittings for this size. But many of the vacuum hoses on my Corvette are a larger diameter. This meant that I didn't have a good way to make an air-tight seal to troubleshoot vacuum problems.
My solution was to 3D print some barbed connectors with the 1/4" size on one side and the larger size on the other.
Here are two copies of the fittings as they came off the printer. They're encased in support material that gets removed using any sharp tool for the large bits and then a water jet to clean things up.
On the left is one of the 1/4" x 1/4" connectors that came with the vacuum pump. The two white ones are the 3D printed custom versions.
Here is one of the new connectors in action, bridging the gap from the 1/4" clear tube to the larger diameter tube on the car.
Not uploaded. They're just something I modeled up in SolidWorks in about 5 minutes.Those are awesome. Do you have them uploaded anywhere? Those could be very useful.
Bret
I just got an alert that the Ender3 V2 price dropped. It's currently at $196.79 on Amazon. It's a pretty good price on a decent machine.


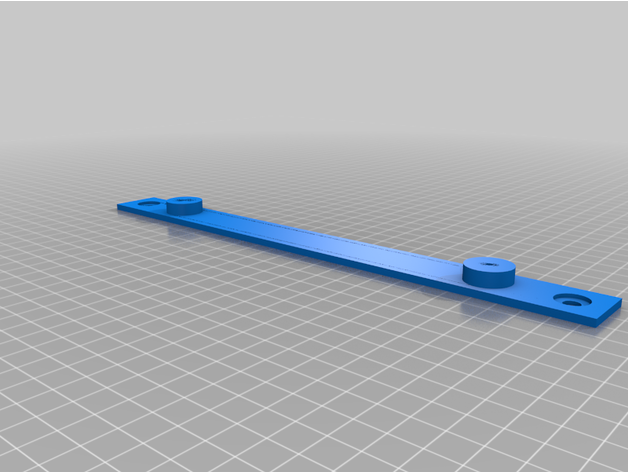
 www.thingiverse.com
What printer are you using that needs XYZ steps calibration? Extruder calibration makes sense, especially for single-gear extruders, but I'm trying to understand what kind of motion system would require it for XYZ. Shouldn't it be the result a mathematical formula based on the screw or belt pitch, number of leads or pulley teeth, and step angle?I had not done the extruder and XYZ steps calibration in a couple of years. Oh my god! what a difference that made when I did that now.
If you all have not it ever or have not done it in a long time, do it. My tolerances are sooooo tight now.
What printer are you using that needs XYZ steps calibration? Extruder calibration makes sense, especially for single-gear extruders, but I'm trying to understand what kind of motion system would require it for XYZ. Shouldn't it be the result a mathematical formula based on the screw or belt pitch, number of leads or pulley teeth, and step angle?
I notice on that page it says the opposite:I am using an ender 3 pro. Basically, you print a 20mm calibration cube, measure it, make the appropriate adjustments to the XYZ steps to compensate for the actual vs. the design (20mm) variance. The goal is to get the actuals as close as possible to design.
Hers is a good guide for it.
He also said:It is common practice for 3D printer users to measure a 20mm calibration cube to see how dimensionally accurate their machine is. While this is a very valid test to measure the accuracy of their printed parts, it is not a suitable measurement to base adjustments of the X, Y and Z steps per mm.
I agree with him, and with Andrew Ellis who said this in his print tuning guide (which I recommend as a good companion to Teaching Tech)these values should already be correct because they are based on the characteristics of your machine
Don't mess with your steps_per_mm/rotation_distance. Deviations are almost always from material shrinkage, bulging, layer inconsistencies, etc, NOT issues with your axes. Tinkering with these values will usually only add another variable.
I'm sure you're getting good results. My point isn't that it won't work. It's that doing it that way creates a less stable equilibrium. And people with much more 3D printing knowledge and experience than me have said it's not the best approach because of that.@BeansBaxter, not sure what to tell you other than the fact that my tolerance for the parts I have printed after the adjustment, have never been better. The printed threads particularly fit well.


")