RivennHewn
Well-known member
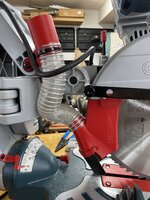
The white material is soluble support material.Riv, what's the deal with the wash cycle? I've never seen a printed part need washing.
Dissolves away in the wash.

The white material is soluble support material.Riv, what's the deal with the wash cycle? I've never seen a printed part need washing.
And it’s smaller than the one he had at his previous employer.That Fortus is a bit more robust than an Ender, eh? Lol.
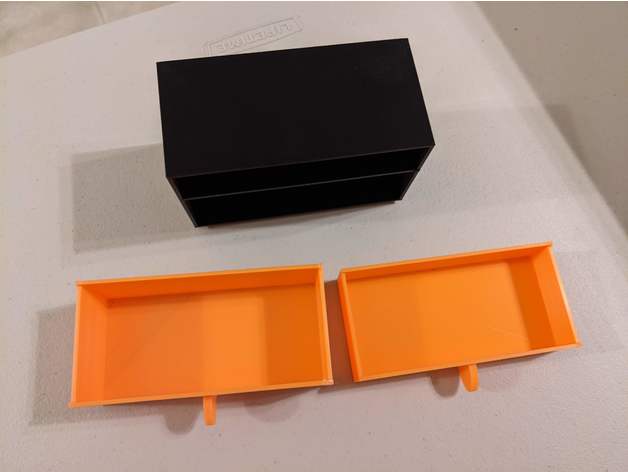
I would like a copy please! If it’s e-mailable I’ll DM you my addy. Thanks!Just to follow up on my previous post about my nut driver tray... below is the current print. I did it in two pieces, tabbed it so that its both aligned and gives an additional stregth member when gluing, did some embossing plus put a mariana trench in it to make it easier to grab the tools. My only gripe at this point is that the embossing details were a bit less detailed than I wanted because I didn't bother to slow the print speed down for that part, but that got me thinking. Going forward, I think I will start just leaving a spot in the basic build and print the embossed pieces separately so that if it doesn't come out as clearly as I'd like, I can just reprint the embossed plate and insert it.
I'll post the STL file if there is any interest. Its not quite as clean as I'd like, especially compared to some of the works of art that others have posted here, but I don't do this sort of thing for a living. lol
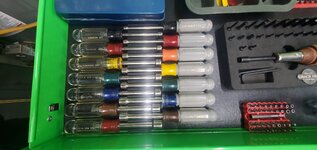
I have that same set. Here is my solution.And since y’all are showing off your stuff, I figured I should offer up something as well. This is a tray I am building up for a set of Craftsman nut drivers I had rolling around the tray. I’m just piecing it together right now to make sure I have all the dimensions correct but will reprint it in fewer pieces and emboss the sizes on it for a final print. I wish I had a bigger printer but I am getting pretty good at splitting print jobs and rejoining them at this point. I will probably reduce the height slightly on the final version but it’s easy enough to grab the tools as-is.


Grimp is that posted somewhere I'd like to print one. Thanks!I have that same set. Here is my solution.
I'll send you the file.Grimp is that posted somewhere I'd like to print one. Thanks!
I'd also be interested, please!I'll send you the file.
Could you share the file?

 www.thingiverse.com
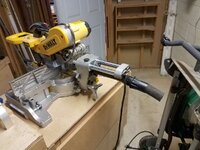
I've got print one for me first and make sure it doesn't have any more issues. I'll let you know when I'm finished.LeonardY, I have the same Dewalt saw. Yes the dust collection does **** on it from the factory. I dont guess you would be interested in printing one for me for a fee would you?
Sounds good. Looking forward to itI've got print one for me first and make sure it doesn't have any more issues. I'll let you know when I'm finished.


I have it listed on Thingiverse if you don't want to model them lol. As a warning, I would recommend printing the cabinet first, and measuring the inner dimensions to make sure there is appropriate clearance for the drawer as is. Can be a tight fit sometimes.I'll have to steal that idea, although I'll make them out of wood since I can probably fabricate them by hand as quick as i could model them
Plus it'll give me reason to try out my new dust collection
 www.thingiverse.com


Didn't know you could run Klipper from a Sonic Pad. I've been using RPi, but I know those are as scarce as can beGot a Creality Sonic Pad for Christmas from Santa!
I was thinking it would be cool to run Klipper on my new Ender 5 Plus, make it a bit faster for the bigger prints, but my research said that the 5 plus was not supported… yet.
The Ender 3 V2 was, so I thought I’d learn how to use it on that first.
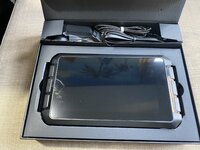
Looks cool at unboxing.
Today I started getting it set up.
Went thru the startup menu and there was a new software version…
And lo and behold, the Ender 5 Plus is now supported… as well as being able to run multiple printers from the Sonic Pad.
This should be interesting… if I can figure out how to set it up!
It is like a remote for the printer, but since it runs Klipper, it also moves some of the processing load off of the printer and onto the tablet, improving performance and making it capable of printing better at speedWhat is the point of the pad, quick google search and I still don't understand what it does/improves.


That bed visualizer is a big help. I personally try to get my beds in the .03 variance range for best resultsGot it set up and running on the Ender 5 Plus yesterday.
Here are some pics of the display I took yesterday.
Still learning how it works.
The silver aluminum extruder? Make sure that the teeth are aligned correctly on the splines and check the tension on the arm. If you tighten the screw holding the gear on the arm too much, it will not allow it to turn with the other splines on the other gear.Liking it so far, but not had a good print off it yet... not the Pads fault.
I upgraded the extruder for a Creality all metal, and Capricorn tube, and its just clicking, and grinding/breaking the filament every print.
No clue what is going on... but I'm sure its user error!
this is the bed on my 300x300 corexy machine. I don't really ever have to touch the bed settings on it, it is auto leveled on Marlin with a BlTouch. Even as out of wack as it is my prints still come out surprisingly dimensionally accurate. 
So one thing I also love the ABL mesh visualizers for is, in this scenario, i'd be more than willing to bet your bed is pretty level, and your x gantry arm is the culprit. If you don't have dual z-motors, the side without the motor can get loose and "drag" behind the side that does have the motor, causing this massive imbalance.This seems fine
This is a custom built corexy machine the gantry is held on both sides. Every so often I run a G34 to align the z motors, but other than that I let this one eat.So one thing I also love the ABL mesh visualizers for is, in this scenario, i'd be more than willing to bet your bed is pretty level, and your x gantry arm is the culprit. If you don't have dual z-motors, the side without the motor can get loose and "drag" behind the side that does have the motor, causing this massive imbalance.
You can more or less confirm that by leveling the bed according to that mesh, rasising z up high and then back down, and then running the visualizer again. If it still looks like it's falling off a cliff like that, or even more or less inconsistent, the pulleys on the x arm likely need attention


Check your nozzle for clogs. I had a similar clicking issue and replacing the nozzle solved it.Liking it so far, but not had a good print off it yet... not the Pads fault.
I upgraded the extruder for a Creality all metal, and Capricorn tube, and its just clicking, and grinding/breaking the filament every print.
No clue what is going on... but I'm sure its user error!
It was one of those weird ones, where I did the Extruder, Capricorn Bowden upgrade, and changed to the 0.6 nozzle in one hit.Check your nozzle for clogs. I had a similar clicking issue and replacing the nozzle solved it.