To avoid these ads, REGISTER NOW!

Above 1200 Sq/FT The Lone Beech Garage (60x46x16)

Wokspaces above 1200 squarefeet.
OP
S

sbosecker

Well-known member
Joined
Sep 25, 2012
Messages
3,539
Location
Peachtree City, GA
Continued...


20201212-31.jpg 20201212-32.jpg

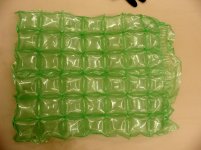
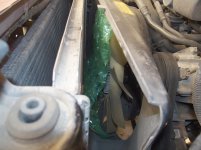
Since the Shop Manual indicates that the Fan and Shroud should be removed at the same time, I thought it prudent to try to provide some protection for the Radiator. I used this very stout piece of "bubble wrap" for that purpose.


20201212-33.jpg

I spun off the Fan from its shaft and started to lift out the Fan and Shroud but it looked like I could bring out the Fan by itself. That's what I did. Perhaps my smaller V6 engine allowed this where the more common V8 might not allow it.


20201212-34.jpg

Now the Shroud was removed.


20201212-35.jpg

It's getting easier to see stuff!


20201212-36.jpg

The Shop Manual indicated the next step was to remove the Serpentine Belt. I thought it made sense to at least attempt to break loose the 4 bolts holding the "fan pully" before removing the Belt. That's what I did.


20201212-37.jpg

Now I used a Breaker Bar and a Socket (I don't recall the size) to release the tension on the Belt Tensioner. This allowed me to remove the Serpentine Belt.


Continued in next post...


KEYWORDS: 2000 F150 F-150 4.2 Liter 4.2L Water Pump Heater Water Outlet Tube Replacement
 
Last edited:
To avoid these ads, REGISTER NOW!
OP
S

sbosecker

Well-known member
Joined
Sep 25, 2012
Messages
3,539
Location
Peachtree City, GA
Continued...


20201212-41.jpg

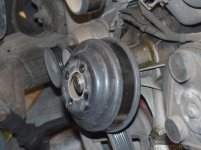
The 4 bolts securing the Fan Belt Pully were unfastened allowing the Pully to be removed.


20201212-42.jpg

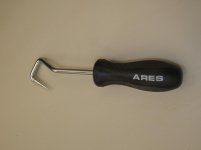
I had this Ares 70078 Hose Removal Tool in my tool chest since 2017. I had bought it to replace the hoses in this truck and then didn't get to that project ...until now.


20201212-43.jpg

That thing is amazing! It made short work of the Upper Radiator Hose.


20201212-44.jpg 20201212-45.jpg 20201212-46.jpg

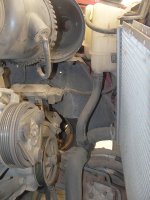
Next up was the Lower Radiator Hose. Again, the Hose Removal Tool was extremely helpful in removing this Hose. Here is where I began to learn that it is almost unavoidable to keep coolant from getting all over the floor. Most of my coolant is going into the "Tornado Shelter".


20201212-47.jpg

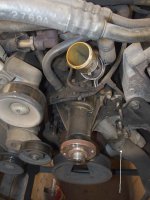
A Heater Water Outlet Tube is inserted into and mounted on top of the the Water Pump. There are several Hoses associated with the Heater Water Outlet Tube (White Arrow points to one of them). I was evaluating how it would be best to deal with these Hoses and I decided to try to remove them while the Water Pump was still installed as this would provide for "something to push against".

Continued in next post...


KEYWORDS: 2000 F150 F-150 4.2 Liter 4.2L Water Pump Heater Water Outlet Tube Replacement
 
Last edited:
OP
S

sbosecker

Well-known member
Joined
Sep 25, 2012
Messages
3,539
Location
Peachtree City, GA
Continued...


Next I started examining the various fasteners securing the Water Pump to the Engine. What a varied collection!


20201212-51.jpg

White arrows point to 2 bolts at the top right of the Water Pump. The Heater Water Outlet Tube is the black item just to the left of the first bolt. Note the wire bundle attached to the Heater Water Outlet Tube's base.


20201212-52.jpg

There are 2 studs (white pointers - far right) and 2 bolts (white pointers - lower). I'm pretty sure the studs should have a couple of nuts on them securing a bracket not associated with the Water Pump. Those nuts are missing.


20201212-53.jpg

Here's a different view showing those same studs and bolts as well as an additional stud (white arrow - upper left).


20201212-54.jpg

White pointers show the 3 studs on the left side of the Water Pump. (Upper stud is the same as the upper left stud in the previous picture)

9 fasteners in all secure the Water Pump to the Engine.


20201212-55.jpg

Its time to get busy! There is a Bracket that must be removed in order to remove the Water Pump. Red arrow points to the Bracket. White pointers point to the two studs missing nuts. Yellow pointers point to two very long bolts that need to be removed to free the Bracket. Green arrow points to the Power Steering Pully that interferes with removing one of the two yellow pointer bolts.


20201212-56.jpg

Fortunately I had watched a YouTube video that mentioned the "bolt interference" issue. The video was of a 4.2L V6 in a 2000 E150 Van. This fellow had loosened 3 bolts on the Power Steering Pump which gave him enough room to remove the trapped bolt.


20201212-57.jpg

Unfortunately an E150 isn't the same as a F150. My Power Steering Pump had 4 bolts not 3 but the real issue was Hose Coupling (white arrow) interfered with the steering linkage in my truck.


Continued in next post...


KEYWORDS: 2000 F150 F-150 4.2 Liter 4.2L Water Pump Heater Water Outlet Tube Replacement
 
Last edited:
OP
S

sbosecker

Well-known member
Joined
Sep 25, 2012
Messages
3,539
Location
Peachtree City, GA
Continued...


20201212-61.jpg

It was a close thing but I managed to get the bolt past the pully. If it gives me trouble during reassembly I will flatten one side of the flange a bit with a grinder to give me clearance.


20201212-62.jpg

I was surprised to find a couple of, what appeared to be nuts, on the studs under the Bracket.


20201212-63.jpg 20201212-64.jpg

With the Bracket out of the way, I felt confident enough to start removing the Hoses from the Heater Water Outlet Tube. I removed this plastic cover to give me more room to work.


20201212-65.jpg

I thought there was 3 Hoses attached to the Outlet Tube. Let's just say I spent a ridiculous amount of time removing those Hoses from the Outlet Tube. What a PITA.


20201212-66.jpg

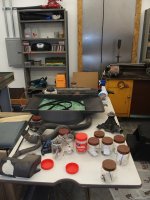
With the Heater Water Outlet Tube now free from those Hoses, I started removing the fasteners from the Water Pump. The first thing I did was set up 9 containers, one for each fastener, and numbered them 1 through 9. It was clear from looking at them that several of the fasteners were different from each other. I thought it best to label each fastener as it came out so as to avoid confusion during reassembly.

I used a deep well 15mm socket to remove those 2 studs. When I started on the first one, I thought it was a nut on a stud but then these things came out!


20201212-67.jpg

I got all the fasteners removed and tapped the Water Pump with a dead blow hammer. It popped free and another gush of coolant went into the "Tornado Shelter".

This is when I found that I wasn't going to be able to remove the Water Pump and the Heater Water Outlet Tube as an attached assembly. There was too many wire bundles and hoses in the way to do that.

Continued in next post...


KEYWORDS: 2000 F150 F-150 4.2 Liter 4.2L Water Pump Heater Water Outlet Tube Replacement
 
Last edited:
OP
S

sbosecker

Well-known member
Joined
Sep 25, 2012
Messages
3,539
Location
Peachtree City, GA
Continued...


20201212-71.jpg

I removed the bolt securing the Heater Water Outlet Tube to the Water Pump. I used a pry bar to separate the Outlet Tube from the Water Pump.


20201212-72.jpg 20201212-73.jpg

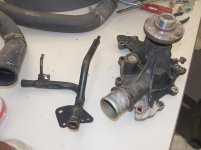
The Water Pump was now out of the Engine Compartment. The white arrow points to the Heater Water Outlet Tube.

I now attempted to remove the Heater Water Outlet Tube and discovered there was another Hose attached to the Tube. This was the 4th Hose and I hadn't seen it till just now. It was midnight-thirty and I decided to quite for the night.


20201212-74.jpg

Here's everything that's been removed on day 1.


20201213-75.jpg

When I got up this morning I found my torso incredibly sore from lying across the front of the truck for several hours yesterday. I decided to improve my working environment by putting some old pillows over those hard surfaces.


20201213-76.jpg

My decision to quit last evening was a prudent one. This last Hose was a son-of-a-gun. The Hose Clip's squeeze points were lined up behind the larger vertical tube. They were just about inaccessible. I finally managed to free this last Hose but it was a titanic struggle.


20201213-77.jpg

Even with all the Hoses released, the Heater Water Outlet Tube was difficult to extract from its former home.


Continued in next post...


KEYWORDS: 2000 F150 F-150 4.2 Liter 4.2L Water Pump Heater Water Outlet Tube Replacement
 
Last edited:
OP
S

sbosecker

Well-known member
Joined
Sep 25, 2012
Messages
3,539
Location
Peachtree City, GA
Continued...


20201213-81.jpg

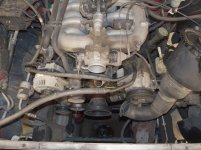
Engine Compartment at the end of the day.


20201213-82.jpg

Items that were removed.


20201213-83.jpg

New parts that I have on hand. Tomorrow I hope to nail down what items I need to order to replace the parts that need replacing.


Scott


KEYWORDS: 2000 F150 F-150 4.2 Liter 4.2L Water Pump Heater Water Outlet Tube Replacement
 
Last edited:
OP
S

sbosecker

Well-known member
Joined
Sep 25, 2012
Messages
3,539
Location
Peachtree City, GA
Tuesday - December 15, 2020

This morning I placed an order with FordPartsGiant.com for the 3 major items I need for the F150 Water Pump project. I am completely frustrated by the Ford Parts Web Site methodology for searching for parts. At least the way it's set up for the model year 2000 F150 I have. What an obtuse mess!

There are nine fasteners that attach the Water Pump to the Engine. It was almost impossible to even find reference to those fasteners and, even when I thought I might have located that information, there was no way to determine which fasteners were which.

Geez...

I'll see if I can track that down locally but I was hoping to avoid that sort of lengthy face-to-face interaction when COVID cases are on the rise.

I am going to use a Ford Water Pump and Ford Gasket for this repair. In the Ford Shop Manual there is no mention of using any sealant on the Gasket during the installation process...

...do any readers of this thread have opinions on the use of gasket sealer in this situation?

Scott
 

LutzTD

Well-known member
Joined
Dec 31, 2011
Messages
3,673
Location
Lutz, Florida
while I can't say yes or no to sealant for you, I have never put on a dry gasket and had success. I guess the new stuff with multi-material seals I would, but I don't think a 2K Ford water pump will be a fancy one. I always put a thin layer of the appropriate for temp permatex. The tricky part is can you get past all of the obstacles to put a sticky gasket in place? If you rub something going in it will grab dirt and fail. If you can get it in clean, I would put some sealant on it to keep it in place. hopefully, Ford made a couple of the bolts studs so you can hang the gasket.
 
Last edited:
OP
S

sbosecker

Well-known member
Joined
Sep 25, 2012
Messages
3,539
Location
Peachtree City, GA
while I can't say yes or no to sealant for you, I have never put on a dry gasket and had success. I guess the new stuff with multi-material seals I would, but I don't think a 2K Ford water pump will be a fancy one. I always put a thin layer of the appropriate for temp permatex. The tricky part is can you get past all of the obstacles to put a sticky gasket in place? If you rub something going in it will grab dirt and fail. If you can get it in clean, I would put some sealant on it to keep it in place. hopefully, Ford made a couple of the bolts studs so you can hang the gasket.

LutzTD,

Thanks. I think I will have unencumbered access to the front of the engine so the gasket should be able to put on without touching anything.

Thanks for your input!

My other big concern is mating the Heater Water Outlet Tube to the Water Pump, I can't seem to find any real information on if that's a big deal or not.

Best regards,

Scott
 

1949 caddyman

Well-known member
Joined
Oct 5, 2010
Messages
1,778
Location
Arizona
There has to be a gasket, seal or O ring for the heater pipe. Is there ether on the pipe or inside the pump?

The sealer on the gasket is personal choice. A THIN smear of silicone on both sides of the gasket is what I would do.
 

PDarby

Member
Joined
Jan 27, 2019
Messages
6
Location
Washington
Having done a few water pumps on that era of Ford. Both the water pump and heater bypass tube have o rings. I would recommend taking a wire wheel to the bypass tube where it inserts into the water pump. Clean it up nice and shiny. It makes it easier to insert it back it. Take your time with the bypass tube. It can bend or break. Lube the o ring and you shouldn’t have any problems.
Phil
 
OP
S

sbosecker

Well-known member
Joined
Sep 25, 2012
Messages
3,539
Location
Peachtree City, GA
There has to be a gasket, seal or O ring for the heater pipe. Is there ether on the pipe or inside the pump?

The sealer on the gasket is personal choice. A THIN smear of silicone on both sides of the gasket is what I would do.

Having done a few water pumps on that era of Ford. Both the water pump and heater bypass tube have o rings. I would recommend taking a wire wheel to the bypass tube where it inserts into the water pump. Clean it up nice and shiny. It makes it easier to insert it back it. Take your time with the bypass tube. It can bend or break. Lube the o ring and you shouldn’t have any problems.
Phil


1949 caddyman & PDarby,

Thanks guys!


20201216-01.jpg 20201216-02.jpg

There certainly is an O-Ring on the Heater Water Outlet Tube. The part of the tube that inserts into the Water Pump has one. (Black Arrow) I hope it is supplied with the Outlet Tube as I had issues tracking that sort of thing down on the websites.


20201216-03.jpg 20201216-04.jpg

I don't think this V6 Water Pump has any place for an O-Ring. I think the V8 Water Pumps had a central tube that went into the Engine and there is an O-Ring on that for those Water Pumps. I haven't paid a lot of attention to those water pumps as they don't apply to my situation...
...and it makes me cry when I read about them as they seem to be easier to work on. HA!

Best regards,

Scott
 
Last edited:

2lt1chevy

Member
Joined
Aug 23, 2006
Messages
21
Something I have done to make radiator and heater hoses easier to install and remove is wipe a thin film of silicone grease on the ****** and interior of the hose. I use
sil-Glide from NAPA. Hose slides on and off and the clamp provides retention and sealing.

Ken
 
OP
S

sbosecker

Well-known member
Joined
Sep 25, 2012
Messages
3,539
Location
Peachtree City, GA
Something I have done to make radiator and heater hoses easier to install and remove is wipe a thin film of silicone grease on the ****** and interior of the hose. I use
sil-Glide from NAPA. Hose slides on and off and the clamp provides retention and sealing.

Ken


Ken,

That makes sense!


41vUIZi4b2L.jpg


I've got a small tube of Molykote 111 that I acquired for the O-rings in my Whole House Water Filter. I will never use all of that tube for that purpose. It's probably overkill for this purpose but I have it on hand.


Best regards,

Scott
 
OP
S

sbosecker

Well-known member
Joined
Sep 25, 2012
Messages
3,539
Location
Peachtree City, GA
Sunday - December 20, 2020

I've been waiting on the parts for the 2000 F150 4.2L Engine Water Pump replacement project most of the week.

FordPartsGiant.com had divided the order between two distribution centers. The first part of the order was shipped almost immediately while the second, from a different distribution center was launched on Friday.

The good news was the first part of the order contained the Heater Water Outlet Tube. The reason that this was good news was that I wanted to know as soon as possible if I needed to also order the O-Ring that seals the Outlet Tube to the Water Pump. If it was included that would be one less thing to pester my local Ford Dealer about and, if it wasn't included, I would add that to the list of fasteners I will be trying to get from the Dealer.

Fedex was scheduled to deliver the first package on Friday. That didn't happen then or on Saturday so it looked like it would be Monday.

There was another reason I wanted to see the Heater Water Outlet Tube as soon as possible. This part of the order was one of those "If it's too good to be true..." deals.

This is a pricy part... the Heater Water Outlet Tube is Ford Part # XL3Z-18663-AA and most OEM (Original Equipment Manufacturer) parts sites listed the full retail Dealer Price as $365.89. Then each of these individual sites would list their price and the best ones were around $230 to $240. FordPartsGiant.com's price was $184.13 or about $50 cheaper than anyone else.

It should be noted that FordPartsGiant's price for the Outlet Tube vs. the Water Pump and Gasket was an anomaly. Their other prices were in line with the other web sites. The one thing that WAS different with FordPartsGiant was the full retail Dealer Price for their Outlet Tube was $251.60 vs. the listed $365.89 at the others.

Anyway, after considerable hesitation, I placed the order with FordPartsGiant due to the savings on this one part. I assumed there would be a restocking fee and return shipping should this somehow go sideways but I had done all the due diligence that I could and the parts numbers matched what I needed.

I awaited the delivery with lively anticipation!


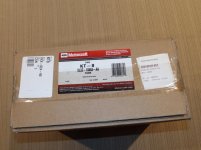
20201220-01.jpg

To my surprise, FedEx delivered the package this morning at about 10 am. The part number on the box matched what I had ordered. So far so good.


20201220-02.jpg

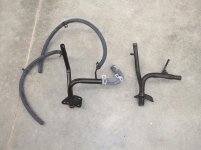
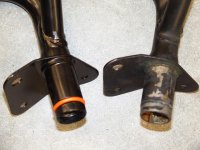
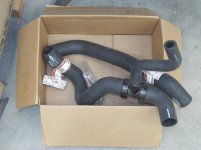
First surprise: There were hoses attached to the Outlet Tube! I pulled it out of the packaging. It looked correct as best as I could tell. I took it out to the shop for a better comparison.


20201220-03.jpg 20201220-04.jpg

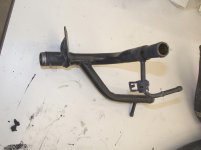
Looks like a match ...and it has the O-Ring!

So it looks like my calculated risk with the Heater Water Outlet Tube worked out. Since I have now exhaled regarding my order, I will probably get a pie-in-the-face when the remainder arrives - which is scheduled for tomorrow.


20201220-05.jpg

With the Outlet Tube verified, I needed to start removing the gasket residue from the Engine. I thought this would be a simple process but I'm learning that this can be quite the PITA.

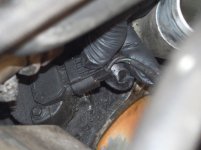
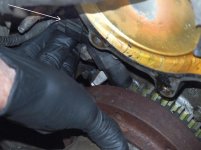
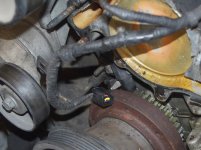
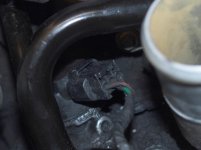
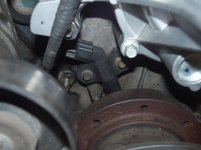
I realized that a wiring bundle was hindering things and needed to be moved if possible. The white arrows point to where the wire bundle connects to sensors. The upper arrow is the Camshaft Position Sensor and the lower arrow points behind my hand to the Crankshaft Position Sensor.

The main reason I hadn't removed these previously as I was concerned about the condition of these plastic electrical connectors after 20+ years. It didn't seem too farfetched that they might be brittle and prone to break.


20201220-06.jpg 20201220-07.jpg

The Camshaft Position Sensor connection was easiest to get to. I started with that and it came out pretty easily. I had done some research and it indicated that the connector had a single release tab on the top of the connector. I was gratified to find my research was correct.


Continued in next post...
 
Last edited:
OP
S

sbosecker

Well-known member
Joined
Sep 25, 2012
Messages
3,539
Location
Peachtree City, GA
Continued...


20201220-11.jpg 20201220-12.jpg

The Crankshaft Position Sensor was next and was more of challenge. Due to obstructing "stuff", it was difficult to get one's hand into a position that the thumb and index finger could pinch the release tab (supposedly located on top). I also wasn't completely sure this connector was a single tab release. Looking at it with my "mirror on a stick" it appeared it might have release tabs top & bottom.

Eventually I was able to pinch top and bottom and pull on the connector at the same time - off came the connector. As it turns out it also is a single release tab, located on top.


20201220-13.jpg 20201220-14.jpg

I stuffed these two connectors out of the way up into the Air Conditioning hoses. This is about as good as it's going to get regarding access to the front of the engine for gasket removal and installing the new Water Pump.


Scott
 
Last edited:
OP
S

sbosecker

Well-known member
Joined
Sep 25, 2012
Messages
3,539
Location
Peachtree City, GA
Thursday - December 24, 2020 - Christmas Eve

Pretty much everything has come to a screeching halt on the F150 Water Pump project as parts sit in USPS distribution facilities. Between Christmas & COVID, the boys and girls at the Postal Service have been unable to keep up with the load. The Water Pump, Gasket, & the plastic clips that hold the Radiator Shroud in place were supposed to have arrived on Monday.

I did go to the Fayetteville, GA Ford Dealership's Parts department on Monday morning and discussed the fasteners I needed for my repair with Ford Parts-Man, Sean. Sean took some rudimentary information on my truck (year, engine, etc.) and walked out of sight to consult a computer.


20201221-01.jpg

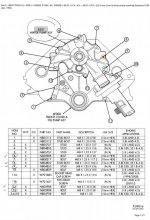
A couple of minutes later he returned with a wonderful line drawing of the front cover of the 4.2L V6 engine in my truck. He asked me to point out which fasteners I needed. I marked the ones numbered 6, 8, 9, 12 & 13.
6, 12 & 13 were the same 8mm bolt with the same part number and 8 & 9 were a couple of weird studs.

I asked Sean about the line drawing as I had been trying to find something like that on the Internet. Sean thought I ought to be able to get the same thing by putting in a code number for the assembly in question. In this case "8501" for the Water Pump.

Sean departed to get the prices on my parts. I was thinking "Cool, I've broken the code on finding parts on the Ford Parts sites!"

Sean returned with prices. Not surprisingly the studs were around $10 each ...the surprise was those bolts: They were $16 each! Even better they came 4 to a bag so I would be in for $64 for 4 bolts. Sean indicated I didn't have to purchase any of these items. I told Sean I would buy the studs but hold off on the bolts and see if I could do better elsewhere.

When I got home I checked eBay and found someone who had apparently bought the 4-bolt bag but only needed one. The seller had them priced at about $15 for the 3 of them. I bought them immediately!

I then checked out the Ford Parts Websites... I used the "secret handshake" that Sean had told me about but it didn't work. It did bring up a Water Pump for my pickup but it was just a picture of the Water Pump, nothing like the line drawing above. I'll revisit this with Sean when I go in to get the Studs that are on order.

Yesterday I was out on my Honda Lawnmower "raking leaves" into its bagging system per my spouse's directions. I had just finished when the Lawnmower wouldn't respond to steering inputs.


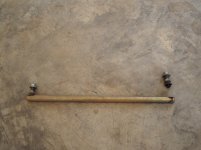
20201223-01.jpg 20201223-02.jpg

Well that's a problem.


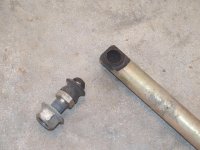
20201223-03.jpg 20201223-04.jpg

Looks like I need a new Tie Rod for my Honda 2013. To my surprise, Tie Rods are still available for this over 20 year old lawnmower and the price isn't hideous - about $25 + shipping. OK, maybe I'm suffering a little Stockholm Syndrome after those Ford bolts but it didn't seem too bad for an admittedly unusual part ...and it certainly beats the price of a new lawnmower.

Still, I had bought this lawnmower used from a fellow in Palmetto, GA - about 12 miles away from me - in 2014 to replace a fully depreciated Honda 2013 I had bought new in the '90's. He had a few others available as parts donors and I gave him a call. Nobody answered.

I looked online and sadly it turned out my 75-year old supplier had passed away in August. He was a very interesting guy - had been a mechanic with Eastern Airlines. I will contact his family after Christmas and see if any of the donor lawnmowers are still around. The main advantage of obtaining a part from them would be having it immediately vs. the meltdown the Postal Service is experiencing at the moment.

I'm picking up hints that maybe, just maybe, I need to get some machines in my stable that are less than 20 years old.

Merry Christmas!

Scott
 
Last edited:
To avoid these ads, REGISTER NOW!
OP
S

sbosecker

Well-known member
Joined
Sep 25, 2012
Messages
3,539
Location
Peachtree City, GA
Tuesday - January 29, 2020

The Water Pump replacement project continued to tread water as the USPS sends the package containing my replacement Water Pump from one side of Atlanta to the other. Last reported location was some facility in Stockbridge, GA. Stockbridge is located adjacent to I-75 on the southeast side of the Atlanta metropolitan area. The package arrived in Stockbridge yesterday after arriving at an Atlanta sorting facility on the 19th.

The two studs I ordered from the Fayetteville, GA Ford dealership did arrive and I picked them up.


20201228-04.jpg

The red dot and the green dot correspond to the locations these two studs go.


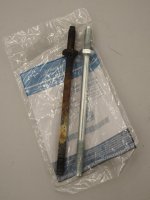
20201228-01.jpg 20201228-02.jpg

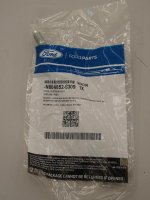
N804852 is the stud that goes into the red dot.


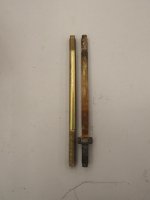
20201228-03.jpg

N804853 is the stud that goes into the green dot. This one came two to a package so the guy behind the counter liberated mine and gave it to me naked. It confused me for a moment as it didn't have - what I thought was - a nut fused onto the stud. After squinting at my original lying on the parts counter more closely I realized that the nut on the original should screw off.

I'm looking at the corrosion on the original studs and wondering what - if anything - would prevent this situation when I install the new ones.

Would sealant on the threads be the way to go?

I also need to do a little research on installing a stud.

Meanwhile I am slowly getting the remnants of the original gasket off the mounting location of the Water Pump. I've just found that the Paint Remover I was using to remove the plastic from the Aluminum C-Channel has an effect on the old gasket material. That is speeding up the process quite a bit.

Scott
 
Last edited:

Bob Heine

ALLIANCE MEMBER
Joined
Oct 24, 2009
Messages
10,709
Location
Boca Raton, Florida
Scott, I believe the Post Office is broken. Went to mail a stack of Christmas cards and the three blue boxes that were located at our main Post Office are gone. The blue box inside the lobby is covered in tape with a "Not Working" sign. Looks like I can't fix my screwup when I miss the delivery/pickup to my house.

I ordered a speed loader setup for a couple of .22 LR pistols on 12/21. The very convenient USPS Information Delivery app still doesn't know when it will arrive. It appears to be taking the scenic route:

  • 12/22 Scottsdale AZ
  • 12/23 Midland TX
  • 12/24-25 Memphis TN
  • 12/26-29 Oxford MS
  • 12/30 Orlando FL
  • ????? Boca Raton FL
Looks like all or part of the trip was made by bicycle (I pray it wasn't by pony):
attachment.php
 

Attachments

  • 2020-12-30 Package.jpg
    2020-12-30 Package.jpg
    81 KB · Views: 416
OP
S

sbosecker

Well-known member
Joined
Sep 25, 2012
Messages
3,539
Location
Peachtree City, GA
Scott, I believe the Post Office is broken. Went to mail a stack of Christmas cards and the three blue boxes that were located at our main Post Office are gone. The blue box inside the lobby is covered in tape with a "Not Working" sign. Looks like I can't fix my screwup when I miss the delivery/pickup to my house.

I ordered a speed loader setup for a couple of .22 LR pistols on 12/21. The very convenient USPS Information Delivery app still doesn't know when it will arrive. It appears to be taking the scenic route:

  • 12/22 Scottsdale AZ
  • 12/23 Midland TX
  • 12/24-25 Memphis TN
  • 12/26-29 Oxford MS
  • 12/30 Orlando FL
  • ????? Boca Raton FL
Looks like all or part of the trip was made by bicycle (I pray it wasn't by pony):

Bob,

I have to agree that the Postal Service seems to be hurting. I will say that, usually, my stuff does eventually arrive.

Between the holidays, COVID, and personnel that are being asked to do more with less it's no surprise that things aren't hitting on all cylinders.

Here in Georgia we've also got the Senate Runoff election. That's generating an enormous amount of political mailers. I get at least 4 of those in my mailbox every day.

So things are strained. Hopefully it will get better soon.

Today the 3 bolts for the Water Pump that I purchased from an Ebay seller were in my mailbox so that's moving the ball forward somewhat. If the Water Pump itself can somehow find its way here I'll just about be ready to start putting things back together.

Happy New Year!

Best regards,

Scott
 
OP
S

sbosecker

Well-known member
Joined
Sep 25, 2012
Messages
3,539
Location
Peachtree City, GA
Wednesday - December 30, 2020


20201230-01.jpg 20201230-02.jpg

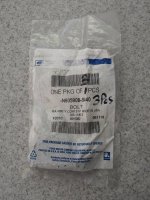
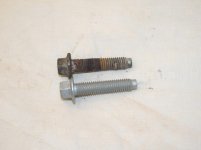
The Post Office delivered 3 Ford N605908 Water Pump Bolts today. Purchased on eBay for about $5 each, I feel that I got a bargain since Ford wanted more for each one than I paid for all three!


20201230-03.jpg

Regardless, those bolts needed to be replaced. Two of the three looked like this. The third would have probably been OK but I decided to replace all of them.


20201230-04.jpg

Since I am waiting on the Water Pump to arrive I've had time to leaf through my OEM Ford Service Manuals. In doing so I discovered some things in the documentation that's giving me pause.


20201230-05.jpg 20201230-06.jpg

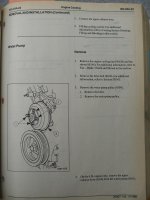
The pages referring to the removal of the Water Pump do not really differentiate between my V6 and the V8 engines that were also available for the 2000 F150. It does helpfully note at the bottom of the first page that for the 4.2L engine (the V6) one needs to remove a Radiator Hose.

Like that's the only difference...

For the installation (next picture) it shows the Water Pump for the V8 engines and makes no reference to the 9 fastener asymmetrically shaped Water Pump that I have on my V6.

The assumption would seem to be that the torque values for all the Water Pump fasteners is 15-22 Ft-lbs.


20201230-07.jpg

I stumbled across this today in a completely different section of the Shop Manual. This section discusses the installation of the Engine's Front Cover on the 4.2L V6 Engine. The Water Pump is mounted on the Front Cover and shares many of the fasteners shown in this diagram.

This procedure calls for torqueing "the bolts" in a particular order in 2 stages.

OK... I'm assuming this information trumps the Water Pump Installation information. But...

1. There are bolts and studs here... does one torque the bolts and nuts (on the studs) both as specified for "the bolts"?

2. Of the 13 fasteners called out numerically in the diagram, removing the Water Pump only required removing 9 of them (1,2,3,4,5,6,7, 10 & 13). Do I tighten these fasteners down in the numerical order I just listed?

I am assuming the answer is "yes" for both of these items but it would be nice to have had this defined clearly in the Water Pump removal procedure.


Scott
 
Last edited:
OP
S

sbosecker

Well-known member
Joined
Sep 25, 2012
Messages
3,539
Location
Peachtree City, GA
Scott, I believe the Post Office is broken. Went to mail a stack of Christmas cards and the three blue boxes that were located at our main Post Office are gone. The blue box inside the lobby is covered in tape with a "Not Working" sign. Looks like I can't fix my screwup when I miss the delivery/pickup to my house.

I ordered a speed loader setup for a couple of .22 LR pistols on 12/21. The very convenient USPS Information Delivery app still doesn't know when it will arrive. It appears to be taking the scenic route:

  • 12/22 Scottsdale AZ
  • 12/23 Midland TX
  • 12/24-25 Memphis TN
  • 12/26-29 Oxford MS
  • 12/30 Orlando FL
  • ????? Boca Raton FL
Looks like all or part of the trip was made by bicycle (I pray it wasn't by pony)

Bob,

Looks like the USPS just needed a hug... This morning's "USPS Informed Delivery" email shows my Water Pump is "out for delivery".

I hope there's still something in the box!

Best regards,

Scott
 

Paul_VR6

Well-known member
Joined
Dec 27, 2012
Messages
301
Location
Oxford, Pa USA
As long as all the bolts/studs are the same size I would think the torquing is the same.

Its a bit odd the bolts are a plus 90 unless they are stretch bolts (like head or rod bolts) and if that is the case using all new fasteners would definitely be the way to go.
 
OP
S

sbosecker

Well-known member
Joined
Sep 25, 2012
Messages
3,539
Location
Peachtree City, GA
As long as all the bolts/studs are the same size I would think the torquing is the same.

Its a bit odd the bolts are a plus 90 unless they are stretch bolts (like head or rod bolts) and if that is the case using all new fasteners would definitely be the way to go.

Paul_VR6,

The only thing I could guess about the +90 degree second stage torque was to compress the gasket a defined distance. It doesn't seem like high enough torque to stretch the bolt/studs.

Best regards,

Scott
 
OP
S

sbosecker

Well-known member
Joined
Sep 25, 2012
Messages
3,539
Location
Peachtree City, GA
Friday - January 1, 2021 - New Years Day


The Water Pump was delivered yesterday afternoon. My smart phone let out an audible yip letting me know that it had been delivered someplace - I was hoping it was sitting outside my house. As I headed for the door I was thinking, "This will be interesting."


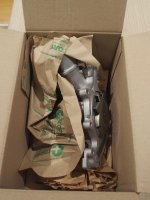
20201231-01.jpg 20201231-02.jpg

There were signs of damage to the box after all that time on the road but, to be honest, I thought it would be worse. There was a pretty good tear in the top of the box and some punctures on one side that had come from the interior... Let's see how the contents faired.


20201231-03.jpg

On top was the Gasket I had ordered along with the Water Pump.


20201231-04.jpg

Under that was a Gasket that apparently came with the Water Pump. Looks like I've got a spare Gasket. As it was naked and loose inside the box, I was somewhat surprised it hadn't been folded, spindled & mutilated. It has a couple of creases in it but it appeared to be in serviceable condition.


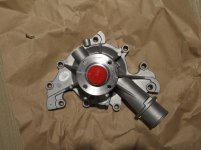
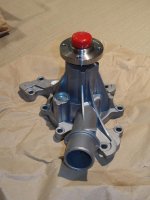
20201231-05.jpg

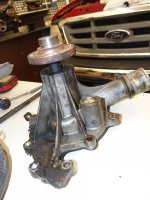
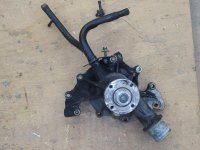
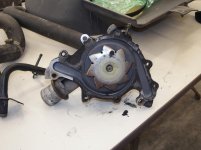
Under the Gasket was the Water Pump itself.


20201231-06.jpg 20201231-07.jpg

Looks like it survived the trip without issue.

Excellent!

Yesterday & today are family days. I am hoping to start the installation tomorrow but we'll see.

Happy New Year!

Scott
 
Last edited:
drivesitfar

Well-known member
Joined
Oct 23, 2013
Messages
36,079
Location
Pacific Northwest
I need to catch up a lot on the goings on around here, but noticed you mentioned issues with USPS. I had a shipment that was supposed to take a week that took over a month about 3 months ago, but I thought they resolved that issue. or is Covid 19 or some other reason why USPS is not the way to ship stuff now?

here's to a great 2021 and I hope you are enjoying your retirement cause it's sometimes hard to know what to do when you have 6 Saturdays a week.

cheers
 
OP
S

sbosecker

Well-known member
Joined
Sep 25, 2012
Messages
3,539
Location
Peachtree City, GA
I need to catch up a lot on the goings on around here, but noticed you mentioned issues with USPS. I had a shipment that was supposed to take a week that took over a month about 3 months ago, but I thought they resolved that issue. or is Covid 19 or some other reason why USPS is not the way to ship stuff now?

here's to a great 2021 and I hope you are enjoying your retirement cause it's sometimes hard to know what to do when you have 6 Saturdays a week.

cheers

DrivesItFar,

The Post Office certainly seems to be struggling. With the holidays and elections (absentee ballots) in the rear view mirror, hopefully things will improve soon.

When most of one's machinery is old enough to vote, along with 20+ years of deferred house maintenance, it isn't hard to find things to do despite having 5 Saturdays a week. HA!

Best regards,

Scott
 
OP
S

sbosecker

Well-known member
Joined
Sep 25, 2012
Messages
3,539
Location
Peachtree City, GA
Saturday - January 2, 2021


Today was the day I was going to get cracking on the F150 Water Pump replacement. There was still some prep work that need to be done before wrenching could begin and I walked out into the house garage on my way to the LBG.

My wife and I had recently been smelling a faint "solvent" smell in the Garage and we had been unable to locate it. Today I smelled it again and paused to investigate.


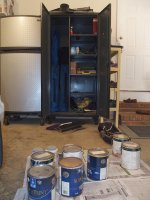
20210102-01.jpg 20210102-02.jpg

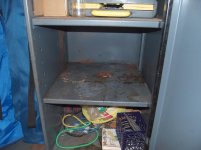
I have a couple of Stronghold cabinets in my garage and this one is a "Broom Closet" version. We had some cans of paint on one of the shelves and one or more of them had corroded and were leaking a bit. That was the source of the smell. Sadly, as I was pulling the paint buckets off the shelf, the last one stuck to the shelf as I was lifting and pulling ...and then it let go.


20210102-03.jpg

This caused my hand to ricochet off the bottom front of the shelf above where the paint cans were. Stronghold cabinets are made of 12 gauge sheet metal - very stout but still sheet metal. The edge of the upper shelf peeled back a pretty good patch of my right hand's hide.

I got my wound bandaged up and then pondered whether I should try to continue with Plan A - the Water Pump project. I decided to wait a bit and see how my hand felt before going out to the shop.


20210102-04.jpg 20210102-05.jpg 20210102-06.jpg

The good news is that bit of wound licking gave my brain a chance to remember I had another Ford Manual that might shed some light on the torque values for the Water Pump fasteners. I located the torque specs for the Water Pump fasteners (green shaded area). This broke out the fasteners into the various types (bolts, nuts & stud bolts) - they were all the same at 15-22 Foot-lbs. Interestingly enough, the Engine Front Cover fastener torque values were also listed (yellow shaded area) and they were identical to the Water Pump values.

With this information in hand I had 2 out of 3 torque values that matched so I decided to go with these specs. (I think maybe all 3 of my torque values may match but more on that later.)


20210102-07.jpg

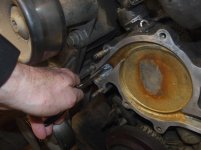
My hand seemed to be OK and I thought I could keep it clean while I worked on the Water Pump. I pulled the rags out of the holes in the Engine Front Cover and got to work.

Continued in next post...
 
Last edited:
OP
S

sbosecker

Well-known member
Joined
Sep 25, 2012
Messages
3,539
Location
Peachtree City, GA
Continued...


After getting the last of the prep work done... cleaning up some of the old fasteners, chasing the threads of the Engine Front Cover, last cleanup of the Front Cover mating surface; I tried to think through my order of operations.


20210102-11.jpg

I thought it would useful to use the old Water Pump & Heater Water Outlet Tube to see if I could install these two items as an assembly. I was afraid if I assembled the new components and then found that I couldn't successfully insert them into the tangle of hoses and cables that I might do harm to something as I pulled them apart.

I was able to play with the old components and, after a couple of tries, I was able to repeatedly get the assembly into position.


20210102-12.jpg 20210102-13.jpg

I now played with my newly acquired Mayhew 28680 Hose Clamp Tool to release the clamps on my new Heater Water Outlet Tube.


20210102-14.jpg

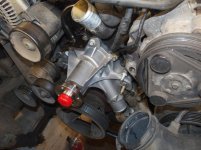
I put a bit of Molykote 111 Grease on the Heater Water Outlet Tube and inserted it into the Water Pump. It went in remarkably easy. I torqued the retaining bolt to 84 Inch-lbs.


20210102-15.jpg 20210102-16.jpg

I needed to install a stud into the Front Engine Cover. I applied some Permatex High Temperature thread sealant to the stud and ran it into the Front Engine Cover.


20210102-17.jpg

This gave me 4 studs to hang the Gasket on. This should keep it in position despite it being a "dry" installation.


Continued in next post
 
Last edited:
OP
S

sbosecker

Well-known member
Joined
Sep 25, 2012
Messages
3,539
Location
Peachtree City, GA
Continued...

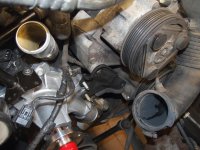
I now ran into trouble as I tried to position the Water Pump/Heater Water Outlet Tube assembly onto the 4 studs. I couldn't get the Water Pumps holes to align with the studs without Heater Water Outlet Tube interfering with something.

I removed the Heater Water Outlet Tube from the Water Pump. It came out without a fight.


20210102-21.jpg

I was now able to line up the Water Pump onto the 4 studs.


20210102-22.jpg

After installing all the Water Pump's fasteners finger tight, I was able to insert the Heater Water Outlet Tube into the Water Pump easily. I again torqued down the retaining bolt to 84 Inch-lbs.


20210102-23.jpg

I now began torqueing down the various fasteners. The specification called for 15-22 Ft-lbs of torque. The odd-ball Engine Front Cover instructions indicated one should torque "the bolts" to 16 Ft-lbs in a particular pattern and then an additional 90 degrees in a second stage - again in the same pattern.

I decided to torque the fasteners to 16 Ft-lbs in the pattern specified in the Engine Front Cover installation. Then I came back and did a second stage at 20 Ft-lbs. Interestingly, the second stage took between 45 & 90 degrees to reach 20 Ft-lbs. Maybe all these 3 "different" torque instructions really are the same.


20210102-24.jpg 20210102-25.jpg

Now the real fun began... attaching the 4 hoses to the Heater Water Outlet Tube. I lubricated all 4 of the Outlet Tube's tubes with Molykote. This helped I'm sure ...as did the Mayhew Hose Clamp Tool but this operation still represented the most difficult part of this installation. Due to the other "stuff" in the way, it's just tedious and difficult to get these hoses attached to the Outlet Tube.


20210102-26.jpg

It's time to install the Air Conditioner Bracket.


20210102-27.jpg

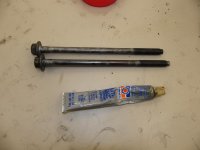
I gave each of the two long bolts that attach this Bracket to the engine a good cleaning with a wire wheel on a bench grinder.


Continued in next post...
 
Last edited:
OP
S

sbosecker

Well-known member
Joined
Sep 25, 2012
Messages
3,539
Location
Peachtree City, GA
Continued...


20210102-31.jpg
I put Permatex Anti-Seize on the threads of these bolts.


20210102-32.jpg

The Flange Nuts and those two long bolts were both torqued to 35 Ft-lbs.


20210102-33.jpg 20210102-34.jpg

Last operation of the evening was to get the Power Steering Pump remounted. Its bolts had been loosened/removed to allow the Power Steering Pump Pulley to be moved enough to remove the lower long bolt. The 4 bolts mounting the Power Steering Pump to the Engine were specified to be torqued to 15-20 Ft-lbs. I torqued the top two bolts to 17.5 Ft-lbs but I couldn't get a Torque Wrench onto the bottom two bolts. I had to go with a firm amount of force with an open end wrench for the bottom bolts.

EDIT: I forgot there was one additional operation: Reattaching some electrical components.


20210102-35.jpg

I attached the Wiring Harness to the Heater Water Outlet Tube bracket.


20210102-36.jpg

The Camshaft Sensor was reattached to its connector.


20210102-37.jpg

As well as the Crankshaft Sensor.


It was now 11:00 pm and I quit for the evening.

I was pleased with today's progress and hope to pretty much complete the procedure tomorrow.


Scott
 
Last edited:

Jayman17

Well-known member
Joined
Feb 6, 2017
Messages
3,820
Location
Seattle, Wa
Jay,

Happy New Year to you and yours!

My 90-year old father managed to get the first shot of his COVID vaccinations today so 2021 is looking up already!

Best regards,

Scott

Glad to hear of regular folks starting to get vaccinated. My mom is 91 and is supposed to get her shots on 1/13 and then 2/3. I will be glad to put this whole mess behind us. My restaurant budget is building up and is about to blow!! :lol_hitti

Jay
 
To avoid these ads, REGISTER NOW!
Top Bottom