To avoid these ads, REGISTER NOW!

Above 1200 Sq/FT The Lone Beech Garage (60x46x16)

Wokspaces above 1200 squarefeet.
OP
S

sbosecker

Well-known member
Joined
Sep 25, 2012
Messages
3,539
Location
Peachtree City, GA
Glad to hear of regular folks starting to get vaccinated. My mom is 91 and is supposed to get her shots on 1/13 and then 2/3. I will be glad to put this whole mess behind us. My restaurant budget is building up and is about to blow!! :lol_hitti

Jay

Jay,

We chat every Sunday on the phone so I'll be talking to dad today. I'll be curious to see how he's feeling after the shot.

I'm looking forward to socializing freely again: Travel, listening to live music, enjoying a meal with friends, visiting family ...these are sorely missed.

Best regards,

Scott
 
To avoid these ads, REGISTER NOW!

Motoman1100

Well-known member
Joined
Oct 2, 2014
Messages
443
Location
GA
Jay,

We chat every Sunday on the phone so I'll be talking to dad today. I'll be curious to see how he's feeling after the shot.

I'm looking forward to socializing freely again: Travel, listening to live music, enjoying a meal with friends, visiting family ...these are sorely missed.

Best regards,

Scott

And we can't forget the long awaited much anticipated BBQ blowout at the Lone Beech Garage!
 
OP
S

sbosecker

Well-known member
Joined
Sep 25, 2012
Messages
3,539
Location
Peachtree City, GA
And we can't forget the long awaited much anticipated BBQ blowout at the Lone Beech Garage!

Alan,

Roger that! I am looking forward to that!

I got an email from Piedmont Healthcare today indicating that they will soon be taking appointments from Geezers (Age 65+) for COVID vaccinations. They didn't have any other details so I think this was just a "Heads Up" so folks could make up their mind before the email arrives saying, "Make an Appointment".

Best regards,

Scott
 
OP
S

sbosecker

Well-known member
Joined
Sep 25, 2012
Messages
3,539
Location
Peachtree City, GA
Wednesday - January 6, 2021

After I finished installing the Water Pump over the weekend I realized I had forgotten something. It would probably be a really good idea to install a new Serpentine Belt while I had easy access to that area of the Engine; it would be best to wait on installing the Radiator Hoses, Fan, etc.

I ordered a new Belt and it is scheduled to arrive on Friday. We'll see if the Postal Service can pull that off.

Meanwhile...


20210106-01.jpg

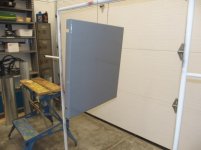
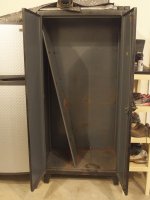
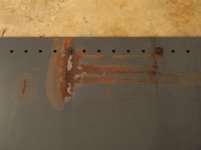
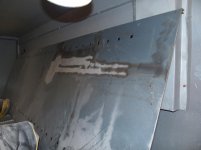
There were two shelves in the Stronghold Cabinet that were corroded. The one above the leaking paint buckets (POST 3916) was really a mess. Not sure what caused that but they both needed to be cleaned up and painted.


20210106-02.jpg

Today I hit both those shelves with the Angle Grinder and a Wire Wheel to get the scaly rust off.


20210106-03.jpg

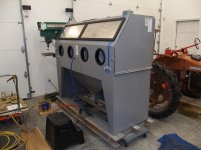
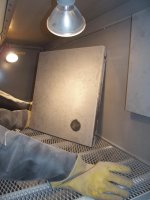
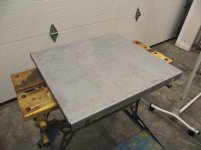
Then a long session in the Blasting Cabinet. I only managed to get one of these done today but it was the really messed up one. I was thinking of hitting it with primer tomorrow but maybe I should put some filler into the pitted areas before I do that.


20210106-04.jpg

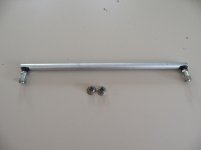
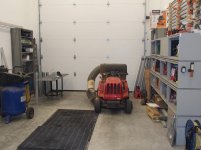
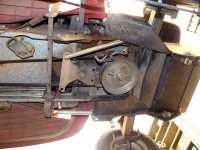
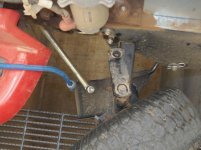
Yesterday the Tie Rod for my Honda 2013 Lawn Tractor arrived in the mail.


20210106-05.jpg

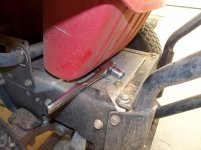
The original Flange Nuts seem to be some sort of Top Lock type nut. I think I can reuse them but I'm going to temporarily use a couple of regular 3/8"-24 nuts to install the Tie Rod.


20210106-06.jpg 20210106-07.jpg

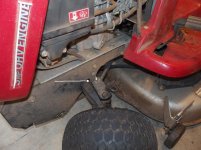
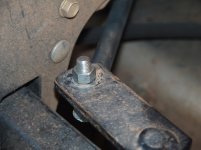
...and that's what I did. When I finish the pickup's Water Pump installation I will pull the Lawn Tractor over the "Tornado Shelter" and replace the Main Drive Belt. When I glanced through the Shop Manual it indicated I would need to unfasten the forward end of each Tie Rod as a part of the Belt Change Procedure. At the moment that doesn't make sense to me.

Still, by putting those regular nuts on the new Tie Rod, the potential to damage the male threads of the Tie Rod when I replace the Main Drive Belt should be eliminated.

Scott
 
Last edited:
OP
S

sbosecker

Well-known member
Joined
Sep 25, 2012
Messages
3,539
Location
Peachtree City, GA
Thursday - January 7, 2021


Weather was moving in this morning and my goal was to get some paint on the Stronghold shelf I cleaned up yesterday before the forecast cold rain made accomplishing that outside impossible.

I had hoped to put some Bondo on the pitted areas of the shelf. However, when I opened the can that I had available, I found that it was almost dried out.

I didn't have time to get a fresh can of Bondo and beat the weather. I decided "it's just a shelf" in an industrial cabinet and pressed on.


20210107-01.jpg 20210107-02.jpg

I took the shelf outside and cleaned up the pitted area a bit with a flap disc on the angle grinder. Following that I hung the shelf on a mobile rack and sprayed a coat of primer. A coat of Rustoleum Dark Machine Gray paint followed.


20210107-03.jpg

The temperature was dropping and the sky getting even darker as I wheeled the rack with the dangling shelf back into the LBG. The temperature inside was 65 degrees and this evening the paint seemed to be drying nicely.

I've been doing a little media blasting on the second shelf this evening.

Scott
 

drivesitfar

Well-known member
Joined
Oct 23, 2013
Messages
36,076
Location
Pacific Northwest
SB: sorry to see that you lost the battle with the Stronghold cabinet. GEESH they were and are built stout aren't they. I rarely see any used ones for sale cause I'd like one or a few if they weren't priced too high. I bought a Lyon cabinet a few years ago from an airline that was moving warehouses and the 4 foot wide 2 foot deep 6.6 foot tall cabinet weighed 550 pounds on their scale. talk about stout!! i've put 3,000 pounds of gym weight plates on each shelf in the past and unfortunately I left 3500 pounds on one shelf for a couple years and just noticed i bent it in the middle a bit.

several years ago I started putting a few big vises in it and 4 of the 5 shelves are still perfectly straight.

good to see you are getting things done with all your extra Saturdays.
 

Attachments

  • WP_20150215_008.jpg
    WP_20150215_008.jpg
    48.6 KB · Views: 51
OP
S

sbosecker

Well-known member
Joined
Sep 25, 2012
Messages
3,539
Location
Peachtree City, GA
SB: sorry to see that you lost the battle with the Stronghold cabinet. GEESH they were and are built stout aren't they. I rarely see any used ones for sale cause I'd like one or a few if they weren't priced too high. I bought a Lyon cabinet a few years ago from an airline that was moving warehouses and the 4 foot wide 2 foot deep 6.6 foot tall cabinet weighed 550 pounds on their scale. talk about stout!! i've put 3,000 pounds of gym weight plates on each shelf in the past and unfortunately I left 3500 pounds on one shelf for a couple years and just noticed i bent it in the middle a bit.

several years ago I started putting a few big vises in it and 4 of the 5 shelves are still perfectly straight.

good to see you are getting things done with all your extra Saturdays.


DriveItFar,

I purchased the two 3' x 2' x 6' Stronghold Cabinets just before I started building the Lone Beech Garage... and was planning my daughter's wedding.

This purchase is documented in this thread: Acquired A Couple Of Strong Hold Cabinets

While I don't recall specifically, I'm pretty sure I got them and placed them immediately in my house garage without doing anything to them. There's a better than 50/50 chance that the corrosion I found on the worst shelf was there when I got the cabinet.

Anyway, I'm getting those shelves cleaned up and I'll deal with any additional refurbishing on one of my future "Saturdays". HA!

Best regards,

Scott
 
OP
S

sbosecker

Well-known member
Joined
Sep 25, 2012
Messages
3,539
Location
Peachtree City, GA
Friday - January 8, 2021


20210108-01.jpg 20210108-02.jpg

Continued working on the second Stronghold Shelf.


20210108-03.jpg

It's ready for a wipe down with acetone and then some paint. We'll see what the weather looks like tomorrow. I'd prefer to paint it outside.


20210108-04.jpg

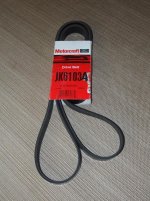
A happy surprise was the on-time delivery of the Ford YL3Z-8620-BA Serpentine Belt I ordered earlier this week.


20210108-05.jpg

I think I have everything I need to get the Water Pump replacement project completed.


Scott
 
OP
S

sbosecker

Well-known member
Joined
Sep 25, 2012
Messages
3,539
Location
Peachtree City, GA
Saturday - January 9, 2021


With a Serpentine Belt in hand, it was time to continue the remainder of the Water Pump project.


20210109-01.jpg

I placed the Water Pump Pulley on the Water Pump and tightened the bolts finger tight.


20210109-02.jpg

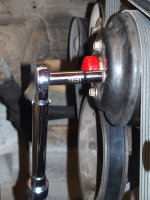
I looped the Serpentine Belt properly around all of the pulleys except the upper Idler Pulley. Then I used a Breaker Bar with the appropriate socket to loosen the Belt Tensioner. I was then able to push the Serpentine Belt under the smooth upper Idler Pulley.


20210109-03.jpg

With the Serpentine Belt now offering useful resistance to rotation, I torqued the Water Pump Pulley Bolts to 18.5 Ft-lbs in clockwise order.


20210109-04.jpg

I now felt it was safe to remove the red plastic thread protector on the Water Pump.


20210109-05.jpg

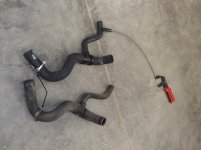
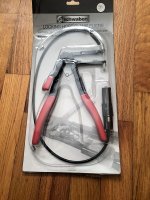
I used my Mayhew Hose Clamp Tool to remove the Constant Tension Clamps from the old Lower Radiator Hose. The tool could then be used to place the open clamp on the new hose. The black arrows point to a clamp on the old hose and a new replacement Constant Tension Clamp on the new hose. The new Clamp arrived with a clip that kept it in the fully open position.


20210109-06.jpg

This was useful to get the new Clamp located on the new Hose but I wasn't quite sure what was the best way to remove the clip. I did an internet search and, for a while, I thought I might have broken the Internet. I did eventually find a single reference to this situation and it seemed that one just pulled the clip off when the Clamp was in position.

All 3 Clamps were placed, a reasonable distance from the each end, onto the Lower Radiator Hose.


20210109-07.jpg

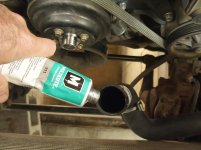
The second step was getting the Lower Radiator Hose's interior a bit of lubrication. I also put a light application on the Water Pump, Radiator & Degas Bottle (Coolant Reservoir).


Continued in next post...
 
Last edited:
OP
S

sbosecker

Well-known member
Joined
Sep 25, 2012
Messages
3,539
Location
Peachtree City, GA
Continued...


20210109-11.jpg

I positioned the lubed & clamp-ready Lower Radiator Hose close to its attachment points.


20210109-12.jpg 20210109-13.jpg


The Hose was attached to the Degas Bottle. Using the Hose Clamp Tool I was able to get the Constant Tension Clamp positioned without too much effort.

I used the same approach with the Radiator.


20210109-14.jpg 20210109-15.jpg
20210109-16.jpg


The new Clamp was positioned and then I used a pliers to pull off the clip. After doing that the Clamp (as shown in the picture) was a little too close to the Water Pump and I used the Hose Clamp Tool to adjust its position a little further away from the Water Pump.


20210109-17.jpg

The Fan Shroud & Fan were lowered together into the Engine Compartment.


Continued in next post...
 
Last edited:
OP
S

sbosecker

Well-known member
Joined
Sep 25, 2012
Messages
3,539
Location
Peachtree City, GA
Continued...

Getting the Fan Nut to thread onto the Water Pump was a bit more of a chore than I thought it would be. It was harder to get a purchase on the Fan that would keep it aligned with the Water Pump's threads than I expected. I was afraid I might cross-thread these two items but then the nut started threading onto the Water Pump.


20210109-21.jpg

I used the Fan Clutch Tools to torque down the Fan to the Water Pump. The Shop Manual calls for 41.5 Ft-lbs but I don't have any way to accomplish that other than to give the tools a guesstimated tightness.


20210109-22.jpg

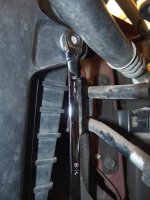
The Fan Shroud has two bolts that attach it to the Radiator. The one on the passenger side is difficult to access due to an Air Conditioner Hose causing interference. I used an 8mm Ratcheting Spline Wrench.


20210109-23.jpg 20210109-24.jpg
20210109-25.jpg

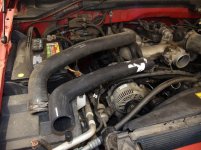
The Upper Radiator Hose was now installed. It attaches to the Radiator and the Water Pump.


20210109-26.jpg

A few odds & ends - Throttle Cable Dust Cover, Air Intake Assembly, etc. - are put back into position and fastened down.


20210109-27.jpg

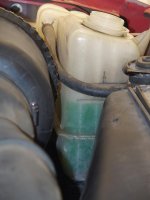
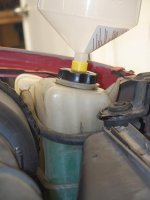
I mixed up 50/50 mixtures of Coolant and Distilled Water and added it to the Degas Bottle. I ran the engine and added more Coolant as needed.

I then ran the engine for a while with the Heater on Hot and occasionally ran the RPM's up to 3000 and held it there for a short time.

I shut the truck down and came back an hour later. I added some Coolant and started the truck. I let it run for about 10 minutes then I shut it down.

I was pleased that I hadn't seen any leaks so far.

I returned an hour later and took the truck for a test drive. All seemed to be going well but, about 4 miles down the road at 45 mph, I noticed the temperature was climbing steadily. I turned around and started back. The temperature continued to climb and it seemed it was going to get into the "Red Band" shortly so I pulled off the road and shut down the engine.

I let her cool down for 5 minutes or so and then checked the temperature. It was around the mid-range of the Temperature Gauge. I decided to see if I could make it home before it overheated. It was about 3-1/2 miles to get back home but, although the temperature was climbing again I made it back before it overheated.

I let the truck sit outside in the 32 degree weather and came into the house to eat supper.

After getting a full belly, I came back out and started the truck again. I watched the temperature climbing and was just about to shut down the engine when the temperature started dropping.

I drove the truck into the LBG and shut her down. After some quality time on the Internet, the most likely problem seemed to be some air in the system. With the heater on Hot, I started the truck and let it idle for a bit, then ran it to 3000 rpm for 30 seconds or so, then back to idle. I went out and examined the Fan, Engine, Hoses and Degas Bottle. I went back and forth from running the Engine up to 3000 rpm and then back to idle for quite a while. The temperature was staying steadfastly at the middle of the temperature range. After close to 30 minutes of this, I shut down the truck and came to the house.

I'll see if it needs some additional coolant tomorrow morning after sitting all night. I plan to give it another test drive tomorrow.


Scott
 
Last edited:
OP
S

sbosecker

Well-known member
Joined
Sep 25, 2012
Messages
3,539
Location
Peachtree City, GA
Sunday - January 10, 2021


20210110-01.jpg 20210110-02.jpg

The truck's engine had fully cooled down overnight. The picture on the left shows the coolant level just below the Cold Low line. I added enough coolant to get it up to Cold Full line (picture on the right).


20210110-03.jpg 20210110-04.jpg

Some of my Internet research on "burping" the coolant system suggested driving the vehicle up on ramps to elevate the Radiator. The thinking was that air would try to get to the high point in the system. I couldn't see any harm in trying to achieve this... especially since the LBG has a circular ramp on the east side of the building.

I backed the truck out of the Long Bay and onto the ramp. I let the truck idle in this position for over a half hour. Every 5 minutes I would run the rpm up to 3000 for 30 seconds. After 35 minutes, the Temperature Gauge had never risen above the mid-point.

It was time for another test drive. I drove the same route and speed I had taken yesterday. The Temperature Gauge stayed at the mid-point the entire trip.

Excellent: Perhaps I have skinned this cat.

There is one remaining issue before the project can be considered completely finished.


20210110-05.jpg 20210110-06.jpg

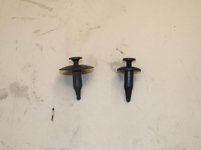
There are a half-dozen or so plastic clips (or rivets) that fasten a plastic shield to the top of the Fan Shroud and front of the truck. Most of the original fasteners were damaged when the plastic shield was removed to allow the Fan Shroud to be extracted from the engine compartment. In the left picture, the original fastener is on the left and Ford Part N804570S is on the right.

I had thought, based on the Ford Parts Sites I had visited, that the correct fastener for my truck was N804570S and I ordered a bag of 15. Now that I have received that order, it is clear that these aren't the same item as the original.

The picture on the right shows the problem more clearly. The hole in the plastic shield is pretty large. While N804570S would probably work for a while, I could see the fastener eventually "falling through" the hole.

I went back to the Internet and it appears that the Ford part number that I really need is N804837S. I ordered a bag of these from China via eBay so it may be the end of the year before I get them.


20210110-07.jpg

The other accomplishment for the day was painting the second Stronghold shelf. I hope to get those shelves back into the cabinet this week sometime.

Scott
 
Last edited:

Paul_VR6

Well-known member
Joined
Dec 27, 2012
Messages
301
Location
Oxford, Pa USA
Many times trapped air is easier to get out if you let it get to temp the first time with the cap off. Once its there shut it down and massage all the hoses, top off and then install the cap. For next time [emoji28]
 
OP
S

sbosecker

Well-known member
Joined
Sep 25, 2012
Messages
3,539
Location
Peachtree City, GA
Many times trapped air is easier to get out if you let it get to temp the first time with the cap off. Once its there shut it down and massage all the hoses, top off and then install the cap. For next time [emoji28]

Paul,

I'll have to check but I'm pretty sure "hose massaging" is not legal in Georgia.

HA!

Thanks for the tip ...for next time!

Best regards,

Scott
 
OP
S

sbosecker

Well-known member
Joined
Sep 25, 2012
Messages
3,539
Location
Peachtree City, GA
Thursday - January 14, 2021

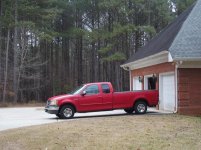
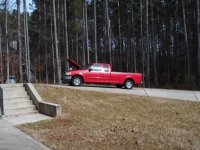
I've been driving my pickup a bit but it has only been a couple of very short trips - a couple of miles away from my house. Last evening, when I returned after one of those drives, I parked the truck outside in front of my house garage with nose pointing a bit downhill.

This morning I was going to take the truck on its first longer drive... about 20 miles away from my house. When I got up and walked up to the driveway to get my newspaper I noticed my truck had a pretty good layer of frost on it. I retrieved the newspaper and then moved the truck, positioning it where the sun would hit it and melt the frost. In its new, sunny position, the truck's nose was still pointing downhill a bit.

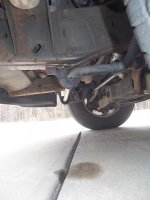
After about 15 minutes I came out again and the truck was now clear of frost but I also noticed a small damp spot on the concrete near where the front end of the truck had been the night before. I walked to the truck and looked underneath. Another very small damp spot was located under the driver's side roughly under the Degas Bottle (coolant reservoir). I got down on all fours and looked up above the area where the damp spot was. I saw a bright green droplet on the driver's side sway bar bushing.

Well shoot...


20210114-01.jpg

I drove the truck through the east door of the long bay and over the "Tornado Shelter".


20210114-02.jpg 20210114-03.jpg

I got under the truck and I saw some coolant around the bushing but nowhere else. I went back topside and examined everything I could visually. I also felt along the bottom of all the hoses above the area I found the droplets of coolant.

I found no evidence of coolant leaking anywhere.

I wiped the area around the bushing and left the truck to sit for most of the afternoon. I came back a few hours later and didn't see any "new" coolant droplets and I saw no evidence of any leaking.

So for several days the truck hasn't leaked and yet last night I found some small damp spots on the concrete. What was different?

Last night I parked the truck with its snout pointed downhill. When I was burping the truck's coolant system a few days ago I had an incident where she cleared her throat and some coolant come out the top of the Degas Bottle and spilled into the truck's engine compartment. This would be just above the bushing that now had coolant on it.

I think that the throat clearing spill had pretty much been cleaned up and whatever else was going to drip down had done so a few days ago.

Last night though, I parked the truck on a hill, nose down, for the first time. I'm hoping a teaspoon or less of coolant was trapped somewhere in the frame or in the bushing hardware and the different orientation of the parked truck allowed that trapped coolant to slowly seep out.

I've just come in from parking the truck in the same spot it was last night so it's pointing downhill again. We'll see if there's anything visible on the concrete tomorrow morning. Again, the truck spent several hours straight & level in the LBG today and I didn't see any leaks.

Scott
 
Last edited:
OP
S

sbosecker

Well-known member
Joined
Sep 25, 2012
Messages
3,539
Location
Peachtree City, GA
Friday - January 15, 2021


20210115-01.jpg

Here's how the truck was parked last night - same as the night before.


20210115-02.jpg 20210115-03.jpg

Again this morning there was a damp spot located in the same place as yesterday morning.

Again I see no evidence of a leak in the engine compartment.

I took the truck on it's first longer trip today. About 40 miles round trip, most of it at 55 mph with a temperature of about 55 degrees. The Temperature Gauge remained in the mid-range of the gauge the entire time.

I also found a nearby place to recycle my old antifreeze today. I hadn't had any luck when I checked on-line. Today I stopped by the Quick Oil-Change Shop I have been recycling my used oil at for the past 20+ years and they took the used antifreeze.


20210115-04.jpg

This evening I have parked the truck, nose up, on the half-circle ramp on the east side of the LBG. We'll see if there's a antifreeze damp spot tomorrow morning.

I'm thinking that dog leg in the frame (picture number 2 above) has some spilled antifreeze trapped inside it that can only seep out when the truck's nose is down somewhat. I don't think there will be a damp spot on the concrete when the sun comes up tomorrow but we'll see.

Scott
 

Bob Heine

ALLIANCE MEMBER
Joined
Oct 24, 2009
Messages
10,709
Location
Boca Raton, Florida
Scott, I have to thank you for reminding me there's a tool I don't have, may never need but is "better to have and not need than to need and not have."
attachment.php
 

Attachments

  • Hose Clamp Pliers.jpg
    Hose Clamp Pliers.jpg
    128 KB · Views: 233
OP
S

sbosecker

Well-known member
Joined
Sep 25, 2012
Messages
3,539
Location
Peachtree City, GA
Scott, I have to thank you for reminding me there's a tool I don't have, may never need but is "better to have and not need than to need and not have."

Bob,

I did find this style of Hose Clamp Tool to be very useful but...

...there's a reason when one Google's "Hose Clamp Tool" several different styles are presented. I think a professional mechanic could make a case for owning many of them as each of them probably solves a particular hose clamp problem.

Automotive hose clamps may well be the work of a dark, mischievous spirit. HA!

I think you'll be happy with your purchase!

Best regards,

Scott
 
To avoid these ads, REGISTER NOW!
OP
S

sbosecker

Well-known member
Joined
Sep 25, 2012
Messages
3,539
Location
Peachtree City, GA
Saturday - January 16, 2021

The pickup sat on the ramp all night with its snout pointing above the horizon. No antifreeze on the concrete this morning.

Early afternoon I moved the truck back to in front of the garage, nose down, to see what happens tonight. However, an hour or so, I checked to see if any antifreeze had appeared and none had.

Perhaps the teaspoon of trapped antifreeze has all seeped out or evaporated.


20210116-01.jpg

I thought before I put those painted Stronghold shelves back into the cabinet I should try to deal with the corrosion on the vertical piece.


20210116-02.jpg

I wonder what in the world spilled on that shelf and dribbled down like that?


20210116-03.jpg

I knocked the scaly bits off with an angle grinder and a wire wheel.


20210116-04.jpg 20210116-05.jpg

The vertical piece fit in the Blasting Cabinet like it was made for it.


20210116-06.jpg

...and then, as I was cleaning up the rusty areas, I saw this. I guess I need a new nozzle.

Ordered this from TP Tools tonight.


Scott
 
OP
S

sbosecker

Well-known member
Joined
Sep 25, 2012
Messages
3,539
Location
Peachtree City, GA
I always hosed down any antifreeze that spilled on a vehicle’s frame & body to prevent customer come backs.

1949 caddyman,


I may have used this before but it never gets old...

VIDEO

HA!


I appreciate the benefit of your experience! Hosing off the spilled antifreeze makes a ton of sense.

This morning there was no damp spot under the truck. I think between the road trip and letting the truck sit parked nose down the residual antifreeze has worked itself out of the bushing & frame.

Best regards,

Scott
 
OP
S

sbosecker

Well-known member
Joined
Sep 25, 2012
Messages
3,539
Location
Peachtree City, GA
Monday - January 18, 2021

With the new Tie Rod temporarily in place on my Honda 2013 Lawnmower, I thought it best to get it into the shop and see if installing a new Drive Belt REALLY required unfastening one end of each of the Tie Rods. Sometimes the manual has steps that aren't absolutely necessary.


20210118-01.jpg 20210118-02.jpg 20210118-03.jpg

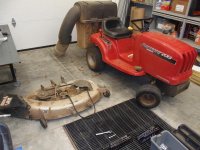
First step was removing the Mower Deck from the Lawnmower.


20210118-04.jpg

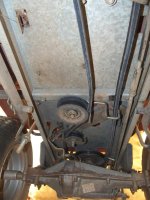
Then getting the Lawnmower over the "Tornado Shelter" to make the inspection - and the procedure itself - easier.


20210118-05.jpg

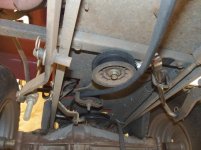
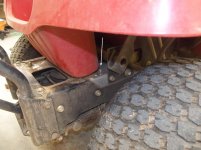
A visual of the situation confirmed that the Tie Rods needed to be dealt with in order to remove the Drive Belt. In this picture I've already removed the temporary fastener from the left Tie Rod.


20210118-06.jpg

Looking aft at the various Pulleys & Belt Guards that need to be loosened to get the Drive Belt free.


20210118-07.jpg

I went top-side and removed the nut from the right side Tie Rod.


Continued in next post...

KEYWORDS: Honda Harmony 2013 Lawn Drive Belt Replacement
 
Last edited:
OP
S

sbosecker

Well-known member
Joined
Sep 25, 2012
Messages
3,539
Location
Peachtree City, GA
Continued...

Time to get to it...


20210118-11.jpg 20210118-12.jpg

This Pulley Assembly is driven directly by the Engine. It powers both the lower Mower Deck Pulley and the upper Drive Belt Pulley.


20210118-13.jpg

The Drive Belt was slowly released from the various Belt Guards and Pulleys.


20210118-14.jpg 20210118-15.jpg

At the rear of the Lawnmower is a cover that, when removed, gives some access to the Transmission Pulley. The white arrow in the second picture points to a Flange Nut that, when loosened, allows yet another Belt Guard to be moved out of the way.

This Flange Nut is deceiving. It looks like there's room to deal with it ...and there is. However, during the reassembly of this procedure I was using a ratcheting Box End wrench and the bolt and nut slid aft a bit as I was tightening it. The act of tightening this Flange Nut will make it want to do that. I didn't notice it had moved when I was tightening it and now the Flange Nut was tight and I couldn't extract the wrench - the red plastic body had trapped it. I had a dickens of a time loosening that Flange Nut - with a ratcheting Box End Wrench trapped on top - but finally I was able to get a open end stubby into position and loosen it. I could then reposition the Belt Guard's Flange Nut and carefully tighten it without it moving aft.


20210118-16.jpg

I now began removing the old Drive Belt.


20210118-17.jpg

With the old Drive Belt removed I could see it was fully depreciated. The black arrow points to a "stretched thin" part of the belt. In general it was so cracked and worn that I'm surprised it hadn't snapped.


Continued in next post...
 
Last edited:
OP
S

sbosecker

Well-known member
Joined
Sep 25, 2012
Messages
3,539
Location
Peachtree City, GA
Continued...


20210118-21.jpg 20210118-22.jpg

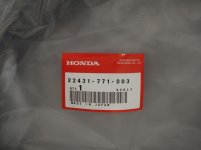
The new Drive Belt is Honda Part 22431-771-003.


20210118-23.jpg

The new Drive Belt is on top and the old, very tired Drive Belt is on the bottom.


20210118-24.jpg 20210118-25.jpg

The installation of the new Drive Belt was, as they say, the inverse of the removal. It is necessary to thread the Drive Belt over the Tie Rods first otherwise there won't be enough slack in the Drive Belt to install it.

It didn't take too long to get the new Drive Belt installed. Once again the "Tornado Shelter's" ability to multi-task made this procedure relatively easy. I can't imagine trying to do this task without having the comfortable access from underneath I had.

I can't imagine the Lone Beech Garage without the "Tornado Shelter".

With the new Drive Belt installed I took the Lawnmower out for a quick test drive. It was almost 10:30 pm and I didn't want to bother the neighbors so it was very quick. The Lawnmower's "power to the ground" had improved dramatically.

Until I realized a month of so ago that the Drive Belt could be shot, I was thinking the Engine or the Transmission might have issues ...and they still might.

HA!

However, the Drive Belt was in such bad shape that replacing it made a huge difference in the Lawnmower's performance. After the test drive I drove the Lawnmower up the Half-Circle Ramp back to the LBG in high gear. Prior to this, with the old Belt still installed, I would have to drop down a couple of gears to climb up the Half-Circle Ramp.

I'll get the Mower Deck cleaned up tomorrow and probably do Pre-Season preventive maintenance on it and the Lawnmower as well.

Scott
 
Last edited:

LutzTD

Well-known member
Joined
Dec 31, 2011
Messages
3,673
Location
Lutz, Florida
Continued...


20210118-21.jpg 20210118-22.jpg

The new Drive Belt is Honda Part 22431-771-003.


20210118-23.jpg

The new Drive Belt is on top and the old, very tired Drive Belt is on the bottom.


20210118-24.jpg 20210118-25.jpg

The installation of the new Drive Belt was, as they say, the inverse of the removal. It is necessary to thread the Drive Belt over the Tie Rods first otherwise there won't be enough slack in the Drive Belt to install it.

It didn't take too long to get the new Drive Belt installed. Once again the "Tornado Shelter's" ability to multi-task made this procedure relatively easy. I can't imagine trying to do this task without having the comfortable access from underneath I had.

I can't imagine the Lone Beech Garage without the "Tornado Shelter".

With the new Drive Belt installed I took the Lawnmower out for a quick test drive. It was almost 10:30 pm and I didn't want to bother the neighbors so it was very quick. The Lawnmower's "power to the ground" had improved dramatically.

Until I realized a month of so ago that the Drive Belt could be shot, I was thinking the Engine or the Transmission might have issues ...and they still might.

HA!

However, the Drive Belt was in such bad shape that replacing it made a huge difference in the Lawnmower's performance. After the test drive I drove the Lawnmower up the Half-Circle Ramp back to the LBG in high gear. Prior to this, with the old Belt still installed, I would have to drop down a couple of gears to climb up the Half-Circle Ramp.

I'll get the Mower Deck cleaned up tomorrow and probably do Pre-Season preventive maintenance on it and the Lawnmower as well.

Scott


I try to never miss an opportunity to install an oversized engine!, but replacing the worn drive belt works too I guess :)
 
OP
S

sbosecker

Well-known member
Joined
Sep 25, 2012
Messages
3,539
Location
Peachtree City, GA
I try to never miss an opportunity to install an oversized engine!, but replacing the worn drive belt works too I guess :)

LutzTD,

HA!

I don't think an oversized engine is in the future of this Lawnmower. The new Drive Belt is going to have to do.

Best regards,

Scott
 
OP
S

sbosecker

Well-known member
Joined
Sep 25, 2012
Messages
3,539
Location
Peachtree City, GA
Thursday - January 21, 2021


Yesterday I positioned the Honda 2013 Lawnmower abeam the opening in the grates I had over the "Tornado Shelter".


20210119-01.jpg

I had let the Lawnmower drain oil overnight. Today I installed the Oil Pan Drain Bolt and added a quart of new oil.


20210121-02.jpg

When I had attempted to torque the Drive Pulley Assembly Bolt a couple of days ago I hadn't noticed the two flats on the bottom of the assembly. I did notice these flats later when I was looking at the pictures I had taken that day. Seeing those I realized that I could apply the required 36 Ft-lbs specified if I used those flats.

It's very nice to see engineering that considers how a machine will be maintained.

Now that I've praised Honda I feel I can freely offer some criticism...

I REALLY like this lawnmower! It's perfect for my needs ...but it is the weirdest thing to work on as one never knows if one should reach for a metric or imperial wrench to loosen a fastener. I can see no pattern to which system is used for what purpose. The different systems are just shot-gunned into the machine willy-nilly.


20210121-03.jpg

Changing the oil in the Lawnmower was certainly easier with the Mower Deck removed from the Lawnmower ...and so is maintenance on the blades.


20210121-04.jpg

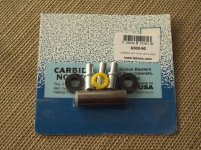
The Carbide Nozzle kit I had ordered earlier in the week for the Blasting Cabinet arrived a day early.


20210121-05.jpg 20210121-06.jpg

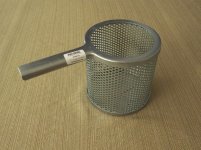
The other item I ordered was a Small Parts Basket. I was surprised and pleased to see my initials drilled into the bottom of the basket. "What a nice little touch", I thought.

...and then I realized that SB probably stood for Skat Blast, the name of the company that manufactures the Blasting Cabinet I have.

HA!


20210121-07.jpg

I installed the new Nozzle .


Continued in next post...
 
Last edited:
OP
S

sbosecker

Well-known member
Joined
Sep 25, 2012
Messages
3,539
Location
Peachtree City, GA
Continued...


20210121-11.jpg

This allowed me to clean up the last of the rust on the vertical section of the Stronghold Cabinet.

We've got rain forecast for the next couple of days so it may be a while before I can take this outside and paint it. I'll need to hit all the existing paint with some sandpaper first to give it some tooth for the new paint.


Scott
 
OP
S

sbosecker

Well-known member
Joined
Sep 25, 2012
Messages
3,539
Location
Peachtree City, GA
Friday - January 22, 2021

The day started out cool, damp & gray but around 3 pm the sun came out.

This was an opportunity to paint the Stronghold Cabinet's interior panel that I had finished media blasting last night.


20210122-01.jpg

I gave it a good wipe down with acetone and then placed it on a prepared spot outside.


20210122-02.jpg 20210122-03.jpg

I straddled the panel and, rattle can of primer in hand, worked my way from the far end to the near end.

Shook up the can of Dark Machinery Gray and did the same procedure.


20210122-04.jpg

Managed to get this rather unwieldly, freshly painted, thing onto a cart and rolled it back into the LBG to dry.

I should be able to get this back into the Stronghold Cabinet this weekend. I have all the stuff that was in the cabinet sitting in the garage bay I use for the F150. Getting this admittedly "band aid" fix done will allow me to put everything back into the cabinet and I'll be able to get my pickup back in the garage instead of sitting outside.

Scott
 

shortykorte

Well-known member
Joined
Sep 1, 2014
Messages
8,039
Location
Tallahassee, Fl
On the fasteners, maybe putting nail polish on the metric would help. Or drill shallow hole or notch it to identify it.


Sent from my iPhone using Garage Journal
 
OP
S

sbosecker

Well-known member
Joined
Sep 25, 2012
Messages
3,539
Location
Peachtree City, GA
On the fasteners, maybe putting nail polish on the metric would help. Or drill shallow hole or notch it to identify it.

Shorty Korte,

I like the marking with nail polish idea... I'll just have to wait until my spouse leaves for work and then "borrow" her favorite color.

What could go wrong with that plan?

HA!

Seriously, I have some Red Testors Model Paint that would work well for this. Thanks for the very nice idea.


Best regards,

Scott
 

drivesitfar

Well-known member
Joined
Oct 23, 2013
Messages
36,076
Location
Pacific Northwest
another option to painting outside and maybe it's windy is to make some panels to set up inside your huge garage. make frames with 2x2's or even scrap lumber if you have some and stretch plastic over the frame so you can make a 3 sided booth sort of. that way you won't get spray paint all over your garage and on the piece you are painting.

on smaller projects I even use an old fridge or appliance cardboard box as a quick paint booth. after painting in the wind and having more paint blow away to GOD knows where instead of on the project I found out that others use these methods.

nice work on your BAND AID fix and it should last for years.

also I bet your bride maybe has an old bottle of nail polish or a color she doesn't like as well that you might ask to borrow?
 
OP
S

sbosecker

Well-known member
Joined
Sep 25, 2012
Messages
3,539
Location
Peachtree City, GA
another option to painting outside and maybe it's windy is to make some panels to set up inside your huge garage. make frames with 2x2's or even scrap lumber if you have some and stretch plastic over the frame so you can make a 3 sided booth sort of. that way you won't get spray paint all over your garage and on the piece you are painting.

on smaller projects I even use an old fridge or appliance cardboard box as a quick paint booth. after painting in the wind and having more paint blow away to GOD knows where instead of on the project I found out that others use these methods.

nice work on your BAND AID fix and it should last for years.

also I bet your bride maybe has an old bottle of nail polish or a color she doesn't like as well that you might ask to borrow?


DriveItFar,

All the painting ideas are good ones! I'll have to set up some sort of "collapsible" paint booth at some point.

I didn't get to the Stronghold Cabinet this weekend like I had planned but I should get the vertical piece back inside early this week.

There's something about the start of the year that seems to "disturb the force". HA! I guess a lot of stuff that causes paperwork gets adjusted on a calendar year basis and that's some of it.

Also, my landline ...does anyone remember landlines?... went down Saturday morning. We are fortunate to have neighbors even older than ourselves on either side of us so that improves the odds that they had landlines also. They do but they weren't having any problems: Troubleshooting ensued. AT&T showed up this morning and, apparently, someone had bumped a wire in one of their buildings and that wire served our house.

What are the odds.

...as to asking my spouse for an out of favor bottle of nail polish. I was taught in the Navy that it is usually easier to beg for forgiveness than to ask for permission.

You know... that policy really didn't work that well in the Navy either.

HA!

Best regards,

Scott
 

Jayman17

Well-known member
Joined
Feb 6, 2017
Messages
3,820
Location
Seattle, Wa
Scott, any updates? It's been awhile since you posted, thought I would check in.
I hope all is well at your place.

Jay
 
OP
S

sbosecker

Well-known member
Joined
Sep 25, 2012
Messages
3,539
Location
Peachtree City, GA
Scott, any updates? It's been awhile since you posted, thought I would check in.
I hope all is well at your place.

Jay

Jay,

Thank you so much for checking on me - I hope all is well with you!

All is fine here ...well, normal anyway. For me February always seems to be a month that crowds out shop time.

There are the usual suspects ...with taxes being at the top of that list.

I've got an anniversary and one of my children's birthday is in February. Valentines Day is in February. Those events soak up a lot of free time. HA!

This year February is even worse as I'm leaving my position as CEO of a very small non-profit corporation and that is requiring some hands-on interactions with my replacement. Of course that would have left a vacuum - that nature abhors - so it was immediately filled with service on my church council. I've been assigned the task of monitoring our communications efforts and I'm trying to learn things about Google Ads and Social Media that I had no idea existed.

I'm drowning... HA!

Then there's the last item that's been soaking up quite a bit of free time.

Last November there was a little national election that I tried to participate in. Here in Georgia they were using many different ways to vote: Normal Election Day In-Person Voting; Early In-Person Voting; Mailed-In Absentee Ballots & Absentee Ballots dropped into (what else) Drop Boxes.

My wife and I decided to use the Drop Box as it would avoid breathing other peoples COVID laden exhalations in the voting room and it seemed more reliable than using the Post Office.

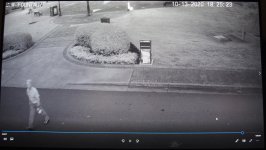
On October 13th I placed our 2 absentee ballots (my wife's and mine) into a Drop Box about 100 yards away from the place those ballots would be tabulated.

I learned in late November that one could look at a web site and see if one's absentee ballot had been processed. To my complete surprise when I checked on our ballots they had not been received and thus not counted.

I've spent a LOT of time since then trying to find out what happened. This culminated in me making an Open Records request for the video taken by the security camera that was monitoring the Drop Box i placed the ballots in.

I received that recorded material last week.


2020 10 13 - 1925-23.jpg

So that's me walking away from the Drop Box on October 13th. That single frame is the only record of my interaction at the Drop Box. I walked out to the box; putzed around for 10 or 15 seconds reading the written directions on the box; placed the ballots in the box; looked around for the Security Camera and saw that; Returned the way I came. The only reason I got recorded at all is the system takes a single frame when it doesn't detect any motion for 60 seconds.

I'm still going through the recorded material but I think the only thing I'm going to determine is that the County needs to upgrade its security system. HA!

I am picking out representative clips to show the city fathers the multitude of problems this particular camera has. Then I'm going to request an audience and present my findings. I'm pretty sure they have no idea how goofed up this security camera is. Without closely examining the recorded material, it appears to be functioning fine. When one actually examines the video clips one learns that not a lot of useful information is being recorded.

It is pretty good at recording cars as they drive by. I don't think that was the primary motivation for the security camera.

I HAVE had some limited time in the shop that I hadn't taken the time to mention here. I'll try to do a quick update soon.

Thanks again for stopping by.

Best regards,

Scott
 
Last edited:

drivesitfar

Well-known member
Joined
Oct 23, 2013
Messages
36,076
Location
Pacific Northwest
VERY INTERESTING INDEED!!

glad to have you back and maybe if enough of us try to fix this broken system maybe something positive will happen.

good luck too!!
 
OP
S

sbosecker

Well-known member
Joined
Sep 25, 2012
Messages
3,539
Location
Peachtree City, GA
Thursday - February 18, 2021


As I mentioned in my post to Jay, it's been slow in the shop for the past few weeks...

...although that's not to say nothing has happened.

Right at the end of January my spouse let me know that the Microwave was as dead as a doornail.


20210129-01.jpg

It seems like only 11 months ago I was doing this very same thing. OK, maybe not THIS very same thing but something pretty close. True, I've got completely different symptoms this time.


20210130-02.jpg

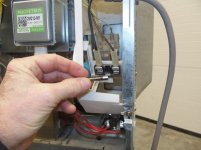
No doubt this blown fuse is the cause of the nonresponsive control panel but, according to the Service Manual, the fuse is a symptom not the disease.


20210130-03.jpg

The troubleshooting table starts with testing the two switches that have black arrows pointing at them. If either of them test bad, they both should be replaced.

The lower of the two failed its test and a lengthy amount of time was spent on the Internet trying to locate part numbers that have mutated several times since 1992. Eventually I did source the parts and the microwave is now back in the kitchen cabinets boiling water in the morning for coffee and tea.


20210208-04.jpg

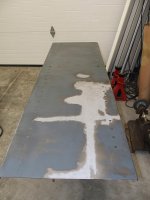
With only small chunks of time available to spend in the shop, I tried to find a project that wasn't that important and could be attacked in small bites. The Dock Board fit the bill perfectly.

I had previously done a welding repair on this item but I wanted to clean it up and then it would be finished. I needed to remove the various bits that were fastened to the Aluminum Plate and I was going to start with these "feet". However, the exposed threads of the fasteners had been damaged and required some cleaning up with a thread-chasing kit. This I did and I could then remove the fasteners without too much drama.


20210208-05.jpg 20210208-06.jpg

The "feet" were cleaned up in the Blasting Cabinet and then primed & painted.


20210210-07.jpg

A few days later I had time to continue the work and I removed the structural "curbs" from the Aluminum Plate.


Continued in next post...
 
Last edited:
To avoid these ads, REGISTER NOW!
Top Bottom