To avoid these ads, REGISTER NOW!

Above 1200 Sq/FT The Lone Beech Garage (60x46x16)

Wokspaces above 1200 squarefeet.
OP
S

sbosecker

Well-known member
Joined
Sep 25, 2012
Messages
3,539
Location
Peachtree City, GA
Re: The Lone Beech Garage Build Thread (60x46)

To all who have offered their congratulations on the delivery...

Thank you!

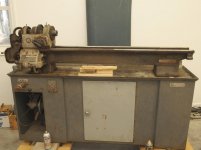
It is great to have that behind me if for no other reason than I was putting pretty much everything else on hold to be available for whatever the shippers threw at me. That coupled with the Rockwell Metal Lathe move had brought most other projects to a standstill for quite a few days.

Now I can get on with other things.

I did have one last panic attack last night though.

I pulled the shrink wrap off the Mill's table and opened the "tool box". The tool box contained a few handles, wrenches, screwdrivers and the Owner's Manual.

I brought the Owner's Manual into the house and was leafing through it. One of the procedures I was looking for was how to raise the head to its upright position. It appears that the procedure is identical to a Bridgeport Knee Mill.

Tucked into the Owner's Manual was an Inspection Sheet.


JET Mill Inspection Sheet.jpg

I pulled it out and examined it ...and then I started cussing as I made best possible speed from the house to the LBG.

Note the checked box in the upper table and follow the information all the way to the right. The mill I ordered was supposed to be single phase not 3-phase.

ARRGGHH!!!

When I got to the mill I had to apply my Inverted Motor Plate reading skills to find the electrical information. To my relief, the plate indicated a single phase motor.

Returning to the house, I grabbed a beer and sat down to look at the Inspection Sheet again. All I can figure is that when this form was printed the Variable Speed version of this mill was a 3-phase motor only. Note the "-1" written in after the "JTM-4VS" to indicate a different variant of this model. It would have been nice if all the motor information had been stricken out as well. I don't think any of it is correct.

Obviously not a big deal but I was startled last night.

Ha!


Best regards,

Scott
 
To avoid these ads, REGISTER NOW!

1949 caddyman

Well-known member
Joined
Oct 5, 2010
Messages
1,778
Location
Arizona
Re: The Lone Beech Garage Build Thread (60x46)

Yea, I can see how that checked box would get your attention. Glad it worked out OK.
 

Motoman1100

Well-known member
Joined
Oct 2, 2014
Messages
443
Location
GA
Re: The Lone Beech Garage Build Thread (60x46)

Motoman1100,

Allis-Chalmers did not make a Front-End Loader for the Model G.

However, there was an aftermarket model produced. It is quite a rare item.


Maquoketa Model G Front End Loader .jpg

I think it was pretty slow and didn't have a lot of lifting power.

I may have something better.
My neighbor just took delivery of a small John Deere with a front-end loader!
He drove it over for me to look at this afternoon.


Best regards,

Scott

LOL...Yes it's true...you don't need one..you just need a friend with one!
 

drivesitfar

Well-known member
Joined
Oct 23, 2013
Messages
36,078
Location
Pacific Northwest
Re: The Lone Beech Garage Build Thread (60x46)

SB: as nice as your garage is i almost thought you'd have 3 phase power or is it as expensive to put in down in Georgia as it is here? was it even available and what was the cost or do you have it already?

glad to hear your mill was single phase and looking forward to seeing you show us how to use it and what sort of things you can make or fix with it.

between the lathe and the mill your shop time should be busy getting those two machines running so best of luck.

cheers
 
OP
S

sbosecker

Well-known member
Joined
Sep 25, 2012
Messages
3,539
Location
Peachtree City, GA
Re: The Lone Beech Garage Build Thread (60x46)

SB: as nice as your garage is i almost thought you'd have 3 phase power or is it as expensive to put in down in Georgia as it is here? was it even available and what was the cost or do you have it already?

glad to hear your mill was single phase and looking forward to seeing you show us how to use it and what sort of things you can make or fix with it.

between the lathe and the mill your shop time should be busy getting those two machines running so best of luck.

cheers


DrivesItFar,

To be honest it never occurred to me to ask the local utility about 3-phase power. I just assumed it would be cost-prohibitive.

Regarding the latest machinery purchases and other projects...
Yes, I have plenty to do. That's a good thing I think! Ha!

Best regards,

Scott
 
OP
S

sbosecker

Well-known member
Joined
Sep 25, 2012
Messages
3,539
Location
Peachtree City, GA
Re: The Lone Beech Garage Build Thread (60x46)

Tuesday - November 7, 2017


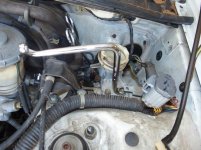
Back in Post 2140 & Post 2146 I noted that my wife's 1997 Honda del Sol's clutch master cylinder had failed and that I had received a new one. Yesterday & today I did the repair.


20171107-01.jpg

Since I was going to be under the dash in close proximity to quite a few bits of electrical "stuff", I elected to disconnect the battery.


20171107-02.jpg

While not completely necessary, I removed this dash cover to give me a little more light on the pedals and a bit more maneuvering room.


20171107-03.jpg

I removed an electrical connection from its bracket near the Clutch Master Cylinder's Reservoir to give better access to the bolts holding the Reservoir Bracket.


20171107-04.jpg

I got a 10mm Flare Wrench into position for removing the connection between the Clutch Master Cylinder and the Clutch Hydraulic Line.


20171107-05.jpg

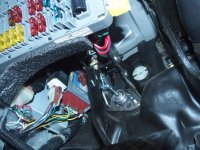
Back under the dash, here's what I was dealing with. The red arrow goes to a pin with a cotter pin that connects the Master Cylinder to the Clutch Pedal. The two white arrows point to the two flange nuts that hold the Master Cylinder to the firewall.

The one on the left is almost inaccessible due to the electronics in the vicinity. I spent a lot of time thinking about how I was going to deal with that son of a gun.


20171107-06.jpg 20171107-07.jpg

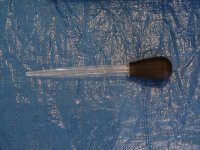
A turkey baster was used to remove the Brake Fluid from the Reservoir and a Hemostat was used to pinch off the line from the Reservoir to the Master Cylinder.


Continued in next post...

KEY WORDS: 1997 Honda del Sol Clutch Master Cylinder Replacement
 
Last edited:
OP
S

sbosecker

Well-known member
Joined
Sep 25, 2012
Messages
3,539
Location
Peachtree City, GA
Re: The Lone Beech Garage Build Thread (60x46)

Continued....


20171107-11.jpg

The Reservoir Bracket Bolts were removed to give better access to the Master Cylinder Hydraulic Line Connection. Next the Hydraulic Line Connection was released. The Flare Nut Wrench was really only for cracking the connection loose. After that was accomplished a stubby wrench - due to clearance issues - was the most effective way to disconnect the connection completely.


20171107-12.jpg

With the Hydraulic Line Connection now removed from the Master Cylinder I returned to under the dash board. I removed the Cotter Pin and the Clutch Pin freeing the Master Cylinder from the Clutch Pedal.


20171107-13.jpg 20171107-14.jpg

I used a 1/4-inch drive 10mm deep well socket with a flex connection and an extension to access the difficult left nut. I used a rubber band wrapped around the flex connection to keep it from flopping so much. This worked pretty well.

I was working almost blind but I managed to get the deep well socket on the flange nut and, with a 1/4-inch drive ratchet wrench, break the nut free.


20171107-15.jpg

With the difficult nut removed, the remaining work to remove the Master Cylinder was a piece of cake.


20171107-16.jpg 20171107-17.jpg

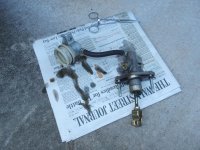
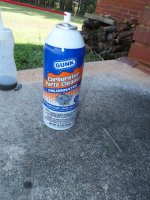
The bottom of the Reservoir was pretty ugly. I used some Carburetor Cleaner on it and set the Reservoir-Supply Tube assembly aside to dry.


Continued in next post...
 
Last edited:
OP
S

sbosecker

Well-known member
Joined
Sep 25, 2012
Messages
3,539
Location
Peachtree City, GA
Re: The Lone Beech Garage Build Thread (60x46)

Continued...


20171107-21.jpg

That's much better!


20171107-22.jpg

This gasket goes between the Master Cylinder and the Firewall on the engine side of the Firewall. I reused it from the old Master Cylinder.


20171107-23.jpg

I put the new Master Cylinder into position and fastened the easy nut.
Now comes the fun part; getting the flange nut onto the difficult stud. I used a magnet on a telescoping handle for this task.

This approach actually worked pretty well. The magnet was attracted to any steel in the area so approaching the stud had to be done with care. It took a few attempts and it didn't help that I hadn't been in a position similar to this in an automobile since high school. Ha!

Eventually I got the flange nut to line up with the stud and I turned the magnet on its axis. The flange nut grabbed enough thread to allow me to withdraw the magnet and I hand tightened the flange nut.


20171107-24.jpg

I now used the ratchet wrench set-up I had used to remove the flange nut to tighten it. Again a bit of a chore to get the socket on the nut but, once I did, the job was done in short order.

I attached the Clutch Pin and inserted a Cotter Pin and I returned to the land of the upright.


20171107-25.jpg 20171107-26.jpg

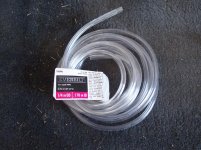
I purchased a Hose Barb that would fit the threads of the clutch Master Cylinder output and several feet of clear vinyl tubing. If needed, I used a Heat Gun to soften the tubing to fit over a larger diameter.


20171107-27.jpg

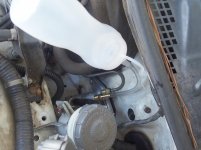
I purchased a plastic "Mustard Dispenser" from Walmart. I assembled these components to bleed the Master Cylinder.


Continued in next post...
 
Last edited:
OP
S

sbosecker

Well-known member
Joined
Sep 25, 2012
Messages
3,539
Location
Peachtree City, GA
Re: The Lone Beech Garage Build Thread (60x46)

Continued...


20171107-31.jpg

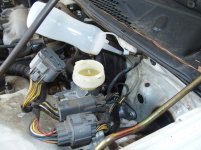
I filled the Reservoir with Brake Fluid and punched a small hole in the plastic container to allow the container to "breathe" as the Brake Fluid was pumped into the container. I made sure to keep the tubing as vertical as possible to allow air bubbles to drift up and out of the fluid. I pumped the Clutch Pedal a few times - replenishing the Reservoir as needed.

With the Master Cylinder "bled", I used the hemostat to pinch off the tubing and removed the barb from the Master Cylinder. I reattached the Hydraulic Line to the Master Cylinder as quickly as possible. A rag under this operation caught any fluid that spilled. I had also placed a drip pan on the garage floor under the car.


20171107-32.jpg

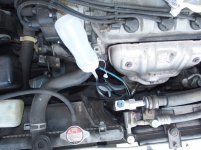
Now I moved to the Bleeder Valve located near the Clutch Slave Cylinder. I set up a similar "Mustard Dispenser" with a longer piece of tubing.


20171107-33.jpg 20171107-34.jpg

At this point my son returned from work and took a couple of pictures of me opening the bleeder valve and then moving to the clutch pedal to push it to the floor. I would then return to the bleeder valve, close it and then return to the clutch pedal and pull it towards me.

This procedure was repeated over and over until the bubbles had stopped and the fluid color changed from opaque olive drab to clear amber. Note the attractive liquid in the Mustard Dispenser. I added Brake Fluid to the Reservoir as needed.

I closed the Bleeder Valve and pushed down on the clutch pedal with my foot. It felt correct.

I buttoned up all the under dash stuff and reattached the battery. I started the car, pushed down on the clutch and attempted to put the car in gear. It did so without issue and I drove out of the garage towards the road. I got out on the street and thoroughly ran through all the gears.

The clutch operated perfectly and shifting the gears was a normal operation.

Despite the fact that this is the first time I've attempted this procedure on any vehicle, I think the del Sol is ready to return to service!


Scott
 
Last edited:

Ole Slewfoot

Well-known member
Joined
Feb 22, 2016
Messages
5,098
Location
Freedom, CA
Re: The Lone Beech Garage Build Thread (60x46)

Getting the flange nut onto the difficult stud

Sometimes you can use a shred of paper or nitrile glove at the side of the nut then shoved into the socket to retain it while snaking into place.

I've also resorted to taping the nut to my fingertip before.
 

Maxton

New member
Joined
Mar 8, 2017
Messages
1
Re: The Lone Beech Garage Build Thread (60x46)

I’ve been reading through all 200+ pages during the last weeks and I must say I am mighty impressed and a tad jealous maybe.

I’ve just started planning for a bigger garage in our next house. In our current single garage I can barely squeeze in my Golf GTE with folded mirrors. The suv is permanently left out in the Norwegian cold.

Might have to steal an idea or two for my own planning:)


Sent from my iPhone using Tapatalk
 
OP
S

sbosecker

Well-known member
Joined
Sep 25, 2012
Messages
3,539
Location
Peachtree City, GA
Re: The Lone Beech Garage Build Thread (60x46)

Getting the flange nut onto the difficult stud

Sometimes you can use a shred of paper or nitrile glove at the side of the nut then shoved into the socket to retain it while snaking into place.

I've also resorted to taping the nut to my fingertip before.

Ole Slewfoot,

Thanks for the tips! That nut was the most daunting item during the planning phase of this project.

I was pretty sure I could get it off but getting it back on... Ha!

Best regards,

Scott
 
OP
S

sbosecker

Well-known member
Joined
Sep 25, 2012
Messages
3,539
Location
Peachtree City, GA
Re: The Lone Beech Garage Build Thread (60x46)

I’ve been reading through all 200+ pages during the last weeks and I must say I am mighty impressed and a tad jealous maybe.

I’ve just started planning for a bigger garage in our next house. In our current single garage I can barely squeeze in my Golf GTE with folded mirrors. The suv is permanently left out in the Norwegian cold.

Might have to steal an idea or two for my own planning:)


Maston,

I am honored to be the recipient of your first post and I admire your stamina!

Ha!

Good luck in your "bigger garage" project! However - as we all know - no matter how big they are, they are never big enough.

Best regards,

Scott
 

drivesitfar

Well-known member
Joined
Oct 23, 2013
Messages
36,078
Location
Pacific Northwest
Re: The Lone Beech Garage Build Thread (60x46)

SB: i know it's more of a love to know how to fix something than maybe just saving money on doing your own service so thanks for showing us all the pictures and telling us the details for some of us that might want to do the same some day.

i might have mentioned it before, but fixing my own cars stopped once i needed an expensive computer and a new set of tools just to work on mine. Not to mention the tricks like taping nuts to your fingers just to put them back on. Besides the costs of new tools i've usually had friends or good mechanics i trusted to work on mine. saying that i'm learning and i just changed my brakes on a friend's lift a few months ago and going to do more as i have more time and learn to.

keep up the good work and i'm sort of excited to see how you like using the Jet mill and what you actually can make on it.

cheers
 
OP
S

sbosecker

Well-known member
Joined
Sep 25, 2012
Messages
3,539
Location
Peachtree City, GA
Re: The Lone Beech Garage Build Thread (60x46)

SB: i know it's more of a love to know how to fix something than maybe just saving money on doing your own service so thanks for showing us all the pictures and telling us the details for some of us that might want to do the same some day.

i might have mentioned it before, but fixing my own cars stopped once i needed an expensive computer and a new set of tools just to work on mine. Not to mention the tricks like taping nuts to your fingers just to put them back on. Besides the costs of new tools i've usually had friends or good mechanics i trusted to work on mine. saying that i'm learning and i just changed my brakes on a friend's lift a few months ago and going to do more as i have more time and learn to.

keep up the good work and i'm sort of excited to see how you like using the Jet mill and what you actually can make on it.

cheers

DrivesItFar,

Yes I enjoy "fixing stuff" and I appreciate folks who have documented a repair or a procedure when I'm looking for information. I hope the information I post will be of use to someone in the future.

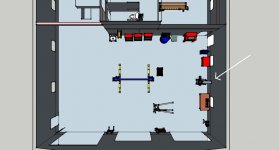
The next issue for the JET milling machine will be to determine the best location for it in the LBG. My knee jerk is that it belongs close to the wall between the two windows on the south side of the metal/auto shop area.


JET Milling Machine Location.jpg

The White Arrow indicates where I was thinking. Not having used a milling machine I'm ignorant of the potential "landmines" of a poor placement decision.


Best regards,

Scott
 
OP
S

sbosecker

Well-known member
Joined
Sep 25, 2012
Messages
3,539
Location
Peachtree City, GA
Re: The Lone Beech Garage Build Thread (60x46)

Friday - November 10, 2017


20171108-01.jpg

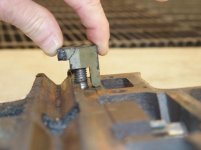
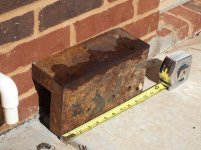
The day after we got the Rockwell 25-100 11-inch Metal Lathe upright I noticed this item sitting on the cabinet underneath the carriage of the lathe. It is about 3/4-inch wide and 1/2-inch tall.

What concerned me the most was the threading on the part. These lathes are orphans - their manufacturer no longer supporting them in any way. Depending on what it was or where in came from on my machine, it might be unobtainium.

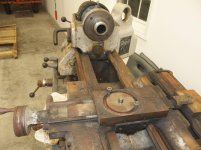
For the past couple of days I've been removing components from the lathe to help meet a couple of goals:

1. Solve the Mystery Piece question.
2. Determine if this lathe can eventually be turned into a useful machine or if it should become a donor for other machines.


20171108-02.jpg 20171108-03.jpg

I removed the Compound.


20171108-04.jpg 20171109-05.jpg 20171109-06.jpg

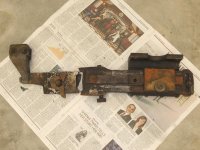
Next was the removal of the damaged Taper Attachment.


20171109-07.jpg

I laid the shattered Taper Attachment on the floor arranged somewhat as it would be if it were still a useable item.


Continued in next post...
 
OP
S

sbosecker

Well-known member
Joined
Sep 25, 2012
Messages
3,539
Location
Peachtree City, GA
Re: The Lone Beech Garage Build Thread (60x46)

Continued...


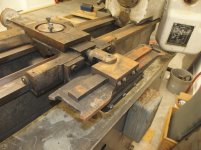
Next I needed to removed the Saddle.


20171109-11.jpg

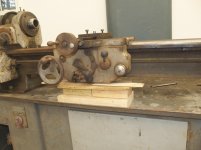
I put some cribbing under the Apron to support it after the Saddle was removed. I didn't want the Apron to be hanging on the Lead Screw.


20171109-12.jpg 20171109-13.jpg

There were 3 socket head machine screws on the front of the machine and a couple of hex head bolts (looks like there should be 4) under the ways on the rear of the machine.


20171109-14.jpg

I removed the two fasteners on the rear of the machine...


20171109-15.jpg

...and the three on the front.


20171109-16.jpg

I lifted the Saddle off the ways and set it upside down on the floor.


20171109-17.jpg

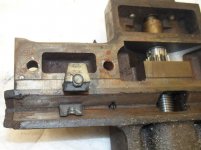
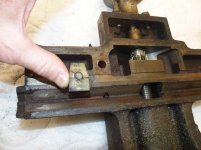
At this point I noticed something (White Arrow).


Continued in next post...
 
Last edited:
OP
S

sbosecker

Well-known member
Joined
Sep 25, 2012
Messages
3,539
Location
Peachtree City, GA
Re: The Lone Beech Garage Build Thread (60x46)

Continued...


20171109-21.jpg 20171109-22.jpg 20171109-23.jpg

The "Mystery Part" puzzle had been solved!
Even better, this looks like something that can be machined from scratch without too much of an issue. That's a good thing because there should be a second one on the opposite end of the Saddle that is AWOL.


20171110-24.jpg 20171110-25.jpg 20171110-26.jpg

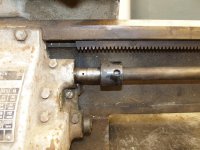
Now it was time to remove Lead Screw so I can remove the Apron. There is supposed to be a set screw in the collar at the headstock end of the Lead Screw. It was missing but the Lead Screw would still turn if I moved the gears in the headstock. I moved the collar and found a pin in the Lead Screw. I used a 3/16-inch punch to drive out the pin.


20171110-27.jpg

I made sure the Lead Screw was supported in a couple of places and then I removed the two bolts holding the bracket at the tailstock end of the lathe.


Continued in next post...
 
Last edited:
OP
S

sbosecker

Well-known member
Joined
Sep 25, 2012
Messages
3,539
Location
Peachtree City, GA
Re: The Lone Beech Garage Build Thread (60x46)

Continued...


20171110-31.jpg 20171110-32.jpg

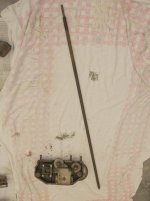
I removed the Lead Screw and then the Apron. I sat both of them on the floor.


20171110-33.jpg 20171110-34.jpg 20171110-35.jpg

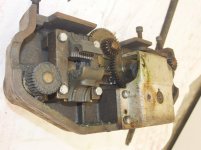
An examination of the innards of the Apron followed. I think everything looked OK. The one thing that didn't seem to be working were the Half-Nuts. When I operated the Half-Nuts Lever on the Apron, the Half-Nuts did not move. I don't know if that's correct or not.


20171110-36.jpg

With all the mechanisms off the Lathe, I had unfettered access to the Ways.


20171110-37.jpg

I spent some time cleaning them. Still more to do but they are in much better shape now.


Scott
 
Last edited:

jriltex

Member
Joined
Jan 30, 2010
Messages
20
Location
Cross Roads, TX
Re: The Lone Beech Garage Build Thread (60x46)

For those broken parts I had a great neighbor who happen to be a sculptor and dealt in bronze and had his own foundry at home. He was able to reproduce many small, and a few large, parts for me that were no longer made by using the broken pieces and making wax models of them, and using lost wax process and bronze, he could recreate many parts. You may have someone in your area who does the same. He is now in northern NC. Just a thought. Good luck!
 
To avoid these ads, REGISTER NOW!
OP
S

sbosecker

Well-known member
Joined
Sep 25, 2012
Messages
3,539
Location
Peachtree City, GA
Re: The Lone Beech Garage Build Thread (60x46)

For those broken parts I had a great neighbor who happen to be a sculptor and dealt in bronze and had his own foundry at home. He was able to reproduce many small, and a few large, parts for me that were no longer made by using the broken pieces and making wax models of them, and using lost wax process and bronze, he could recreate many parts. You may have someone in your area who does the same. He is now in northern NC. Just a thought. Good luck!

jritex,

I have thought about that sort of solution for certain tasks...

It is my impression that cast pieces "shrink" as they cool with the amount of shrinkage being a function of the metal that was used.

What was your experience with the parts he made for you?

Best regards,

Scott
 
OP
S

sbosecker

Well-known member
Joined
Sep 25, 2012
Messages
3,539
Location
Peachtree City, GA
Re: The Lone Beech Garage Build Thread (60x46)

Maybe make that nut on the shiny new mill?

250,

The Shiny New Mill may be a while before I get it up and running but, yes, I think you are correct.


20171111-01.jpg 20171111-02.jpg 20171111-03.jpg

It looks like some 7/8-inch thick steel - maybe even 3/4-inch; I need to make an accurate measurement - would do the trick.

I probably could do this on my Mill-Drill if I was in a hurry ...which I am not.

What I am trying to do now is just make an assessment of the Lathe's condition to determine if it can be used as a tool or if it needs to become a parts donor.


Best regards,

Scott
 

shortykorte

Well-known member
Joined
Sep 1, 2014
Messages
8,039
Location
Tallahassee, Fl
The Lone Beech Garage Build Thread (60x46)

DrivesItFar,


Yes I enjoy "fixing stuff" and I appreciate folks who have documented a repair or a procedure when I'm looking for information. I hope the information I post will be of use to someone in the future.


The next issue for the JET milling machine will be to determine the best location for it in the LBG. My knee jerk is that it belongs close to the wall between the two windows on the south side of the metal/auto shop area.


JET Milling Machine Location.jpg


The White Arrow indicates where I was thinking. Not having used a milling machine I'm ignorant of the potential "landmines" of a poor placement decision.


Best regards,


Scott


Steve, you might want to reach out to Mike-Zmotorsports. He uses his mill and lathe regularly. He's very thorough and can probably give you some great insight on mill location.

7b97121ede2f769fae01ad1f2b15e0c8.jpg
Sent from my iPhone using Tapatalk
 

Attachments

  • 7b97121ede2f769fae01ad1f2b15e0c8.jpg
    7b97121ede2f769fae01ad1f2b15e0c8.jpg
    290.5 KB · Views: 1

jriltex

Member
Joined
Jan 30, 2010
Messages
20
Location
Cross Roads, TX
Re: The Lone Beech Garage Build Thread (60x46)

Honestly I never had an issue. The majority of parts were identical to the cast model. In my case the parts I needed were completely out of production so I was desperate. But my tolerances were not critical in most cases.
 

dchance

Well-known member
Joined
Oct 3, 2016
Messages
614
Location
OKC
Re: The Lone Beech Garage Build Thread (60x46)

Scott Enjoying the amount of detail that you are posting and looking for more on the lathe.

Dwight
 
OP
S

sbosecker

Well-known member
Joined
Sep 25, 2012
Messages
3,539
Location
Peachtree City, GA
Re: The Lone Beech Garage Build Thread (60x46)

Honestly I never had an issue. The majority of parts were identical to the cast model. In my case the parts I needed were completely out of production so I was desperate. But my tolerances were not critical in most cases.

Jim,

Thanks - maybe I've overestimated the problem. Thanks for the information.

Best regards,

Scott
 
OP
S

sbosecker

Well-known member
Joined
Sep 25, 2012
Messages
3,539
Location
Peachtree City, GA
Re: The Lone Beech Garage Build Thread (60x46)

Monday - November 13, 2017


20171113-01.jpg

The Highlander needed an oil change so I had to work around the JET Milling Machine a bit. While the oil was draining...


20171113-02.jpg 20171113-03.jpg

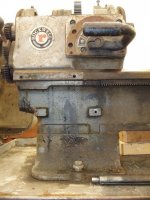
...I worked a bit on the Rockwell 25-100. I had examined the Quick Change Gearbox and it appeared that it could be removed by removing the 3 fasteners I have arrows pointing at. I wanted to get it off the lathe so I could examine the gears.


20171113-04.jpg

I was pleased to find that the gears in the Quick Change Gearbox seemed to be in good condition. I'm trying to determine the best way to clean up these gears.


Scott
 
OP
S

sbosecker

Well-known member
Joined
Sep 25, 2012
Messages
3,539
Location
Peachtree City, GA
Re: The Lone Beech Garage Build Thread (60x46)

Varsol, Kerosene, diesel, etc.....

vekster,

In other parts of the Interweb some have cautioned that using a parts washer might cause any swarf to find its way into bearings.

Others have mentioned that after the use of some solvents everything will need an additional rinsing to remove any residual solvent that might interfere with lubrication during lathe operation.

Hence my research.

Best regards,

Scott
 
OP
S

sbosecker

Well-known member
Joined
Sep 25, 2012
Messages
3,539
Location
Peachtree City, GA
Re: The Lone Beech Garage Build Thread (60x46)

Tuesday - November 14, 2017


When I bought the Rockwell 25-100 11-inch Metal Lathe at the end of October, the gentleman that was cleaning out the storage unit the lathe had been living in told me he was taking a lot of the "stuff" in the unit to a scrap metal business in nearby Fayetteville. I was unaware of this business at that time but today I stopped by to see what they might have.


20171114-01.jpg

After a bit of poking around at "Sweet Returns" I found this chunk of steel. It's actually 2 pieces bolted together. Each pieces is 1-7/16 inch thick by 4-inches wide by a bit over 10 inches long. This weighed about 33 pounds and they charged me $5.00.

I think this is the beginning of a beautiful relationship. Ha!

This material may be used to make new clamp blocks for the Rockwell Metal Lathe.

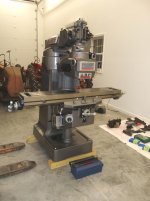
But first I need to get the JET Vertical Mill operational. The first step to that goal is to get the Mill off its skid.


20171114-02.jpg

I attached the Electric Chain Hoist's Hook to the Lifting Bolt on the JET Mill. I pushed the UP button and up she went on this test lift.

That's a Ton and a Quarter hanging from the Yellow Beam.

The Yellow Beam Rocks!!!


20171114-03.jpg 20171114-04.jpg

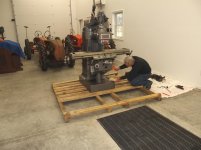
I lowered the Mill back to the floor and removed the 4 bolts that attached it to the wooden skid.


20171114-05.jpg 20171114-06.jpg
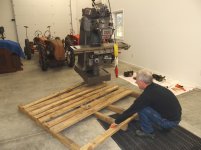
I raised the Mill back into the air and drug the skid away from the Mill.


20171114-07.jpg

I then lowered the Mill onto a couple of 4x4's .


Continued in next post...
 
Last edited:
OP
S

sbosecker

Well-known member
Joined
Sep 25, 2012
Messages
3,539
Location
Peachtree City, GA
Re: The Lone Beech Garage Build Thread (60x46)

Continued...

20171114-11.jpg

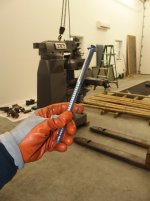
Earlier in the day I had purchased four 8-inch long 1/2-inch Lag Screws to anchor the Mill to the 4x4's.


20171114-12.jpg

I used my Pneumatic Impact Tool to drive the Lag Screws into the 4x4's.

I then tried to use my Pallet Jack to lift the Mill but it was not wanting to come up straight. The front of the Mill was staying on the floor as the back came up a bit.

Not happy with what I was seeing, I lowered the Mill back to the floor.

Either my ancient Pallet Jack isn't up to lifting the mill or I need to adjust the Mill's Center of Gravity ...or both.


20171114-13.jpg 20171114-14.jpg

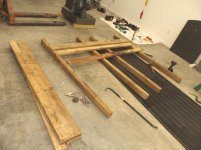
While I pondered the Pallet Jack problem, I decided to tear down the skid. This took a lot longer than I expected. The skid appeared to be put together in a haphazard fashion but the nails that were used had tremendous gripping power. Also, to my surprise, the bolts used on the skid were not metric. Not a big deal; I just know this Mill wasn't manufactured in the USA so I was expecting metric bolts.


20171114-15.jpg

With the Mill off the skid I now have to figure out how to move it about 50 feet to its new home.


Scott
 
Last edited:

matt_i

Well-known member
Joined
Mar 14, 2008
Messages
10,758
Location
SE Michigan
Re: The Lone Beech Garage Build Thread (60x46)

Hi Scott

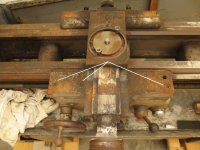
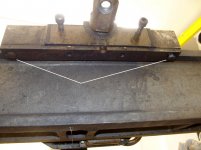
The hold-downs (they are hold-ups more accurately) keep the carriage from lifting off the ways in case that force happens to come into play. In my estimation they should have around .002" clearance to the underside of the ways. Correct material would be grey cast iron, which is not the easiest thing to source. (McMaster Carr would be a start). In generalizations, lubricated cast grey iron running on cast grey iron is one of the longest-wearing propositions in the metal-world. An analogy is a piston ring running in a parent-bore in an IC engine...same materials.

I don't know your total shop, but sometimes a mill is best backed into a corner to minimize its intrusion into the shop.

You can roll the base of the mill, Egyptian-style, on 1/2" dia - 1018 cold rolled steel rods. Takes a little effort but not bad. A standard carpenter's hex-shafted pry bar (crow bar) will lift it up the required 1/2", one end at a time. It can be hard on the floor though...So in my shop, I'm taller and I positioned the Bpt with a pallet jack. I have a stack of triple 2x6s front and rear which moves the mill up and helps me with ergonomics (and allows the pallet jack to exit cleanly). Also very solid that way.

I'm going to suggest ways to drain your wallet now :D. A set of R8 collets (Royals are Caddys), A Kurt 6" vise (either the old D675 or knockoffs or the newer D688 are excellent). You will need a dial test indicator to tram the head (basically sweep out a circle to precisely gauge parallelism with the table) and align the fixed jaw of the vise with the ways, I like Interapid indicators (.0005" 0-30-0) as they are indestructible except under serious abuse. An R8 to Jacobs Taper adapter is a good thing. I like Jacobs Super Ball Bearing chucks, Rohm are also good. Some are keyless but are subject to damage if the bit ever spins whereas the Super Chuck is also indestructible except severe abuse. Great idea to dedicate a 3/4" box end wrench to the drawbar and a deadblow hammer as well. A 52-pc or whatever stud-clamping set is sort of a prerequisite for varied jobs but you can buy the individual 5/8" T-nuts from McM and then a couple of 1/2"-13 Gr 8 socket-head or hex bolts to anchor the vise (will probably have to measure them closely, but its around 2-1/2" long from memory)

Great to see you with mill in the shop and so close to running it! Great job with the monorail, both in planning for the need and executing the lift. I like to save those skids for cribbing, often times they are made with hardwood that's too defective for furniture work. Oak, ash, pecan, sometimes its wormy or knotty but its really nice stuff when you come to moving and setting machines.

As far as your quick change gearbox, the parts washer isn't bad imo. The heavy swarf will gravity feed to the bottom of the tank. Its very slow turning, so a "sticky" lube with tackifiers is good, Mobil Vacuoline 1419 is very good, but any ISO220 or ISO460 oil will be appropriate for the gear teeth themselves, and it is golden/clear in color. Lubriplate had at one time, an aerosol "open gear and wire rope lubricant" which sprayed wet and drippy with a carrier solvent but then after evaporation left a tacky grease-like substance. However this is black in color and may contain MoS2 which is awesome for metal-to-metal contact but is black in color and looks dirty. I would simply keep lubricating any bearings after you clean it up, they are likely plain bronze bushings due to the very low speed and will accept almost any oil, if applied regularly.
 
Last edited:
OP
S

sbosecker

Well-known member
Joined
Sep 25, 2012
Messages
3,539
Location
Peachtree City, GA
Re: The Lone Beech Garage Build Thread (60x46)

Hi Scott

The hold-downs...


matt_i

Thank you for that extremely thoughtful post!

There's a lot there for me to digest and comment on but I'd like to do that later and get right to the task at hand:

Moving the JET mill that last 50 feet.

I watched the following YouTube video...

YouTube-MovingTheMachines

Watching those guys muscle their Mill around on that rough floor was what convinced me that I should be able to follow their lead. I also liked the 4x4's oriented sideways across the Mill instead of the other option. This setup seemed to give me more flexibility once the Mill was near its new home.

As mentioned in an earlier post, when I started lifting with the Pallet Jack the CG of the mill was so far forward that the Pallet Jack wouldn't lift it straight up.

Last night I watched the video again and noticed these guys had their table all the way to the back. I cannot do that with the Head lowered because my motor is taller than the machine in the video.

I moved the Ram back as far as I could with the Head down - gained about an inch and I also moved the Table back as far as I could. This movement wasn't enough to change my Pallet Jack's ability to lift the Mill.

I'm wondering about bringing the Head upright and adjusting the Ram and the Table to bring the Mill's CG to a point that my Pallet Jack can bring it up straight. Obviously this will raise the CG of the Mill but I'm thinking that my floor is so flat that - with care - I would be able to make the move safely.

Another option might be renting a Pallet Jack with forks that are closer together. I might be able to position a device like that forward enough to get it under the Mill's CG allowing a straight lift. I would have to use some blocks of wood if I did that to get around the problem I will describe in the next paragraph.

I don't think the "Egyptian Method" of moving the Mill will work for me. It's hard to see in the pictures I have taken but my Mill's base isn't flush on the floor all the way around. It has "feet". They're big, flat feet but they would still - I think - keep me from using rollers.

It sounds like you use a Pallet Jack for moving your machine. I'd be interested in your experiences with that method when moving your machine.


Best regards,

Scott
 
Last edited:

matt_i

Well-known member
Joined
Mar 14, 2008
Messages
10,758
Location
SE Michigan
Re: The Lone Beech Garage Build Thread (60x46)

Hi again. I see the notches in the base you reference. And that would make it difficult.

If you look at the way the mill is packaged in current pics, the main goal is to lower the height and lower the C.G. But, the table is way out at the end of the knee, and if the head were rotated with the ram positioned right there, the ram is sticking way out also.

So, I would rotate the head first, just general into normal upright position, then slide the ram back until the spindle is about midway on the knee (roughly 6-8" back I think). The table can go all the way back toward the column if necessary. I think you'll find a good balance point there on the pallet jack. I move mine with a forklift under the ram, protected by wood strips, but I positioned it with the pallet jack...very easy to do on level concrete. I plan to leave the wood blocks under it...forever.

If you were satisfied with the mill being on the 4x4s, you could position it with the pallet jack, and I think it would work that way until the end of time and never be a problem.

If not, you're going to have to move it down. Couple of possibilities, use the method of prybar + 3/8" steps I mentioned a few posts back up. Or, if an old-school tow truck with a boom can back into the shop, they have plenty of lifting capacity to rig the mill with an eye bolt and set it on the concrete. I would stay away from tractors or skid steer loaders as in my opinion they are not rigging tools.

Edit...I also found this in the ancient archives. This is a 3 ton hoist...closed...but will do 1 ton with boom fully extended.

bpt_lifting_1.jpg
 
Last edited:

shortykorte

Well-known member
Joined
Sep 1, 2014
Messages
8,039
Location
Tallahassee, Fl
Re: The Lone Beech Garage Build Thread (60x46)

I really like using Egyptian method when moving heavy bulky items (except when I used that method on top of motorcycle jack).
They lagged 4x4s to mill which will allow rolling. Also your new scrap yard friend might have two pieces of plate or 3” angle you can use as a base. I have also found several pieces of 2-1/2 sch. 40 PVC can hold a good amount of weight when placed a couple inches apart.


Sent from my iPhone using Tapatalk
 
OP
S

sbosecker

Well-known member
Joined
Sep 25, 2012
Messages
3,539
Location
Peachtree City, GA
Re: The Lone Beech Garage Build Thread (60x46)

Hi again. I see the notches in the base you reference. And that would make it difficult.

If you look at the way the mill is packaged in current pics, the main goal is to lower the height and lower the C.G. But, the table is way out at the end of the knee, and if the head were rotated with the ram positioned right there, the ram is sticking way out also.

So, I would rotate the head first, just general into normal upright position, then slide the ram back until the spindle is about midway on the knee (roughly 6-8" back I think). The table can go all the way back toward the column if necessary. I think you'll find a good balance point there on the pallet jack. I move mine with a forklift under the ram, protected by wood strips, but I positioned it with the pallet jack...very easy to do on level concrete. I plan to leave the wood blocks under it...forever.

If you were satisfied with the mill being on the 4x4s, you could position it with the pallet jack, and I think it would work that way until the end of time and never be a problem.

If not, you're going to have to move it down. Couple of possibilities, use the method of prybar + 3/8" steps I mentioned a few posts back up. Or, if an old-school tow truck with a boom can back into the shop, they have plenty of lifting capacity to rig the mill with an eye bolt and set it on the concrete. I would stay away from tractors or skid steer loaders as in my opinion they are not rigging tools.

Edit...I also found this in the ancient archives. This is a 3 ton hoist...closed...but will do 1 ton with boom fully extended.

I really like using Egyptian method when moving heavy bulky items (except when I used that method on top of motorcycle jack).
They lagged 4x4s to mill which will allow rolling. Also your new scrap yard friend might have two pieces of plate or 3” angle you can use as a base. I have also found several pieces of 2-1/2 sch. 40 PVC can hold a good amount of weight when placed a couple inches apart.


matt_i & shortykorte,

Thanks for all the good stuff guys! I think we're getting close.

Best regards,

Scott
 
OP
S

sbosecker

Well-known member
Joined
Sep 25, 2012
Messages
3,539
Location
Peachtree City, GA
Re: The Lone Beech Garage Build Thread (60x46)

November 16, 2017


Last evening my pickup truck's battery suffered a complete failure while I was parked about 2 miles from home. So obtaining a battery and recovering the truck was this morning's first order of business.

Then it was on to the good stuff...


20171116-01.jpg

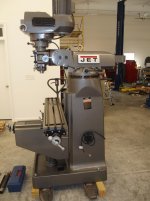
Rotated the JET Mill's Head into the operating position; moved the Table as far towards the column as possible and moved the Ram back a few inches. Tried a lift with the Pallet Jack and thought some additional tweaking of the Ram would be beneficial.


20171116-02.jpg

It was! The Pallet Jack is lifting the Mill pretty much straight up. Tomorrow my son and I will attempt to move the Mill into its working location.


Scott

Key Words: Pallet Jack Vertical Mill Knee Bridgeport Moving
 
Last edited:
To avoid these ads, REGISTER NOW!
Top Bottom