To avoid these ads, REGISTER NOW!

Above 1200 Sq/FT The Lone Beech Garage (60x46x16)

Wokspaces above 1200 squarefeet.
OP
S

sbosecker

Well-known member
Joined
Sep 25, 2012
Messages
3,539
Location
Peachtree City, GA
Monday - May 27, 2019


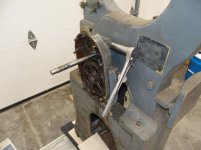
Today I worked on removing the Bandsaw's Gearbox from the frame.

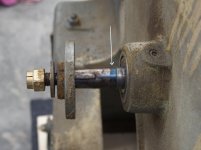
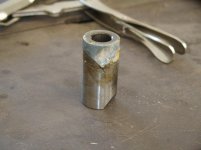
EDIT: There SHOULD be a set screw in the hub of the Upper Gear. This would have to be loosened in order to slide the Gearbox off the Drive Shaft. My Upper Gear had been repaired with a weld/braze and the setscrew hole was covered up by that repair. Here's a LINK to an image showing that setscrew.


20190527-01.jpg 20190527-02.jpg

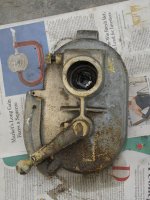
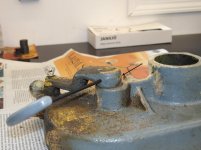
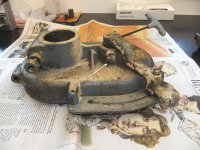
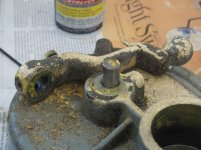
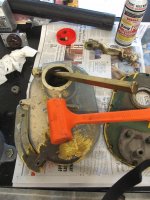
There is a nut that puts clamping force where the Gearbox attaches to the frame. I loosened that nut and used a deadblow hammer to try to move the Gearbox off the frame. I thought I did get some movement but it wasn't a lot.


20190527-03.jpg 20190527-04.jpg

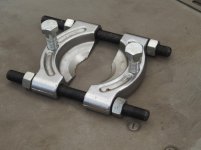
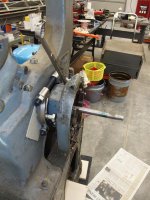
I used a bearing splitter and a couple of bolts, properly positioned, to attempt to apply force evenly to the move the Gearbox. I had put a couple of turns on each of the bolts when I stopped. Maybe the other end of the apparatus that provided clamping force to hold the Gearbox to the frame had so much paint on it that it was still providing some clamping force


20190527-05.jpg 20190527-06.jpg

I hit that end of the clamping apparatus with a wire cup and then applied PB Blaster everywhere that seemed appropriate.


20190527-07.jpg

Previous to this I had tried to twist the Gearbox and had had no luck. After all of the above I tried again. It twisted!

I started pulling and twisting.


Continued in next post...
 
Last edited:
To avoid these ads, REGISTER NOW!
OP
S

sbosecker

Well-known member
Joined
Sep 25, 2012
Messages
3,539
Location
Peachtree City, GA
Continued...


20190527-11.jpg

So now I had the Gearbox off the frame.


20190527-12.jpg 20190527-13.jpg

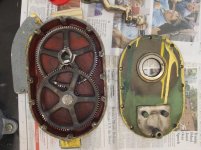
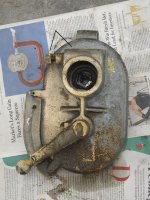
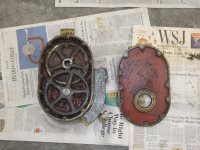
Here's the Gearbox from front & back.


20190527-14.jpg 20190527-15.jpg

It seemed clear that in order to get the Lower Gear out of the Gearbox, the Selector Handle had to be removed from the Selector Shaft. There were 2 set screws (two different sizes!) and a grub screw.


20190527-16.jpg 20190527-17.jpg

I removed all three of those screws from the Shifter Handle and Gearbox. I used a couple of flat blade screwdrivers as wedges to move the Shifter Handle a bit and then I used a puller to remove the Shifter Handle.


Continued in next post...
 
Last edited:
OP
S

sbosecker

Well-known member
Joined
Sep 25, 2012
Messages
3,539
Location
Peachtree City, GA
Continued...

20190527-21.jpg 20190527-22.jpg

With the Shifter Handle off, the shaft & Lower Gear could be pushed free of the Gearbox. With the Lower Gear free, it can be seen that the Grub Screw rides in the groove (Black Arrow) to keep the that assembly properly positioned.

With that in mind it would not have been necessary to remove the Grub Screw in order to remove the Shifter Handle but before the Lower Gear could be freed, the Grub Screw would need to be removed.


20190527-23.jpg 20190527-24.jpg 20190527-27.jpg

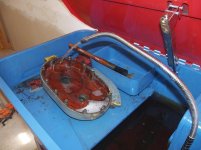
I took the gears to my Parts Washer and cleaned off the grease.

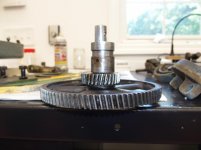
It appears to me that the Upper Gear had been broken and repaired in the past. Arrows point to the many areas that appear to have been welded or brazed. Additional Arrows point to several broken teeth.

The Lower Gear is generally OK but there are a few chipped teeth.

EDIT: After I posted the first two pictures I found a picture of these gears - in good condition - online. In that picture there was a set screw in the hub of the upper gear. I went back to the shop and looked more closely at my upper gear. (Third Picture) Inside the gear's hub one can see a hole for a set screw. The access to this is covered by a weld/braze on the opposite side of the hole. Here's a LINK to an image showing how these gears should really look.


So the Gearbox Gears are pretty much shot.


20190527-25.jpg 20190527-26.jpg

With the clear evidence of repairs having been made to the Upper Gearbox Gear in the past, I returned to the Bandsaw itself.

What's up with what appears to be Layout Dye on the Bandsaw's Drive Shaft? The slot in the shaft that receives a key for the Gearbox's Upper Gear is oversize for the key I found.

Could the Drive Shaft had also been repaired or a completely machined replacement made? I am starting to get concerned that this machine is going to be a black hole for time and dollars in order to make it function well. In addition to today's revelations, I still need to deal with the broken bolt boss in the frame...

I believe I could easily sell various parts from this machine and make myself whole ...or better than whole. I'd really like to refurbish this machine and use it in the Lone Beech Garage ...but I need to be realistic about how much blood & treasure that would require.

Something to sleep on tonight.


Scott
 
Last edited:
OP
S

sbosecker

Well-known member
Joined
Sep 25, 2012
Messages
3,539
Location
Peachtree City, GA
Tuesday - May 28, 2019


20190528-01.jpg

Yesterday, as I was working on the Bandsaw Gearbox, I heard a noise near me that sounded like a drop of water hitting the table ...and then another.


20190528-02.jpg

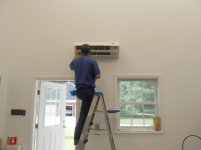
I looked up and saw that the water was coming from the Mini-Split Air Exchanger. Great ...my condensate line is probably clogged.

I shut off the air conditioning and cleaned up the water that had dripped out. Then I continued working on the Bandsaw Gearbox.


20190528-03.jpg

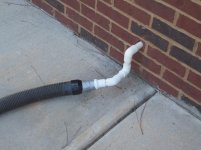
Today I made a trip to Home Depot and picked up a few items. Those bits along with a leftover adapter from the Miter Saw Station vacuum were to be used in an attempt to clear whatever was plugging the condensate line.


20190528-04.jpg 20190528-05.jpg 20190528-06.jpg

I put the pieces together, got out the shop vac and hit the "on" button. A substantial pressure drop was introduced to the condensate line.

I shut down the shop vac, removed my homemade adapter and turned the air-conditioner back on.


20190528-07.jpg

I came back about a half hour later and the condensate line seemed to be draining well. No leaking was observed inside.


Scott
 

matt_i

Well-known member
Joined
Mar 14, 2008
Messages
10,744
Location
SE Michigan
Scott, checking in here to see how things are going, looks like you have a full-on project :)

Relative to the cast boss, it may work as intended if there's enough thread engagement and a flat big enough to land the other part.

A possibility is to do as suggested and core it out with a holesaw. Turn a round boss from steel (1018, W1 drill rod, grey iron, etc) and put a shoulder on it. Put a hole pattern of 3 holes in the shoulder/flange using the mill, drill and tap. Then you can drill the cover plate for the 3 screws, transfer punch clearance holes. Last task is to transfer-punch the center tapped hole location (in case its not perfectly centered in the new boss), remove it one more time, and do the drill + tap step in the mill. One final installation ready to go.

The gears look like they have seen better days. It would be very useful to have a diametral pitch (DP) gauge but you can figure out close enough using the equations. OD = N+2/DP Where OD is the actual OD in inches, N = number of teeth, and DP is the diametral pitch. From there you have to figure out the 14.5 or 20 degree pressure angle but that's more of a visual indication after studying pictures of both teeth. Boston Gear *may* have a replacement change gears which can possibly fit with some adaptation. They have an online catalog which eventually boils down a part number, then its a matter of trying to source that part thru Applied Industrial, Motion Industries, possibly Amazon or other. Sometimes the price is reasonable and worth it, other times the prices are "whoa!".
 

Pressingonward

Well-known member
Joined
Mar 9, 2016
Messages
522
Location
SW WA
Wow, that gear is done for. Sorry to see that. Hopefully you can find a replacement or something close enough to adapt without too much work. There are lots of industrial gear suppliers out there - I just had to order a custom timing belt pulley for a fixture at work. Cost a bit over $1000 for a 7" custom pulley. I would think a custom gear would be a bit more since it would have to be Iron or steel instead of aluminum - in other words probably not a cost effective option, but if you can find a replacement that only needs some mods to the hub or an adaptor it should be much more affordable.
 
OP
S

sbosecker

Well-known member
Joined
Sep 25, 2012
Messages
3,539
Location
Peachtree City, GA
Scott, checking in here to see how things are going, looks like you have a full-on project :)

Relative to the cast boss, it may work as intended if there's enough thread engagement and a flat big enough to land the other part.

A possibility is to do as suggested and core it out with a holesaw. Turn a round boss from steel (1018, W1 drill rod, grey iron, etc) and put a shoulder on it. Put a hole pattern of 3 holes in the shoulder/flange using the mill, drill and tap. Then you can drill the cover plate for the 3 screws, transfer punch clearance holes. Last task is to transfer-punch the center tapped hole location (in case its not perfectly centered in the new boss), remove it one more time, and do the drill + tap step in the mill. One final installation ready to go.

The gears look like they have seen better days. It would be very useful to have a diametral pitch (DP) gauge but you can figure out close enough using the equations. OD = N+2/DP Where OD is the actual OD in inches, N = number of teeth, and DP is the diametral pitch. From there you have to figure out the 14.5 or 20 degree pressure angle but that's more of a visual indication after studying pictures of both teeth. Boston Gear *may* have a replacement change gears which can possibly fit with some adaptation. They have an online catalog which eventually boils down a part number, then its a matter of trying to source that part thru Applied Industrial, Motion Industries, possibly Amazon or other. Sometimes the price is reasonable and worth it, other times the prices are "whoa!".

matt_i

Thank you for your thoughtful post...

Yes... just what I need: A (BIG) project. Ha!

Thanks for the ideas on the Bolt Boss and the gears. I will post more information on the gears and the Main Driveshaft Key Slot in a following post.

Best regards,

Scott
 
OP
S

sbosecker

Well-known member
Joined
Sep 25, 2012
Messages
3,539
Location
Peachtree City, GA
Wow, that gear is done for. Sorry to see that. Hopefully you can find a replacement or something close enough to adapt without too much work. There are lots of industrial gear suppliers out there - I just had to order a custom timing belt pulley for a fixture at work. Cost a bit over $1000 for a 7" custom pulley. I would think a custom gear would be a bit more since it would have to be Iron or steel instead of aluminum - in other words probably not a cost effective option, but if you can find a replacement that only needs some mods to the hub or an adaptor it should be much more affordable.

PressingOnward,

Yes I also think the gears are fully depreciated.

Some folks are only using these saws for woodworking and selling the gearbox to help monetized other projects. Acquiring a used Gearbox probably represents the most cost-effective option if I decide to keep this bandsaw.


Best regards,

Scott
 
OP
S

sbosecker

Well-known member
Joined
Sep 25, 2012
Messages
3,539
Location
Peachtree City, GA
Wednesday - May 29, 2019


20190529-01.jpg 20190529-02.jpg

I threw the Bandsaw Gearbox into the Parts Washer today. I may make a YouTube video describing the disassembly of the Gearbox in an attempt to help others. Getting the Gearbox cleaned up will help with that effort.


20190529-03.jpg 20190529-04.jpg

The literature indicates that both of the large Reduction Gears in the Gearbox have 94 teeth. I measured them to be 1/2 inch wide. The gear's teeth are not perpendicular to the side of the gear but are set at a 10 degree angle. I measured the gear's diameter as best as a could. All of my precision measuring tools are limited to 6-inches. These gears are both about 6-1/8 inch in diameter.


20190529-05.jpg 20190529-06.jpg

I found a manual that indicated that Upper Gear in the Gearbox used a #8 Woodruff Key. I returned the Main Driveshaft and, to my surprise, found that Woodruff Key's dimensions to be 5/32" x 3/4". In other words it was the correct size for a #8 Woodruff Key.

Yet the slot in the Main Driveshaft is about 20 Thousands wider than 5/32". Why is that slot so wide? That can't be correct.


Best regards,

Scott
 

matt_i

Well-known member
Joined
Mar 14, 2008
Messages
10,744
Location
SE Michigan
Hi Scott, I may have given you some bad info...it looked to me at first like those were straight up spur gears but now, seeing your post with the 10deg helix that won't be as simple. Its highly unlikely the Boston Gear catalog will have an off-the-shelf solution unless supremely lucky. I think your idea of trying to find a saw being parted will be better.
 
OP
S

sbosecker

Well-known member
Joined
Sep 25, 2012
Messages
3,539
Location
Peachtree City, GA
Hi Scott, I may have given you some bad info...it looked to me at first like those were straight up spur gears but now, seeing your post with the 10deg helix that won't be as simple. Its highly unlikely the Boston Gear catalog will have an off-the-shelf solution unless supremely lucky. I think your idea of trying to find a saw being parted will be better.

matt_i

Thanks for the update! I really appreciate the benefit of your knowledge on these things.

Best regards,

Scott
 

250

Well-known member
Joined
Oct 16, 2014
Messages
537
Location
West of the Sierras
Scott,

I stumbled across this development over on OWWM first. That's a real sour development for sure. I've always like the aesthetics of the WT's, and their not a bad saw either. I can only offer moral support, but I'll offer it in quantity. As I'm sure you know, you can post a want to buy on the OWWM BOYD. Just costs you a few electrons.

david
 
OP
S

sbosecker

Well-known member
Joined
Sep 25, 2012
Messages
3,539
Location
Peachtree City, GA
Friday - May 31, 2019


20190530-01.jpg

Late afternoon yesterday I noticed the Air Handler that had been leaking inside my shop was still having issues. I shut down that unit and went into the house, called the HVAC folks and scheduled a service call for today.


20190530-02.jpg 20190530-03.jpg 20190530-04.jpg

I returned to the LBG and started moving stuff so a technician could access the Air Handler. I was glad I had made the casters for this table back in December (Post 2751). That made this bit of preparation a lot more tolerable.


20190531-05.jpg

The technician from Trinity Heating & Air showed up at 9 am today. I gave him the symptoms and described what I had done to attempt to vacuum the condensate line. We turned the Air Handler back to the ON position.

He examined the unit but didn't find anything obviously amiss. He poured some water into the "trough" inside the Air Handler to see how it drained. While it was draining to the outside, he thought it should be draining faster than it was. He got a small shop vacuum from his truck ...and discovered that he couldn't get his to attach to the Condensate Drain because there wasn't enough clearance to attach his vacuum.

What a coincidence! That's exactly why I had made the adapter when I used my shop vac to try to clear the line. Since I had told him what I did and how I did it, he sheepishly asked if we could use my setup to try vacuuming again.

This we did. Then he told me to do something I hadn't done. My Shop Vac has the ability to blow as well as vacuum. We swapped the hose around on the Shop Vac and blew into the condensate line.

We shut off the Shop Vac and removed the hose from the condensate line. The technician poured water into the Air Handler again and it ran out of the drain line pretty freely.

I was handed a bill and the technician departed.

...should I charge these guys a tool rental fee? Ha!

Hopefully this fixes the issue.


Scott


He f
 
OP
S

sbosecker

Well-known member
Joined
Sep 25, 2012
Messages
3,539
Location
Peachtree City, GA
Scott,

I stumbled across this development over on OWWM first. That's a real sour development for sure. I've always like the aesthetics of the WT's, and their not a bad saw either. I can only offer moral support, but I'll offer it in quantity. As I'm sure you know, you can post a want to buy on the OWWM BOYD. Just costs you a few electrons.

david

David,

Thanks for stopping by... and your support!

As previously mentioned I am at a crossroads on this project. The following options are listed in order of highest anticipated financial outlay.

1. Damn the torpedoes! Full speed ahead!

2. Patience... look for replacement parts targets of opportunity and fill in the missing pieces in an economical manner.

3. Abandon Ship! Sell parts from this machine and probably have a positive cash flow on the project.

I'm still chewing on which direction to go. At the moment the closer to the bottom I get, the more attractive the options seem.

Ha!

Best regards,

Scott
 

drivesitfar

Well-known member
Joined
Oct 23, 2013
Messages
36,055
Location
Pacific Northwest
SB: my guess is that you should look for another bandsaw like yours that maybe yours will be able to give parts too so you'll have one vintage bandsaw. best of luck with that and it still might be a spendy restoration and damn the torpedos, but having a vintage 1940's Walker Turner bandsaw isn't something everybody has and after restoring it you'll know more about it than most owners will.

nice thinking on the mini split and guess you were on the right track and just needed to do a little more. I hear you that paying a repairman while you are helping and lending them your tools seems a bit awkward, but some of them have the missing piece to get the job done and that certainly is worth paying for their knowledge and experience.

hope you are having a great weekend!!
 
OP
S

sbosecker

Well-known member
Joined
Sep 25, 2012
Messages
3,539
Location
Peachtree City, GA
SB: my guess is that you should look for another bandsaw like yours that maybe yours will be able to give parts too so you'll have one vintage bandsaw. best of luck with that and it still might be a spendy restoration and damn the torpedos, but having a vintage 1940's Walker Turner bandsaw isn't something everybody has and after restoring it you'll know more about it than most owners will.

nice thinking on the mini split and guess you were on the right track and just needed to do a little more. I hear you that paying a repairman while you are helping and lending them your tools seems a bit awkward, but some of them have the missing piece to get the job done and that certainly is worth paying for their knowledge and experience.

hope you are having a great weekend!!

DrivesItFar,

Yes, I'm torn on the Bandsaw. It does have a "a look" that I like a lot as well as it being - as I understand it - a capable machine when refurbished properly.
On the other hand I could wait a long time for a donor machine to show up at a reasonable price. In the meantime the various bits of the current project get scattered about and lost.
I'd prefer to either finish it or move on...
We'll see.

As to the Mini-Split's Air Handler...
I will be requesting another service call tomorrow morning. Ha!

See following posts.

Best regards,

Scott
 
OP
S

sbosecker

Well-known member
Joined
Sep 25, 2012
Messages
3,539
Location
Peachtree City, GA
Saturday - June 1, 2019

Despite being at a decision point on the Walker-Turner Bandsaw refurbishment, I still think - at some point - I will make a video of the Gearbox tear-down to help others. With that in mind...


20190601-01.jpg

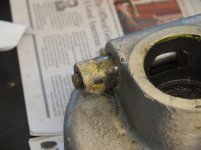
I decided to examine the "Clamping Device" that secures the Gearbox to the Bandsaw's Frame. A couple of black "pointers" in the above picture indicated what I'm referring to.


20190601-02.jpg 20190601-03.jpg 20190601-04.jpg

Maybe I could have gripped the exposed portion of the "Clamping Device" with something and twisted it out but I used a brass punch to tap it out a bit.


20190601-05.jpg 20190601-06.jpg 20190601-07.jpg

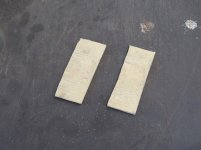
I have a couple of feet of rubberized upholstery strapping. This stuff works great to protect parts - like shiny finished plumbing items - when gripping them with toothed tools. It also works well with an ancient oil filter wrench I have to help grip the tiny oil filters that are the norm these days.

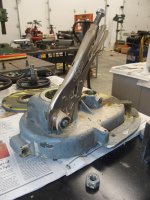
I cut a couple of small pieces of the strapping and placed one of them around the exposed end of the "Clamping Device". A few back and forth twists with a Vise-Grip and it was out of the Gearbox.


Continued in next post...
 
OP
S

sbosecker

Well-known member
Joined
Sep 25, 2012
Messages
3,539
Location
Peachtree City, GA
Continued...


20190601-11.jpg


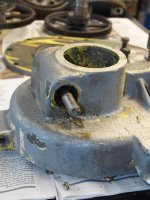
A view of the Gearbox with the "Clamping Device" element removed.


20190601-12.jpg

A lot of paint on this thing.


20190601-13.jpg

A little love from a Bench Grinder's Wire Wheel and all is well.


20190601-14.jpg

Added a bit of lubricant and the "Clamping Device" now moves freely in the Gearbox.


20190601-15.jpg

The little victory with the Gearbox was offset by an Air Handler defeat.

Today had been a bit cooler than it had been the past week. The Air Conditioner really hadn't been doing much. This evening the building got heat soaked enough to cause the Air Handler to start making cool air.

I was disappointed to see the unit leaking again but not particularly surprised. I was hoping that blowing air into the condensate line would be effective but I really don't think this is a condensate line blockage. I think something inside this device is not fastened together properly.

I'll be calling Trinity Heating & Air on Monday morning for another service call.


Scott
 
Last edited:
OP
S

sbosecker

Well-known member
Joined
Sep 25, 2012
Messages
3,539
Location
Peachtree City, GA
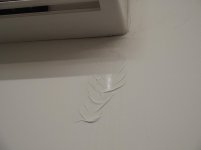
A new but unwanted wall texture. Hope they check things better next go around.

shortykorte,

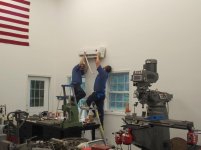
The same fellow came out, I gave him some observations I had made that might be useful, and then he said he probably should get an additional person out to help him take the Air Handler off the wall.

I agreed.

They are scheduled to come out on Monday afternoon.

Best regards,

Scott
 
To avoid these ads, REGISTER NOW!
OP
S

sbosecker

Well-known member
Joined
Sep 25, 2012
Messages
3,539
Location
Peachtree City, GA
Thursday - June 6, 2019

I had been curious about the specifications of the GE motor that had been installed in the Walker-Turner 16-Inch Bandsaw.

However since it had been dipped in paint like everything else, I was expecting to have to try to determine its abilities by working backwards from measurements.


20190606-01.jpg 20190606-02.jpg

A few measurements were taken.


20190606-03.jpg

I had read that the size of the capacitor might be a clue as to the horsepower of an electric motor.


20190606-04.jpg

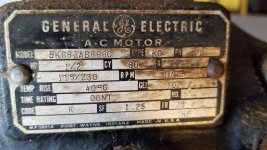
Then I started trying to clean the paint off what I assumed was the "Motor Plate". I didn't want to go nuclear immediately so I started with denatured alcohol and a rag. I was not expecting much but, to my surprise, the paint yielded to this rather lowly solvent.

Model: 5KC65AB559A
HP: 3/4
RPM: 1725

There's more there but I need more time to sort it out.

Scott
 

250

Well-known member
Joined
Oct 16, 2014
Messages
537
Location
West of the Sierras
I'd guess the following.

3/4 hp, 1ph (115v/230v), 10/5 full load amps, 1725 rpms.

There is usually something that indicates phase, maybe that was in the top right of the motor plate at one point.

As to your three options, if you have the space to 'store' the project, then you don't have a penalty for seeing if the appropriate parts show up. And no penalty for keeping an eye out for another saw.

david
 

Pressingonward

Well-known member
Joined
Mar 9, 2016
Messages
522
Location
SW WA
Hi Scott,

It definitely sounds like finding a replacement gearbox is the best path forward. As someone else mentioned, the chances of finding a replacement gear with an 11 degree helix angle off the shelf is probably nil.

I do think it would be possible to find a pair of off the shelf straight cut gears for $250-$500 that could be made to fit. You would basically need to measure your shaft center to center distance and then play around with different pitches and gear ratios to get the closest replacement you can. The gear material can be switched to hardened steel to ensure they have sufficient strength. Let me know if you want to pursue this and I can help walk you through the process.

My other crazy thought was to replace the gear pair with a chain or belt drive, which would be cheaper but require more fab and design work.

Lastly, I think you are correct that the keyway on the main shaft is way too loose. There are charts online showing recommended tolerances. Does the keyway look worn? It shouldn't be too hard to repair. I seem to recall some specialty epoxys (or maybe it was a loctite product?) designed specifically for keyway repair. A bit of Googling should turn up some options.
 
Last edited:
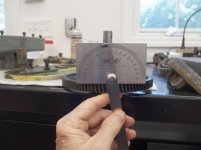
OP
S

sbosecker

Well-known member
Joined
Sep 25, 2012
Messages
3,539
Location
Peachtree City, GA
I'd guess the following.

3/4 hp, 1ph (115v/230v), 10/5 full load amps, 1725 rpms.

There is usually something that indicates phase, maybe that was in the top right of the motor plate at one point.


David,


20190609-01.jpg

I found this "Rosetta Stone" at the following web page:

https://imgur.com/gallery/916eJNw

I am curious as to the age of the Devilbiss Air Compressor but I see no information on that.

The motor this nameplate is on looks VERY similar to my motor.


Best regards,

Scott
 
Last edited:
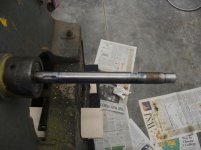
OP
S

sbosecker

Well-known member
Joined
Sep 25, 2012
Messages
3,539
Location
Peachtree City, GA
As to your three options, if you have the space to 'store' the project, then you don't have a penalty for seeing if the appropriate parts show up. And no penalty for keeping an eye out for another saw.

Hi Scott,

It definitely sounds like finding a replacement gearbox is the best path forward. As someone else mentioned, the chances of finding a replacement gear with an 11 degree helix angle off the shelf is probably nil.

I do think it would be possible to find a pair of off the shelf straight cut gears for $250-$500 that could be made to fit. You would basically need to measure your shaft center to center distance and then play around with different pitches and gear ratios to get the closest replacement you can. The gear material can be switched to hardened steel to ensure they have sufficient strength. Let me know if you want to pursue this and I can help walk you through the process.

My other crazy thought was to replace the gear pair with a chain or belt drive, which would be cheaper but require more fab and design work.

Lastly, I think you are correct that the keyway on the main shaft is way too loose. There are charts online showing recommended tolerances. Does the keyway look worn? It shouldn't be too hard to repair. I seem to recall some specialty epoxys (or maybe it was a loctite product?) designed specifically for keyway repair. A bit of Googling should turn up some options.

I will probably try to find storage space for the bandsaw and keep my eyes open for a donor. We shall see how that goes.

Best regards,

Scott
 
Last edited:
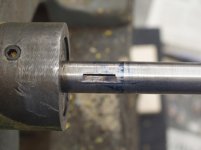
OP
S

sbosecker

Well-known member
Joined
Sep 25, 2012
Messages
3,539
Location
Peachtree City, GA
Monday - June 10, 2019


20190610-01.jpg

Two technicians from Trinity Heating & Air showed up this afternoon to work on my leaking Air Handler.


20190610-02.jpg 20190610-03.jpg

They unmounted the Air Handler from its wall bracket and removed a hose that routed condensate from the left side of the Air Handler to the right side. There is another fitting on the right side that was a more direct connection to the condensate line that leads to the outside of the building.

The Air Handler was remounted on the wall bracket and the "ON" button was pushed.

To be honest, I didn't think this solution would be the cure but, 8 hours later, there has been no leaking.

We'll keep an eye on it.

Scott
 
OP
S

sbosecker

Well-known member
Joined
Sep 25, 2012
Messages
3,539
Location
Peachtree City, GA
Tuesday - June 11, 2019

The Air Handler is still leak free as of 8:00 pm this evening. I am surprised - pleased but surprised - that the "repair" is holding up.


20190611-01.jpg

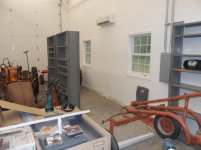
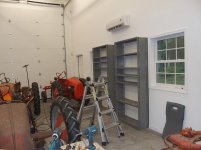
Late this afternoon I was able to get out to the LBG for a few hours. Today seemed like a good day to finish installing the Shelving Units I got back in April (Post 2875). I slapped a The Pretenders CD into the music box and pulled the first unit out from the wall to allow access to the baseboard.


20190611-02.jpg

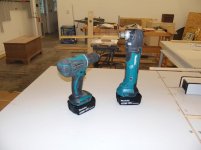
The main weapons today would be the oscillating multi-tool and the drill.


20190611-03.jpg 20190611-04.jpg 20190611-05.jpg

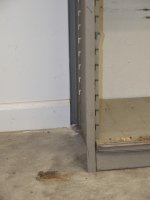
Before I had moved the shelving unit away from the wall, I had scribed lines on the baseboard marking the edges of the shelving unit. I used the oscillating multi-tool to cut the baseboard. I cut along the top of the baseboard with a utility knife and then pried the baseboard away from the wall.

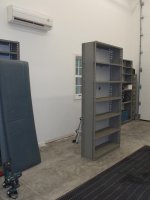
I drilled a couple of holes in the top ends of the shelving unit and then, with the baseboard section now removed, slid the shelving unit into position on the wall. I marked the location of the holes on the wall and pulled the shelving unit back out. A couple of moly bolts were installed and then the shelving unit was slid back against the wall. The moly bolts secured the shelving unit to the wall.

One down... seven to go.


20190611-06.jpg

I moved to the northeast corner of the LBG and had gotten two more shelving units secured to the north wall when my wife called and wanted to meet somewhere for supper. It was an offer I couldn't refuse. Ha!


20190611-07.jpg

For one of the shelving units I found that securing the base to the sill plate with deck screws seemed like a good idea. Tomorrow I'll probably add deck screws to the other two shelving units before continuing with the remaining 5 shelving units.
 
Last edited:
OP
S

sbosecker

Well-known member
Joined
Sep 25, 2012
Messages
3,539
Location
Peachtree City, GA
Wednesday - June 12, 2019


This afternoon I was able to return to getting the 5 remaining Shelving Units secured to the walls. Shortly after I entered the building, Alice Cooper's Under My Wheels was echoing off the walls of the LBG and I got to work.


20190612-01.jpg 20190612-02.jpg 20190612-03.jpg

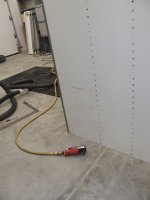
The next shelving unit on the list was in front of an electrical outlet. Out of the 8 Shelving Units two are in front of outlets.


20190612-04.jpg

Only 3 to go!


20190612-05.jpg 20190612-06.jpg 20190612-07.jpg

The final couple of units required some Tractor Tetris but then the Shelving Units were all secured to the wall. If you looked at the Shelving Units now versus a week ago, you probably couldn't tell that anything was different.

This project took about a man-day to accomplish so the fact the finished product would be unnoticed to the casual observer makes it seem even more like real life than usual.

Still it was a very good day in the Lone Beech Garage - it was Quality Shed Time.

RIP 1/2 Cup.


Scott
 
Last edited:
OP
S

sbosecker

Well-known member
Joined
Sep 25, 2012
Messages
3,539
Location
Peachtree City, GA
Friday - June 14, 2019 - FLAG DAY


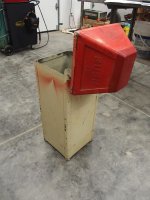
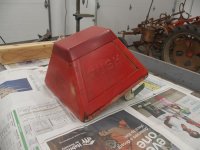
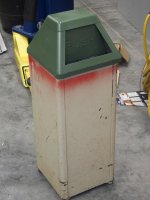
Almost 2-1/2 years ago I acquired a Vintage Bennett Trash Can (Post 1624).


20190614-01.jpg 20190614-02.jpg

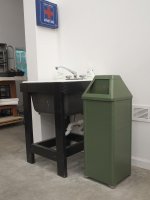
Although I'd been using it as a trash can next to the Shop Sink, it still looked like a tube of lipstick. It was time for that to change.


20190614-03.jpg

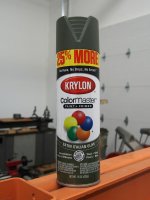
I was looking for something like an Olive Drab color in a spray can. The closest thing I could find while visiting a Big Box store was this Krylon Italian Olive.


20190614-04.jpg

When I got home with the spray paint I hit an old lawnmower blade with it and let it dry. When I took the top off the Bennett Trash Can, I found a place with what appeared to be the original color. Amazingly it looks like I found a pretty good match without even knowing what I was looking for.


20190614-05.jpg 20190614-06.jpg 20190614-07.jpg

While I think most of the paint on the Trash Can is sound, I wasn't comfortable just painting over that red color. It needed to go. I hit it with acetone and started rubbing. While it did come off, it wasn't as easy as I thought it would be. When I finished the rags I'd been using made it look like I'd been butchering a hog.


Continued in next post...
 
OP
S

sbosecker

Well-known member
Joined
Sep 25, 2012
Messages
3,539
Location
Peachtree City, GA
Continued...


20190614-011.jpg 20190614-012.jpg 20190614-013.jpg

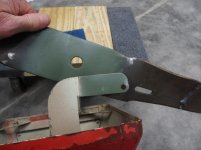
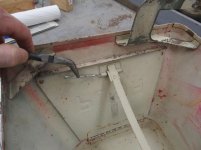
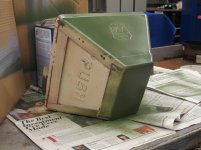
With the red paint dealt with, I turned the top over and removed the "spring" that holds the doors closed. This would allow me to paint the doors and not have the drying paint cause the doors to stick to the opening.


20190614-014.jpg 20190614-015.jpg 20190614-016.jpg

I don't know... I think I liked the red better ...NOT!

Ha!

Tomorrow morning I'll try to paint the base of the Bennett Trash Can. Then I am supposed to be the guest of honor at a One-Day-Early Father's Day lunch with my kids.

I'm looking forward to that.

Scott
 
Last edited:
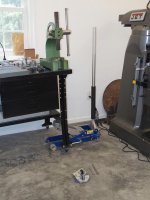
adrenalnjunky

Active member
Joined
Dec 14, 2011
Messages
36
Location
NE Louisiana
....annnnd I'm finally caught up. Took me a couple of weeks to get through the whole thread.

Awesome space, and many cool toys. I hope to be designing something in the 24'x48' range by year's end if everything goes well. Will carry a couple of your ideas with me down that path!
 
OP
S

sbosecker

Well-known member
Joined
Sep 25, 2012
Messages
3,539
Location
Peachtree City, GA
....annnnd I'm finally caught up. Took me a couple of weeks to get through the whole thread.

Awesome space, and many cool toys. I hope to be designing something in the 24'x48' range by year's end if everything goes well. Will carry a couple of your ideas with me down that path!

adrenalnjunky,

Thanks so much for coming along for the ride! I appreciate the nice comments and hope your build goes well. The building process can be an adventure that's for sure.

Best regards,

Scott
 
OP
S

sbosecker

Well-known member
Joined
Sep 25, 2012
Messages
3,539
Location
Peachtree City, GA
Saturday - June 15, 2019

Despite my best intentions, I slept in this morning and didn't get out to the shop until late this afternoon.


20190615-01.jpg 20190615-02.jpg 20190615-03.jpg

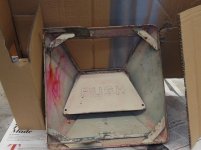
I brought the Bennett Trash Can outside to prep & paint. I got the red paint overspray off with acetone and wiped down the sides as well. However, the condition of the paint on the sides still looked questionable after that treatment so I got out the D/A Sander. I worked on the sides for a while to clean up the paint. In doing this I discovered a layer of beige paint between the "white" and the green layers.

I hit the feet of the trash can with a wire wheel and covered them with some painters tape.


20190615-04.jpg

I gave the trash can a couple of coats of the spray paint. There was a bit of a breeze blowing so that made painting more interesting. I may need to put more paint on in the future but I'm going to let this cure for a couple of days first.


20190615-05.jpg

This paint dries well enough to be handled very fast. After an hour or so I brought it inside and put the top on it. Still work to be done but what an improvement to the tube of lipstick!


20190615-06.jpg

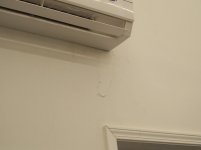
It's been several days since the "repair" to the Air Handler and there has been no leaking. I decided to clean up the area damaged by the dripping water so I could get this part of the LBG's floor space back into action.


20190615-07.jpg

I hit the damaged area with my random orbital sander, vacuumed up the dust & paint chips and then put on some paint. I'll let that dry and then hit it with another coat soon.


Scott
 
Last edited:
To avoid these ads, REGISTER NOW!
Top Bottom