To avoid these ads, REGISTER NOW!

The making of a table

1/2 Cup

Member Emeritus
Joined
Apr 28, 2012
Messages
19,283
Location
Shepparton. Victoria. Australia
Just found another Etsy seller that I thought ya'll might find interesting.

Amazing craftsmanship on the toolbox.

https://www.etsy.com/shop/sbucy?ref=l2-shopheader-name

Thanks for posting, that's one sweet toolbox. Consider the idea traded.

FedEx tracking is telling me that my order from Twertsy will be here tomorrow!

http://www.garagejournal.com/forum/showthread.php?t=275199

Good thing, as I'm in need. Pictured is the just the 1st round of compiling all my bits/drivers.

Great assortment:thumbup: I picked up a Dewalt set on sale last year but I was only the basics.

Regards
 
To avoid these ads, REGISTER NOW!

Fyrme

Well-known member
Joined
Nov 28, 2012
Messages
2,231
Location
Green country, Oklahoma
.................
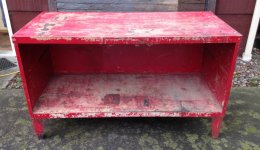
I converted an old autoshop/garage into a restaurant awhile back.

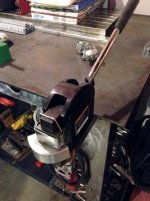
I got to the project late, and all the good stuff was gone..................

Those dang Demo guys, sheesh, they always get first dibs. :lol:


I don't want to sidetrack your thread too bad, but I have a funny story that you can appreciate.
In all of our contracts, it is written that all remaining property and materials becomes our property once the contract is signed, every piece of furniture, decoration, lumber, screws, etc.
We got a contract to do select demo on two historical buildings downtown. One of them being a hotel that was built in the 19-teens, and has been, for the most part, untouched for nearly a century. The original bid included salvaging the original doors for the owner. The owner didn't want that included, so we wrote it out of the bid and he signed it.
Now fast forward, I was sent over to pick up over 30 antique doors to bring back to our storage. Half way through loading, the owner shows up claiming they are his doors. He was then reminded that he declined the salvage bid and now they belong to us. In the end, we sold the doors right back to the owner for over a grand, and moved them down the street a couple blocks and unloaded them.
The moral here is, if it belongs to you, you better claim it before the demo guys get that contract.
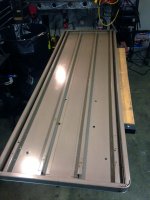
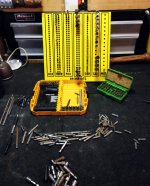
:evil:
 
Last edited:
OP
R

RivennHewn

Well-known member
Joined
Jun 4, 2011
Messages
10,373
Location
PNW
Fyrme

And a sad story….

When I started the job I'm currently finishing now, there was a large tin-tiled fire door with really nice Richard Wilcox sliding hardware on it.

The plans noted they were to be demo'd.

I should have taken the door on day one, but want to get some other task done first.

A week later, the client walked in and said they wanted it to stay.:sad:
 
OP
R

RivennHewn

Well-known member
Joined
Jun 4, 2011
Messages
10,373
Location
PNW
I received my bit organization boards from Twertsy this afternoon, and proceeded to spend hours organizing bits.

My head and eyes hurt now.

These are going to be a great way to keep some organization in the shop.

Thank you Twertsy.
 

Attachments

  • Twertsyboard.jpg
    Twertsyboard.jpg
    141.4 KB · Views: 200
OP
R

RivennHewn

Well-known member
Joined
Jun 4, 2011
Messages
10,373
Location
PNW
Today I accessorized the table.

Finished the rivet-welds, with this little set up to prevent me burning my fingers trying to hold them in place while welding.

Next I mounted the drawer unit, and cut a piece of rubber to line it with.

I found a pipe hanger on the floor at work yesterday, and now it's my accessory hook.
 

Attachments

  • Accesshook.jpg
    Accesshook.jpg
    134.9 KB · Views: 126
  • hook.jpg
    hook.jpg
    136.6 KB · Views: 132
  • drawerclosed.jpg
    drawerclosed.jpg
    134.5 KB · Views: 141
  • draweropen.jpg
    draweropen.jpg
    137 KB · Views: 144
  • rivetholder.jpg
    rivetholder.jpg
    133.6 KB · Views: 131
OP
R

RivennHewn

Well-known member
Joined
Jun 4, 2011
Messages
10,373
Location
PNW
Thanks again 1/2 cup.

I'm looking for a review/feedback on a vise.

Here's my thinking; The welding table is not that large or heavy, and it's on wheels. No real need for a large vise. I always have one on the other bench.

So my criteria are small, enclosed screw, 360 degree, and under $100.

Yost makes one that seems to fit. The RIA-4.

Anybody put their hands on one? I have read mixed reviews.

Wilton makes a similar unit.
 

Attachments

  • spin_prod_159434401.jpg
    spin_prod_159434401.jpg
    8.9 KB · Views: 26

Fyrme

Well-known member
Joined
Nov 28, 2012
Messages
2,231
Location
Green country, Oklahoma
If you want a new one, then the vise listed above or a Wilton import will work fine for what you need I'm sure. But I'd suggest cruising CL for a couple weeks several times a day. Just simply search "vise" AND "vice". You will likely come up with a good old American piece of iron for well under $100. I've even run a ad for "wanted to buy a old vise" and got lots of hits. I've bought 7 vises that way off CL and the most expensive one was $50, a 75lb ~1908 Rock Island 142. The rest were $40 or less, Including my big Wilton bullet.
 

Bears Fan

Well-known member
Joined
Jan 26, 2012
Messages
3,438
Location
Indiana
Just went threw all nineteen pages of this thread and it might be my new favorite, RivennHewn you got a great eye and i love all your projects, you have given me so many ideas! love the vintage industrial look...Your metal brake stand is almost too cool to leave in the garage could of been a center piece bench or table in anybody's house!
:beer:
 
Last edited:
OP
R

RivennHewn

Well-known member
Joined
Jun 4, 2011
Messages
10,373
Location
PNW
Bears Fan,

much appreciated. That's why I hang out here.

Lot's of inspiration for projects.

I've pilfered and borrowed many details from a number of skilled/talented members.
 
OP
R

RivennHewn

Well-known member
Joined
Jun 4, 2011
Messages
10,373
Location
PNW
The wood shim and plastic C-clamp wasn't holding the rivets in as well as I'd like, so tonight I came up with another solution.

I had an off-brand name vise grip clamp that I cut apart, and welded the feet to another clamp.

Then I welded a little nut on the opposing foot. I chamfered the inside of the nut to better fit the rivet heads.

The 3-finger clamp snugs the heads tight, holds them and gives me room to weld.

Note: Welds are a little ugly, and I made no attempt to clean them up. They'll be covered in slag in no time.
 

Attachments

  • 3finger2.jpg
    3finger2.jpg
    146.5 KB · Views: 77
  • 3finger3.jpg
    3finger3.jpg
    136 KB · Views: 82
  • 3fingerclamp.jpg
    3fingerclamp.jpg
    139.1 KB · Views: 84
OP
R

RivennHewn

Well-known member
Joined
Jun 4, 2011
Messages
10,373
Location
PNW
Found a new use for the HF magnetic paper towel holders tonight.

A quick, easy, lightweight, moveable hanger for your welding hood.

Bonus- the other half hangs your ear protection!

Have both for the price of one paper towel holder: http://www.harborfreight.com/magnetic-paper-towel-holder-69323.html

$8.99 before 20% off coupon: http://www.hfqpdb.com

And, they look like they'll match the new vise I just ordered:

http://www.homedepot.com/p/Yost-4-in-Forged-Steel-Vise-FSV-4/205192405?keyword=yost+FSV-4
 

Attachments

  • 712slh7tNwL._SL1500_.jpg
    712slh7tNwL._SL1500_.jpg
    67.3 KB · Views: 50
  • earhanger.jpg
    earhanger.jpg
    138.1 KB · Views: 77
  • hoodhanger.jpg
    hoodhanger.jpg
    139.1 KB · Views: 77

1/2 Cup

Member Emeritus
Joined
Apr 28, 2012
Messages
19,283
Location
Shepparton. Victoria. Australia
The wood shim and plastic C-clamp wasn't holding the rivets in as well as I'd like, so tonight I came up with another solution.

I had an off-brand name vise grip clamp that I cut apart, and welded the feet to another clamp.

Then I welded a little nut on the opposing foot. I chamfered the inside of the nut to better fit the rivet heads.

The 3-finger clamp snugs the heads tight, holds them and gives me room to weld.

Note: Welds are a little ugly, and I made no attempt to clean them up. They'll be covered in slag in no time.

Clever.:thumbup:
 
OP
R

RivennHewn

Well-known member
Joined
Jun 4, 2011
Messages
10,373
Location
PNW
With what little shop time I got this evening, I cleaned up some welds, sanded a few rough spots, and added the little rivets mid-leg. The original table had a shelf, and left some 1/4" holes that needed filling. My little 3-finger clamp worked great.

All cleaned up and masked off. Tomorrow I'll spray the inside of the legs/apron and underside with Krylon rattle can truck bed liner.
 

Attachments

  • cornershot.jpg
    cornershot.jpg
    148.4 KB · Views: 78
  • masked.jpg
    masked.jpg
    141.9 KB · Views: 102

nine4gmc

Well-known member
Joined
Mar 24, 2012
Messages
14,357
Location
Dallas
Coming along nicely, I think I would have incorporated a shelf or leg stringers at the lower rivet mark though for more support. Any solid ideas on a top yet or still playing by ear?
 
OP
R

RivennHewn

Well-known member
Joined
Jun 4, 2011
Messages
10,373
Location
PNW
Thanks Nine,

The lower shelf will be just above the casters. The legs definitely need some help.

I may even need to add some corner braces.

I decided to go ahead and order a 5/16" top.

Should get it next week.
 
To avoid these ads, REGISTER NOW!
OP
R

RivennHewn

Well-known member
Joined
Jun 4, 2011
Messages
10,373
Location
PNW
Much appreciated 1/2 Cup!

Did a little dink'n around before dinner, and got the black sprayed on the inside components, and de-masked.

I will say I'm not a real fan of the newer 3M Blue masking tape.

I liked the old stuff better.

Then I cranked out a plate for the receiver tube for my old pipe vise.

I've had this thing for years, and never really used it because it was never mounted. Not sure I'll ever use it now, but it's ready if I do need it.
 

Attachments

  • flatblack.jpg
    flatblack.jpg
    150.7 KB · Views: 104
  • flatblack2.jpg
    flatblack2.jpg
    140.2 KB · Views: 84
  • pipevise.jpg
    pipevise.jpg
    142.9 KB · Views: 133
OP
R

RivennHewn

Well-known member
Joined
Jun 4, 2011
Messages
10,373
Location
PNW
Yost vise showed up this afternoon.

Haven't gotten a chance to mount it yet, but my initial impression is good.

more pics to follow.

D0xl
 
OP
R

RivennHewn

Well-known member
Joined
Jun 4, 2011
Messages
10,373
Location
PNW
Yost FSV-4

22 lbs

This series is constructed out of 90,000 psi Tensile Strength (54,000 psi yield strength) Forged Steel. This line is the only forged steel vise line to come with replaceable machinist and pipe jaws. Adjustable hardened guide rails provide smooth, precise operation. The durable powder coat finish provides a professional finish that helps prevent damage from weather. The forged steel base features 2 lockdowns for a tight grip.
90,000 psi tensile strength (54,000 psi yield strength) forged steel castings (S45C)
Black oxide main handle for increased corrosion resistance
Replaceable black oxide machinist and pipe jaws
Large anvil work surface
Adjustable guide rails for smooth operation
360° swivel base with two lockdowns
Forged steel base with 3 mounting holes
 

Attachments

  • yostrecord.jpg
    yostrecord.jpg
    135.9 KB · Views: 93
  • yostside.jpg
    yostside.jpg
    132.7 KB · Views: 51
  • yostjaw.jpg
    yostjaw.jpg
    125.8 KB · Views: 47
  • yostbottom.jpg
    yostbottom.jpg
    140.9 KB · Views: 44
  • yostcollar.jpg
    yostcollar.jpg
    138.6 KB · Views: 44
  • yostbase.jpg
    yostbase.jpg
    138.1 KB · Views: 46
Last edited:
OP
R

RivennHewn

Well-known member
Joined
Jun 4, 2011
Messages
10,373
Location
PNW
Thanks guys.

Today's task was to get the vise mounted to the tube insert.

Had some scrap 1/4" plate, and cut it out with the porta-band.

Employed my HF welding table to put it together.

I got a little heat warp in the plate, and had to grind about a 32nd off the vise base between the mounting ears to get it to set flat on the plate.

I was afraid I'd crack the base when I tightened it all down.

Task done, and I still have time for a Saturday afternoon nap.:lol:
 

Attachments

  • yostopen.jpg
    yostopen.jpg
    142.2 KB · Views: 92
  • yostmounted.jpg
    yostmounted.jpg
    132.1 KB · Views: 92
  • yostmount.jpg
    yostmount.jpg
    139.7 KB · Views: 104
  • yostplateweldup.jpg
    yostplateweldup.jpg
    138.5 KB · Views: 87
  • yostplatecutout.jpg
    yostplatecutout.jpg
    138.6 KB · Views: 83
Last edited:
OP
R

RivennHewn

Well-known member
Joined
Jun 4, 2011
Messages
10,373
Location
PNW
Spent most of this last week cleaning and organizing the shop.

Got rid a lot of clutter, and also some items that I just wasn't utilizing enough to justify.

40" shear, brake roll sold the 1st day on CL, thinking I may have let it go too cheap.

The large industrial metal cabinet/stand it was on is next, as with a Lista cabinet.

I've come to the conclusion that what I really want is clean, organized space.
 

Attachments

  • workspace1.jpg
    workspace1.jpg
    139.8 KB · Views: 178

1/2 Cup

Member Emeritus
Joined
Apr 28, 2012
Messages
19,283
Location
Shepparton. Victoria. Australia
Spent most of this last week cleaning and organizing the shop.

Got rid a lot of clutter, and also some items that I just wasn't utilizing enough to justify.

40" shear, brake roll sold the 1st day on CL, thinking I may have let it go too cheap.

The large industrial metal cabinet/stand it was on is next, as with a Lista cabinet.

I've come to the conclusion that what I really want is clean, organized space.

I am hearing you, clean and organised. Looks like we are on the same mission..;)
 
OP
R

RivennHewn

Well-known member
Joined
Jun 4, 2011
Messages
10,373
Location
PNW
What to do with this old Tanker desk style credenza top?

What to do with this old left over Zinc?

Hmmmm…….
 

Attachments

  • Zinc2.jpg
    Zinc2.jpg
    138.5 KB · Views: 50
  • Zinc1.jpg
    Zinc1.jpg
    110 KB · Views: 58
  • bottomside.jpg
    bottomside.jpg
    116.9 KB · Views: 58
  • Topside.jpg
    Topside.jpg
    85.9 KB · Views: 57
OP
R

RivennHewn

Well-known member
Joined
Jun 4, 2011
Messages
10,373
Location
PNW
Thought tonight would be a good time to break out the shrinker/stretcher and see what I could do for some radius corners.

I was pretty happy until I realized I had made the reverse of what I had intended.

Also came to realize that zinc is soft, and has it's limits with the stretcher.

Gonna keep trying. Maybe even read up on the subject.
 

Attachments

  • corner3.jpg
    corner3.jpg
    86.8 KB · Views: 93
  • corner1.jpg
    corner1.jpg
    128.2 KB · Views: 87
  • corner2.jpg
    corner2.jpg
    117 KB · Views: 84
OP
R

RivennHewn

Well-known member
Joined
Jun 4, 2011
Messages
10,373
Location
PNW
$hipping to STL? ouch.

It kinda ***** to let go of good shop tools and equipment.

But I'm looking at it as progress. The new welding table has taken over the space I was using for the shear brake roll. I still have the 48" brake, so I'll get by. But I loved the stand it was on.

And, there are funds in the wallet for a new "accessory" for the welding table.:dunno:


Tonight's fun was mounting the shrinker on a tube so I could mount it in the table insert.

I made my first radius corner! it actually fits. Only 3 more to go.
 

Attachments

  • corner7.jpg
    corner7.jpg
    70.5 KB · Views: 96
  • corner6.jpg
    corner6.jpg
    77.7 KB · Views: 96
  • shopcab2.jpg
    shopcab2.jpg
    69.3 KB · Views: 83
  • SBR1.jpg
    SBR1.jpg
    87.7 KB · Views: 86
  • corner 5.jpg
    corner 5.jpg
    101.9 KB · Views: 94
OP
R

RivennHewn

Well-known member
Joined
Jun 4, 2011
Messages
10,373
Location
PNW
Okay thanks, now I need a stretcher/shrinker... What brand are you rocking?

I impulse bought at HF, and already wishing I had done more research before I bought.

Lazze has a few really good vids on youtube:

I took the jaws apart after watching one of his vids, and they are obviously of lesser quality than the good ones.

I'll make them work for awhile, and then step up if needed.
 

classicJackets

Well-known member
Joined
Sep 26, 2014
Messages
448
Location
SE Michigan
Wow, the stretcher/shrinker is awesome.. and cool video link!
Nice work! Happy to see your keeping the shop neat and tidy!
I love this thread.
Doug
 
To avoid these ads, REGISTER NOW!
Top Bottom