To avoid these ads, REGISTER NOW!

Tooling organization

OP
L

lilscorpion

Well-known member
Joined
Mar 15, 2010
Messages
3,599
Location
Colorado
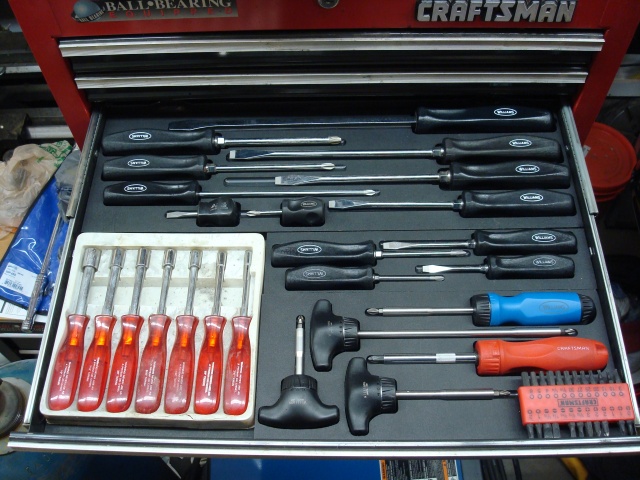
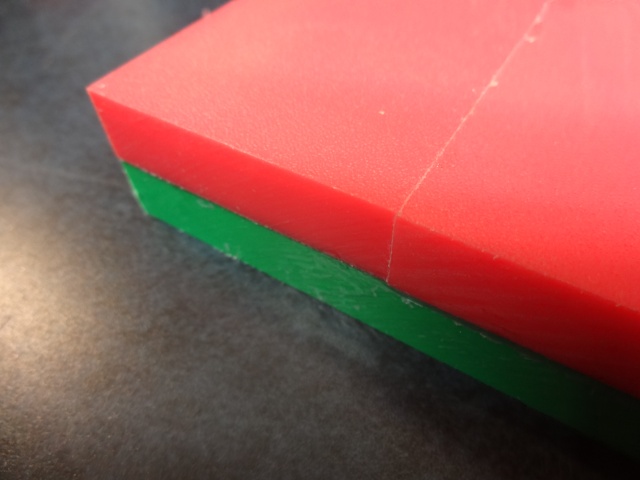
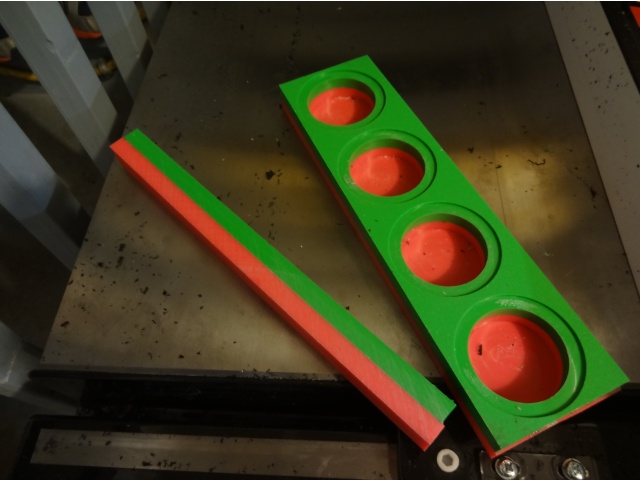
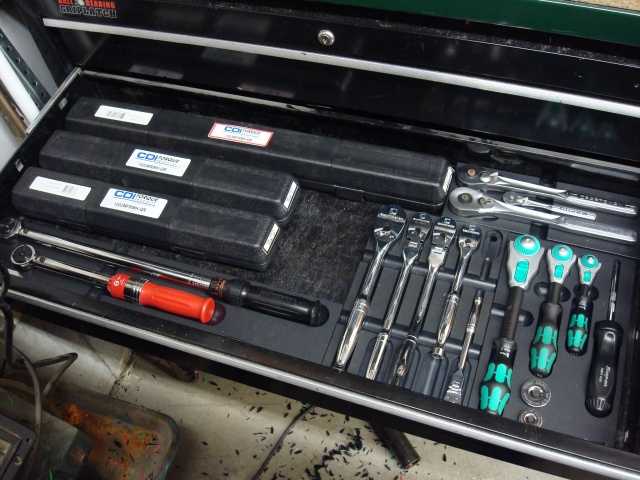
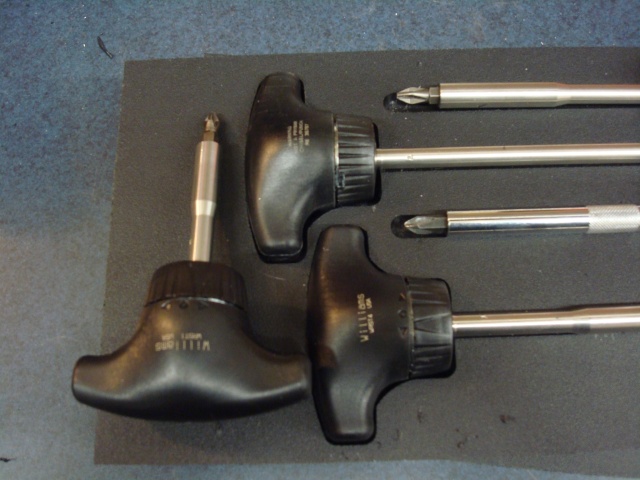
My OCD was kicking in and I couldn't stop the urge to finish the screwdriver drawer so I went out for what I thought would be a couple of hours and ended up having one of those days where whatever I try to do just doesn't work out on the first couple of tries. Part of the problem was that I had to figure out the shape of the Williams T-Handle. It's a 3-dimensional feat of marvel (not really but to make a mold for it sure makes it seem like it).

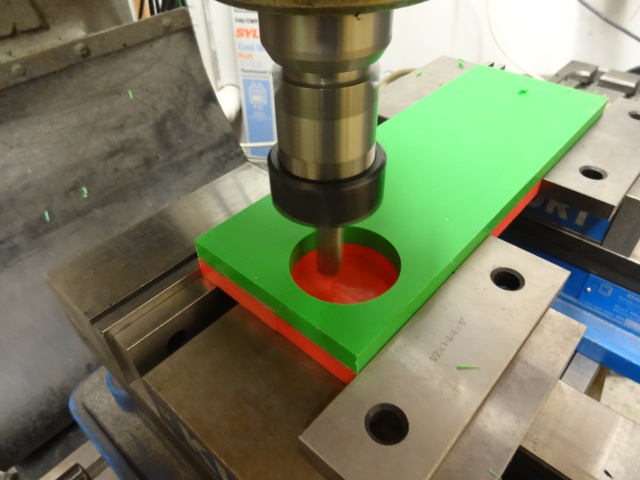
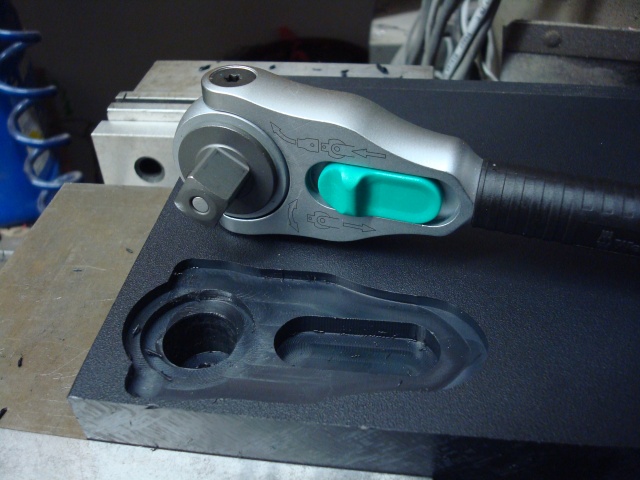
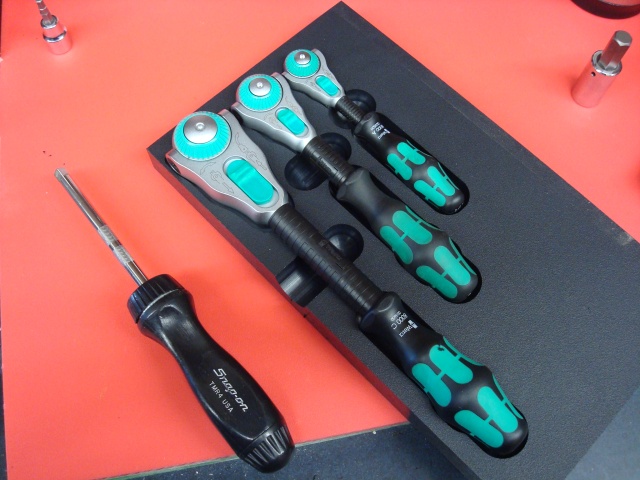
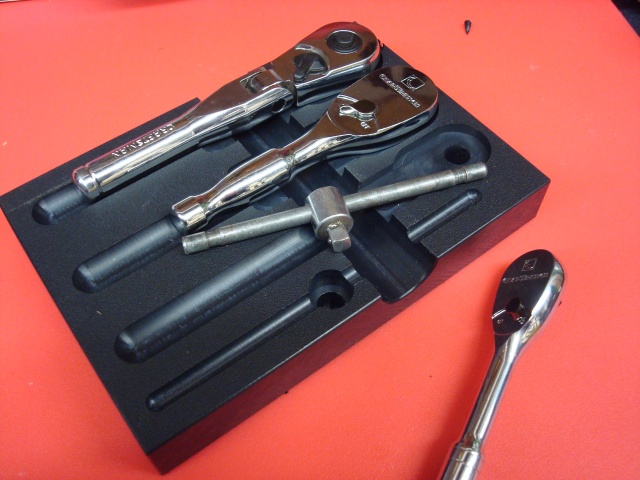
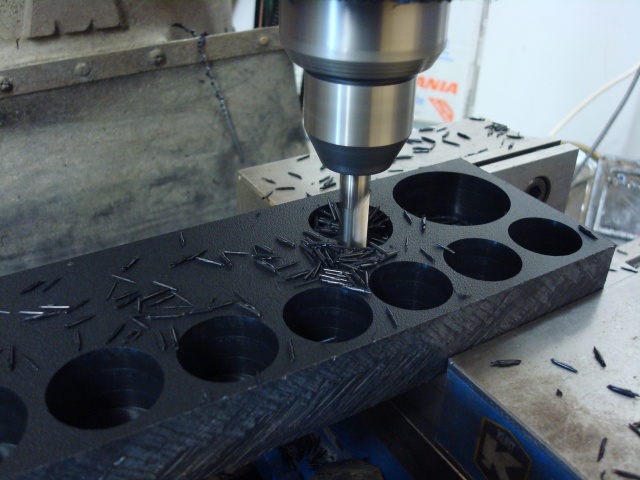
Of course I started with the easy part of the tray. I cut in the two large normal ratcheting drivers. Then, after tinkering for only a few minutes, I nailed the first t-handle. Since I have a couple of built in features in my conversational programming like Mirror, Repeat, Rotate, etc. it seemed like I was all but done. I just threw in a repeat and just like that, I had only one ratchet to go.

ScrewDriver15.jpg


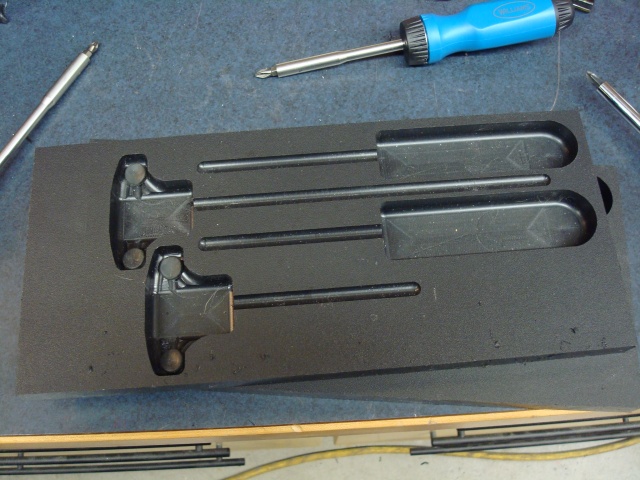
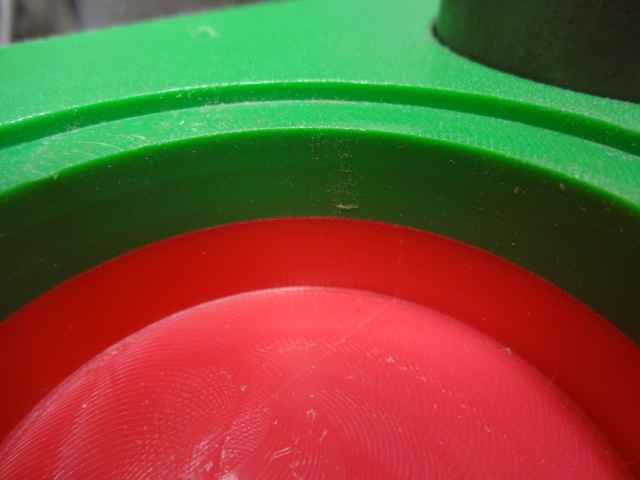
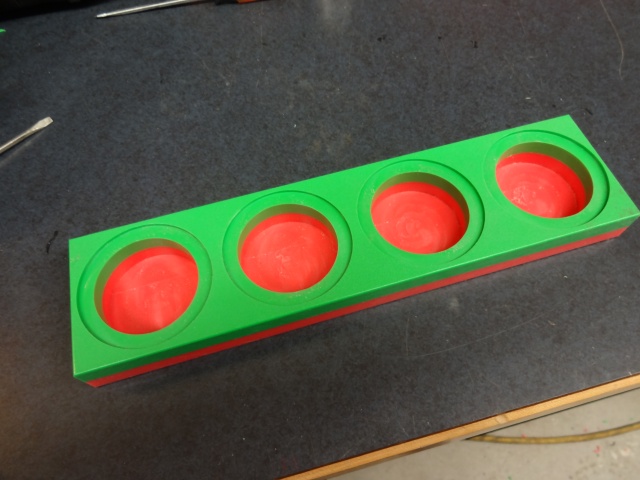
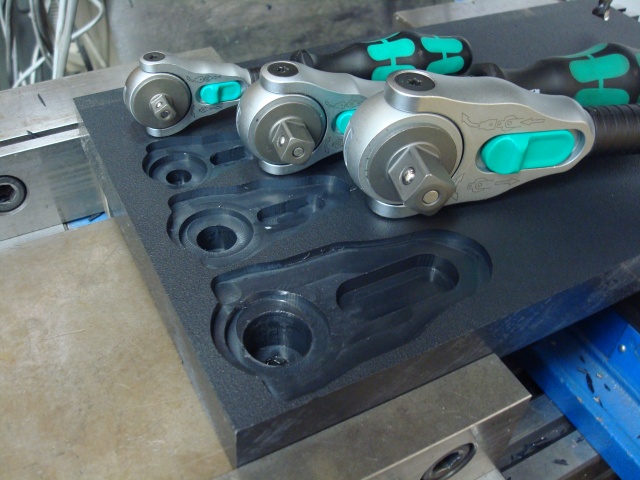
'Cept when I put the final T-Handle on there, I found I should have shifted the medium sized one over about .300". The smaller one won't even fit on the tray now. Had I taken a second, I would have probably been done in 40 minutes.

ScrewDriver16.jpg


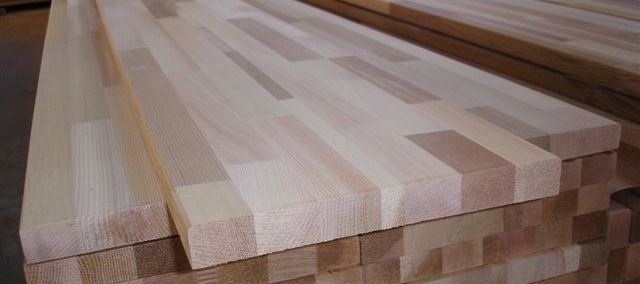
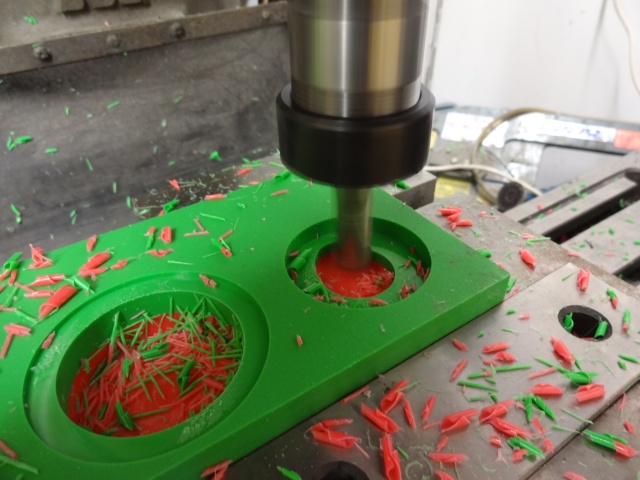
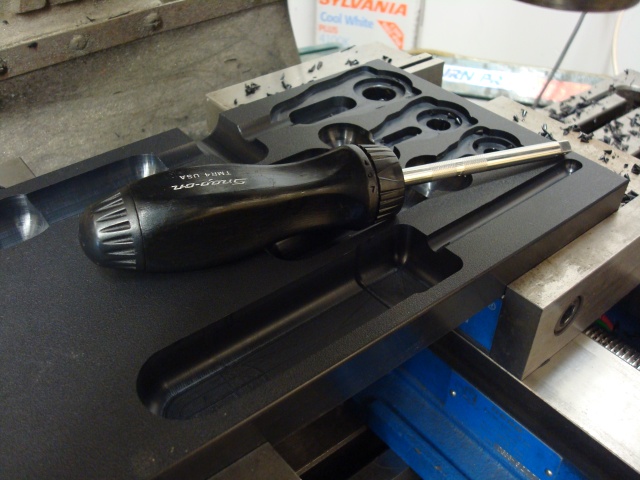
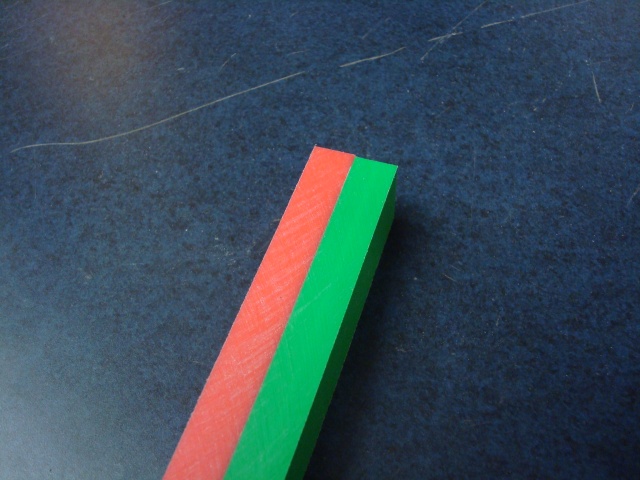
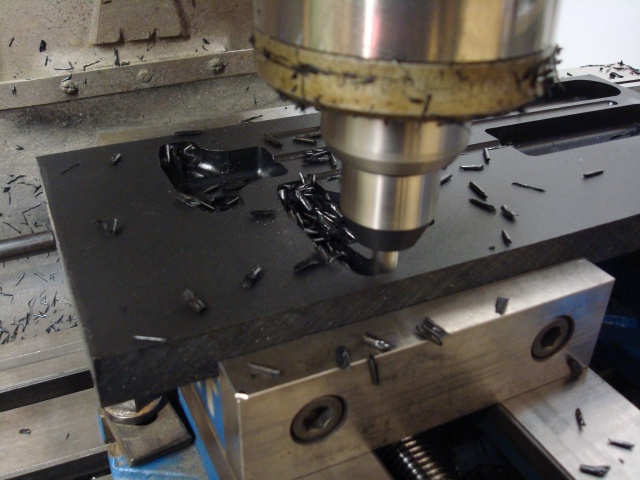
No biggie, I cut another piece of HDPE and dropped in the mill until I realized - One of the downsides of the way I sometimes do things on the mill is I either don't save the program because I figure I'll never need it again or I'll carelessly delete steps for the same reason and reuse the program. In this case I did the latter. I didn't have the standard ratcheting handles in the program anymore so I had to add them back. Not a biggie, I could just measure the first one and add them back quickly only quickly ended up being less than accurate.

ScrewDriver17.jpg


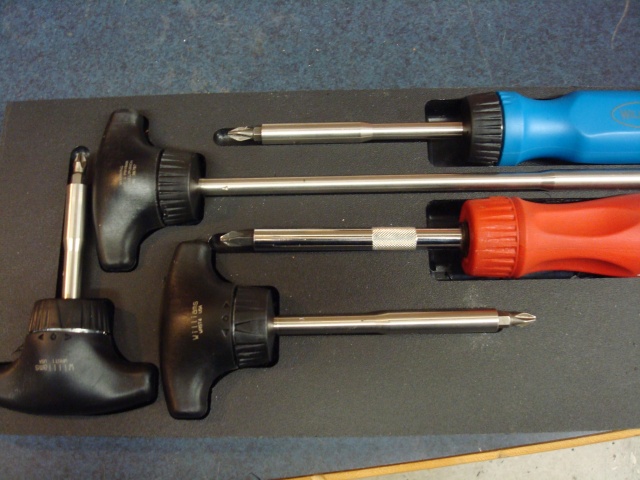
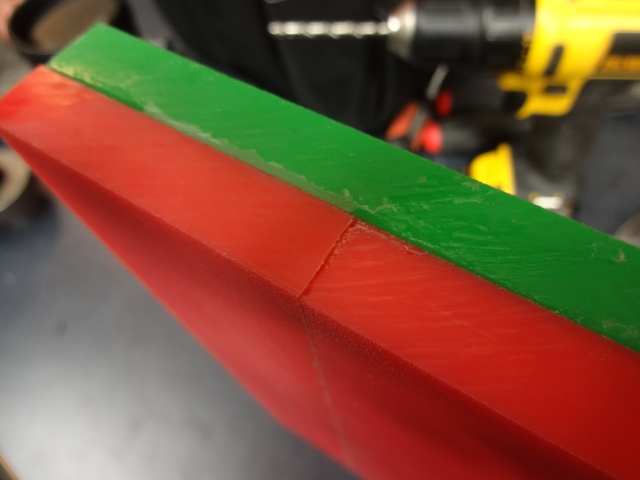
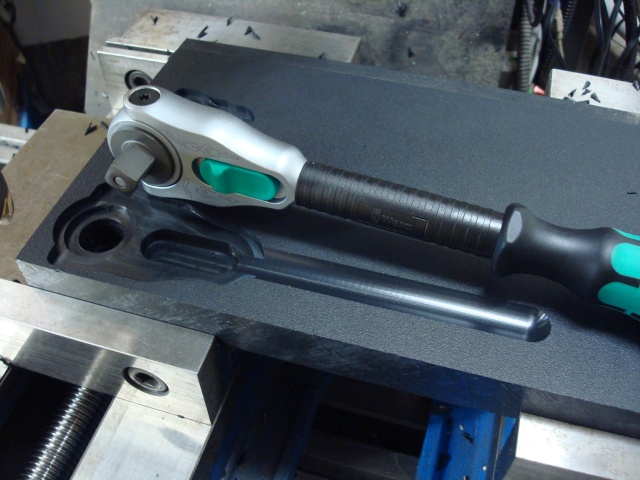
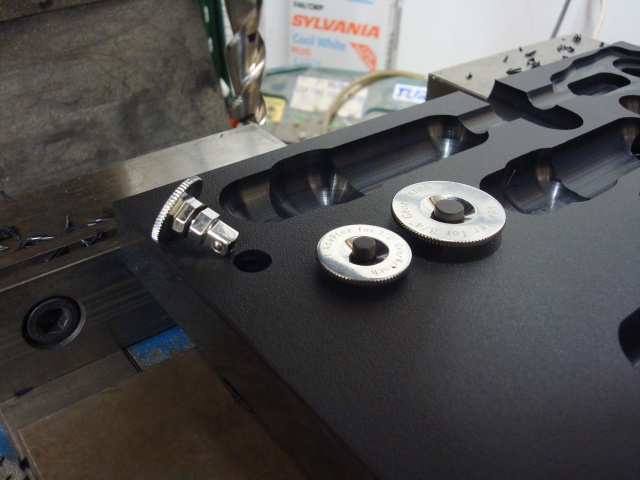
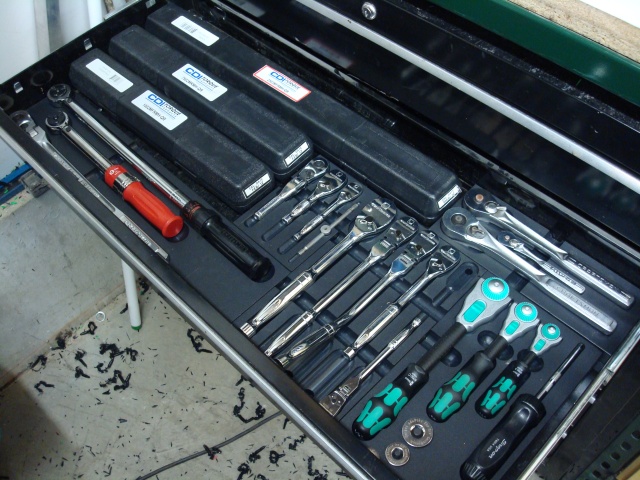
The second attempt got the 3rd T-Handle on the plastic but the standard drivers now had a pocket that's 1/2-inch longer than they needed to be. Normally I could live with that but I also didn't like that the 3rd T-Handle was 1/64" away from the second. It really needed to shift to the left about .200" and then it would look centered. I grew a brain at that moment. Instead of thinking I had it all figured out, I flipped over the second instead of cutting a third piece of material and cut the backside just to see if everything was where I wanted it to be. As it turned out, everything was perfect so I could have gone for it but safe was better than sorry.

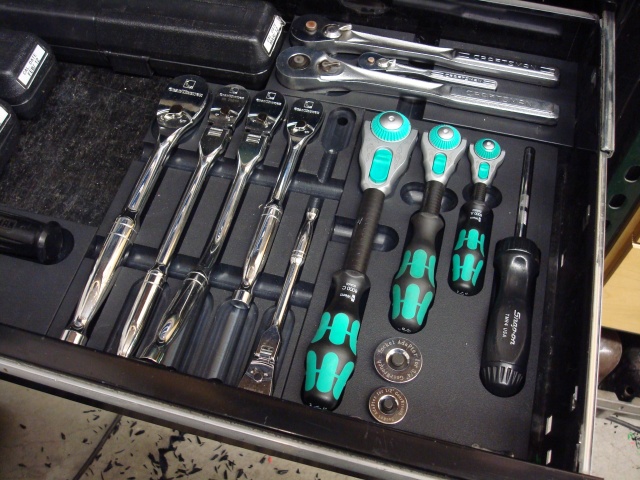
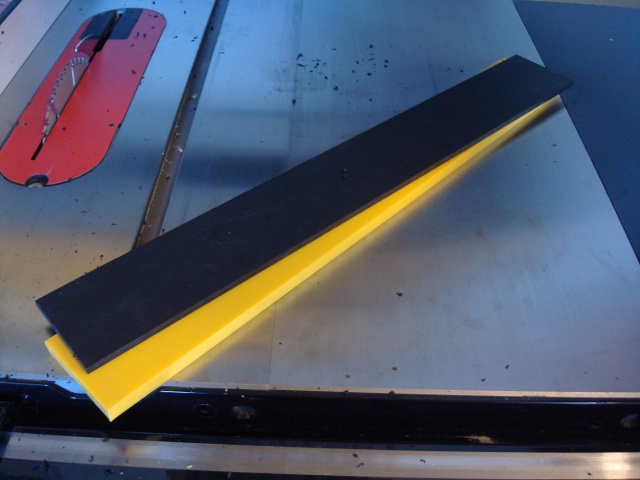
With the knowledge that I'd nail it this pass, I cut a new blank and headed over to the mill.

ScrewDriver19.jpg
 
To avoid these ads, REGISTER NOW!
OP
L

lilscorpion

Well-known member
Joined
Mar 15, 2010
Messages
3,599
Location
Colorado
One final touch I decided to add were some small rubber pads on the t-handles in hopes that it would reduce the rubbing of them in the tray and wear on the finish. I have some left over from a previous project (I needed a dozen and ordered a hundred so I have plenty).

ScrewDriver22.jpg


Since they require the material be about 1/4-inch thick and I don't want the ****** on the back to stick out the bottom of the tray, I needed to cut a .200" relief in the back of the tray. First I drill the holes where I want. Since they don't need to be perfect, I just hammer it out quick with a hand drill.

ScrewDriver20.jpg


Then I take it over to the mill, locate all of the holes, and run the 1/2-inch circular pockets.

ScrewDriver21.jpg


Then back to the bench where I push the rubber bumpers into the holes with a small screwdriver.

ScrewDriver23.jpg


After a little wiggle, the ****** flares out in the pocket and the bumpers are securely retained.

ScrewDriver24.jpg


The bumpers should isolate the T-Handles enough so they aren't sloppy in the hole.

ScrewDriver25.jpg


Seeing the finished product made it worth doing it 4 times to get it right. With my numb hands, ears, and nose, it's time to drop it in the drawer and turn off the lights for the day. Took a quick pic so you could all see it and back in the house to watch a little football and warm up.

ScrewDriver27.jpg
 

rick carpenter

Well-known member
Joined
Jan 20, 2011
Messages
3,763
Location
Huntsville, East Texas
It was COLD today. I'm already tired of it and ready for some warmer weather so I can get back to the cabinets and truck. After setting up the heater, I decided I better get something done even if it wasn't much so I decided to knock out the smaller Williams tray. ...

How do you like the Williams drivers? I have a set and like them pretty good, though I read that the shanks may not extend as far into the handles as other mfrs'. I don't know that for sure, can't see into them ya know. I put heat shrink for grip on the shanks because I twist with the shanks too.
 
OP
L

lilscorpion

Well-known member
Joined
Mar 15, 2010
Messages
3,599
Location
Colorado
How do you like the Williams drivers? I have a set and like them pretty good, though I read that the shanks may not extend as far into the handles as other mfrs'. I don't know that for sure, can't see into them ya know. I put heat shrink for grip on the shanks because I twist with the shanks too.

I really like them so far. Did a little appliance repair with one of the t-handles today actually. Had I tried the t-handles first, I probably wouldn't have gotten the standard one at all. The t's just fit so naturally in my hand. I had not heard the thing about the shanks. If it ends up causing problems, that'll **** but hopefully I'll never find out since I got all excited after using one and ordered every available length. I do like the smoothness of the ratcheting mechanism though. Its identical to my SO 1/4-inch ratchet driver which I really like. I like the heat shrink idea. I'll give that a shot.
 
OP
L

lilscorpion

Well-known member
Joined
Mar 15, 2010
Messages
3,599
Location
Colorado
One of the downsides to making all of these tooling trays is that there are, at times, drops that aren't big enough to make a useful tray. I've been keeping the bigger scraps in hopes that I'd find a use and over the past couple of weeks I've been pondering if it's possible to edge glue the smaller pieces together to make bigger pieces.

EdgeGluedBoards.jpg


If you're not familiar with edge gluing, it's commonly used in woodworking where boards are glued on the edge to make up wider boards. When working with wood, the two biggest challenges to edge gluing boards is (1) getting the edges square and (2) clamping the glued edges to make a tight union. One of the benefits to gluing this HDPE together is that the edges have been machined and HDPE doesn't warp or twist like wood so you don't need to worry about #1 above. #2 was my primary concern for two reasons. First, when HDPE is machined, it has a smooth and non-porous edge which isn't conducive to helping glue bond two items together. Second, once the glue has dried and I begin machining, I won't know if the bond between the pieces will be strong enough to overcome the pressures of the machining process and the two pieces could easily be pushed apart. On the other hand, the HDPE I've been using doesn't have a smooth surface front or back and actually has more of a texture. I could use this texture to my advantage and support an edge by also gluing a piece to the face.

EdgeGluedHdpe1.jpg


I failed to snap a few pictures of the material during glue-up (I'll be sure to do it next time) however about two weeks ago I glued up three pieces of scrap that I had in my drawer to use for this experiment. The top piece (green) is full size and the bottom two (red) would be edge glued as well as face glued to the top piece. This will be the last time I use the christmas theme however it will do nicely as a way to test my theory. I used a melamine glue which is specifically designed to bond wood to synthetic materials like melamine and vinyl as well as metals like aluminum and brass making it the most likely to create a successful bond in my sample.

EdgeGluedHdpe2.jpg


I used maybe a dozen large woodworking clamps to ensure that the three pieces of material were tightly joined together. The glue dried for far longer than it actually took (I just left it where it was until I remembered about it 2 weeks later) so I was certain that the glue had dried. When I pulled it out of the clamps, all excess was easily removed using my finger nail - which proves that the bonding ability isn't ideal but maybe just enough. I flexed the piece in my hand to see if the edge joint would fail and after a couple of attempts, I decided it was good enough and stopped short of making it fail (since I'd learn nothing but I knew it would at some point).

If this practice piece works out, it will be where I store my lathe bushings (some bushings I made for the backside of the thru-hole to support smaller diameter material in the lathe head). After squaring the sample piece on the table saw, I took it over to the mill and set it in the vise and cut the first hole. As expected, the chips flew. I was interested in seeing if the seem between the materials would be obvious once the cut was complete.

EdgeGluedHdpe3.jpg


The depth of the hole in the material was nearly .900" deep leaving only .100" thickness at the base. The seem (this is the edge seem between the two pieces of red HDPE) was barely noticeable though you can see it in the picture below. The seem between the red and green faces of the material is more noticeable but that's only because they are both textured surfaces. I'm maybe 2-inches away in the picture below. Back up to 2 feet and you can't tell there's a seem.

EdgeGluedHdpe4.jpg


With the sample hole being a success, I reprogrammed the mill to cut the remainder of the bushing holes so I could finish the piece. My favorite part of the machining process is where the end mill breaks through the green and transitions the cut into the red...again not a fan of the Christmas color theme however the idea of creating color depth in the tool trays is really starting to get my creative juices flowing.

EdgeGluedHdpe5.jpg
 
OP
L

lilscorpion

Well-known member
Joined
Mar 15, 2010
Messages
3,599
Location
Colorado
All I have left to complete the tray is to trim the excess and then break the edge with the router. Back to the table saw, I trim the one side down by half an inch. Here's a nice picture that shows the laminated materials.

EdgeGluedHdpe6.jpg


After breaking the outer edges with the router, it now looks like a finished piece and the lamination/Edge Gluing of HDPE is declared a success.

EdgeGluedHdpe7.jpg


This is the first organization tray of the drawer I usually refer to as my bushing and fixture drawer however it's become the overflow drawer of all the other drawers. As you can see it now has misc taps, some milling machine parts, and a variety of fixtures I've used in the past (that I'll likely never use again but I can't stand the thought of pitching).

EdgeGluedHdpe8.jpg


Between the time this tray hit the bottom of the drawer and the time the write up was added to the website, I've found and purchased some yellow and blue 1/2-inch thick HDPE (Known as Colorboard) off of eBay and I hope to have it in a week or so. I also ordered some 1/4-inch black that I will face glue to the yellow and blue to create 3/4-inch pieces I can cut trays out of. If the thinner HDPE works on the face, I should be able to cut trays that have a third dimension to them and create a much more attractive presence in the bottom of a drawer...that's the plan anyway.
 
OP
L

lilscorpion

Well-known member
Joined
Mar 15, 2010
Messages
3,599
Location
Colorado
The King Colorboard arrived today. Talk about electric colors...I'm really looking forward to trying out the laminated effect this weekend.

hdpecolors.jpg
 

Woodr004

New member
Joined
Dec 26, 2008
Messages
1
Your organization is remarkable. Are your plans available as drawings? The French cleat idea is interesting. Maybe someday I can get to your level of organization! Keep up the good work.
Pat
 
OP
L

lilscorpion

Well-known member
Joined
Mar 15, 2010
Messages
3,599
Location
Colorado
Your organization is remarkable. Are your plans available as drawings? The French cleat idea is interesting. Maybe someday I can get to your level of organization! Keep up the good work.
Pat

Thanks! Unfortunately I usually only sketch plans to determine material needs and to better optimize the use of the materials. The cabinets were all built specifically for their location so, in many cases, I just went for it. Anything that I machine is usually one-offs and I have parts of the programs saved and some parts of the programs are single ops I don't save. The only problem is the control I have can only save to a floppy disc and I don't have a machine with one anymore so it's difficult (maybe not even possible) to get things off the machine.

If you're curious about the French Cleat system, there's a couple of videos by TheWoodWisperer on youtube you may want to check out. Here's one:

I think he has a site as well.
 
Last edited:
OP
L

lilscorpion

Well-known member
Joined
Mar 15, 2010
Messages
3,599
Location
Colorado
Well today I got back after the Rachet drawer. I'm sure you've noticed, I tend to bounce all over the place when I'm working on huge projects like this. Because of the time it takes to complete a drawer, I tend to stay more motivated if I have three or four going at one time and work on whichever one I want when the mood strikes to put some time in. For me it helps keep rolling. My goal (about two months ago) was to be done with the organization of the tool boxes so I could get back to the truck on the first warm day...well it looks like that's going to be tomorrow and I'm weeks away from being close to done.

Anyway, back to the drawer. The next tray is for the Wera Cyclops which have to be the most goofy shaped ratchets I've ever seen. I was previously planning on taking the easy approach and just cut ovals for each like the other ratchets but then guilt flooded over me. The shape of the heads is just screaming "make me a cool tray".

CyclopsTrayA.jpg


After plotting out one side I used the mirror feature to create the opposite side of the head and made a sample cut that was good enough to keep. Close inspection of the 1/2-inch ratchet showed a multitude of convex and concave radii. The only thing simple about the design is that the face of the ratchet was mostly flat with the exception of the ball release lever in the middle of the head that I'd need to make a relief for.

CyclopsTrayC.jpg


In cases like this, I've found it's far easier to trace the shape on the material and then plot the points. Using the points, I enter them in cad and then figure out the connection radii and make a dry slow run with the cutter .100 above the material so I can see if it follows the profile I want. I make adjustments and rerun until the profile is correct. After getting the profile correct, I adjust the depth of the cutter and make some chips.

CyclopsTrayB.jpg


Next is to figure out how I want to stagger the 3/8-inch and 1/4-inch ratchet. If I go heads up, I'll have enough space to add my Snappy Ratcheting 1/4-inch driver and my thumb drives to the tray. Cutting the profiles for the other sized ratchets went quite a bit faster because I wasn't guessing as much.

RatchetDrawerU.jpg
 
Last edited:
OP
L

lilscorpion

Well-known member
Joined
Mar 15, 2010
Messages
3,599
Location
Colorado
I decided to take the easy path for the handles instead of attempting to profile each one of them since the Cyclops handles shapes are so complex. I ended up having to use just about every size ball mill to make it work due to the variety of sizing between the three ratchets.

RatchetDrawerV.jpg


After cutting in the handles, I added some relief cuts with a 1-inch ball mill. Without the reliefs, it's difficult to get them out because of how deep they're sunk in the tray.

RatchetDrawerW.jpg


Now to cut in the Snappy driver. Since I'd done the tray for the Williams screw drivers a couple of weeks ago, I was able to make a few adjustments and cut it in. It's about time that I made a tray for this ratchet. Because of it's shape, it rolls around in the drawer quite a bit which has left little "abuse marks" all over it. Had I made a tray for it a couple years ago it would still look brand new.

RatchetDrawerX.jpg


For now, all that's left is the holes for the thumb-wheel set. I machined the holes shallow by .120 so each would have enough stand-off where I could easily pull them out of the tray without cutting additional reliefs.

RatchetDrawerY.jpg


After breaking the edges with the router, I drop it in place in the drawer. The drawer is starting to come together now. Everything visually has it's place and I'm through all of the hard trays.

RatchetDrawerZ1.jpg


I have one more tray that I need to make for my stubby ratchets that will go in the empty space just to the left of the GearWrench tray and then I'll have to decide if I want to make trays for the torque wrenches or leave them in their cases...which I keep waffling on. The cases are good because they protect the wrenches however the tray would probably do just as well since I have no plans to pile anything on top of them within the drawer. The downside of the cases is they take up more space. Once I tackle the extensions I'll have a better idea if I need the space or not and that will likely make up my mind for me.

RatchetDrawerZ.jpg
 
OP
L

lilscorpion

Well-known member
Joined
Mar 15, 2010
Messages
3,599
Location
Colorado
I'm sure everyone is getting tired of watching me machine plastic. I'm getting a little tired of doing it. Instead of throwing out all of the pics from today's time in the shop, I'll just share the final pic of the completed small tray

RatchetDrawerZA.jpg


...and the completion pic of the ratchet drawer.

RatchetDrawerZD.jpg


It's time to drag everything away from the wall and start cleaning up plastic chips. They're everywhere.
 

Turbo_Prop

Well-known member
Joined
Sep 23, 2012
Messages
297
This thread simply reenforces my belief that I need, must have and want so badly, a bridgeport in my home garage.

To the OP: Your work in this thread is gorgeous and inspires me to do better. Maybe I missed it someplace, but are you hand cranking this or drawing and CNC-ing?
 
OP
L

lilscorpion

Well-known member
Joined
Mar 15, 2010
Messages
3,599
Location
Colorado
This thread simply reenforces my belief that I need, must have and want so badly, a bridgeport in my home garage.

To the OP: Your work in this thread is gorgeous and inspires me to do better. Maybe I missed it someplace, but are you hand cranking this or drawing and CNC-ing?

I manually spun the wheels for about two years and then I converted it to CNC using a Centroid Retrofit with keyboard jogging combined with some parts from ElrodMachine.com - CNC XY Brackets, HD yolk, a new pair of ball screws and zero backlash nuts, and a few other things to make it painless. Manually I would have problems making some of the more complicated trays I made over the past couple months but most of them would be possible. The Centroid control has conversational programming and I use that for most of the things I machine. At times I switch to manual mode because its just easier to do simple ops that way. With ball end mills in the correct sizes, that's what I do more than before because getting the measurements into the machine correctly can sometimes take longer than just cranking the wheel for 3-inches. When the CNC is in manual mode, I still have full DRO and that helps a lot. Back when I only had DRO, I'd plot the points of a complex shape and then navigate to them using the DRO. Large circles had to be done different ways, I never could get the XY ratio thing down by hand like some of the ill school machinists I've been lucky enough to watch. To make large circles I used a very large indexing table the just collects dust now. Hess that's the really long answer to your question. LOL
 
Last edited:

sakurama

Well-known member
Joined
Oct 10, 2010
Messages
1,458
Location
Portland - the cool one.
I have to say that this is the most valuable thread I've yet seen here in terms of contribution of ideas. I just purchased my first house and I have started to contemplate the garage and this thread has significantly altered my plan. I was thinking of looking for cabinets and going the Jack's-12-gauge way and besides the cost and overkill it would always be a compromise as those solutions aren't made for me or my space.

So you've convinced me to build out my entire garage myself. Something I'm interested in doing as, like you, I enjoy learning a new skill. It would be great to see some more detailed cabinet builds as so far your tutorials are better than most I've found.

I'll have to dig up a photo but I've gone the foam tool cutout route. It's worked well and it's cheaper as well as less time consuming. Other than that, like many others, I intend to liberally plagiarize many of your ideas and I thank you for them.

A couple of questions:

Why frame faced as opposed to faceless? I'm leaning towards faceless for the greater space and simplicity.

Are you dealing with the 5x5 baltic birch? Is this size a limitation?

How did you do the cabinet fronts and what is the reasoning?

Why not pocket screws - a friend has convinced me they're a great method and I can skip the glue up.

Thanks much for the ideas. Keep it up.

Gregor
 
OP
L

lilscorpion

Well-known member
Joined
Mar 15, 2010
Messages
3,599
Location
Colorado
Thank you for your compliments. I've enjoyed documenting my projects more than I used to in the past because others are interested. As it turns out, this documentation has turned into a valuable way for me to work through the design and execution of my ideas.

I'll have to dig up a photo but I've gone the foam tool cutout route. It's worked well and it's cheaper as well as less time consuming.
Shadowing using foam is an excellent way to organize and I likely would have also gone that route had I not had this crazy idea that I'm now attempting to follow through to the end. I enjoying the machining process so using plastic is really just feeding that part of my addiction.

I was thinking of looking for cabinets and going the Jack's-12-gauge way and besides the cost and overkill it would always be a compromise as those solutions aren't made for me or my space.
  1. Jack's space is one of my all time favorites
  2. Searching for organization ideas found his thread on GJ and I joined. He's the reason I'm here as far as I'm concerned.
  3. Given the choice, I'd prefer steel cabinets for durability reasons
  4. I very much respect his space optimization ideas and either considered many of them or used them as fuel to come up with my own

That being said:
I could not, no matter how I tried, adapt his type of solution to my space given space constraints. To have as much storage as I wanted I needed my cabinets to fit in every nook and crevice and you can't do that with a steel cabinet without heavy fabrication. Also, if a cabinet didn't work out as I imagined, I wanted to be able to change direction and build one that did fit what I wanted which makes fabrication more desirable to me. Also, assembling a garage like Jack's takes time. You have to find, and bring back to life, most of those treasures he has. I wanted a usable space as quickly as possible and, for the most part, labor was the only thing separating me from being where I wanted to be. Patience isn't one of my strong suits.


Other than that, like many others, I intend to liberally plagiarize many of your ideas and I thank you for them.
I spent many hours searching the net for ideas before I started down my path. I have found many inspiring ideas here and there and it was many of those seeds that helped me turn what I thought were crazy ideas into reality. If any of them can be used as fuel to feed someone else's idea engine, I'm all for it. In reality, something you may do may end up being what fuels my next idea so in many ways, I need you to get to work. LOL

Why frame faced as opposed to faceless? I'm leaning towards faceless for the greater space and simplicity.
This question may be difficult to explain until the weather improves and I can build, and document, a cabinet but I'll try. There's face frame construction, there's faceless, and there's the approach I took. Since you already know the difference between the first two, I'll just attempt to explain mine. One of my observations pertaining to cabinets is that most of the construction of the cabinet is never seen by the layperson, it's hidden. I started down the path of building face-frames but I quickly found that it was a time consuming process. If I leveraged the fact that most of the assembly is hidden, I could easily build a facade (false front) that looked like a face frame but was actually just well finished trim. Consider this photo:

BenchConstruction.jpg


95 - 99% of the presentation of this counter is the drawer faces. I knew I could get a beautiful finish with the HVLP. Because you can barely see the frames I even stopped spraying them because it was easier and faster to brush them in place and you can't tell the difference unless you get too close. So...back to the facade. Let me introduce you to the man behind the curtain.

BenchConstructionA.jpg


The cabinets have a top, bottom, two sides, a back, and the face. I use 3/4" melamine for the top, bottom and sides. The sides are dado'd for two reasons. First, it gives the glue a place to bite and makes it stupid simple to pre-drill the screw holes before assembly. Second, they help locate the drawer slides and are used to add additional cross-bracing which add strength to the cabinet and prevents the drawers from pushing out the sides of the cabinets. The backs are all 1/4" melamine and, when cut to the perfect size, they ensure the squareness of the cabinet during assembly. Basically I glue, assemble, pull the frame square to the backing, staple the back in place, and then hammer down with the screws.

Next is the face frame/facade which is extremely simple and fast. I cut strips, glue, and brad/staple them in place on all faces of the Melamine. These trim strips add strength to the cabinet and give the cabinet the illusion of having a face frame. By leaving the picture in high-res and cropping it down to a small section you can basically see the whole enchilada. Red circles show the brad holes that have been filled, sanded and then top-coated. I try to get all of the trim pieces as flush to each other as possible but slight differences can easily sand out as long as the difference isn't greater than the thickness of the top ply.

BenchConstructionB.jpg


This particular cabinet was a serious re-design. I originally planned for it to be a tooling cabinet with many yery short drawers. I had a difficult time getting the dividers to work out without losing a mess of drawer space so I decided to cut out the braces and double the depth of the drawers. Even though it initially pained me to know it was such a bastardized cabinet, I honestly had forgotten it's ugly on the inside because I never see it now that it's assembled and in use.

Oh...and I break the edges on the plywood strips after sanding with a 1/8" quarter-round bit on a hand router to prevent the ply from splintering.

I realize that pictures on the web can hide imperfections that are otherwise obvious in person. I'm proud to say that in person they look equally as nice if not nicer. 95% of the people that look at them say they're nicer than the cabinets in their kitchen. Good enough for me. The finish exceeded my expectations.

Why not pocket screws - a friend has convinced me they're a great method and I can skip the glue up.
Pocket screws are a nice way to join a pair of boards together however there are two problems with plywood. First, when you attempt to sink the pocket screw I found that many times it separates the plys and essentially blows out. At that point you either pitch the board or have new finishing problems/considerations. I started down the face frame path and built one complete cabinet using them. In fact, this cabinet has a full face frame and isn't a facade.

StorageBins.jpg


After building this particular cabinet I realized that, though nice, building real face frames was going to be the longest part of the process. By going to the facades, I was able to do the construction part of the cabinets in 3 weekends if I recall correctly. Finishing was another story which ended up taking months considering three coats + dry time between coats + real job + family mad because they wanted attention.
 
Last edited:
To avoid these ads, REGISTER NOW!

sakurama

Well-known member
Joined
Oct 10, 2010
Messages
1,458
Location
Portland - the cool one.
Wow, great reply. You should teach.

So are you using true Baltic birch? I ask as I mentioned that I want to use that to our contractor and he was placing an order and said I could piggy back. He's getting Chinese 4x8 3/4 birch ply for $25 a sheet. Russian 12mm "cabinet ply birch" is $33 and 18mm is $48 and I assume these are 5x5 sheets. What do you recommend? Is it worth double the cost?

I will do my best to come up with a storage idea for you in my build. I have a novel method of keeping my AXA Aloris tool holders handy with magnets that I will improve on in the new shop.

Gregor

PS I will be ordering pneumatic pinner because of you.
 
OP
L

lilscorpion

Well-known member
Joined
Mar 15, 2010
Messages
3,599
Location
Colorado
Wow, great reply. You should teach.

So are you using true Baltic birch? I ask as I mentioned that I want to use that to our contractor and he was placing an order and said I could piggy back. He's getting Chinese 4x8 3/4 birch ply for $25 a sheet. Russian 12mm "cabinet ply birch" is $33 and 18mm is $48 and I assume these are 5x5 sheets. What do you recommend? Is it worth double the cost?

I will do my best to come up with a storage idea for you in my build. I have a novel method of keeping my AXA Aloris tool holders handy with magnets that I will improve on in the new shop.

Gregor

PS I will be ordering pneumatic pinner because of you.

Thanks. As luck would have it, I've become fairly experienced in trial and error (sometimes more of one than the other). If sharing spares someone else a sheet of wasted material, I'm in.

I won't pretend to be an expert on the various types of plywood. I do use true Baltic Birch. It has more but thinner layers, it is extremely consistent in thickness (some plys can differ more than 1/32" within the same sheet), it has no voids (or pockets within the plys), the surface layer is thicker, and the plys are more dense. This is not true for all Baltics though I guess. I've been told that some in the lower grade slip in some of these categories.

The thinner and dense plys gives the material better flatness accuracy and helps it hold its shape. I've had much less problems with warpage and the sheets seem to be in better condition when I get them. It also seems to cut better on the saw (probably due to the density and lack of voids).

I think you want the Russian stuff (Baltic region). That's the true source of the stuff I use. The Chinese stuff is lower quality and I've heard that some have glue even on the surface ply due to it's manufacturing process. I've not experienced finishing a ply that's like that but I would assume that it would be difficult to finish any other way than paint. If there's a wood supplier in your area I'd give them a call or stop by and ask some questions. If you tell them your finishing plans they may have your answer.

You may want to look into a Brad nailer instead of a pinner. A pinner is essentially a headless nail and a brad has a slight head. The pinner will hold something in place whereas a brad will have a clamping force due to the head. If I really want clamping force, I use a narrow crown stapler and tend to lean towards it now. When using staples you gotta do so with the grain or you blow out but they do hold much better.

I'm interested in your aloris holder organization. Mine just sit on a shelf so I could use some help in that area. Thanks!
 

sakurama

Well-known member
Joined
Oct 10, 2010
Messages
1,458
Location
Portland - the cool one.
You may want to look into a Brad nailer instead of a pinner. A pinner is essentially a headless nail and a brad has a slight head. The pinner will hold something in place whereas a brad will have a clamping force due to the head. If I really want clamping force, I use a narrow crown stapler and tend to lean towards it now. When using staples you gotta do so with the grain or you blow out but they do hold much better.

I was thinking of the Cadex 23ga pinner as it will do both pins and slight headed brads. I'm sure I'll also get the stapler and others as needs present themselves. I basically wait until a project requires a tool and then I justify the price of the tool against what it would cost me to either hire someone or buy it new instead of build it. Then I have if for the future.

Gregor
 
OP
L

lilscorpion

Well-known member
Joined
Mar 15, 2010
Messages
3,599
Location
Colorado
Is there any way to show the pics from the prevous pages?

At the top (and bottom) right of every page there is a small list of links that allows you to go back to previous pages. If you click any one of the numbers it will take you to that page within the thread.
4uputygu.jpg
 
Last edited:
OP
L

lilscorpion

Well-known member
Joined
Mar 15, 2010
Messages
3,599
Location
Colorado
I was thinking of the Cadex 23ga pinner as it will do both pins and slight headed brads. I'm sure I'll also get the stapler and others as needs present themselves. I basically wait until a project requires a tool and then I justify the price of the tool against what it would cost me to either hire someone or buy it new instead of build it. Then I have if for the future.

Gregor

Cool, I didn't know there were pinners that could shot headed nails. I've been holding off getting a pinner for the same reason (couldn't justify it) but when it's dual purpose...that's a different story. Thanks for the tip!
 
OP
L

lilscorpion

Well-known member
Joined
Mar 15, 2010
Messages
3,599
Location
Colorado
I've had some plastic drops laying around that I need out of the way so today I decided to work on my socket drawer and consume them.

For years I've been using the Mechanics Time Saver socket rails for organizing my extensions. They work extremely well however I'm growing tired of the $20 expense each time I acquire a new set of sockets. Middle of last summer I made a socket holder for my 1/2-inch universal impact extensions and ever since then, I've been mulling around ideas for reclaiming some of that wasted space in my socket drawer as well as freeing up some of the MTS racks so I can move them to my metric drawer which has sockets just laying in there.

ImpactHolderE.jpg


The original tray was made out of Delrin and turned out well except the surface finish wasn't what I'd hoped it would be (though I admit I didn't try really hard to get a quality finish since I let it run on at the same time I was doing something else). If I'm going to take the time to make many more of them, I'd prefer that they'd have a higher quality finish. Since I'd been using HDPE for most of my drawer organization for the last couple of months, and I really like the textured finish of the Starboard, I figured why not. To set this up, here's how my socket drawer looks before starting. This pic is from earlier on in the post but figured I needed to revive it to give a proper before and after..

SocketDrawerA.jpg


Though the MTS work well for organizing sockets, there's a lot of wasted space between. Maybe that's by design so you can get your fingers around a socket however with only one 39" x 18" drawer allocated to my SAE sockets, even that space is needed. The plan here is to attempt to close the gaps without losing access.

The thickest Starboard available is 1 1/2-inch and it's typically sold by the square foot. I think I got this 12 x 12 piece for roughly $40. Keep in mind I didn't spend any time determining if it was actually cheaper than the MTS racks because that wasn't the purpose. For the record though, It turns out that it's far less expensive.

SocketDrawerB.jpg


As mentioned before, the beautiful thing about HDPE is it cuts like butter on the saw unlike Delrin. A when I did the write up on the Delrin socket tray I commented that I had to make multiple passes due to the pressure, the heat, and the inability to make the full cut in a single pass. On the HDPE, you can cut the full 1 1/2-inch thick stock in a single pass with a fairly quick feed and the chips clear easily without heat. Note: the weird looking surface is actually a thin film that comes on one side to protect the finish in transit.

SocketDrawerC.jpg


I try to minimize waste as much as possible however sometimes it's necessary to get measurements dialed in. For some of the trays I used scrap pieces to get the spacing even and dial in the programs. Sometimes I get it on the first try, others I spend too long adjusting diameter and spacing before I actually run the part.

SocketDrawerD.jpg
 
OP
L

lilscorpion

Well-known member
Joined
Mar 15, 2010
Messages
3,599
Location
Colorado
Since a made quite a few, here's a sample. This tray was extremely easy (as with most of the universal impact sockets I have) because the bases are almost identical throughout the size range.

SocketDrawerE.jpg


This set of torx sockets came in a sleeve like thing that required it lay in the bottom of the drawer on it's side. In the MTS racks I needed to disassemble them and make a custom one that had one @ 1/2-inch, five @ 3/8", and 6 @ 1/4-inch. Though the MTS studs are universal and can handle it, it causes other racks to end up short or have mis-matched sizes as well which ended up hurting over time. Now this set can stand alone but move together anywhere and I have space left if I end up with some other sockets that are fit to join the set later.

SocketDrawerF.jpg


Most of the chrome sockets I have differ in diameter throughout the size range. Since I didn't have a 12-point set in the same size I opted to cut the holes anyway even though it, in hind sight, makes no sense because I have no intention of buying the 12-point set. Well, the holes are there on the chance I happen across one at a garage sale I guess.

SocketDrawerG.jpg


Here's a fun fact I never noticed until I started going through my drawer - I must have some sockets "in the wind" (the term I use to describe something just being out there somewhere). I'm missing my 6-point 1/2-inch and 7/16-inch sockets so my set is now incomplete. If you have them I'd appreciate it if you'd return them. Thanks.

SocketDrawerH.jpg


After making 5 socket trays out of the 1 1/2-inch plastic I had this strip left. It was too narrow to make another socket tray for anything I had left except these 3/8-inch extensions. Previously they'd either fill open space on a MTS rack or they'd lay in the bottom of the drawer. Now all extensions 3-inch or shorter have a home and the 1 1/2-inch 12 x 12 is 100% utilized.

SocketDrawerI.jpg


So at the end of Day 1, the drawer is beginning to take shape. At first glance it appears I'm not picking up much space however I think I actually am. Many of the new trays have additional space for new sockets and half of the MTS still remaining in the drawer are only half full. I probably won't actually be able to see the net gain until it's complete.

SocketDrawerM.jpg


nd, as of now, I've freed up more than enough racks to get the metric drawer under control.

SocketDrawerN.jpg


I figured I'd share these next few facts because some have been curious on what the organization has actually cost me (not including the cost of the mill and tooling of course). With the exception of the 1 1/2-inch 12 x 12 I purchased for $40, all of the trays were made out of drops left over from my other drawer organization projects. My guesstimate is that I've used right at or less than a 12 x 12 of 1 1/2-inch ($.28/sq inch) and 3/4-inch ($.09/sq inch) HDPE and less than 22 square inches of the 1-inch ($.16/sq inch). My waste was ~30 sq inches of 3/4-inch only. Rough counts say that I gained nearly 1/5 more socket spaces than I had previously at a current cost of ~$61.88. Keep in mind that I purchased the 3/4 and 1-inch stuff in bulk so I got a much better price break than the 1 1/2-inch stuff that I paid through the shorts for. For comparison, I think I paid between $17 and $20 for each one of the MTS racks. So conservatively, the MTS racks cost - 7 * $18 = $126. Obviously there are cheaper socket storage solutions out there that may actually be comparable in price.
 

Kevin54

MEMBER EMERITUS
Joined
Jan 12, 2005
Messages
29,341
Location
Urbana, Ohio
B]Since I'd been using HDPE for most of my drawer organization for the last couple of months, and I really like the textured finish of the Starboard, I figured why not. To set this up, here's how my socket drawer looks before starting. This pic is from earlier on in the post but figured I needed to revive it to give a proper before and after..


lilscorpion....if you want to get a real good finish on Delrin, take a stone on a regular HSS toolbit, or in the case of a carbide too, use a diamond hone and round off the tip of the cutter. I am assuming that you are using a flycutter to face the blocks off? If not, you should use one. Round the tip slightly and you will have a super smooth cut.

I see that you also have some gaps in places where you have your blocks in the drawers. Take some of the Delrin scraps and make some small boxes to fit in there. Small containers always come in handy for dropping a spare screw or two in there, plus they keep the other boxes from sliding around.

I can see I'm going to have to save some coin up and pick me up some Delrin. Nice job what you've done. I like it.
 
OP
L

lilscorpion

Well-known member
Joined
Mar 15, 2010
Messages
3,599
Location
Colorado
lilscorpion....if you want to get a real good finish on Delrin, take a stone on a regular HSS toolbit, or in the case of a carbide too, use a diamond hone and round off the tip of the cutter. I am assuming that you are using a flycutter to face the blocks off? If not, you should use one. Round the tip slightly and you will have a super smooth cut.

Interesting. Breaking the edge will help smooth the finish? I'll give that a shot. On the lathe I get a beautiful finish and that would likely be why. The inserts aren't sharp like the end mills. I'll give it a try, thanks for the tip.

I see that you also have some gaps in places where you have your blocks in the drawers. Take some of the Delrin scraps and make some small boxes to fit in there. Small containers always come in handy for dropping a spare screw or two in there, plus they keep the other boxes from sliding around.

Funny you should mention that, I was thinking the same thing for a couple of drawers I have. Little dishes and trays would be extremely valuable in just about every drawer. I do have some undersized drops (too small to use for a socket set) that would turn into a dish beautifully and quickly. I might just take mu **** back into the shop and make one. Great idea.
 
OP
L

lilscorpion

Well-known member
Joined
Mar 15, 2010
Messages
3,599
Location
Colorado
I paced around the house for an hour and decided I wasn't really done in the shop for the day. I threw another piece of plastic in the mill and knocked out the 1/2-inch shallow socket tray.

SocketDrawerO.jpg


I found something interesting while making them too. When I measured the sockets I found that the impact socket was nearly exactly the same diameter as the chrome equiv. that was 1/16th bigger (3/4-inch impact diameter ~= 13/16-inch chrome socket). After finding this out, I made a tray that would fit two sets of the chrome and out of dumb luck, all I had left over was the larger hole on the impact size (good to grow that way when I need to I guess). After loading it up, I reorganized the drawer as it will be from now on. Everything interlocked nicely and doesn't move (even though none of them will when I add the magnetic backing to the trays when I get to it).

SocketDrawerQ.jpg


Now it's time to start thinking about the socket extension trays. A couple of weeks ago I posted up about a HDPE lamination idea I've been working on. Back a couple of pages in this thread, I was trying to figure out how to join smaller pieces of plastic together into bigger ones so I could use up some of the scrap I'd been accumulating. The outcome was an impressive union.

SocketDrawerQQ.jpg


I found is that melamine glue was extremely effective for binding the two textured surfaces of the Kingboard. Combine that with the fact that the malamine glue dries clear and I was able to bond the two together in a way where, once machined, it was difficult to see the seem between the two (other than the obvious change in color).

I don't know how you guy sare but once I get an idea in my head, I sometimes have difficulties sleeping. The idea was a thin layer of black HDPE glued over a colored layer of HDPE and then machine out the tool pattern into the plastic and reveal a colored "shadow" of the tool. This colored shadow would create depth in the otherwise 2 dimensional appearing tool tray.

My chance came a few weeks ago when some surplus King Colorboard (HDPE similar to Starboard commonly used in playground equipment) in royal blue and bight yellow popped up on Ebay for less than 1/2 it's typically value. It's been sitting in the shop for almost two weeks now collecting dust (and black HDPE chips) and today it was just barely warm enough to do the first glue-up. I plan to do my testing on some extension trays I need for my socket drawer and the goal is to use 1/4-inch HDPE on the surface with 1/2-inch yellow below to match the 3/4-inch depth of the trays surrounding it. I started by cutting off 3 1/4-inch wide strips (1/2-inch wider than I needed so I'd have some wiggle room when I glue and trim to actual size).

SocketDrawerR.jpg


The yellow contrasts beautifully next to the black even without the flash and looks MUCH better than the sample green/red piece from before. Next is to apply a liberal coat of the melamine glue.

SocketDrawerS.jpg


The goal is to get a thin coathing that covers 100% of the surface between the two pieces of plastic. To accomplish this, I stick the two sheets together and slide the top (1/4-inch) sheet back and forth until, when moved to the side, I can't see where there isn't any.

SocketDrawerT.jpg


Then the two pieces of plastic are lined up making sure that one edge of the thicker piece is slightly exposed across the length of the piece. This edge will be my guide edge when I cut it after the glue dries. Keeping one of the surfaces exposed it easily slides along the fence of the saw ensuring that the cut will be straight. Once you have it in place, clamps need to be applied to get the two surfaces as close together as possible and remove all excess glue. The tighter I get the two boards to each other the less noticeable the seem will be. Wood working clamps work extremely well for this. I use as many as I can, get 'em tight, and wipe away the excess glue in an attempt to minimize the cleanup later.

SocketDrawerU.jpg


Unfortunately I get to wait now though I'm dying to start machining out the first tray. Given the temp today, and the likely hood that it will be cold tonight, the glue is going to need much longer than normal to dry. I'll leave them for now and check back in on them tomorrow.
 

fringeofinsanity

Well-known member
Joined
Nov 24, 2010
Messages
223
Location
Elgin, IL
Your efforts have sucked me in! It's gotten to the point I wait a few days then read your thread so I can soak it all in.

Oh, and I stole your idea for easy reach drill access and added it to my efforts in organizing my new garage. Thanks
 

akdiesel

Well-known member
Joined
Aug 8, 2008
Messages
2,617
Location
Wasilla, AK
These are looking great. Never would have thought to glue them together for additional thickness and color effects.
 
OP
L

lilscorpion

Well-known member
Joined
Mar 15, 2010
Messages
3,599
Location
Colorado
14 hours later and the glue had appeared to dry...until I tried to cut it on the saw at which time it fell apart about 3 inches into the cut. After inspection it was barely dried with only a dry film under the glue as I was scraping it off. So back to the clamps but this time I used the map gas torch, preheated the plastic, re-glued, and applied smaller clamps so it can come in the house.

SocketDrawerV.jpg


A full week should be enough dry time inside the house so I'll give it a crack again next weekend. This time of year the office is nice and warm due to the combination of the house heat and the computers so I'll just hide it in the corner in there. Totally bummed, I figured I'd get to give a tray a go today. Guess I'll have to do something else.
 
Last edited:

Kevin54

MEMBER EMERITUS
Joined
Jan 12, 2005
Messages
29,341
Location
Urbana, Ohio
A lot of times, and also depending on the materials, two smooth surfaces won't bond together. One of the jobs we do at work was to take a larger endmill in the mill, cut the rpm's way down and increase the feed real fast. This would leave a coarse spiral pattern in the material. Once that was done to both bonding surfaces, the parts were then glued and clamped, and they would not come apart.
 
OP
L

lilscorpion

Well-known member
Joined
Mar 15, 2010
Messages
3,599
Location
Colorado
A lot of times, and also depending on the materials, two smooth surfaces won't bond together. One of the jobs we do at work was to take a larger endmill in the mill, cut the rpm's way down and increase the feed real fast. This would leave a coarse spiral pattern in the material. Once that was done to both bonding surfaces, the parts were then glued and clamped, and they would not come apart.

The material has a texture to it and it seemed to be enough before. I thought about scuffing a it with a really fast feed rate but would prefer not having to do that if I can avoid it. I do have this single inset taper cutter that would do a nice job. I'd like to be able to glue up some larger pieces which would be tough to surface on the mill but I'll do what'd have to if it doesn't work out is way. To be fair, the glue was really wet still and I did have to make an effort to pull it apart when I noticed it split. Too cold in the garage - probably averaged less than 40 through the night. the office is in the 70's i would think. Enough time at room temp and it should be okay...I hope.
 
Last edited:

beck3906

Active member
Joined
Jun 18, 2011
Messages
26
Location
Temple, TX
Where are you getting your material? I like the colors but having a hard time finding anything.

Thanks for the inspiration.

Rick
 
To avoid these ads, REGISTER NOW!
Top Bottom