To avoid these ads, REGISTER NOW!

Walker 93632 Jack Rebuild

Hiball

Well-known member
Joined
Apr 30, 2009
Messages
14,027
Location
Missery
I have been working on my rebuild and it has fought me at every turn. I had to tack-weld my tank nut to the socket. The ears on my socket held up fine. The metal of the tank nut gave so I had to weld them together. Then I had to heat the nut up to a dull glow to get it loose. Luckily no threads were damaged. Then the pump plunger required every ounce of my *** on the end of a 2' box end to break loose. Now I can't get one of the plugs out as well as a few other issues.

First off the is the main shaft. The rebuild kit only came with one seal and it appears there were three nylon ones and one steel originally. How do I go about reassembling these?


Next is the tank nut seal. The main seal is the same in the rebuild kit but the dirt wipe in the kit is rubber. The original appears to be jute (which i tore removing) and I just want to confirm its the right seal.


I can't get this gallery plug out. It is fubar and I may have to easy-out it. Is there somewhere I can get a replacement?


Finally I have the pump plunger. The removed seals are stacked as they were taken off. Four seals with a convex washer on bottom and a flat one on top. My kit only came with one seal that has one convex side and one flat side but I has three convex washers :dunno: I have no idea what to do here.


Thanks for the help!

The Main ram only utilizes 1 seal, the install order is the small metal washer, then the white nylon guide (or yellowish in your case) then the black Ucup with the flat side resting against the white guide.

Tank nut seal looks correct, its a BunaN quad ring with a backup.

Valve plug.. You need a hand impact with a solid fitting bit, if you continue to swell the drive it will fight you all the way out. Fortunately for you, as it unthreads out it will clean the threads.

Pump piston.. You have 3 leather Vee's and 1 buna spreader. The correct order is the 3 Vee's (soak them in hydraulic oil prior to installing) Then the black Buna spreader goes on mating the convex portion to the Vee's/flat side out, which mates to the washer/nut. Don't crank the nut down initially, lube the Vees with hydraulic oil and pull them intO the pump cylinder and adjust accordingly to provide a good seal but NOT damage them. I also advise that you stake the nut when done, to prevent it from backing off.
 
To avoid these ads, REGISTER NOW!

Sharpest

Well-known member
Joined
Feb 11, 2013
Messages
169
Location
South Texas
Awesome! Thanks for the help. Didn't realize the piston vees were leather :lol: 
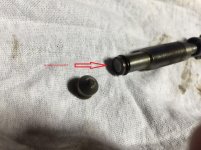
Any idea where to get an impact bit for that plug? I've never seen one that big.
 

Sharpest

Well-known member
Joined
Feb 11, 2013
Messages
169
Location
South Texas
The Craftsman hammer operated impact driver worked like a charm. I got everything back together but am hung up again on the snap ring that retains the pump piston spring cap. The clip was damaged when I removed it and is altogether fubar now. Can I use a regular snap ring from Lowes? The original one is a little thicker than normal and seems to be more of a clamp on type than springy.
 

Sharpest

Well-known member
Joined
Feb 11, 2013
Messages
169
Location
South Texas
Used a 5/8" E-clip, it worked great. I finally got the whole thing back together and it works! Thanks again to everyone here for the help. Only issue I ran into was cross threading a couple of the bolts that secure the hydraulic to the frame. They seem to be some weird thread that didnt want to start easily. Oh well, they're in there. Ill worry about them in 30 years when it needs to be rebuilt again.
 
Last edited:

Wayne J

New member
Joined
Mar 1, 2013
Messages
2
I'm in dire need of a tank nut for my 93632. Any body have any suggestions as where to find one?

Thanks,
Wayne
 

ffast65

Well-known member
Joined
Mar 8, 2014
Messages
159
Location
Columbia Station, OHIO
Anyone have a parts jack? My son was helping me put the hydraulic unit in the frame, and cross threaded a lower bolt. While I had the tap, and chased the threads in the hydro unit, the bolt it screwed up. its 5/8-18, but I dont have a die. Due to the shoulder on the bolt, I would rather try to properly support the hydraulic unit with the right bolt if I can.

If you have an extra you want to part with, please drop me a line.
Thanks
Paul
 

Pcbship

Member
Joined
Jul 24, 2012
Messages
20
Hi everyone! I have been hanging around this site for awhile, but have never posted. I am trying to repair a Walker J-134 series AA / Walker model 93657 series J. I have had this jack since I was a kid. It has been housed for years at my Vol. Fire House. A couple years ago some one said it did not work anymore, and they were going to throw it out. It has been in my garage for at least 2 years untouched. Decided to pull it apart and see what was wrong. I think some helpful soul at the firehouse added brake fluid or something because the main ram seal is almost completely disintegrated.
I am wondering how to flush the jack out, and I am in need of some new seals.
I am attaching photos because they are fun to look at.
Thanks Chris38423714b24ad5a9b1386a5e8d35c610.jpgdf39c4b804a9fdf9a6fd125505fc5ed8.jpg23415a483d67ef6c9d781339b8a601d3.jpg8e0f6a312e58cbd3ebfaaf32f6f8b8bc.jpg260b31efcc2df2ced55951d443582fda.jpg


Pcbship
 

Hiball

Well-known member
Joined
Apr 30, 2009
Messages
14,027
Location
Missery
@PCBSHIP

In regards to flushing the system, You need to remove all the Valve Caps/Components/Release Components/Pump Pistons/Ram and I normally clear all Side ports to clear all hiding spots. I then depending on the Severity of the unit either introduce it to the Parts tank or spray some in the holes and hit it with pressurized Water, Followed by Pressurized Air while blocking holes with my fingers to direct pressure via various routes and then some light lube if im not reinstalling components right away. I see a couple things with your Jack that i would like to touch on, Your Main Ram seal is definitely Gone, The only thing left is the Older Split type UCUP Securement fastener, which is the Black piece, 9 times out of 10 they have lost the tension to actually stay in place and are normally bent up from being crushed in the bottom of the cylinder. I dont trust them, I have some quality Zip ties that utilize in place as im fairly certain that piece is NLA. The job is simply to prevent the Ucup from coming off if someone would by chance reach down and grab the lift arm and Raise it, in a attempt to bleed the system. The Next thing i see is the Over-extension Valve has the Spring protruding out the end of the Ram, Thus the Washer is Missing and you need to verify the condition of the Stake material as it is what keeps it all together, along with Components. I dont recall the exact series, but there was a small run of the J134 that utilized Drive in Seats in the Valve department, versus having them machined into the block. They can quickly identified by not being able to remove the lower ball.. LOL. If you run into this on your Jack, Dont try and remove them, I have a very limited supply of these, And there not really for sale and too my knowledge NLA. Its possible and judging by the pictures (multiple model tags) your jack was probably updated during the Rebuild time at Walker, So you might not have these valve parts. In regards to parts, There are Numerous retailers that all can be found via Google, If and When you do your final inspection on the Hydraulic Unit (which i always recommend prior to buying a kit) and its a Viable rebuild candidate you can contact HPS in my Signature, Marc with Lazzar Hydraulics or simply google for Price comparisons.
 
Last edited:

Pcbship

Member
Joined
Jul 24, 2012
Messages
20
Thanks for replying Hiball! I was hoping I would get a reply from the Wizard!
The main seal is those globs of junk in front of the ram. When I opened the tank (which I did with a large pipe wrench and a vice) there was a half inch of gunk laying in the bottom. I presume this is the result of some kind of fluid contamination. You are correct about the over-extension valve. I thought the hole was clogged because of all the gunk. I found out it was clogged with a little brass screen. I removed the retaining washer and planned to replace the screen. It is actually lay on the cardboard in the back of the photo. I have not opened the valves yet because I haven't found a suitable screwdriver for the screws. The jack was rebuilt, the pump is tagged as such. Also the metal tag was painted over with blue paint. I did find one kit for $75 online.

I have read your page on questions. So I guess I'm looking for bad seats or major damage to be eligible for a rebuild?
Thanks for your time. I'm sure answering all the questions must get old after a while.

Thanks again! Oh and good luck with the family!


Pcbship
 

Hiball

Well-known member
Joined
Apr 30, 2009
Messages
14,027
Location
Missery
Thanks for replying Hiball! I was hoping I would get a reply from the Wizard!
The main seal is those globs of junk in front of the ram. When I opened the tank (which I did with a large pipe wrench and a vice) there was a half inch of gunk laying in the bottom. I presume this is the result of some kind of fluid contamination. You are correct about the over-extension valve. I thought the hole was clogged because of all the gunk. I found out it was clogged with a little brass screen. I removed the retaining washer and planned to replace the screen. It is actually lay on the cardboard in the back of the photo. I have not opened the valves yet because I haven't found a suitable screwdriver for the screws. The jack was rebuilt, the pump is tagged as such. Also the metal tag was painted over with blue paint. I did find one kit for $75 online.

I have read your page on questions. So I guess I'm looking for bad seats or major damage to be eligible for a rebuild?
Thanks for your time. I'm sure answering all the questions must get old after a while.

Thanks again! Oh and good luck with the family!


Pcbship

It will take a hand impact/good fitting bit to remove those valve caps, in regards for what to look for.. Severe pitting in the cylinder walls of both the main ram and pump cylinders, Rod finish etc.. If the Jack was working previous to it just quitting the valve seats might just need some light lapping compound to address any surface rust on the seats, then again Maybe Not.. you won't know till you get inside. I believe HPS sells the J134/93657 kit for roughly $50 FYI, Casters can be pricey if you need replacements also, but can be serviced if you can put the time in.
 

Pcbship

Member
Joined
Jul 24, 2012
Messages
20
Hi! I finally got around to working on my Walker 93657 again. I had to do the brakes on my truck over the weekend. I remembered why I want to get this jack working again. After visiting Napa I picked up a drag link socket to get into the valves. I do not have driven seats as I could remove everything. The valve seats look ok to my untrained eye. The seats are fairly shiny and the seat surface is approximately an 1/8 wide. I looked at a couple kits and I don't see the plastic "poppet valve". I also have some scoring in the low pressure pump cylinder. There is some on the piston also. I was thinking of using a brake cylinder hone to smooth out some of the scratches. I am planning to polish the piston as well.
d986ad47b2b9c25258807b5b0aa37df5.jpg
Here is the piston0d6e21b74d5b6ef8eeeaa13aa64c658d.jpg
The main ram has pitting but seems like most of it would ride inside the pump.2417c92bf09d6dd3656a3c1e4de85820.jpgc794dda7d8121149063d6de191163873.jpg
The cylinder itself looks ok inside. There is some pitting on the outside. But I don't think it will affect anything.07c7bf59a01b0b1f0f2d16f182944dfa.jpg988bffb9279a48b6b1f10aeed2a223ab.jpg
The high pressure piston has some scratches but I was going to leave it alone because I don't have anything that would fit inside to clean it up.6c6ce2c17505e7d878239d33947456f7.jpg
The plug on the side of the valve passages I could not remove. I used an impact driver with a 3/16 hex bit but just spun the bit on two. I gave up after that. I'm hoping I can clean the passages without removing them.
Here is a picture of the release valve.
30f28535ae4293aa8151cd7ee4ef21e6.jpg
I haven't opened the overload valve. But I guess I should. I remember someone saying they were trying to jack one of the fire trucks with it.
Thanks again for your time.
Chris


Pcbship
 

Pcbship

Member
Joined
Jul 24, 2012
Messages
20
By the way the valve cover screws were buggered up when I got the jack. I didn't do it. I think someone used a punch to open the screws before.


Pcbship
 

Hiball

Well-known member
Joined
Apr 30, 2009
Messages
14,027
Location
Missery
I would definitely try and clean up all Rod/Cylinder surfaces at Min knock down any sharp edges that will eat seals. I would also add a New Release Cone to the order, that one is worn considerably.
 
Last edited:

Pcbship

Member
Joined
Jul 24, 2012
Messages
20
I ordered new "soft" parts for rebuild from Steve @ HPS . I also ordered a new release handle, a poppet, and a release valve. I looked up some drawings of the jack and I see a "plastic spring". Between the release valve and the release stem. It's part #233917.
715b93513cc4048cf95f65b7823fb816.jpg
I looked up a complete valve kit and it looks like thisd11b48c8695407f789d62aabfa4e9b5b.jpg
I guess the stem is hollow and the plastic piece goes inside the stem? My valve is metal to metal and there was no plastic piece. Should I be worried about that? This is what I have.f42073be24029773f585a26918d56fb1.jpg.
I cleaned up the main ram and low pressure bores with a brake cylinder hone and I think they look good. I still don't know what to clean up the high pressure bore with. I also cleaned up the low and high pressure Rams. I still have to work on the main ram. Hard to find time between work, kids and honey-do lists. This is the high pressure ram. It's the only thing I took a picture of. Before 290e2fcbeefb28c1a2d5e1f227bb6b8e.jpg
Afterc9a35c28f5f949b2c184f35fb6589996.jpg


Sent from my iPad using Tapatalk
 

Hiball

Well-known member
Joined
Apr 30, 2009
Messages
14,027
Location
Missery
I wouldn't worry about it, that drawing is for a newer model hence the fill plug on the reservoir, the older models didn't have that spring or used a button style. The job of the spring was to reduce friction between the stem/cone, if it bothers you that much or you notice a lot of friction (highly unlikely) you can center punch the stem and drill a hole to accept a spring. <--- there was actually a member who did this recently.
 
Last edited:

EDGAR

Well-known member
Joined
Aug 21, 2010
Messages
437
The release stem looks like it has an aluminum insert. Is that so? Also, does it look like the insert may have had a domed or convex surface to reduce area in contact with the release valve and now is worn down? There was a reason the design was changed, because it can stick and make it difficult to release it. Did the release had a tendency to stick before you took the pump apart?

Adding the nylon insert added more machining cost plus the cost of the nylon insert, even if it is a small cost, so if it was added is because they realized it was needed even if the bean counters were opposed to it.

If you want to hone the cylinder, by hand, use a mandrel of suitable size, maybe wood, or a steel, aluminum tube and wrap 320 grit wet and dry sand paper to it to start the honing. The sandpaper needs to be securely attached to the mandrel so, if it is wood, you can staple it but be sure that the staples get hammered down a little so they don't protrude over the wood so no damage is done to the cylinder wall. If you are using a steel tube or pipe, duct tape would serve, although it kind of unsticks after a short while. Also can use 2" high tack masking tape. If you want to go fancy, make a slit in part of the tube so the sandpaper can be inserted in the slit and bend in the direction you intend to spin the mandrel but something must be inserted in the tube that will pinch the sandpaper so it stays in place, otherwise it will come off easily.

The outside diameter of the mandrel has to be about 3/16" less than the inside diameter of the cylinder. You make up that space by adding cut sheets of water proof paper or anything similar, that is thin and bends easily, under the sandpaper. The idea is to adjust the tension of the sandpaper against the cylinder wall by adding more paper as needed. So this is a test-and-add paper as you go. Too little papers and you will have very little tension or friction of the sand paper against the cylinder wall. Too much papers under the sand paper and the mandrel can get stuck. You have to feel that it is actually sanding the cylinder wall, so some resistance should be felt. The papers under the sandpaper give some cushioning for the mandrel inside the cylinder, and also it allows the sandpaper to conform better to the cylinder surface. So the use of more water proof papers is not a problem. I actually prefer to use more, than less, papers under the sand paper, so the diameter of the mandrel should be considered carefully to achieve this.

Do one or two passes with the 320 grit sandpaper and then change to a 500 or 600 grit paper. Use plenty of oil when doing this. A used sandpaper gives a better finish as it wears down. The more the grains wear the smoother the surface becomes, so don't necessarily go changing the papers after only one use, unless the tape fails and the sandpaper falls out. If you don't want to reuse the paper much, then change to finer grits, like 800 , 1000. If the cylinder is mounted on the pump body, place the pump in a vise, so the cylinder is horizontal to prevent or minimize the mix of removed metal and oil from entering the pump body. Anyway, you will have to clean the cylinder thoroughly to remove any trace of the oil mixed with steel particles.

This can also be done faster and better with a low speed drill, 600 rpm or less, but you need to make a mandrel with a pin at one end that can be inserted in the drill chuck.

Let me mention that the waterproof paper is set loosely under the sandpaper, it stays in place when the sandpaper is wrapped tightly over the mandrel. With the sandpaper tightly wrapped around the mandrel, this is carefully inserted in the cylinder taking care not to catch the edge of the sandpaper on the edge of the cylinder as this can damage the sandpaper. When removing the mandrel be ready to hold the sandpaper wrapped around the mandrel otherwise the sandpaper will unwrap and the waterproof paper fall off. I always have a rubber band ready to put over the sandpaper.

It is very important to keep the sandpaper very clean, so do not place it anywhere where it is dirty and can pick up hard particles than can scratch the cylinder surface. It is better to place the mandrel vertical, with the sandpaper on the upper part held together with a rubber band, inside something that will keep it from making contact with any surface, if doing it by hand. If doing it with a drill, place the drill in such a way that the sandpaper does not touch anything. Always look at the sandpaper surface looking for any particles before inserting it in the cylinder.

It is very important that you understand that cylinders should be highly polished, almost to a mirror finish. Do not achieve a mirror finish because it does not retain oil; a drop of oil placed on the surface beads up like water on a waxed car and falls off. The cylinder surface needs to retain some oil, so a drop of oil placed on the surface of a highly polished cylinder should spread evenly.

So, the use of engine hones is not recommended as these leave a cross hatch finish, which is just a bunch of "organized" scratches, which is fine for gas engines and air compressors but totally unsuitable for hydraulic cylinders. The ram seals in a hydraulic bottle are compressed against the cylinder wall when under a load. And the ram moves out with the seal compressed against the cylinder wall, so the smoother the surface, the better the seal performs and the longer the seal last. By the way, this also applies to pump pistons, when the seal is installed in a cylinder groove (or gland) and not at the end of the pump piston itself. In this case, the pump piston should be highly polished.

By the way, a cylinder hone with 400 grit stones will not produce a highly polished surface, not even close, no matter how much you try, it will only produce a set of finer scratches in a cross hatch pattern, which is still no good for hydraulic service.
 

Attachments

  • RELEASE  4 TON  ALUMINUM INSERT.jpg
    RELEASE 4 TON ALUMINUM INSERT.jpg
    125.6 KB · Views: 28
Last edited:

Hiball

Well-known member
Joined
Apr 30, 2009
Messages
14,027
Location
Missery
@Pcbship Your more than welcome to Hone any cylinder however you feel is best for you, but I would recommend taking the time to call a Flex Hone Manufacturer or Do some research on rigid stone setups there is lots of supplier information on the web for using both to hone hydraulic cylinders.


I have successfully for Years used your common 3 sided rigid hones for Hydraulic cylinders, they come specifically marketed for hydraulic applications from "Numerous" suppliers. Here is what I have learned over the years... When using a "Rigid" stone setup you need to pay very close attention to cylinder wall pressure (which is adjustable) and you obviously need to finish with the lightest stone (400-600 IRC) and most importantly use a lube that will carry cuttings away from the cylinder wall at all times. In regards to cross hatch, and I'm sure there are engine builders who can verify, but cross hatch is a combination of the rotational speed of the tool And most importantly the vertical speed (up and down) you are running in the cylinder. Again if IRC with hydraulic cylinders you want somewhere around a 15 degree cross hatch, versus 45 that is typical with engine bores, which is created by faster vertical movements within the bore, so for Hydraulic applications, slower vertical speed/lighter wall pressure on the finishing grit. Again.. It is a learning process on how much cylinder wall pressure and vertical speed is suffiecient to create a wall finish that will prevent seal damage and also provide a surface that will hold oil pressure. Do I use a special tool to measure my cross hatch? Absolutely Not... I just use some common sense and utilize my finger and eyeballs, it's amazing how far those qualities can get you in the world.

While I still use my rigid setup on occasion, if I find a oddball size, I really enjoy using my Flex Hone's, I've found they don't tend to load up as bad, Mainly because of there rotational properties and literally you can clean up a cylinder within minutes, if not seconds because of this. If you or anyone else would like to speak to someone who can definitely explain it better than me, contact Brush Research they will guide you in regards to application etc, they are very Nice people to talk too. . Just to Clarify.. Cross hatch is not the Enemy, it is a Necessity in function (wall finish) to hold Pressurized oil and also keeps the seal lubed as it moves up the cylinder wall.
 
Last edited:

Hiball

Well-known member
Joined
Apr 30, 2009
Messages
14,027
Location
Missery
If you want to hone the cylinder, by hand, use a mandrel of suitable size, maybe wood, or a steel, aluminum tube and wrap 320 grit wet and dry sand paper to it to start the honing. The sandpaper needs to be securely attached to the mandrel so, if it is wood, you can staple it but be sure that the staples get hammered down a little so they don't protrude over the wood so no damage is done to the cylinder wall. If you are using a steel tube or pipe, duct tape would serve, although it kind of unsticks after a short while. Also can use 2" high tack masking tape. If you want to go fancy, make a slit in part of the tube so the sandpaper can be inserted in the slit and bend in the direction you intend to spin the mandrel but something must be inserted in the tube that will pinch the sandpaper so it stays in place, otherwise it will come off easily.

The outside diameter of the mandrel has to be about 3/16" less than the inside diameter of the cylinder. You make up that space by adding cut sheets of water proof paper or anything similar, that is thin and bends easily, under the sandpaper. The idea is to adjust the tension of the sandpaper against the cylinder wall by adding more paper as needed. So this is a test-and-add paper as you go. Too little papers and you will have very little tension or friction of the sand paper against the cylinder wall. Too much papers under the sand paper and the mandrel can get stuck. You have to feel that it is actually sanding the cylinder wall, so some resistance should be felt. The papers under the sandpaper give some cushioning for the mandrel inside the cylinder, and also it allows the sandpaper to conform better to the cylinder surface. So the use of more water proof papers is not a problem. I actually prefer to use more, than less, papers under the sand paper, so the diameter of the mandrel should be considered carefully to achieve this.

Do one or two passes with the 320 grit sandpaper and then change to a 500 or 600 grit paper. Use plenty of oil when doing this. A used sandpaper gives a better finish as it wears down. The more the grains wear the smoother the surface becomes, so don't necessarily go changing the papers after only one use, unless the tape fails and the sandpaper falls out. If you don't want to reuse the paper much, then change to finer grits, like 800 , 1000. If the cylinder is mounted on the pump body, place the pump in a vise, so the cylinder is horizontal to prevent or minimize the mix of removed metal and oil from entering the pump body. Anyway, you will have to clean the cylinder thoroughly to remove any trace of the oil mixed with steel particles.

This can also be done faster and better with a low speed drill, 600 rpm or less, but you need to make a mandrel with a pin at one end that can be inserted in the drill chuck.

Let me mention that the waterproof paper is set loosely under the sandpaper, it stays in place when the sandpaper is wrapped tightly over the mandrel. With the sandpaper tightly wrapped around the mandrel, this is carefully inserted in the cylinder taking care not to catch the edge of the sandpaper on the edge of the cylinder as this can damage the sandpaper. When removing the mandrel be ready to hold the sandpaper wrapped around the mandrel otherwise the sandpaper will unwrap and the waterproof paper fall off. I always have a rubber band ready to put over the sandpaper.

It is very important to keep the sandpaper very clean, so do not place it anywhere where it is dirty and can pick up hard particles than can scratch the cylinder surface. It is better to place the mandrel vertical, with the sandpaper on the upper part held together with a rubber band, inside something that will keep it from making contact with any surface, if doing it by hand. If doing it with a drill, place the drill in such a way that the sandpaper does not touch anything. Always look at the sandpaper surface looking for any particles before inserting it in the cylinder.

It is very important that you understand that cylinders should be highly polished, almost to a mirror finish. Do not achieve a mirror finish because it does not retain oil; a drop of oil placed on the surface beads up like water on a waxed car and falls off. The cylinder surface needs to retain some oil, so a drop of oil placed on the surface of a highly polished cylinder should spread evenly.

So, the use of engine hones is not recommended as these leave a cross hatch finish, which is just a bunch of "organized" scratches, which is fine for gas engines and air compressors but totally unsuitable for hydraulic cylinders. The ram seals in a hydraulic bottle are compressed against the cylinder wall when under a load. And the ram moves out with the seal compressed against the cylinder wall, so the smoother the surface, the better the seal performs and the longer the seal last. By the way, this also applies to pump pistons, when the seal is installed in a cylinder groove (or gland) and not at the end of the pump piston itself. In this case, the pump piston should be highly polished.

By the way, a cylinder hone with 400 grit stones will not produce a highly polished surface, not even close, no matter how much you try, it will only produce a set of finer scratches in a cross hatch pattern, which is still no good for hydraulic service.

I'm not knocking your method, everyone needs a plan, I believe "Agree to Disagree" is the best option, but even If you go and look at Hercules seal catalog there hone sets max out at 400 grit, i really think finishing with the above mentioned 1000 grit is bordering on too smooth. I expect the biggest issue with honing a cylinder with a rigid hone is operating at the correct speed, too slow and you will wear out the abrasive, too fast and it will glaze the cylinder wall. I believe there is a rule of 800 or maybe 600, can't recall exactly where you multiply/divide by the cylinder bore to get the correct speed. I don't have a machine where I can set the RPM, so I wing it with my Milwaukee electric drill and have had good results.
 
Last edited:
To avoid these ads, REGISTER NOW!

MixManSC

Well-known member
Joined
Jan 6, 2014
Messages
154
Location
South Carolina
I just ran into that same "spring" which is actually a smallish piece of nylon rod.

http://www.garagejournal.com/forum/showpost.php?p=4790039&postcount=86

I figured it would probably make the release a bit easier/softer to use so I drilled the end of mine and added it. My 10 ton is a very very similar setup and I'm just in the process of finishing mine up. Since mine had multiple layers of paint (over rust in places) I've gone ahead and stripped it down and repainted the entire thing. I'm actually starting to reassemble it today although I still need to do a bit of final paint work. Since I've gone this far I went ahead and ordered some new hand grips which are on the way and the main handle is the last bit I need to paint still.

Regardless it looks like you are moving right along nicely. Nice job. Turns out these are pretty big jobs to tackle. I know on my 93660 10 ton unit, everything is massively heavy and cumbersome to work with. Looking forward to having her back together and ready for another 30+ years of service.
 

Hiball

Well-known member
Joined
Apr 30, 2009
Messages
14,027
Location
Missery
For Anyone interested, I did send a Email to Brush Research asking if they could pop in to give some Information, As many Hydraulic Jack projects that are going on, It might be in there best interest.. :beer:

Here is a Link to there Website.


Here is a Link where they discuss working with Enerpac in Helping them reach there Cross hatch pattern of 8-18 on Cylinder Surfaces <-- Which based off the RA charts I've read can be acquired with 240-400 grit finishing.

On a too-smooth cylinder finish, the Flex-Hone gives
a crosshatch finish to bring the cylinder up to the
8-18 range. On a too rough finish, it brings it down
to the 8-18 range.


Hopefully they will Check in.. :thumbup:
 
Last edited:

Pcbship

Member
Joined
Jul 24, 2012
Messages
20
Whoa. Hey guys! Just got in. So I'm probably going to piss someone else off soon. Can't wait to hear what you guys think of this. I couldn't get the main ram chucked in my 1/2 inch drill press so I thought I would take it to work and spin it in the plumbers pipe threading machine during lunch. Guys at work thought it was funny that I wanted to polish my shaft. Anyway threaded was to slow, so I went to my father-in-law who has a shop smith wood lathe. I'm sure someone is going to tell me I am breaking all kinds of Osha rules, but it what I have access to. Check this rig out!d888120053eb9d16da8b5e5d474ab0ad.jpg
I used 320, 400, 800, 1200 wet dry paper and my son as emergency lathe turner offer.
Before0bc79e8ccaf5e06d9b555817918b337c.jpg
After515cc9ae9d255cb844898eabb40a83e2.jpg.
I did use a brake cylinder hone on the main and low pressure bores. I went on the assumption that a brake cylinder is in fact a hydraulic cylinder. I did try for 45 degrees. Just remembered that # for some reason. I do agree with Edgar, maybe a little to rough. I thought it may be part of the break in process. I'm not building a rocket, but I would like the jack to hold up my truck. I went out to take some pics of the main bore and high psi bore.0a2b7aae1b401fccf586b97f6cc43c37.jpg
27737ac7d3f1d22775131411e410453b.jpg
a366bfcc91b5c0c26607d4d3e138186c.jpg
I am thinking that shallow scratches parallel with the oil seal is better than deeper scratches perpendicular to the seal. I think these jacks were meant for rough service. So dirt and scratches ****, but the jack is still going to work well, but maybe not NASA perfect.


Sent from my iPad using Tapatalk
 
Last edited by a moderator:

Hiball

Well-known member
Joined
Apr 30, 2009
Messages
14,027
Location
Missery
@Pcbship What grit did you use on Brake Cylinder Hone? It does appear to be a bit Rough.. You can get different stones for different applications, Generally i only use a 240 grit and finish with a 400.

Here is a link to some affordable options if your interested, Notice the 2836 is specific for Hydraulic Cylinders.
 

EDGAR

Well-known member
Joined
Aug 21, 2010
Messages
437
First, Brush research has to sell their products, so they will never say that their products are no suitable for honing a hydraulic cylinder. I have some Honeflexs so I know what they can and can't give. Maybe an 800 grit can do it but a 400 will leave a lot of scratches which are good for gas engines but not for hydraulic cylinders.

The piston rings on an engine ride over the oil retained on the cylinder wall surface, so there is no actual metal to metal contact of the rings and the wall surface.

The hydraulic seals ride compressed against the wall cylinder under load, therefore you need a smooth surface like a highly polished surface, free of scratches or swirls. This is not the same. Why is this so difficult to understand?

Please, anyone with good eyesight, look a new hard chromed ram on a Caterpillar or similar heavy machinery and tell me what do you see:

Do you see a smooth surface, free of scratches or swirls?

or

Do you see a cross hatch pattern, which is just a lot of scratches running at a cross angle, on the ram surface?

All the above rams I have seen so far are smooth. Am I seeing faulty rams? Or perhaps that is the right way?

The same smooth polished surface also applies for cylinders.

I am looking for my links from professional hydraulic seals companies with the knowledge, were these state that the surfaces should be scratch and swirl free.
 

Pcbship

Member
Joined
Jul 24, 2012
Messages
20
I check out the brush link. They are pretty cool. I don't know what grit the stone are. I bought a Gear wrench brake cylinder hone at Sears. It doesn't list the grit. There are two part # stones one for discs and one for drums??. My phone's camera actually takes pretty good pictures. It looks worse than it is. I may try Edgar's trick of making a mandrel to smooth the scratches out. That is also a solution to the high pressure bore that I have not touched yet. I still think that the scratches from the hone are nil compared to the relatively deep scratches running the length of the bore.


Sent from my iPad using Tapatalk
 

Hiball

Well-known member
Joined
Apr 30, 2009
Messages
14,027
Location
Missery
First, Brush research has to sell their products, so they will never say that their products are no suitable for honing a hydraulic cylinder. I have some Honeflexs so I know what they can and can't give. Maybe an 800 grit can do it but a 400 will leave a lot of scratches which are good for gas engines but not for hydraulic cylinders.

The piston rings on an engine ride over the oil retained on the cylinder wall surface, so there is no actual metal to metal contact of the rings and the wall surface.

The hydraulic seals ride compressed against the wall cylinder under load, therefore you need a smooth surface like a highly polished surface, free of scratches or swirls. This is not the same. Why is this so difficult to understand?

Please, anyone with good eyesight, look a new hard chromed ram on a Caterpillar or similar heavy machinery and tell me what do you see:

Do you see a smooth surface, free of scratches or swirls?

or

Do you see a cross hatch pattern, which is just a lot of scratches running at a cross angle, on the ram surface?

All the above rams I have seen so far are smooth. Am I seeing faulty rams? Or perhaps that is the right way?

The same smooth polished surface also applies for cylinders.

I am looking for my links from professional hydraulic seals companies with the knowledge, were these state that the surfaces should be scratch and swirl free.

Obviously you have Issues with difference of Opinion along with Brush Research along with Enerpac with there required for a RA of 8-18, I guess we can throw Hein Werner into the Mix also. Im in such a good place right now i have no desire to Argue with you, I passed the information along, Never claimed your method was wrong as everyone should have a plan and they should use what works for them. If that Angers you, Im Sorry.. Yes Cylinder bores look smooth to the Eye, But require some Cross hatching or Imperfections under magnification, which is what you get with a RA 8-18 surface, These Imperfections help with lubing the seal and extending the life. Is there a problem understanding the Variances in Cross hatch Angle's? I never said that they should be 45 Degree's, Yes that is what Engines prefer, Please dont put words into my Mouth, Go back and Read and Try and Understand that there is a visual difference between a 15 degree crosshatch and a 45 degree Crosshatch and its possible to get both with a 400 grit flexhone.

Do you really think Enerpac doesnt understand what type of Surface there Hydraulic equipment requires? Come on Edgar...

Another Company who explains the need for Cross hatch finish on Hydraulic Cylinders.

Caterpillar you Say? Well here is a Article where they use the Sunnen unit to service there cylinders.

It also provides better quality parts by producing a controlled crosshatch pattern, which allows the honed surface to retain oil or grease, ensuring proper lubrication and ring seal of pistons in cylinders.

Are they all playing a big Joke on Us? Is Hercules Seals keeping the +400 grit hones for themselves?

Here is a RA to Grit comparison Chart, It basically shows what Grits are required to reach RA levels, Now mind you RA is only 1 way of measuring the Peaks and Valleys of a Cylinder wall, But based off the Enerpac study, They claimed 8-18 was acceptable, but even if you wanted to step into 4-8 (Mirror Finish) you could still accomplish this with a 400 grit stone. Undoubtedly the Key is RPM and Vertical Speed for a Quality finish, There is a formula for figuring all this out.. Tangent (A/2) = {(L-F)xS} / (DxR) <-- That gives me a headache.
 
Last edited:

Hiball

Well-known member
Joined
Apr 30, 2009
Messages
14,027
Location
Missery
I check out the brush link. They are pretty cool. I don't know what grit the stone are. I bought a Gear wrench brake cylinder hone at Sears. It doesn't list the grit. There are two part # stones one for discs and one for drums??. My phone's camera actually takes pretty good pictures. It looks worse than it is. I may try Edgar's trick of making a mandrel to smooth the scratches out. That is also a solution to the high pressure bore that I have not touched yet. I still think that the scratches from the hone are nil compared to the relatively deep scratches running the length of the bore.


Sent from my iPad using Tapatalk

Its Generally Not Cost Effective to purchase Flex Hones for a 1 time Job, I normally buy mine when Zoro has a %Off coupon.
 

Pcbship

Member
Joined
Jul 24, 2012
Messages
20
I bought my cylinder hone at Sears because I was returning a broken 1/2 to 3/8 adapter and saw it for $12 on the clearance rack.
I do thank you guys for the help. Everybody relax, it's Friday. I know you all are just trying to help. Thank you. I'm going out to hone my cylinder @ 88 degrees. Just kidding. Going to bed!


Sent from my iPad using Tapatalk
 

Hiball

Well-known member
Joined
Apr 30, 2009
Messages
14,027
Location
Missery
I bought my cylinder hone at Sears because I was returning a broken 1/2 to 3/8 adapter and saw it for $12 on the clearance rack.
I do thank you guys for the help. Everybody relax, it's Friday. I know you all are just trying to help. Thank you. I'm going out to hone my cylinder @ 88 degrees. Just kidding. Going to bed!


Sent from my iPad using Tapatalk

Better put a Catch pan under it... LOL Maybe if i can find the time, Ill see if i can figure out how to put a Youtube video together showing some Honing Processes, But im going to need someone to come to the house and finish the backsplash in the Kitchen, I think ive ran out of excuses with the Wife. :lol_hitti
 

EDGAR

Well-known member
Joined
Aug 21, 2010
Messages
437
Hurry, hurry, someone please call Caterpillar and tell them to send people out to scratch the surface of those beautiful smooth hard chrome rams! What a bunch of morons, why would they want such highly polished surfaces? An industry wide recall is probably in order.

Anyway, the cross hatch pattern angle is of little consequence, whether is 45 or 15 degrees, is the depth of the valleys and height of the peaks that is important. Had you read your links, you would know this. But you did not. At any angle, the depth would be about the same for any particular cross hatch pattern, so no improvement on the quality of the finish with a different angle should be expected. It is the size of the grit that is important, as finer grits produce finer finishes.

The cross hatch pattern I object is the one left by the 400 grit stone that you like so much. I am pretty sure I mentioned that particular grit size in the post. Any surface finish would be rather rough, for hydraulic applications, if any cross hatch pattern is visible to the naked eye and the cross pattern of the 400 grit is quite visible. If it leaves the surface visibly etched, then I like to call that a scratched surface, you may call it something else if you want. But the good thing about honing is that it removes scratches from the surface; at least that is what it says in one of the links you posted.

I also mentioned that the cylinders and rams have to be highly polished but not to a mirror smooth finish because the surface needs to retain oil to properly lubricate the seal. A mirror finished surface does not retain oil, so there would be seal failure in the future. You probably did not read that either. So that implies that there is some type of micro finish in the surface with enough texture to retain oil. If you insist, we can call this a micro finish cross hatch pattern. There, I gave you one. But this pattern should no be visible to the naked eye. This pattern should also produce a highly reflective surface, in which, if you hold the cylinder over a newspaper, for example, you are able to see the letters reasonably clearly. This is not the type of finish produced by the 400 grit stone you like. A 400 grit produces like a satin surface finish, meaning this that is not very reflective, you may see the letters reflected but these look kind of fuzzy instead of sharp edged. If anyone applies little pressure to the 400 grit it may leave a less marked pattern, but what is the use? Why not instead use a finer grit. I did mention that a 800 grit, whether it is a Flexhone, or anything else, will produce a much better finish suitable for hydraulic applications than what the 400 grit, stones would produce. Why, even a 600 grit finish would be superior to the 400 grit. Just don't over do it. I really can’t understand your fixation with the 400 grit stones. Weird, isn’t it? Better call Dr. Phil…

No one has to super polish the cylinders, but the fact is that the smoother the surface, the better is for the seal longevity. As I mentioned in the other post, a ram seal, like an u-cup, runs compressed against the cylinder wall under load, so the surface finish is very important. So, the smoother the finish, the better the sealing quality and the longer the seals last sealing properly.

If you insist using 400 grit stones, that is your choice, but it is not mine. A 400 grit finish is okay, I guess, if the hydraulic equipment is going to be used like 6 or 7 times per year or so. For hydraulic equipment used daily for many hours, finer and smoother finishes are required.

And anyway, have you, or anyone, ever seen a cross hatch pattern on any ram? Probably not. What applies for cylinder surface finishes also applies for ram surface finishes. In both of these, there are seals making contact with the metal surfaces, so a smooth surface is required in both of these situations when there is movement between the seals and the metal surfaces.

A surface may feel smooth to your finger and yet be rough enough for a seal surface of an o-ring, for example, and this "smooth" roughness can catch the o-ring and make it twist in its groove and cause it to fail in very short order. So the surface has to be smooth enough to prevent this but a 400 grit cross hatch pattern is not smooth enough to prevent this. Look at any new pump piston surface and tell me if the finish on the piston is the same as the finish made by the 400 grit stone. It is not. There is a lot of distance between those two.

And you know what? Smooth files have cross patterns on them and these do abrade the surface of the material it is used on. Maybe a 400 grit cross hatch pattern on a cylinder surface could work like smoother file on the seal edge and wear it away faster than what a smoother cylinder surface finish, achieved with finer grits, could. Just a thought.

If you want to do a video, do one comparing two cylinders of the same type, one with the 400 grit cross hatch pattern that you like so much and one with a polished surface. Test them until failure and lets see which one fails first. Want to guess?

And, if you believe me or not, I could not care less.

I rest my case.
 

Hiball

Well-known member
Joined
Apr 30, 2009
Messages
14,027
Location
Missery
I refuse to clog up Daves thread anymore, it not fair to him. Edgar I clearly stated earlier that it was OK to Agree to Disagree, If using sandpaper at 1000 grit is working for you, no one can question that, but Please don't blatantly ignore the RA surfacing charts, they do provide uniformity in regards to surface finish and are even discussed in the Parker handbook where it takes it a bit further and breaks everything down into materials/sealing characteristics along with the other formulas for measuring surface imperfections. Well.. I take that back, if you want to ignore the charts/Parker that's your right, just don't expect me to buy it. Please stay on topic.. Nobody was talking about Caterpillar Cylinder Rod surfaces, Yes even Chrome Rams will have some imperfections, but not visible to the Naked Eye, I believe I read that the preferred RA Rod finish is 4-12 which is considered a very smooth finish, Nobody is disputing that Chrome finished rods arent smooth, Chrome is a byproduct of needing to protect the finish in a industry that lives in the elements. In regards to Orings as mentioned earlier, finish characteristics vary from material to material along with application, there is no 1 size fit all in regards to finish, this is why Orings typically need a more refined finish, Milwaukee Jacks? Pump Pistons on your Yasui based jacks? Yes and Yes..

In regards to 400 and why use that as a final grit on cylinder surfaces? Because that is what is what Brush research recommended, that goes along with what the Chart calls for in regards to RA when using Poly seals in dynamic applications for providing enough imperfections to properly lube the Sealing lips under load and also give longevity in the seal department. Obviously this doesn't mean you can just start with a 400, it's vital to utilize a glaze breaking stone first, and then finish with the 400 at a speed that won't simply reheat/glaze the walls again.

Why so angry? Everyone is free to handle there equipment how they see fit, it doesn't have to be Hiballs way or Edgar's way. I just don't get it.. The MinSpec info is out there, if one doesn't feel the surface is suffiecient, grab another grit, but don't rule out the fact that your results may have been attributed to improper cutting speed or lack of suffiecient cutting oil.
 
Last edited:

Pcbship

Member
Joined
Jul 24, 2012
Messages
20
Hi! Spent the weekend reading about cylinder finishes and now I feel I have to do more work on my sealing surfaces. Just got seal kit today. Is it normal to have extra parts and not enough parts? I have 1 extra ball valve, a couple extra plastic washers that don't fit anywhere, a rubber seal, a leather cup,an extra freeze plug and two missing copper washers.
3e5728ffd6dfa4e9d342a37b67319407.jpg

I can find the match for some things, but something's up.


Chris
 

Hiball

Well-known member
Joined
Apr 30, 2009
Messages
14,027
Location
Missery
Hi! Spent the weekend reading about cylinder finishes and now I feel I have to do more work on my sealing surfaces. Just got seal kit today. Is it normal to have extra parts and not enough parts? I have 1 extra ball valve, a couple extra plastic washers that don't fit anywhere, a rubber seal, a leather cup,an extra freeze plug and two missing copper washers.
3e5728ffd6dfa4e9d342a37b67319407.jpg

I can find the match for some things, but something's up.


Chris

Yes that is a Universal Kit that covers a variety of series, There are some seals you wont use, As far as the Missing Copper washers, Make a Call.
 

Hiball

Well-known member
Joined
Apr 30, 2009
Messages
14,027
Location
Missery
@PCBSHIP Don't Sweat the Cylinder Bore finish, If you utilize a Glaze Breaking stone and finish with a Fine grit 400 stone/brush IMO you "Will" be good if you utilize some cutting oil/lube and attempt to stay within the recommend 900+/- RPMs for the Bore size on your 4 ton. You will find a variable of RA finishes for Cylinders across the Internet, Anywhere from 6-18 with Enerpac to 8-20 thru various Hydraulic Shops who advertise there service and this follows suit with Parker, Below is a attached RA to Grit conversion Chart.


Ive Highlighted the Section that pertains to Recommended RA for Hydraulic Cylinders, As you can see 400 Grit gets you actually Lower (Smoother) than what some Manufacturers (Enerpac) strive for. Below is a small clipping from a Hydraulic Cylinder shop explaining the Downfalls of too Rough/Smooth of a bore.

Surface finish is measured in Ra, Rz, and RMS (Rq), with the most common scale in hydraulics being Ra. The measure of a surface finish, Ra, is defined as the arithmetical mean deviation of the assessed profile. In simple terms, it is the measure of peaks and valleys in the surface over a defined distance. This surface is critical in the longevity and sealing properties. If the surface is too rough, oil is allowed to pass under the seal through the “valleys”, thereby causing oil to leak by the seal. If the surface finish is too smooth, no oil is passed under the seal at all, thereby increasing the wear of the seal. Ideally, a very small amount of oil should pass under the seal to allow for lubrication of the seal, but not enough that there is leakage

What does all this Mean? Absolutely Jack Sh!T, Use some Common sense, Do your own Research and forge your own opinion on what you feel is best for your application, If you finish up with 400 and it doesn't suit, Step up to finer stone/paper and see what results you get, The Beauty of Polyurethane is that is very resilient material.

Good Luck with finishing your project. :thumbup:
 
Last edited:

Pcbship

Member
Joined
Jul 24, 2012
Messages
20
Made up some mandrels and a custom anti-contamination stand. I used 400 wet dry paper. Apparently a 2 inch mandrel doesn't like having a 1/2 inch shaft. I'm happy with the result. Definitely knocked down the roughness from the cylinder hone. I think the stones on mine may be more like 240 grit. Still have to find a couple copper washers and clean the pump well. I may try to clean up valve seats as well. 35ff418a9356cac2d94ac2629600f140.jpg


Chris
 

EDGAR

Well-known member
Joined
Aug 21, 2010
Messages
437
The use of 1000 grit is really not necessary. Using a 400 paper more than once, in other words, more than one pass, will produce a nice smooth finish because with every pass the grits gets duller and therefore, the finish gets smoother. I did mention something about that.

I did mention than the cylinder wall has to retain oil, so it can not be polished to a mirror like finish, which does not retain oil and will cause failure.

The thing about Caterpillar rams is about how an smooth finish can retain enough oil to work properly, because hard chrome retains oil. If that can be done to the rams, it can certainly be done to the cylinder. The seal in any application, piston or rod, should run in a smooth enough finish, without affecting oil retention, that produces the less wear possible. What applies to cylinder also applies to rams, yet no one sees rams with a cross hatch finish. So a cylinder could withstand a little more polishing than what Brush Research says.

Below see a link were it mentions the thing about no scratches. It mentions the following;

"Scratches, scores, machine scoring running concentrically or spirally, is not permitted"

http://ecatalog-na.fst.com/catalog/FP.htm

The link does not get you directly to the page, you have to "Click to view contents", then in the table of contents, click Surface finish.

To me that sounds exactly like what an engine honer does to cylinder walls; that description is what a cross hatch pattern is.

So if anyone think that this company recommendation is wrong, please, by all means contact the company and tell them that they are wrong, that they know nothing, that the only finish suitable is the visible cross hatch pattern produced by engine honer stones.

If anyone does not feel comfortable with polishing the cylinder to a near mirror finish, at least polish the cylinder enough to the point were the cross hatch pattern is nearly invisible to the naked eye. That should provide a good enough balance between less wear and enough oil retention.
 
Last edited:

Hiball

Well-known member
Joined
Apr 30, 2009
Messages
14,027
Location
Missery
The use of 1000 grit is really not necessary. Using a 400 paper more than once, in other words, more than one pass, will produce a nice smooth finish because with every pass the grits gets duller and therefore, the finish gets smoother. I did mention something about that.

I did mention than the cylinder wall has to retain oil, so it can not be polished to a mirror like finish, which does not retain oil and will cause failure.

The thing about Caterpillar rams is about how an smooth finish can retain enough oil to work properly, because hard chrome retains oil. If that can be done to the rams, it can certainly be done to the cylinder. The seal in any application, piston or rod, should run in a smooth enough finish, without affecting oil retention, that produces the less wear possible. What applies to cylinder also applies to rams, yet no one sees rams with a cross hatch finish. So a cylinder could withstand a little more polishing than what Brush Research says.

Below see a link were it mentions the thing about no scratches. It mentions the following;

"Scratches, scores, machine scoring running concentrically or spirally, is not permitted"

http://ecatalog-na.fst.com/catalog/FP.htm

The link does not get you directly to the page, you have to "Click to view contents", then in the table of contents, click Surface finish.

To me that sounds exactly like what an engine honer does to cylinder walls; that description is what a cross hatch pattern is.

So if anyone think that this company recommendation is wrong, please, by all means contact the company and tell them that they are wrong, that they know nothing, that the only finish suitable is the visible cross hatch pattern produced by engine honer stones.

If anyone does not feel comfortable with polishing the cylinder to a near mirror finish, at least polish the cylinder enough to the point were the cross hatch pattern is nearly invisible to the naked eye. That should provide a good enough balance between less wear and enough oil retention.

Whew... Only 5 Years of Constant Denial about using 400 grit.. Wait Min Lemme "Print Screen" this stuff. LOL...Well Kinda your almost there, Cross hatch is whether for Engines or Cylinders is a Necessity, The only difference is the Application, Rate of Finish, which is derived from the Vertical speed and Grit. Absolutely.. You shouldnt have Rough 45 degree Engine type Cross Hatch, The Larger/Deeper More perpendicular "Hatch pattern" would allow too much oil to pass under the Seal, Thus Leak and More than likely eventually cause damage to the sealing lips over time. If i could expand on this further for anyone not following, The Sealing lip of a Seal is very small, You need to imperfections (valleys) to allow Oil to bypass under pressure to lube the lips, If you use too much of a Angle of Cross Hatch, Say 45 as it seems to be a common theme in this discussion, What you have done is create a Underpass that will be a constant source of Leakage, couple that large angle with not finishing with a fine stone and you have a canal for pressurized oil to travel. If you use a smaller angles (Less Rapid Vertical movement when finishing the bore) You can control the Cross Hatch Angle and attempt to find the balance between Lubing the sealing lips and controlling leakage. Shorter length Bores+Finger+Eyes+common sense = good.

And Just so we are Clear... Im not ruling out Edgars Sandpaper method, There is something to be said about working in small steps and at a speed that can allow for more careful examination, and you can probably finish the Job more $$$ effectively. The sunnens honing machine which is the standard in most shops across the USA, and it uses stones just like a engine hone, only difference is the fine tuning ability to control RPM and Vertical speed, which when dealing with long cylinders bores is a must I suspect.

@Edgar, I made a couple Phone Calls, There are variances in Sealing Applications, Especially Material (see Parker), The Most Common differences is between Rod and Piston Applications, Rod Seals Generally Need to have a Smoother finish, Because Not only do they need to find that balance between Sealing the Rod tight enough not to leak, They also need to allow the Rod to Move both directions under Pressure while that Rod Seal has it in a Chokehold, which is why buffer seals are generally utilized with rod seals help distribute pressures more evenly or control/buffer pressure spikes.
 
Last edited:

Hiball

Well-known member
Joined
Apr 30, 2009
Messages
14,027
Location
Missery
I would like to add, the Internet doesn't make you smarter, No matter how many words you string together, or links, copy/paste quote you use. I absolutely Didn't know all the detailed information about how seals/surfaces vary in application till I made some calls and did some research. Here's what I did know though.. 25+ years of servicing hydraulic floor jack cylinders and Rod surfaces has taught me what can and can't be done just by simply using common sense along with eyesight and touch.

Life is all about learning, Hopefully these additions to Daves thread will further help others.
 

EDGAR

Well-known member
Joined
Aug 21, 2010
Messages
437
At least you learned something after 25 years of servicing hydraulic jacks. Let us hope the next thing you learn does not take 25 more years. See, right there you admitted that you do things by the seat-of-the-pants method and not because you researched the topic. There is information out there, just do a little research. And doing something for 25 years does not guarantee that you are doing things right. You could be replicating a mistake for many years without knowing it or doing something different from what the standards call for.

If quoting from the internet or posting links does not make you smarter, well, you posted and linked more than I did; I only linked the Simritna site. And you did not like Parker at all, you even made fun of the Parker manual and of me using it. So what gives? You know, I am pretty sure the Parker people know a little more than you do. It is a worldwide company, with thousands of products, not a mom and pop shop. It is a good thing that you are coming out of the cave you live in and are starting to see the light, but you still show a lot of resistance to improving your knowledge. But what do I care, it is not my problem, it yours after all.

As for the 400 grit, for the third time I will explain that the 400 grit stone cut remains the same no matter how many times you make passes, but the cut depends on the tension it was adjusted to. In the case of the 400 grit wet and dry sandpaper, the grain wears out, or becomes duller, after each pass. So if you start with the 400 grit and do 3 or 4 passes, the finish at the end is finer than doing 3 or 4 passes with the 400 grit stones. With the stones, the finish should always be the same if the honer tension remains the same. That is why I stated that a 1000 grit is not really needed if you do a few passes with the 400 grit sandpaper. I hope I don't have to explain this four times.

As for feeling the finish with finger, I already stated that I it is not the same for the finger as for the seal. The seal sees much more pressure, or compression, against the cylinder than your finger does when feeling the finish. So what feels smooth to you may not be, in fact, so smooth for the seal. With an o-ring , a not so smooth finish that feels smooth enough for the finger, can make the o-ring twist in its groove and get damaged in a short time. A seal like an u-cup might not twist in its groove because its shape prevents it, but the seal would wear faster with a not so smooth finish. This would only be of concern for hydraulic equipment that is used daily for many hours. For a floor jack, that is used a few times a year, is not important.

I will repeat, a finer and better polished finish is better than the cross hatch finish left by 400 grit stones in terms of seal longevity. No one has to super polish the cylinder, but it should be polished at least a little more than just leaving it with the cross hatch finish produced with 400 grit stones

As for the rams, just look at the Milwaukee floor jacks which use a thick o-ring in a rod application as the main seal. The ram of the Milwaukee is hard chromed and it is smooth; no cross hatching there and it works fine, so why complain about polishing the cylinders at least a little more than the cross hatch finish left by stones? There are also many other hydraulic bottles which use u-cups in a rod application and the ram is smooth in all of them, and the u-cup holds the pressure and seals the ram, no problem there. In general, if the rams can have a smoother surface than the cross hatch finish, why can't the cylinders benefit of a better polished finish?

If I say blue, he says red, if I say red then he says blue. This might be complaining just for the sake of complaining.
 
Last edited:
To avoid these ads, REGISTER NOW!
Top Bottom