To avoid these ads, REGISTER NOW!

Woodworking 101--Tools and Tips

R_einan

Well-known member
Joined
Aug 29, 2016
Messages
461
Location
Eastern WA
Memo to: Procurement Dept
From: The Chief
RE: Woodworking Vises

Effective immediately the open order for woodworking vises is rescinded. Under no circumstances should ww vises be purchased, even if said vise is accompanied by a letter of transit signed by General De Gaulle himself.

:willy_nil:willy_nil:willy_nil:willy_nil

:spit::drool:
 
To avoid these ads, REGISTER NOW!

ALLFAST

Well-known member
Joined
Feb 20, 2017
Messages
1,233
Location
Northern California
Jim Reed,

If they ever collectively decide to come to life and turn on you as a group, you are in for a slow and painful demise ! That's an awesome collection there my friend !.

Can you venture to guess how much you have invested, vs what their fair value is now ?
 

rrich1

Well-known member
Joined
Oct 7, 2015
Messages
793
Gaming table is done! Buffed out the finish today. Very happy with how it turned out. Whole lot of firsts for me in this build including mortis and tenons, bridle joints, pillowing, routing channels/tracks, tapering legs. I'm sure I'm missing some others as well.445154bced1c86e6370339e561478631.jpga7f733f313ea6072b713b9855ec8382a.jpg043074eecafdfddf211254e7a6a08b08.jpg8935711da70464b539a4bfde2f7ae0fc.jpgfd4cad85040298318eb922b61fa0f93c.jpgc05c74c9b9b9895661e210821d1167b2.jpg9e27b9b5b334bbc8e012b30fadd73f3f.jpg530b520d62a0fb4b12791b6a02f12ec9.jpgedb521fae5a2cb9968bf05b3df027ce5.jpg

Sent from my Pixel XL using Tapatalk
 

Attachments

  • 445154bced1c86e6370339e561478631.jpg
    445154bced1c86e6370339e561478631.jpg
    75.8 KB · Views: 0
  • edb521fae5a2cb9968bf05b3df027ce5.jpg
    edb521fae5a2cb9968bf05b3df027ce5.jpg
    81.3 KB · Views: 0
  • 530b520d62a0fb4b12791b6a02f12ec9.jpg
    530b520d62a0fb4b12791b6a02f12ec9.jpg
    63.8 KB · Views: 0
  • 9e27b9b5b334bbc8e012b30fadd73f3f.jpg
    9e27b9b5b334bbc8e012b30fadd73f3f.jpg
    59.8 KB · Views: 0
  • c05c74c9b9b9895661e210821d1167b2.jpg
    c05c74c9b9b9895661e210821d1167b2.jpg
    63.3 KB · Views: 0
  • fd4cad85040298318eb922b61fa0f93c.jpg
    fd4cad85040298318eb922b61fa0f93c.jpg
    54.2 KB · Views: 0
  • 8935711da70464b539a4bfde2f7ae0fc.jpg
    8935711da70464b539a4bfde2f7ae0fc.jpg
    74.7 KB · Views: 0
  • 043074eecafdfddf211254e7a6a08b08.jpg
    043074eecafdfddf211254e7a6a08b08.jpg
    86.6 KB · Views: 0
  • a7f733f313ea6072b713b9855ec8382a.jpg
    a7f733f313ea6072b713b9855ec8382a.jpg
    85.3 KB · Views: 0

txvwnut

Well-known member
Joined
Jan 1, 2015
Messages
7,606
Location
Bedford, Texas
Memo to: Procurement Dept
From: The Chief
RE: Woodworking Vises

Effective immediately the open order for woodworking vises is rescinded. Under no circumstances should ww vises be purchased, even if said vise is accompanied by a letter of transit signed by General De Gaulle himself. QUOTE]

If you ever need to make room you could send a couple over here and I’d gladly store them for you. Hell I’ll even go as far to install them on my soon to be built bench to keep them off the floor. :D
 

ptgarcia

Well-known member
Joined
Nov 15, 2016
Messages
1,202
Location
Alta Loma, CA
Gaming table is done! Buffed out the finish today. Very happy with how it turned out. Whole lot of firsts for me in this build including mortis and tenons, bridle joints, pillowing, routing channels/tracks, tapering legs. I'm sure I'm missing some others as well.445154bced1c86e6370339e561478631.jpga7f733f313ea6072b713b9855ec8382a.jpg043074eecafdfddf211254e7a6a08b08.jpg8935711da70464b539a4bfde2f7ae0fc.jpgfd4cad85040298318eb922b61fa0f93c.jpgc05c74c9b9b9895661e210821d1167b2.jpg9e27b9b5b334bbc8e012b30fadd73f3f.jpg530b520d62a0fb4b12791b6a02f12ec9.jpgedb521fae5a2cb9968bf05b3df027ce5.jpg

Sent from my Pixel XL using Tapatalk


Wow, fantastic table! Great job!
 

Attachments

  • a7f733f313ea6072b713b9855ec8382a.jpg
    a7f733f313ea6072b713b9855ec8382a.jpg
    83.3 KB · Views: 0
  • 043074eecafdfddf211254e7a6a08b08.jpg
    043074eecafdfddf211254e7a6a08b08.jpg
    84.5 KB · Views: 0
  • 8935711da70464b539a4bfde2f7ae0fc.jpg
    8935711da70464b539a4bfde2f7ae0fc.jpg
    73.7 KB · Views: 0
  • fd4cad85040298318eb922b61fa0f93c.jpg
    fd4cad85040298318eb922b61fa0f93c.jpg
    53.8 KB · Views: 0
  • c05c74c9b9b9895661e210821d1167b2.jpg
    c05c74c9b9b9895661e210821d1167b2.jpg
    62.7 KB · Views: 0
  • 9e27b9b5b334bbc8e012b30fadd73f3f.jpg
    9e27b9b5b334bbc8e012b30fadd73f3f.jpg
    59 KB · Views: 0
  • edb521fae5a2cb9968bf05b3df027ce5.jpg
    edb521fae5a2cb9968bf05b3df027ce5.jpg
    79.9 KB · Views: 0
  • 530b520d62a0fb4b12791b6a02f12ec9.jpg
    530b520d62a0fb4b12791b6a02f12ec9.jpg
    62.6 KB · Views: 0
  • 445154bced1c86e6370339e561478631.jpg
    445154bced1c86e6370339e561478631.jpg
    74.9 KB · Views: 0
OP
J

jimreed2160

Well-known member
Joined
Aug 7, 2016
Messages
3,589
Location
Tallahassee FL
Milling machine table

I am continuing to go through and upgrade my construction lumber shop furniture. Today, I worked on the milling machine table. The room is only 36" wide and that is challenging.

DSCN4625.jpg


I decided to raise the table a bit and put a box of drawers under it for better storage.

DSCN4626.jpg


Doesn't look like much change, but every drawer helps.

But now the lone toolbox is without a home for the second time. Poor guy keeps getting bumped. At least I got another wagon off the main floor.

I think I can make the space a little more productive.

DSCN4627.jpg


The vintage box holds my end mills.

DSCN4629.jpg


DSCN4628.jpg


It gives the place a little character.
 
Last edited:
OP
J

jimreed2160

Well-known member
Joined
Aug 7, 2016
Messages
3,589
Location
Tallahassee FL
Jim Reed,

If they ever collectively decide to come to life and turn on you as a group, you are in for a slow and painful demise ! That's an awesome collection there my friend !.

Can you venture to guess how much you have invested, vs what their fair value is now ?

I am into them at about $50-60 each. Shipping these things is the big issue. I think I can squeak by and get my money back but windfall profits are out of the question. I have had fun playing with them. These old things are built to last.
 

rrich1

Well-known member
Joined
Oct 7, 2015
Messages
793
Thanks guys. This was first time in a while that I can think of that everything just "went right" with the project. Would have been nice to have gotten paid for it as well but it was a great learning experience. I know our assistant pastor is going to love it. He hasn't seen it since the finish was applied. He will come by tomorrow to pick it up.

Jim: your grinding area is very nice. I would love to have the space for that.
 

R_einan

Well-known member
Joined
Aug 29, 2016
Messages
461
Location
Eastern WA
Rich, that table turned out beautifully, wonderful work!

My craigslist find was a good one, grizzly g1028z2 1.5 HP with an upgraded canister filter and he threw in a trash can and chip separator and a couple 4” hoses with it. Only thing missing is a lower bag, but I ordered a pack off Amazon. Now time to follow Jim’s example and clear out that corner so I can put into place and get it hooked up.
 

Attachments

  • F93E0D87-2252-4E72-8948-90B3C3773F4E.jpg
    F93E0D87-2252-4E72-8948-90B3C3773F4E.jpg
    21.2 KB · Views: 72

rrich1

Well-known member
Joined
Oct 7, 2015
Messages
793
R-great pick up on the dust collector

Sent from my Pixel XL using Tapatalk
 
Last edited:
OP
J

jimreed2160

Well-known member
Joined
Aug 7, 2016
Messages
3,589
Location
Tallahassee FL
R--I am afraid your journey has just started. Sometimes our ww journey takes us in diverse directions. Now you need to get schooled in the physics of airflow so you can make that thing as efficient as possible. Good luck.
 

Slednut

Well-known member
Joined
Dec 20, 2012
Messages
2,550
Location
Washington state
Wow rich I really like the corner treatment on that table.

Earlier I posted a pic of a slab table my SIL built. Here are some more pics. He tig welded the base.
 

Attachments

  • IMG_5034.JPG
    IMG_5034.JPG
    86.9 KB · Views: 74
  • IMG_5033.JPG
    IMG_5033.JPG
    87.6 KB · Views: 76
  • IMG_5010.JPG
    IMG_5010.JPG
    97 KB · Views: 82
  • IMG_5011.JPG
    IMG_5011.JPG
    84.2 KB · Views: 77
  • IMG_5017.JPG
    IMG_5017.JPG
    113.9 KB · Views: 77

R_einan

Well-known member
Joined
Aug 29, 2016
Messages
461
Location
Eastern WA
Sled: that’s a very nice piece of work, props to your SIL.

Jim: I’m very aware of how deep a pool my toe is in, just hope to keep my head above water... lol! At this point it’s only going to be hooked to the Unisaw and hopefully in the future a jointer. For the foreseeable future it will be enough for my needs, after that, space becomes the issue to address. I already want a bigger shop, now to figure out the most logical way to add the space I need and separate the woodworking from the rest.
 
OP
J

jimreed2160

Well-known member
Joined
Aug 7, 2016
Messages
3,589
Location
Tallahassee FL
R-I hear you. I don't mind doing a little sweeping, esp if it is just shavings. But I have been running the power tools lately and now there is fine dust all around. I have been opening the garage doors and blowing it all out with compressed air but there is a better way. I need a scrubber or something.
 
To avoid these ads, REGISTER NOW!

rrich1

Well-known member
Joined
Oct 7, 2015
Messages
793
Sled: thanks! The slab table your SIL made is awesome!

With the table done and gone and me now having my vise screw it is time to try and finish the bench. Between watching the kids today and housework, I was able to get some shop time in. I made the garter for the screw and got it attached. I also attached the nut to the leg as well. The nut was slightly bigger than the leg so I trimmed it to fit. I countersunk the screw holes with a forstner bit as the kreg screws were not long enough on their own. It came out really well.

I am waiting on a handle from Lee valley to get here so I will hold off on drilling the handle hole. I can tell it is not going to be fun to drill a large hole through all of this hickory for the handle.

Up next is trying to figure out a parallel guide system. I think I am just going to go old school with a guide and pin. I have an awesome piece of hickory that will work perfectly. I like the Jay Bates' approach with the wedge but my bench is mobile and I don't feel like having to deal with moving that as well.

Also a helpful tip for today. I did this a week ago and did it again today. The piece of wood I used for the garter was too short to run through the planer on its own so I glued it to a longer piece of wood with CA glue. Worked perfectly and the larger piece takes any snipe if there is some. Just make sure to put it in the middle of the longer piece. db64fa736efdc3fe6a16a7fa89e1e8cc.jpg84456c1e19c08379c1cabdec0244443c.jpg62d476ff418d05a196d17f9102dbe82b.jpg423cfcba14ff068067d6f522cd32eaaa.jpgb2c3c5f4885810798e4b5cead7a9a866.jpg5b74b159e7ea1b0a8c6453ecd45f0fc1.jpg

Sent from my Pixel XL using Tapatalk
 

Attachments

  • 423cfcba14ff068067d6f522cd32eaaa.jpg
    423cfcba14ff068067d6f522cd32eaaa.jpg
    98.8 KB · Views: 1
  • b2c3c5f4885810798e4b5cead7a9a866.jpg
    b2c3c5f4885810798e4b5cead7a9a866.jpg
    93.2 KB · Views: 0
  • 5b74b159e7ea1b0a8c6453ecd45f0fc1.jpg
    5b74b159e7ea1b0a8c6453ecd45f0fc1.jpg
    100.4 KB · Views: 0
  • 62d476ff418d05a196d17f9102dbe82b.jpg
    62d476ff418d05a196d17f9102dbe82b.jpg
    80.4 KB · Views: 0
  • 84456c1e19c08379c1cabdec0244443c.jpg
    84456c1e19c08379c1cabdec0244443c.jpg
    80.8 KB · Views: 0
  • db64fa736efdc3fe6a16a7fa89e1e8cc.jpg
    db64fa736efdc3fe6a16a7fa89e1e8cc.jpg
    71.2 KB · Views: 1

R_einan

Well-known member
Joined
Aug 29, 2016
Messages
461
Location
Eastern WA
Jim: I’ve been reading some articles from woodworkers that built a box that accepts furnace filters available to most hardware store using a furnace blower. If you size your fax correctly you can build a air filtering unit designed for your space for almost nothing. The other option if you want to save time and spend a little money is to order the Jet air filter from either Rockler or woodcraft, both have them for sale for Black Friday at $299. A buddy of mine offered me a blower fan for venting greenhouses, I haven’t seen it yet, but I’m thinking some plywood and a few filters and I can build something to cut down on the dust in the air of my shop.
 

raskal

Well-known member
Joined
Aug 16, 2005
Messages
290
Location
British Columbia
I built an air cleaner last year. It works ok. I sized it to use the same filter as my house and use filters that spent some time in the house. I use a timer as the switch so I can set it to clean after I'm done in the shop. My only complaint with it is that's its loud
 

Attachments

  • 20171122_203634_HDR.jpg
    20171122_203634_HDR.jpg
    146.9 KB · Views: 61
  • 20171122_203644_HDR.jpg
    20171122_203644_HDR.jpg
    144.4 KB · Views: 65
  • 20171122_203652_HDR.jpg
    20171122_203652_HDR.jpg
    142.8 KB · Views: 60

rrich1

Well-known member
Joined
Oct 7, 2015
Messages
793
Built a tapering/straight line jig for my microjig dovetail clamps. Simple build that I'm sure will get some good use out of. 940fa18c43f7804b8504ec6c1f4ae099.jpg

Sent from my Pixel XL using Tapatalk
 

Attachments

  • 940fa18c43f7804b8504ec6c1f4ae099.jpg
    940fa18c43f7804b8504ec6c1f4ae099.jpg
    101.9 KB · Views: 1

ztorres

Well-known member
Joined
Sep 22, 2016
Messages
195
Location
Iowa
Built a tapering/straight line jig for my microjig dovetail clamps. Simple build that I'm sure will get some good use out of. 940fa18c43f7804b8504ec6c1f4ae099.jpg

Sent from my Pixel XL using Tapatalk


I saw David Piccuito do something similar to this as a replacement for his jointer. How do you like it?


Sent from my iPhone using Tapatalk
 

Attachments

  • 940fa18c43f7804b8504ec6c1f4ae099.jpg
    940fa18c43f7804b8504ec6c1f4ae099.jpg
    101.9 KB · Views: 1

rrich1

Well-known member
Joined
Oct 7, 2015
Messages
793
I saw David Piccuito do something similar to this as a replacement for his jointer. How do you like it?


Sent from my iPhone using Tapatalk
I actually just finished it so haven't really used it yet. Really simple to build and the clamps slide pretty easily. I used a kreg miter bar as well.

Sent from my Pixel XL using Tapatalk
 

shortykorte

Well-known member
Joined
Sep 1, 2014
Messages
8,037
Location
Tallahassee, Fl
Thanks rrich and ztorres. I actually could have used the set up to extend fence height the other day. Looks like versatile clamps.


Sent from my iPhone using Tapatalk
 

R_einan

Well-known member
Joined
Aug 29, 2016
Messages
461
Location
Eastern WA
Breadboard ends are draw bored and set, the top is finally assembled. Now to sand them perfect and finish sanding the base assembly before I start finish sanding and finish work.
 

Attachments

  • 41A0E4F0-C5AC-402F-A7B0-FE5A5A5DD31B.jpg
    41A0E4F0-C5AC-402F-A7B0-FE5A5A5DD31B.jpg
    12.7 KB · Views: 73
  • 4811604D-7019-4CDB-9D7E-9C6E52E97C81.jpg
    4811604D-7019-4CDB-9D7E-9C6E52E97C81.jpg
    12.8 KB · Views: 69

cheechi

Well-known member
Joined
Feb 29, 2012
Messages
4,384
Location
Triad, NC
gentlemen, I'd like some help.

All of my tools have dust ports meant for a 2-1/2" shop vac hose. So far I can't find an adapter that will go into that port, and the other side have a 4" dust collector hose clamped to it. The 4" side is fine, the 2-1/2" side for the ones I've tried are meant for 2-1/2" dust collector hose (which I don't have any) to be clamped outside it.

whatever experience you guys have would be appreciated.
 

rrich1

Well-known member
Joined
Oct 7, 2015
Messages
793
gentlemen, I'd like some help.

All of my tools have dust ports meant for a 2-1/2" shop vac hose. So far I can't find an adapter that will go into that port, and the other side have a 4" dust collector hose clamped to it. The 4" side is fine, the 2-1/2" side for the ones I've tried are meant for 2-1/2" dust collector hose (which I don't have any) to be clamped outside it.

whatever experience you guys have would be appreciated.
Never once has it come out. I use quick spring clamps from wood river for quick disconnection of the Dec hose. The two black pieces stay on the table saw. If you needed they can come off. They are friction fit.603e8d3365527b82c63d9286592f229f.jpg4dd086fa41d7688868e815cb84da0bc6.jpgebd7cec5333d6f098cc9b2a5822aad68.jpg

Sent from my Pixel XL using Tapatalk
 

Attachments

  • ebd7cec5333d6f098cc9b2a5822aad68.jpg
    ebd7cec5333d6f098cc9b2a5822aad68.jpg
    98.3 KB · Views: 0
  • 603e8d3365527b82c63d9286592f229f.jpg
    603e8d3365527b82c63d9286592f229f.jpg
    81.3 KB · Views: 0
  • 4dd086fa41d7688868e815cb84da0bc6.jpg
    4dd086fa41d7688868e815cb84da0bc6.jpg
    74.1 KB · Views: 0
OP
J

jimreed2160

Well-known member
Joined
Aug 7, 2016
Messages
3,589
Location
Tallahassee FL
I use hillbilly aluminum to fasten my shopvac to the sander. First I clamped a 2 foot piece of flexible hose to the sander and then duct tape the ragged end to the shopvac. Works great. Easy to remove and reinstall. Tape lasts about six months before replacing.
 
OP
J

jimreed2160

Well-known member
Joined
Aug 7, 2016
Messages
3,589
Location
Tallahassee FL
Goodbye Photobucket, hello SPLINTERMAKING.COM

My on line experience began in the 1970s and my on line woodworking began in the 1990s. Many sites have come and gone. Others delete posts after a year or two. GJ is one of the big exceptions. I have been using PB for the last ten years to post pictures all over the web. It has been a fun experience but has not been permanent. The recent changes in PB policy really have forced me to make some changes.

My last warning from PB was that all of my pictures would be unavailable after the end of the month unless I paid their fee. I knuckled under the first two times and they kept increasing that fee. My $39 became $69 and then went to $399.

Well, they can have the dang pictures. I have backups of the important ones. And now I have my own website. It costs waaaay less than their fee and I have complete control. No more deleted posts.

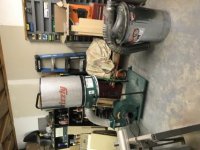
It is like my shop--incomplete, dusty, ragged, but functional. I will continue to post on GJ but most of my time and effort will be at
splintermaking.com
https://splintermaking.com/

Please join me there. The back end is stable and I am working like a dervish to get the front end and links presentable. It is a work in process but I will get the links worked out as I load in the content. AND IT WILL NOT DISAPPEAR!
 

cheechi

Well-known member
Joined
Feb 29, 2012
Messages
4,384
Location
Triad, NC
rrich thanks for the photos that's exactly what I need.

on some tools I have 'made' a bigger/better hose port using the rubber hose couplers meant for pvc plumbing, and while I was only using the shop vac had good success with them. I found the W1044 easily enough. I'm going to wait until it gets here and see if what I have will go around it, if not I'll probably be asking you for measurements on the coupler.
 

R_einan

Well-known member
Joined
Aug 29, 2016
Messages
461
Location
Eastern WA
Considering the purchase of a small palm/trim router for small edge treatments, like round overs under 3/8 and other small and delicate tasks. Looked at the Bosch Colt the other day and was VERY unimpressed with the depth adjustment, seems very inarticulate and difficult to adjust. What are you guys using and what do you think of them?
 
OP
J

jimreed2160

Well-known member
Joined
Aug 7, 2016
Messages
3,589
Location
Tallahassee FL
Ornament hooks

OK, this is not woodworking. But it might come in handy during the holidays.

The Queen wanted to set up the Christmas tree yesterday and most of the ornament hooks were MIA. Where do those things go???

I found some 20 gauge wire.

DSCN4632.jpg


Cut a 2 1/2 inch length.

DSCN4633.jpg


Then I put the large screwdriver in the vise and used the shaft to roll a perfect hook for the tree end.

DSCN4634.jpg


And finally used the needle nosed pliers to fashion the ornament hook end.

DSCN4635.jpg


Two dozen of these later and the crisis was over. Whew! At least I saved a trip out into the holiday shopping crowds on Black Friday.
 
To avoid these ads, REGISTER NOW!
Top Bottom