To avoid these ads, REGISTER NOW!

Woodworking 101--Tools and Tips

vartz04

Well-known member
Joined
Feb 17, 2009
Messages
1,882
Location
LaSalle County IL
vartz: Oh, that kind of kitchen helper. Very good idea. They do love to help. When he's too big to need it any longer you could make a quick top and use it for a mixer or microwave stand. Well done.


I figured it would make mor sense with a kid standing on it haha
 
To avoid these ads, REGISTER NOW!
OP
J

jimreed2160

Well-known member
Joined
Aug 7, 2016
Messages
3,589
Location
Tallahassee FL
Vartz--Nice work. Every project looks better with an assistant to show it off.

As for trammels, they were on my mind last night. I do have a few sets. Here is a group photo.

DSCN0903.jpg


Breaking it down a little further, here are some of the Stanley offerings. Small set is #1, medium set is #2 and large set is #3 size. All because woodworkers demand a specific tool for each job.

DSCN0904.jpg


Here are some interesting larger pairs.

DSCN0905.jpg


The set on the yardstick is new but very handy. Points are easily replaced with lead for marking or points for scribing. The single is my first set. I found an orphan trammel and made a stick with a nail for its companion. It saw me through many projects. The large set is often called Coachmakers Trammels because of their size. They are obviously mismatched but I found a way to match them so they would work together on the same sized stick.

DSCN0906.jpg


You will note that I also made a top keeper for the other trammel. Top keepers are often missing but they are necessary. Otherwise the screw drills into the beam and leaves marks.

Here is the top with a close up of the imbedded nail. Notice also the hang hole. Hang your trammels close to your bench and they will get used more often.

DSCN0907.jpg


How about a small set? Here is a tiny one made of brass.

DSCN0908.jpg


Here are my three user trammel sets. Each size has its own use. I like the newer Stanley set because they clamp on and can be used with any 1" board. I found a walnut scrap for mine.

DSCN0909.jpg


And lastly, here is why your trammel beam compass is better than a regular compass.

DSCN0911.jpg


I hope everyone can squeeze in some shop time this weekend.
 

ztorres

Well-known member
Joined
Sep 22, 2016
Messages
195
Location
Iowa
I was at the FIL's house last night, and he's a wood worker, and he was asking if I had an air filter in my shop. I was wondering if anyone could share some information on air filters for a shop and maybe discuss some good brands.


Zach
 

Slednut

Well-known member
Joined
Dec 20, 2012
Messages
2,550
Location
Washington state
I don’t consider myself as a true woodworker but I do have a tip.

I beveled the edges of 1x stock and used biscuits as fasteners to make these legs.
 

Attachments

  • P82A0833.jpg
    P82A0833.jpg
    143.8 KB · Views: 97
  • P82A0834.jpg
    P82A0834.jpg
    144.8 KB · Views: 106

bj383ss

Well-known member
Joined
Sep 29, 2011
Messages
3,166
Location
TX
Vartz- that is a great project. Anything for the little ones like that will build some cool memories.

Jim- thanks for the info on trammels. Know I now why there are none for sale on ebay. :)

Ztorres- there any many good brands or you can build your own. I showed a picture of mine above. I used an old squirrel cage fan from an HVAC and it has a 3 pocket filter on the inside and a 3m 1900 before that. I have some plans for building one let me find them for you. If I was going to buy one I know Grizzly has some good ones and a lot of guys use Jet. You buy it based on how big your shop is. It needs to cycle the air at least 6 times an hour if I remember correctly

Sled thanks for sharing.

Bret
 

schor

Well-known member
Joined
Apr 16, 2013
Messages
531
Location
Ajax, Ontario
I was at the FIL's house last night, and he's a wood worker, and he was asking if I had an air filter in my shop. I was wondering if anyone could share some information on air filters for a shop and maybe discuss some good brands.


Zach

That's what you have your nose hairs for. :thumbup:

The really fine particles of dust can be a problem for some and the air cleaner will clear the air eventually but your still going to get some into your lungs if you are not wearing a mask.

I don't have one, I have a dust collector that I use 90% of the time, that 90% is usually when I know I am going to do a lot of a certain operation. Table saw, chop saw, planer, jointer, sander, .... The other 10% of the time I am usually making 1 or 2 cuts so I don't bother.

I know lots of old guys well into their 80's and up that worked in the industry for years with no mask, dust collector or air filter. But that doesn't mean its good for you or benign.

I think the real value in one is to keep the dust down when your shop is in a house. Also you need to consider the shop volume and how quickly you want to exchange the air.
 

drivesitfar

Well-known member
Joined
Oct 23, 2013
Messages
36,007
Location
Pacific Northwest
JIM: thanks for spending all the time pulling out some of your cool tools and teaching us how they work too. i wish this thread would have started maybe 5 years ago cause i honestly would own more woodworking tools that i never knew i'd use that i left laying on tables and benches. at least i'll know what they are now and try to find some.

ZT: take a look at Denwood's (Woody's) shop vac system post on this thread he posted a few days ago for one option to keep your shop and air cleaner.

BJ: thanks for posting up your cool shop again and i've never done a frame up build on an old car or truck, but i'd love to own and drive one so good luck with that too. is the wood lathe good therapy while you are thinking about how to fix a 60 year old truck piece or replace a part that they don't make anymore?

Sled: welcome to the group. can you post up a few more pictures of that piece cause hard to tell exactly what it is? also did you make the legs out of 4 pieces of wood. you are in good company here if you might want to improve your skills as you've maybe seen a few of the member's projects already. any questions just ask and i bet this will be a great go to thread for troubleshooting too for all of us.

ALL: i'll get a few shots of my tools and lumber piles as it quits raining and take any suggestions for storing my wood better or keeping my tools more Organized so i can find them. nothing worse than knowing you own 2,3 or more of something as you are buying a new one to do a job that needs to be done now.

cheers and hope you all have a good weekend. one of our members who has a famous garage gallery thread made this for his kids and i hope he finds this thread and tells us how. i love this kind of stuff too.
 

Attachments

  • Rv6vJm.jpg
    Rv6vJm.jpg
    131.3 KB · Views: 60

schor

Well-known member
Joined
Apr 16, 2013
Messages
531
Location
Ajax, Ontario
I don’t consider myself as a true woodworker but I do have a tip.

I beveled the edges of 1x stock and used biscuits as fasteners to make these legs.

Cheater. :)

If you can get a nice accurate bevel that is a great way to make legs that are large but also not as heavy as solid ones. Trick is to get the bevel perfect along all lengths.

Did you use feather boards? I usually do when the bevel needs to be perfect.
 
OP
J

jimreed2160

Well-known member
Joined
Aug 7, 2016
Messages
3,589
Location
Tallahassee FL
Two projects for show. The first is a dollhouse I built for my daughter 30+ years ago. My granddaughter suggested that we "flip the dollhouse" this summer. I repaired the insides and the broken door, added a HF dolly to the bottom, and did a paint job. Now it is ready for another 30 years.

IMG_3568_1.jpg


Lurking behind the dollhouse is an 18th century fall front desk secretary. I worked on it 11 years ago but it stalled at 90%. Cherry with maple accents. Maybe it needs to be bumped up on the project list.
 

ztorres

Well-known member
Joined
Sep 22, 2016
Messages
195
Location
Iowa
Drives
This is a premise feather board. Same concept can be applied to a wooden one. What it does is it allows you to put pressure perpendicular to the cut but the board can still move relatively easily.
15af4b69aacc3a5c2af9c2a25f78e505.jpg


Zach
 

Attachments

  • 15af4b69aacc3a5c2af9c2a25f78e505.jpg
    15af4b69aacc3a5c2af9c2a25f78e505.jpg
    148.9 KB · Views: 5

schor

Well-known member
Joined
Apr 16, 2013
Messages
531
Location
Ajax, Ontario
when cutting on a tablesaw you are sliding the piece on the table and you want downward pressure and also pressure towards the fence. Featherboards allow you to apply the pressure while still allowing the piece to slide.

Many feather boards you buy have a t-slot piece that can clamp it down to the table for pressure towards the fence and there are all kinds of ways to rig up a featherboard to the fence for the downward pressure.

The feather board should be behind the front edge of the blade. Don't let the featherboard push the wood against the blade. But you can also have a downward pressure featherboard behind the blade without any issues.
 
OP
J

jimreed2160

Well-known member
Joined
Aug 7, 2016
Messages
3,589
Location
Tallahassee FL
Here is a setup photo of a featherboard in action. It keeps the piece from moving sideways to the left as it rides along the fence and is pushed along with user made push stick.

DSCN0912.jpg


(Safety officer note: Blade guard was removed for photo.)
 

drivesitfar

Well-known member
Joined
Oct 23, 2013
Messages
36,007
Location
Pacific Northwest
JIM, SCHOR, & ZT: thank you for explaining Feather boards.

JIM: speaking of SAFETY on table saws maybe that could be a few very good lessons in the future. I'm into safety a lot more now, but honestly in the past i've used table saws without safety guards, push boards, ear or eye protection and on my old Makita miter saw i actully pinned the safety cover up so it wouldn't stop me from sawing. i'm sure you have lots of SAFETY TIPS TO SHARE and maybe other members do too.

ALL: THINK SAFETY and buy and use good ear and eye protection. I say this as i'm heading to go get my hearing checked and probably going to get hearing aids. might be cause both my Dad and Gramps both had hearing aids in their late 50's and i still can't recall them wearing anything over their ears or eyes. Gramps metal hat hat more than a few really good size dents on it so he did wear that, but if you've ever fired up an old chain saw you'll know why he couldn't hear as he got older.

JUST AN FYI. i have a pair of ear protection and full face shields on my DP, grinders now so i do use them a lot more and almost 100% now.
 

ztorres

Well-known member
Joined
Sep 22, 2016
Messages
195
Location
Iowa
As far as safety goes obviously everyone always preaches about wearing eye protection and rightfully so. But having worked around large machinery, firearms, and tools for the past 16 years without ear protection, it's not something to take for granted. I'm very close to being legally deaf and it's annoying having to have people yell so that I can hear them and have to have the tv or radio blaring. Ear protection is just as important as eye protection, in my opinion


Zach
 

vartz04

Well-known member
Joined
Feb 17, 2009
Messages
1,882
Location
LaSalle County IL
I was at the FIL's house last night, and he's a wood worker, and he was asking if I had an air filter in my shop. I was wondering if anyone could share some information on air filters for a shop and maybe discuss some good brands.


Zach


My shop is really small at 12x20. I use a box fan with a furnace filter on it. Works great
 

CRSINMICH

Well-known member
Joined
Aug 15, 2015
Messages
2,397
Location
Southeastern Michigan
Drives et al: I do wear hearing aids and the hearing loss was from loud sounds. Factories, ROCK and ROLL, and the indestructibility of youth was a bad combination. Hearing aids are only better than not hearing at all. They are a PITA too. By the time you can notice it, you already have about 25% hearing loss and there is NO way to get it back. Prevention is the only thing you can do.

ztorres: Ditto! I hope at least someone will listen to us better than I listened to others. On my first day on my first job, the first thing I was told to do was go to the tool crib and get hearing protectors. I never wore them.
 
Last edited:

Toolfool

Well-known member
Joined
Aug 22, 2011
Messages
4,982
Location
Tallahassee, FL
slednut, nice job on the table legs. For those who are router table equipped, here's a nice alternative to beveled edges (no biscuits needed) :
 

Attachments

  • 4905_1_.jpg
    4905_1_.jpg
    57.6 KB · Views: 108

turbowoodworker

Well-known member
Joined
Mar 18, 2012
Messages
3,531
Location
Apex NC
Let's talk dust collection vs. dust filtration.
For a primer, pick up the book "Woodshop Dust Collection" by Sandor Nagyszalanczy. Lots of others for great information.

Dust collection principal one is capture dust at the source.

Dust filtration is getting the ultra fine particles that stay airborne long after the shop is closed up for the day. This is the stuff that gets into the lungs, past the nose hairs. Really bad for you.

Modern dust filtration uses two filters to collect this fine stuff. Commercially available models have multiple speed motors and timers so they can run two hours after you go in for dinner. It really does make a difference in settled dust, and therefore your health as well.

Grizzly, Jet, Delta, Rikon, etc. I've sent them priced $129 to $450 depending on CFM etc, bells and whistles. There are even bench top filters but not sure of their utility.

Take home message: Don't confuse Dc with filtration, they are very complementary not exclusive.
 
To avoid these ads, REGISTER NOW!
OP
J

jimreed2160

Well-known member
Joined
Aug 7, 2016
Messages
3,589
Location
Tallahassee FL
EAR MUFFS ! ! !

Go to HF and buy a load of ear muffs. They are about three bucks a pop. Put them around your shop where you make noise. USE THEM. Have extras for visitors. My granddaughter goes straight for the ear muffs whenever I start up one of the machines.

Ear muffs will protect your ears AND those of your visitors.

Ditto SAFETY GLASSES
Ditto DUST MASKS

The paper masks are not the best but they are inexpensive and work OK for short periods. Just the thing for visitors. Protect those little eyes, ears, and lungs.
 

ztorres

Well-known member
Joined
Sep 22, 2016
Messages
195
Location
Iowa
As safety glasses go I would avoid the cheap $5 plastic ones. Having worked in a machining environment and been a range supervisor I've seen those be broken by some small stuff. I personally have a pair of Oakley clear ballistics lenses. Now I'm not saying you should spend $100-$200 on safety glasses like I did if you're only using them occasionally. But it is a serious investment worth making. Especially a company like Oakley who will replace your lenses for free if they break.


Zach
 

Slednut

Well-known member
Joined
Dec 20, 2012
Messages
2,550
Location
Washington state
welcome to the group. can you post up a few more pictures of that piece cause hard to tell exactly what it is? also did you make the legs out of 4 pieces of wood. you are in good company here if you might want to improve your skills as you've maybe seen a few of the member's projects already. any questions just ask and i bet this will be a great go to thread for troubleshooting too for all of us.

Thanks Drives, here's a picture of the table and chest of drawers where I used the same method. Yes, four pieces beveled on each side along the entire length.

I just found this thread and I'm in awe at all the projects, shops, tools and ability of all here.
 

Attachments

  • P82A0844.jpg
    P82A0844.jpg
    141.1 KB · Views: 105
  • P82A0843.jpg
    P82A0843.jpg
    129.5 KB · Views: 95

Slednut

Well-known member
Joined
Dec 20, 2012
Messages
2,550
Location
Washington state
Cheater. :)

If you can get a nice accurate bevel that is a great way to make legs that are large but also not as heavy as solid ones. Trick is to get the bevel perfect along all lengths.

Did you use feather boards? I usually do when the bevel needs to be perfect.

Yes, two feather boards.

nice job on the table legs. For those who are router table equipped, here's a nice alternative to beveled edges (no biscuits needed) :

That is nice, thanks for the tip.
 

schor

Well-known member
Joined
Apr 16, 2013
Messages
531
Location
Ajax, Ontario
One of my first projects after I moved into the house and got my basic woodworking tools about 13 years ago.

Jc2SoR9Roija_8U6YIyOrC7eR6gMkp7tRkzkS4THbtpcSEXdwPFuKwYrRMSZq6SxSw6CeVjSFP2899FimHXwG46XekLM_eAa1sy8G5mZJiOPNRVjbjQaDO32gVuvuWYOTB_tOa-DL0y6OuQFLb3a1RFvWRA60ZlH3Gze9xVMrMRqcOYFJaLlMucGW7xk4kUoTlZFdxDBRybVatPhabIvl3i2qZTX4NDz2O8VZGOuM-I8-YYZxYaRejECVPllSnOCulIKjX-_jQlOYIJR2uMJp5TpuP2pMbMuLrrAvzzVLgEeJHBrIKPWTPex8KvPtpAHhpw3wGHvK-jO-zvDXXCGv26mvTPgJeQs5xbWGkMJqy0I5ay7bVPJSX1ozFjDwML957rmGU9ZC-XtoWNOFIEUDMq9hGKpQPJ504L0WA9TrSl7czufX40UVOEiJzIn1-2JLhUL0i3XsRgdBs_5XIsKiXlYpxesRk2ioOEBWMKAyfZvo3_-wmLYVP5IzHJh7tPnVUSmaDe-ZeBwCCNDaYmNn-cjdneDnMZHx-EdNSZWbdVGbzD1TtVHoVC2dIYKnFxZHmBlhhHvjCoqE_ZzfRQ6Xf59xwk8GxKluEOpAB9kHfVoqhyd=w1138-h853-no


WQjK2K_r2m3yWVHkv6PJ9g_P04GffC1LrEzIaPS0IPzGiPu0Ry8fAMXErYivE7toTgxQHclILUvwbcWBMTT9a-PdiWQK8pXW63dpW-gpMvmyN9aO5CktpMsDzAu9nBxbZUCFEg8lcg-rHaGDod1ez5tqCveXm7kXlJZPFm9C9XwdAjEqzE2q0Xj2v4JQczyCIrBjk2YyMikP7uA5k7hKkzyGzF13wNKHAHelznnX3NQDRUzIev0hNayy5mgkFheotVL1ZV5gEWj2Ki54pulv4SO9QC0DOY_rqLVcw90hIPLBunGYm_AvNqJ6M_3ID-zuTsQ6USRvQske8taMFZXWB08dQDU-dGCj1CnsbrFnD8mOasG4fWW8Q6tnFc9NszQGjLCjKR86LYPxQDaIi89bmyjr_ohZyaETLZPcytTCyLaOdOYYEA0WuX7HO6__Gc3OWDCJp-fxPHZVijyYdqOTmOCosZJVHinVZKD1s84lGmFGoDP2ubm1KuBFU4N4VeKkxuF42ZCZulKuuenLZdygBmoPUIIwqRi7OKthRKsZcQ3Er30hO1Oz8Gt1MaaQlZ5-BItAESQ_2EmJLJkp7C3OQKYqemAlfcL1jffS5nybnnwjqeU5=w1138-h853-no
 

bj383ss

Well-known member
Joined
Sep 29, 2011
Messages
3,166
Location
TX
Another good day of posts. I agree that a DC and Air cleaner are as essential tools as a tablesaw. Unfortunately they are sometimes the last thing bought. Also agree with all the safety. I have 3 or 4 pairs of glasses and I use the 3M ear buds that have a string on them. Hang them around my neck when not in use. It's too hot here in Texas for ear muffs. I sweat enough as is.


So just a couple of pics of featherboards. You can make your own out of scrap wood.

Picture 411 by bjohnson388, on Flickr

The one for my tablesaw I have a cool custom knob my dad made at work for me.
DSCN4244 by bjohnson388, on Flickr

DSCN4243 by bjohnson388, on Flickr
 

TerryH

Well-known member
Joined
Dec 8, 2012
Messages
2,248
Location
Springdale, AR
Let's talk dust collection vs. dust filtration.
For a primer, pick up the book "Woodshop Dust Collection" by Sandor Nagyszalanczy. Lots of others for great information.

Dust collection principal one is capture dust at the source.

Dust filtration is getting the ultra fine particles that stay airborne long after the shop is closed up for the day. This is the stuff that gets into the lungs, past the nose hairs. Really bad for you.

Modern dust filtration uses two filters to collect this fine stuff. Commercially available models have multiple speed motors and timers so they can run two hours after you go in for dinner. It really does make a difference in settled dust, and therefore your health as well.

Grizzly, Jet, Delta, Rikon, etc. I've sent them priced $129 to $450 depending on CFM etc, bells and whistles. There are even bench top filters but not sure of their utility.

Take home message: Don't confuse Dc with filtration, they are very complementary not exclusive.

Always better to capture it before it's airborne. Problem with that statement is that it can be easier said than done.
 

TerryH

Well-known member
Joined
Dec 8, 2012
Messages
2,248
Location
Springdale, AR
As for trammels, they were on my mind last night. I do have a few sets. Here is a group photo.

DSCN0903.jpg

Wow, Jim. Coupla thoughts here. First, I think you have some sort of trammel addiction. Second, were you washing and drying them? :D

Seriously, that's a gorgeous collection!! :bowdown:
 
OP
J

jimreed2160

Well-known member
Joined
Aug 7, 2016
Messages
3,589
Location
Tallahassee FL
It all started one night on the on line auction when I found the stray trammel and made the beam compass using a nail. Then something happened... :eyecrazy:
 

Boatman53

Well-known member
Joined
Dec 17, 2013
Messages
137
Location
Mid coast maine
Nice collection of trammel Jim.
This thread moves along at a pretty good pace but a while back you asked to see some scratch stocks..... well here is one I made very quickly to do a specific job. Made it 17 years ago fo cut a bead on the edge of the gunnels on an Adirondack Guide Boat. Used it several times since and it's always set up and ready to go. I do have a Stanley 66 for other tasks.

IMG_2096_zpscruwun0g.jpg


IMG_2097_zpssoemdukv.jpg


IMG_2098_zpsengcmdgp.jpg


The blade is an old Red Devil scraper blade.

Jim
 

ztorres

Well-known member
Joined
Sep 22, 2016
Messages
195
Location
Iowa
A tip that I learned awhile ago when I worked in irrigation. I'm sure this can be applied to wood working even though I use it for metal. I use two vise grips to hold pipe in place while I saw, this is useful if you don't have a vive around or when you cut long pieces.
a06196e8b5f7f4ed1f4c1d93954092f6.jpg


Zach
 

Attachments

  • a06196e8b5f7f4ed1f4c1d93954092f6.jpg
    a06196e8b5f7f4ed1f4c1d93954092f6.jpg
    268.2 KB · Views: 4

Craptain

Well-known member
Joined
Apr 18, 2013
Messages
4,028
Location
Tampa Bay FL
Here are a couple of pictures I came across in my computer. First is a fairy door for a friends Xmas present. First I had to find out what a fairy door was.... Then a table I made ** years ago for a friend in a very small apartment. Oddly enough it came back to me recently even though I don't want/need it. I would not do things the same again due to 1. my improved skills, and 2. I doubt I would ever need to fit the exact dimensions again. It was partly my design and partly a sketch from the friend.
 

Attachments

  • Fairy Door.jpg
    Fairy Door.jpg
    30.4 KB · Views: 80
  • P1030485.jpg
    P1030485.jpg
    145.2 KB · Views: 88
OP
J

jimreed2160

Well-known member
Joined
Aug 7, 2016
Messages
3,589
Location
Tallahassee FL
Schor--Nice table. Thanks for the pictures.

BJ--Good info on featherboards.

Akalian--Welcome, and thanks for the info on the featherwheel. I do resawing and need to look into something like that.

Boatman--Thanks for the details on your self made scratch stock. I am sure others will be encouraged to make their own.

Ztorres--Great tip on the vise grips. I use handscrews in a similar fashion. I guess that is why you need more than one pair of visegrips.

Craptain--Thanks for your project pictures.

Thanks to all for your interest. Woodworking is a passion.
 
OP
J

jimreed2160

Well-known member
Joined
Aug 7, 2016
Messages
3,589
Location
Tallahassee FL
This is a story about the day I fell in love.

I was in my favorite wood store in Atlanta and spied this big wide cherry board. It was magnificent. Eleven feet long and fifteen inches wide!!! It had a large knot and was beautiful. It spoke to me and I had to take it home. Being too large to transport in my small truck, I had them cut three feet off the bottom. Surely I could come up with a project that could be cut from eight feet and three feet. I found some other cherry that matched well and scurried home with my prizes.

Months later, I was browsing a furniture project book and saw a secretary desk from about 1740. Here was my project. I cut the eight footer into two four foot pieces, added a strip on the front and made the base. The three footer got cut down into the fall front.

DSCN0914.jpg


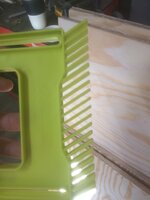
The desk was made to stand alone, with the bookcase optional. In fact, I wanted the whole piece of furniture transportable. There is a base (not shown), a desk, a bookcase top, and a moulding crown. My challenge was to attach all pieces so they were sturdy but temporary. I used a dovetail key for the bookshelf. Here is the top.

DSCN0915.jpg


And here is the bottom of the bookcase.

DSCN0916.jpg


Here is the crown. The moulding design details were in the book. I traced out the pattern and made the moulding from a cherry board using handplanes. It was my first attempt using H&R planes. I needed about 4 feet for the front and about 5 feet for the sides. That was larger than my bench so I made a two pieces. Each one took a day. I was pleased with how it came out.

DSCN0917.jpg


DSCN0922.jpg


Here is a picture of it all put together except for the base. It is sitting beside a Lonnie Bird cupboard I made from maple. I still have some details left to finish.

DSCN0923.jpg


The inside is mostly finished. I need to attach the hinges with brass screws. Notice the deep well. It will be a hidden compartment beneath a false writing surface.

DSCN0924.jpg


I am hoping that having this piece in the open will inspire me to finish it. My youngest daughter has already put her name on it and I need to get it out of the way. Maybe when it gets too cold to work in the shop...
 

McBrownie

Well-known member
Joined
Mar 27, 2014
Messages
1,827
Location
Cleveland, OH
Scrap plywood+pocket screws+lousy weather=garage furniture. A new stand for the drill press with some much needed drawer space.

View media item 65310
Now to get to work on more important things like Jim just posted. Nice work and great vision with that cherry slab.
 
Last edited:

drivesitfar

Well-known member
Joined
Oct 23, 2013
Messages
36,007
Location
Pacific Northwest
JIM: looks like a great project and if you really LOVE it i'm thinking it will be finished in the near future. sounds like your little girl benefits A LOT from your woodworking skills. there is so many cuts and joints on that that i just have to look in wonder. WELL DONE!!

is the plan for drawers below or are those just sliding fronts to openings?

McB: did you make the entire cabinet with drawers, casters or just put a new top on a cabinet? looks like you have a great location for it to sit until you need it. since your bench grinder that fits under your bench is mostly a woodworking project if i recall correctly can you post up a few pictures cause i'm sure a lot of the other members haven't seen it and might like to do something similar with their bench grinders?

ALL: so about 3 months ago i finally pulled the trigger and bought a DEWALT 12 inch compound miter saw after only owning a couple chop saws my entire life. hence my wood butchering efforts on molding and other projects. anyway after i saw this video and a few like it showing how to square up your blade a BIG LIGHTBULB went off. i was always just a bit off on my 45's so wood putty or adjusting the saw to a different angle was always my solution. some of you are probably shaking your heads and going well DUH, but i'm hoping maybe another member or two or more might benefit from just squaring up their saws. here's the link:


McBrownie

Well-known member
Joined
Mar 27, 2014
Messages
1,827
Location
Cleveland, OH
McB: did you make the entire cabinet with drawers, casters or just put a new top on a cabinet? looks like you have a great location for it to sit until you need it. since your bench grinder that fits under your bench is mostly a woodworking project if i recall correctly can you post up a few pictures cause i'm sure a lot of the other members haven't seen it and might like to do something similar with their bench grinders?

Drives,

Made the whole thing out of scrap plywood, pine, and mdf, then added the casters. The old grinder under the bench, and the bench itself, are long gone. Had to make room for a better woodworking bench. But, thanks to GJ, I still have some old pictures.

View media item 41160View media item 41163View media item 41152
 
OP
J

jimreed2160

Well-known member
Joined
Aug 7, 2016
Messages
3,589
Location
Tallahassee FL
Drives--Thanks for your kind words. My daughter, the oncology nurse with a teenager, will be both amused and delighted that you called her a "little girl". She will, of course, always be my little girl. As for the drawers, I guess it is hard to tell from the pictures. The bright wood under the fall front is a quilted maple bookmatched inset that will front the hidden compartment. I have not fixed it in place because I need to make the top cover that hides everything. I thought it would be easier to leave it unpinned in case I needed access from the front.

Underneath it are two small drawers and two large drawers. They are dovetailed and already made. One of them holds the brasses and a quick project would be installing the dang things. It would make installing the drawer stops a little easier. I guess that is stalled because the plywood back warped a bit and came loose. I need to put it back in place. I should have used shiplap furring strips like on the bookcase back. They are in great shape.

I also need to work out some trim and mouldings in transition areas. Need to get going--showing it off also shows off my procrastination. Just need more focus. :willy_nil
 

don long

Well-known member
Joined
Mar 31, 2012
Messages
8,845
Location
southern california
As a wanabe wood worker I must thank you pros for this thread and your contributions to it.

As some of you might remember, I started a thread for starting my vintage Craftman wood shop that didn't get very far before I got sidetracked with things I know about and how to do them.
I realized that before I set up a wood shop I need to learn about them and how to use the tools.

I have found several old planes but until this thread had no clue what they were really for and how to service them.
I have a wood lathe,band saw, table saw, planner, jointer, drum sander and router along with several different clamps and this thread is a ton of help

Thanks again

Don
 

mbatarga

Well-known member
Joined
Sep 14, 2005
Messages
883
Location
GA
Before and after of the fireplace mantel that was in our den when we moved here 4 years ago- and the replacement mantel that I finally took care of on the honey do list.
 

Attachments

  • DSC_0040.jpg
    DSC_0040.jpg
    134.7 KB · Views: 125
  • DSC_0015.jpg
    DSC_0015.jpg
    133.5 KB · Views: 133
To avoid these ads, REGISTER NOW!
Top Bottom