To avoid these ads, REGISTER NOW!

Woodworking 101--Tools and Tips

drivesitfar

Well-known member
Joined
Oct 23, 2013
Messages
36,009
Location
Pacific Northwest
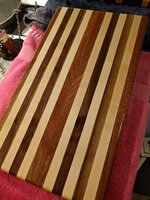
Craptain and Turbo: i think that is the name that was written in black sharpie on the wood with $43.25 on it like it was the price from the wood store. since it was about 6 foot long maybe the price was less than $10 per foot when the buyer bought this piece of Jatoba which definitely was heavier than oak. you guys are GOOD and thanks for the heads up and warning about what to expect from that wood when working on it.

Jim: sorry i didn't buy it cause i'm not into paying retail for pieces of wood (or what i thought was retail) unless i have a project in mind for it.

PST: i've never sent any of my saw blades to a shop to get sharpened so hadn't seen old blades with the wax or rubber protection on them before. is that standard? i would think if you didn't want to peel off the wax that a couple cuts into some scrap would eliminate the wax?

ALL: i've seen some homemade tools (Z's hammer comes to mind) on this thread and wondered if any of you make handles for your old tools? i've got a lot of really cool old wood handled screwdrivers that need some new wood so would Oak be a good wood to use or do tell and to get a patina i was thinking BLO, but maybe another oil or chemical might look better?

cheers and hope you are all thinking about doing something with your wood and tools.
 
To avoid these ads, REGISTER NOW!

Craptain

Well-known member
Joined
Apr 18, 2013
Messages
4,028
Location
Tampa Bay FL
Only handles I have made recently are for a perfect handle screwdriver. Though in the past I have made hammer, file handles etc. That is really just tool maintenance.

Sent from my SM-G900T using Tapatalk
 
OP
J

jimreed2160

Well-known member
Joined
Aug 7, 2016
Messages
3,589
Location
Tallahassee FL
Chee--If you still live in the Triad, check out Steve Wall lumber. Online and also within driving distance for you.

Drives--Six feet long but 8" wide is six "running" feet but four "board" feet. I would have passed on that board also. That is not much wood when you start working on a project. Hatrack maybe.
 

drivesitfar

Well-known member
Joined
Oct 23, 2013
Messages
36,009
Location
Pacific Northwest
JIM: you are right as usual about it not being much wood, but as i think about it i bet it would make great new wood handles for my old pre WWII tools that need some replacements. of course dealing with wood that dense sounds like there might be more disadvantages than advantages.

Craptain: i have more than a few tools and i'm sure i'll start thinning the pack a little like i have with my vises, but i've been buying tools for years and not just a few. i won't blame GJ, but i know they might have helped my appetite for them seeing so many cool tools every day i log on. i'm sure i could pass on the ones that need work, but i'll need something to work on and i don't have the talent to build a boat or a car from the frame up.

cheers
 
OP
J

jimreed2160

Well-known member
Joined
Aug 7, 2016
Messages
3,589
Location
Tallahassee FL
The marathon three day shop organization project is coming along. Arthur came by for a visit but I shooed him away with some ibuprofen. Not a big fan of the Itis clan.

One of my goals was to find ways to pull space out of thin air by making certain areas more efficient. Case in point is the bump out in rear of garage. The previous owner did some auto work and bumped the garage out in the rear. The area is about 4 feet x 16 feet and the roof slopes down to about 4 feet. I use this area for metalworking because it seems to contain the metal dust and swarf. I removed a tool box and moved a shelf over to the low wall, freeing up a nice bit of wall storage area. Here is what I was able to "liberate".

DSCN1132.jpg


I love my large clamps but they were all over the shop and in the way. But with the addition of a 2x4, the big boys now have a home.

DSCN1134.jpg


There are about 30 clamps on that wall now. The 48" Jorgies weigh about 15-20 lbs each and make quite the racket when they fall. I am really glad to have them secure at last.

And here is another liberated prize. I sacrificed lunches to purchase this Craftsman tool chest many years ago. It has followed me around for over 40 years now. I will clean it up and use it for more organization. The bottom cabinet is perfect for storage of cordless tools.

DSCN1131.jpg


So as this project winds down, I am eager to get back to some real woodworking. But this time, things will be just a tad easier.
 

turbowoodworker

Well-known member
Joined
Mar 18, 2012
Messages
3,532
Location
Apex NC
Love the pictures of the guns. I play a little with guns but have not yet built one completely. Last one I worked on was a minor repair on a long rifle that was converted to percussion cap by Henry Derringer in 1726 or thereabouts. It was to valuable to mess up. I will look see if I might have a picture but my repair is not visible.
I will have to take a look and see what other antique repairs I might have pictures of. That is what I take most pleasure in doing. Especially when the repair is not visible to the untrained eye.

Sent from my SM-G900T using Tapatalk


Hey Craptain,
I found this on Pinterest when looking at flintlocks and searched half the thread to quote you. Here is a pic of a Derringer flint:

https://www.pinterest.com/pin/340162578080301924/
 

Craptain

Well-known member
Joined
Apr 18, 2013
Messages
4,028
Location
Tampa Bay FL

cheechi

Well-known member
Joined
Feb 29, 2012
Messages
4,384
Location
Triad, NC
Chee--If you still live in the Triad, check out Steve Wall lumber. Online and also within driving distance for you.
Cheechi,
I hope you are never stuck buying oak from Lowe's. In the Triad, there is the Hardware store of NC in Gibsonville. Big selection and inventory.

https://hardwoodstore.com/how-calculate-board-footage
I'm going to check both of these out. Gibsonville is a bit of a drive. Mayodan isn't short but it's not near as far. Thanks both of you.
 
OP
J

jimreed2160

Well-known member
Joined
Aug 7, 2016
Messages
3,589
Location
Tallahassee FL
Day three of the shop cleanup.
Things are looking nice here--well, nicer than before--perhaps a horror to those accustomed to more order. But it looks so good to me that I am inspired to continue. There is still room in front of the clamps and it looks like a good spot for some vises. They have been multiplying on the chop table all summer long. Here is what I have to contend with.

DSCN1135.jpg


So I cut down a little shop table to 24" x 11". It has a shelf and should hold a good load of vises.

Here is the after shot.

DSCN1136.jpg


Whew! I am bushed. I have an appointment with the doctor tomorrow morning but I hope to get another tutorial done--in my clean shop!
 

bj383ss

Well-known member
Joined
Sep 29, 2011
Messages
3,166
Location
TX
Looks great Jim. Feels good to see tops of benches again.

So my parents stopped by to visit today and my dad showed me this youtube link


I already bought the plans for it and building me a buy list on Amazon right now as we speak. As soon as my shop rearrange is done I will be building one of these next.

Bret
 

ztorres

Well-known member
Joined
Sep 22, 2016
Messages
195
Location
Iowa
That is an awesome tool Bret. It looks like a homemade mill. Doesn't look too terribly difficult to build.


Zach
 

bj383ss

Well-known member
Joined
Sep 29, 2011
Messages
3,166
Location
TX
That is an awesome tool Bret. It looks like a homemade mill. Doesn't look too terribly difficult to build.


Zach

It can do a lot. I think a sheet and a half of 3/4 cabinet grade plywood will build it. Need a bunch of bearings and the biggest expense will be the spindle motor. I think I can adapt a Dewalt Trim router for now and get a spindle motor later. I usually get Lowes gift cards for Xmas. So that will fund the router. :bounce:

Bret
 
OP
J

jimreed2160

Well-known member
Joined
Aug 7, 2016
Messages
3,589
Location
Tallahassee FL
BJ--That is a neat looking machine. Keep us updated on your progress. It reminds me of how handy a drill press can be. This tool seems to have much more capability.
 

The Slurpee King

Well-known member
Joined
Jun 19, 2011
Messages
173
Location
Behind the wheel of my truck
Subscribed. I'm only on the second page yet, so I skipped ahead to post.

I like working with wood, but I'm all ham-fisted at it. Cut to fit, beat into place. Measure 6 times, cut twice, still the wrong size. That sort of thing. It took me all weekend to install a 2'x4' section of pegboard a couple of garages ago because I refused to bodge it up (and I didn't!). Watching & learning.
 
OP
J

jimreed2160

Well-known member
Joined
Aug 7, 2016
Messages
3,589
Location
Tallahassee FL
King--Welcome aboard. Hope you keep gnawing through the thread from the beginning because there are some good tips and projects there. I am glad you mentioned quality because that is one of the things I struggle with. In the beginning, woodworking presents us with many unique tasks. Some ww can master those tasks easily while others (me included) need practice to improve. This practice can lead to butchered projects and frustration.

I think every ww needs a good woodstove for some of that early work. It would really save embarrassment. Although my ww career has spanned over 50 years, there were times that I went idle because my projects were embarrassing. But I always returned and found that the more I worked the better things looked. It was that dogged persistence that helped me move from 90% shabby to just 10% shabby.

I think forums like GJ help us improve. Having an audience encourages us to bring our A GAME. Thanks to everyone who participates and helps us be better woodworkers.
 

drivesitfar

Well-known member
Joined
Oct 23, 2013
Messages
36,009
Location
Pacific Northwest
JIM: nice to see our leader getting his shop in shape. keep up the good work and looking forward to many many lessons from you in the future.

BJ: even the commercial on that cool video was good. nice looking and very handy idea and i'll be watching your progress that is for certain.

ALL: hope you all had a great weekend. anybody making any more Christmas projects post those pictures up and any comments would be awesome. started this thread i think a couple weeks ago and already 40,000 views. keep up the great posts everyone and thanks for sharing even your simple skills for those of you that have to help us WOOD BUTCHERERS maybe become WOODWORKERS some day.

cheers
 

ztorres

Well-known member
Joined
Sep 22, 2016
Messages
195
Location
Iowa
Well I have been working on making the drawers for my wife's dresser, and I thought I would try to cut all my dovetails and finger joints by hand. This has not turned out very well for me; I can only assume it will just take practice to make these joints actually look nice. But I was searching the interwebs today and found a good article in Popular Mechanics about dovetails; it has three videos that discuss different ways to cut dovetails.
1. Using a table saw which looks like the simplest method and results in good, clean cuts
2. Using a router table and a jig. Note that the shown cuts are for dovetail keys and not interlocking dovetails
3. Cutting by hand

I hope this may help some other people out with getting a good idea, and to continue our learning like any good person should do. If anyone else has some techniques they'd like to share that would be great.

http://www.popularmechanics.com/hom...19197/how-to-cut-dovetail-joints-woodworking/
 

72highboy

Well-known member
Joined
May 14, 2016
Messages
269
Location
So Cal
Oh wow, been meaning to look into this thread, now I have a lot of catching up to do..

ALL: hope you all had a great weekend. anybody making any more Christmas projects post those pictures up and any comments would be awesome. started this thread i think a couple weeks ago and already 40,000 views. keep up the great posts everyone and thanks for sharing even your simple skills for those of you that have to help us WOOD BUTCHERERS maybe become WOODWORKERS some day.

cheers

I just posted this in the what'd you do in your garage thread, but since you mentioned it, I made some cutting boards for Christmas gifts this weekend.. And an extra one for me, just need to decide who gets what..
ea5d7e690f05d1caeb049c5032833bbc.jpg546ea91fa040232e9ab4381875954254.jpg7a2e011f4bec8fd09dd4585107052325.jpg8443e9b852e383485b4cd21c8b13f2e4.jpg

Cheers

Sent from my Nexus 6P using Tapatalk
 

Attachments

  • 8443e9b852e383485b4cd21c8b13f2e4.jpg
    8443e9b852e383485b4cd21c8b13f2e4.jpg
    130.6 KB · Views: 1
  • 7a2e011f4bec8fd09dd4585107052325.jpg
    7a2e011f4bec8fd09dd4585107052325.jpg
    110.7 KB · Views: 1
  • 546ea91fa040232e9ab4381875954254.jpg
    546ea91fa040232e9ab4381875954254.jpg
    119.4 KB · Views: 0
  • ea5d7e690f05d1caeb049c5032833bbc.jpg
    ea5d7e690f05d1caeb049c5032833bbc.jpg
    82.1 KB · Views: 0
To avoid these ads, REGISTER NOW!

Autonomous

Well-known member
Joined
Dec 26, 2015
Messages
66
I'd feel guilty cutting on those the first 10 times. After that I think I could enjoy the utility and still admire the craftsmanship.


*Edited for auto-incorrect*
 
OP
J

jimreed2160

Well-known member
Joined
Aug 7, 2016
Messages
3,589
Location
Tallahassee FL
72--Nice cutting board. Everybody on your "nice" list will be pleased. What kind of finish did you use?

I was going to do a tutorial today but got sidetracked. My hernia surgery got tweaked yesterday while I was moving the vises. So I am on light duty for a few days until it settles down. Until then, I will share some photos.

We had an earlier post of an English turnscrew. They are great eye candy--here is my set.

DSCN1137.jpg


Fits my paw just right.

DSCN1138.jpg


Because the tops are slightly oval shaped.

DSCN1139.jpg


BTW--These turnscrews are currently available in sets and in singles. They make great Christmas gifts. Make sure you add them to your list because ww don't need any more stinkin' neckties. :pimpflash
 

72highboy

Well-known member
Joined
May 14, 2016
Messages
269
Location
So Cal
Thanks Jim, finish is just mineral oil, pictures were right after I oiled them letting them soak in, hence the gloss look.. Definitely my favorite part and the most satisfying to see all the grain pop with the oil

Sent from my Nexus 6P using Tapatalk
 

Sgt Nox

Member
Joined
Dec 4, 2016
Messages
16
Location
Rochester, NY
Been quietly reading these forums for awhile but actually made an account because of this thread. I am a new hobbyist but hoping to learn enough to make more than a few old school tool boxes and crates.

Keep up the good work Gents.
 

drivesitfar

Well-known member
Joined
Oct 23, 2013
Messages
36,009
Location
Pacific Northwest
72: you have skills sir. looks very nice. also welcome to the WW 101 thread and feel free to post more of your projects, pictures of your tools or ask questions as you have some. cheers

SGT: all of us that post a lot like to see posts like you just made. thanks for posting and hope you stick around to share your wisdom while you maybe learn a bit more.

WELCOME to GJ too and ask questions if you need help and we'll usually try to if we see the questions and can.
 

Sgt Nox

Member
Joined
Dec 4, 2016
Messages
16
Location
Rochester, NY
IMG_0426.JPG
Hardly special or difficult but sanded down two pine crates, applied a coat of danish oil to all sides except the front/back faces of the crates. And to the faces applied chalkboard paint. I waited several days after staining because the stain continued to bleed through to where I wanted to paint.
Christmas present for my mom so she can decorate them with chalk with the grand kids and store some of their toys in when visiting.


Sent from my iPhone using Tapatalk
 
Last edited:

bj383ss

Well-known member
Joined
Sep 29, 2011
Messages
3,166
Location
TX
SGT Nice crates.

Jim I will add those tools to my list.

72 love the wood you choose for the cutting boards.

So I didn't make it this year but 3 years ago. My mom collects Nutcrackers so I made her an oversized one. My wife painted the face.

IMG_1119 by bjohnson388, on Flickr

IMG_1121 by bjohnson388, on Flickr

DSCN7668 by bjohnson388, on Flickr

DSCN7666 by bjohnson388, on Flickr

Ready to paint.

DSCN7656 by bjohnson388, on Flickr

DSCN7658 by bjohnson388, on Flickr

DSCN7526 by bjohnson388, on Flickr

How he started.

DSCN7524 by bjohnson388, on Flickr

Bret
 

Craptain

Well-known member
Joined
Apr 18, 2013
Messages
4,028
Location
Tampa Bay FL
You want to share a pictures of your jig? What do you do for joints then, out of curiosity?


Zach
Just a stock Porter Cable dovetail jig.
Otherwise the joints are either mitre or whatever I think of. I am not a craftsman just an occasional adventurer.

Sent from my SM-G900T using Tapatalk
 
OP
J

jimreed2160

Well-known member
Joined
Aug 7, 2016
Messages
3,589
Location
Tallahassee FL
Sgt--Welcome aboard and thanks for the project picture. I see from the pegboard that you like order. Good characteristic for a ww. I see also that you like to build shop furniture with 2x4s and plywood. That is one of my favorite pasttimes. BTW, nice projects for your mom. My mom was a frequent recipient of my ww projects and was always my biggest fan. Her encouragement helped me survive those low skill years while I was learning.

BJ--Like the nutcracker. Great seasonal project.
 
OP
J

jimreed2160

Well-known member
Joined
Aug 7, 2016
Messages
3,589
Location
Tallahassee FL
Design Considerations
My fingers are dancing on a keyboard that is supported by a 200 year old table frame. How did this come to be?

About 150-200 years ago, a cabinetmaker in Ohio selected some of his prized walnut stock and made a small utility table and turned the legs in the fashionable Sheraton style. It has a drawer in the center of the front. For the top, he selected wide cherry boards and gave them a generous overhang.

Fifty years ago I was traveling during the holidays with my ex and her mother. We stopped at a little antiques shop in Centerville, Oh, and I found a shabby little table out back. It was dirty and the top was cracked in several places. But it had charm and the leg mortices were pegged. I pulled out my $30 and set about knocking it apart for the journey home to Virginia. The top came off easily, but the pegs would not budge. I wedged it inside MILs car with the front leg resting in the middle of the front seat.

I really like 18th and 19th century American furniture. Many of my projects have been in that style and I like to use the antiques for design tips. Like the table. My next project is a mortice and tenon tutorial but I need some design help. For example, how much reveal? Will the tenon sit flush with the outside of the leg, or will it be inset? If inset, how much? Let's ask the antique. Here is the rear skirt.

DSCN1140.jpg


Wow. That is an aggressive skirt placement. It is almost 1/4" back. How about the front?

DSCN1150.jpg


Whut!? The front is almost flush. Well, sometimes antiques do not have the answer. Let's check an old project. Here is a Shaker style lamp table I built.

DSCN1141.jpg


Yes. That is just about right. It looks pleasing to me. I will use that as a guide.

My woodshop had a collection of patterns and test joints. The one most used was the mortice and tenon. This table was built with that joint as a guide. Unfortunately, the patterns were left behind during a shop move. Now I have a chance to rebuild my favorites.

DSCN1147.jpg


I have prepared my stock for the sample joint. Now that I have a good idea of the design I can begin cutting. Stay tuned. I will work as fast as Mr Hernia will permit.
 

Zeke

Well-known member
Joined
Aug 13, 2009
Messages
17,176
Location
Long Beach CA, the sewer by the sea.
I like having a test joint. This is my door my M & T example. And the 3rd pic is what I did with an old/extra TS. 2-sided disc sander with miter gauge and a router table using the TS fence.
 

Attachments

  • 100_9921[1].jpg
    100_9921[1].jpg
    134.3 KB · Views: 123
  • 100_9923[1].jpg
    100_9923[1].jpg
    142.5 KB · Views: 104
  • 100_9922[1].jpg
    100_9922[1].jpg
    148.7 KB · Views: 97

turbowoodworker

Well-known member
Joined
Mar 18, 2012
Messages
3,532
Location
Apex NC
Zeke,

At first I was going to compliment you on a nice "haunched" tenon but it seems to be more than that. Is there a name for it when you add that extra lip to conceal the actual joint?

And good idea on the TS turned sander. I have my dad's 1950 Shopsmith IIE. Not good for much but I use the big 12" sanding disk alot.

Nice to see you posting here.

Rick
 

Zeke

Well-known member
Joined
Aug 13, 2009
Messages
17,176
Location
Long Beach CA, the sewer by the sea.
Zeke,

At first I was going to compliment you on a nice "haunched" tenon but it seems to be more than that. Is there a name for it when you add that extra lip to conceal the actual joint?

And good idea on the TS turned sander. I have my dad's 1950 Shopsmith IIE. Not good for much but I use the big 12" sanding disk alot.

Nice to see you posting here.

Rick

Not really a name that I know of. I think that is a haunch that just happens to line up with the rabbet. Here's a clearer pic.
 

Attachments

  • 100_9926[1].jpg
    100_9926[1].jpg
    128.5 KB · Views: 76
  • 100_9929[1].jpg
    100_9929[1].jpg
    141 KB · Views: 72
  • 100_9927[1].jpg
    100_9927[1].jpg
    142.1 KB · Views: 74

drivesitfar

Well-known member
Joined
Oct 23, 2013
Messages
36,009
Location
Pacific Northwest
Zeke: so do you leave that sanding disk on your extra table saw 100% of the time and just lower it when you need to use the top for your router?

nice job making that joint too.

Sgt: looks like a simple yet very functional WW project.

Jim: so you make practice joints before you do a lot of your projects or keep those sample joints in a box so you can recall how you made them? nice story on the 100+ year old bench and joints and shoving something too big in my car brings back good memories. what's even funnier is while i have it hanging out the back i've never thought of using the roof rack, but i did finally a few months ago buying some plywood and it worked great.

ALL: anybody have simple or difficult Woodworking items to post please do and post lots of pictures with comments telling us how would be even better.
 

ez-duzit

Well-known member
Joined
Jun 24, 2013
Messages
5,097
Location
Marina del Rey
If you have room, a free-standing belt/disc sander is extremely handy. I picked up mine, a Delta/Rockwell 12" disc/ 6" x 48" belt, when a local boat builder (Sydney Sabots) sold out to Catalina Yachts.. It had been well used and required new belt-roller bearings. Paid $350 for it.

shop-9_zpsia7zkf3l.jpg
 

Zeke

Well-known member
Joined
Aug 13, 2009
Messages
17,176
Location
Long Beach CA, the sewer by the sea.
Zeke: so do you leave that sanding disk on your extra table saw 100% of the time and just lower it when you need to use the top for your router?

nice job making that joint too.
The truing/sanding disc does stay in place and lowered most of the time. Mainly that is for covering the table. Using the router part of the table doesn't interfere with the disc area. However, this is a multi use work station. First of all, it makes a great place to set any bench-top tool to get it out in the middle of the work area. Things like strip sanders and a thickness planer. Secondly, you might notice the 1HP 3450 RPM motor has been replaced with a 1/2HP 1725 RPM with a stepped pulley. I can use this still as an auxiliary TS with a blade, a dado or a molding cutter. The molding head takes more RPM so I move the belt. The dado likes the middle position. Not a lot of power so the work remains light or multiple passes.

The main table saw is a Unisaw running on 230v, so I have the juice if needed. I run a bigger Freud dado on the Delta.

Both tools are at the same height as well as a large out-feed/assembly table. That makes it easy for a one-man operation when working with larger stock. The whole area is the size of a 1 car garage and I've built cabinets there. Sure, there is overflow, but I have other areas to work in if need be.

The thing is, this is all outdoors. In SoCal we can get away with that. In the garage there are — hold on to your hat — cars! I can move them out for a 2 car garage work area for the real big projects. And all the dust stays outside. I can clean up with a leaf blower.

Mama don't like her Porsche parked outside though. :dunno:
 

crguy

Well-known member
Joined
Jan 24, 2016
Messages
2,654
Location
SW Washington
If you have room, a free-standing belt/disc sander is extremely handy. I picked up mine, a Delta/Rockwell 12" disc/ 6" x 48" belt, when a local boat builder (Sydney Sabots) sold out to Catalina Yachts.. It had been well used and required new belt-roller bearings. Paid $350 for it.

I also use a 6 x 48 Delta belt/disc sander. A good US built machine that provides years of service.
 
OP
J

jimreed2160

Well-known member
Joined
Aug 7, 2016
Messages
3,589
Location
Tallahassee FL
More Christmas gift ideas for woodworkers

One of the most frequently used tools in my workshop is my bench brush. It is horsehair and I found it on that auction site for pennies.

DSCN1155.jpg


Another item is LED lights. My tired eyes sure do appreciate every bit of bright they can find. I think I found these at Costco. The little magnetic guys stick on your iron tools and brighten your days.

DSCN1169.jpg
 
To avoid these ads, REGISTER NOW!
Top Bottom