To avoid these ads, REGISTER NOW!

Woodworking 101--Tools and Tips

trainer

Well-known member
Joined
Nov 28, 2005
Messages
2,019
Location
Northern Ontario, Canada
In this case, no fancy clamping schemes are needed, as no clamping pressure is required (just tape the pieces together).

Other advantages are:

High strength.
Gap-filling qualities (assure strong joints even where mating surfaces are imperfectly fitted).

There is a bit of a learning curve with epoxy. In some species and especially on endgrain it will absorb into the wood and starve the joint for glue. The usual remedy is to prime with unthickened epoxy , then thicken the rest of the batch , apply and lightly clamp. To thicken I usually use fine sanding dust.
 
To avoid these ads, REGISTER NOW!
OP
J

jimreed2160

Well-known member
Joined
Aug 7, 2016
Messages
3,589
Location
Tallahassee FL
Well thanks for the tip. I will get some epoxy and give it a try. There are dozens of broken totes in the boneyard. In the meantime, I am sticking to what I have on hand.

Today's issue was a broken tote with a half roll of friction tape on it. Of course, the previous owner is off to that great workshop in the sky and the tape is dry and crusty. I was working on it and hoping to spare my fingers a nasty stab. Dry tape is hard to deal with.

So I got out my special clamp to hold the tote and keep my fingers out of the way.

DSCN2797.jpg


It came off in a few minutes WITHOUT blood AND without scars on the rosewood.

DSCN2798.jpg


And then it immediately fell apart.

DSCN2799.jpg


I glued it up and let the glue sit and soak in for five or ten minutes. Then I applied more glue and clamped.

DSCN2801.jpg


The new clamp works like a charm.

DSCN2805.jpg


Looks like this one also needs a horn. Gotta find that 5/4 walnut.
 

ez-duzit

Well-known member
Joined
Jun 24, 2013
Messages
5,094
Location
Marina del Rey
There is a bit of a learning curve with epoxy. In some species and especially on endgrain it will absorb into the wood and starve the joint for glue. The usual remedy is to prime with unthickened epoxy , then thicken the rest of the batch , apply and lightly clamp. To thicken I usually use fine sanding dust.

Tip--indeed first choose an epoxy glue which has been specifically formulated for gluing wood, such as Wood Epoxy Saturation Technique. Thoroughly mix resin and hardener* in precise proportions only as recommended by the formulator, taking care that all of both components have been combined. Prime mating surfaces by applying coat upon coat until the wood will not further absorb; this is particularly important on end grain and plywood edge grain, which can sometimes absorb astonishing amounts of mix.

Then, if gap filling is required, thicken the remaining resin using additives specifically recommended by the formulator (I use colloidal silica with micro fibers, for glue). Apply a coat of the thickened mix to one surface before lightly mating the pieces to be joined; heavy clamping pressure is neither needed nor desired. Cleanup excess squeeze-out immediately, as it can stain light colored veneers and be difficult to remove later. I use a small piece of paper towel, followed by another which has been soaked in acetone. Allow sufficient time for complete cure, typically overnight, before removing clamps or tape. Clean hands with soap and water (though I regularly use acetone) before any curing can take place.

The above tips are described to cover a large range of epoxy gluing projects. Gluing a chip replacement on a tote is a non-critical application which is quickly done. However, once you setup to use epoxy glue you will produce 100% waterproof and stronger glue joints.

*Use the appropriate hardener (for the ambient temperature range) to allow sufficient pot life and working time (I usually just use slow hardener for everything; on large glue-ups, during hot weather, I might use extra slow).
 
OP
J

jimreed2160

Well-known member
Joined
Aug 7, 2016
Messages
3,589
Location
Tallahassee FL
EZ--Thanks for the write up. It was very helpful. Do you have a favorite source for WEST epoxy? What is its shelf life?

Totes in action undergo a lot of forward stress and need to flex a little to keep from breaking. Do you have any experience with totes that have been glued with epoxy? Does it become brittle when it hardens?

Thanks for your tips. The brittle cast iron seems to hold up much better than the totes. It seems that I find ten broken totes for every casting break.
 

ez-duzit

Well-known member
Joined
Jun 24, 2013
Messages
5,094
Location
Marina del Rey
WEST Epoxy is flexible, not brittle. I buy mine at West Marine (no relation to WEST Epoxy) because I have one nearby and get a boat builder's discount. Shelf life is in years.

Gougeon Brothers, who make WEST Epoxy, are in Michigan and have a very talented staff to answer technical questions. I personally have used barrels of it, since the mid '70's, and am happy to answer questions, particularly in regard to wood gluing, as this is my main use, as well as some glassing.
 

hunterguy86

Well-known member
Joined
Jan 22, 2012
Messages
168
Location
Central Texas
My Stanley #7C has a missing bearing on the lateral adjustment lever. Anybody have a solution to replace it?

The #7 is the one on the left in my little family photo.

8af73e751ef0ea398253c0543c144374.jpg


Sent from my iPhone using Tapatalk
 

Attachments

  • 8af73e751ef0ea398253c0543c144374.jpg
    8af73e751ef0ea398253c0543c144374.jpg
    573.8 KB · Views: 0

ez-duzit

Well-known member
Joined
Jun 24, 2013
Messages
5,094
Location
Marina del Rey
86--if it is just a simple bushing you could likely order it from McMaster Carr. Just measure the ID and OD and length with a dial caliper.
 

MaineGuide

Well-known member
Joined
May 26, 2014
Messages
225
Location
Maine
86--if it is just a simple bushing you could likely order it from McMaster Carr. Just measure the ID and OD and length with a dial caliper.

That, or keep an eye out on eBay. I've grabbed a couple parts for my Stanley/Bailey planes.
 

ztorres

Well-known member
Joined
Sep 22, 2016
Messages
195
Location
Iowa
I definitely would not wash my hands with acetone. Prolonged exposure to the skin can actually stop your skin from producing oil. Worked with a guy that had this issue. Nothing wrong with small contact but constant contact is unacceptable


Sent from my iPhone using Tapatalk
 

ez-duzit

Well-known member
Joined
Jun 24, 2013
Messages
5,094
Location
Marina del Rey
I've been using acetone for 40 years to do a quick wipe off of epoxy. It evaporates very rapidly and does not soak in. It seems to be the most effective solvent to use for wet epoxy. Gougeon Brothers says soap and water will do the trick. But I never have it handy to where I work with epoxy.
 

ztorres

Well-known member
Joined
Sep 22, 2016
Messages
195
Location
Iowa
I agree it's one of the best cleaners there is for epoxy or grease


Sent from my iPhone using Tapatalk
 
OP
J

jimreed2160

Well-known member
Joined
Aug 7, 2016
Messages
3,589
Location
Tallahassee FL
Hunterguy--I am puzzled by your #7 issue but want to help. Can you be more descriptive on the "bearing". Is the lateral pin missing? Can you take a picture?
 

hunterguy86

Well-known member
Joined
Jan 22, 2012
Messages
168
Location
Central Texas
Hunterguy--I am puzzled by your #7 issue but want to help. Can you be more descriptive on the "bearing". Is the lateral pin missing? Can you take a picture?


This is a frog I found online, not mine. I am missing the round piece on the end of the lateral adjustment lever that fits inside the iron and moves it side to side. I tried to circle it.


a4000eb5bb709c625c723645dd73ded8.jpg


Sent from my iPhone using Tapatalk
 

Attachments

  • a4000eb5bb709c625c723645dd73ded8.jpg
    a4000eb5bb709c625c723645dd73ded8.jpg
    107.7 KB · Views: 0
OP
J

jimreed2160

Well-known member
Joined
Aug 7, 2016
Messages
3,589
Location
Tallahassee FL
Hunterguy--I would call that the cam on the end of the lateral adjuster lever. There are several ways to repair that item. Remember that some people do not like the lateral adjuster and just tap the blade to adjust it from side to side. In fact, the early planes did not have a lateral adjuster.

But to fix it, try some of these methods. The best part of this repair is that cosmetics are moot since no one will see it. I like those types of repairs.

1. If the pin is still there, look for some washers or make a washer to fit.
2. Use a small bolt nut.
2. Find a donor plane and replace the entire lateral piece.

Hope this helps.
 
OP
J

jimreed2160

Well-known member
Joined
Aug 7, 2016
Messages
3,589
Location
Tallahassee FL
Stanley #146 refurb

Today is tax day and I restricted myself to the computer until taxes are done in draft form. That took most of the morning. Lucky for me I had the Evaporust out working in the shop. Here is what I fed it last night.

DSCN2802.jpg


That mess is a very uncommon Stanley #146 tongue and groove plane. It literally does not know whether it is coming or going. :willy_nil

Stanley made three variations of this plane, known as double ender match planes, from 1905 until 1958. The smaller sizes were discontinued during WWII. The #146 centers a T&G on 3/8" stock. The #147 centers a T&G on 5/8" stock, and the big brother #148 centers a T&G on 7/8" stock.

Well, this #146 was a little rusty and was missing one of its cutters. I also found a #147 that needed a little cleaning so I threw it into the soup also.

DSCN2803.jpg


They were pretty clean this afternoon, so I finished the process and got them oiled to keep the rust at bay. But then there was the issue of blades. For that I had to venture into the boneyard and root around in the blade toolchest. Here is what I found.

DSCN2811.jpg


Back when I was making blades for sale, I often made extras and threw them into the batch for heat treating. This box contains all of the extras from several batches. It has mostly specialty blades. I got lucky and found a 1/8" cutter for the #146, a tongue cutter for the #147, and a 3/16" cutter for the #147. They do need final grinding and sharpening. I set up a work order for tomorrow.

Here they are, ready to go.

DSCN2812.jpg


I guess I could have left them in the EV longer, but I hate to remove ALL of the patina. I think they look better as working tools.
 

derosa

Well-known member
Joined
Oct 19, 2010
Messages
1,078
Location
Oceanside, NY
I was finally able to spend a little time in the shop, the refurbishing of my house has reached the point of being able to trim the entire downstairs, other then the floors there's nothing left to do. Local place has 3/4 quartersawn poplar kiln dried for only 1.80 a board foot so I'm working my way through a few hundred worth.
Each board after going through the planer has the sides trimmed down on the tablesaw to 9/16, then a stanley 220 is used to shave off the saw marks and the jointer marks that are on the sides of each board along with relieving the edges just a touch. The original moulding design didn't have the raised edges on the sides but I thought the overall design looked better.
I purchased one of the drill press rosette cutters and knives from grizzly, it was a total fail, couldn't produce a decent rosette in oak, poplar or mahogany no matter how much I adjusted it. Instead I turned all of them, eight so far, on the lathe and shot for similar enough.
Smaller doorways like the two on the left side of the second pic will just get a taller blank top, as will all the regular windows to keep things from looking overdone while the wider windows will get the same treatment. I felt this kept the taller and wider doorways from looking too clunky especially once the crown is put in. The trim design is based off trim from the late 18- early 19th century when the house was built, a trip to colonial williamsburg convinced me paint was appropriate vs staining. The crown will be made from premium but not clear pine and along with the ceilings will be left to age naturally.
 

Attachments

  • IMG_20170411_100228.jpg
    IMG_20170411_100228.jpg
    134.4 KB · Views: 82
  • IMG_20170411_190958.jpg
    IMG_20170411_190958.jpg
    146.1 KB · Views: 83
  • IMG_20170411_191103.jpg
    IMG_20170411_191103.jpg
    143.4 KB · Views: 85
  • IMG_20170411_191045.jpg
    IMG_20170411_191045.jpg
    140.4 KB · Views: 81
Last edited:
To avoid these ads, REGISTER NOW!
OP
J

jimreed2160

Well-known member
Joined
Aug 7, 2016
Messages
3,589
Location
Tallahassee FL
Derosa--Outstanding job on your trim. I am sorry you could not make the rosettes with your DP. Was it spinning fast enough? Anyway, the lathe ones look great. Thanks for your pictures.
 
OP
J

jimreed2160

Well-known member
Joined
Aug 7, 2016
Messages
3,589
Location
Tallahassee FL
Serendipity

So I was cruising along the auction site last week and found a real prize--a depth stop for my Fales plane. It is a "C" shaped piece that fits the square fence rod along with a conventional foot. Fits like a charm.

DSCN2815.jpg


It is the first one I have seen close up. The often printed catalog picture has just a whiff of it from the back. Luck strikes unexpectedly. :rocker:
 

derosa

Well-known member
Joined
Oct 19, 2010
Messages
1,078
Location
Oceanside, NY
Derosa--Outstanding job on your trim. I am sorry you could not make the rosettes with your DP. Was it spinning fast enough? Anyway, the lathe ones look great. Thanks for your pictures.
I tried at 800, 1600 and 2200 rpm, the cutter is fairly heavy and bulky which seemed at odds with high speed but I had to try. Biggest issue was the level of tear out. Making them on the lathe takes 7 minutes from mounting to removal so not too bad time wise, each one is just slightly different but that just makes them "artisan" which is my excuse for not enough time on the lathe.
 
OP
J

jimreed2160

Well-known member
Joined
Aug 7, 2016
Messages
3,589
Location
Tallahassee FL
I tried at 800, 1600 and 2200 rpm, the cutter is fairly heavy and bulky which seemed at odds with high speed but I had to try. Biggest issue was the level of tear out. Making them on the lathe takes 7 minutes from mounting to removal so not too bad time wise, each one is just slightly different but that just makes them "artisan" which is my excuse for not enough time on the lathe.

True that sometimes in ww, the wood decides to be uncooperative and wood working turns into sawdust making. As you discovered, it is always good to have a backup plan ready. At least this way, you have a really good story to tell.
 

drivesitfar

Well-known member
Joined
Oct 23, 2013
Messages
36,006
Location
Pacific Northwest
Jim: until you started this thread i thought i had a fair amount of wood planes and now i see i'm just a rookie. any idea how many you might have and i'm sure it's a moving target/number with you restoring/repairing/selling and buying them all the time. thanks again for sharing all your knowledge as you have time too. :thumbup:

just one question before i leave. have you went to a sale where there are planes for sale for really good prices and just left them sit cause you didn't like them? cause it looks like you pick up some wounded ones to bring back to life often. or are some too far gone or not good enough quality to mess with? any tips on ones NOT TO BUY would be good for us ROOKIES if you have some advice to share.

cheers
 

trainer

Well-known member
Joined
Nov 28, 2005
Messages
2,019
Location
Northern Ontario, Canada
Derosa: I'd suggest that you run a few extra pieces of moulding while you have the setup in place and stash them in the attic or someplace safe in case you need to change a window or door in the future.

Another option for cutting rosettes is to use MDF. I know MDF is a dirty word in most woodworking circles, but it machines beautifully and takes paint very well. The downside is that its very dusty to work with.
 
OP
J

jimreed2160

Well-known member
Joined
Aug 7, 2016
Messages
3,589
Location
Tallahassee FL
Derosa: I'd suggest that you run a few extra pieces of moulding while you have the setup in place and stash them in the attic or someplace safe in case you need to change a window or door in the future.

That is an outstanding suggestion. :rocker:

My house is young at just 40 yo but it has really nice trim. A few months ago I started repairing cat damaged repairing trim. All of the lower trim is dark stained doug fir and the scratches really pop out. Minwax is doing a great job on the random scratches but some of the boards were too far gone to save--even by turning around(!). I was able to find some clear white pine, rip it to size, and stain it to match. The new trim was a wonderful repair but I was lucky that it was simple.

My easy job was not so because I could not find any local doug fir. Future you will appreciate present you for your thoughtfulness of leaving some extra trim around. In fact, you could trim out the INSIDE of a closet door or two with those fancy rosettes and some moulding. It would be a great place to store the extras.
 
OP
J

jimreed2160

Well-known member
Joined
Aug 7, 2016
Messages
3,589
Location
Tallahassee FL
Jim: until you started this thread i thought i had a fair amount of wood planes and now i see i'm just a rookie. any idea how many you might have and i'm sure it's a moving target/number with you restoring/repairing/selling and buying them all the time. thanks again for sharing all your knowledge as you have time too. :thumbup:

just one question before i leave. have you went to a sale where there are planes for sale for really good prices and just left them sit cause you didn't like them? cause it looks like you pick up some wounded ones to bring back to life often. or are some too far gone or not good enough quality to mess with? any tips on ones NOT TO BUY would be good for us ROOKIES if you have some advice to share.

cheers

Thanks for your kind words. I think everyone should have a few handplanes. They are plentiful, mostly inexpensive, and handy.

I will share some of my buying tips, but they may not help the casual user because I follow a system. My original plan was to buy low and sell high. Buying low means buying "issue" planes. BUT if you buy a planes with different issues, then you can rearrange the parts and kick out a good user. It also meant that I needed to focus on a single manufacturer (Stanley) and a few different products (bench planes, combo planes, etc). And then it got out of control. I was having so much fun, I forgot to turn off the spigot and now have a large plane overflow in my garage boneyard.

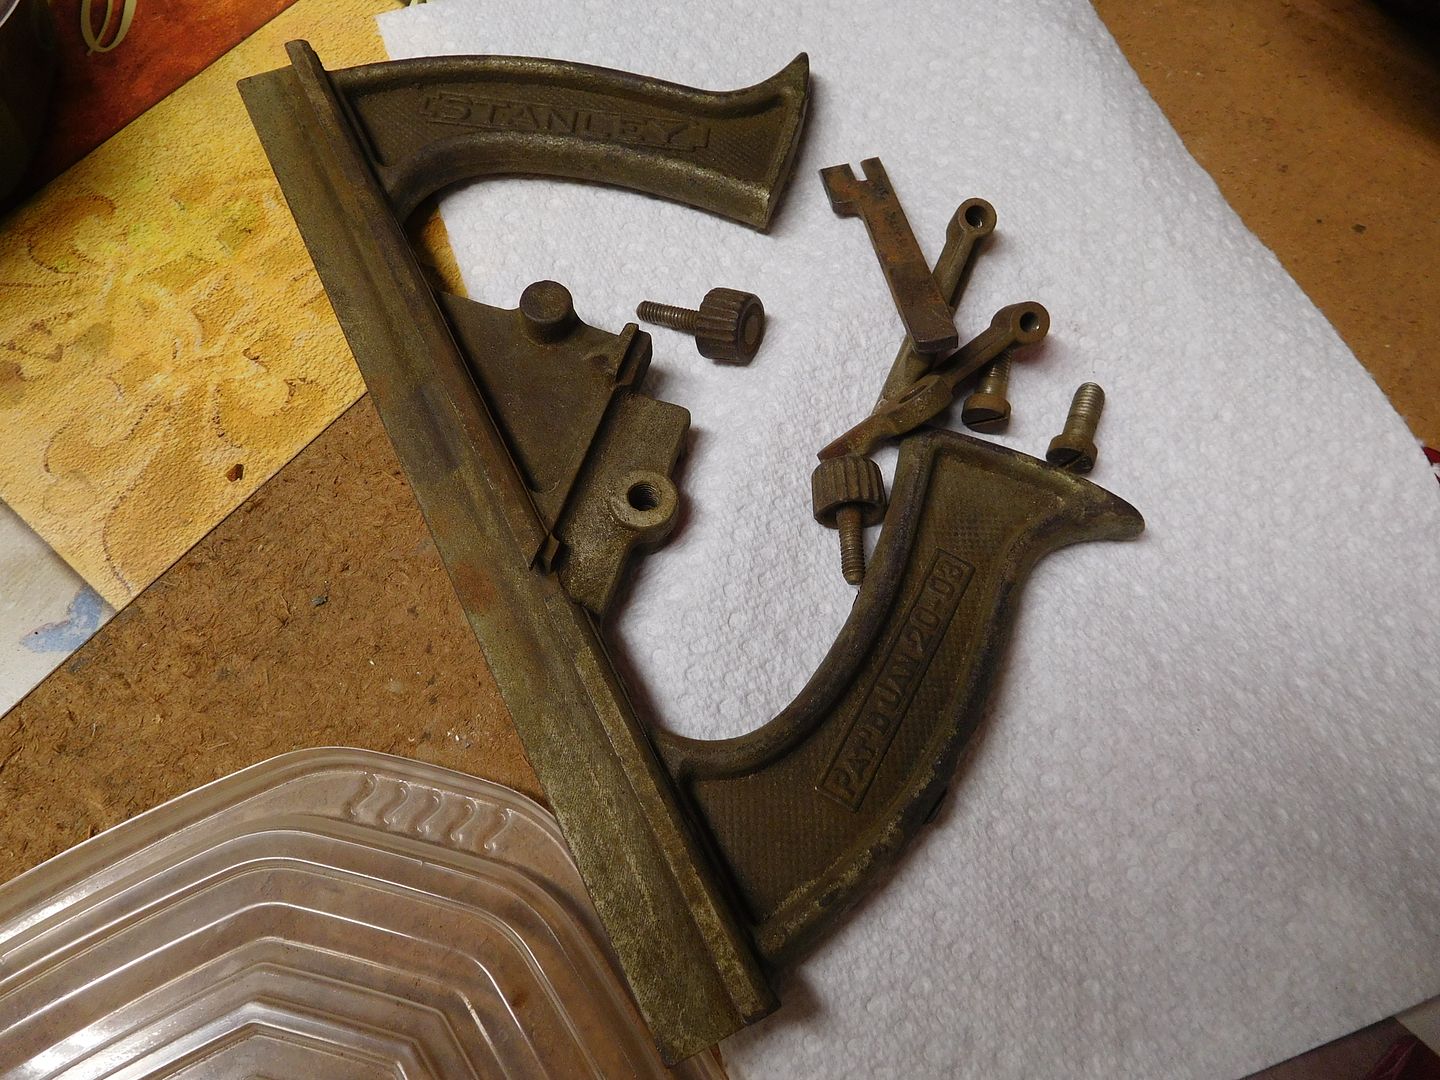
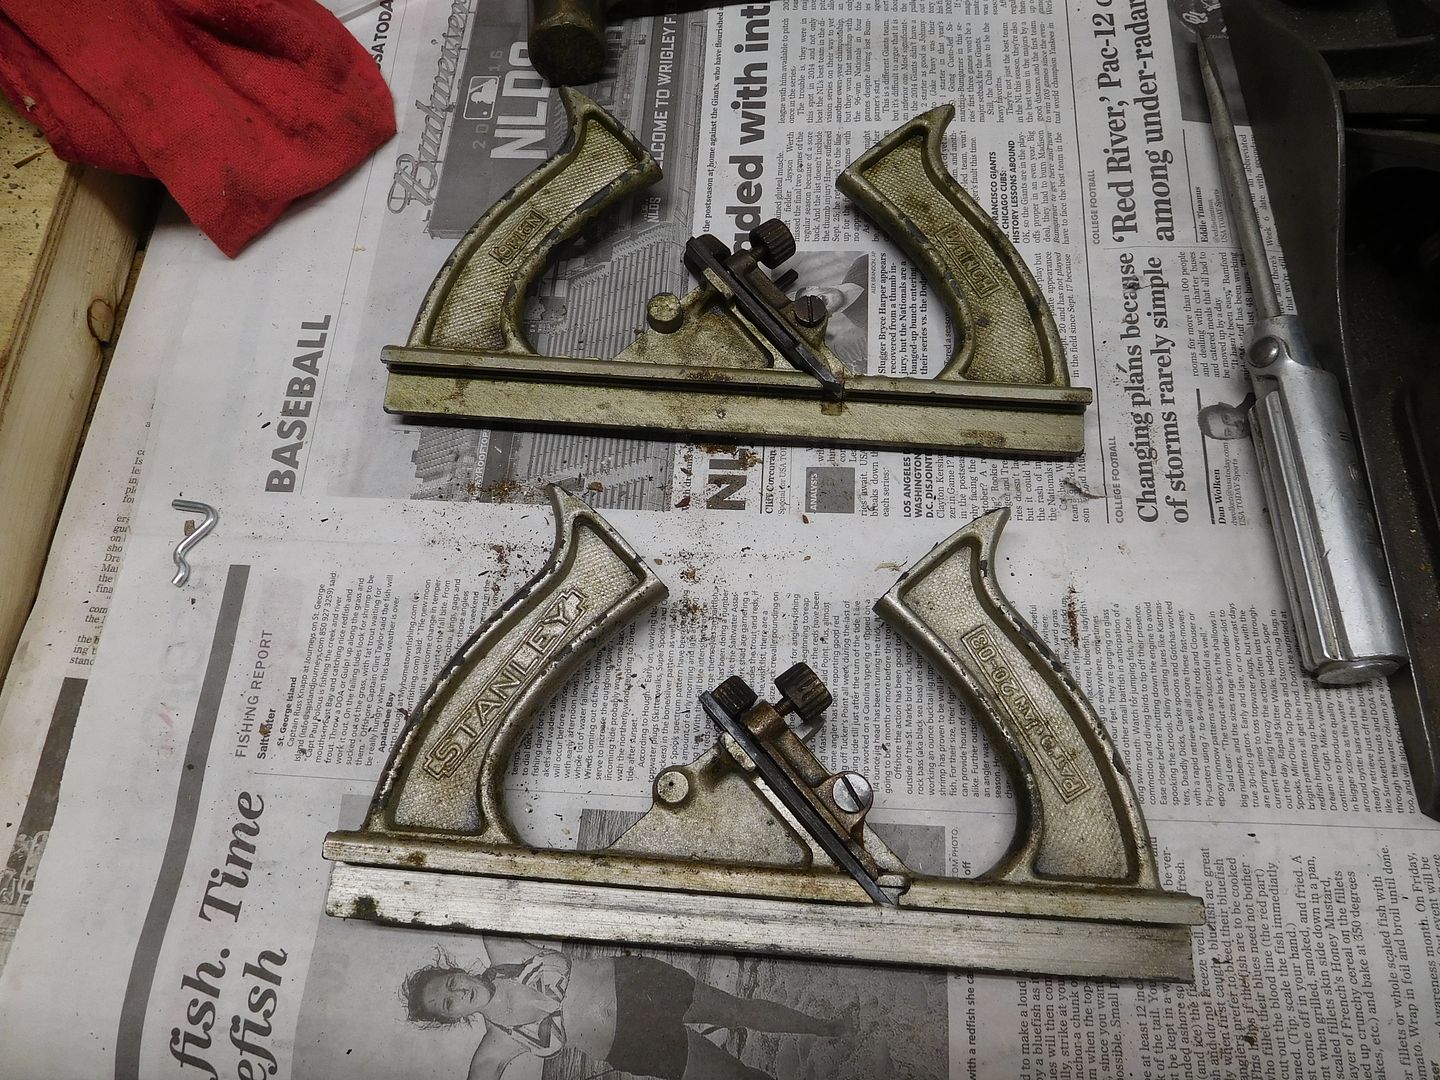
Plane afficianados often refer to "Frankenplanes". Most Stanley planes were made over time and model changes (improvements) were made just like in automobiles. Collectors study catalogs and other documents and develop type charts to show how planes looked when they originally left the factory. Using improper parts makes a plane a "frankenplane". Kinda like using wheel covers from a 1940 Chevy truck on a 1950 Ford truck. It can be unsettling to those in the know.

Many of the planes in my user stable are of the Franken persuasion. When it comes to use, parts are parts. But collector planes command a premium and the parts have to match.

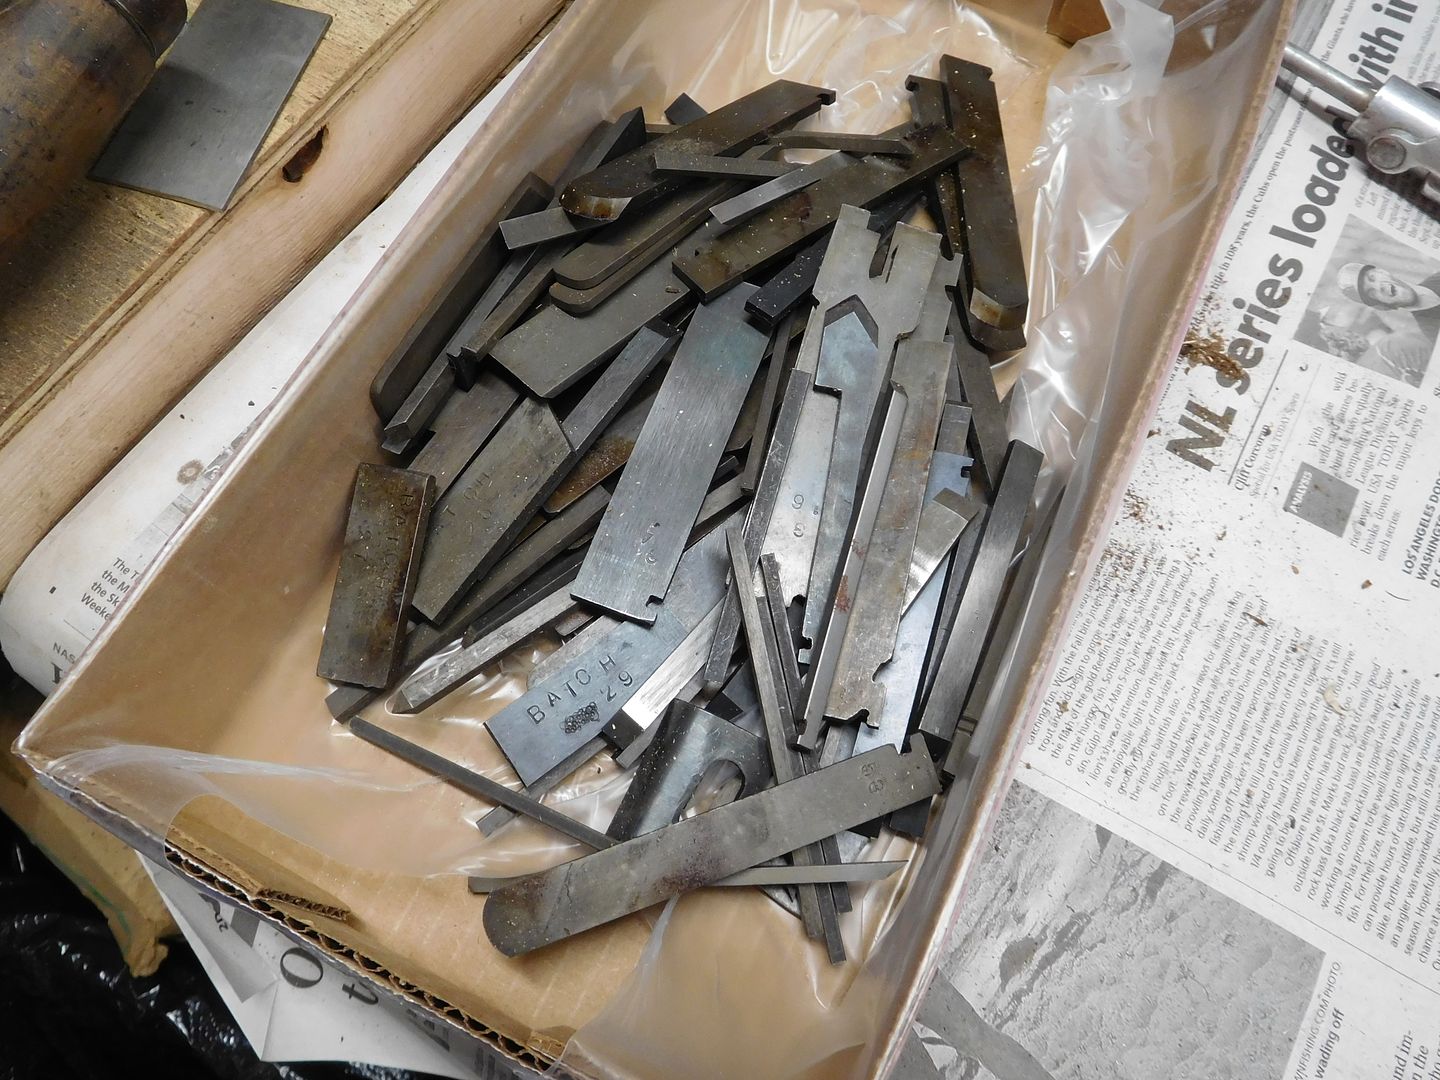
So I purchase planes to use and to resell to other users and to collectors. It means that I buy all over the board. I also have tons of parts and can replace or repair most defects. The key to making the hobby pay for itself is to buy properly and that usually means buy on the bottom.

But I also purchased lots of planes as education. Nothing educates like having lots of examples around.

I will buy ratty parts and pieces if I need something hard to find. I will pass up pristine examples if the price is too high.

Anyone who wants to learn handplanes can purchase on the bottom like I did and learn. It is a hard road and one way to move to the front of the line is to purchase a Lie Nielsen or Lee Valley plane. Or even some of the middle of the road stuff like modern Stanley and Woodriver. Or one can purchase vintage refurb planes like the ones I work up. There are many of us out there. I have been doing it for 20 years and expect to break even one day.

What I avoid

Heavy corrosion
Flood damaged or big corroded lumps should be avoided. At some point, the screws seize and the plane cannot be adjusted. Blades have to be replaced. Most lumps of red iron are not worth shipping. Light rust can be easily cleaned but heavily pitted planes rarely turn into good users. What is the difference between light and heavy? If the rust hurts your hand when you rub the plane, it has probably won the corrosion race.

Cracked castings
I know any metal can be repaired. Even cast iron can be welded. But I have never seen a welded plane that is worth a flip as a user. Heck, some non-welded planes are not good users. Any plane with a cracked casting (sole or frog) is a donor plane for me.

Visual damage
Stanley bench planes are heavy and tend to take dives off the bench. Sometimes this results in a casting break that is visual. Examples are broken shoulders, broken sides on front or rear, and even broken frog tops. I have used many of these planes because they work well. But I no longer buy them (except as donors) because they are impossible to sell. Ditto with hang holes. Often school planes have a hole drilled in the sole so the plane will hang easily. It does not affect the use, but it kills the market value. Buyers are picky and do not like hang holes. (Hint: Hang hole planes at a discount can be a great bargain if you want a user plane.)

Frankenplanes
I do not like to purchase FP unless the seller is honest and explains the differences. My experience is that most of them have hidden defects. Sometimes the parts are from a different manufacturer and do not even fit correctly. The worst examples are "goats" which have been cobbled up with broken and defective parts.

Painted planes
Most vintage Stanley planes have a black japan finish. Repainting is OK for a user but it destroys collector value. Painted planes are hard to sell and I avoid them.

I could go on for hours about buying and selling. But this seems like a good place to stop.
 
OP
J

jimreed2160

Well-known member
Joined
Aug 7, 2016
Messages
3,589
Location
Tallahassee FL
The hospital called today and scheduled the Queen's procedure tomorrow morning at 7:00am. It looks like an all day affair. So tomorrow will be a no shop day for me. Hope someone else can make some shavings.
 

rk5n

Active member
Joined
Jan 11, 2016
Messages
39
eDIev62l.jpg


First flea market of the year. Total spend was only $182
Two panel saws. Richard Groves & Sons and Disston #76
Tenon saw
Stanley #6
Two Stanley #7's. One corrugated
Two Stanley #4's. One needs a front knob
Stanley sweetheart #21 8" combination square
Miller Falls #77
Small outside dividers
Two Jorgensen clamps
Saw vise

The #6, #7c and the better #4 are being given to friends. The ratty #4 is cleaning up nicely so far.
 
Last edited:

CSRPenFab

Well-known member
Joined
Oct 27, 2015
Messages
5,148
Location
Meridian Idaho
For the non-haters of pens in this thread. Just finished up a new design for a couple of friends that like handguns. The "revolver", .357 caliber bullet at the nib end. Cylinder rotates when pushing top to extend the nib, and again when you pull the trigger to retract the nib. It's a nice heavy pen. Buckeye Burl on left and African Bloodwood on right. Both finished with many coats of CA before polishing.

99e7ea0fe97912551015b3294f4bb731.jpg
 
OP
J

jimreed2160

Well-known member
Joined
Aug 7, 2016
Messages
3,589
Location
Tallahassee FL
so how's she doing?

Thanks for asking. After our month long runaround, everything is just fine. The radiologist reviewed her CAT scans (recent and old) and other PET scan and halted the procedure so there was no puncturing. Whew! He is convinced that the anomalies are benign and shows where they been stable for years.

So after a month long cancer scare, it looks like we are in the good zone. We were able to escape the hospital and I napped the afternoon away. Then we went to a birthday celebration to cap it all off.

Life is good. :beer:
 
OP
J

jimreed2160

Well-known member
Joined
Aug 7, 2016
Messages
3,589
Location
Tallahassee FL
eDIev62l.jpg


First flea market of the year. Total spend was only $182
Two panel saws. Richard Groves & Sons and Disston #76
Tenon saw
Stanley #6
Two Stanley #7's. One corrugated
Two Stanley #4's. One needs a front knob
Stanley sweetheart #21 8" combination square
Miller Falls #77
Small outside dividers
Two Jorgensen clamps
Saw vise

The #6, #7c and the better #4 are being given to friends. The ratty #4 is cleaning up nicely so far.

It's not that we do not believe you, but pictures would really seal the deal.
 
OP
J

jimreed2160

Well-known member
Joined
Aug 7, 2016
Messages
3,589
Location
Tallahassee FL
For the non-haters of pens in this thread. Just finished up a new design for a couple of friends that like handguns. The "revolver", .357 caliber bullet at the nib end. Cylinder rotates when pushing top to extend the nib, and again when you pull the trigger to retract the nib. It's a nice heavy pen. Buckeye Burl on left and African Bloodwood on right. Both finished with many coats of CA before polishing.

99e7ea0fe97912551015b3294f4bb731.jpg

Pretty wood. Good turning. Nice finish. What's not to like? Those are great pens. :pimpflash
 
OP
J

jimreed2160

Well-known member
Joined
Aug 7, 2016
Messages
3,589
Location
Tallahassee FL
In light of some recent comments on this thread, here is a relevant posting by Ryan, who almost burnt down the Atomic shop.

http://www.garagejournal.com/2017/04/surviving-my-own-stupidity/

Thanks for the heads up. I don't know about your woodshop, but there are tons of combustibles in mine--solvents, paint, wood, sawdust, etc. We all need to be diligent about cleaning up and properly disposition of oily rags. Even though most of these fires happen when the shop is vacant, we need to have fire extinguishers close by.

Could your shop pass a shop safety inspection?
 
To avoid these ads, REGISTER NOW!
Top Bottom