To avoid these ads, REGISTER NOW!

Woodworking 101--Tools and Tips

ztorres

Well-known member
Joined
Sep 22, 2016
Messages
195
Location
Iowa
Not necessarily woodworking tip but building tip:
Know where water lines are when you drill into concrete. Especially in old homes. Had to make this repair tonight because the old copper water pipe was only an inch under the surface. Needless to say the hammer drill punched a good hole through the piping.
97b1920f0fd141d841958e4573c18249.jpg


Sent from my iPhone using Tapatalk
 

Attachments

  • 97b1920f0fd141d841958e4573c18249.jpg
    97b1920f0fd141d841958e4573c18249.jpg
    569.1 KB · Views: 1
To avoid these ads, REGISTER NOW!

nutsnbolts

Well-known member
Joined
Jan 15, 2016
Messages
1,576
Location
Seattle, WA
I meant to ask this the other day...what is the difference (Shopsmiths) between the Mark V and the ER10? Size? Era? Is one better than the other?
 
OP
J

jimreed2160

Well-known member
Joined
Aug 7, 2016
Messages
3,589
Location
Tallahassee FL
I meant to ask this the other day...what is the difference (Shopsmiths) between the Mark V and the ER10? Size? Era? Is one better than the other?

Here is what Mr Google sez--The first Shopsmith, model 10ER, was introduced in 1947 and replaced by the Mark V in 1953. Color was green until 1960, gold from 1960-61 and grey until 1964 when it was discontinued. The company formed again in 1972 with a Grey spatter mark V and has made over a million since. They have made improvements and claim that these improvements can be added to ANY Mark V machine.

I think the early models are rare, so the chances are very good that most of what you run across will be a post 1972 Mark V.
 
OP
J

jimreed2160

Well-known member
Joined
Aug 7, 2016
Messages
3,589
Location
Tallahassee FL
New arrival

So package deliveries are slowly resuming after the storm disruption. USPS has not delivered packages in awhile. This came yesterday via FedEx.

DSCN3905.jpg


DSCN3906.jpg


It is an AMT brass edge plane. The design was copied straight from the Stanley #95. These planes are good for putting a square edge on a board. This one has glue on the sole right up in the corner.

DSCN3907.jpg


I used a VERY sharp Japanese chisel to lift up the glue, being careful not to scratch the soft brass.

DSCN3908.jpg


Then I lightly honed the blade and put it to work.

DSCN3909.jpg


The first pass found a high edge but the second pass was full width.

DSCN3910.jpg


The resulting edge is crisp and perfect for an edge glue up.

DSCN3911.jpg


This plane has an interesting footnote. The design was reproduced in the 1970s and sold by several vendors. Around 1981, the guy who started making them sold his tooling and etc to Thomas Lie Nielsen who set up a company in Maine to continue the manufacture. That business has become very successful.
 

turbowoodworker

Well-known member
Joined
Mar 18, 2012
Messages
3,522
Location
Apex NC
Jim and Nuts,
The obvious biggest difference is the 10ER is belt drive with three speed step pulley.
The Mark models have an internal speed control.
Oh, and the 10s are not that rare. I see them on CL often.
Here is a thread about a restoration that is quite good but it looks like Photobucket F'd us again so no pics.
I have my dad's 10ER and use it some as a long bed drill press or lathe but mostly as a 12" disk sander.
 

nutsnbolts

Well-known member
Joined
Jan 15, 2016
Messages
1,576
Location
Seattle, WA
Thanks for the clarification on the shopsmiths guys. I have been seeing the 10ER models around quite a bit, and recently saw one for $100. That being said, I don't think I want to be dealing with something that old. There is a pretty nice Mark V that looks brand new for sale locally for $500. If it is still there next week when I get home from my fishing trip I will give him a shout and see what he will take for it.
 
OP
J

jimreed2160

Well-known member
Joined
Aug 7, 2016
Messages
3,589
Location
Tallahassee FL
Today's Arrivals

The USPS resumed package deliveries today after a brief hiatus due to Irma's rudeness. Here are some of my arrivals. The first is a handle for the Sipco tool box.

DSCN3912.jpg


DSCN3913.jpg


I found it on that famous on line auction site. It has clips on each end and fits well.

DSCN3914.jpg


It sure makes this box easier to deal with. The box is heavy and awkward to hold without it. I will declare this one a winner. Now it is up to my daughter to carry on and finish the project.

Another prize in the post was this Stanley plane.

DSCN3915.jpg


This is a rare Stanley #146 T&G plane. It centers a T&G on a thin 3/8" board. This one was advertised with the incorrect blades noted. The tongue is a homemade blade for a #147 that centers on 1/2" stock. The groove blade is a rusty 3/16 cutter that may have come from an early #45. But blades are not a problem for me. I just wandered over to my cutter box and found a #146 set. Here it is along with the included cutters.

DSCN3916.jpg


Now it is ready to go. Of course, I used my last set of #146 cutters so I probably need to make a few sets when it gets a little cooler in the shop. It has been awhile since I cranked up the mill and made METAL shavings.

So here is a question. Is it still woodworking if you use a metalworking mill to make woodworking plane blades? Or is it pure metalworking?
 

R_einan

Well-known member
Joined
Aug 29, 2016
Messages
461
Location
Eastern WA
Well, not exactly fine wood working, but carpentry anyway. Moved in about 18 mos ago and knew the deck was is tough shape. Finally got a few days off strung together and managed to get this far in 3 and a half days. Would have been able to get the railings installed, at least the horizontal portions, but the distributor shipped the wrong boards and we couldn't get the correct ones until next week. Hopefully they will come in on Tuesday so I can retrieve them and finish the railing Thursday when I have another day off. 2x4 top and bottom rails with a 2x6 hand rail/cap and 2x2 decorative verticals.

Interesting thing I learned in this process, how to measure and cut stair stringers. Also, did you know an HVLP gun works great for an oil based water protectant/stain? Saved me at least 6 hrs of brush work.
 

Attachments

  • IMG_2346.jpg
    IMG_2346.jpg
    147.3 KB · Views: 64
  • IMG_2348.jpg
    IMG_2348.jpg
    150.1 KB · Views: 57
  • IMG_2349.jpg
    IMG_2349.jpg
    146.8 KB · Views: 68
  • IMG_2352.jpg
    IMG_2352.jpg
    148.3 KB · Views: 61

rrich1

Well-known member
Joined
Oct 7, 2015
Messages
793
R_einan deck looks good. Did you use pressure treated wood and then stain right away or is that cedar? For staining or painting decks pads make for an excellent t option. Way faster than rolling or brushing.

Sent from my Pixel XL using Tapatalk
 
Last edited:

rrich1

Well-known member
Joined
Oct 7, 2015
Messages
793
Got some work done after shift tonight! Got the castor's on and 2 coats of Danish oil! She is looking great! The power tech castor's I had bought came with dinky screws. I replaced them with 2" lag screws to be safe. 2 of them broke on me even though I pre drilled. I got one out but the other I had to leave in. I drilled two holes in the bracket and used 2 1/2" kreg screws along with the bottom lag bolts. I don't see it being an issue.

The castor's work extremely well and give a lot of lift. They are rubber and glide over the garage floor.

The Danish oil gave the bench a nice color. I used natural. Almost with I went with a walnut but thought it might be too dark. It looks great though and am happy. It made the cherry dowels really stick out which I was hoping for. Some before during and after pics below.

Still need to finalize a chop design and still waiting on the vise screw. Other than that I think the bench is done. I originally bought an old brod head Garret vise to put on but I don't think I am. It would require me to route a lot of the top out to get it almost flush with the top and i don't want to do that. At some point in the near future I will drill some dog holes. b09d614de8143b9154bfd2c14cd50315.jpg6b586e46a5fe8a1ffd7cd4e757ba8fcd.jpgd9f00f6cd34fb00a72165d19cfec6329.jpg68bb30b70416523b468938ef4ab43c01.jpg7a9d2d34718f50d891723b86d0ffb8a1.jpgcd86f8adc53911568b92f5960dac9cc5.jpg03a9bc315941067b3842775fa9570fd4.jpgbb9cbb7e78fb39f18333ae5f1500b992.jpg5857e27311ddeb59f9e0df4fcde861b3.jpgd8a48c44c2e4e3dd1653a6b62269c5f3.jpg

Sent from my Pixel XL using Tapatalk
 

Attachments

  • cd86f8adc53911568b92f5960dac9cc5.jpg
    cd86f8adc53911568b92f5960dac9cc5.jpg
    68.9 KB · Views: 0
  • 7a9d2d34718f50d891723b86d0ffb8a1.jpg
    7a9d2d34718f50d891723b86d0ffb8a1.jpg
    79.5 KB · Views: 0
  • d9f00f6cd34fb00a72165d19cfec6329.jpg
    d9f00f6cd34fb00a72165d19cfec6329.jpg
    71.2 KB · Views: 0
  • 03a9bc315941067b3842775fa9570fd4.jpg
    03a9bc315941067b3842775fa9570fd4.jpg
    85 KB · Views: 0
  • bb9cbb7e78fb39f18333ae5f1500b992.jpg
    bb9cbb7e78fb39f18333ae5f1500b992.jpg
    92.8 KB · Views: 0
  • 5857e27311ddeb59f9e0df4fcde861b3.jpg
    5857e27311ddeb59f9e0df4fcde861b3.jpg
    100.8 KB · Views: 0
  • d8a48c44c2e4e3dd1653a6b62269c5f3.jpg
    d8a48c44c2e4e3dd1653a6b62269c5f3.jpg
    79 KB · Views: 0
  • 6b586e46a5fe8a1ffd7cd4e757ba8fcd.jpg
    6b586e46a5fe8a1ffd7cd4e757ba8fcd.jpg
    74.2 KB · Views: 0
  • b09d614de8143b9154bfd2c14cd50315.jpg
    b09d614de8143b9154bfd2c14cd50315.jpg
    78.1 KB · Views: 0
  • 68bb30b70416523b468938ef4ab43c01.jpg
    68bb30b70416523b468938ef4ab43c01.jpg
    88.6 KB · Views: 0
OP
J

jimreed2160

Well-known member
Joined
Aug 7, 2016
Messages
3,589
Location
Tallahassee FL
R--Great deck project. Would like some details on decking. How far apart are the boards spaced? Pressure treated? What kind of fasteners? BTW, I see great space underneath for yard tools. Any plans for adding some sort of enclosure?

rrich--You did a good job on the bench. Are you sure the BG vise is a no go? I agree with not molesting the top. Here is something to think about. Mount it on the end, just inside one of the legs. Add wood jaws on both faces and make them even with the benchtop. Then add a spacer to the end of the bench to make it even with the jaw. You could even make the dynamic jaw cover extra thick and add additional dog holes between it and the vise face. That is a strong vise and I think it could work well without digging into the top.

But whatever you do, I am sure it will turn out as nice as the rest of the bench. Good job.
 

R_einan

Well-known member
Joined
Aug 29, 2016
Messages
461
Location
Eastern WA
Thanks guys, the material is a non incised pressure treated Doug fir that is pre dried. Still had more moisture content than a kiln dried stud, but not wet by any means. Spacing is about 1/8, I used a 8d nail for spacing. Figuring on my low humidity climate coupled with the high heat, I figured that was the best compromise. Posts are mounted with 3/8 galvi bolted through and everything else with #9 3" deck screws in stainless. Currently I don't intend to enclose below, though if I ever decide to remove the covered boat parking attached to my shop and expand another bay dedicated to wood working, I may consider that for yard tool storage.
 
OP
J

jimreed2160

Well-known member
Joined
Aug 7, 2016
Messages
3,589
Location
Tallahassee FL
Currently I don't intend to enclose below, though if I ever decide to remove the covered boat parking attached to my shop and expand another bay dedicated to wood working, I may consider that for yard tool storage.

That's what I was thinking. It looks like a great spot for one of those inexpensive metal tool sheds. It is amazing to me how much floor space yard tools can squander in the garage.
 
OP
J

jimreed2160

Well-known member
Joined
Aug 7, 2016
Messages
3,589
Location
Tallahassee FL
New project

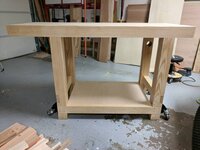
When I offered up this spool desk to my daughter, she jumped. So today I dug it out of storage. These things were given to merchants as store displays for thread. Often the desk part was used to keep up with accounts. I have had many of these thru the years--I even refinished one in a DORM ROOM while I was in school at UNC.

DSCN3918.jpg


Anyway, this one is in really good shape and can be put into use immediately. The lid prop is MIA. Here is what it should do.

DSCN3919.jpg


I dug this oak sliver out of the scrap pile and sanded a roundover.

DSCN3920.jpg


It needs a screw. Lucky for me that I got organized a while back because I knew right where to go.

DSCN3922.jpg


DSCN3921.jpg


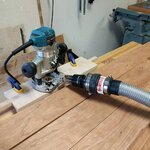
The next operation was to countersink for the screw. Again, lucky for me that I keep a brace loaded with a countersink and have a nice vise nearby. I think walking over there took longer than making the countersink.

DSCN3923.jpg


DSCN3924.jpg


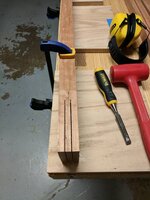
I put it in place but needed to mark the angle for trimming. There are many ways to do this, but I just used a thin scrap as a marking gauge.

DSCN3925.jpg


Then I installed it.

DSCN3927.jpg


Perfect fit and tight enough to not fall. Once the desk lid is raised a bit, the support falls down with the flick of a finger.

DSCN3927.jpg


And the countersink was perfect.

DSCN3929.jpg


DSCN3930.jpg


This means that I get one more thing out of my garage. And while I was getting this desk out of storage, I found a bunch of wooden cigar boxes. Looks like daughter #2 will get a package in the mail soon. Last week, one of my buddies called because he was looking for kitty litter pails. And I had a dozen to send his way. Every little bit helps. I think you could say that my shop cleanup and organization is going well these days.
 
To avoid these ads, REGISTER NOW!

rrich1

Well-known member
Joined
Oct 7, 2015
Messages
793
Some work on the gaming table today. I got the t slot access holes routed out. Used 3 adapters to get the Makita dust collection port to fit with my Bosch hose. Worked very well even with a @/2" guide bushing. Had some chip outs (all in the same corners) but got them glued back in. Tonight I am going to get the bridle joints cut and maybe start chiseling them out but that depends on what time it is. aa3062f13fea8984a220b923e205186e.jpge15930e2f36de715705ab407024a6768.jpg003ab24fb534e49a15333ab17d6c5a51.jpg

Sent from my Pixel XL using Tapatalk
 

Attachments

  • 003ab24fb534e49a15333ab17d6c5a51.jpg
    003ab24fb534e49a15333ab17d6c5a51.jpg
    143.4 KB · Views: 0
  • e15930e2f36de715705ab407024a6768.jpg
    e15930e2f36de715705ab407024a6768.jpg
    160.6 KB · Views: 0
  • aa3062f13fea8984a220b923e205186e.jpg
    aa3062f13fea8984a220b923e205186e.jpg
    89.6 KB · Views: 0

rrich1

Well-known member
Joined
Oct 7, 2015
Messages
793
rrich--It sure is good to see that bench in action. So soon too. Must be some kind of a record. Kudos!
Doing this stage of the table build was the sole reason I pushed forward to finish the work bench lol. I didn't have any other place to clamp the rails and aprons to do the access holes and chisel out the bridle joints.

Speaking of bridle joints...Got the bridle joints cut on the long rails. Rough chiseled one out. Three more to go and to fine tune them. Will have to wait for tomorrow. My table on the bandsaw was too high so I had to use my leg chop plus some plywood to bring it up to level. 311727d2c4aff554b5344be2cc6a375e.jpg62b5c98c659b086831d46317fbe08a8f.jpg2f45f36dc8eb2a2ff1cdd7f1ac699f72.jpg308384326b05ed102147ca66759d3fb7.jpgd1552926ca4e63adf098f58c4b6a52fa.jpg

Sent from my Pixel XL using Tapatalk
 

Attachments

  • d1552926ca4e63adf098f58c4b6a52fa.jpg
    d1552926ca4e63adf098f58c4b6a52fa.jpg
    56.5 KB · Views: 0
  • 308384326b05ed102147ca66759d3fb7.jpg
    308384326b05ed102147ca66759d3fb7.jpg
    83.2 KB · Views: 0
  • 2f45f36dc8eb2a2ff1cdd7f1ac699f72.jpg
    2f45f36dc8eb2a2ff1cdd7f1ac699f72.jpg
    97.2 KB · Views: 0
  • 311727d2c4aff554b5344be2cc6a375e.jpg
    311727d2c4aff554b5344be2cc6a375e.jpg
    119 KB · Views: 0
  • 62b5c98c659b086831d46317fbe08a8f.jpg
    62b5c98c659b086831d46317fbe08a8f.jpg
    94.8 KB · Views: 0

drivesitfar

Well-known member
Joined
Oct 23, 2013
Messages
36,006
Location
Pacific Northwest
RR: no worries on taking your time making that AWESOME WOODWORKING BENCH cause i've got things on my TO DO LIST that have been on there since we moved in 30 years ago. you've done an amazing job and i hope you find a great vise or here's one you might like. i'm not sure if you have room or want a pattern maker's vise, but this one is an almost exact copy of an EMMERT that you can buy new for a lot less. WELL DONE and looking forward to seeing and hearing how you like using your bench.


ALL: I bought a 12 inch Dewalt compound miter saw a couple years ago used and haven't had a chance to use it yet so maybe i'll try to see how much of a cut i can make on my 6x6's and i'll let you know. even if i can't cut them all the way through maybe i can at least make cuts square that i can finish cutting the middle out with a hand saw of which i own more than a few.

thanks for the comments
 

madison069

Well-known member
Joined
Nov 5, 2010
Messages
4,147
Location
Monroeville, PA
Anyone dealt with wood boring beetles? I'm finding little pin holes in my slabs and fine powder wood dust below the holes. I thought about putting the slab in a confined space and running a dehumidifier to reduce moisture in the wood and hopefully kill the larvas off. Is this a possible solution or are there no hope beside chemically? This is the stack I didn't take to the kiln and it air dried instead. Obviously it is still wet so my thought was to do this which is essentially the kiln process.
 
OP
J

jimreed2160

Well-known member
Joined
Aug 7, 2016
Messages
3,589
Location
Tallahassee FL
Mad--The only treatment I know for active beetles is to stick the wood in a freezer. You could try insecticide but they are usually pretty deep and hard to hit. Once they hatch, they will bore in and infect the rest of your stash. Anytime I find active beetles, I throw out the wood.
 

rrich1

Well-known member
Joined
Oct 7, 2015
Messages
793
Got the rails cut. Still need fine tuning to get exactly where they need to be. Got it fitted enough do a mock-up and see how this table is really going to look. The corners are all proud by 1/8". They will be rounded over to give a really nice look and feel.0d2843c3895292f965873dd4e44190d2.jpg8e57e28762b6ab8e79e8954d4551e80c.jpg27b20f603518f70cd3d9e546569fa80d.jpg

Sent from my Pixel XL using Tapatalk
 

Attachments

  • 0d2843c3895292f965873dd4e44190d2.jpg
    0d2843c3895292f965873dd4e44190d2.jpg
    105.9 KB · Views: 0
  • 8e57e28762b6ab8e79e8954d4551e80c.jpg
    8e57e28762b6ab8e79e8954d4551e80c.jpg
    100.3 KB · Views: 0
  • 27b20f603518f70cd3d9e546569fa80d.jpg
    27b20f603518f70cd3d9e546569fa80d.jpg
    93.6 KB · Views: 2

madison069

Well-known member
Joined
Nov 5, 2010
Messages
4,147
Location
Monroeville, PA
I'm finding online that if I can heat the wood to 130* f for a few days it will kill the beetles. If only the furnace was working I could use it to heat the whole room where the wood is stashed also.
 

olysteve

Active member
Joined
May 21, 2010
Messages
32
But I do have a deep freezer........
Would vacuum bagging the lumber work? Larvae or not they need oxygen don't they?
It'd be easier to vacuum pack each slab for a while than trying to freeze them

Sent from my XT1585 using Tapatalk
 
OP
J

jimreed2160

Well-known member
Joined
Aug 7, 2016
Messages
3,589
Location
Tallahassee FL
Would vacuum bagging the lumber work? Larvae or not they need oxygen don't they?
It'd be easier to vacuum pack each slab for a while than trying to freeze them

According to Mr Google, vacuum treatments to kill wood borer larvae have had low success rates. The proven effective methods are kiln drying and freezing for at least ten days.
 

1Garageman

Well-known member
Joined
May 12, 2009
Messages
4,417
Location
Columbus, Ohio
HELP!!!!!!!!!!!!!
So I have my end table that I built all stained up and looking great!:thumbup::bounce:

The next day I apply the first coat of Polyurethane. Goes on pretty good and I made sure I read the directions BEFORE applying the next coat. It says, " lightly sand with sand paper to remove imperfections with 220 sandpaper or higher".
So I have some 320 sand paper and LIGHTLY touch it to remove some inperfections. And look what happened. I barley touched the surface and it rippep off some stain so far that I saw the wood!:mad::rocketwho I am pissed and ready to explode!

What did I do wrong????
Sorry if I hijacked this thread:bounce:


IMG_4245.jpg

IMG_4246.jpg

IMG_4243.jpg
 

ez-duzit

Well-known member
Joined
Jun 24, 2013
Messages
5,095
Location
Marina del Rey
Those scratches look like they were produced with sandpaper MUCH coarser than 320! And you were supposed to sand lightly, not go all the way through the varnish and stain.
 
To avoid these ads, REGISTER NOW!
Top Bottom