To avoid these ads, REGISTER NOW!

Woodworking 101--Tools and Tips

madison069

Well-known member
Joined
Nov 5, 2010
Messages
4,147
Location
Monroeville, PA
That ***** about the deep scratches!! I don't have any tips to help you fix that but I wish I did!

I will clear out the freezer and drop a few of the slabs that will fit in it and give it a go. Starting to wish I bought the bigger unit now.

Awhile back I picked up a Craftsman plane that was near perfect and mint except for a crack in the sled. This weekend I could the exact same thing except the handles was damaged so I got a project of putting the good handles and such on the good sled this weekend! I'm at $4 for both planes right now.
 

Attachments

  • IMG_20170919_190451526.jpg
    IMG_20170919_190451526.jpg
    146.7 KB · Views: 44
To avoid these ads, REGISTER NOW!

rrich1

Well-known member
Joined
Oct 7, 2015
Messages
793
HELP!!!!!!!!!!!!!
So I have my end table that I built all stained up and looking great![emoji106]:bounce:

The next day I apply the first coat of Polyurethane. Goes on pretty good and I made sure I read the directions BEFORE applying the next coat. It says, " lightly sand with sand paper to remove imperfections with 220 sandpaper or higher".
So I have some 320 sand paper and LIGHTLY touch it to remove some inperfections. And look what happened. I barley touched the surface and it rippep off some stain so far that I saw the wood!:mad::rocketwho I am pissed and ready to explode!

What did I do wrong????
Sorry if I hijacked this thread:bounce:


IMG_4245.jpg

IMG_4246.jpg

IMG_4243.jpg
Are you sure you used 320? Did you do this by hand or with a machine? I don't see how doing it by hand would have produced those results.

Sent from my Pixel XL using Tapatalk
 

1Garageman

Well-known member
Joined
May 12, 2009
Messages
4,417
Location
Columbus, Ohio
I am positive it is 320 sand paper. Those scratches are the Polyurethane being scratched, I assume. Because if you run you fingers over it you can't feel any ripples. Also if you wet the wood the scratches disappear.
Last night I put some stain on the spots that got taken down to the wood. Hopefully i'll have some time to try putting another coat of polyurethane on it tonight, and NEVER sand it again!
 

cheechi

Well-known member
Joined
Feb 29, 2012
Messages
4,384
Location
Triad, NC
Usually between coats of poly I will do #0000 steel wool. I think 320 is too coarse considering you already sanded to your finished smoothness and stained, so the 'texture' you wanted is already there. the only reason to sand between coats of poly is you can eliminate any bubbles/dimples that formed and get that really velvety smooth poly feel the more layers you put on.

Thank you.

glad to help.
 
Last edited:

Bigmichaelkim

Active member
Joined
May 5, 2017
Messages
38
145783d443d0a558aff7b022ded4b753.jpgdcf0dc7d76f80706d6d107d878f2bcec.jpgfc95ec0608235dffd536eda5cc32d7e0.jpg

Started on my build of a proper woodworking workbench based on the Paul sellers style. Started by planing some 2x4's kiln dried Douglas fir from Lowe's to remove surface machine marks in order to make lamination go smoothly. I noticed throughout this process that despite Mr. Sellers suggestion of using a #4 plane to plane down the wood, I ended up using my 5 1/2 C plane and found the process much more enjoyable. To be fair it could be that my #4 is just poorly set, I am getting so much chips stuck in between the chip breaker, and have to figure out how to fix that issue. Regardless planing was done in about 4 hours for one 12 inch section of lamination (1/2 of my workbench surface area). And then I rehearsed and set my clamps according to the advice of Mr. Sellers and then went about lamination. This was my first ever glue up and I am afraid that for the first couple of pieces I starved them of glue. I hope this doesn't come back to bite me in the *** in the form of a poor lamination. Just waiting 24 hrs for the glue to dry and will see how my first ever lamination worked out. But this experience made me realize that woodworking is indeed a hobby which I see myself continuing and even though I am so sorfar right now I am kind of proud of my rather ****** but still my own work. By the way I am using Mr. Sellers online YouTube guide which is designed for a 8 ft long bench but I am actually looking to make a 5 ft long bench much like the small joinery workbench Paul uses in his videos.

Any fans of his out there that have plans for that small joinery workbench?

Sorry for the long winded post oh and I will continue posting pictures of my progress.


Sent from my iPhone using Tapatalk
 

Attachments

  • fc95ec0608235dffd536eda5cc32d7e0.jpg
    fc95ec0608235dffd536eda5cc32d7e0.jpg
    743.6 KB · Views: 0
  • 145783d443d0a558aff7b022ded4b753.jpg
    145783d443d0a558aff7b022ded4b753.jpg
    715.5 KB · Views: 0
  • dcf0dc7d76f80706d6d107d878f2bcec.jpg
    dcf0dc7d76f80706d6d107d878f2bcec.jpg
    855 KB · Views: 0

56vette461

Well-known member
Joined
Jan 13, 2013
Messages
492
Location
Northern California
HELP!!!!!!!!!!!!!
So I have my end table that I built all stained up and looking great!:thumbup::bounce:


What did I do wrong????
Sorry if I hijacked this thread:bounce:


One thing I have learned with wood finishes. Never trust that the source of wood product you use, the pre finish (sander sealer) stain and finish coats are going to be compatible. I purchased a wood for a small cabinet that had been lightly sprayed with some type of sealer to prevent it discoloring during transit. I neglected to sand the wood down to the raw wood surface and the ultimate result was the failure of my choice of finish to work and be compatible with the initial sealer. sanding before final finish coat simply pulled previous coats off the cabinet and left bare wood patches.

As far as "why" I have no ideal :rocker: but I ended up stripping the project and completely sanding it down to all raw wood before starting all over.
 

rrich1

Well-known member
Joined
Oct 7, 2015
Messages
793
145783d443d0a558aff7b022ded4b753.jpgdcf0dc7d76f80706d6d107d878f2bcec.jpgfc95ec0608235dffd536eda5cc32d7e0.jpg

Started on my build of a proper woodworking workbench based on the Paul sellers style. Started by planing some 2x4's kiln dried Douglas fir from Lowe's to remove surface machine marks in order to make lamination go smoothly. I noticed throughout this process that despite Mr. Sellers suggestion of using a #4 plane to plane down the wood, I ended up using my 5 1/2 C plane and found the process much more enjoyable. To be fair it could be that my #4 is just poorly set, I am getting so much chips stuck in between the chip breaker, and have to figure out how to fix that issue. Regardless planing was done in about 4 hours for one 12 inch section of lamination (1/2 of my workbench surface area). And then I rehearsed and set my clamps according to the advice of Mr. Sellers and then went about lamination. This was my first ever glue up and I am afraid that for the first couple of pieces I starved them of glue. I hope this doesn't come back to bite me in the *** in the form of a poor lamination. Just waiting 24 hrs for the glue to dry and will see how my first ever lamination worked out. But this experience made me realize that woodworking is indeed a hobby which I see myself continuing and even though I am so sorfar right now I am kind of proud of my rather ****** but still my own work. By the way I am using Mr. Sellers online YouTube guide which is designed for a 8 ft long bench but I am actually looking to make a 5 ft long bench much like the small joinery workbench Paul uses in his videos.

Any fans of his out there that have plans for that small joinery workbench?

Sorry for the long winded post oh and I will continue posting pictures of my progress.


Sent from my iPhone using Tapatalk
Looking good so far. Did Paul recommend a #4 or did he just say it can be done with a #4? Do you have a table saw? One thing I would have changed would have been to take off the rounded edges. I wouldn't like that as a workbench surface. I just finished up my workbench build. It comes in at just over 5ft. I used Jay Bates' plans from youtube. Love it so far.

Sent from my Pixel XL using Tapatalk
 

Attachments

  • fc95ec0608235dffd536eda5cc32d7e0.jpg
    fc95ec0608235dffd536eda5cc32d7e0.jpg
    89.9 KB · Views: 0
  • dcf0dc7d76f80706d6d107d878f2bcec.jpg
    dcf0dc7d76f80706d6d107d878f2bcec.jpg
    134.1 KB · Views: 0
  • 145783d443d0a558aff7b022ded4b753.jpg
    145783d443d0a558aff7b022ded4b753.jpg
    101.4 KB · Views: 1
OP
J

jimreed2160

Well-known member
Joined
Aug 7, 2016
Messages
3,589
Location
Tallahassee FL
1G--Hoo Boy! What a distressing mess. But it is the most effective way to learn. Don't despair--I have done much worse. Looks like your paper was too coarse and left big scratches. In spite of what you were told, you need to go finer like a smooth emery board. And your light touch needs some work. I like to drag 800 paper by holding the sheet a few inches above and letting the weight of the paper provide pressure. The remedy is to sand a little more with much finer paper, apply more stain, and try the clear again. Don't worry, with care all of the scratches will mysteriously disappear. Thanks for sharing your goof. I think others will learn. Good luck with your fix.

Mad--That is great news about your plane rehab. I use the same strategy often. Like old automobiles, sometimes your plane's best friend is a donor.

BigM--I love the pile of shavings and am glad you graduated up to a more suitable plane. Shavings stuck into the tip of the chipbreaker is common. The first job of the chipbreaker is to provide stiffness. Second job is to deflect the shaving. The contact area is important. Make sure the contact begins at the edge. You may need to bend the metal a bit. Make sure the contact does not leave a vee groove. You may need to grind it a bit until it sits flat. Once the chipbreaker sits flat, move on to the shaving. It can be hard to deflect it is too thick. Lighten up on the cut just a tad. Good luck.

All--I have been busy with a sick cat this week and that cut considerably into my shop time. Good news is that the cat is on the mend. I drove to Gainesville FL yesterday and delivered the summertime desk project to its new owner. I would have provided a shot of the happy owner but she is busy clearing a spot in her room and the desk is in the garage in pieces. Everyone got extensive training on the assembly and I even left a rubber hammer so I am confident it will be installed in no time. Whew! Time for a new project.
 

1Garageman

Well-known member
Joined
May 12, 2009
Messages
4,417
Location
Columbus, Ohio
Well I sanded the raw wood areas and put stain on them the other night. Last night I went ahead and put another coat on there, and it looks ok. I don't think I will EVER sand after I put polyurethane on wood again!

I still need to stain the knob I made for the door, but it looks ok.
IMG_4250.jpg


Below is a picture of the sandpaper that I used.
IMG_4252.jpg
 

ztorres

Well-known member
Joined
Sep 22, 2016
Messages
195
Location
Iowa
Well I sanded the raw wood areas and put stain on them the other night. Last night I went ahead and put another coat on there, and it looks ok. I don't think I will EVER sand after I put polyurethane on wood again!

I still need to stain the knob I made for the door, but it looks ok.


How many coats of poly did you put on before you sanded? What type of poly did you use? I've done exactly what you've done and I've realized that Minwax Satin Poly is the best for the first three coats – doesn't matter whether you want the final look to be glossy or Satin. I personally put 5 coats on; 3 coats of Satin followed by 2 coats of glossy. I sand between the second and third coats, then again between coat number 4 and 5. Make sure you give at least 24 hours for the poly to cure.


Sent from my iPhone using Tapatalk
 

R_einan

Well-known member
Joined
Aug 29, 2016
Messages
461
Location
Eastern WA
G-man: two thoughts for you, the first is there is a difference between P rated paper and non, p320 is closer to 250/280 in regular cami specs. Could account for some of the heavy sanding. Usually I only cut a finish back with 400 wet/dry using a very light hand and some water with a drop of dish soap to break the surface tension of the water. Second, you could have applied the poly over the stain before it dried all the way, which would cause the poly to cure soft or not completely and lift when sanding. Either that or the stain and poly were incompatible. Was it water based poly or oil based? What brand of stain and what brand of poly? I'm sorry you ran into an issue, but even mistakes help down the road to know what doesn't work.
 

Attachments

  • IMG_2355.JPG
    IMG_2355.JPG
    104.9 KB · Views: 66

1Garageman

Well-known member
Joined
May 12, 2009
Messages
4,417
Location
Columbus, Ohio
Thanks for the info guys!!!!!! I am not sure what Polly I used on it. I put the second coat on last night, and this morning it looks OK.

I need to put some light on it and thoroughly examine it. I was just SO PISSED when I sanded it LIGHTLY and it ripped off the stain. I have never had that happen before! I will have to see what kind of Polyurethane that I used.

Thanks again for the tips and info. I will do some more reading and investigating on it.

: All and ztorres, I sanded it after the first coat. I read that directions and it said to lightly sand it after the first coat.
 
OP
J

jimreed2160

Well-known member
Joined
Aug 7, 2016
Messages
3,589
Location
Tallahassee FL
1G--Good save. I judge a ww skill more on how he recovers and fixes issues. Knocking something together takes a high level of skill, but fixing problems usually takes a HIGHER level of skill. Congratulations on your fix.
 

Bigmichaelkim

Active member
Joined
May 5, 2017
Messages
38
Looking good so far. Did Paul recommend a #4 or did he just say it can be done with a #4? Do you have a table saw? One thing I would have changed would have been to take off the rounded edges. I wouldn't like that as a workbench surface. I just finished up my workbench build. It comes in at just over 5ft. I used Jay Bates' plans from youtube. Love it so far.

Sent from my Pixel XL using Tapatalk


Unfortunately I do not have a table saw. I do have a circular saw and was planning on maybe ripping off the rounded edges but decided against it because of the possible danger. I do not plan on leaving the rounded edges on the top or bottom of my work surface.

My plan is to use a scrub plane that I made from an old cheapo plane I found at an estate sale to hog off a lot of the top and finish the smoothing with another plane. Does this sound like a suitable idea? Anyone with experience with this?


Sent from my iPhone using Tapatalk
 
OP
J

jimreed2160

Well-known member
Joined
Aug 7, 2016
Messages
3,589
Location
Tallahassee FL
New project
When I dropped off the desk yesterday, I casually mentioned that I should take her old desk into the shop sometime for repair. With that, daughter and SIL jumped up and emptied the thing out!!! Of course, I was deadheading home so there was plenty of room for it.

The desk was made in late 19th century. It is walnut fall front desk in Eastlake style. Charles Locke Eastlake's book, "Hints on Household Taste" was not published until 1868, so it is after then. Golden oak ruled the early 20th century, so it was before then.

DSCN3932.jpg


DSCN3933.jpg


DSCN3931.jpg


Some of the drawer runners need repair where they have worn. The brasses need to be polished. But the real story is the carcass. The 100 yo glue seams have failed and the whole thing is falling apart. It needs a reglue. That is compounded by the fact that this thing is HEAVY. I can barely lift it. Just getting it on the bench will be a great challenge.

There is a personal history here also. I purchased this desk sometime in the late 1970s but lost it (along with most of my other antique furniture) in the Great Divorce of the 1980s. I worked on this desk then and got it into shape. Since it is falling apart, The Plantiff gifted it to my daughter. So it is back again. Funny how those things work out. Anyway, this will be a big challenge. It is huge and I need to turn it around quickly. Also need a shop crane to move it around. As they say, this will be interesting. Will our intrepid hero manage to save both the desk and his hernia repair? Stay tuned for the next episode--same time, same Bat channel.
 
OP
J

jimreed2160

Well-known member
Joined
Aug 7, 2016
Messages
3,589
Location
Tallahassee FL
BigM--I have done lots of work with a real scrub plane and my advise is to leave the rounded edges. I just made two toolbox benchtops using 2x6s and the rounded edges are not a problem. Some of it was taken out by just getting the tops flat. You will resurface your workbench over time and will those little grooves will disappear over time.

Of course, you need a bench brush to keep the top clean. It is just a little more work to dust out the grooves.

If you really want to scrub, then put a camber on your blade and scrub away at a 45 degree angle to the grain. Scrub to the right and then scrub to the left. Your blade needs a tight camber and should be exposed so that your shavings are about 1/2-3/4" wide. Anything bigger and you will totally wear yourself out. It is easier to take two thin swipes than two wide swipes.
 

Teenager with old tools

Well-known member
Joined
Jun 3, 2015
Messages
595
Location
riverside california
So I have a stanley no5 Bailey plane with 3 patent dates on it that was broken and welded with a gold color metal by the guy I bought it from. He did a good job all is straight. I'm just going to hide it by painting the sides black. I have everything cleaned and painted but now I'm starting on the handle. Anyone ever seen one with a walnut handle? Maple slab is nice and smooth at 320 by the way so this week will map out template and thin out paint to paint on a flag. It will be thin paint so the grain still shows nicely

Sent from my P027 using Tapatalk
 

Bigmichaelkim

Active member
Joined
May 5, 2017
Messages
38
BigM--I have done lots of work with a real scrub plane and my advise is to leave the rounded edges. I just made two toolbox benchtops using 2x6s and the rounded edges are not a problem. Some of it was taken out by just getting the tops flat. You will resurface your workbench over time and will those little grooves will disappear over time.


Of course, you need a bench brush to keep the top clean. It is just a little more work to dust out the grooves.


If you really want to scrub, then put a camber on your blade and scrub away at a 45 degree angle to the grain. Scrub to the right and then scrub to the left. Your blade needs a tight camber and should be exposed so that your shavings are about 1/2-3/4" wide. Anything bigger and you will totally wear yourself out. It is easier to take two thin swipes than two wide swipes.


Hi thanks for the advice with the scrub. I scrubbed a little bit and finished it with my 5 1/2. I am still in the process of planing the top flat when I noticed the poor job of my lamination... 9743ac9576dd6617506989a1572e81a1.jpg9d882985798e608ffa8e609173e874d1.jpg

That unsightly gap only is visible on what would become the bottom of my bench. How should I go about fixing this? Will this gap effect the strcuture of my bench or can I simply hide in on the bottom. The top doesn't have that large of a gap.

Oh and also did this gap develop due to the lack of clamping pressure or just poor fitment of the glued joints? I'm guessing probably both. I feel like such an idiot not checking the bottom of my lamination after glue up.


Sent from my iPhone using Tapatalk
 

Attachments

  • 9743ac9576dd6617506989a1572e81a1.jpg
    9743ac9576dd6617506989a1572e81a1.jpg
    742.1 KB · Views: 0
  • 9d882985798e608ffa8e609173e874d1.jpg
    9d882985798e608ffa8e609173e874d1.jpg
    719.4 KB · Views: 0
To avoid these ads, REGISTER NOW!

rrich1

Well-known member
Joined
Oct 7, 2015
Messages
793
Starts with your boards and how straight they were on glue up. You said there is a gap on top as well? A drastic measures you could do is take a circular saw and cut the lamination apart, plane both sides flat and re glue it. You definitely need a good amount t of clamps or at least some cauls to help spread the pressure across the surface.

Sent from my Pixel XL using Tapatalk
 

Bigmichaelkim

Active member
Joined
May 5, 2017
Messages
38
Starts with your boards and how straight they were on glue up. You said there is a gap on top as well? A drastic measures you could do is take a circular saw and cut the lamination apart, plane both sides flat and re glue it. You definitely need a good amount t of clamps or at least some cauls to help spread the pressure across the surface.

Sent from my Pixel XL using Tapatalk


I see. I want to salvage this lamination as I don't want to simply throw this piece away so I guess I will do what you suggested with the circular saw and rip the lamination and reglue the two pieces. Hopefully this solves the problems. I will make sure on a dry run the fitment is good and that I use plenty of glue and some more clamps.


Sent from my iPhone using Tapatalk
 
OP
J

jimreed2160

Well-known member
Joined
Aug 7, 2016
Messages
3,589
Location
Tallahassee FL
BigM--That is a pretty big gap. It may be enough to make the top flex a bit. Probably the result of crooked construction lumber. The real fix is to rip it apart, joint the boards, and then clamp it back up. But it is only a benchtop and there are a few ways to repair it. How deep is the crack? Can you fit a thin piece of cardstock into it to see? If it is only a half inch or so, you could enlarge the crack with a saw and fill it with a snug fitting shim. Sounds a bit wonky but wood is wood. If you use a piece of the same stock and make the repair just right, it should strengthen the top. Too thin and it is useless; too thick and it will act like a wedge.
 
OP
J

jimreed2160

Well-known member
Joined
Aug 7, 2016
Messages
3,589
Location
Tallahassee FL
In a pickle

So I promised my daughter I would glue up this desk for her. It is really heavy and I found out this morning it is larger than my bench!!! The bench is 24" wide and the desk is 34" wide. What to do? I pondered that this morning in the shop as I was working on a plan to lift it onto the bench without ripping open a hernia repair. This is what I came up with for the bench width issue.

DSCN3934.jpg


My recent shop organization added a mobile workbench behind my cabinetmakers bench. It was a little taller so I shimmed up the low bench with construction 2xs and a piece of plywood. The result was a wide workbench for clamping.

The next issue was how to get it up there. I finally decided to move it a piece at a time and use my sawbench as an intermediate stop.

DSCN3935.jpg


The desk was already on rollers, so I moved one corner up on the sawbench and followed it with the other corner. It only had to move about a foot. So far, so good. Then I moved the other end on to the sawbench. That short move was not too hard either. With the entire desk on the sawbench, I discovered that the center of gravity had changed in my favor. Because of the solid top and the desk component, this piece is very top heavy. When it was perched on the sawbench, all I had to do was tip it over onto the plywood in a controlled crash. Once again, gravity and leverage were my friends and the desk arrived unhurt on top of the makeshift bench.

DSCN3936.jpg


There is about a foot hanging off but that will let me get clamps on the backside.

DSCN3937.jpg


I guess the good news is that most of the loose joints are on the lower part of the case. I think it has been damaged by pushing on the tiny casters.

DSCN3939.jpg


So I need to remove them. All but one come out easily--a good sign of too much stress.

Here is why you need needle nose vise grips.

DSCN3941.jpg


DSCN3942.jpg


This is a fuzzy picture (sorry) that shows one of the drawer frames out about an inch.

DSCN3943.jpg


All of them are loose and the glue blocks have failed.

DSCN3940.jpg


Not only do I need to reglue and tighten up this casework, I also need to figure out the mobility part or this thing will break down again. Maybe I can build a better base for it to sit on. One that does not ruin the integrity of the piece. And there is a user training issue to address. In the meantime, I need to remove hazards. There are a few exposed nails that need to be tapped down.

DSCN3938.jpg


Once I deal with the casework, I can start on the drawers. Most of them need a little touch up work.
 
OP
J

jimreed2160

Well-known member
Joined
Aug 7, 2016
Messages
3,589
Location
Tallahassee FL
New project

Well, when it rains, it pours. Here is what Mr. Mailman brought me this week.

DSCN3944.jpg


It is a Stanley #72 chamfer plane that is in sad shape. Not only is the wood broken and missing, it is the victim of serious user mods.

DSCN3945.jpg


DSCN3946.jpg


DSCN3947.jpg


Either the user was terribly mistaken about how to use the plane or he had a special job. Who knows? The mods are serious. No doubt I can fix the blade and the plane will work just fine. The cosmetics are ruined so resale is out of the question. I think I will strip the rust and glue splatters off the sole and repaint it. Then I will add new/old wood and make it my user plane. Many of my users are very blemished and have value only to me. Most of the pretty ones get released back into the wild.
 

Alchymist

Well-known member
Joined
Mar 1, 2009
Messages
4,423
Location
Central PA
In a pickle


Not only do I need to reglue and tighten up this casework, I also need to figure out the mobility part or this thing will break down again. Maybe I can build a better base for it to sit on. One that does not ruin the integrity of the piece. And there is a user training issue to address.

Bigger casters will help. Hide them inside a new base.
 
OP
J

jimreed2160

Well-known member
Joined
Aug 7, 2016
Messages
3,589
Location
Tallahassee FL
Blade work

Game went to halftime and I went into the shop to work on that #72 blade. I used sandpaper to remove some rust on the backside, painted it with a sharpie, and scored a right angle line.

DSCN3948.jpg


And then I went at it with a white wheel. The objective was to grind it flat at 90 degrees. But the blade begins to lose temper around 500 degrees, so I grind and quench in one or two second intervals. The Cool Whip quenching tub is close by. Here is a progress shot.

DSCN3949.jpg


Here it is all done. I do the same grind and quench when doing the bevel. No need to dry, just grind and quench. Note that the tool rest is still wet.

DSCN3951.jpg


And here is the new bevel.

DSCN3952.jpg


Here is a shot of my grinder set up.

DSCN3953.jpg


I was careful on the bevel and that meant only a few trips across the sandpaper for honing.

DSCN3954.jpg


I found some wood to fit the plane and dressed it up for a trial run.

DSCN3956.jpg


It made a nice chamfer.

DSCN3955.jpg


With the plane working again, I can tear it down and do a restore. It will be nice to have a user that I can keep in the garage.
 

ScottsGT

Well-known member
Joined
Jan 1, 2014
Messages
4,883
Location
Lake Wateree, SC
One thing I am learning about woodworking. There are two schools of thought here. Those that use their skills without power and those that do.
I see a lot of diehard old school craftsmanship work using hand planes, hand saws, etc. Then you have the guys that have really nice, full blown modern (and old) power tools that get the job done in a fraction of the time.

Am I going to cause a disturbance in the force if I mix the two? I mean, will it be like Marty McFly meeting himself? :lol_hitti

I really enjoy practicing some of the hand crafted techniques, but grabbing a few hours of weekend time to get something done requires power tools. :scared: And then I pull out my chisels to finish a corner where my router rounds them, I kind of look over my shoulder to make sure some Amish Carpenter God isn't about to smite me.
 
OP
J

jimreed2160

Well-known member
Joined
Aug 7, 2016
Messages
3,589
Location
Tallahassee FL
Scotts--I think you are right--there is a balance. I think it would be foolish to ignore power tools if you are really serious about woodworking. My shop is full of vintage hand tools and, of course, buckets full of handplanes. But I also have a jointer, table saw, bandsaw (2), lathe, oscillating spindle sander, biscuit cutter (2), router (2), drill press, and cordless drills, powered drills, circular saws, etc. I think handtools are fun to use and sometimes they are even quicker than powered tools. But serious ww requires power and unless you have an apprentice or two, most of that power comes from a plug.
 
Last edited:

CRSINMICH

Well-known member
Joined
Aug 15, 2015
Messages
2,397
Location
Southeastern Michigan
Scotts: To make an analogy, when it comes to fly fishing I'm a purist but not a snob. I prefer catching trout on dry flies but you're welcome to catch them with any kind of fly you want. Do your projects with whatever tools you choose. Even Paul Sellers unabashedly admits to using power tools. I have to admit, though, that since I started doing most of my projects with hand tools the phrase "working wood" has taken on new meaning.
 

ScottsGT

Well-known member
Joined
Jan 1, 2014
Messages
4,883
Location
Lake Wateree, SC
Whew. Thought I was in trouble here mixing things up! My last woodworking tool purchase was a Makita track saw. And yesterday I ordered a Lie Nielson low angle block plane.
 

cheechi

Well-known member
Joined
Feb 29, 2012
Messages
4,384
Location
Triad, NC
It's funny Jim how I can learn more about grinding a blade in a few words & photos from you than in several videos and attempts/failures in the real world. Tell me more about that Veritas jig, is it something that you got after comparing it to others or was it the only choice at the time or was there some other factor? It looks like it has a track fora bevel gage or is that just a perspective thing?

I need to build a stand so I can start using my Peachtree one. I have two grinders on pedestals and I think I'm going to need to put a wood platform in between them and the pedestal stand, and whether or not I need to buy more than one is the next thing to decide once I do. May be a project that ends up being way down the road depending on the time and scrap I have to flesh it out.
 
OP
J

jimreed2160

Well-known member
Joined
Aug 7, 2016
Messages
3,589
Location
Tallahassee FL
che--Thanks for your kind words. The Veritas jig is pretty cool. I bought one and wore it out. This one came with the slow speed grinder that I bought from a ww buddy. You are correct--it comes with a blade holder. My favorite jig, however, is a Wolverine. I like it because it is robust and easy to use for heavy duty work. I will take some pictures today of grinder jigs because they are very good fixtures to have around the shop.
 
OP
J

jimreed2160

Well-known member
Joined
Aug 7, 2016
Messages
3,589
Location
Tallahassee FL
Grinding jigs

So here is some info on grinding. I sharpen lots of plane blades and even made them at one time. I use a grinder for sharpening and a grinder for roughing out raw steel. Let's start with that one. It is an 8" grinder with a grey coarse and gray fine wheel. I use the Wolverine jigs with it. They have a fixture that mounts to the base.

DSCN3962.jpg


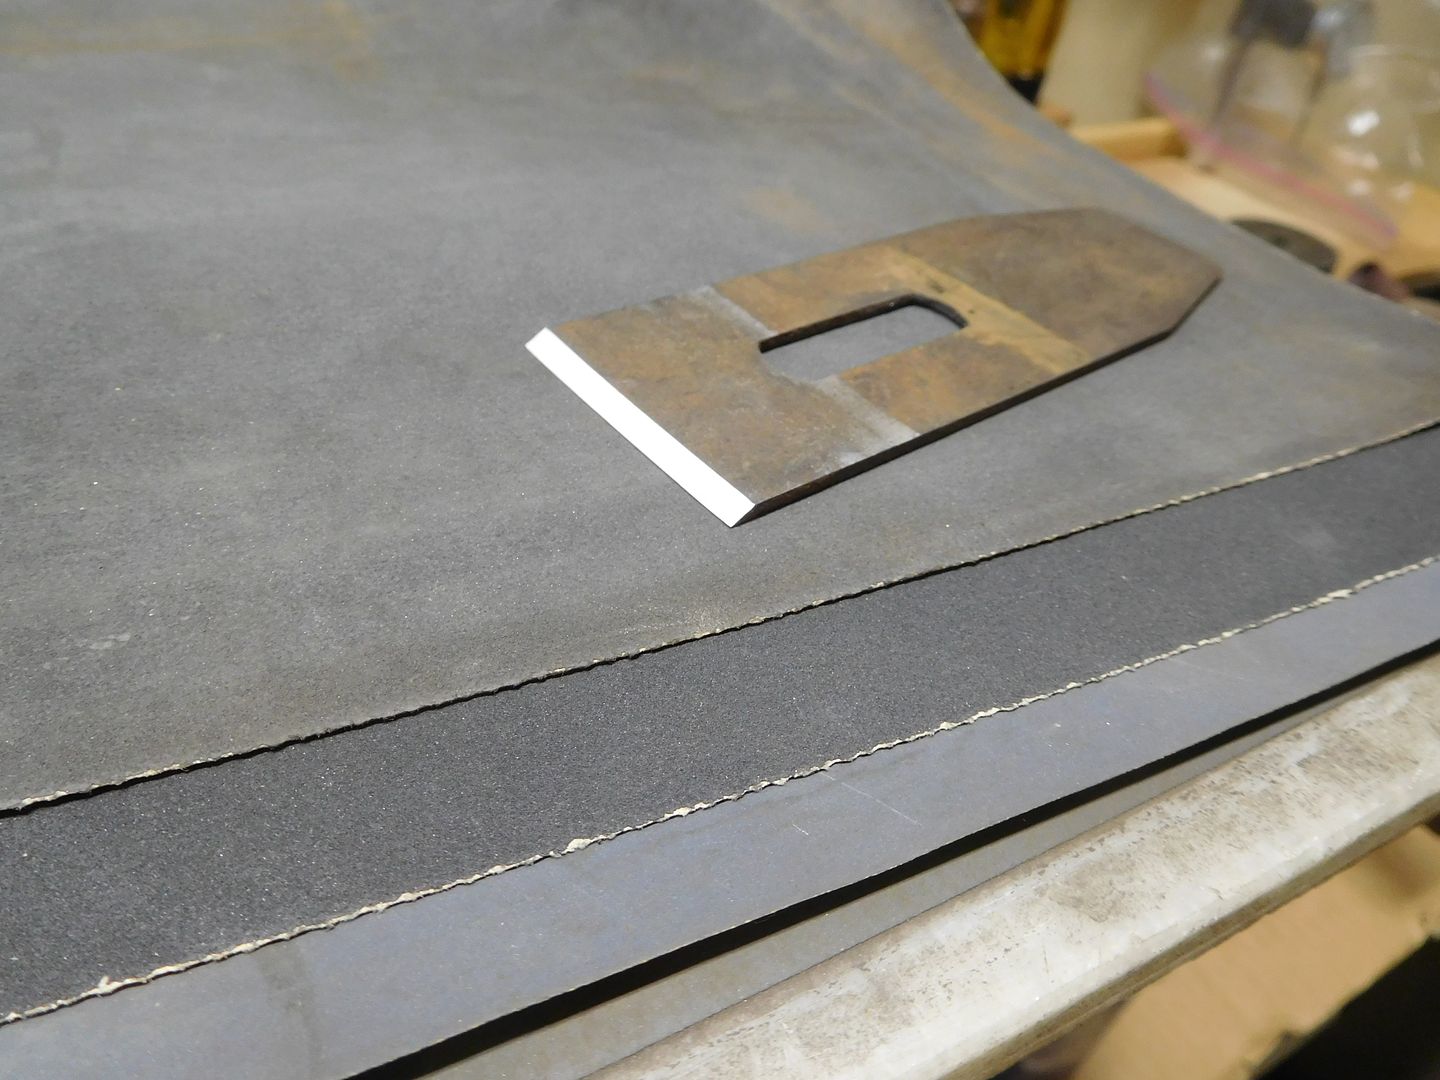
Here is the fine side with a flat jig mounted in the fixture.

DSCN3963.jpg


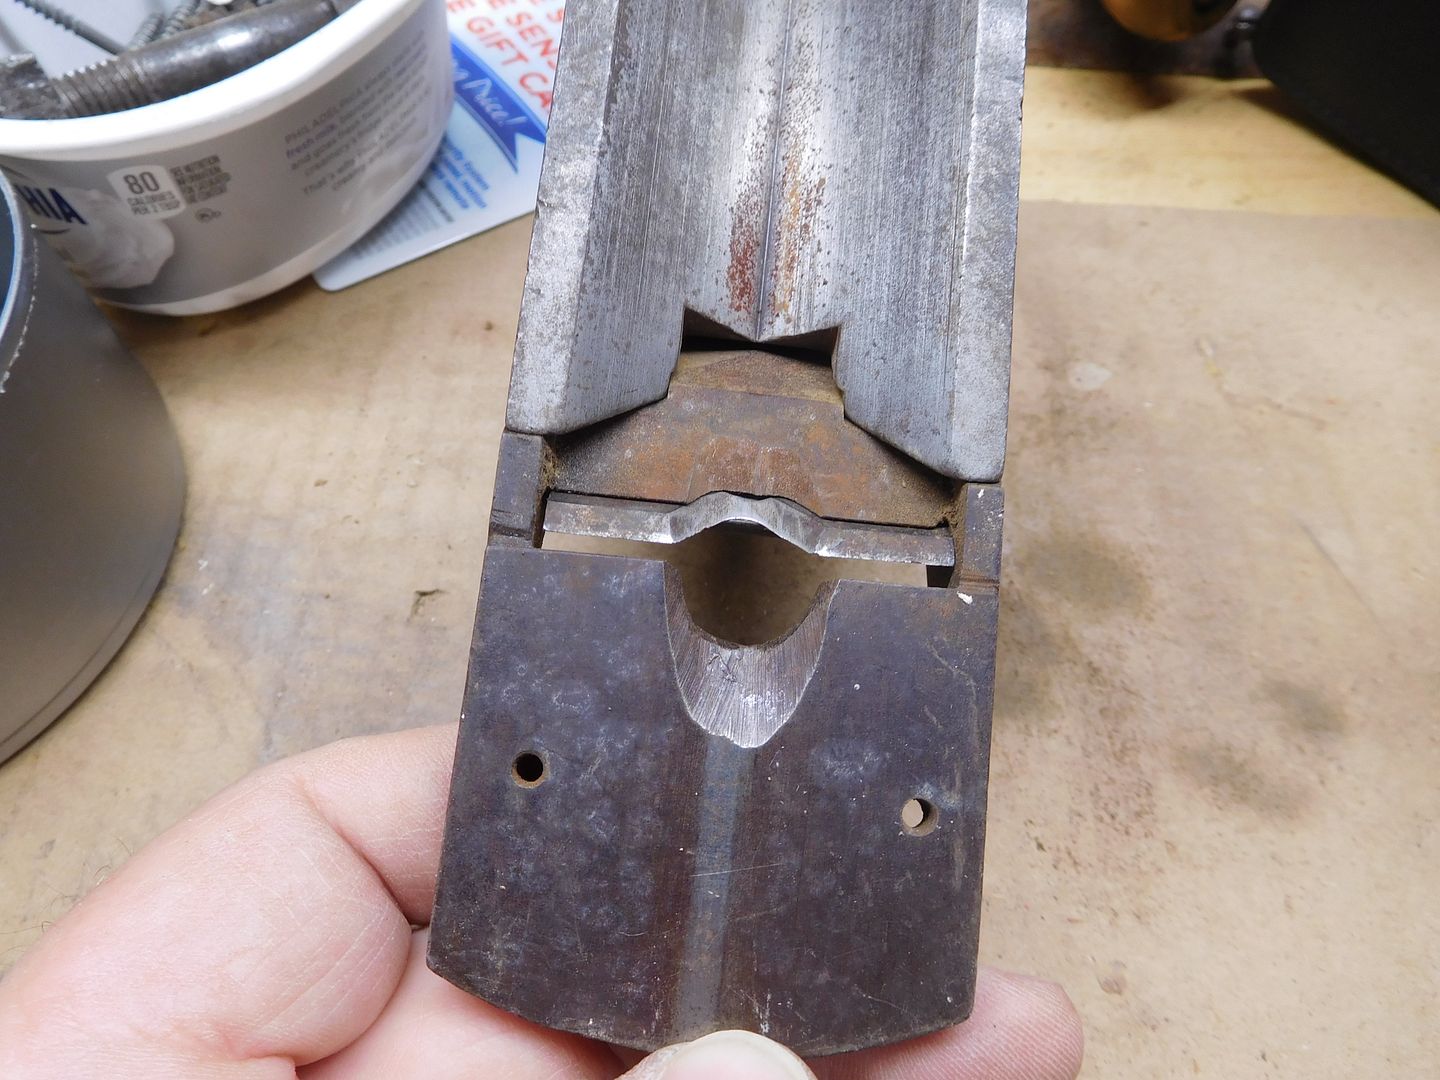
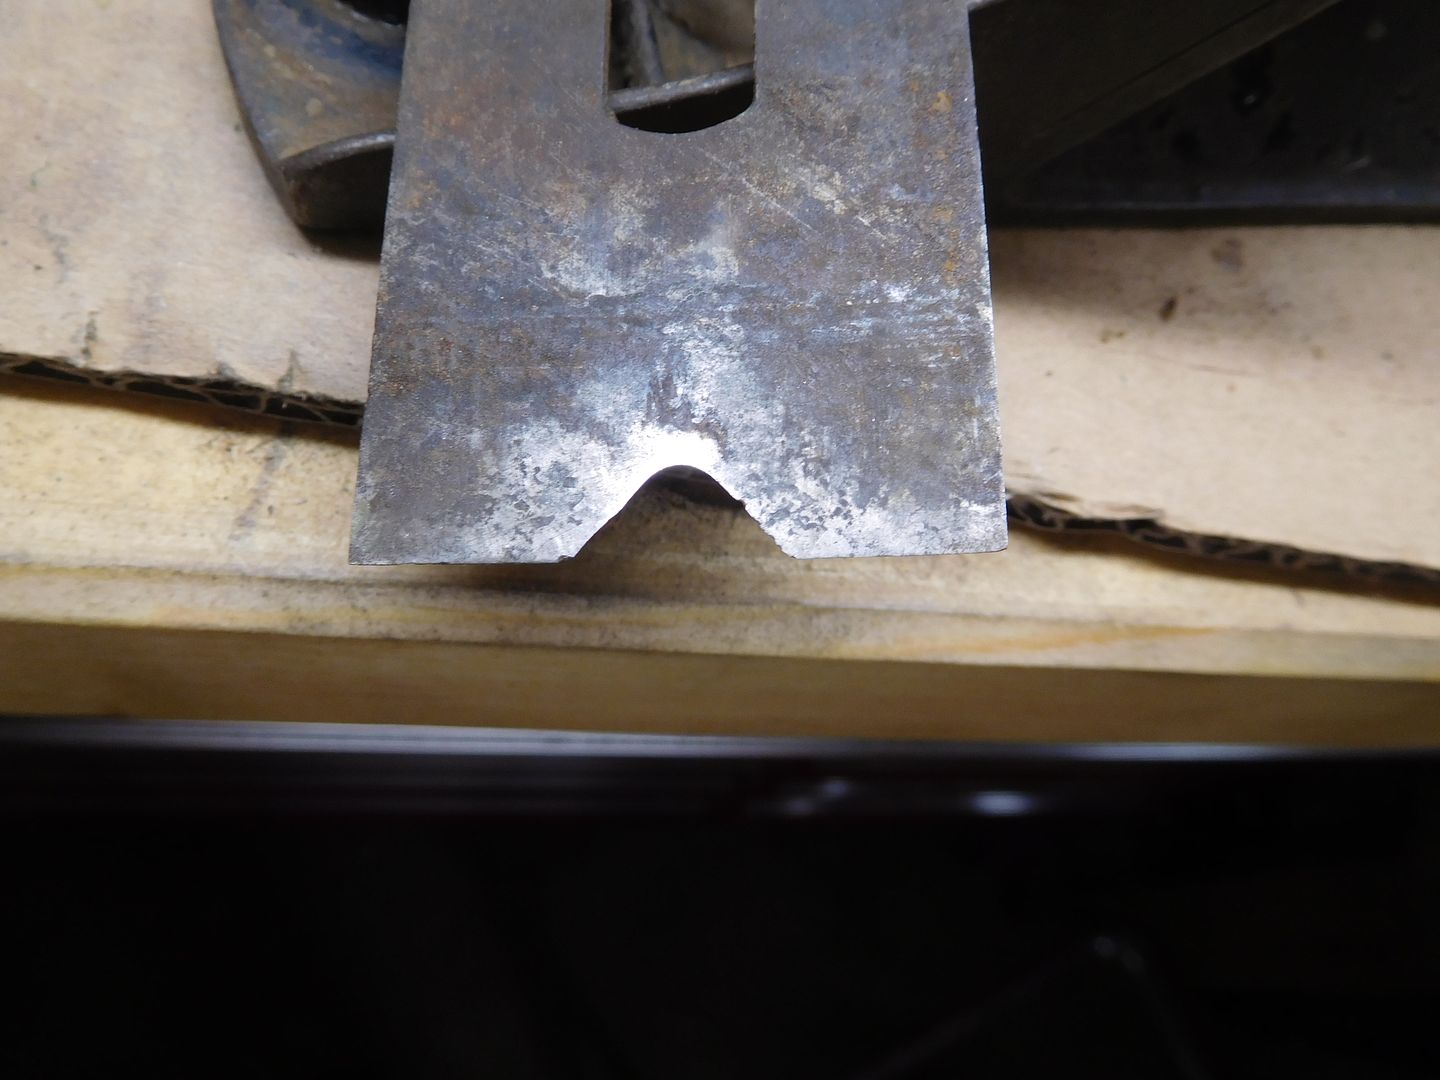
Here is the gouge jig in place on the coarse wheel (for demo).

DSCN3964.jpg


The end of the chisel sits in a square pocket and rotates freely during sharpening. Since the turning tools are made of high speed steel (HSS), they do not lose temper when being ground. All they really need is a quick kiss on the fine grey wheel and they are good to go.

DSCN3965.jpg


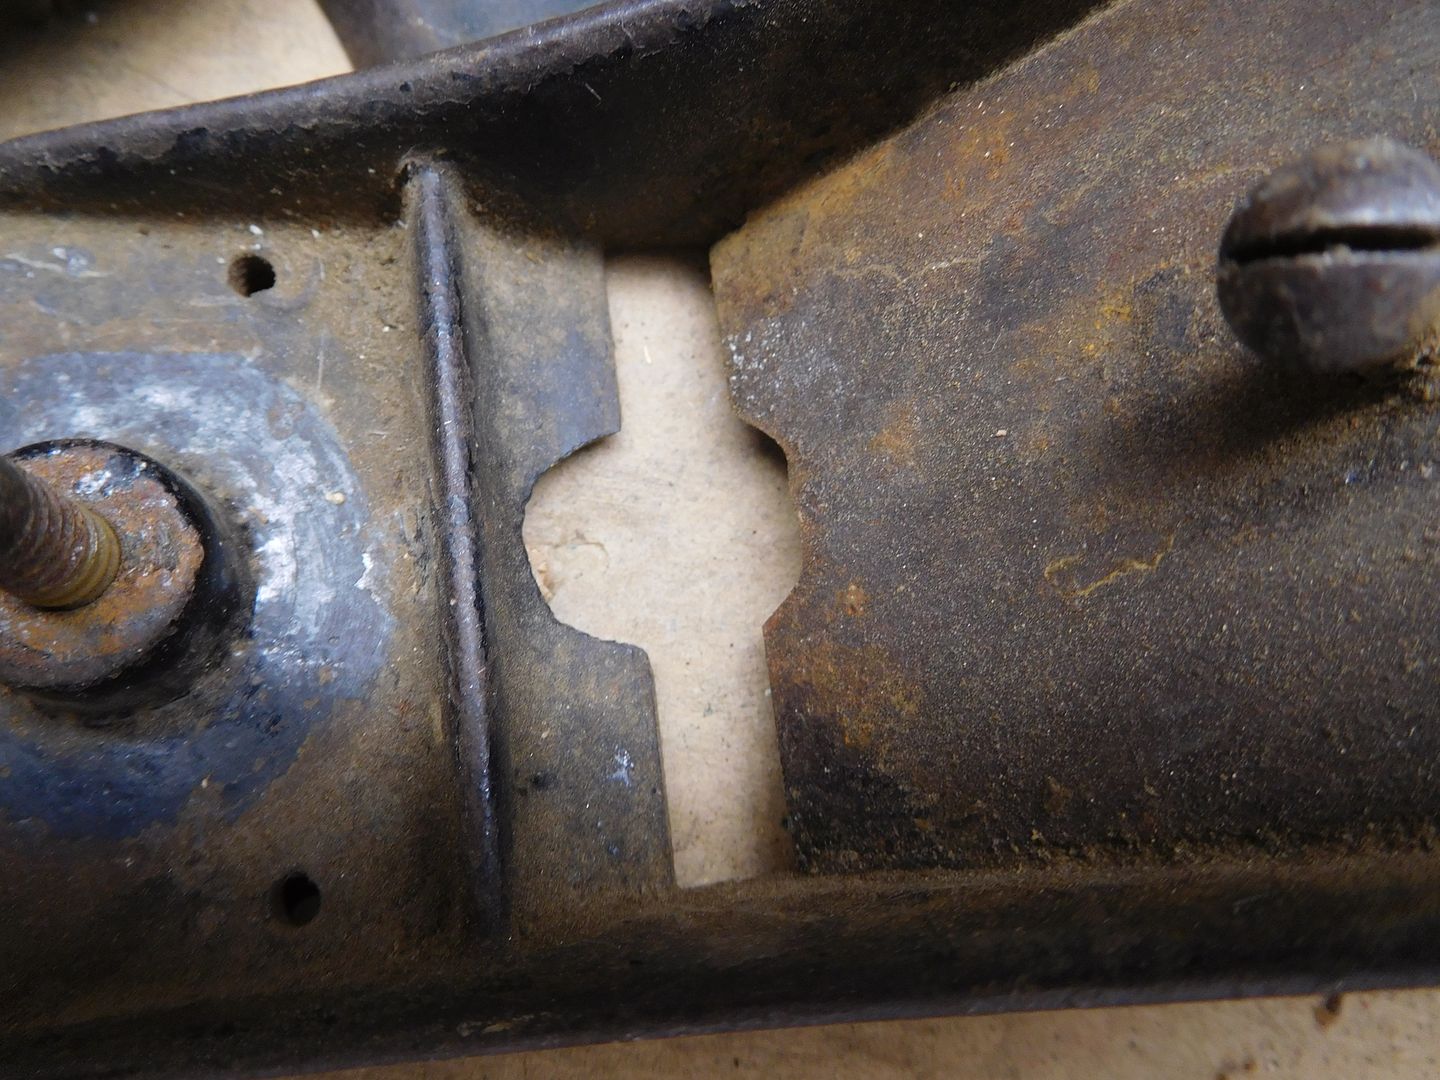
As you can see, adjusting the jig forward and backward changes the bevel angle.

DSCN3966.jpg


Sometimes I need to get closer to the wheel. I made this attachment that allows me to grind on the corners.

DSCN3971.jpg


The Veritas jig is pretty handy and is easy to adjust. There are two levers--one on each side--which make it easy to hit the correct location with the right angle.

DSCN3969.jpg


It has an accessory for holding blades.

DSCN3968.jpg


This holder slides back and forth in the slot.

DSCN3967.jpg


I do everything freehand and never use the blade holder. Once you get a feel for it, you can tell when the blade is flat against the flat of the wheel. But I do use an angle gauge.

DSCN3970.jpg


I noticed that my pink wheel was getting clogged.

DSCN3973.jpg


So I dressed it.

DSCN3974.jpg


And exposed clean grit.

DSCN3976.jpg


Grinding wheels NEED to be DRESSED. How often? FREQUENTLY. Grinding steel against the wheel causes abrasive to drop off and expose fresh grit. That makes the surface less than flat. And sometimes steel and worn out abrasive gets stuck in the matrix. Dressing makes the wheel surface flat, cleans off the goo and also exposes fresh and sharp abrasive. A clean wheel cuts more accurately and faster. Do yourself a favor and dress often.

There are many different tools that can be used to dress a wheel.

DSCN3975.jpg


Here you see the diamond tee dresser, an abrasive dresser, and a wheel dresser. Most of these can be had for less than $20 each and are well worth the investment. I like the diamond tee and have worn out many of them through the years. They are quick and accurate.

DSCN3974.jpg


Just hold the dresser against the wheel and slide back and forth. It takes about 5-10 seconds.

The other side of this grinder has a white wheel. It is coarser than the pink and I use it for coarse grinding. Coarse as in taking out nicks. The best way to deal with a nick is to grind it at 90 degrees and then reestablish the bevel. Grinding on the bevel heats up the thin edge too much. You can see that I use the grinder supplied tool rest on this side. It is just fine for my 90 degree grinding.

DSCN3977.jpg


I keep the Cool Whip container with water between these two fine work wheels. Remember that body temp is 98.6 F, water boils at 212 F and temper of O-1 tools steel changes begin around 400 degrees. Steel that is warm to the touch is higher than 100F. If you keep the temp below steam making you are not going to lose temper. If you plunge the blade into water and great hissing follows, you have probably already ruined the temper of the blade.

My first grinder blade guide was a long wooden dowel. I do not recommend that for obvious reasons. Sometimes I like to learn by doing and this educational experience involved smoke. You might be able to use the tool rest that comes with your grinder, but you will quickly want something that is easier and quicker to adjust. Best to fast forward and go for a Veritas or a Wolverine.

Keep one grinder with gray wheels for lawnmower blades and raw steel. Outfit your good grinder with pink and/or white wheels. Get a wheel dresser and use it.

Also wear eye protection and DO NOT stand in front of the wheel because sometimes they EXPLODE. Those wheel covers on the end have a purpose--don't leave them off. Good luck with your grinding.
 

rrich1

Well-known member
Joined
Oct 7, 2015
Messages
793
Got most of the routing done for the plywood panels of the top. Used a 1/4" spiral bit so it took a few passes with the router. Will do one more pass to finish it up. Then on to pillowing the corners and glue up. Bad pic warning.

Sent from my Pixel XL using Tapatalk
3aba57e097555346c72a0c51c10e5057.jpg
 

Attachments

  • 3aba57e097555346c72a0c51c10e5057.jpg
    3aba57e097555346c72a0c51c10e5057.jpg
    89 KB · Views: 1
To avoid these ads, REGISTER NOW!
Top Bottom