turbowoodworker
Well-known member
Frankenstein?

Looks like it. Looks like someone took a #5 and tried to make it a jointer.Frankenstein?
Goin to look at it Thursday. Looks like it was done decently from the pics looks as though the wood was added without modifying the plane itself. Might get it just for the stanley or may get it and leave the wood on it if it seems good. Guy wants ten bucksLooks like it. Looks like someone took a #5 and tried to make it a jointer.
Sent from my Pixel XL using Tapatalk
...Looks like it was done decently...


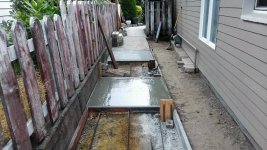
Deck is completed, now hopefully I get get 36 hrs without rain to treat it...


Adding to the part about the turning chisels. Roughing gouge is much beefier and better for roughing than a spindle gouge. And when turning the inside of a bowl only use tools made for it. Not just any tool. Tools for the inside are beefier for a reason. I watched someone try to use a skew inside a bowl. Broke two inches off the skew sending it into his hand and could have used stitches afterward. Here is a pic of a roughing gouge a spindle gouge and a bowl gouge.New project
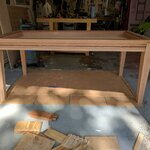
As I continue to procrastinate on the desk glue up, I am finding other things to do that do not require a workbench. Today's project was wooden faces for the hammer that I just rehandled. I know I have posted about this before, but here it goes again in case some of our new crowd has not gotten through all of the archives.
I started with a six inch hickory glue up. It was pretty simple. I glued two faces and let the glue sit for a few minutes to soak in. Then I glued the third face and clamped it up. Two days later and it is ready for turning.
I measured the size roughly with calipers.
And started to turn it down. This rough turning is dangerous and requires concentration because if you get too aggressive, the chisel may stick and flip.
My dad once flipped a carbide chisel into the ceiling. He was afraid of lathe work. But he was cheap and had flimsy chisels. Knowing his experience, I use BIG chisels and caution.
Pretty soon, I had a cylinder but it was too large. I picked a spot at random and used the parting tool to make a depth mark.
Then I turned the cylinder to that mark on both ends.
I used a pencil to mark the pieces to length and then used a skew chisel to make a chamfer.
I removed the tool rest and sanded the turning.
And now it is time to cut them apart. I use my bandsaw. But the bandsaw can be a dangerous tool for cutting small round pieces. You see, the blade can grab and spin the work. When that happens, all heck breaks loose and you lose yet another pair of good pants. If you choose this method, be sure you have a way of securing your work.
And then there were four.
I could not find a wrench large enough for the nut so I clamped the nut in my vise and turned the hammer.
So here is the money shot.
I picked up the Chicago hammer head for about ten bucks. The HD mattock handle was about $14. I dunked the hammer pieces into Evaporust overnight and brushed them down with BLO. Then I attached the head and cut down the handle. There is another head that needs the larger end so the replacement handle will actually be a toofer. The last step was to turn some hickory faces.
Now that I have these hammers around the shop I am finding many uses for them. One is to use these wood faced hammers to set the lathe endstock. I was using a ball pien but metal to metal is not good and will deform the endstock over time. These hammers are also good for knocking apart furniture without leaving marks. I have wooden mallets but the hammers are smaller and pack more punch.


I'm still not quite happy with the shavings though. Some is technique I can get a good strip then a bunch of dust the next pass. Only sharpened to 320 grit stone but it was shaving sharp. I might go up to 1000 if I have time. It chatters slightly along the wood so I've got to fiddle a little more with it. Another turning tip. Pay attention to the grain when gluing up to turn. Want the grain to go from yardstick to tailstock not perpendicular to them or turning will be a pain and you will have lots of problems and end up using a rasp in the end to get rid of the problems.teen--Good tips on turning. Glad to see you got your #50 making shavings. Some planes seem to need a little more fiddling than others.
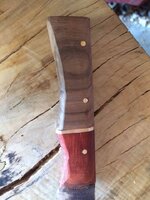
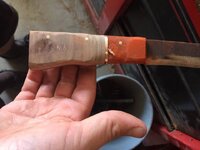
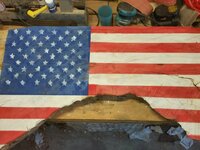
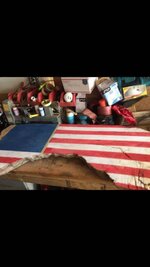
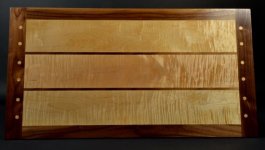
R--I'd place the white wood against other light wood or along an edge, rather than against dark wood.


![WP_20170416_088[30425].jpg](/forum/data/attachments/564/564530-d489c1b35ae959f5791044934c456b00.jpg)
![WP_20170416_091[30428].jpg](/forum/data/attachments/564/564568-fe05693a1bf77fc8e0c77371ac61629b.jpg)
![WP_20170416_094[30431].jpg](/forum/data/attachments/564/564602-0dd7d1e5a7593a995d2e00f3adec4bb1.jpg)