To avoid these ads, REGISTER NOW!

Woodworking 101--Tools and Tips

Unruh

Well-known member
Joined
Aug 12, 2017
Messages
1,431
Location
Silverdale, Washington
A WW Buddy

Ten or twelve years ago I worked closely with a colleague named Dan. We discovered early on that we both liked woodworking. I was talking about planes one time and he got intrigued. I told him I could bring in a different plane each Friday and we could have show and tell. He asked how long I could keep it up. I replied, "Forever." His office was beside mine and I brought in a different kind of plane every Friday for over two years until he changed jobs. Those short sessions of ww bonding created some great memories.

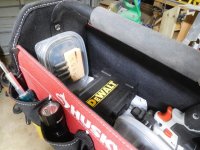
During that time, we talked each other into buying DeWalt contractors saws. When I unboxed mine, I set it up and then went to the bandsaw with a scrap of plywood and made my push stick. It has held up well over the years.

Jim, I love that story. I’m a teacher and don’t get too much tool talk with the ladies or kids at my job.
 
To avoid these ads, REGISTER NOW!
OP
J

jimreed2160

Well-known member
Joined
Aug 7, 2016
Messages
3,589
Location
Tallahassee FL
Tree day

Tuesday was tree day. There was a junk camphor tree leaning over my back patio that has been on my list for awhile. The trunk was about 8" in diameter and the tree was about 30 feet long. Not too big but too close to the house for an easy drop. So I pitched a plumb bob on a string over a branch that was about 15 feet high. Then I ran a rope up the string and tied it into a loop. Next I fixed the come-along to another tree and pulled on the loop. This six feet of sideways tension was all I needed to bring it away from the roof.

Tree dropped with a thump and I spent the next hour dragging brush. I can get the trunk later. Sorry for no pictures, but these tree photos don't show the excitement very well. I wish this tree had some nice wood so there would be a reward of some sort. But the camphor is not worth the trouble.
 
OP
J

jimreed2160

Well-known member
Joined
Aug 7, 2016
Messages
3,589
Location
Tallahassee FL
New product for shop

Those guys at Lee Valley Tools must be working overtime these days. I found this sanding product and it just came in. Sorry to sound like an ad but I am not a paid spokesperson--in fact, I paid full price for this thing.

It is a box of five sandpaper rolls which provide graduated strips of paper from 80 to 320 grit. Now when I need a little niblet of paper, I can just cut one of these off and go to town. I am sure it will come in handy on those plane rehabs.
 

Attachments

  • DSCN5780.jpg
    DSCN5780.jpg
    143.2 KB · Views: 75
  • DSCN5781.jpg
    DSCN5781.jpg
    146.1 KB · Views: 53

madison069

Well-known member
Joined
Nov 5, 2010
Messages
4,155
Location
Monroeville, PA
THat sandpaper roll dox gave me a idea for my emery clothes rolls I have laying around the garage. I always use them for cleaning up surfaces on engines and car related things so I'll make something out of metal/wood to help hold up better!
 
OP
J

jimreed2160

Well-known member
Joined
Aug 7, 2016
Messages
3,589
Location
Tallahassee FL
GJ fever!

GJ is a nice place to hang out with friendly tool lovers and chat. The upside is that you find out about all kinds of neat tools. The downside is that you may begin to lust after some of those tools. I saw this thing in another thread, got excited, and just had to run down to HD to get my grubby little mitts on one.

It is a $21 dollar vac that attaches to a 5 gal bucket. So by the time you buy one and a new HD bucket, you have invested a total of $25. Seemed like a no brainer to me because dedicating this one to my oscillating spindle sander means that I free up a shop vac. The sander setup was supposed to be temporary but I got caught up in tote repair and other misc projects and have not been able to tear it down. Sure is nice to have it available all the time.
 

Attachments

  • DSCN5784.jpg
    DSCN5784.jpg
    133.3 KB · Views: 63
  • DSCN5785.jpg
    DSCN5785.jpg
    140.6 KB · Views: 66

sdavis622

Well-known member
Joined
Mar 19, 2014
Messages
518
Location
Surprise, AZ
GJ fever!


GJ is a nice place to hang out with friendly tool lovers and chat. The upside is that you find out about all kinds of neat tools. The downside is that you may begin to lust after some of those tools. I saw this thing in another thread, got excited, and just had to run down to HD to get my grubby little mitts on one.


It is a $21 dollar vac that attaches to a 5 gal bucket. So by the time you buy one and a new HD bucket, you have invested a total of $25. Seemed like a no brainer to me because dedicating this one to my oscillating spindle sander means that I free up a shop vac. The sander setup was supposed to be temporary but I got caught up in tote repair and other misc projects and have not been able to tear it down. Sure is nice to have it available all the time.


Jim, I’ve notice these too and wondered how well they work. Thinking about grabbing one to put under my miter saw station. What are your initial thoughts?


Sent from my iPhone using Tapatalk
 
OP
J

jimreed2160

Well-known member
Joined
Aug 7, 2016
Messages
3,589
Location
Tallahassee FL
I have only had a little time to test the bucket vac but I think it will do just fine. There appears to be enough suction to take care of what needs to be done. The sander has different sized baffle rings that limit the open space under each tube. And most dust falls right through. In addition, I am considering moving this sander to a bench that is close to my new air scrubber and that will take care of any fines that escape.

I like having a dedicated bench for the sander but the current bench is too much real estate to lose. I also have a tote project coming up so maybe this weekend I can move it and do a real test.
 

jar944

Well-known member
Joined
Jul 26, 2010
Messages
5,917
Location
Northern VA
Any one else here have a tenoner? I picked up this 5 head single end Millbury 106lt yesterday. 3hp 3 phase, flat belt drive.

It's the design the powermatic 2a tenoner was based on.
 

Attachments

  • IMG_2123.JPG
    IMG_2123.JPG
    114.1 KB · Views: 81
  • IMG_2124.JPG
    IMG_2124.JPG
    96.4 KB · Views: 84
  • 20180222_181821.jpg
    20180222_181821.jpg
    147 KB · Views: 84

cheechi

Well-known member
Joined
Feb 29, 2012
Messages
4,384
Location
Triad, NC
quick question for those that have more experience. Watco Danish Oil, in my case it's got a finish colour to it, not sure if that makes it different from just regular Danish Oil. If I do a top coat of Tung oil is that going to work? I don't have a lot of experience with what bases doesn't like what.

I'm trying to polish a turd, getting a cheap bass neck from China, maple with rosewood fingerboard. I'm going to tape over the rosewood and keep it natural. Usually I use minwax stains with 3 coats of poly for everything. Thinking that's going to be too thick for this project.

thanks in advance.
 
OP
J

jimreed2160

Well-known member
Joined
Aug 7, 2016
Messages
3,589
Location
Tallahassee FL
Jar--That is some impressive iron. Let us know how it works.

Chee--Danish oil is linseed oil and varnish. Tung oil is tung oil. They should be compatible. I have never used Watco but it is a very popular product. My experience with Tung oil is limited but I liked it because it looked so natural.

For your new axe, I would start with tung oil. You can always clean it up and try something else later if you don't like the look.
 

cheechi

Well-known member
Joined
Feb 29, 2012
Messages
4,384
Location
Triad, NC
Thanks for the advice. I'm going to do a small bit inside the heel to see how it looks when it dries, of each. that way I can plan how many coats are needed and feel the texture in a hidden spot. It's going on a natural finish, gloss coated swamp ash body so I can't let it get too dark.

Do you have any experience with tru-oil also?
 
OP
J

jimreed2160

Well-known member
Joined
Aug 7, 2016
Messages
3,589
Location
Tallahassee FL
Tru oil is a mixture of mineral spirits, varnish, and (boiled) linseed oil or tung oil. Haven't used it but I would bet that it is a lot like Watco. I like your idea of using a test piece. It may take a week or two to get it dialed in just right but that will be time well spent.

My early finishing efforts were rushed and my results were inconsistent. Sometimes I nailed it and sometimes I did not. Now that I have slowed down my process (why rush?) my finishing is much more consistent and closer to my original vision. Patience is virtue in ww.
 

jar944

Well-known member
Joined
Jul 26, 2010
Messages
5,917
Location
Northern VA
I spent the afternoon running door stop moulding for a door I installed last weekend.
 

Attachments

  • 20180213_184457-1195x2124.jpg
    20180213_184457-1195x2124.jpg
    141.9 KB · Views: 67
  • 20180213_203846-2124x1195.jpg
    20180213_203846-2124x1195.jpg
    149.2 KB · Views: 72
  • 20180217_213122-2124x1195.jpg
    20180217_213122-2124x1195.jpg
    135.7 KB · Views: 89
  • 20180224_140439-2124x1195.jpg
    20180224_140439-2124x1195.jpg
    151.9 KB · Views: 68
  • 20180224_142912-2124x1195.jpg
    20180224_142912-2124x1195.jpg
    138.6 KB · Views: 69
  • 20180224_135450-2124x1195.jpg
    20180224_135450-2124x1195.jpg
    151.9 KB · Views: 71
  • 20180224_143336-2124x1195.jpg
    20180224_143336-2124x1195.jpg
    141 KB · Views: 77

turbowoodworker

Well-known member
Joined
Mar 18, 2012
Messages
3,533
Location
Apex NC
Hey Cheechi,
I used Truoil once and it was on a gun stock. It ended up being way more smooth and glossy than Watco. Now I am presuming your are talking about the Truoil brand by Birchwood-Casey. Watco is my go to finish for a natural look.
 

cheechi

Well-known member
Joined
Feb 29, 2012
Messages
4,384
Location
Triad, NC
Yes exactly. Watco happens to be the Danish oil I have or what's available locally if I wanted to buy more or a different finish colour. If I buy a bottle of Tru oil it will be the BC brand.

So for a guitar or bass neck, I want something smooth so it's easy to play but not so slick that it's too slippery. I personally don't know how much is too much or not enough yet. I know that that these several products are whats been used by others who don't have the setup to spray nitro or the like.

Not that the neck is all that expensive but I'm not quite ready to wet sand either. That's why I was thinking I could do a coat of danish in the colour I like, then top coat with tung or tru oil to get the feeling I like to go with it.

Jim had some comments about marking the other day and I just happened to be moving some of my pencils from one cabinet to another, so I took a photo during. The Sanford Technician II is by far my favourite of the mechanicals, the Mitsubishi my favourite wood pencils.
20180224_112242.jpg
 
OP
J

jimreed2160

Well-known member
Joined
Aug 7, 2016
Messages
3,589
Location
Tallahassee FL
Jar--Nice setup and great doors.

Che--Since you are going for a certain feel, you should be able to try the product on some shop scraps. I would make a neck from some scraps similar to your project. Do the finish sanding and then apply finish. Let it dry and see how it feels. One of the issues we all have as part-time woodworkers is that we always seem to be working on one-off projects. You can reduce some of the risk with models and prototypes. As luck would have it, finishing is the easiest thing to try out on a substitute. Good luck.
 

cheechi

Well-known member
Joined
Feb 29, 2012
Messages
4,384
Location
Triad, NC
Thanks again. Would maple ply scraps approximate real solid maple, considering the ply is flat and the maple neck is curved? It's the only other maple I have in any form. I mean just for the purpose of feeling how glossy & slick the finish turns out it should be fine you think?
 
OP
J

jimreed2160

Well-known member
Joined
Aug 7, 2016
Messages
3,589
Location
Tallahassee FL
In my experience plywood has a different absorption rate for finishes. That is also somewhat true for different boards from the same stack. So I think the maple would be OK for testing. The final finish feel of the maple ply should approximate your project well. But how you get there might be different. The ply may take more or less coats if the absorption is a little different. That variable should be easy to adjust for when you are doing your project.
 
To avoid these ads, REGISTER NOW!

Bob Heine

ALLIANCE MEMBER
Joined
Oct 24, 2009
Messages
10,705
Location
Boca Raton, Florida
I have the usual sharpened wood pencils and carpenter's pencils in the workshop but I keep the mechanical pencils and Incra Rule in the office or garage. BGJ (Before Garage Journal) my mechanical pencils were just for jotting down notes. AGJ (obviously After Garage Journal) they are for marking -- more accurately than in the past.
attachment.php
attachment.php


Office Depot and Staples still sell Pentel mechanical pencils and I think I bought a 3-pack about 25 years ago for $5. They're about $9 for two now. They aren't fancy but the 0.5mm ones work perfectly with the Incra Rule. Just be careful because they also sell mechanical pencils (like my red Berol) for 0.7mm and 0.9mm leads and those won't work with an Incra Rule.

I did buy that uni KURU TOGA pencil just to see if it was a better tool. It works fine but the narrower Pentels are easier for me to see the hole I'm putting the lead in. At around $8 it isn't too extravagant but it helped me decide I didn't need to throw out the cheap ones.
 

Attachments

  • Marking and Measuring.jpg
    Marking and Measuring.jpg
    107.5 KB · Views: 169
Last edited:
OP
J

jimreed2160

Well-known member
Joined
Aug 7, 2016
Messages
3,589
Location
Tallahassee FL
Well thanks for Bob's inspiration, I managed to get control of my bits. Shop time this morning was spent making cases for some of the loose bits. I made one for the plug cutting set, two for loose Forstners, and a backer board for a random set of hex pilot bits.

Thanks Bob!
 

Attachments

  • DSCN5787.jpg
    DSCN5787.jpg
    137.8 KB · Views: 83
  • DSCN5790.jpg
    DSCN5790.jpg
    138.2 KB · Views: 76
  • DSCN5793.jpg
    DSCN5793.jpg
    133.5 KB · Views: 74
  • DSCN5796.jpg
    DSCN5796.jpg
    135.9 KB · Views: 76
  • DSCN5800.jpg
    DSCN5800.jpg
    136 KB · Views: 71
  • DSCN5801.jpg
    DSCN5801.jpg
    147.9 KB · Views: 64
OP
J

jimreed2160

Well-known member
Joined
Aug 7, 2016
Messages
3,589
Location
Tallahassee FL
Which way?

Others might not have this problem, but I find it vexing when I have to stop and figure out a tool in my shop. The vacuums are the worst because I have several and cannot remember which port is "****" and which one is "blow". None of them are intuitive to me and I usually have to turn them on to figure it out. Well, I decided to mark my new bucket vac at both ends.

Problem solved.
 

Attachments

  • DSCN5795.jpg
    DSCN5795.jpg
    127 KB · Views: 42

Bob Heine

ALLIANCE MEMBER
Joined
Oct 24, 2009
Messages
10,705
Location
Boca Raton, Florida
I bought some new router bits, specifically for the ice maker/audio cabinet project. I ordered a set of five dado bits (1/4", 3/8", 1/2", 5/8" and 3/4"). I also bought a tongue and groove set of bits and two locking miter bits for some other possible future projects. I have mostly high-speed steel bits from 25- or 30-years ago (black box).
attachment.php


Soon after I ordered the five dado bit set I recalled a GJ comment about plywood-dimension router bits and went searching. Sure enough there's a three-bit set (as well as a 4-bit set). I really only want the 13/64" and 23/32" bits but the other one may come in handy some day.
attachment.php
 

Attachments

  • Router Bits 2.jpg
    Router Bits 2.jpg
    89.2 KB · Views: 462
  • Router Bits 1.jpg
    Router Bits 1.jpg
    74.3 KB · Views: 461

Bob Heine

ALLIANCE MEMBER
Joined
Oct 24, 2009
Messages
10,705
Location
Boca Raton, Florida
Well thanks for Bob's inspiration, I managed to get control of my bits. Shop time this morning was spent making cases for some of the loose bits. I made one for the plug cutting set, two for loose Forstners, and a backer board for a random set of hex pilot bits.

Thanks Bob!
You're welcome Jim.

We must be having senior moments in parallel universes. I decided that my single plug cutter was inadequate so I bought an 8-bit set like the one you show. They arrived loose in a couple of bags within a bag so I thought I would make a simple rack. I laid the cutters down next to a piece of furring and marked the centers. Used my Incra Rule to mark the center to intersect with all my other marks. It's great to be able to mark one line from each side and know the open space between them is dead center. I thought drilling a series of holes with twist bits would work but it didn't come out perfect.
attachment.php


I own a drill press so I thought it might help if I used it to drill the holes. It also occurred to me that I have a set of cheap Forstner bits that might work better. Because the drill press and Forstner bits are in the workshop I had the opportunity to find a scrap piece of walnut.

I stepped through the sizes from 1/4" through 3/8" and the holes came out much better.
attachment.php


That vise isn't a precision piece of equipment but it was a lot better than doing it by eye.

To my surprise, all but one of the plug cutters fit fine. Turns out the machining line at the Chinese plant decided to make the smallest plug cutter have a slightly larger stem. I was fortunate to find a 13/32" twist drill and was able to enlarge the one hole. My original plug cutter took center stage in the holder. I am pretty sure I've had that one for more than 30 years.
attachment.php


I went a little overboard sanding and Tung oiling the finished piece. My mind seems to forget things that are out of sight so I may have to mount the rack on the cabinet door next to the Costco drill rack. Just need to bevel the back a bit.
 

Attachments

  • Plug Cutter Rack 3.jpg
    Plug Cutter Rack 3.jpg
    68.3 KB · Views: 462
  • Plug Cutter Rack 2.jpg
    Plug Cutter Rack 2.jpg
    118.7 KB · Views: 467
  • Plug Cutter Rack 1.jpg
    Plug Cutter Rack 1.jpg
    123.2 KB · Views: 467

Craptain

Well-known member
Joined
Apr 18, 2013
Messages
4,028
Location
Tampa Bay FL
I approached my plug cutter storage from the opposite direction so to speak. I drilled the cutters into the wood as if making plugs, but left them like that. It protects the cutting edge of the tool, and protects fingers from said cutting edges when reaching carelessly. Which of course I never do....

Sent from my SM-G930T using Tapatalk
 

EOC_Jason

Well-known member
Joined
Jun 25, 2012
Messages
11,388
Location
Bentonville, AR
Quick question... I don't feel like going to Lowe's *just* to get a small piece of dowel rod.. I know if I go I will waste at least a couple hours and end up buying a lot more than just the stupid dowel... :lol:

Any easy way to make a 5/8" dowel rod without a lathe or special tools? Doesn't need to be long or fancy, just need it for some saw blades...

Was considering just cutting a square piece to close dimensions and going at it on the belt sander?
 

drivesitfar

Well-known member
Joined
Oct 23, 2013
Messages
36,009
Location
Pacific Northwest
Jason: i like your idea of just cutting some small square pieces of oak or whatever wood you have available and then shaping them on your belt sander or other sanding tools.

I think Jim actually has a tool that turns wood into dowels that he posted up pictures on this thread maybe last year.

good luck and I hear you about going to the HD or Lowes and trying to get out of there with just what you went for. it's part of the reason i'm trying to make my own DRIVESITFAR'S HARDWARE STORE here so I don't have to leave during a project.

hope you all had a great weekend. i spent half the day at our city's HOME SHOW and saw a few interesting things.
 
OP
J

jimreed2160

Well-known member
Joined
Aug 7, 2016
Messages
3,589
Location
Tallahassee FL
Quick question... I don't feel like going to Lowe's *just* to get a small piece of dowel rod.. I know if I go I will waste at least a couple hours and end up buying a lot more than just the stupid dowel... :lol:

Any easy way to make a 5/8" dowel rod without a lathe or special tools? Doesn't need to be long or fancy, just need it for some saw blades...

Was considering just cutting a square piece to close dimensions and going at it on the belt sander?

I use my handy #77 dowel machine but they are a bit rare. Another way is to plane a rounded edge on a piece of 4/4 lumber, rip it free, and then round the other half. I would use my H&R plane set but a block plane would work just fine.
 
OP
J

jimreed2160

Well-known member
Joined
Aug 7, 2016
Messages
3,589
Location
Tallahassee FL
I approached my plug cutter storage from the opposite direction so to speak. I drilled the cutters into the wood as if making plugs, but left them like that. It protects the cutting edge of the tool, and protects fingers from said cutting edges when reaching carelessly. Which of course I never do....

Very clever indeed. I will file that idea away for future consideration.
 

EOC_Jason

Well-known member
Joined
Jun 25, 2012
Messages
11,388
Location
Bentonville, AR
Another way is to plane a rounded edge on a piece of 4/4 lumber, rip it free, and then round the other half. I would use my H&R plane set but a block plane would work just fine.

That's an idea... Well hopefully I won't get sidetracked today and will be able to get my project done and I'll report back with the finished product!
 
OP
J

jimreed2160

Well-known member
Joined
Aug 7, 2016
Messages
3,589
Location
Tallahassee FL
That's an idea... Well hopefully I won't get sidetracked today and will be able to get my project done and I'll report back with the finished product!

Here is another idea that popped into my head last night in a fever dream. You can drill two 5/8" holes in some thin plywood and use them for templates. Save one intact. Cut the other one in half. I think plywood gauges would be easier to use than calipers. Good luck.
 

Bob Heine

ALLIANCE MEMBER
Joined
Oct 24, 2009
Messages
10,705
Location
Boca Raton, Florida
I like Andrew's (Craptain's) idea for cutter storage. My walnut scrap collection doesn't have a large enough piece but I'm going to file that idea somewhere besides my brain, which tends to lose things.

I managed to mount the racks on the cabinet door in the workshop after beveling their back sides (I know I'm going to get grief for "nice rack" and nice backside"). The first rack I made with a scrap of pine to hold 1/4" hex-drive drills and countersinks also went on the door. I may someday find a better location but for now I'm just happy to have them off the bench.
attachment.php
 

Attachments

  • Plug Cutter Rack 9.jpg
    Plug Cutter Rack 9.jpg
    100.8 KB · Views: 432

EOC_Jason

Well-known member
Joined
Jun 25, 2012
Messages
11,388
Location
Bentonville, AR
So I took the easy way out and I think also the better way. I found a 5/8" bolt that was just about the right length. I drilled a hole with a forstner bit leaving a little ledge of the head head above the height of the wood to compensate for the thickness of the carbide tips on the blade. I was going to chisel out the rest of the hex pattern of the bolt but ended up just threading the nut on the end to make it flush then beat it in the hole with a brass hammer and filled the gaps in with glue.

I'll probably sand it a little but it's just some scraps of 3/4" ply, not like I'm trying to make some high dollar box. Just needed something to keep my $10 dado set from Habitat safe. The original plastic packaging was brittle and coming apart.

I need to order some shims which I have room on the bolt to place them or I can drill some recesses in the base.
 

Attachments

  • 20180201_110035.jpg
    20180201_110035.jpg
    151.5 KB · Views: 45
  • 20180226_171239.jpg
    20180226_171239.jpg
    56.1 KB · Views: 43
  • 20180226_171016.jpg
    20180226_171016.jpg
    128.7 KB · Views: 47
  • 20180226_171003.jpg
    20180226_171003.jpg
    121.7 KB · Views: 45
Last edited:
OP
J

jimreed2160

Well-known member
Joined
Aug 7, 2016
Messages
3,589
Location
Tallahassee FL
Bob--I like your organizing ideas. It is nice to be able to see things because they can get lost inside a drawer.

Jason--Nice storage. I agree that the bolt is better than a dowel.
 

EOC_Jason

Well-known member
Joined
Jun 25, 2012
Messages
11,388
Location
Bentonville, AR
I was in Wallyworld today and in the grill section on an endcap they had some various grill related thing on clearance...

One was some cheapie grill covers for $1! I know they wouldn't hold up for squat outside, but I figured they would make great dust covers to go over some equipment in the garage that I don't use too often. :)
 
OP
J

jimreed2160

Well-known member
Joined
Aug 7, 2016
Messages
3,589
Location
Tallahassee FL
I was in Wallyworld today and in the grill section on an endcap they had some various grill related thing on clearance...

One was some cheapie grill covers for $1! I know they wouldn't hold up for squat outside, but I figured they would make great dust covers to go over some equipment in the garage that I don't use too often. :)

Handy things show up in strange places.
 

CRSINMICH

Well-known member
Joined
Aug 15, 2015
Messages
2,397
Location
Southeastern Michigan
TAIL VISE​
I got a Sheldon vise at an estate sale last fall. While trying to find information about it, I ran across an article by Chris Schwarz. He had mounted one as a tail vise on one of his Roubo benches. He liked it so much that I decided to mount mine to my laminated construction grade 2x4 bench top.

The first task was to chisel out a recess on the underside and one on the end grain of the top for the static part of the vise. Even though I was lucky enough to have a very sharp Sorby framing chisel, I had to go all Mjolnir on its **** to make headway through the end grain of the stringy fir. Actually, the hardest part was that I had to do it while upside down.

After I got the Sheldon mounted, all that was left was to fab some jaw faces (see post #4637) and bore some dog holes. The advantage to using a Sheldon is that it is Quick Adjust. All you have to do is lift the handle to 12 o'clock, slide the dynamic jaw to fit the workpiece, then turn the handle down to 3 o'clock.

I put it to use this morning smoothing the faces of freshly resawn walnut. It worked great.

Just to emphasize one of the subtle benefits of using only hand tools, I added a picture of my dust collection system.

This project was, I hope, the final preparation for an all hand tool project for which I have been gearing up for far too long. I now have the tools, techniques, space, and enough practice to begin. Stay tuned - but don't hold your breath.
 

Attachments

  • A) 1916 Mongomery Ward catalog p 871.jpg
    A) 1916 Mongomery Ward catalog p 871.jpg
    125.5 KB · Views: 74
  • B) Thor and Sorby.jpg
    B) Thor and Sorby.jpg
    166.3 KB · Views: 85
  • C) Mounted and faces added.jpg
    C) Mounted and faces added.jpg
    113.5 KB · Views: 87
  • D) Quick adjust.jpg
    D) Quick adjust.jpg
    129.3 KB · Views: 85
  • E) First use of Sheldon tail vise.jpg
    E) First use of Sheldon tail vise.jpg
    147.7 KB · Views: 80
  • F) Dust collection system.jpg
    F) Dust collection system.jpg
    150.8 KB · Views: 78
Last edited:
OP
J

jimreed2160

Well-known member
Joined
Aug 7, 2016
Messages
3,589
Location
Tallahassee FL
CRS--Too much eye candy. Love the Thor hammer and the vise and the plane. As for your dust collection system, I have the same one. :beer:

Looks like you are ready to make some serious shavings.
 
To avoid these ads, REGISTER NOW!
Top Bottom