PugetDude
ALLIANCE MEMBER
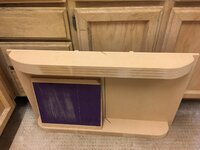
Nice piece of walnut, I see why you selected it. Agree with crsinmich that it's going to be a bit of a challenge with that grain; might be a good idea to take a practice run with a piece of radiata pine of even MDF before you commit to cutting up that specimen piece. If you have resaw capability you might resaw a section of that fancy grain, flip one piece and glue it back together as a bookmatched panel (like your photo) for the top of the box; it would be stunning. The box itself could be made out of the thicker material, but the top and botton could be thinnner and set into a dado or rabbet. For a box this size I'd consider a sliding top; it would be easy to do with a dado the thickness of your top on three sides of the box, one end would be cut narrower to allow the top to slide over. If you have a table saw or access to one it would be a fairly easy project.I haven't done any woodwork since high school, but recently did a spiral staircase step stool which gave me the bug. A friend has a garage shop that was used to make it and I wanted to thank him, so I'm making a small walnut box that will have some things he needs in it (i.e. dowel pin markers).
The walnut treads on the step stool was the first time I've worked with walnut, but I haven't put a finish on those yet. Anyway, I've been stopping by the store periodically looking at walnut boards for the box. Not having any idea what to look for, and there are a lot of variations in grain, I just kept hesitating.
Hard to tell much when they are dry, so in the store I got my hand wet from the rain water on the cart and wiped it on the boards that interested me. Yesterday I found this board and I thought it was so visually striking that I bought it. It's 3/4 x 3 1/2 x 5.
When I got home I wiped it with mineral spirits. The pic is about 2 feet of one end of the board; the top of the pic is one side of the board and the bottom of the pic is the flip side. I cropped both pics and spliced them together to make it easier to look at and decide which would be the outside of the box.
I'm curious about the grain and figuring. I can see the sapwood and that doesn't bother me. Does anyone have an opinion on whether this is a good piece for a box?
Good luck, post pics of the finished box(es)
Last edited: