To avoid these ads, REGISTER NOW!

ZMotorsports Shop Projects 2.0

OP
Z

zmotorsports

ALLIANCE MEMBER
Joined
Oct 20, 2009
Messages
21,441
Location
Northern Utah
Final pictures of the weekend's work.

While the paint was drying on the axle I began to bleed the brakes and pull new brake fluid through my entire brake system as I do this every other year on my Jeep, as well as all my other vehicles for that matter.
jp31.jpg

Another routine maintenance item on the list was to replace the rear brake pads. These have held up well and in 129k miles this is the second set I have replaced. I noticed they were getting a little thin during the last LOF service so I had a new set of pads sitting on the bench ready to be installed. I pay particular attention to my brakes before our annual SW Colorado Jeep gathering as the long steep grades that we must ascend to around 13k feet elevation, we also have to descend and with 1k foot plus drop-offs brakes are not something I want to worry about.
jp32.JPG

New anti-rattle clips installed with a little synthetic brake grease applied. I also pull the guide pins from the caliper brackets to clean and lube them as well. This ensures the caliper slides on the pins properly.
jp33.JPG

The synthetic brake grease I started using on my brake hardware recently. One note here, be careful how much lubricant that is applied to the brake guide pins as you don't want to apply so much that it gets into the bottom of the guide pin bore. What can happen is when the brakes get hot the extra lubricant can expand and therefore push the caliper pin outward applying pressure to one of the pads moreso than the other resulting in uneven wear as well as more heat as it is applying half the brake pads for that particular corner.
jp34.JPG

Brake caliper and pads installed and brake pedal depressed a few times to seat the pads against the rotor.
jp35.jpg

Lastly before putting tires back on I add a small bead of Torque Seal to the brake fasteners. This creates a visual indicator of the fasteners for quick checks.
jp36.JPG


Yesterday I spent about 6 hours rebuilding shocks, touching up some paint, going through the front brake components and putting everything back together as well as a detailed inspection of the chassis and powertrain in preparation for several RV/Jeep gatherings and rallies that we have coming up over the next several months.

Thanks for looking.
 
Last edited:
To avoid these ads, REGISTER NOW!

Bob Heine

ALLIANCE MEMBER
Joined
Oct 24, 2009
Messages
10,708
Location
Boca Raton, Florida
Mike, I don't know why but I like the small improvements more than the big ones. No one else will probably ever notice but the tweaks are the things that make me smile the most. I also find a one-inch chopped top on a custom car much cooler than a five-inch chop (early '50s Mercs and GM cars are the exception).
 
OP
Z

zmotorsports

ALLIANCE MEMBER
Joined
Oct 20, 2009
Messages
21,441
Location
Northern Utah
Mike, I don't know why but I like the small improvements more than the big ones. No one else will probably ever notice but the tweaks are the things that make me smile the most. I also find a one-inch chopped top on a custom car much cooler than a five-inch chop (early '50s Mercs and GM cars are the exception).

Thanks Bob and I completely agree. While I love the big mods it's the small ones that can make or break project.

My suspension has been something that I have been tweaking on for many years now. Finding idiosyncrasies about it that I didn't care for as it started out as an off-the-shelf suspension system and then I customized it to be better and more capable than what it started out as.

Most aftermarket suspension systems basically keep the same suspension travel as a stock Jeep but just move the frame and body upwards to allow larger tires/wheels. While they work ok, there are a lot of things that can be done to improve the 8 inches of travel most suspension systems have. I have now maximized my suspension travel to match my shock travel and having 10.5"/10" front/rear respectively is pretty substantial while retaining OEM fenders.

The next step would be coil-overs and net me closer to 12+ inches of travel but I have no plans to go to coil-overs so this is the best I can do and can't wait to get it off-road and test it out.

Thanks for following along Bob.
 

rattle_snake

Well-known member
Joined
Jun 25, 2015
Messages
5,225
Location
Chandler, AZ
Agree on moving the shock mount up, nice solution. Might as well use the travel.

When you say you rebuilt the shocks, what does that entail? Seals? How do you recharge the nitrogen?

Looks like you have the suspension well dialed in. Maybe 38s would fit when the time comes?😁
 

Bigblue&Goldie

Well-known member
Joined
Mar 12, 2009
Messages
10,714
Location
AZ
When you say you rebuilt the shocks, what does that entail? Seals? How do you recharge the nitrogen?
Seals/o-rings/wipers/wear bands. You probably have everything you need for your shocks besides a tool to run the floating piston in the reservoirs up and down during bleeding, which is easily made out of allthread. Hit me up when the time comes and you can use my nitrogen bottle and gauge set, or if you just want to check yours every so often.
 

Gwrench

Member
Joined
Jan 19, 2015
Messages
9
Location
Indiana
Hello Mike,
When time permits could you tell me a little about your brake bleeder system? I'm in the market for one but not sure which one works best. What brand/model do you have and does it meet your satisfaction? I see its a vacuum system rather than a pressure system.
Thank you sir,
Rick
 
OP
Z

zmotorsports

ALLIANCE MEMBER
Joined
Oct 20, 2009
Messages
21,441
Location
Northern Utah
Agree on moving the shock mount up, nice solution. Might as well use the travel.

When you say you rebuilt the shocks, what does that entail? Seals? How do you recharge the nitrogen?

Looks like you have the suspension well dialed in. Maybe 38s would fit when the time comes?😁

Thanks Justin. Funny you mention the 38's. I text my wife yesterday letting her know that Nitto just released the Ridge Grappler in a 38" size for 17" wheels. She didn't find my humor as funny as I did. :ROFLMAO:

Nothing larger than the 37's for me, at least not at this time as the Jeep is handling so freakin' awesome both on and off-road with the perfect gearing and RPM for these 37's, plus the wife can barely get in it now. :bounce: I will be needing new tires more than likely before this coming winter as mine have gotten down to around 1/4"-9/32" in the 36,500 driven miles and probably close to another 13~ish thousand towed miles. They have worn great and have been an excellent tire but I have been eyeing the new Mickey Thompson Baja Boss A/T in a 37x12.5x17 that was just released and it looks like another nice "hybrid" tire, plus it actually has the 3-Peak winter rating so I have been contemplating trying them out next time. Trying new tires always makes me nervous because it is a lot of money to be laid out and then the possibility of them not being as good as what you removed, but then they can be better too.:unsure:
For the past nearly 30 years I have been a big fan of the BFG's and was nervous to venture away from them and try these Nitto's, to the point of almost being sick to my stomach when I ordered them. They have been a great tire and I would run them again in a heartbeat. However, they are not as good on winter roads as the BFG KO2's that I replaced prior. As much as I drive my Jeep on all types of roads as a daily driver winter traction is paramount. These Nitto's do a "fair" job on snowpacked roads but if I were being honest I would have to say the KO2's did a much better job on winter roads. All other areas I lean hard towards the Nitto Ridge Grappler for my driving conditions and style.

As for the shocks, they come apart relatively easy after releasing the nitrogen charge. I thought I posted up some pictures in my big photo dump from last weekend but I guess I didn't. I just went back and looked and I guess I left those out of the thread. I will have to see about retrieving them from our home computer as I have cleared the pictures from my phone and post them up.

I have most all of the tools for rebuilding shocks because I used to rebuild a LOT of Fox shocks in my powersports days. Snowmobiles, ATV's and sandrails mainly. We ran Marvin Shaw (RIP as of a few weeks ago) shocks on all of our sand drag quads and they come apart much the same way as the Fox shocks which we ran on our sand rails.

They recommend rebuilding annually, and on a race car that is probably barely adequate. However, on my Jeep I have been waiting for a diminishing point before I rebuilt them and to be honest, I really hadn't noticed any. Some shops recommend on a daily driver/weekend wheeler that they be rebuilt between 50k and 100k miles. Mine were right @ 71k last weekend when I decided to rebuild them. After a week of driving the Jeep I really can't tell much, if any, difference but the oil was dirty and they were in need of being rebuilt.

I purchased the seal kits from Kar Tek, whom I've purchased a lot of stuff from between my Jeep and our previous sand rail days and they were only about $13 each and a gallon of their 7W Fox oil was only about $65. I still have nearly a full bottle of nitrogen and I already had the needle for charging them and the regulator and hose assembly from about 15 years ago. Ryan is correct that the IFP (Internal Floating Piston) tool can be made by simply using allthread but I made a nice T-handle style years ago that threads into the IFP and allows me to easily purge the air from the oil. Then you simply set the oil level, reassemble the rod assembly with new seals and wear ring then charge after completing assembly.
 
Last edited:
OP
Z

zmotorsports

ALLIANCE MEMBER
Joined
Oct 20, 2009
Messages
21,441
Location
Northern Utah
Hello Mike,
When time permits could you tell me a little about your brake bleeder system? I'm in the market for one but not sure which one works best. What brand/model do you have and does it meet your satisfaction? I see its a vacuum system rather than a pressure system.
Thank you sir,
Rick

Rick, the brake bleeder that I have been using for nearly 20-years now is the Blue Point vacuum bleeder that I purchased from my Snap-on rep. It operates off of the venturi effect using compressed air and works great. I don't think they make it any longer but I am sure they make a newer version of it as well as probably other manufactures. I also have a pressure style as some of the manufacturers require they be pressure bled from the master cylinder, however, I have found that 99.8% of the vehicles I have worked on respond well to having the new fluid pulled through the system from the wheels. It is also very quick, efficient and mess free which I like. I used it a lot on sand rails when I was heavily involved in sand duning as it worked well on hydraulic clutch systems as well.

Hope that is helpful and thanks for following along Rick.
 
OP
Z

zmotorsports

ALLIANCE MEMBER
Joined
Oct 20, 2009
Messages
21,441
Location
Northern Utah
A couple of weeks ago on our last trip I noticed that our entry steps on our coach flexed a bit as I exited the coach and they are usually rock solid. I had a gut feeling I had a weld failing as I witnessed a guy at the sand dunes many years ago in a 2000 Dynasty have his entry steps come clean off while in the campground. I had helped him undo the wiring and get the coach drivable and when doing so I noticed that the welds didn't appear to all be fresh breaks and most were a bit rusty telling me that his steps had been failing for some time and then finally broke free from the last bit of structure. It had resulted in a lot of torn parent material and would have been much easier to repair before it got that bad. So with that in mind I tore into mine last night and sure enough, I had a couple of small sections where the parent material had failed in the HAZ (Heat Affected Zone).

I started by removing the powered step from the framework it was bolted to.
step1.JPG

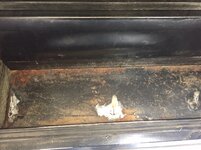
Here you can see the couple of areas where the parent material was beginning to tear.
step2.JPG

I removed the four layers of plywood to get to the steel step well.
step4.JPG

Circled areas are the couple of tears in the step well.
step3.jpg

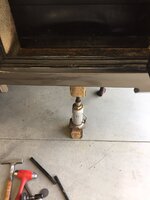
Once the undercoating was removed by a combination of Roloc disks, emery rolls and carbide burrs to get to clean metal I used a bottle jack to push the center of the structure back up into place. It went exactly back into the location without much persuasion so I think I caught this just in time to prevent having to completely start from scratch.
step5.JPG

Tears ground down after they fell right back into place.
step6.jpg

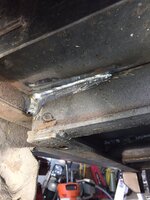
Welded up and painted. The areas welded very well and flowed out nicely. Not much bead height to have to knock back down from the top.
step7.jpg

I then went underneath to weld the square tubing back to the step well and also added some additional weld where there wasn't prior. Lastly I welded the vertical sections at the end which were not welded from the factory. I feel that these few vertical areas will provide more strength than just throughout the middle of the step well floor and not sure why they didn't weld them originally.
step8.JPG

step9.JPG


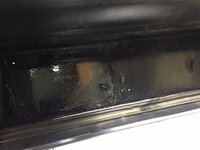
The floor is now painted and sealed and the frame work where the powered steps bolt to is at least as solid as it was for the first 20 years and 130k miles of her life. I shouldn't have to mess with this area again. Tonight I will reinstall the four layers of plywood and glue the rubber step tread back in place and call this repair done.

Thanks for looking.
 

Bodj Built

Well-known member
Joined
Feb 3, 2016
Messages
1,167
Location
Moorpark, CA
Nice work on the shock mount relocation, Mike. I don’t know if you mentioned this, but did you cycle the suspension after installing the shocks with the new mounts? Moving them up did net you more droop, but can also cause you to bump early by fully collapsing the shock, negating your droop gains.
Also, I order my seal kits from shockseals.com. They have seals for nearly every shock, good pricing, and quick shipping
 
OP
Z

zmotorsports

ALLIANCE MEMBER
Joined
Oct 20, 2009
Messages
21,441
Location
Northern Utah
Nice work on the shock mount relocation, Mike. I don’t know if you mentioned this, but did you cycle the suspension after installing the shocks with the new mounts? Moving them up did net you more droop, but can also cause you to bump early by fully collapsing the shock, negating your droop gains.
Also, I order my seal kits from shockseals.com. They have seals for nearly every shock, good pricing, and quick shipping

Thanks and yes, I've fully cycled everything to ensure my bumpstops are fully compressed just before the shock bottoms out. I didn't move my lower shock mounts until I added the new longer limiting straps to ensure that I took full advantage of the the full-stroke of the shock, with a little safety margin calculated in at each end.

Getting excited to test and confirm the results here shortly and see if there is much difference in off-road characteristics with just a minor tweak to down travel.
 
OP
Z

zmotorsports

ALLIANCE MEMBER
Joined
Oct 20, 2009
Messages
21,441
Location
Northern Utah
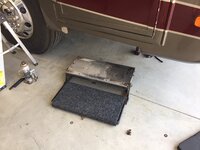
Friday after work I completed the step repair on our coach.

I reinstalled the powered step using new fasteners as the old ones had some corrosion showing and were a bit problematic removing. New fasteners and a bit of anti-seize and the step was back working.

I then moved inside the step well and reinstalled the four layers of plywood followed by gluing down the rubber entrance mat. I placed some heavy steel on the mat and allowed it to dry and cure overnight. Everything feels rock solid again and hopefully it will last another 20-years. ;)

step1.JPG

step2.JPG

Thanks for looking.
 

Gwrench

Member
Joined
Jan 19, 2015
Messages
9
Location
Indiana
Rick, the brake bleeder that I have been using for nearly 20-years now is the Blue Point vacuum bleeder that I purchased from my Snap-on rep. It operates off of the venturi effect using compressed air and works great. I don't think they make it any longer but I am sure they make a newer version of it as well as probably other manufactures. I also have a pressure style as some of the manufacturers require they be pressure bled from the master cylinder, however, I have found that 99.8% of the vehicles I have worked on respond well to having the new fluid pulled through the system from the wheels. It is also very quick, efficient and mess free which I like. I used it a lot on sand rails when I was heavily involved in sand duning as it worked well on hydraulic clutch systems as well.

Hope that is helpful and thanks for following along Rick.

Thank you for getting back to me on this Mike. I appreciate your detailed response. I found a vacuum system from Summit that I believe is close to the one you have and am going to give it a try.

Also, just to go full circle...... the Napa rotating engine stand that I asked you about a while ago did not disappoint. It's really nice and worked perfectly. If anyone else is in need of a good quality, sturdy rotating engine stand... Mike's advise is dead on.

Thanks again Mike,
Rick
 
OP
Z

zmotorsports

ALLIANCE MEMBER
Joined
Oct 20, 2009
Messages
21,441
Location
Northern Utah
Thank you for getting back to me on this Mike. I appreciate your detailed response. I found a vacuum system from Summit that I believe is close to the one you have and am going to give it a try.

Also, just to go full circle...... the Napa rotating engine stand that I asked you about a while ago did not disappoint. It's really nice and worked perfectly. If anyone else is in need of a good quality, sturdy rotating engine stand... Mike's advise is dead on.

Thanks again Mike,
Rick

That's great to hear Rick. Glad the engine stand is working out and I didn't steer you wrong. I appreciate the feedback.
 
OP
Z

zmotorsports

ALLIANCE MEMBER
Joined
Oct 20, 2009
Messages
21,441
Location
Northern Utah
In response to Cam's question. Last week I spent getting the Jeep prepped for our annual Ouray, CO trip that is coming up.

I had wanted to see about getting that last little bit of travel from my rear suspension that I know I was losing out on with my lower shock mounts so that was addressed as well as rebuilt all of my Fox shocks and double and triple checked all of my suspension links and joints.

Colorado wheeling really torture tests the entire Jeep and all of its systems so I generally do all of my major preventive maintenance in early August just before that trip.

Climbing grades starting from Ouray at around 7800' all the way up to 13k plus feet is hard on everything, even though the roads are not that technical. This will be the 14th year that the wife and I have been to Ouray and about 6 of those years we've hosted gatherings for our RVing and Jeeping friends. We love the area but it's not for everyone. Last year was hands down the driest and hottest of the 13 years we've been wheeling in the area. At those elevations the air is so thin it is hard to keep things cool and even worse when it's as warm as it was last year being in the 90's. Usually the area is only in the mid-high 70's this time of year but last year it was warm to hot and although everything performed perfectly, I was worried being as warm as it was.

I changed my differential fluids and transmission fluid just a few months ago and last night I changed my engine oil, transfer case oil and power steering fluid. I also make sure everything with the cooling system is functioning properly and last week I went through and replaced rear brake pads while also double checking banjo connections and other brake connections before lastly replacing brake fluid with fresh and bleeding the entire system.

Going up the steep grades really tests the cooling system and pushes the engine, transmission, transfer case and differentials as the stresses placed on them is well elevated. Then coming down off of those steep grades you want to make absolutely certain that you can and do trust your brakes and steering while everything that got hot going up has a chance to cool while going down. Other trips after Ouray/Silverton are nothing in terms of torturing a vehicle. South Dakota and Moab wheeling are just normal wheeling and for the most part relatively level with the occasional grade and/or obstacle to climb. While crawling along in South Dakota and Moab my engine temps generally sit right between 205-212 degrees with transmission temps sitting around 165-180 degrees max. In Ouray/Silverton area over some of the larger passes such as Engineer Pass, Hurricane Pass and Corkscrew Pass my engine temperatures climb as high as around 233 degrees and transmission temperatures will get to about 195 degrees with last year's higher than normal ambient temperatures.

Last night I pulled the Jeep in to rack it and give it one last look while changing the engine oil, transfer case and steering fluids.
jeep1.JPG


I also tested out my new Carlyle drain pug removal tool. I don't know why I didn't get one of these sooner as it sure makes it nice for not getting hot oil on your hands or wrists.
jeep2.JPG

Thanks for looking.
 
OP
Z

zmotorsports

ALLIANCE MEMBER
Joined
Oct 20, 2009
Messages
21,441
Location
Northern Utah
Also yesterday I found a place to flex the Jeep out and took some real life measurements of the Jeep's suspension travel, which turned out to be very close to my calculated measurements.

In the rear I now have 4.25" of uptravel and 5.625" of droop for a total of 9.875" of overall travel and a 43/57 uptravel/droop ratio. In the front I have 4.5" of uptravel and 5.75" of droop totaling 10.25" of overall travel and a ratio of 44/56 uptravel/droop. I could possibly get another half inch of droop from the front with slightly longer limiting straps as I have just a bit more shock travel remaining but I think I'll leave it where it's at for the time being. I am more than pleased with those suspension numbers, especially considering I have been able to do all of this with OEM fenders, no cutting of the body panels and keeping the body clean and unadulterated for a sleeper look.

IF I were to go with some flat fenders I may be able to pick up about an inch or so of additional uptravel in both front and rear and then lower the suspension about an inch but I don't care for the flat fender look nor do I want to give up any of my breakover clearance so I am going to leave everything the way it is for the time being. I have a good fairly low center of gravity with the Jeep the way it is and great handling characteristics with awesome manners both on and off-road. The suspension has great travel with good anti-squat and anti-dive responsiveness.

This trip will be a good test for her after these last iterations to my suspension.
 
Last edited:
To avoid these ads, REGISTER NOW!

SilverJimmy

Well-known member
Joined
Apr 14, 2012
Messages
1,660
Location
Prescott/Flagstaff, AZ
Sir Z,
just finished reading this thread after reading your shop build, it was a great activity for my Rona Quarantine! Your workmanship and craftsmanship are inspiring, I really enjoyed your tips and stories of your shop, your projects, and your road trips. Thanks!
 

rattle_snake

Well-known member
Joined
Jun 25, 2015
Messages
5,225
Location
Chandler, AZ
Hi Mike, are your travel measurement at the shock or at the tire?
You really have it dialed in, enjoy your trip.

I like the classy, grown up look of your Jeep. One has to look under it to really appreciate the work and parts invested.
(y)
 
OP
Z

zmotorsports

ALLIANCE MEMBER
Joined
Oct 20, 2009
Messages
21,441
Location
Northern Utah
Sir Z,
just finished reading this thread after reading your shop build, it was a great activity for my Rona Quarantine! Your workmanship and craftsmanship are inspiring, I really enjoyed your tips and stories of your shop, your projects, and your road trips. Thanks!

Thank you for the kind words, I really appreciate them and appreciate you taking the time to read through all of my ramblings.
 
OP
Z

zmotorsports

ALLIANCE MEMBER
Joined
Oct 20, 2009
Messages
21,441
Location
Northern Utah
Hi Mike, are your travel measurement at the shock or at the tire?
You really have it dialed in, enjoy your trip.

I like the classy, grown up look of your Jeep. One has to look under it to really appreciate the work and parts invested.
(y)

Thanks Justin, the sleeper look is what I was going for but I like your definition of a "grown up" looking Jeep. :thumbup:

I took those measurements directly at the bumpstops so just inboard of the tire/wheel where I should actually have a bit more travel than what I reported.

I'll report back afterwards and see if I detected any noticeable difference in off-road handling. I am not really expecting much as it has worked so freaking awesome this past year and a half since I removed the ACOS and really spent some time fine tuning the actual travel in the suspension. I can say that on the pavement it really responds well and is so stable and planted. I took an on ramp curve on Sunday with the wife and she was slightly freaking out but I was so impressed as the body roll was very minimal and it felt completely stable as I was increasing speed upwards of about 70 MPH. I don't necessarily drive like that but there was no one around and I wanted to see just how it stuck to the road on a long swooping curve.

I'm sure you know as well as I Justin that an off-the-shelf kit is designed for the masses and for one-off vehicles some time must be spent to really fine tune and dial in the suspension to make them work. I've found also that the more I learn the more I want to tweak and look for improvements. My suspension is not even close to an off-the-shelf kit as it has so many custom built components and mix-n-matched components but I think they are working very well together. I try to encourage members of our Jeep club to not accept merely bolting a kit on and forgetting about it as there are always gains to be had if you spend some time tweaking.

This next week will be another good test as we will be running with some various Jeeps of all level of suspension alterations.
 
Last edited:

Monza Harry

Well-known member
Joined
Dec 29, 2018
Messages
1,433
Location
Windsor ON
Thanks Justin, the sleeper look is what I was going for but I like your definition of a "grown up" looking Jeep. :thumbup: 1*

I took an on ramp curve on Sunday with the wife and she was slightly freaking out but I was so impressed as the body roll was very minimal and it felt completely stable as I was increasing speed upwards of about 70 MPH. Don't necessarily drive like that but there was no one around and I wanted to see just how it stuck to the road on a long swooping curve. 2*
This next week will be another good test as we will be running with some various Jeeps of all level of suspension alterations. :thumbup:
1* Agreed I feel no need to impress the masses following yesterdays trends, function with form is a much higher challenge!
2* I Don't necessarily drive like that! Me either Mike! ;););) And then I go faster to show her how far from the edge we "WERE"
I don't mind the couch! It's closer to the bathroom. Harry
 
OP
Z

zmotorsports

ALLIANCE MEMBER
Joined
Oct 20, 2009
Messages
21,441
Location
Northern Utah
1* Agreed I feel no need to impress the masses following yesterdays trends, function with form is a much higher challenge!
2* I Don't necessarily drive like that! Me either Mike! ;););) And then I go faster to show her how far from the edge we "WERE"
I don't mind the couch! It's closer to the bathroom. Harry

Yep, sometimes less is more. I look at some of the Jeeps on the trail that look like the owner went through the Quadratec catalog and said I'll take one of everything. Too dawdy for me. :bounce:
 

OutlawDrifter

Well-known member
Joined
Jan 20, 2015
Messages
3,895
Location
KS
Mike, I haven't been getting updates on the thread for some reason?!

Roller cart looks awesome and it looks like you've got the Jeep ready for its next big outing...travel safely and have fun!
 
OP
Z

zmotorsports

ALLIANCE MEMBER
Joined
Oct 20, 2009
Messages
21,441
Location
Northern Utah
Mike, I haven't been getting updates on the thread for some reason?!

Roller cart looks awesome and it looks like you've got the Jeep ready for its next big outing...travel safely and have fun!

Thanks Marc. I get anxious each time I've made alterations to anything on the Jeep until the first couple of trail miles, then I can relax and enjoy the ride.

I'll report back on the difference, if I even notice any as it was such a small amount of travel that I gained in the rear. The shock rebuild although needed I doubt will have any effect as they really weren't that bad yet.

Some friends just stopped by our place and parked their coach in the backyard for the evening as they were traveling through our area. He just had AEV raise his 2016 JKUR from their 3.5" lift to their 4.5" lift with taller springs, bumpstops and reservoir shocks so he is just as anxious to see how it does off road as I am with mine. Last year he seemed to be dragging his rear bumper a bit coming off the ledges so he wanted to remedy that.

P.S. I like the new avatar Marc. :thumbup:
 
OP
Z

zmotorsports

ALLIANCE MEMBER
Joined
Oct 20, 2009
Messages
21,441
Location
Northern Utah
Our friend's rig who stayed with us on their way to Ouray, CO a couple of weeks ago.

TB1.JPG

TB2.JPG


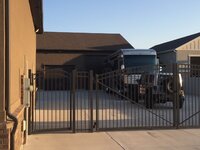
I think I could easily put another 45' coach in the back yard and still not land lock my shop access. If needs be for a night I think I could fit three 45' coaches back there and have enough power to run them if I didn't do much work in the shop that night.

I love the room we have in our back yard and it is such a HUGE difference compared to our last home where just parking our own coach and trailer in the driveway completely land locked the shop and negated any access. Love our new home so much and everything that I had planned in my head turned out great in reality.

Stay tuned as I have many pictures from our annual Ouray, Colorado trip to follow......
 

OutlawDrifter

Well-known member
Joined
Jan 20, 2015
Messages
3,895
Location
KS
Time and experience make that a posibility. I'm very happy that you have reached that amount of contentment with your property. For the amount of money and time we spend at home, it should be that way!

Looking forward to your trip recap.
 
OP
Z

zmotorsports

ALLIANCE MEMBER
Joined
Oct 20, 2009
Messages
21,441
Location
Northern Utah
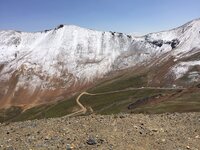
Now for several posts and a large picture dump from last week's trip to Ouray, CO. It was such a nice change from the hot weather we've been having here in Utah and made me excited for fall. Last year it was unseasonably hot in Ouray but this year it was back to normal with daytime temps in the high 60's to mid-70's and overnight temps in the high 40's. They also seemed to have some normal rain fall and everything was so lush and green this year. The trails were nearly dustless for the first couple of days and then we had a couple days of rain and even some snowfall up on Yankee Boy and Poughkeepsie Gulch trails.

First day on Owl Creek Pass and over towards Silverjack Reservoir.
CO1.JPG

Stopped for lunch and found a great spot up above the dirt road overlooking the valley below.
CO2.JPG

On Monday several wanted to do Black Bear Pass so my wife and I led the trail. It was a beautiful sunny day with great friends.
CO3.JPG

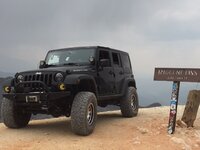
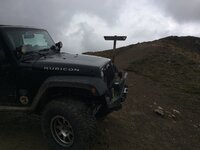
Poser shot at 12k feet elevation just before the one-way section heading to the waterfall and dropping down in to Telluride.
CO4.JPG

Jeep flexed out well and had great articulation with no interferences whatsoever.
CO5.JPG

On the return trip from Black Bear Pas we took Imogene out of Telluride. We experienced a small amount of rain on the way back down the mountain which did wonders to control dust. Nearly the entire week of off-roading was dustless.
CO6.JPG

We were fortunate enough to see a LOT of small streams flowing this year and the foliage was so lush and green all around the area.
CO7.JPG

Picture of the Coors twin waterfalls on the lower section of Yankee Boy Basin trail.
CO8.JPG

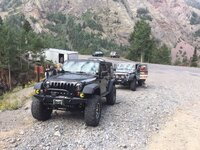
Airing down on the fourth day as we tackled Mineral Creek then commenced over the Alpine Loop heading over Engineer Pass to Lake City where we stopped for lunch and then back to Animas Forks via Cinnamon Pass and then into Silverton to air up and finally north over Highway 550 back to camp in Ouray.
CO9.JPG

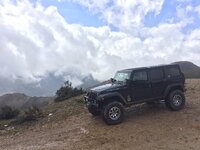
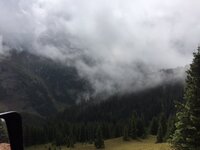
Clouds really began forming on Wednesday while heading over Engineer Pass.
CO10.JPG


Stay tuned for more pictures of the trip.....
 

Mr.zippy

Well-known member
Joined
Apr 27, 2020
Messages
2,221
Location
Wyoming
I love the room we have in our back yard and it is such a HUGE difference compared to our last home where just parking our own coach and trailer in the driveway completely land locked the shop and negated any access. Love our new home so much and everything that I had planned in my head turned out great in reality.

Man if that isn't the truth........When we start out, we buy the best we can for a starter home, and as we get older if any hobbies, vehicle needs or toys come into play, we are SOL with our small footprint, that we struggled to get in the first place!

I am happy for you Mike.........you have reached the pinnacle of your needs! (for right now anyway :)
 
OP
Z

zmotorsports

ALLIANCE MEMBER
Joined
Oct 20, 2009
Messages
21,441
Location
Northern Utah
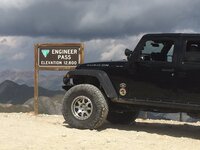
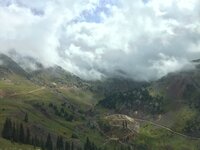
Another picture from top of Engineer Pass as storm was rolling in on Wednesday.
CO11.JPG

Just as we started up Cinnamon Pass out of Lake City when we ran across this cow and calf moose in the river.
CO12.JPG

Dropping back down into Animas Forks from Cinnamon Pass just as a sucker hole opened up and we saw blue sky.
CO13.JPG

The next day heading to Poughkeepsie Gulch trail and it was a torrential downpour then the snow moved in.
CO14.JPG

Heading up to the top of California Pass.
CO15.JPG

Top of Hurricane Pass.
CO16.JPG

More storm.
CO17.JPG

Top of California Pass and still storming.
CO18.JPG

Snow on the ground on Poughkeepsie Gulch but the blue skies were now starting to show through.
CO19.JPG

CO20.JPG


More to follow.....
 
OP
Z

zmotorsports

ALLIANCE MEMBER
Joined
Oct 20, 2009
Messages
21,441
Location
Northern Utah
Time and experience make that a posibility. I'm very happy that you have reached that amount of contentment with your property. For the amount of money and time we spend at home, it should be that way!

Looking forward to your trip recap.

Man if that isn't the truth........When we start out, we buy the best we can for a starter home, and as we get older if any hobbies, vehicle needs or toys come into play, we are SOL with our small footprint, that we struggled to get in the first place!

I am happy for you Mike.........you have reached the pinnacle of your needs! (for right now anyway :)

Thanks guys. It's been a long haul and truth be told, when we bought our first home in 1991 I really didn't look at it as a starter home. I figured my wife and I would die there, even though we were running out of room I figured I would deal with it. The decision to move for us was when the white trash Sanford & Son neighbor moved in next door and our lovely neighborhood started going down the toilet. At that point neither my wife nor I could see us there much longer. We felt like Clint Eastwood in the movie Gran Torino being the last well kept property in the neighborhood and my nerves couldn't take it much longer. I could feel my blood pressure rise each afternoon as I was driving home from work and turned into our subdivision. That's when the wife and I decided we had better make a change for our sanity even though it meant having to go back to having a mortgage. Now looking back it seems like a no brainer of a decision and so glad we made the decision to move and construct our dream property. I can easily see us here through our retirement years and having our RV'ing friends stopping over as they travel across the country. Plus we will have something substantial to leave to our son and DIL when we're gone.
 
OP
Z

zmotorsports

ALLIANCE MEMBER
Joined
Oct 20, 2009
Messages
21,441
Location
Northern Utah
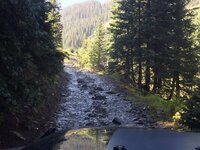
The water was running down the trail like a stream as we were heading up the trail.
CO21.JPG


CO22.JPG

As we left Poughkeepsie Gulch and started up over California pass on the last day of the trip there was snow. The day earlier it was just rain but the temps were much cooler on the last day of the trip. Hard to believe this was the middle of August.
CO23.JPG

CO24.JPG

CO25.JPG

CO26.JPG

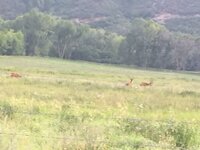
We went into the small town of Ridgeway for dinner on the last evening with our friends to say goodbye, kind of a last supper that we usually have. Upon driving back to camp we took a small detour that brings us around some small farms and into the campground from the back way and ran across several bucks grazing out in a field. A couple were pretty decent sized.
CO27.JPG

Thanks for looking.
 
Last edited:
OP
Z

zmotorsports

ALLIANCE MEMBER
Joined
Oct 20, 2009
Messages
21,441
Location
Northern Utah
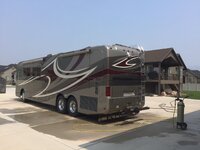
The couple of days of rain in Ouray was actually pretty clean and I thought maybe I would be able to get away from having to wash the coach other than the bugs off of the front. However, during the drive home Saturday we got caught in some rain showers and the road spray really dirtied the coach so yesterday I spent a couple of hours cleaning her up and then backing it into the RV bay until the next trip.

Coach1.JPG

Coach2.JPG

Coach3.JPG


Thanks for looking.
 

Monza Harry

Well-known member
Joined
Dec 29, 2018
Messages
1,433
Location
Windsor ON
Beautiful Scenery there Mike! Around here we have to drive for about 3-5 hrs. just for a hill! Now while on Black Bear Pass, did you play:
or at least:
. Enjoy! As too your property, for me it is a case of hindsight 20:20, um no, I'm apparently blind, too close to retirement to move, and boy do I understand the neighbour's from hell scenario! Harry
 
OP
Z

zmotorsports

ALLIANCE MEMBER
Joined
Oct 20, 2009
Messages
21,441
Location
Northern Utah
Beautiful Scenery there Mike! Around here we have to drive for about 3-5 hrs. just for a hill! Now while on Black Bear Pass, did you play:
or at least:
. Enjoy! As too your property, for me it is a case of hindsight 20:20, um no, I'm apparently blind, too close to retirement to move, and boy do I understand the neighbour's from hell scenario! Harry

Thanks Harry. Retirement age and time frame actually played a VERY large part in our decision making process when we were discussing moving. At the time we were considering the move we were about 10 years or so from our "scheduled" retirement age as we were debt free and were doing quite well with our investments although I think I should have played less and put away more at an earlier age, but we were on target and doing well. I had a strong feeling that at 48 years of age when we moved that I was too old to start over. However, I had to keep reminding myself that we weren't necessarily starting over as we had a home that had appreciated 300% in 26 years and was paid for free and clear plus we had enough in savings to put a fair amount down as a down payment to eliminate having mortgage insurance.

Prior to looking to move we penciled it all out we figured we would be able to retire around 58-60 years of age and be sitting pretty good going into retirement, even though I wanted to retire earlier but I also wanted to upgrade our coach before retirement so that was calculated in.

When we weighed the new house and money we would put into the shop and property we figured we may have to push that out about 4 more years to make it all work, especially if we still wanted to upgrade our coach one more time. I wasn't thrilled about delaying retirement but my wife and I determined it was a relatively good tradeoff to get away from our declining neighborhood especially when taking our emotional wellness and sanity into the equation if we stayed where we were.

Shortly after getting the shop and yard completed we started buckling down again on knocking down the mortgage as well as upped our investment strategy as the mortgage payment became more routine again. Now penciling out retirement I think we've gained a few years back and are still on target to have the house paid off by the time we are around 60 and as long as our investments are doing well we should still be on target to retire within a year or two after that including upgrading our coach one last time so we really didn't change our retirement age all that much, but it took a lot of weighing pro's and con's as well as calculating for me to get comfortable with the thought of moving and having a mortgage again.

In hindsight I can now say it was a good decision and one I don't regret even for a second.
 
OP
Z

zmotorsports

ALLIANCE MEMBER
Joined
Oct 20, 2009
Messages
21,441
Location
Northern Utah
While I was prepping the Jeep a couple of weeks ago going over everything, rebuilding shocks, raising rear shock mounts and servicing the engine and transfer case I had one other task that I waffled on completing. I have RCV chromoly axle shafts in my front ProRock 44 axle and have had them since I originally built the Jeep with the original Dana 44. I developed the inherent "RCV click" back in 2017 while we were in Ouray, CO during our annual Jeep gathering that the wife and I hosted. That is when I ordered my ProRock 44 bare housing to swap out while rebuilding the RCV shafts because my son wanted my OEM housing to run in his 2004 WJ, so I built my ProRock 44 using my old components from the original Dana 44 front axle in our 2011 Jeep Wrangler Unlimited Rubicon which I set aside for my son's project which followed shortly afterwards. At the time while I was swapping axle housings and rebuilding my RCV shafts I also adjusted my steering stops to slightly reduce the steering angle to hopefully prolong the RCV joints but I don't think it had much effect on prolonging the inevitable clicking.

I had ordered the parts a few months ago to rebuild my RCV shafts knowing I was passing the mileage that I had on them previously and my original intent was to rebuild them while I was doing my major prep prior to our marathon of Jeep gatherings coming up. I hadn't had any noises coming from the RCV's so I was reluctant to throw the new components in them and wanted to see just how many more miles I could go before they developed the click. Well, I should have rebuilt them while the Jeep was on the lift doing the prep work because mid-way through our trip last week to Ouray, CO I started to detect the ever so slight clicking sound from the RCV joints. ****!

Oh well, I have just under 60k miles on them now over exactly the last four years so I knew it was coming and I should have just rebuilt them a couple of weeks ago.

Last night I racked the Jeep, pulled the axle shafts and rebuilt them. Started with the passenger's side. I use one of my trimmed down pole jacks to slightly raise the side I'm working on to keep the diff. fluid in from running out into the axle tubes when the shaft is removed.
rcv1.JPG

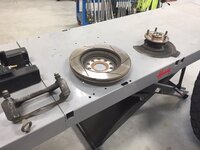
Brakes, caliper bracket, unit bearing and backing plate removed and set aside.
rcv2.JPG

Package containing the new splines, race and roller balls/bearings at the ready as well as my newly fabricated chisel hammer which worked slick.
rcv3.JPG

Axle shaft, old race and balls as well as stub shaft and polyurethane boot freshly cleaned in the solvent tank and ready for reassembly. I saw no noticeable wear or anything to be concerned about so just a good cleaning of old grease and ready to start reassembling.
rcv4.JPG

Passenger's axle shaft rebuilt with new parts and fresh grease. Ready for installation back into the axle houseing.
rcv5.JPG

Axle shaft installed, some anti-seize applied to the splines and ready to install the backing plate, unit bearing and brakes.
rcv6.JPG

Tightening the unit bearing fasteners to proper torque spec.
rcv7.JPG

With the passenger's side completed it was time to move over to the driver's side and repeat the process.
rcv8.JPG


Completed the job and put the Jeep back on the road. I'm torn whether I should have rebuilt these prior to our trip or not. The clicking sound is freaking embarrassing and I was mortified when I first detected it mid-way through our trip but I think if I had rebuilt them preemptively before our trip I would have been second guessing myself and wondering just how many more miles I could have gone. I feel like I now have a good baseline for rebuilding the axle shaft joints.

Now I know to have the rebuild kits at the ready to rebuild them prior to 60k miles/4 years to avoid those embarrassing looks from people when the clicking begins.

Thanks for looking.
 
Last edited:
To avoid these ads, REGISTER NOW!
Top Bottom