
You are using an out of date browser. It may not display this or other websites correctly.
You should upgrade or use an alternative browser.
You should upgrade or use an alternative browser.
ZMotorsports Shop Projects 2.0
- Thread starter zmotorsports
- Start date


stockerwithalocker
Well-known member
My bad, didn’t realize the nuts were that length to nest in the ID of the rod end.
OP
zmotorsports
ALLIANCE MEMBER
Can i get your insight on something? I am buying a GMT900 2011 Suburban with the LC9 5.3L. It has 132k on it. I will be doing the DOD delete in the spring(it is too cold to do anything). Is there anything else that I have to worry about that you know of? I know that the 6L80's are hit-and-miss with issues.
That is the earlier version of the 6L80 so it should be good as is. The later ones had a thermistor or thermostat on the cooler lines that were causing some issues and there are several companies that offer bypass kits for it. Some people flip the internal valve around but I like using the new valve in kit form. That 2011 however, should be the version previous like my 2012 and it doesn't have the thermostat restriction in the cooler line block.
Other than that I would do the steering center link kit from Cognito to prolong the life of the steering components but that is about it for the most part unless you start doing more mods.
OP
zmotorsports
ALLIANCE MEMBER
Sorry, I usually proof read my posts but sent that one on my way into work. I meant to say bumper cap. I’m not sure that’s even the correct term but I’m talking about the black plastic piece above the chrome bumper.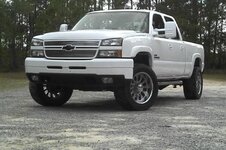
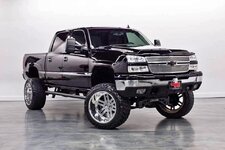
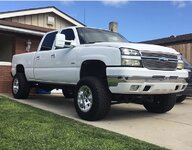
OK. That makes more sense. I didn't even think bumper when I read that.
I haven't done anything to mine for the time being but keep waffling on smoothing and painting them.
I refrain from painting the plastic bumper and lower valance as well as mirrors because they simply don't seem to last long term and I keep things for a very long time. In fact, this is more than likely the last truck I will ever own. The ones I've seen that have been done seem to chip out easily then they look like **** after a few years. The textured plastic just isn't very friendly when it comes to primer and paint for the long run.
Last edited:
OP
zmotorsports
ALLIANCE MEMBER
Mike,
it’s hard to see on my phone but do they not supply a safety washer to put between the rod end and nut? It also looks like there are just a few threads of engagement on the nut. Not questioning your work, but it seems concerning they supplied the kit like that.
Btw i appreciate you taking time to document all the work you do as well as providing tips and tricks, and tools you use.
Like others have already mentioned, there are locking washers under the nut and quite a bit of thread engagement. It is just hard to tell in the picture.
Thanks for following along.
MrPink
Well-known member
Mike,That is the earlier version of the 6L80 so it should be good as is. The later ones had a thermistor or thermostat on the cooler lines that were causing some issues and there are several companies that offer bypass kits for it. Some people flip the internal valve around but I like using the new valve in kit form. That 2011 however, should be the version previous like my 2012 and it doesn't have the thermostat restriction in the cooler line block.
Other than that I would do the steering center link kit from Cognito to prolong the life of the steering components but that is about it for the most part unless you start doing more mods.
Thanks for the Input. The only "mods" that this one will be getting will be the DOD/AFM delete with an upgraded cam, tuning both the trans and the engine. 3" exhaust. Lowering the rear to match the front height(2"). Some 9C1 Police Tahoe wheels(17") and a front push bar. Outside that it's getting nothing but maintenance. I'll look into the cognito parts.
OP
zmotorsports
ALLIANCE MEMBER
Work on the 2002 Silverado 2500HD LB7 Duramax continues.
Saturday I had some time in the morning so I was able to complete the FASS system.
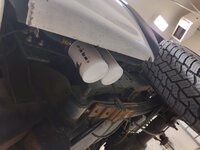
Last night I removed the original exhaust system. Looks like the previous owner cut the muffler out and straight piped it. No wonder it sounded like ****. Although the current owned kind of likes the sound of it but I think they sound like garbage straight piped. This was somewhat of a hack job and although there was a LOT of weld on the mid-section it appears to have been leaking quite a bit around the nasty welds.

Band clamp loosened and front pipe removed. I also flipped the V-band clamp around which makes it just a little easier to access from the wheelwell above the frame with an extension and socket.
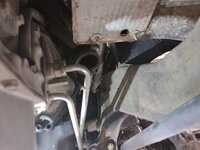
For the extended cab/short bed (ECSB) it required cutting 9.5" from the end of the front intermediate pipe. My Baileigh BS-210 made short work of that.

I started at the band clamp at the front and loosely installed the sections then worked my way back tightening them one by one so the system didn't grow and to keep the bends away from chassis components and crossmembers. Once the clamps were all tightened and positioned I went back and added about an inch or so of weld to each union as these clamps have a tendency to slip when bouncing down the road. I place the small welds in locations that can be easily cut with a die grinder if the need arises.
Once everything was completed and I bounced and moved the system around to ensure there were no interferences I installed the final detail, the tip. I also don't like them tucked too far up under the body as they have a tendency to drone severely when the exhaust gets cupped by bumpers and/or body panels. I prefer to have the tip clear the bumper and body but not so far out that it is an eyesore (or a trip hazard).
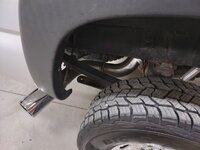
From the top looking down it appears to be sticking out quite a bit but it is actually about flush with the bedside above where it rolls under.

This is a better representation of the tip placement. Flush with the bedside and slightly out from the bumper width yet less than the outermost sidewall of the tire. Looks good here and yet is practical.

System completed with some small weld beads to hold everything in place.

Also installed the rear shocks after the exhaust was complete.
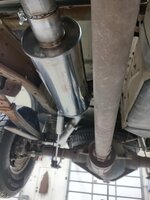
I turned the lettering on the muffler so it can barely be seen from beneath the truck when looking up at it.

Thanks for looking.
Saturday I had some time in the morning so I was able to complete the FASS system.
Last night I removed the original exhaust system. Looks like the previous owner cut the muffler out and straight piped it. No wonder it sounded like ****. Although the current owned kind of likes the sound of it but I think they sound like garbage straight piped. This was somewhat of a hack job and although there was a LOT of weld on the mid-section it appears to have been leaking quite a bit around the nasty welds.
Band clamp loosened and front pipe removed. I also flipped the V-band clamp around which makes it just a little easier to access from the wheelwell above the frame with an extension and socket.
For the extended cab/short bed (ECSB) it required cutting 9.5" from the end of the front intermediate pipe. My Baileigh BS-210 made short work of that.
I started at the band clamp at the front and loosely installed the sections then worked my way back tightening them one by one so the system didn't grow and to keep the bends away from chassis components and crossmembers. Once the clamps were all tightened and positioned I went back and added about an inch or so of weld to each union as these clamps have a tendency to slip when bouncing down the road. I place the small welds in locations that can be easily cut with a die grinder if the need arises.
Once everything was completed and I bounced and moved the system around to ensure there were no interferences I installed the final detail, the tip. I also don't like them tucked too far up under the body as they have a tendency to drone severely when the exhaust gets cupped by bumpers and/or body panels. I prefer to have the tip clear the bumper and body but not so far out that it is an eyesore (or a trip hazard).
From the top looking down it appears to be sticking out quite a bit but it is actually about flush with the bedside above where it rolls under.
This is a better representation of the tip placement. Flush with the bedside and slightly out from the bumper width yet less than the outermost sidewall of the tire. Looks good here and yet is practical.
System completed with some small weld beads to hold everything in place.
Also installed the rear shocks after the exhaust was complete.
I turned the lettering on the muffler so it can barely be seen from beneath the truck when looking up at it.
Thanks for looking.
As always Mike 
But I’ve got a question that I know isn’t an oversight just because it’s you doing the work. But the FASS filters look like they’re dead in line with the front tire. Is there no guard means to keep rocks or whatever from being tossed up and hitting them? Or is that an optical contusion?
But I’ve got a question that I know isn’t an oversight just because it’s you doing the work. But the FASS filters look like they’re dead in line with the front tire. Is there no guard means to keep rocks or whatever from being tossed up and hitting them? Or is that an optical contusion?
OP
zmotorsports
ALLIANCE MEMBER
Thanks Cam, no it is not an optical illusion. The filter and manifold assembly sits directly in front of the rear tire on the driver's side, just outside of the frame rail and fuel tank.
I have not heard of any damage occurring to any of these in the past and that is where FASS instructs to mount these pump/filter assemblies. I actually like these smaller filters better as the previous iteration of filters were quite tall and they hung down well below the bedside and were visible from the outside. I much prefer these as they are mostly hidden and cannot really be seen when the truck is sitting on the ground at ride height.
I have not heard of any damage occurring to any of these in the past and that is where FASS instructs to mount these pump/filter assemblies. I actually like these smaller filters better as the previous iteration of filters were quite tall and they hung down well below the bedside and were visible from the outside. I much prefer these as they are mostly hidden and cannot really be seen when the truck is sitting on the ground at ride height.
MrPink
Well-known member
My BIL just ordered the FASS system for his 04.
OP
zmotorsports
ALLIANCE MEMBER
My BIL just ordered the FASS system for his 04.
I think he will be happy with it. I noticed that the FASS systems are on sale right now. I have installed several over the past few years for clients and one on my coach but have held off installing one on my own truck but finally ordered two of them yesterday. One for my 2006 LBZ and one for my son's 2002 LB7.
MrPink
Well-known member
Yeah, he paid $800 or so I think. I am about to drop around that on my DOD delete stuff for the Suburban lol.
OP
zmotorsports
ALLIANCE MEMBER
Yeah, he paid $800 or so I think. I am about to drop around that on my DOD delete stuff for the Suburban lol.
If he has a 2004 Duramax, and is under 600 HP, the TS C10 100G kit is now on sale for $649 from either FASS or Summit Racing. This is what was just installed on the 2002 in my shop currently. It is their newest kit out with the FWT (FASS Whisper Technology) pump and manifold assembly. It is much quieter than their earlier versions.
bigdave_185
Well-known member
How did you wire the pump? Is it on with key power?
I found that to be A very bothersome way to do it, can’t turn the key on with out the darn pump running!
I also took a piece of angle iron and mounted a portion of rubber mudflap to mount in front of the Fass to protect mine from the childish off-road tires I had tossing 1” rocks at the pump down dirt roads. While I never had or heard of others with damage to the pump in that location it gave me peace knowing it wasn’t getting blasted.
Clean install as always mike!!
I found that to be A very bothersome way to do it, can’t turn the key on with out the darn pump running!
I also took a piece of angle iron and mounted a portion of rubber mudflap to mount in front of the Fass to protect mine from the childish off-road tires I had tossing 1” rocks at the pump down dirt roads. While I never had or heard of others with damage to the pump in that location it gave me peace knowing it wasn’t getting blasted.
Clean install as always mike!!
csp
Well-known member
I haven't wired a FASS pump, but I like to use a three pole oil pressure switch to trigger a fuel pump relay. One pole that get's power from the starter solenoid when cranking the engine and one pole that's energized when the engine has oil pressure with the key in the run position. The third pole goes to the relay coil.How did you wire the pump? Is it on with key power?
OP
zmotorsports
ALLIANCE MEMBER
How did you wire the pump? Is it on with key power?
I found that to be A very bothersome way to do it, can’t turn the key on with out the darn pump running!
I also took a piece of angle iron and mounted a portion of rubber mudflap to mount in front of the Fass to protect mine from the childish off-road tires I had tossing 1” rocks at the pump down dirt roads. While I never had or heard of others with damage to the pump in that location it gave me peace knowing it wasn’t getting blasted.
Clean install as always mike!!
Dave, I tied the FASS pump in to an ignition "hot" circuit. It does not run in the accessory position.
I have a different take I guess on adding in unnecessary switches and such as I feel they are another potential failure point. It is easy enough to pull the fuse in the event you need to work on the vehicle with the KOEO.
I know quite a few RV'ers on one of the RV sites I frequent have been wiring their FASS pumps through a dash mounted switch for the exact same reason, to be able to turn off when the key is on, but I refrained as I don't need another point of failure and again, it is easy enough to pull the control fuse if/when needed. So far with the FASS system on my coach for exactly a year now I have not had the need to do so.
My truck is a highway queen so it will never see off-road (that's what I built my Jeep for) so I have no plans to add anything as far as protection to the FASS filters. If I saw more people having problems due to rocks maybe I would feel differently but if you take yours off-road that may be a good preventive measure to ensure nothing gets damaged.
OP
zmotorsports
ALLIANCE MEMBER
Last night I pretty much finished up the 2002 LB7 Duramax 2500HD. I still have a few things to wipe down and double check fluids then the owner can pick it up and I'll move on to the next project.
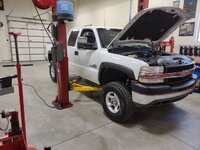
Front wheels installed and torqued to spec.
I then addressed this rat's nest of wiring while the transmission was draining after dropping the pan. Each night when I opened the shop door my eyes were drawn to this mess of wires and horribly mounted trailer plug.
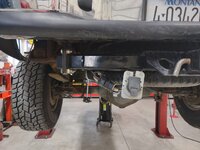
I removed the original plug bracket, straightened it and made an angle mounting plate which would allow me to mount it up under the bumper tighter and not hang down so far.

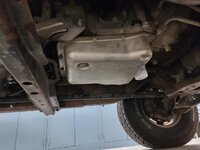
Pan dropped and draining while I was working on the trailer plug.

New filter installed and cleaning the pan in the solvent tank.

This looks much better. Wiring is now encased in split loom and tucked up and over the hitch rather than hanging down under it for the whole world to see. I also bead blasted and painted the angle mount and trailer plug mount, then cleaned the terminals and applied some dielectric grease to the pins.

Allison transmission pan installed and torqued to spec.
Sitting back down on the ground and returned from a road test.
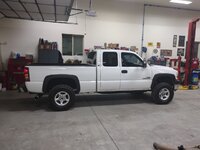

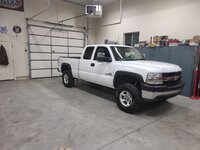
I got the front suspension close by eye and it ended up being really close. Now time for a front end alignment and it will provide the owner with many more miles. Overall a pretty clean LB7.
Thanks for looking.
Front wheels installed and torqued to spec.
I then addressed this rat's nest of wiring while the transmission was draining after dropping the pan. Each night when I opened the shop door my eyes were drawn to this mess of wires and horribly mounted trailer plug.
I removed the original plug bracket, straightened it and made an angle mounting plate which would allow me to mount it up under the bumper tighter and not hang down so far.
Pan dropped and draining while I was working on the trailer plug.
New filter installed and cleaning the pan in the solvent tank.
This looks much better. Wiring is now encased in split loom and tucked up and over the hitch rather than hanging down under it for the whole world to see. I also bead blasted and painted the angle mount and trailer plug mount, then cleaned the terminals and applied some dielectric grease to the pins.
Allison transmission pan installed and torqued to spec.
Sitting back down on the ground and returned from a road test.
I got the front suspension close by eye and it ended up being really close. Now time for a front end alignment and it will provide the owner with many more miles. Overall a pretty clean LB7.
Thanks for looking.
rattle_snake
Well-known member
not a GM guy but a clean looking truck, like yours and your sons.
Nice job thanks for sharing details including specialty tools. Guess I need one of those wrench extensions now...
Nice job thanks for sharing details including specialty tools. Guess I need one of those wrench extensions now...
OP
zmotorsports
ALLIANCE MEMBER
not a GM guy but a clean looking truck, like yours and your sons.
Nice job thanks for sharing details including specialty tools. Guess I need one of those wrench extensions now...
Thanks Justin. I wasn't sure I would get to use the wrench extension when I bought it but I used it on several fasteners just on this one job.
Finallygotit
ALLIANCE MEMBER
Mike, so after the new exhaust was installed, what kind of review would you give it?

OP
zmotorsports
ALLIANCE MEMBER
Mike, so after the new exhaust was installed, what kind of review would you give it?
I give it high marks Dan. I love the fit, finish and quality of the Banks exhaust systems. I've used them on all of the big three (GM, Dodge and Ford) now over the past 25~ish years as well as on about a half dozen RV's between the Ford F53 chassis and the GM Workhorse W22 chassis. I'm not sure if you saw it, but I mentioned earlier that I have the same Banks Monster exhaust under my 2006 and have had since 2009 when I purchased the truck. This was the first and only exhaust system I recommended to the owner when he asked based on my previous experiences with them. I hope the owner is pleased with it. The LB7 has a distinct sound anyways and the fact that it doesn't have a catalytic converter makes it a bit louder compared to my LBZ but it isn't annoying at all, more deep and throaty compared to mine would be the best description. Mine has a catalytic converter so therefore it is much more mellow than this truck but also because mine is an LBZ which inherently sounds different. Mine is actually very quiet and subdued unless I get on it, then it audibly comes to life a little more but only slightly.
OutlawDrifter
Well-known member
Mike, Banks used to make a system for my Suburban, I've always got my feelers out for one just incase it pops up.
Banks definitely does a great job on exhaust, I still can't believe I found that NIB setup for my Z28.
Banks definitely does a great job on exhaust, I still can't believe I found that NIB setup for my Z28.
Boosted1
Well-known member
That will be another very happy customer.
OP
zmotorsports
ALLIANCE MEMBER
That will be another very happy customer.
I hope so. He's picking it up this afternoon.
OP
zmotorsports
ALLIANCE MEMBER
Whew......
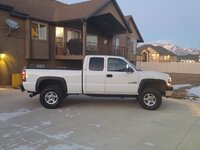
The owner came and picked up his 2002 Silverado 2500HD last night. He was ecstatic over it. I couldn't get a read on him at first when he dropped it off nor over the phone when I called him to inform him it was done. When he dropped it off and we were going over the plan of what he actually wanted out of the truck he knew more about what he didn't want than what he wanted and it was hard to get a read on him as to what he was really after. Obviously, those items that we discussed as per the front leveling kit and steering were a given but I then took some liberties with the stuff we didn't discuss. Also, he was shocked that the exhaust was installed because the last he knew is that it would be a couple weeks out as I hadn't told him the exhaust showed up early. He was fully expecting to have to bring it back in a couple of weeks.
When he walked into the shop last night he lit up. That is why I love doing this so much. Some shops want to give their customers exactly what they need, I want to give people what they didn't even know they wanted.
Afterwards my son brought over his MIL's snowblower to have me help him with it. He knew it had carburetor issues but was still having a hard time getting it to run and said when he shut if off fuel spit out of the carb.
We put it up on the lift to work on it and I noticed right away it was quite wet around the exhaust muffler. He said it was smoking quite a bit after he installed a new carburetor on it. They had let it sit all summer long with ethanol fuel in it and the carb was plugged up solid so he had ordered a new one. When it arrived he installed it and that is when he noticed it smoking and spitting fuel upon shutting off.
I removed the carburetor mounting and primer housing to inspect to make sure the primer was functioning properly as well as I wanted to put my pressure pump on the fuel inlet of the carb and ensure the needle and seat were holding pressure before going too far into it.
The needle and seat were holding just fine with the new carburetor. We fired it up and only let if run a matter of seconds before shutting it off. As soon as I shut if off, fuel spit back out of the vent hose right onto my tool cart full of tools. I told my son to check the oil level. He pulled the dipstick and sure enough, way overfull. Bingo, the old carburetor's needle and seat had allowed the fuel to drain from the tank and filled the crankcase.
We drained the crankcase oil, or fuel rather.

Look at that fuel pour from the crankcase. Yuck!
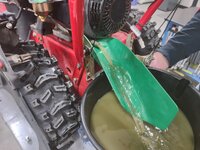
After draining raw fuel, we refilled the crankcase with actual oil, cleaned the muffler the best we could and cleaned and blasted the spark plug then reassembled and ran it for a while (outside) until it quit smoking indicating that the raw fuel had been burnt off from the exhaust and combustion chamber. My son was on the right track doing the repair but didn't realize the crankcase had filled with fuel and the fuel being expelled when it was shut down was actually coming from the crankcase vent and not the carburetor. I was very proud of him for helping out his mother-in-law and for diagnosing it as well as he did, just didn't take the symptom to the next step. It was an awesome teaching moment when he saw the fuel in the crankcase and I saw the light bulb come on.
Overall a quick and easy job that I hadn't planned on for the evening but I was able to spend about an hour hanging out with my son in the shop so very much worth it.
The owner came and picked up his 2002 Silverado 2500HD last night. He was ecstatic over it. I couldn't get a read on him at first when he dropped it off nor over the phone when I called him to inform him it was done. When he dropped it off and we were going over the plan of what he actually wanted out of the truck he knew more about what he didn't want than what he wanted and it was hard to get a read on him as to what he was really after. Obviously, those items that we discussed as per the front leveling kit and steering were a given but I then took some liberties with the stuff we didn't discuss. Also, he was shocked that the exhaust was installed because the last he knew is that it would be a couple weeks out as I hadn't told him the exhaust showed up early. He was fully expecting to have to bring it back in a couple of weeks.
When he walked into the shop last night he lit up. That is why I love doing this so much. Some shops want to give their customers exactly what they need, I want to give people what they didn't even know they wanted.
Afterwards my son brought over his MIL's snowblower to have me help him with it. He knew it had carburetor issues but was still having a hard time getting it to run and said when he shut if off fuel spit out of the carb.
We put it up on the lift to work on it and I noticed right away it was quite wet around the exhaust muffler. He said it was smoking quite a bit after he installed a new carburetor on it. They had let it sit all summer long with ethanol fuel in it and the carb was plugged up solid so he had ordered a new one. When it arrived he installed it and that is when he noticed it smoking and spitting fuel upon shutting off.
I removed the carburetor mounting and primer housing to inspect to make sure the primer was functioning properly as well as I wanted to put my pressure pump on the fuel inlet of the carb and ensure the needle and seat were holding pressure before going too far into it.
The needle and seat were holding just fine with the new carburetor. We fired it up and only let if run a matter of seconds before shutting it off. As soon as I shut if off, fuel spit back out of the vent hose right onto my tool cart full of tools. I told my son to check the oil level. He pulled the dipstick and sure enough, way overfull. Bingo, the old carburetor's needle and seat had allowed the fuel to drain from the tank and filled the crankcase.
We drained the crankcase oil, or fuel rather.
Look at that fuel pour from the crankcase. Yuck!
After draining raw fuel, we refilled the crankcase with actual oil, cleaned the muffler the best we could and cleaned and blasted the spark plug then reassembled and ran it for a while (outside) until it quit smoking indicating that the raw fuel had been burnt off from the exhaust and combustion chamber. My son was on the right track doing the repair but didn't realize the crankcase had filled with fuel and the fuel being expelled when it was shut down was actually coming from the crankcase vent and not the carburetor. I was very proud of him for helping out his mother-in-law and for diagnosing it as well as he did, just didn't take the symptom to the next step. It was an awesome teaching moment when he saw the fuel in the crankcase and I saw the light bulb come on.
Overall a quick and easy job that I hadn't planned on for the evening but I was able to spend about an hour hanging out with my son in the shop so very much worth it.
Last edited:
OutlawDrifter
Well-known member
Mike, the effects of ethanol fuel and time still aren't widely known to the masses. Your son's MIL is lucky to have him. Glad your customer was happy with the results on his pickup.
OP
zmotorsports
ALLIANCE MEMBER
Mike, the effects of ethanol fuel and time still aren't widely known to the masses. Your son's MIL is lucky to have him. Glad your customer was happy with the results on his pickup.
Thanks Marc.
I know he has mentioned to his BIL's that when they get fuel for their mother's lawn and garden equipment that they should purchase ethanol free fuel but I don't think they listened. I hope this was a learning experience for them. I could see the anguish in my son's face that he really wanted to figure this out and he didn't necessarily want to bother me with it but I was happy to help and was proud of him for getting as far as he did.
OP
zmotorsports
ALLIANCE MEMBER
Those "form a funnels" are one of my favorite tools in the garage!
Agreed. So simple yet so useful.
4 FN 27
ALLIANCE MEMBER
Mike I am pretty sure you drained the "Reserve Tank".We drained the crankcase oil, or fuel rather.
Look at that fuel pour from the crankcase. Yuck!
That is bad. Worst I have seen. Ish!!!
OP
zmotorsports
ALLIANCE MEMBER
Mike I am pretty sure you drained the "Reserve Tank".
That is bad. Worst I have seen. Ish!!!
Agreed Pat. That was one of the worst I've worked on. Both my son and I looked at each other as it come shooting out and said, we should have recorded that. It would have made a great YouTube video on what can happen when the needle and seat stick. Unfortunately we didn't think about it until it was too late.
signcrafter
Well-known member
- Joined
- May 9, 2012
- Messages
- 12,535
Thanks for reminding me. We have a plate compactor with a honda engine and every so often it wont run worth a ****. We drain the oil that has gotten gas in and put new oil in it and it runs like a champ. Not sure if carb is sticking or if it just gets thrown around and tipped so much that gas runs down into the oil. But everytime it happens we are so busy in the summer that we just drain oil and add new and keep going. Then forget about it when we have some down time. I'll have to go grab it and see what I can find.Agreed Pat. That was one of the worst I've worked on. Both my son and I looked at each other as it come shooting out and said, we should have recorded that. It would have made a great YouTube video on what can happen when the needle and seat stick. Unfortunately we didn't think about it until it was too late.
Duker
Well-known member
I have finally caught up.... I have missed seeing the projects and commentary Mike. It was like getting to read your favorite book where each chapter has an interesting ending but the chapters never end....
Finallygotit
ALLIANCE MEMBER
I bet the drained gas had a pretty strong smelling funk. I really dislike working of things that have (or had) old gas in them. That smell lives in my sinuses for days.

OP
zmotorsports
ALLIANCE MEMBER
I have finally caught up.... I have missed seeing the projects and commentary Mike. It was like getting to read your favorite book where each chapter has an interesting ending but the chapters never end....
I appreciate you following along and getting "caught up" Duke. Hope all is going well my friend.
OP
zmotorsports
ALLIANCE MEMBER
I bet the drained gas had a pretty strong smelling funk. I really dislike working of things that have (or had) old gas in them. That smell lives in my sinuses for days.
It was horrific Dan. Nasty smelling stuff. However, not nearly as bad as back in my 2-stroke racing days when someone would bring me a Banshee or Quadracer that had the pre-mixed fuel sitting in the tank all winter long and it wouldn't start come spring. That would stink up my shop for days.
bigdave_185
Well-known member
I got one of those banshees I can bring ya lol
PhantomEB
Well-known member
When I looked at my old truck last time, I wondered why the hell would they put the 7 way plug under the bumper when even my old man would buy the hole saw bit needed and put it IN the bumper?
to each their own, just sayin!
to each their own, just sayin!
OP
zmotorsports
ALLIANCE MEMBER
When I looked at my old truck last time, I wondered why the hell would they put the 7 way plug under the bumper when even my old man would buy the hole saw bit needed and put it IN the bumper?
to each their own, just sayin!
Yep, my dad did the same thing, all our trailer plugs were drilled and mounted directly in the bumpers. Nowadays, I kind of prefer them tucked up tight under the bumpers rather than directly in the bumpers.