BrianHayes
Well-known member
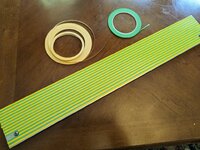
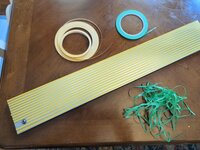
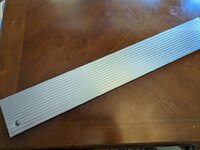
Original on top. The replacement is still in need of some trimming. Honestly, the hardest part was cutting the band to shape after the turning. A 1x30 sander really helped in sneaking up on the finished dimensions.


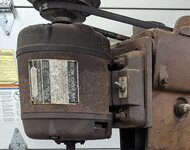



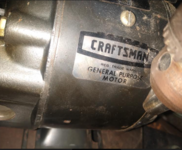

1966, maybe early '67, was the last model year for the Craftsman 150.I believe this dates my drill press to late 60's?

If you could separate the wiring enough from the others, you could probably sand off the laquer, solder, and re-laquer/shrink tube? Even if you don't get it tight against the winding, I don't think you'd impact the magnetic flux much?Thank you for your condolences. I just returned from the motor repair shop, where I was told it would be a minimum of $1000 to rewind the motor. So since returning, I purchased a replacement 115.19780 from eBay for a whole lot less. I'd rather be restoring than replacing, but I don't see an alternative.
I got replacement in there. Vibration persists and it's coming from the armature after all, not the cap. If I tap the motor in different areas the noise comes and goes. I tried old and new and to my surprise the older cap let out a bigger spark when I shorted to discharge which led me to believe that my meter is bad (new cap also tests as dead though they could simply be outside the meter's range). With the old cap I got consistent centrifugal switch disengagement but now it seems intermittent so maybe something's sticking?Edit: used replacement capacitor, problem persists. My meter is bad or auto-ranging not working for capacitor test. By shorting/spark test, old capacitor packs a larger punch (it's also twice the size, I'd say avoid the one listed below).
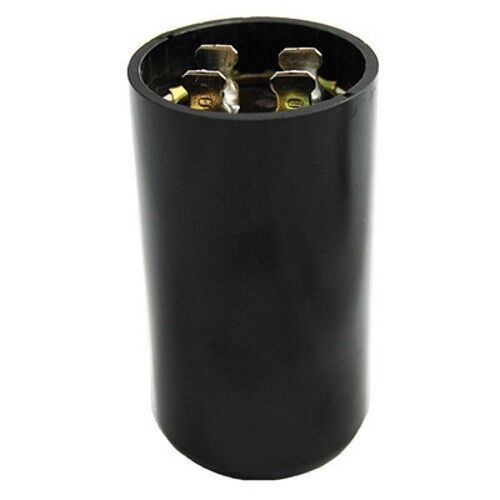
I got this on a 150 (113.12130); dual shaft 5/8 keyed and 1/2 flat, capacitor hums quite a bit so I pulled it and it tests as dead. Found 6$ replacements on ebay; slightly narrower and one farad short (link below; will report if there's issues once I get it). I believe this dates my drill press to late 60's?
Packard PMJ324B Start Capacitor 324-388 MFD 110-125 Volt 840899105697 | eBay
Find many great new & used options and get the best deals for Packard PMJ324B Start Capacitor 324-388 MFD 110-125 Volt at the best online prices at eBay! Free shipping for many products!www.ebay.com
The centrifugal switch was sticking as I suspected (could hear it disengage a few seconds after a dead stop instead of @ low rpm). I don't think this motor is even broken in and the sliding mechanism was not retracting as it would if more worn. I gave the felt pads on the metal hinges a squirt of oil and lubed the sliding surfaces w/silicone lubricant. Contact cleaner on the contacts w/a piece of cardboard to rub it in followed by contact grease. Cleaned bearing bores of dry grease and gave them a squirt of lithium grease. All quiet now.I got replacement in there. Vibration persists and it's coming from the armature after all, not the cap. If I tap the motor in different areas the noise comes and goes. I tried old and new and to my surprise the older cap let out a bigger spark when I shorted to discharge which led me to believe that my meter is bad (new cap also tests as dead though they could simply be outside the meter's range). With the old cap I got consistent centrifugal switch disengagement but now it seems intermittent so maybe something's sticking?
I'd say avoid the cap I bought (edited original comment) based on spark test.
I have a question for you on the capacitor for the 1Hp #113.19063. I was looking at the picture of your capacitor because mine is broken. Is yours a 193 MFD? The one in mine is. Thanks.Wow, you guys have some really cool looking motors. I love the older Craftsman (30s and 40s) motors. Thank you all for sharing.
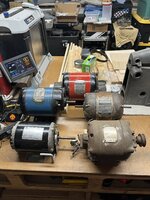
I finished rebuilding another 115 motor for my 150 drill press. here is a pic of the motor with the sardine can capacitor.

And this is that motor assembled.

113.19063

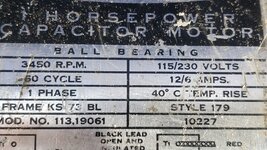
The 113.19063 is a beast of a motor. This motor is a 1 HP capacitor start, 3450 RPM, 115/230-volt, 60 cycles motor and is reversable with dual shafts. The motor weighs 45.5 pounds and is 13 ¼” to each end of the shaft. The housing is 9 ½” long and 7 ¾” in diameter and the keyed shafts are 5/8”.


I am not sure about the age of this motor. I suspect it is a mid- 50s motor but the stamping on the data plate says 15A 33. I will look more closely at the capacitor tonight and see if there is a date on it. This motor was attached to my 113.27520 10” table saw. I relaced the cord and powered up the motor to see if it run and it worked perfectly.

One of the unique features of this motor aside from its size is the capacitor and where it is housed. In this pic you can see (through all the saw dust) capacitor is housed inside the terminal end frame. Both of the end frames are made from cast iron and the stator band rolled steel about ¼” thick.

The base on this motor is removable and previous owner did a fine job of splicing in the toggle switch (not really).
The original bearings for this motor were New Departure 77503 (double shielded). The bearings are 40mm x 11mm with a 17mm bore.

I disassembled the motor and placed all the metal parts in simple green for degreasing. I will add some pics as I work on the rebuild.
Working on this motor was a lot of fun and I learned a bit more about motors. Specifically, that for anything around the 1HP range you need a 1HP rated switch. The switch in this motor was only rated for ¾ HP and when I reassembled it, the switch was permanently on. I could move the switch to he off position, but the motor stayed on. This is because the switch was fused in the open connection position and is a common issue with switches not rated for the voltage and amps of a 1 HP motor.
I removed the data plate from the stator band and needed to redrill the panel screw holes.

I filled in the old holes with PC-7 and once the stator is painted you will never know anything was done to it.
I reached out to MattBlast to have the data plate reproduced. We worked together to build the graphics and I am very pleased with the final product. Here is a side by side of the new and old data plates.

Anyway, here are the parts being primed and painted.


And here is the finished motor:

Thanks for the interest.
Ok. I talked to Frank Lee and he pointed me in the right direction. Frank has so much knowledge. on these matters. Thanks for your attention on this matter Jeff. "Happy Holidays"Reviving, I do not recall and I would need to pull the motor and open it up to check it. I can do that but it will be some time before I can get to it. For a quicker answer, I recommend using this: https://www.electrical4u.net/induction-motor/single-phase-motor-capacitor-calculation-calculator/
It depends on which direction you want the motor to rotate. Just attach one yellow lead to each post. Swap to reverse rotation.Which one goes where?
I love this, I know this a old post. I'm trying to get information on my motor which is identical but different model number. I actually weighted mine same weight. I can't find the parts list anywhere. I just had mine apart, because had a starting issue every once in a while. I checked the condenser, thermal switch and everything else.Wow, you guys have some really cool looking motors. I love the older Craftsman (30s and 40s) motors. Thank you all for sharing.
I finished rebuilding another 115 motor for my 150 drill press. here is a pic of the motor with the sardine can capacitor.
And this is that motor assembled.
113.19063
The 113.19063 is a beast of a motor. This motor is a 1 HP capacitor start, 3450 RPM, 115/230-volt, 60 cycles motor and is reversable with dual shafts. The motor weighs 45.5 pounds and is 13 ¼” to each end of the shaft. The housing is 9 ½” long and 7 ¾” in diameter and the keyed shafts are 5/8”.
I am not sure about the age of this motor. I suspect it is a mid- 50s motor but the stamping on the data plate says 15A 33. I will look more closely at the capacitor tonight and see if there is a date on it. This motor was attached to my 113.27520 10” table saw. I relaced the cord and powered up the motor to see if it run and it worked perfectly.
One of the unique features of this motor aside from its size is the capacitor and where it is housed. In this pic you can see (through all the saw dust) capacitor is housed inside the terminal end frame. Both of the end frames are made from cast iron and the stator band rolled steel about ¼” thick.
The base on this motor is removable and previous owner did a fine job of splicing in the toggle switch (not really).
The original bearings for this motor were New Departure 77503 (double shielded). The bearings are 40mm x 11mm with a 17mm bore.
I disassembled the motor and placed all the metal parts in simple green for degreasing. I will add some pics as I work on the rebuild.
Working on this motor was a lot of fun and I learned a bit more about motors. Specifically, that for anything around the 1HP range you need a 1HP rated switch. The switch in this motor was only rated for ¾ HP and when I reassembled it, the switch was permanently on. I could move the switch to he off position, but the motor stayed on. This is because the switch was fused in the open connection position and is a common issue with switches not rated for the voltage and amps of a 1 HP motor.
I removed the data plate from the stator band and needed to redrill the panel screw holes.
I filled in the old holes with PC-7 and once the stator is painted you will never know anything was done to it.
I reached out to MattBlast to have the data plate reproduced. We worked together to build the graphics and I am very pleased with the final product. Here is a side by side of the new and old data plates.
Anyway, here are the parts being primed and painted.
And here is the finished motor:
Thanks for the interest.
Hi,Tubes, what is the model number of your motor? can you post a pic of the data panel? I may be able to locate a parts diagram with that info.
Yes is on my 113- 10" saw. The cap is inside, checked out reads with in 6%.Tubes, what are you using this motor on? The RPMs are 3450, for a table saw that is good but for a band saw or drill press that is too fast. I did not find a diagram for this motor but if your capacitor is round and sits inside the stator this this should help. http://vintagemachinery.org/pubs/222/6042.pdf
Hi The link doesn't work at least for me.Tubes, what are you using this motor on? The RPMs are 3450, for a table saw that is good but for a band saw or drill press that is too fast. I did not find a diagram for this motor but if your capacitor is round and sits inside the stator this this should help. http://vintagemachinery.org/pubs/222/6042.pdf
Thanks, got trying to figure out why the link is not working. Maybe some cel phone thingIm not sure why its not working for you. Go to VintageMachinery.org and click on manufacturers index (left side). Scroll and find Sears-Craftsman and click on it. Click on publication Reprints on the second menu bar. Filter results for motors. Do not use the search bar (top right) it never works for me. Use your browser's "find" (CTRL+F)and type in 113.19063. Click on the highlighted link then click on view pdf.
 Jim
Jim