To avoid these ads, REGISTER NOW!

Between 705 & 1200 SQ/FT The 'NOT' a garage, CABIN build.

Workspaces between 705 and 1200 squarefeet.
OP
P

PWC Repair

Well-known member
Joined
Dec 27, 2012
Messages
3,189
Location
Arkansas
Has your wife been the official cutter on other projects you two have done together?

The cabin is moving along very well. Especially in winter time and snow.
No,......this is really the first big project. She has helped hold, nail, demo, etc for rooms we've remodeled in our house through the years. She's pretty good at drywall and mud too. I bought her a tape measure with 1/8ths actually marked on it couse she was not great with the "little lines" LOL! I also showed her the difference if I want an exact cut, short cut, or long cut so she knows where to cut the line I marked.
 
To avoid these ads, REGISTER NOW!
OP
P

PWC Repair

Well-known member
Joined
Dec 27, 2012
Messages
3,189
Location
Arkansas
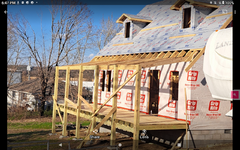
Today my wife finished running about 600 screws into the porch decking and I cut some ceiling joists. To my own amazement the whole porch is square, and level.........well, almost level. I purposefully pitched the porch deck down about 1/2" away from the house. My thought was since the front of the house faces WEST, and that's where wind driven rain would blow in during a storm, that the water would likely run off instead of just sitting there. Roof ended up at a nice 2.5/12 pitch exactly as I intended. That's 1/2 of the dormer and rear pitch, which is 1/2 again of the front pitch. I felt like it was more appealing to the eye like this. I still have the frontside of the header to build with rafter tails and attach that to the posts.
 

Attachments

  • 20250313_173015_064142.jpg
    20250313_173015_064142.jpg
    837 KB · Views: 426
  • Screenshot_20250313-184724.png
    Screenshot_20250313-184724.png
    2 MB · Views: 169
Last edited:
OP
P

PWC Repair

Well-known member
Joined
Dec 27, 2012
Messages
3,189
Location
Arkansas
Moving right along.....I got the post tops cut off today. Then I added a 2x6 right up to the eave to get that boxed in. Then the wife and I heaved up enough plywood to fiinish the lower house roof section AND got a row of plywood on the porch roof. Then before quitting for today I ran a row of roof underlayment.
 

Attachments

  • 20250317_184419_074012.jpg
    20250317_184419_074012.jpg
    564.5 KB · Views: 115
  • 20250317_184331_073941.jpg
    20250317_184331_073941.jpg
    517 KB · Views: 116
OP
P

PWC Repair

Well-known member
Joined
Dec 27, 2012
Messages
3,189
Location
Arkansas
We did NOTHING on the house today. 20-30mph sustained winds with 50mph gusts..........NOPE, not tryin' to work in that mess.
 
OP
P

PWC Repair

Well-known member
Joined
Dec 27, 2012
Messages
3,189
Location
Arkansas
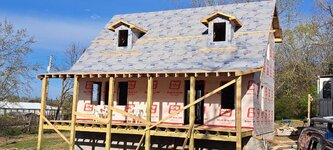
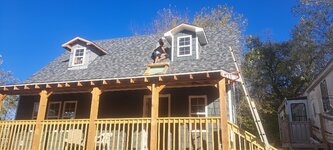
I put the rest of the porch roof on and built the outer "headers" with the faux rafter tails. I think it came out good. I still have to put the short diagonal supports in at the posts.
 

Attachments

  • thumbnail.jpeg
    thumbnail.jpeg
    148.2 KB · Views: 99
  • thumbnail (1).jpeg
    thumbnail (1).jpeg
    156 KB · Views: 102
OP
P

PWC Repair

Well-known member
Joined
Dec 27, 2012
Messages
3,189
Location
Arkansas
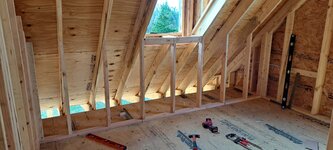
......STILL waiting on the windows which are now over 3 weeks late. Because of a local-ish tornado, the guys that roofed my house and will be doing this one are WAAY behind. BUT,....I loaded, and hauled upstairs, 23 bundles of shingles today. Then loaded another 22 bundles in my trailer but now I'm too pooped to go pack 'em up into the house!
 
Last edited:
OP
P

PWC Repair

Well-known member
Joined
Dec 27, 2012
Messages
3,189
Location
Arkansas
Well........I'm VERY unhappy with the Epilay brand synthetic underlayment. During the crazy pouring rains we had 2 weeks ago the house was just pouring water in. Today we had a light rain......I mean walk around outside with no umbrella LIGHT rain. Here is INSIDE the house! It appears to all be fastened down and overlapped as per factory instruction. I just really don't know why this amount of water would leak right through the stuff.

 
Last edited:
OP
P

PWC Repair

Well-known member
Joined
Dec 27, 2012
Messages
3,189
Location
Arkansas
I e-mailed a rep for the synthetic underlayment.......APPARENTLY, that stuff is "water shedding" UNTIL you put holes in it everywhere with staples and cap nails. my advice for anybody........stick with the tried and true self sealing asphault paper IF you actually want a WATER PROOF roof. I'm now regretting that we went with synthetic on my house and we might have the roofer tear this $hit off and replace it all with old school felt paper.
On a good note,.......the windows FINALLY came in. Vinyl, single hung, double pane, low-e glass, U factor of .31, Made in Missouri. Total of 15 windows for a bit less than $2500.........**** it big box stores!
 

Attachments

  • 20250426_142920_032159.jpg
    20250426_142920_032159.jpg
    447.1 KB · Views: 90
OP
P

PWC Repair

Well-known member
Joined
Dec 27, 2012
Messages
3,189
Location
Arkansas
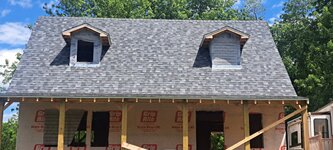
I forgot to update.......we got the roofers out (in between crazy rainstorms) and they got it shingled May 5th. He knew water would leak through but even HE DID NOT KNOW it would just come pouring in like it did. The good news is that the plywood took it just fine and there was no issues. The roof came out great!
 

Attachments

  • 20250505_140627_094831.jpg
    20250505_140627_094831.jpg
    676.6 KB · Views: 72
OP
P

PWC Repair

Well-known member
Joined
Dec 27, 2012
Messages
3,189
Location
Arkansas
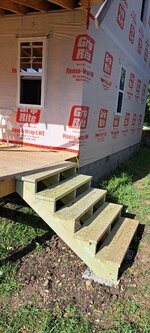
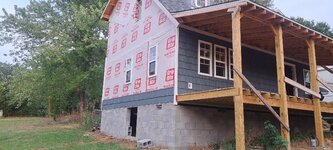
One more window in and I finally built porch stairs. NOW.....I can finish framing up the kitchen window and wall that we've been coming in and out of like a door. I guess I figured since we had a 97* heat index today I'd stand right in the sun so I could get 'em built.
 

Attachments

  • 20250622_175441_061537.jpg
    20250622_175441_061537.jpg
    557.4 KB · Views: 59
  • 20250622_175511_061441.jpg
    20250622_175511_061441.jpg
    943.6 KB · Views: 62
OP
P

PWC Repair

Well-known member
Joined
Dec 27, 2012
Messages
3,189
Location
Arkansas
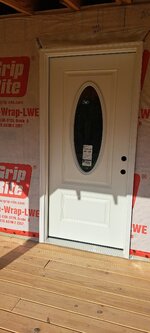
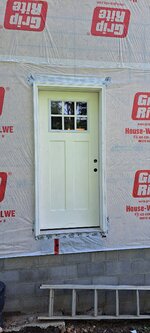
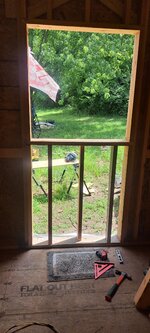
We made more progress today. The front and rear entry doors are hung. Then I framed in the kitchen window area that we've been using as a doorway. And we got that installed as well.
 

Attachments

  • 20250705_180818_052543.jpg
    20250705_180818_052543.jpg
    462.7 KB · Views: 42
  • 20250705_163546_052500.jpg
    20250705_163546_052500.jpg
    639 KB · Views: 38
  • 20250706_124540_052614.jpg
    20250706_124540_052614.jpg
    783.8 KB · Views: 37
  • 20250706_152219_052650.jpg
    20250706_152219_052650.jpg
    794.3 KB · Views: 62
OP
P

PWC Repair

Well-known member
Joined
Dec 27, 2012
Messages
3,189
Location
Arkansas
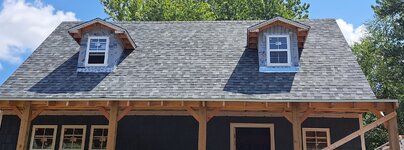
Well, it's been 100 degrees and sun a shinin' for weeks now...........but the weather finally broke. I just finished installing the 2 dormer windows. That was AFTER I made an angled stand with legs so I could sit up there on the 12/12 pitch roof!!
 

Attachments

  • 20250803_122104_123913~2.jpg
    20250803_122104_123913~2.jpg
    621.2 KB · Views: 85
OP
P

PWC Repair

Well-known member
Joined
Dec 27, 2012
Messages
3,189
Location
Arkansas
And this afternoon I set up a bit of scaffolding that I bought CHEAP last year. Then I cut up some Advantech and 2x4's and made a few walk boards. I DON"T LIKE HEIGHTS! But I managed to get up there and Install a second story window. Only 3 windows left to go!!!!! And did I mention,.......I DON'T LIKE HEIGHTS!
 

Attachments

  • 20250803_174633_075316.jpg
    20250803_174633_075316.jpg
    847 KB · Views: 90
To avoid these ads, REGISTER NOW!
OP
P

PWC Repair

Well-known member
Joined
Dec 27, 2012
Messages
3,189
Location
Arkansas
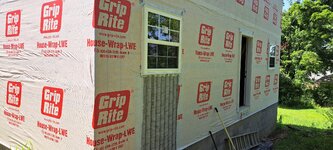
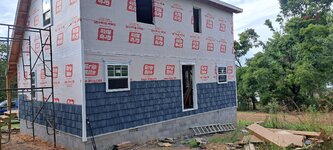
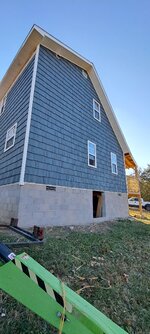
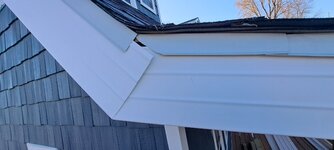
Today I figured out how to make the siding on the sides of the house line up with the front we already put on. As per Murphy's law, the lower edge of the side walls was JUST far enough down to throw alignment to the front OFF! Line up the sides with the front and had about 2.5" of wrapped osb showing..........GREAT, NOW WHAT?? I ran back to Home Depot and found some white aluminum 3" eave drip edge, hmmmmm..........this will work. By primitive means and some scrap lumber I bent out the drip edge to form more a "z". Just the right amount of flashing to cover up the bottom edge. Then I put on the starter strip and VIOLA.....the siding lines up and the lower side wall edge is covered.
 

Attachments

  • 20250810_162017_070048.jpg
    20250810_162017_070048.jpg
    988.3 KB · Views: 75
  • 20250810_162028_070003.jpg
    20250810_162028_070003.jpg
    732.1 KB · Views: 73
OP
P

PWC Repair

Well-known member
Joined
Dec 27, 2012
Messages
3,189
Location
Arkansas
Hopefully it as the shady side. We were close to that yesterday too.

As an added bonus, there was high humidity.
Oh ya, it has been wet and sticky out. Here's today's weather.........yesterday was it's twin.
 

Attachments

  • Screenshot_20250818-123215.png
    Screenshot_20250818-123215.png
    133.2 KB · Views: 49
OP
P

PWC Repair

Well-known member
Joined
Dec 27, 2012
Messages
3,189
Location
Arkansas
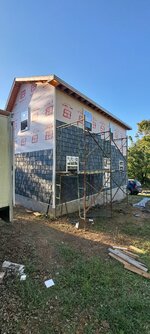
The 100* days finally broke and we took advantage of the nice weather. My wife and I spent the holiday weekend working on the siding. Another 2-3 boxes and whole first floor will be done.
 

Attachments

  • 20250901_151357_064840.jpg
    20250901_151357_064840.jpg
    934.5 KB · Views: 36
  • 20250831_172949_064743.jpg
    20250831_172949_064743.jpg
    844.9 KB · Views: 36
OP
P

PWC Repair

Well-known member
Joined
Dec 27, 2012
Messages
3,189
Location
Arkansas
My wife and I set up another section of scaffolding and we got some more siding done today. SO many times up and down ladders. This bit took us around 5 hours but that includes about an hour moving, setting up, and leveling the scaffolding.
 

Attachments

  • 20250928_174955_073534.jpg
    20250928_174955_073534.jpg
    738 KB · Views: 73
OP
P

PWC Repair

Well-known member
Joined
Dec 27, 2012
Messages
3,189
Location
Arkansas
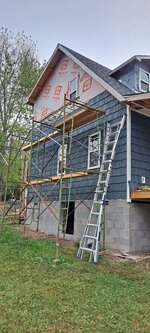
We put in more time on siding today.........YAY!! I finished this area in the rear top left, then we broke down and moved the scaffolding to the lower side of the house. I got that corner trim up and did everything above the window tops. It wasn't much but when you factor in moving the scaffolding and a lunch break, we got about 6 hours in.
 

Attachments

  • 20251004_171313_051929~2.jpg
    20251004_171313_051929~2.jpg
    691.6 KB · Views: 73
OP
P

PWC Repair

Well-known member
Joined
Dec 27, 2012
Messages
3,189
Location
Arkansas
We got about another 5 hours in today before the rain moved in. I'm becoming a little more comfortable up on the second level of scaffolding but still don't like standing on one 12" wide walkboard!! I'm guessing I hung about a square total of siding and got a bit of soffit started as well. The purple rope with clamp is how my wife 'hands' me the cut pieces.
 

Attachments

  • 20251018_134321_035115.jpg
    20251018_134321_035115.jpg
    921.4 KB · Views: 56
  • 20251018_134351_034956.jpg
    20251018_134351_034956.jpg
    678.3 KB · Views: 98
OP
P

PWC Repair

Well-known member
Joined
Dec 27, 2012
Messages
3,189
Location
Arkansas
I built a little platform to work on the dormers..........it's just IMPOSSIBLE to stay put on this 12/12 pitch roof!! Well,.......that was a fail. after getting a little trim and soffit up I rode that sucker down flat onto the porch roof......NOT COOL! Watched some videos and saw guys working on foam. Bought this twin egg crate mattress topper at the Salvation Army thrift store for $10 and problem solved YAY! I've NEVER done siding before but managed to BS my way through one dormer......one more to go!
 

Attachments

  • 20251107_151542_085634.jpg
    20251107_151542_085634.jpg
    704.3 KB · Views: 86
OP
P

PWC Repair

Well-known member
Joined
Dec 27, 2012
Messages
3,189
Location
Arkansas
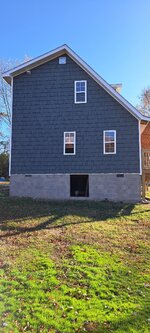
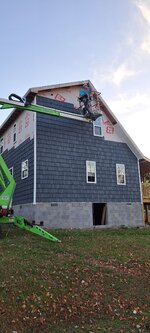
We finished the other dormer today.......YAY! Glad to have those suckers done. Also will be renting a towable boom lift for the weekend. The PLAN.....is to finish up ALL the rest of the siding, soffit, and fascia with it. Hopefully I feel better about being in a little cage rather than standing up on a 12" wide walk board. Also fit in the power vents on each gable end.
 

Attachments

  • 20251113_155029_060904.jpg
    20251113_155029_060904.jpg
    803.3 KB · Views: 66
  • 20251113_155125_061001.jpg
    20251113_155125_061001.jpg
    554.7 KB · Views: 76

wendle

Active member
Joined
Jul 19, 2018
Messages
27
Location
NSW,AU
I spent some time back in the day restoring old terracotta tiled roofing (slippery), and, by far, the best non-slip solution was to stretch a big pair of wool socks over the top of your boots.

Not sure if it will have the same effect on your shingle material, but worth a try...
 
OP
P

PWC Repair

Well-known member
Joined
Dec 27, 2012
Messages
3,189
Location
Arkansas
I spent some time back in the day restoring old terracotta tiled roofing (slippery), and, by far, the best non-slip solution was to stretch a big pair of wool socks over the top of your boots.

Not sure if it will have the same effect on your shingle material, but worth a try...
Doesn't matter now, I'm done up there!
 
OP
P

PWC Repair

Well-known member
Joined
Dec 27, 2012
Messages
3,189
Location
Arkansas
Well.........I did NOT get it all finished with the rental lift. It wasn't for lack of effort, it is simply because I DON'T DO HEIGHTS. I'm pretty nervous up in the air and things went very slowly. The good news is the TALL gable side is DONE!! I also finished up the soffit and fascia across the whole rear and most of that siding as well. First time I've EVER done any siding so wife and I are pretty proud of ourselves! I also found a couple surprises the roofers left me...........WHICH AGAIN.....is why I'm doing everything I can for my son. The so called 'skilled' labor these days is PATHETIC! I found this neat little 'OOPS' cut on the drip edge where the Main roofline meets the front porch. I took back FOUR leftover pieces of drip edge after the job!!! They could have just grabbed another piece!! I took a scrap, snipped and bent it, caulked behind, and slid it up into place. They were also nice enough to to pull the drip edge banjo string tight around both rear corners of the roof. I had to snip up about an inch to get enough room to slide the fascia in behind it. I just don't understand.
 

Attachments

  • 20251116_145308_085247.jpg
    20251116_145308_085247.jpg
    867.1 KB · Views: 66
  • 20251116_145820_085356.jpg
    20251116_145820_085356.jpg
    683.3 KB · Views: 61
  • 20251116_083929_085423.jpg
    20251116_083929_085423.jpg
    343.7 KB · Views: 61
  • 20251116_085246_085443.jpg
    20251116_085246_085443.jpg
    477.9 KB · Views: 85
OP
P

PWC Repair

Well-known member
Joined
Dec 27, 2012
Messages
3,189
Location
Arkansas
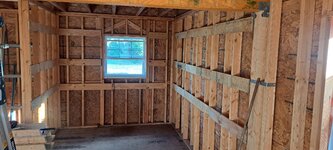
Today my wife cleaned up a bunch of trash and moved scrap wood around so I could start interior blocking. Here you can see the 'let-in' method I used to notch the studs for some plywood scraps. Kitchen is now all blocked out for cabinets.
 

Attachments

  • 20251118_144517_065658~3.jpg
    20251118_144517_065658~3.jpg
    594.2 KB · Views: 68
  • 20251118_152506_065608.jpg
    20251118_152506_065608.jpg
    586.4 KB · Views: 71
OP
P

PWC Repair

Well-known member
Joined
Dec 27, 2012
Messages
3,189
Location
Arkansas
We've been busy several hours every day this past week blocking. Most of the first floor is done. Pic of small bathroom medicine cabinet blocking and utility room.
 

Attachments

  • 20251121_143640_062428.jpg
    20251121_143640_062428.jpg
    467.6 KB · Views: 48
  • 20251120_162724_062353.jpg
    20251120_162724_062353.jpg
    398.9 KB · Views: 50
To avoid these ads, REGISTER NOW!
Top Bottom