To avoid these ads, REGISTER NOW!

Above 1200 Sq/FT DFB's Garage

Wokspaces above 1200 squarefeet.
OP
D

D.F.B

Well-known member
Joined
Aug 2, 2023
Messages
1,555
Location
Australia
Wildtrak Seat Trim Replacement

Some time ago, the drivers side seat base trim valance on the Wildtrak broke. From memory, the XLT that this car replaced also did the same, so I’m pretty sure this is a common failure part.

IMG-0187.jpg

IMG-0183.jpg

From what I can tell, the way the trim is shaped and attached to the seat has it subjected to substantial pressure as the driver enters and exits the vehicle. Repeated cycles of compression and release sees the plastic fatiguing over time, which then leads to it cracking.

Could I have made a warranty claim on this failure? Perhaps, but unlikely. Apart from the fact that its just outside of warranty now, Ford would likely claim it as wear and tear, which is fair enough. As such, I decided to order the part from Bayford and do the job myself.

There are a few different versions of this part, all dependent on trim and model spec, and of course driver or passenger orientation. For example, the same part in my Ranger would not have cut-outs for power seat adjustment but would have a mechanical backrest lever. There are also two versions for the 8-way powered Wildtrak, with or without seat heating. This particular Wildtrak is not equipped with seat heaters. At this point, I would list the part number and provide the link, but more on that in later.

First, I removed the two electric seat adjustment levers with my fancy skin wedge tool. There is also a singular Phillips head screw on the rear of the seat. The trim is then "massaged" from the locator tabs.

IMG-0190.jpg

Next, remove the two screws holding the switch module to the trim, you then need to release it from the tabs.

IMG-0193.jpg

IMG-0194.jpg

For the new trim, refit the switch module, then wrangle the trim into place to align and then snap into the three locator tabs, replace the rear screw. The adjuster levers then snap back into place. But........................

IMG-0197.jpg

Despite being a professional online shopper, for some reason I bought the wrong part. I think the new one is for an XLT and not the Wildtrak with its black rather than grey plastics. I've tried searching the part number for the old piece but I can only find the grey version.

Does it matter? To me it does, to my father, not at all. I might try and track down the correct part, but I guess its not critical concern. I'm just chuffed I managed to do this myself.

Whilst I had the car, I also gave it the monthly wash. This was my second use of the XL version of the Detail Factory tyre brush.


IMG-0203.jpg

IMG-0207.jpg

While the XL version doesn't have the same joyous flex to the bristles when compared to the original, it's still a very nice user experience and makes short work of these large tyres.

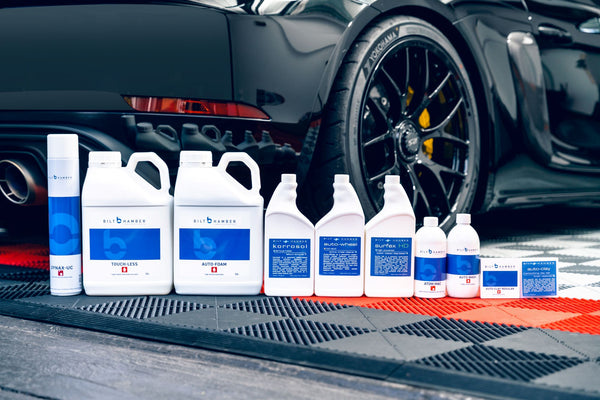
The pre-wash on this car was Bilt Hamber Touchless, used neat in the foam cannon. My earliest attempts using this soap were unsuccessful due to the flow of my Kranzle KHD-10 diluting it too much. So, I use it straight/un-diluted in the foam cannon canister.

Following the pre-wash, which removed all of the bugs and general road grime, I decided to use Koch Chemie Nano-Magic Shampoo, basically a fancy wash-n-wax. Normally, a soap like this would not have enough cleaning ability to deal with this car, but because of what Touchless can do, I decided to give it a try.


Nano-Magic was not designed for foam cannons, it really doesn't foam, but I did anyway to at least get it onto the paint like I normally would. It's also strangely lacking in lubrication compared to a pure soap.

IMG-0210.jpg

The car was then dried with the excellent Meguiar's Hybrid Ceramic Detailer, tyres dressed with 1:1 Perl, the interior wiped down with Griot's Interior Cleaner, leather given a once over with ONR.

I also got the XR6 out for a drive, taking the loooong way to the Big-Green-Shed. This gave me a chance to really lean on those new brakes, which now gives me confidence to drive the car hard. That same low speed smoothness that I was impressed with initially translates to performance driving as well. I did get them to fad a little bit in the end, but they don't start shuddering after two heavy applications like the stock setup would. The Project MU pads do produce more dust than the OE Ford pads, but not terrible like Brembo pads do. I'd still love to put Brembo's on this car, but overall, I'm happy with how the changes have translated.
 
To avoid these ads, REGISTER NOW!
OP
D

D.F.B

Well-known member
Joined
Aug 2, 2023
Messages
1,555
Location
Australia
Introduction to the Rupes HLR 15

Unveiled at SEMA late last year, Rupes finally uncovered their take on a battery powered 5 and 6-inch polisher.


hlr21-152.jpg

While Rupes led the industry with the iBrid Nano machines, it took them a while to bring larger sized battery machines to market. The first was released a couple of years ago, the 3-inch HLR 75, or Stiletto as it has become known.

hlr75.png

But it's the 5 and 6-inch machines many were asking for. Flex and ShineMate have owned this space for a while now, in some ways that gave Rupes the chance to take their time with the machines, and to learn from what it's competitors have done. I also believe Rupes held back due to professional users preferring electric machines for consistency and sustained performance when being used all day. But, the Pro-Sumer market is very real, and often more profitable. And so, after many hints and silent nods, Rupes finally unveiled their response late last year, and is now on sale across the world.

hlr21-15.jpg

It's important to note that these polishers are ground up new machines, not an electric polisher converted to battery power. The composite gearset contributes to a noticeable weight and size reduction. The dual-action eccentric set has been redesigned for lighter weight and smoother operation. The motor is now brushless with a redesigned cooling system, and the dual LED strips that run along the body provide battery condition on the fly. Rupes also redesigned the backing plate, which is ultra-thin compared to typical backing plates and is said to deliver a lower center of gravity and superior balance.

The batteries themselves are 5.0ah lithium-ion units and can deliver 40 minutes of continuous running at full power. Considering you won't ever run a polisher like that, battery life will never be a problem. At the moment, the new machines are only available in kit form, so each unit is sent with two batteries and a new dual port charger.

Waxit were one of only a couple retailers to have the new machines for sale, availability is expected to be limited until Rupes catches up with global demand. Other retailers have them listed as pre-orders for June/July supply. At the time of writing, Waxit have already sold out of the 15mm / 5-inch machine, but the 21mm / 6-inch is still in stock. For US readers, the new machines are filtering out across the usual retailers. Unless you are dealing with larger trucks and SUV's, I would stick with the smaller 15mm 5-inch.


But before going any further, let's address the elephant in the room...................the price! These are not a cheap purchase, exaggerated by the current kit-only format. In Rupes defense, the kit includes $275 (AUD) worth of pads and compounds. Even still, these are considerably more expensive than the now well-established Flex and ShineMate equivalents.

So why did I buy one when I already have a ShineMate EB351 5/15 5-inch polisher? Equal parts curiosity and stupidity. Personally, I would have been happy with just the machine, battery and charger without all the pads, towels and compounds that come with the kit. But here we are.....................

IMG-0226.jpg

IMG-0229.jpg

IMG-0230.jpg

The kit includes an assortment of foam and wool pads, along with DA Fine and DA Coarse compounds -

DA Fine Yellow Foam x2
DA Intermediate Teal Foam x2
DA Medium Yellow Wool x2
DA Coarse Blue Wool x2

The wool pads have actually been re-designed for the new HLR machines and feature a thicker foam interface. From what I can tell, this coincides with the updated foam and microfiber pads that launched some time ago. I suspect this added foam is to compensate for the ultra-thin backing plate.

IMG-0236.jpg

Dual port charger and 5.0ah batteries.

IMG-0238.jpg

IMG-0240.jpg

IMG-0243.jpg

IMG-0244.jpg

IMG-0245.jpg

IMG-0248.jpg

The new machines are made in Italy, US-market units will soon be made in the US. The batteries are, of course, made in China. The rubberized battery casing is also nice touch, providing some protection for accidental contact with the car.

IMG-0252.jpg

IMG-0254.jpg

IMG-0256.jpg

IMG-0258.jpg

IMG-0261.jpg

So, how does the all-new Rupes HLR 15 compare to my old ShineMate?

The very first thing you notice is how light the new Rupes is, with or without the battery.

IMG-0263.jpg

Overall, the two machines are about the same length, the extended nose and the way the battery is located on the Rupes has it standing taller than the ShineMate.

IMG-0266.jpg

My initial pre-use thought is that I prefer the ShineMates battery placement as it offers a more natural place to hold the polisher from, but that does tend to make it quite tail heavy. The Rupes has better weight balance. It may also take me a bit to acclimatize to the longer nose of the Rupes.

dec297.jpg

Where the ShineMate is pretty noisy and has quite a lot of chatter when winding down, the Rupes is buttery smooth and very quiet running at any speed. The thin backing plate is especially noticeable next to the ShineMate.

IMG-0269.jpg

Of course, the real comparison will begin once I get a chance to polish something with the new Rupes. At the moment, current thinking has the Mustang being first in line, basically the last polish in my care and the beginning of me saying goodby to the car.

More to come.....................
 

ajohno

Well-known member
Joined
Mar 25, 2014
Messages
1,359
Location
Sydney Australia
The Rupes machine looks good. Good how they all have battery’s now.

I have never used any of those polisher machines before just worried I will stuff the paint work up on the car. It looks easy but just not for me.
 
OP
D

D.F.B

Well-known member
Joined
Aug 2, 2023
Messages
1,555
Location
Australia
After a short break, I'm again providing blog posts for Detailing Shed. While these are not credited with my name, rather the business owner, I wrote and collaborated with the team to arrive at the final result.

The latest post is a Bilt Hamber range overview. While I could easily write multiple pages on the topic, I've had to dial that back to make it approachable for all readers rather than just for diehards like me.

For Bilt Hamber, I've tried to convey what each product does and why you would use it. Even for someone who lives and breathes detailing, I find Bilt Hamber's product descriptions rather confusing. Hopefully the article provides a better understanding of the brand and its products.

 
OP
D

D.F.B

Well-known member
Joined
Aug 2, 2023
Messages
1,555
Location
Australia
Is that real or fake carbonfibre?

And on another note...how do you turn over your vehicles - private? trade-in?
Having never been near carbon fiber, I'm not sure if it's real or not, unlikely would be my guess. Or..............maybe that's why they cost so much.

I've sold cars private and through trade-in, just depends on the situation. I will say that I hate the hassle of selling private and would much rather just trading, drive in/drive out. Considering how low the Ford dealer valued my basically brand-new Mustang, I'll probably sell privately, I already have someone who wants it.
 
OP
D

D.F.B

Well-known member
Joined
Aug 2, 2023
Messages
1,555
Location
Australia
Wildtrak Seat Trim Replacement

Some time ago, the drivers side seat base trim valance on the Wildtrak broke. From memory, the XLT that this car replaced also did the same, so I’m pretty sure this is a common failure part.

IMG-0187.jpg

IMG-0183.jpg

From what I can tell, the way the trim is shaped and attached to the seat has it subjected to substantial pressure as the driver enters and exits the vehicle. Repeated cycles of compression and release sees the plastic fatiguing over time, which then leads to it cracking.

Could I have made a warranty claim on this failure? Perhaps, but unlikely. Apart from the fact that its just outside of warranty now, Ford would likely claim it as wear and tear, which is fair enough. As such, I decided to order the part from Bayford and do the job myself.

There are a few different versions of this part, all dependent on trim and model spec, and of course driver or passenger orientation. For example, the same part in my Ranger would not have cut-outs for power seat adjustment but would have a mechanical backrest lever. There are also two versions for the 8-way powered Wildtrak, with or without seat heating. This particular Wildtrak is not equipped with seat heaters. At this point, I would list the part number and provide the link, but more on that in later.

First, I removed the two electric seat adjustment levers with my fancy skin wedge tool. There is also a singular Phillips head screw on the rear of the seat. The trim is then "massaged" from the locator tabs.

IMG-0190.jpg

Next, remove the two screws holding the switch module to the trim, you then need to release it from the tabs.

IMG-0193.jpg

IMG-0194.jpg

For the new trim, refit the switch module, then wrangle the trim into place to align and then snap into the three locator tabs, replace the rear screw. The adjuster levers then snap back into place. But........................

IMG-0197.jpg

Despite being a professional online shopper, for some reason I bought the wrong part. I think the new one is for an XLT and not the Wildtrak with its black rather than grey plastics. I've tried searching the part number for the old piece but I can only find the grey version.

Does it matter? To me it does, to my father, not at all. I might try and track down the correct part, but I guess its not critical concern. I'm just chuffed I managed to do this myself.
Well, it got the better of me!

IMG-0272.jpg

IMG-0274.jpg

I had the local Ford dealer find the correct part, which was ordered late yesterday and was at the parts department by 9am this morning. Can't beat that for turnaround, not to mention not paying for shipping.
 

ajohno

Well-known member
Joined
Mar 25, 2014
Messages
1,359
Location
Sydney Australia
After a short break, I'm again providing blog posts for Detailing Shed. While these are not credited with my name, rather the business owner, I wrote and collaborated with the team to arrive at the final result.

The latest post is a Bilt Hamber range overview. While I could easily write multiple pages on the topic, I've had to dial that back to make it approachable for all readers rather than just for diehards like me.

For Bilt Hamber, I've tried to convey what each product does and why you would use it. Even for someone who lives and breathes detailing, I find Bilt Hamber's product descriptions rather confusing. Hopefully the article provides a better understanding of the brand and its products.

Just read your product review. Very easy to read and detailed in each use of product.
 
OP
D

D.F.B

Well-known member
Joined
Aug 2, 2023
Messages
1,555
Location
Australia
I feel so much better now.....................

Black -

IMG-0277.jpg

River Rock Silver, not the contrast to the black switch levers -

IMG-0197.jpg

And what I would have preferred to include in the original post, the part number. If you have a PX MK III Ranger Wildtrak WITH 8-way powered seat but WITHOUT seat heating, you want the following part in black and NOT River Rock silver -

EB3Z 17A861 FH

IMG-0274.jpg

You would think that having done this before, removing the wrong part and putting the correct one on would have been easy. NO! :unsure:

The incorrect part put up a fight and I broke one of the rear locator tabs, which is no matter because I have no use for it anyway. The new part went on pretty good but.....................then I realized I forgot to reattach the two screws that secure the adjustment module to the trim. Rookie!! :mad:

So, off the trim comes, screws reattached and then the fight started. :lol_hitti I got the thing on again, but something didn't look right, and I somehow unhooked the front of base cushion from the seat frame. It was then I realized I hadn't slotted the front of the trim to the frame properly, so off it came again. I got everything lined up and clicked into place, I then had to fight that final screw to get it properly aligned.

What was going to be a 10-minute job turned into 45 minutes. :confused: A lot of that was moving the seat base and backrest up/down/backwards/forwards. It's at this point I have to wonder why powered seat bases are seen as a luxury, every movement takes far longer than a manual adjustment lever.

In any case, I don't mind, I think this is what they call a "learning experience".
 
OP
D

D.F.B

Well-known member
Joined
Aug 2, 2023
Messages
1,555
Location
Australia
The Victa Commercial 21 performed leaf vac duties today..............

IMG-0284.jpg

Grass has basically stopped, just tipping light regrowth now. The above is the last Ornamental Pear I have to deal with these days. I once had four properties with a combined 30 Pear trees to clean up every Autumn. Thankfully, they all dropped at different rates, so it spread out my workload across the season, with the last of them holding right up until the start of Winter. Would have carted billions of the things to the green waste every year......................

IMG_2999.jpg

And no, I didn't set fire to them....................

IMG_3003.jpg

I did two full loads that day, luckily the green waste tip was only a 3-minute drive from that particular property. Try doing that is a dual cab model.......................

IMG_3484.jpg

IMG_3485.jpg

Back to today, despite appearances, the below image is before I started cutting. The technique I use is to blow all of the leaves onto the lawn, in the process clearing a path around the perimeter to avoid the mower blowing leaves onto the pavement. I then get to it...............

IMG-0286.jpg

IMG-0289.jpg

After the initial cut.....................

IMG-0292.jpg

From there, most would be happy, but I then go around with the blower again and re-cut the area to **** up any remaining leaves. With so many more leaves yet to fall, it's probably a waste of time, but I have high standards!

IMG-0296.jpg

For leaf vacuuming, I would normally be using my Rover ProCut 560 or a 2-stroke Victa for this role, the Rover for its full width chute and massive catcher, the Victa 2-stroke for its sheer power. The Victa Commercial 21 with its partial chute did surprisingly well in this case, the engine barely raising a sweat.

I wish I bought this mower years ago!
 
Last edited:

ajohno

Well-known member
Joined
Mar 25, 2014
Messages
1,359
Location
Sydney Australia
Good job with the leaves.

I wish Ford still made those utes as I would order one straight away.

I had the Ford Courier as per my avatar picture for I think 9 years and it was fantastic.
 
OP
D

D.F.B

Well-known member
Joined
Aug 2, 2023
Messages
1,555
Location
Australia
Good job with the leaves.

I wish Ford still made those utes as I would order one straight away.

I had the Ford Courier as per my avatar picture for I think 9 years and it was fantastic.
Ford still offer a 4x2 single cab chassis Ranger, but its now only available with high-ride suspension. For me, that is disappointing as it would make loading up mowers harder, not to mention the roly-poly dynamics. Not that I'm saying a low ride Ranger would be a sports car, but at least I can drive it and not worry about rolling the thing over. Also, why have the 4x4 suspention without the 4x4 system.


ngr102.jpg

The thing is, Ford don't promote or encourage dealers to stock single cab Ranger's. Ford also don't allow you to Build & Price one on their configurator, only dual or extra cabs. I cannot understand why they do this, a very lazy approach in my opinion. All Ford are interested in selling are the high profit show ponies that are so far away from a workhorse that it's a bit of joke really. Not everyone needs or wants a dual cab.

And then to cap it all off, a base model 4x2 XL single cab chassis with the standard undernourished single turbo 2.0 diesel and 6-speed auto, vinyl flooring and steel wheels is a $40,000 proposition now. If you want the twin-turbo version with the 10-speed auto, you have to have 4x4, all yours for $50,000! Both figures are such a piss take for a base model tradesman workhorse.


Yet another reason why Ford are an exercise in frustration.
 

ajohno

Well-known member
Joined
Mar 25, 2014
Messages
1,359
Location
Sydney Australia
Ford still offer a 4x2 single cab chassis Ranger, but its now only available with high-ride suspension. For me, that is disappointing as it would make loading up mowers harder, not to mention the roly-poly dynamics. Not that I'm saying a low ride Ranger would be a sports car, but at least I can drive it and not worry about rolling the thing over. Also, why have the 4x4 suspention without the 4x4 system.


ngr102.jpg

The thing is, Ford don't promote or encourage dealers to stock single cab Ranger's. Ford also don't allow you to Build & Price one on their configurator, only dual or extra cabs. I cannot understand why they do this, a very lazy approach in my opinion. All Ford are interested in selling are the high profit show ponies that are so far away from a workhorse that it's a bit of joke really. Not everyone needs or wants a dual cab.

And then to cap it all off, a base model 4x2 XL single cab chassis with the standard undernourished single turbo 2.0 diesel and 6-speed auto, vinyl flooring and steel wheels is a $40,000 proposition now. If you want the twin-turbo version with the 10-speed auto, you have to have 4x4, all yours for $50,000! Both figures are such a piss take for a base model tradesman workhorse.


Yet another reason why Ford are an exercise in frustration.
Thanks I know about the hi riders but like you I also find the lower models suit my needs better like you for your business.
 
OP
D

D.F.B

Well-known member
Joined
Aug 2, 2023
Messages
1,555
Location
Australia
I've been wanting something like these for a while, but finally jumped when I had a request for something to help clean up vintage Campagnolo bike gear. In this case, I'll be using these on a Milwaukee Rotary Multi-tool.


IMG-0308.jpg

For polishing cars, pads like these would be used to deal with door handle cups, wheels, exhaust tips or any hard-to-reach spot. While ShineMate and Flex produce an attachment for these pads, you need a rotary machine to drive it, in particular a Flex PXE-80 or the ShineMate EP803k or EB230k


I have no use for a rotary machine other than the iBrid Nano, so careful use of these pads with the multi-tool will have to do, although it won't offer the same level of fine control.
 
OP
D

D.F.B

Well-known member
Joined
Aug 2, 2023
Messages
1,555
Location
Australia
Most people choose one tool and battery eco-system and stick with it. Me, I tend to shop for the tool I want based on performance or preference first, then consider the battery family second.

I probably don't recommend the method, it's certainly the more expensive route, not to mention juggling various batteries and chargers...............which is the subject of this post. I currently have 10 different chargers serving 11 different battery systems.

- Milwaukee 12v and 18v (M18 and M12 tools)
- Makita 18v
- EGO 56v (Blower, Fan and Inverter)
- Stihl AL101 36v (Hedge trimmer, pole trimmer, chainsaw, blower)
- Stihl AL1 10.8v (Handheld hedge shears)
- Solo 10.8v (Easy 206 Sprayer)
- Briggs & Stratton 18v (Victa Mustang 750iS lawn mower)
- ShineMate 18v (3 and 5-inch polishers)
- Rupes 18v (5-inch polisher)
- Rupes 10.8v (iBrid Nano polisher)

Ideally, I would love to do something like below, but there is no easy access to power where I'd want to locate this.

ccs101.jpg

So, I came up with something that would suit my chosen location. This area is where I have charged batteries from for a while, but in a very disorganized way.

(An old image taken before the flooring went down, and even before chargers got located there.)

csl101.png

To start with, I decided to keep the polisher chargers above my chemical storage cabinet next to the sink, this charging station will be for outdoor power equipment and general tools.

Firstly, I bought a piece of dressed pine from the hardware store, which was cut into two identical pieces. I then sanded and painted both with paint I already had on hand.

https://www.bunnings.com.au/285-x-19mm-1-2m-dar-pine-premium_p8401502

I then secured the timbers to the racks using stainless steel bolts that I also had in stock. This created a gap between the two pieces of timer, allowing the power cords to route through to the back. It was then a matter of measuring and driving in screws to hang each charger, along with two power boards on the back. The EGO charger will remain free standing due to its size, and in theory leaving room for potential future additions.

IMG-0313.jpg

IMG-0318.jpg

I now just have to figure out some cable management to tidy things up and it will hopefully serve me well.
 
OP
D

D.F.B

Well-known member
Joined
Aug 2, 2023
Messages
1,555
Location
Australia
My latest article went live today, this time focusing on Armour Detail Supply Wheel Coating.

https://detailingshed.com.au/blogs/articles/armour-detail-supply-wheel-coating-how-to-guide

https://detailingshed.com.au/products/armour-detail-supply-wheel-coating
https://armourdetailsupply.com/collections/protect/products/wheel-ceramic-coating

While this brand has been available for a while in the USA, it has only just landed in Australia. Having imported it directly from the Armour Detail Supply, I've had the chance to use it a few times now prior to its official release in Australia.

While I don't think ceramic coatings are the be all and end all of paint protection, I still like waxes and sealants, however, they make a lot of sense for wheels. No other surface is subjected to as much contamination and abuse than wheels, having a coating on wheels makes cleaning so much easier. And in that regard, the Armour product is a clear winner for durability, slickness and hydrophobic behavior. It's one of my favorite product discoveries.
 

ajohno

Well-known member
Joined
Mar 25, 2014
Messages
1,359
Location
Sydney Australia
My latest article went live today, this time focusing on Armour Detail Supply Wheel Coating.

https://detailingshed.com.au/blogs/articles/armour-detail-supply-wheel-coating-how-to-guide

https://detailingshed.com.au/products/armour-detail-supply-wheel-coating
https://armourdetailsupply.com/collections/protect/products/wheel-ceramic-coating

While this brand has been available for a while in the USA, it has only just landed in Australia. Having imported it directly from the Armour Detail Supply, I've had the chance to use it a few times now prior to its official release in Australia.

While I don't think ceramic coatings are the be all and end all of paint protection, I still like waxes and sealants, however, they make a lot of sense for wheels. No other surface is subjected to as much contamination and abuse than wheels, having a coating on wheels makes cleaning so much easier. And in that regard, the Armour product is a clear winner for durability, slickness and hydrophobic behavior. It's one of my favorite product discoveries.
Another great write up mate.
 
OP
D

D.F.B

Well-known member
Joined
Aug 2, 2023
Messages
1,555
Location
Australia
The XR6 up on the lift this week for its annual service...................read: oil and filter change.

ser241.jpg

ser242.jpg

ser243.jpg

ser244.jpg

Actually, it was quite confusing for the service advisor. The odometer reads just 31,000 km (19,600 mile), but his computer said it was in for 105,000km (65,240 mile) service. I made things worse when I said its already had the 105,000km service a few times now. He looked backwards and forwards a few times in confusion, then took a photo for reference. In actual fact, being a 2008 with 15,000 km (9360 mile) service intervals, in theory it would have been in for the 225,000km (140,000 mile) service. In the end, I told him to just change the oil. ;)

He then mentioned that they didn't have their detailer in to wash today. That made me VERY happy actually...................regardless, I still told him NOT to wash it, which he agreed it looked perfect anyway. I should have tipped him. 🤣
 

MadeByMiller

Well-known member
Joined
Dec 29, 2018
Messages
1,230
Location
Rapid City, SD
My latest article went live today, this time focusing on Armour Detail Supply Wheel Coating.

https://detailingshed.com.au/blogs/articles/armour-detail-supply-wheel-coating-how-to-guide

https://detailingshed.com.au/products/armour-detail-supply-wheel-coating
https://armourdetailsupply.com/collections/protect/products/wheel-ceramic-coating

While this brand has been available for a while in the USA, it has only just landed in Australia. Having imported it directly from the Armour Detail Supply, I've had the chance to use it a few times now prior to its official release in Australia.

While I don't think ceramic coatings are the be all and end all of paint protection, I still like waxes and sealants, however, they make a lot of sense for wheels. No other surface is subjected to as much contamination and abuse than wheels, having a coating on wheels makes cleaning so much easier. And in that regard, the Armour product is a clear winner for durability, slickness and hydrophobic behavior. It's one of my favorite product discoveries.
I'm going to have to order some! I'm getting some wheels refinished right now and I want to protect them and make them easy to maintain. Is it best to apply the coating after tires have been mounted and balanced?
 
To avoid these ads, REGISTER NOW!
OP
D

D.F.B

Well-known member
Joined
Aug 2, 2023
Messages
1,555
Location
Australia
I'm going to have to order some! I'm getting some wheels refinished right now and I want to protect them and make them easy to maintain. Is it best to apply the coating after tires have been mounted and balanced?
Good question.

While its easier to handle the wheels without tires on them, I have the tire fitted and balanced before coating. I'm not sure if this is a thing or not, but I don't want to have issues with the wheel weights not adhering to the coating.

Application process documented here -

If you haven't got a wheel stand, then a large trash can to stand the wheel up on will work almost as well.

G5HCKHn.png
 

MadeByMiller

Well-known member
Joined
Dec 29, 2018
Messages
1,230
Location
Rapid City, SD
Good question.

While its easier to handle the wheels without tires on them, I have the tire fitted and balanced before coating. I'm not sure if this is a thing or not, but I don't want to have issues with the wheel weights not adhering to the coating.

Application process documented here -

If you haven't got a wheel stand, then a large trash can to stand the wheel up on will work almost as well.

G5HCKHn.png
Thank you! That's what I was thinking too, I don't want to compromise the adherence of the wheel weights. I also don't want to risk the tire mounting process damaging the coating somehow. The trash can tip is a great one!

As per your methods and recommendation, I ordered the Wheel Coating Kit from OG as well as a couple of cans of Tarminator.

I'm excited, thank you!
 
Last edited:
OP
D

D.F.B

Well-known member
Joined
Aug 2, 2023
Messages
1,555
Location
Australia
Thank you! That's what I was thinking too, I don't want to compromise the adherence of the wheel weights. I also don't want to risk the tire mounting process damaging the coating somehow. The trash can tip is a great one!

As per your methods and recommendation, I ordered the Wheel Coating Kit from OG as well as a couple of cans of Tarminator.

I'm excited, thank you!
I'm excited for you!

If you want one of those wheel stands, the guy who originally came up with the idea has sadly decided not to make them anymore, although Carzilla still has some for sale.


Otherwise, there are a few different variations on the one I have -


msws2.jpg

IMG-9649.jpg

IMG-9758.jpg

IMG-9830.jpg
 
OP
D

D.F.B

Well-known member
Joined
Aug 2, 2023
Messages
1,555
Location
Australia
Clouted two birds on the way home last night, the stupid things flew out of a tree and swooped down in front of the Ranger. Looking back in the mirror, I only spotted the one on the road despite hearing two distinctive thuds. When I got home, I gave the car a quick look over from above and below and left it that.

Later in the evening, I went out into the garage for something and was startled by something scratching around under Ranger. I then spotted something looking out from the lower bumper intake................

IMG-0322.jpg

I must have stunned the bird, which explains why I didn't notice it in there after work. Of course, it was stuck in there and couldn't squeeze through the opening. That area of the car is sealed up with a plastic undertray, so I'm sure you can guess what came next. :confused:

I ended up removing three of the four 15mm bolts, enough for the undertray to hang down, but of course the stupid thing didn't want to get out. Several minutes of banging on the undertray, then a guiding prod with a mop handle had it falling out of the bumper, where it then scurried its way from under the car and out of the garage into the next-door neighbor's garden.

Well, that's a new one for me. At least I got to use my 1/2-inch socket extension for the first time. :lol:
 

Geoff289

Well-known member
Joined
Nov 10, 2013
Messages
1,209
Location
Melbourne, Australia
Clouted two birds on the way home last night, the stupid things flew out of a tree and swooped down in front of the Ranger. Looking back in the mirror, I only spotted the one on the road despite hearing two distinctive thuds. When I got home, I gave the car a quick look over from above and below and left it that.

Later in the evening, I went out into the garage for something and was startled by something scratching around under Ranger. I then spotted something looking out from the lower bumper intake................

IMG-0322.jpg

I must have stunned the bird, which explains why I didn't notice it in there after work. Of course, it was stuck in there and couldn't squeeze through the opening. That area of the car is sealed up with a plastic undertray, so I'm sure you can guess what came next. :confused:

I ended up removing three of the four 15mm bolts, enough for the undertray to hang down, but of course the stupid thing didn't want to get out. Several minutes of banging on the undertray, then a guiding prod with a mop handle had it falling out of the bumper, where it then scurried its way from under the car and out of the garage into the next-door neighbor's garden.

Well, that's a new one for me. At least I got to use my 1/2-inch socket extension for the first time. :lol:
I had a bird strike the grille on my daily Merc and break it, also ending its life. Didn't really enjoy extracting the carcass or the $900 odd cost of replacing the grille. The bird didn't have insurance and refused to provide details on the flimsy excuse that it was dead.
 
OP
D

D.F.B

Well-known member
Joined
Aug 2, 2023
Messages
1,555
Location
Australia
Post service sanity wash for the XR6 this morning.

This time, I washed the wheels and paint with the remainder of a bottle of Gtechniq G-Wash. Despite a lovely scent and decent slickness, I never really loved this soap.

IMG-9568.jpg

Drying Aid was Meguiar's Last Touch, the wheels wiped down with NV Boost v1 and the tyres dressed with Auto Finesse Satin, the only product from the brand that I ever liked. Glass was cleaned with Invisible Glass, the interior wiped over with ONR.

I then retuned the XR6 to storage for a while. Next week, its the Mustang's turn for a service.

And then, onto one of my favorite things to do, filling up spray bottles........................

IMG-0326.jpg
 
OP
D

D.F.B

Well-known member
Joined
Aug 2, 2023
Messages
1,555
Location
Australia
My latest article, this time featuring Bilt Hamber Atom Mac.


IMG-9970.jpg

I chased a product like this for the longest time, now we have two specific products that can prevent flash rusting of brake rotors. The first being Hydes Serum Rustopper, which I managed have shipped to Australia despite it being off the cards for air freight. It then landed in the Detailing Shed store after numerous requests from me.


Atom Mac arrived shortly after and does a similar job, but I have found it to be more effective. The bottle itself is expensive, but hyper concentrated, so it will go a very long way when diluted at the recommended 5% dilution. I apply it after cleaning each wheel, then again after the final rinse before blow drying.

This is super **** level detailing, but something I conder worth having, especially if you have black wheels.
 
OP
D

D.F.B

Well-known member
Joined
Aug 2, 2023
Messages
1,555
Location
Australia
Two articles posted this week, the latest on the updated MTM PF22.2 Foam Cannon.


IMG_0023.jpg

What I love about this update is not only does it improve the overall user experience, but the upgrade kit can also be used on other non-MTM foam cannons. If you have an older foam cannon with a narrow thread, I highly recommend this relatively cheap and simple upgrade, as can be seen on my original Waxit foam cannon.

IMG-1301.jpg

IMG-1315.jpg
 
OP
D

D.F.B

Well-known member
Joined
Aug 2, 2023
Messages
1,555
Location
Australia
I spend Sundays attending to my commercial gardening clients, that way I don't get in the way of others, or they get in my way. For the most part, these areas are publicly accessible, it can be quite amusing/puzzling/disgusting what I find discarded on lawns and in gardens. Everything from shoes, under wear and clothing, money, certain rubber devises, syringes, assorted car parts, human waste.................and everything in between. :dunno:

Most of the time it's just litter from low life individuals who have no concept putting things in a bin, even when its within walking distance from one...................

IMG_4354.jpg

I've found plenty of hub caps.....................

jun141.jpg

Today's lucky find was a rusted out muffler......................

IMG-0329.jpg

The ****** thing left rust in my tray! :confused:

IMG-0331.jpg

I'm thinking of compiling a special reference guide, The Observers Book Of **** On Your Front Lawn......................

[VIDEO]
 
OP
D

D.F.B

Well-known member
Joined
Aug 2, 2023
Messages
1,555
Location
Australia
Ready for it's last service in my care.................

IMG-0343.jpg

IMG-0355.jpg

IMG-E0347.jpg

The engine enjoyed sucking in some chilly 17-degree air too! With short gearing and rev happy nature, the engine winds out so quickly. It's such a shame the rev limiter on these gen-2 Coyote's is set at 6800 rpm, it's all too easy to kiss the limiter by accident. Gen-3 and 4 Coyote's rev out to 7500 rpm, which helps make use of the engine's big lungs and inherent appetite for revs.
 
OP
D

D.F.B

Well-known member
Joined
Aug 2, 2023
Messages
1,555
Location
Australia
Such a nice colour and car. Does this mean your S650 is coming?
Ha ha, I've given up trying to know what's going on with the S650. Apparently RHD production started late April/ early May, despite me asking for updates, the salesman doesn't seem interested in finding those things out. Other customers have been sent emails from Ford welcoming them to the family, some have also been sent a Ford Performance gift pack, some have been notified of their car being made..................................

I've received none of that, although I have a VIN number. I thought being so early on the order list would have counted for something, but I suspect my dealer being a somewhat small country dealer that doesn't sell a lot of Mustang's means their allocations are not priority. If I don't get a car in the first allocations (as in built this year), there is going to be hell to pay. I'm closing in on two years now.
 
Last edited:
OP
D

D.F.B

Well-known member
Joined
Aug 2, 2023
Messages
1,555
Location
Australia
How do you find the Meguiars Hyper wash?
I'm liking Hyper Wash more than I expected.

There were a couple of key aspects that put me off it -

- The expensive full RRP
- The ultra thick consistency
- Prior experience of other Meguiar's soaps
- It's not pH neutral, leaning alkaline at about 10.0

Curiosity eventually got the better of me. The key is to buy it when on sale, at full RRP it's just not viable against something like NV Snow and Optimum Car Wash.

The thicker consistency is mitigated by the wide-mouth foam cannon that I now have, I dispense it directly from the gallon bottle with a Griot's spout. It does need to be agitated to properly mix it with the water.

IMG-0023.jpg

IMG-0033.jpg

IMG-0027.jpg

The scent is not overly prominent, but its pleasant. Foam quality is brilliant, ultra thick. The product itself is super concentrated, even so I probably overdo it in terms of dose rate in the foam cannon. The higher pH means it cleans very well, which could be a little hard on a traditional wax or sealant, but totally fine on a ceramic coated vehicle. Apparently, the higher pH helps prevent ceramic coatings from "clogging up".

While it doesn't reach the same heights that Carpro Reset and Koch Chemie GSF reaches, overall, Hyper Wash is a very good soap.
 

ajohno

Well-known member
Joined
Mar 25, 2014
Messages
1,359
Location
Sydney Australia
Ha ha, I've given up trying to know what's going on with the S650. Apparently RHD production started late April/ early May, despite me asking for updates, the salesman doesn't seem interested in finding those things out. Other customers have been sent emails from Ford welcoming them to the family, some have also been sent a Ford Performance gift pack, some have been notified of their car being made..................................

I've received none of that, although I have a VIN number. I thought being so early on the order list would have counted for something, but I suspect my dealer being a somewhat small country dealer that doesn't sell a lot of Mustang's means their allocations are not priority. If I don't get a car in the first allocations (as in built this year), there is going to be hell to pay. I'm closing in on two years now.
Such a sham. Yes 2 years is a long wait.
 

ajohno

Well-known member
Joined
Mar 25, 2014
Messages
1,359
Location
Sydney Australia
I'm liking Hyper Wash more than I expected.

There were a couple of key aspects that put me off it -

- The expensive full RRP
- The ultra thick consistency
- Prior experience of other Meguiar's soaps
- It's not pH neutral, leaning alkaline at about 10.0

Curiosity eventually got the better of me. The key is to buy it when on sale, at full RRP it's just not viable against something like NV Snow and Optimum Car Wash.

The thicker consistency is mitigated by the wide-mouth foam cannon that I now have, I dispense it directly from the gallon bottle with a Griot's spout. It does need to be agitated to properly mix it with the water.

IMG-0023.jpg

IMG-0033.jpg

IMG-0027.jpg

The scent is not overly prominent, but its pleasant. Foam quality is brilliant, ultra thick. The product itself is super concentrated, even so I probably overdo it in terms of dose rate in the foam cannon. The higher pH means it cleans very well, which could be a little hard on a traditional wax or sealant, but totally fine on a ceramic coated vehicle. Apparently, the higher pH helps prevent ceramic coatings from "clogging up".

While it doesn't reach the same heights that Carpro Reset and Koch Chemie GSF reaches, overall, Hyper Wash is a very good soap.
I use a lot of Meguairs products as well. For car wash I use Adam’s car wash which I think is pH neutral.

Thanks for the reply.
 
OP
D

D.F.B

Well-known member
Joined
Aug 2, 2023
Messages
1,555
Location
Australia
I use a lot of Meguairs products as well. For car wash I use Adam’s car wash which I think is pH neutral.

Thanks for the reply.
All three of the Adam's soaps are excellent choices. Of the three, I prefer Mega Foam, it's not quite as thick as the blue and purple versions and foams better.

IMG-6474.jpg

IMG-5890.jpg

IMG-6032.jpg

Like any brand, Meguiar's has some excellent products, and some forgettable ones too. At the moment, I have Hyper Wash, Hyper Dressing, Hybrid Ceramic Detailer, M39 (now discontinued) and Last Touch in rotation. I also like the retail version of Quick Interior Detailer, the gallon format smells weird.

I have used a variety of other Megs products but moved on to other things. I do in particular HATE their Leather Cleaner and Conditioner that is sold in the Detailer gallon format. That stuff neither cleans or provides the sort of leather "condition" that I find desirable, all it does is slather the surface in a gloopy liquid that smells terrible and leaves a greasy, slippery and glossy finish. I bought it when I started doing more customer cars as a side gig but hated it so much that I ended up throwing it all away.
 
OP
D

D.F.B

Well-known member
Joined
Aug 2, 2023
Messages
1,555
Location
Australia
Service day for the Mustang....................

ser241.jpg

ser242.jpg

ser243.jpg

With only 10,559 km on the clock, it was given the 120,000 km / 96-month service...............again. With greasy fingerprints all over the car, and $540 later, it's good for another 12 months of sitting in the garage. :rolleyes:

They did have the car on display in the service reception, which was a nice touch, nor did they wash it! 😎 But, I had to go back in to have the book stamped because the service tech apparently couldn't find it. :unsure:

I have a habit of removing the service book from the glovebox and leaving it on the passenger seat...............you know, so they don't forget. I do this for Mustang especially as the service books are hidden in a special compartment of the glovebox, which considering this is a country dealer, they mostly service Ranger's and could be forgiven not knowing where to look.

1604940277428.png

gb1.jpg

gb2.jpg

gb3.jpg

The service tech told me that he couldn't find it, that he "looked everywhere" for it. I then pointed to the books in their black Ford branded cover sitting on the passenger seat and mentioned that I put them there because they are usually hidden in the above compartment. Let's just hope that's the only thing he didn't pay attention to.

Other than the page long list of "checks" that they carry out, the only physical thing they did was change the oil and oil filter, install a new pollen filter and road test. I'm at the point where I'm now seriously considering doing my own oil changes, I just don't like the prospect of laying on my back. Even though I would still need to get under the car to change the filter, are pneumatic oil extractors effective?
 
To avoid these ads, REGISTER NOW!
Top Bottom