Today I had a need arise to build a small rolling welding table.
One of my customers is having me do some site work for a week or two. I have discovered having a small rolling table on long term jobsites is really handy.
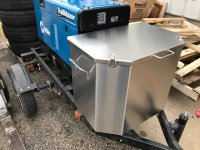
I usually use the top of the lid on my Knaack box, but its not a great welding surface die to the paint, and if you need to open it up you have to take everything off the top, making organization a pain.
Recently I came into possession of a bunch of aluminum. The local college was cleaning out the sculpture studio and they had a bunch of aluminum tubes and plates leftover from past projects. Some friends of mine were helping and called me up. "Hey, we've got a bunch of material you may want that's getting scrapped. If you want to buy any come have a look. Scrap price."
I busted hump downtown and took a look. Ended up making a deal for all of the new tubing plus a few drops and plates. Not a ton of stuff, but enough to make it worth my while.

I decided to make a table quick from some of this material.
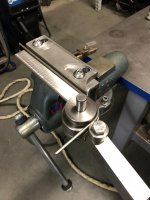
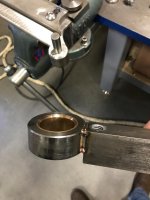
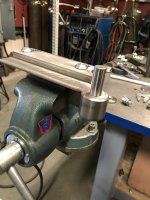
Cut the parts on the cold saw.

Laid it all out on the top. Top is 3/4" tooling plate approx 36" x 48". I think they used this as a work surface, it was pretty scratched up. I rounded the corners and ran a router around the edges to take the sharp corner off.

The big table makes these frames really easy to do.

If you do a slight bevel on the **** welds, they lay in pretty flush so you don't have to grind as much when you are putting a part over the joint.


The finished frame.

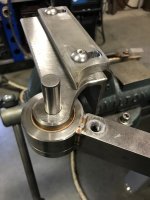
Drilled and tapped some 1/2-13 holes to mount the top to the base.

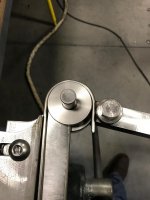
Mounted the table base to the top, attached some casters and voila! Small welding table.

I'm going to look for some wheel locks or something, it'll annoy the **** out of me if I can't stop it rolling away. Its done for now though.
One of my customers is having me do some site work for a week or two. I have discovered having a small rolling table on long term jobsites is really handy.
I usually use the top of the lid on my Knaack box, but its not a great welding surface die to the paint, and if you need to open it up you have to take everything off the top, making organization a pain.
Recently I came into possession of a bunch of aluminum. The local college was cleaning out the sculpture studio and they had a bunch of aluminum tubes and plates leftover from past projects. Some friends of mine were helping and called me up. "Hey, we've got a bunch of material you may want that's getting scrapped. If you want to buy any come have a look. Scrap price."
I busted hump downtown and took a look. Ended up making a deal for all of the new tubing plus a few drops and plates. Not a ton of stuff, but enough to make it worth my while.
I decided to make a table quick from some of this material.
Cut the parts on the cold saw.
Laid it all out on the top. Top is 3/4" tooling plate approx 36" x 48". I think they used this as a work surface, it was pretty scratched up. I rounded the corners and ran a router around the edges to take the sharp corner off.
The big table makes these frames really easy to do.
If you do a slight bevel on the **** welds, they lay in pretty flush so you don't have to grind as much when you are putting a part over the joint.
The finished frame.
Drilled and tapped some 1/2-13 holes to mount the top to the base.
Mounted the table base to the top, attached some casters and voila! Small welding table.
I'm going to look for some wheel locks or something, it'll annoy the **** out of me if I can't stop it rolling away. Its done for now though.
Last edited:


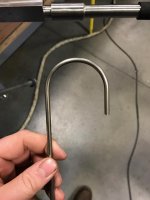

") I like that you can change it up for different radii and stock just by machining a new set of round slugs. Depending on the need (generally if it will be around people), I've learned to take the stock to the belt-sander and spin it around to put a ball-point on the hook, pre-bend.
I like that you can change it up for different radii and stock just by machining a new set of round slugs. Depending on the need (generally if it will be around people), I've learned to take the stock to the belt-sander and spin it around to put a ball-point on the hook, pre-bend.