To avoid these ads, REGISTER NOW!

E-tek Restorations: PROJECT THREAD

OP
E

e-tek

Well-known member
Joined
Dec 19, 2007
Messages
10,690
Location
Saskatoon, SK
Here she goes! The 40 Ford gets modern EFI power - with looks to match -

113_5254.JPG


113_5268.JPG


We changed the exhaust to these sweet Sanderson shorty headers to gain some much needed clearance at the steering linkage and it seems to have worked:

113_5270.JPG


Tomorrow the front and rear glass goes in and the engine gets wired.
 
To avoid these ads, REGISTER NOW!
OP
E

e-tek

Well-known member
Joined
Dec 19, 2007
Messages
10,690
Location
Saskatoon, SK
Well the glass guys came but they didn't leave themselves enough time, so I had them do the glass in my own car (the Z) rather than someone elses (the 40 Ford). They'll come back tomorrow when the have ample time to do the 40Ford without rushing.

113_5274.JPG


113_5276.JPG


In the meantime, I continued on with the running gear, wiring and engine re-assembly on the '40:

Every time I replace a seal like the rear ****** seal, I think there's got to be a better way....but there still isn't..... ;)

113_5283.JPG


113_5285.JPG


I always clean up the yoke when I replace a rear trans seal:

113_5287.JPG


A lot of wiring work still to be done. Prior to paint I had labelled most of it and had done up a schematic, but there's still a lot of final wiring to be done, including a lot of fine details and the removal of all the excess wiring not needed in this application.

113_5296.JPG


I removed paint from around the ECU mount studs to act as good grounding points:

113_5303.JPG


The painted and polished intake looks awesome in the engine bay!

113_5297.JPG


I wanted to get this shot of everything together but the polished name plate stole the show!

113_5298.JPG


Before quitting for the evening, I put the rear bumper on - what a rear end! :pimpflash

113_5294.JPG

More tomorrow!
 
OP
E

e-tek

Well-known member
Joined
Dec 19, 2007
Messages
10,690
Location
Saskatoon, SK
Back glass going in - lots of soapy water!

113_5318.JPG


113_5319.JPG


113_5320.JPG


The front, 2-piece windshield has this chrome centre piece which had a lot of rust on the backside. It took a good hour to clean, treat and paint as the last thing we need is some rust affecting the fit - or worse (?) the seal...

113_5305.JPG


113_5307.JPG


113_5309.JPG


Metal Ready, my favourite phosphoric acid solution was used to soak the metal inner piece. It should have gone all the way through and under the chrome outer section to stop any rust inside.

113_5311.JPG


After a few applications over a couple hours to allow it to work it's magic, I cleaned it off with pre-paint solvent and applied a few coats of Rust Paint.

113_5311.JPG


Finally, I gave it a good polishing and it was ready to rock -

113_5315.JPG


113_5316.JPG


Unfortunately, with everything ready to go, the men here and the pieces ready, I misplaced the glass pieces!!:dunno::willy_nil Seriously.

So the guys left and I called the owner, to ask if he had actually dropped them off. Yes he did. A further, closer look and I found them - still wrapped in their plain brown paper, standing up against the parts washer - right next to all the other glass pieces. What an idiot!

Once I found them I made sure they fit. The guys will be back tomorrow to get er done....


Lots of wiring still to be done before the front - end goes together. Best to get all this done now rather than leaning over freshly painted fenders!

113_5326.JPG


113_5325.JPG


During fitment the inner fenders took a bit of a beating, so everything was hammered straight, sanded, primed....

113_5324.JPG


113_5321.JPG


...then painted Dupli-Color's trim black - the perfect hue for anything under the hood -

113_5327.JPG


I sprayed the opposite sides with Dupli-Color's Undercoating treatment, but we plan to use a bed-liner product in all the wheel wells once it's all assembled to add a true protective, sound-deadening layer.

113_5328.JPG


:beer:
 

DynoDave

Well-known member
Joined
Mar 25, 2005
Messages
1,685
Location
Michigan

That bumper looks nice. And if you stripped/prepped/primed/blocked/painted that rounded trunk, and it came out that nice...you are the MAN! My neighbor built a '39 Plymouth coupe, and a '39 Chevy coupe, and he struggled with both of those deck lids.
 
OP
E

e-tek

Well-known member
Joined
Dec 19, 2007
Messages
10,690
Location
Saskatoon, SK
That bumper looks nice. And if you stripped/prepped/primed/blocked/painted that rounded trunk, and it came out that nice...you are the MAN! My neighbor built a '39 Plymouth coupe, and a '39 Chevy coupe, and he struggled with both of those deck lids.

Thanks Dave! Another shop welded some back-end parts in it 10+ years ago but they didn't fit up as they didn't have the hatch to match it. I welded in some metal to bring the lower lip out, aligned the hatch, made a mount for the latch and did a ton of blocking to even it all up. No one's happier than me that it turned out so good! :lol:
 

ddawg16

Well-known member
Joined
Jul 11, 2008
Messages
21,005
Location
S. California
The wiring for that motor should be easy. If it was anything like the TBI for my jeep....I ended up taking out more wires than what got added. For the most part, the engine should pretty much be it's own wiring system....bat, ign, start, brake....maybe a couple more...that is about it. Stupid simple once you really get into it.

I'm a fan of soldered connections as well....

One suggestion....double check those ground connections....especially on older cars where they depend on the body and chassis as the ground points.

BTW....and I know I'll get flamed by some of the guys....but I liked the other (lighter) blue on your Z better....
 

don long

Well-known member
Joined
Mar 31, 2012
Messages
8,841
Location
southern california
Unfortunately, with everything ready to go, the men here and the pieces ready, I misplaced the glass pieces!!:dunno::willy_nil Seriously.

So the guys left and I called the owner, to ask if he had actually dropped them off. Yes he did. A further, closer look and I found them - still wrapped in their plain brown paper, standing up against the parts washer - right next to all the other glass pieces. What an idiot!

Once I found them I made sure they fit. The guys will be back tomorrow to get er done....

Ed
I played that game all day today
Every time put down a part or tool I could not find it again
for several minutes. Just couldn't remember where I had layed it down.

The old ford is looking great.

(took a page out of your play book and changed my avatar)
Don
 

gipraw

Well-known member
Joined
Apr 25, 2013
Messages
1,033
Location
Cypress, TX
Looking good. Can't wait to see it with the glass all installed.


I played that game all day today
Every time put down a part or tool I could not find it again
for several minutes. Just couldn't remember where I had layed it down.

The old ford is looking great.

(took a page out of your play book and changed my avatar)
Don

I am horrible with that kind of thing. Partially explains why I have five and six of the same type tool.
 
OP
E

e-tek

Well-known member
Joined
Dec 19, 2007
Messages
10,690
Location
Saskatoon, SK
Robert - all the restoration/build threads are in Garage Gallery now. Mine was the only one in Free PArking, which may still not be long for this world (though you didn't hear that from me!)

ddawg - you could not be more right! ;) The basics were easy enough, but tracing, ID'ing and labelling all the other stuff took a while. Entire looms are dedicated to the AC systems, cruise control, WOT cutouts....

Don - you and I should work together some time - it might be FUN (or funny!!) Of course it's rather embarrassing when others are waiting on you...

And gipraw.....the front glass....is IN! :thumbup:


113_5345.JPG


113_5346.JPG


And this time there was no wasted time - so I had them pull the Front and Rear glass from the 68 Camaro project as well:

113_5331.JPG


113_5332.JPG


113_5333.JPG


113_5335.JPG


113_5337.JPG


The Camaro has some odd clips holding the WS mouldings in place. Takes a couple special tools and some wishing for them to pop out...

113_5340.JPG
 
OP
E

e-tek

Well-known member
Joined
Dec 19, 2007
Messages
10,690
Location
Saskatoon, SK
So glad you asked Simon - LOTS!

Chrome center piece and wiper towers add sparkle to the front end!

113_5354.JPG


113_5353.JPG


Owner picked up an ECU tester which plugs into the available leads. Looked like a simple operation... (sorry for the blurry photos' - I gotta slow down)

113_5347.JPG


113_5348.JPG


...until I saw the programming book!

113_5350.JPG


For all you solder and shrink-wrap fans!

113_5352.JPG


Time for some more house-cleaning. I SWEAR it didn't look like this when it left for paint!

113_5356.JPG


Sometimes I feel like I'm back in college.....

113_5359.JPG


After a lot of wiring, some power steering work and hooking up the heater hoses, as well as a coat of DC Trim Paint on the rad shrouding and the front end is nearly ready for re-assembly.

113_5364.JPG
 
Last edited:
OP
E

e-tek

Well-known member
Joined
Dec 19, 2007
Messages
10,690
Location
Saskatoon, SK
When I did the 56 Chev I tried Eastwood's Chassis Black on the vent window frames and found it to be perfect: a hard-shell glass-like black, so it's now my go-to paint for items like this. As luck would have it, I have lots on hand, since Eastwood sent me a bunch and it looks like **** on frames....

So I threw together my "Instant" parts paint booth and put 4 good coats on it.

113_5372.JPG


After letting it bake overnight it was rock hard and ready for re-assembly:

113_5392.JPG


Of course the photo doesn't show the nearly hour-long struggle it took to just to get to this point! :willy_nil

113_5397.JPG


Next up was the vent seal on the window surrounds - which was much easier!

113_5365.JPG


The included rivets fit perfectly -

113_5383.JPG


One item that has been an issue since the 40 rolled into the E-tek compound ;) was the inner door latch rods. At first they just rode a bit on the inside of the doo rat the latch, but then they got worse when I had to install the window bars...

113_5373.JPG


It seemed a simple enough but there were 3 or 4 possible fixes and I was in no hurry to choose the wrong fix as I didn't want to compromise the strength of the door panel.

So I finally decided a hole near the latch - and running it on the outside - was the right fix:

113_5374.JPG


113_5375.JPG


113_5377.JPG


113_5378.JPG
 
OP
E

e-tek

Well-known member
Joined
Dec 19, 2007
Messages
10,690
Location
Saskatoon, SK
Also got some prep work done on the dash ahead of it's installation:

113_5402.JPG


The owner decided on the use of the round vent holes and it was definitely the right call:

113_5404.JPG


113_5406.JPG


113_5408.JPG


BLING!

113_5411.JPG
 
To avoid these ads, REGISTER NOW!
OP
E

e-tek

Well-known member
Joined
Dec 19, 2007
Messages
10,690
Location
Saskatoon, SK
Eastwood reads that and they're not gonna send you any more ****! :lol_hitti

....that's OK Robert, they blew it with me when they had an issue with me being honest before. I told them I wouldn't editorialize if it wasn't warranted.
 
OP
E

e-tek

Well-known member
Joined
Dec 19, 2007
Messages
10,690
Location
Saskatoon, SK
Ed, Tell me what do you do when you have a project that needs Air Con gassed ? Can they do it on site for you ?

All happening in your workshop.

Yes, there are several on-sight shops that do that. I'll have them come out later to cut and crimp the lines, test and fill the system.
 

HOTFR8

Banned
Joined
Mar 2, 2007
Messages
24,498
Location
Castlemaine, Victoria. The Hot Rod Centre of Austr
Yes, there are several on-sight shops that do that. I'll have them come out later to cut and crimp the lines, test and fill the system.

Interesting to know as here the regulations are being tightened although I queried how they do farm machinery for example as that is still done on site.
Many workshops here want the vehicle moved so they can do the work in their own premises.
 

signcrafter

Well-known member
Joined
May 9, 2012
Messages
12,317
Looking good Etek.

Do you have anymore pictures of your "instant" paint booth? Just some Styrofoam made into a box? Any fans to pull overspray out?

Also you mentioned you let it bake overnight. In an oven or what did you mean by bake?
 
OP
E

e-tek

Well-known member
Joined
Dec 19, 2007
Messages
10,690
Location
Saskatoon, SK
Interesting to know as here the regulations are being tightened although I queried how they do farm machinery for example as that is still done on site.
Many workshops here want the vehicle moved so they can do the work in their own premises.

Regulation were tightened here too - but it was a while ago now (1990's) when they switched from R12 to R134. They tried to get everyone to "capture" old refrig, but few did - and the R134 leaked out on its own anyways! We can get fairly cheap DIY kits to recharge your own systems, but between crimping, cutting, parts, a flush and re-charge, someone else can do it! ;)
 
OP
E

e-tek

Well-known member
Joined
Dec 19, 2007
Messages
10,690
Location
Saskatoon, SK
Looking good Etek.

Do you have anymore pictures of your "instant" paint booth? Just some Styrofoam made into a box? Any fans to pull overspray out?

Also you mentioned you let it bake overnight. In an oven or what did you mean by bake?

If you look back in the thread, you'll see one of my "make-shift" booths explained in detail, using a 4" furnace duct fan that filters it through a Allergen media.

By "bake" I just meant I kept the ceramic heater running - which heats the little box up to about 200F and really seems to help flow and harden these paints.
 

HOTFR8

Banned
Joined
Mar 2, 2007
Messages
24,498
Location
Castlemaine, Victoria. The Hot Rod Centre of Austr
DIY kits :eek:.

Regulation were tightened here too - but it was a while ago now (1990's) when they switched from R12 to R134. They tried to get everyone to "capture" old refrig, but few did - and the R134 leaked out on its own anyways! We can get fairly cheap DIY kits to recharge your own systems, but between crimping, cutting, parts, a flush and re-charge, someone else can do it! ;)

We went through the same changes here from R12 to R134. Although here I have never seen a DIY kit in fact you can not touch Air Con here unless you have the correct qualifications. In the process of getting my F4 Air Con sorted out yet again as it has lost the gas twice now. When working it blows ice.

Sorry to hijack the topic but I noticed an Air Con hose in I think the 40 Ford and I just had to ask.
 
OP
E

e-tek

Well-known member
Joined
Dec 19, 2007
Messages
10,690
Location
Saskatoon, SK
Continued working on the dash today....

102_5413.JPG


Some intricate trimming of the center chrome piece that was required:

102_5416.JPG


102_5418.JPG


102_5425.JPG


A broken glovebox locking tab had to be fabbed up:

102_5421.JPG


102_5420.JPG


Vent openings installed:

102_5414.JPG


In between those items I cleaned and painted the rear glass runners prior to their installation:

102_5417.JPG


102_5426.JPG


102_5427.JPG


Prepped these window surround moldings I just found in the parts box - they should have been painted purple with the rest of the car!

102_5428.JPG


Engine looking much cleaner after wires on this side had been trimmed and re-routed. Pretty much ready for front end bolt up!

102_5424.JPG
 

signcrafter

Well-known member
Joined
May 9, 2012
Messages
12,317
If you look back in the thread, you'll see one of my "make-shift" booths explained in detail, using a 4" furnace duct fan that filters it through a Allergen media.

By "bake" I just meant I kept the ceramic heater running - which heats the little box up to about 200F and really seems to help flow and harden these paints.

I'll go back and try and find that post. I was a little late to the party on this thread but now that I started reading it I come back everyday to check for updates!

That engine wiring turned out really nice and clean.

What are you using in your shot sprayer?
 
OP
E

e-tek

Well-known member
Joined
Dec 19, 2007
Messages
10,690
Location
Saskatoon, SK
I'll go back and try and find that post. I was a little late to the party on this thread but now that I started reading it I come back everyday to check for updates!

That engine wiring turned out really nice and clean.

What are you using in your shot sprayer?

Thanks man, much appreciated. The sprayer has a Wax and Grease remover, which I buy in bulk.

Those fiddly little pieces like for the glove box must be fun to fabricate. Nicely done.
I noticed the vents are the same I used in the F4 so they must be popular. What is the front end for the 40 ?

Those vents are the stock pieces from the Vintage Ari unit - likely a universally available after-market vent piece.

This:

106_2987.JPG


When I was looking for ^THAT^ photo I was getting confused by my own thread! So I CAN'T IMAGINE (!) what it's like for someone else looking through this thread! It's not that the thread jumps all over - but my life in the shop sure does. So when it looks like I'm rebuilding a flathead 8 with twin SU's and mating it up to a 3spd Ford trans, then stuffing it all in a Henry '27 shell (all while Mrs E-tek is spayed across a couple convertibles)...it just looks that way.....

I would have gotten MUCH more done today, but it was also time to rake up the 6" carpet of leaves blanketing the front yard.....

photo.JPG
 
Last edited:
OP
E

e-tek

Well-known member
Joined
Dec 19, 2007
Messages
10,690
Location
Saskatoon, SK
HAHA! We JUST got curbside recycling!

Of course these are CITY trees and the wind comes from the West (to our side), so I get MORE than my share of leaves....PLUS the neighbors on BOTH sides are single, older females....so that's a LOT of their leaves too....

Oh well, all told, 5 kids came around this year asking if they can 'help' for $$, so I spread the work around a bit like that....otherwise it'd KILL me!
 
OP
E

e-tek

Well-known member
Joined
Dec 19, 2007
Messages
10,690
Location
Saskatoon, SK
The 40 Ford's onwer, Leonard, came out to lend a hand with the color-sanding process (speaking of which, I have no idea why it's even called "Color-sanding', as no color is sanded, only clear....and the major part of the process is buffing, not sanding)...

Tools of the trade...

102_5434.JPG


A newer tool in the process are these "Hook-it" (velcro-backed) sanding pads meant to attach to a Velcro backing disc in the DA or Palm-sander. They also work brilliantly on a rubber sanding block, or by hand.

102_5433.JPG


Leonard took one side, while I went down the other, first with 1000 on any bits of dirt, runs or heavy peel, then 1500 and finally 3000. Once the sanding was done, I followed up with the polisher -

102_5447.JPG


....while Leonard went on to some other items that required attention.

Such as attempting to fit a vent glass in it's frame (note the fender he had just completed in 3000 grit)

102_5444.JPG


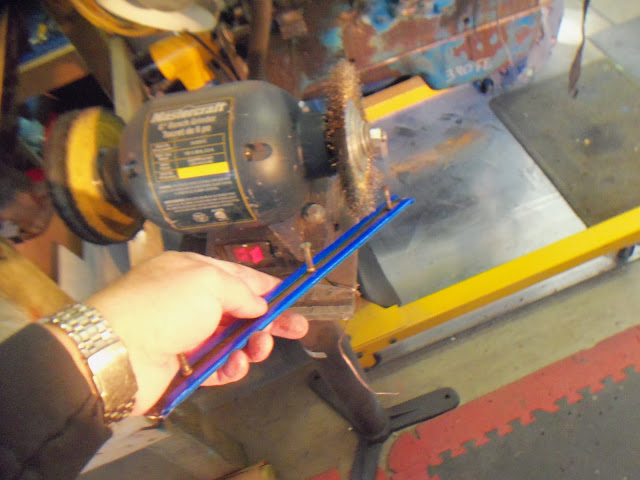
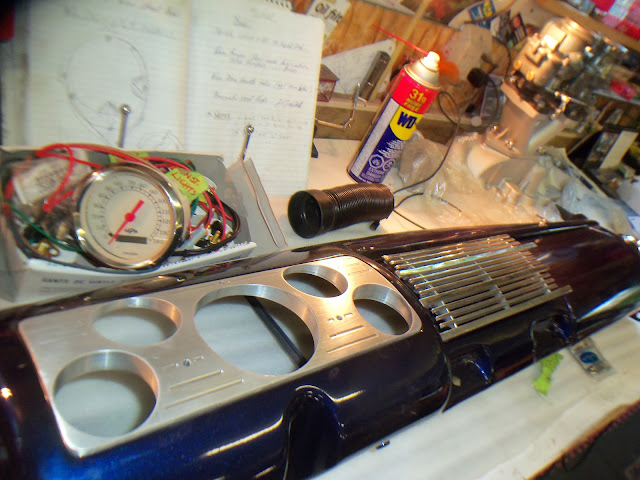
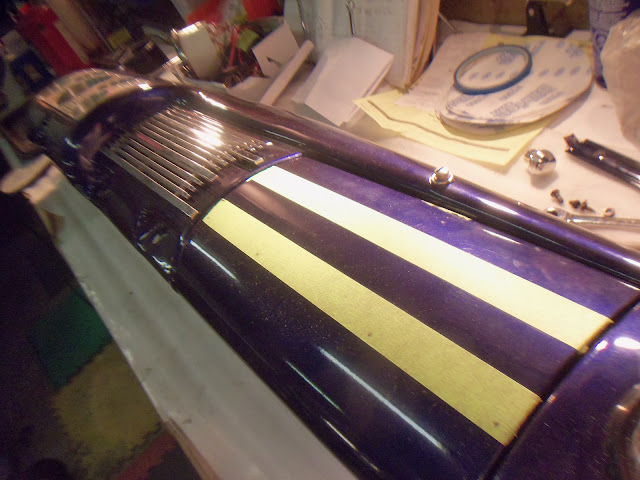
Measuring out chrome strips to add a "deluxe" touch to the dash....

102_5449.JPG


...and attempting to place an order for some parts missing from the inventory (or so he said as I had my suspicion he was texting his sweetie...)

102_5442.JPG


Meanwhile, back at the polishing-party....

102_5448.JPG


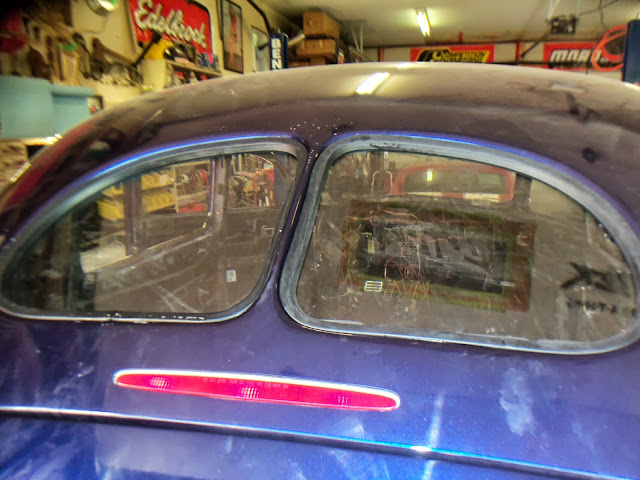
Swirl-marks in the truck lid mean were about 3/4 the way done with this panel!

102_5445.JPG


Here's that fender from above - after a first pass with the full-cut compound -

102_5450.JPG


And here it is after a second cut and come clean-up -

102_5452.JPG


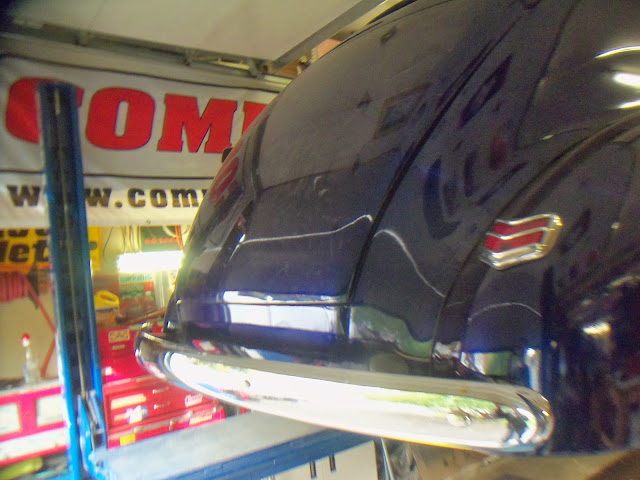
Reflections are a good gauge of how much cut is left to be done -

102_5454.JPG


After everything is sanded and cut to this point (still have to do the rest of the roof, front fenders and hood...) the wool pad is exchanged for one of 2 or 3 foam pads in order to do a final cut, a swirl remover and a filler. Total hours to color-sand? Between 25 and 30.....sometimes as high as 40! :willy_nil
 

Jtcrep

Well-known member
Joined
Apr 20, 2013
Messages
80
E-tek,

Man you sure have a lot of things going on all at the same time. I just spent three days reading all 88 pages, and I gotta echo everyone else you do wonderful work and I want to thank you for taking the time to share. I learned a lot and look forward to hearing and seeing more.
 

Zeke

Well-known member
Joined
Aug 13, 2009
Messages
17,176
Location
Long Beach CA, the sewer by the sea.
The 40 Ford's onwer, Leonard, came out to lend a hand with the color-sanding process (speaking of which, I have no idea why it's even called "Color-sanding', as no color is sanded, only clear....and the major part of the process is buffing, not sanding)...

Because back in the day when nitrocellulose lacquer was used on customs it was done in stages. 10 coats and sand. 10 coats and sand. 10 more coats and sand. All the while the floor of the shop took on the color of the paint. But I think the real reason for calling color sanding was that you were sanding the color between coats.

We didn't have anything finer than 600 grit either. I know, walked to school in the snow up hill both ways. We had to take the 600 scratches out with rubbing compound followed by polishing compound. Then we used several coats of Blue Coral wax and finally a pure carnuba blend of pure wax, no abrasive action. Maintenance was often done with Maguires as that was the only decent cream wax available.

Today you can pick and choose. Then, Maguires made only one product and 3M made the best compounds. Original Blue Coral is an incredible product but very hard to use.
 
OP
E

e-tek

Well-known member
Joined
Dec 19, 2007
Messages
10,690
Location
Saskatoon, SK
E-tek,

Man you sure have a lot of things going on all at the same time. I just spent three days reading all 88 pages, and I gotta echo everyone else you do wonderful work and I want to thank you for taking the time to share. I learned a lot and look forward to hearing and seeing more.

THIS. Thank YOU for reading and taking the time to say it.

Because back in the day when nitrocellulose lacquer was used on customs it was done in stages. 10 coats and sand. 10 coats and sand. 10 more coats and sand. All the while the floor of the shop took on the color of the paint. But I think the real reason for calling color sanding was that you were sanding the color between coats.

We didn't have anything finer than 600 grit either. I know, walked to school in the snow up hill both ways. We had to take the 600 scratches out with rubbing compound followed by polishing compound.

I was just a kid when I saw that kind of work going on at my Dad's shop so I don't recall the details, but it makes total sense.

THANKS for the history lesson Zeke!! :beer:
 
Last edited:
To avoid these ads, REGISTER NOW!
Top Bottom