To avoid these ads, REGISTER NOW!

Above 1200 Sq/FT Eastern Washington Workshop

Wokspaces above 1200 squarefeet.
OP
S

slodat

ALLIANCE MEMBER
Joined
Feb 6, 2010
Messages
3,679
Location
Central-ish, WA
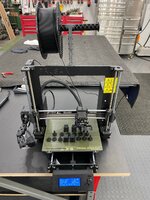
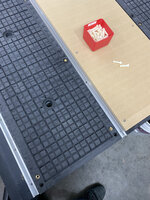
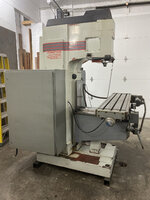
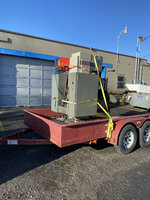
Drives- thank you so much for the kind words of encouragement. I walk in the shop every day and smile. It's crazy looking back at the photos, seeing how it has changed. I've owned it 4.5 years tomorrow. Lots left to do. I really want to finish painting the outside next spring. One day I'll have the spare cash for a ton of concrete work. The list goes on.

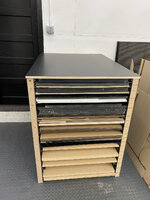
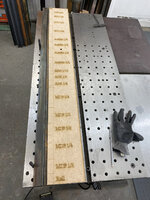
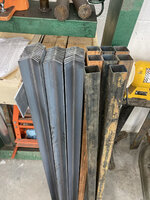
I have two sections of Interlake (aka teardrop) pallet racking in the shop. One in the woodshop that holds full sheets of all sorts of materials and the very top is for construction lumber, abs pipe and so on. I keep enough on hand to do a small project without having to drive 90 miles to the Depot. I had more pallet racking in this shop and I was able to eliminate the need for it. I may get some 2' deep stuff for the other building at some point. My storage style in this shop is drawers. Lots and lots of drawers. I don't like looking at clutter once the shop is cleaned up and things are put away. It's funny.. a local friend stopped by one day when I was in the middle of a project and the shop was a complete mess. He was surprised. Said he wondered if I used the shop. Ha! Cracked me up.

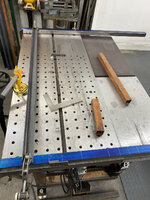
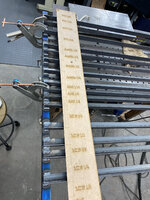
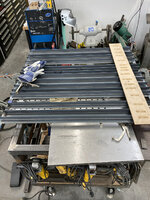
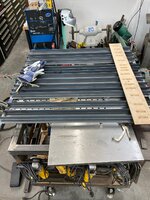
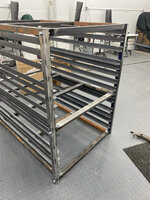
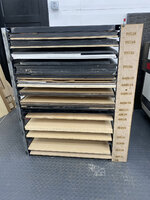
The material rack I'm planning a couple posts up is specifically for 32 x 48 (third of a sheet) of the composites I use for fabrication and mdf for prototyping. I'm pretty sure I'm going to weld it together. I don't think I'll really need to change anything with it.
 
To avoid these ads, REGISTER NOW!

KST1

Active member
Joined
Jun 22, 2005
Messages
38
Location
Illinois
I like this idea and am always looking for good ways to store materials. I tend to default to the "lean it on the wall" method most of the time.

Have you considered using UniStrut for the uprights? It would provide the adjustment/flexibility that JB suggested might be useful. Of course, it would come at the cost of having to buy the sliding nuts and drilling holes in the horizontal shelf brackets.

-Derek

p.s.: Following along and loving your projects. Very jealous of the laser!
 
OP
S

slodat

ALLIANCE MEMBER
Joined
Feb 6, 2010
Messages
3,679
Location
Central-ish, WA
Started on my material rack. 1.5 x 1.5 x 0.065 square tubing and 1.5 x 1.5 x 0.125 angle. Drew in Fusion 360 to make sure it’s what I wanted. This is a really good way to go.

fe31a16463545ce9d4614873a9446792.png

Material cut to length.
0d935d6215d95ff7a72bd6e7caa0a420.jpg

Cut a full size layout template on the laser.
1d1df9ff89b9c2d4deda1755b7f04a8e.jpg

fbabb1574a15fdbea8bcd26e7c22c146.jpg

Squared up and clamped down to the welding table.
bcf0f3cd4cbb567b3154358448dcbf5d.jpg

Now I have a square.
680ab8d6a928e977a6a3617e1e1fd74f.jpg

I made a layout template out of scrap. This is the material setback from the edge.
3392ece04b3180ace8b97c7f5627d4f6.jpg
6a8a1e14fcc6b2bbe97d9f02f4cc64c7.jpg

This should be some good TIG welding practice.
 

Attachments

  • bcf0f3cd4cbb567b3154358448dcbf5d.jpg
    bcf0f3cd4cbb567b3154358448dcbf5d.jpg
    1.7 MB · Views: 0
  • 6a8a1e14fcc6b2bbe97d9f02f4cc64c7.jpg
    6a8a1e14fcc6b2bbe97d9f02f4cc64c7.jpg
    1.4 MB · Views: 0
  • 3392ece04b3180ace8b97c7f5627d4f6.jpg
    3392ece04b3180ace8b97c7f5627d4f6.jpg
    1.6 MB · Views: 0
  • 680ab8d6a928e977a6a3617e1e1fd74f.jpg
    680ab8d6a928e977a6a3617e1e1fd74f.jpg
    1.8 MB · Views: 0
  • fbabb1574a15fdbea8bcd26e7c22c146.jpg
    fbabb1574a15fdbea8bcd26e7c22c146.jpg
    1.7 MB · Views: 0
  • 1d1df9ff89b9c2d4deda1755b7f04a8e.jpg
    1d1df9ff89b9c2d4deda1755b7f04a8e.jpg
    1.6 MB · Views: 0
  • fe31a16463545ce9d4614873a9446792.png
    fe31a16463545ce9d4614873a9446792.png
    993.2 KB · Views: 1
  • 0d935d6215d95ff7a72bd6e7caa0a420.jpg
    0d935d6215d95ff7a72bd6e7caa0a420.jpg
    1.9 MB · Views: 1
OP
S

slodat

ALLIANCE MEMBER
Joined
Feb 6, 2010
Messages
3,679
Location
Central-ish, WA
First side went together well.

8ea5cc350226d4c5c302b96ddce54b6f.jpg

ef3f21811de690c578f3382546aeaaa6.jpg

57cd07ebac8ab3bbb2d3aaedd10bbed5.jpg
 

Attachments

  • 8ea5cc350226d4c5c302b96ddce54b6f.jpg
    8ea5cc350226d4c5c302b96ddce54b6f.jpg
    1.8 MB · Views: 0
  • 57cd07ebac8ab3bbb2d3aaedd10bbed5.jpg
    57cd07ebac8ab3bbb2d3aaedd10bbed5.jpg
    1.5 MB · Views: 0
  • ef3f21811de690c578f3382546aeaaa6.jpg
    ef3f21811de690c578f3382546aeaaa6.jpg
    1.9 MB · Views: 0

lilscorpion

Well-known member
Joined
Mar 15, 2010
Messages
3,599
Location
Colorado
First side went together well.

8ea5cc350226d4c5c302b96ddce54b6f.jpg

ef3f21811de690c578f3382546aeaaa6.jpg

57cd07ebac8ab3bbb2d3aaedd10bbed5.jpg


Lookin sweet! For whatever reason I really like material racks that follow the bread rack design. Looking forward to see it come together.
 

Attachments

  • 8ea5cc350226d4c5c302b96ddce54b6f.jpg
    8ea5cc350226d4c5c302b96ddce54b6f.jpg
    396 KB · Views: 0
  • ef3f21811de690c578f3382546aeaaa6.jpg
    ef3f21811de690c578f3382546aeaaa6.jpg
    429.4 KB · Views: 0
  • 57cd07ebac8ab3bbb2d3aaedd10bbed5.jpg
    57cd07ebac8ab3bbb2d3aaedd10bbed5.jpg
    295.5 KB · Views: 0
OP
S

slodat

ALLIANCE MEMBER
Joined
Feb 6, 2010
Messages
3,679
Location
Central-ish, WA
Thanks Matt!

I’ve got it together. Decided to bolt the two sides to the top, bottom and mid shelf. The uprights bowed.. a lot. Despite being clamped to 2.125” thick cast iron plate. I welded angle to the second side and removed after it was welded up. Still bowed. This is the reason for the middle bolt in shelf.

It wants to rack a little. I’ll add a plywood back that should take care of that. At some point I’ll send it out for powder coat. Overall I’m happy with it. I need to do a lot more TIG welding before I’m going to be any good at it. Struggling with feeding rod.

Anyway. This thing was a ton of work, a lot of fun to build and I think it will do a great job cleaning the area up next to the laser.

acda28f3b643339c30bae8cb580c9614.jpg
 

Attachments

  • acda28f3b643339c30bae8cb580c9614.jpg
    acda28f3b643339c30bae8cb580c9614.jpg
    1.7 MB · Views: 0
OP
S

slodat

ALLIANCE MEMBER
Joined
Feb 6, 2010
Messages
3,679
Location
Central-ish, WA
Fifteen hour day working on this thing. 1/2” plywood back took care of any racking. Turns out 1/2 plywood is good for the shelves. Loaded up.. mostly.

897565a97bc7f111fe2ec1566781a6d8.jpg

82b2513d939cf91b2f5412ea3da40206.jpg

I’ve wanted this stuff organized and accessible since I started cutting sheets in thirds almost three years ago.

I’ll sort out a top tomorrow.
 

Attachments

  • 82b2513d939cf91b2f5412ea3da40206.jpg
    82b2513d939cf91b2f5412ea3da40206.jpg
    1.7 MB · Views: 0
  • 897565a97bc7f111fe2ec1566781a6d8.jpg
    897565a97bc7f111fe2ec1566781a6d8.jpg
    366.4 KB · Views: 0
OP
S

slodat

ALLIANCE MEMBER
Joined
Feb 6, 2010
Messages
3,679
Location
Central-ish, WA
Thanks Justin! The organization projects are super satisfying. Smile every time you use it or just walk by.

Legend made on the laser, attached with 6-32 button head screws. I’m thinking I’ll box the whole thing in with black laminate. Back engraved acrylic on the front once the top and sides are done.

51e0721e25737f259722c748fe32396a.jpg
 

Attachments

  • 51e0721e25737f259722c748fe32396a.jpg
    51e0721e25737f259722c748fe32396a.jpg
    842.2 KB · Views: 0

drivesitfar

Well-known member
Joined
Oct 23, 2013
Messages
35,988
Location
Pacific Northwest
SD: you are doing well at GETTING ORGANIZED that is for certain. looking at your shop it looks like you maybe clean up after each job and put everything away? so then when you want to start a new project you don't have a PRE TO DO LIST just cleaning up?

your new rack looks like it's doing it's job. WELL DONE!!

it wasn't mentioned, but did you finish the NOVA before he sold it or did he get the offer in the middle of you doing the interior and pull the plug?

that was a cool car and the stuff you were doing looked like 22nd century so nothing better than vintage looks with ultra modern insides.

cheers
 
OP
S

slodat

ALLIANCE MEMBER
Joined
Feb 6, 2010
Messages
3,679
Location
Central-ish, WA
I’ve been wanting a 3d printer for a while. It’s an aspect of digital fabrication that I know fits in with what I’m doing in the shop. On a good friend’s strong recommendation and after a ton of research I settled on a Prusa i3 MK3S. I bought it factory assembled. It’s also available as in kit form. I can’t recommend the assembled Prusa i3 MK3S enough. Great prints out of the box. First project was beyond impressive.

These parts mount a Raspberry Pi 3 and Pi camera for OctoPrint- a nice remote management and monitoring setup. Instead of shuttling an SD card between the PC and Prusa, OctoPrint lets you send the file via WiFi. It also allows you to monitor the status of the printer remotely. It even creates the cool stop motion videos. Higher quality prints take longer. They are so worth the wait. Really happy with it all.

02c9ea672ff775680bf545918e1a0824.jpg

9cd2ebe7e4f28913bc5987596adc27f7.jpg

726d8afc4858f6c32aecdb498ff449c6.jpg

32a66136aeea37654892a5bcce3beeb4.jpg

c558db791058092590b8d6253d3c6251.jpg

b280bc99a5aafb5c37a8af43f605153e.jpg

a7a06e7df2a969262d175be5512b0eea.jpg

The missing screws are because I’m waiting on a hardware order.
1eda02b02546622e5fb7545141deb6ff.jpg

13140c4d0f72a3ebbaffc133a0188467.jpg

a016da3d951f600ce35507618a2f83a9.jpg

d20f75995dd23913e840ae74d243036b.jpg
 

Attachments

  • d20f75995dd23913e840ae74d243036b.jpg
    d20f75995dd23913e840ae74d243036b.jpg
    100 KB · Views: 1
  • 32a66136aeea37654892a5bcce3beeb4.jpg
    32a66136aeea37654892a5bcce3beeb4.jpg
    407.9 KB · Views: 1
  • 726d8afc4858f6c32aecdb498ff449c6.jpg
    726d8afc4858f6c32aecdb498ff449c6.jpg
    343.1 KB · Views: 0
  • 9cd2ebe7e4f28913bc5987596adc27f7.jpg
    9cd2ebe7e4f28913bc5987596adc27f7.jpg
    595.8 KB · Views: 0
  • 02c9ea672ff775680bf545918e1a0824.jpg
    02c9ea672ff775680bf545918e1a0824.jpg
    632.4 KB · Views: 0
  • c558db791058092590b8d6253d3c6251.jpg
    c558db791058092590b8d6253d3c6251.jpg
    427.3 KB · Views: 0
  • b280bc99a5aafb5c37a8af43f605153e.jpg
    b280bc99a5aafb5c37a8af43f605153e.jpg
    369.2 KB · Views: 0
  • a016da3d951f600ce35507618a2f83a9.jpg
    a016da3d951f600ce35507618a2f83a9.jpg
    408.7 KB · Views: 0
  • 13140c4d0f72a3ebbaffc133a0188467.jpg
    13140c4d0f72a3ebbaffc133a0188467.jpg
    370.9 KB · Views: 0
  • a7a06e7df2a969262d175be5512b0eea.jpg
    a7a06e7df2a969262d175be5512b0eea.jpg
    301 KB · Views: 0
  • 1eda02b02546622e5fb7545141deb6ff.jpg
    1eda02b02546622e5fb7545141deb6ff.jpg
    351.6 KB · Views: 0
To avoid these ads, REGISTER NOW!
OP
S

slodat

ALLIANCE MEMBER
Joined
Feb 6, 2010
Messages
3,679
Location
Central-ish, WA
Calling the material rack done for right now. Top and sides are on. Top has cleats that sit in the open ends of the square tubing uprights. I’m sure I’ll edge bad the top at some point. Entire thing bolts together. The sides took it from slight racking/rocking when pushed hard to a big solid box. I’m surprised and pleased with how big of a difference that made. All in all this is exactly what I pictured and wanted.

a774c9594fbfe8ac948941548c0cc55d.jpg

f7d860222a1a0d9af22b96eb6cf1a892.jpg

c3b073c35169a41e2d99da593b08afda.jpg
 

Attachments

  • c3b073c35169a41e2d99da593b08afda.jpg
    c3b073c35169a41e2d99da593b08afda.jpg
    1.4 MB · Views: 1
  • f7d860222a1a0d9af22b96eb6cf1a892.jpg
    f7d860222a1a0d9af22b96eb6cf1a892.jpg
    1.5 MB · Views: 0
  • a774c9594fbfe8ac948941548c0cc55d.jpg
    a774c9594fbfe8ac948941548c0cc55d.jpg
    1.6 MB · Views: 0
OP
S

slodat

ALLIANCE MEMBER
Joined
Feb 6, 2010
Messages
3,679
Location
Central-ish, WA
Forgot to post the before/after of the air management system I did. Wish hard lines would have been in the budget.

4e59f0b5d131d75224a79c98fea32750.jpg
 

Attachments

  • 4e59f0b5d131d75224a79c98fea32750.jpg
    4e59f0b5d131d75224a79c98fea32750.jpg
    768.4 KB · Views: 1

bigpokie

Well-known member
Joined
May 25, 2013
Messages
438
Looks like a 63/64 impala/biscayne. Anymore pics of the whole car ? You cleaned it up really nice.
 
OP
S

slodat

ALLIANCE MEMBER
Joined
Feb 6, 2010
Messages
3,679
Location
Central-ish, WA
Didn't take any photos of the whole car. All I did was the wiring cleanup, which included making the mounting panel for the ENDO tank.
 

HotWire

Well-known member
Joined
Mar 21, 2010
Messages
368
Location
Montana
I stayed up past my bedtime 2 nights in a row reading your thread. Excellent work!

I love the ingenuity and work ethic. I also enjoy all your automation. I used to build automated manufacturing equipment and have taken PLC classes.

I would love to have even 20% the capacity of your shop, but for now Im very happy with my humble shop.

Thanks for sharing with us!


Sent from my iPhone using Garage Journal
 
OP
S

slodat

ALLIANCE MEMBER
Joined
Feb 6, 2010
Messages
3,679
Location
Central-ish, WA
Thank you for checking out my shop!!


Much needed weekend off is here. Tinkered a bit today on a few things I’ve wanted to get done..

First was changing my Milwaukee battery chargers to switched power via the lighting contactor. I’ve read of batteries (not specifically these batteries) causing fires. Now they only charge when the lights are on, which is when I’m in the shop. While I was up there I made a small shelf for the Sonos speaker.

Baltic birch cut on the laser. Front lip to prevent speaker from falling off.
3e22d971d6aaaf271ece883e1d1a9c19.jpg

66b04af0cb5a4762b05a2e767439ca7f.jpg

All back together.
75676e396ea4e7276b53975107322826.jpg

Printed an organizer for Craftsman ignition wrenches. Turned out nice.
01e4cd6167dc3f491cbb1a875f1fbf78.jpg
 

Attachments

  • 3e22d971d6aaaf271ece883e1d1a9c19.jpg
    3e22d971d6aaaf271ece883e1d1a9c19.jpg
    1.8 MB · Views: 1
  • 66b04af0cb5a4762b05a2e767439ca7f.jpg
    66b04af0cb5a4762b05a2e767439ca7f.jpg
    1.2 MB · Views: 1
  • 75676e396ea4e7276b53975107322826.jpg
    75676e396ea4e7276b53975107322826.jpg
    1.6 MB · Views: 1
  • 01e4cd6167dc3f491cbb1a875f1fbf78.jpg
    01e4cd6167dc3f491cbb1a875f1fbf78.jpg
    1.9 MB · Views: 1
Last edited:

OOBER

Well-known member
Joined
Dec 2, 2012
Messages
153
Location
Kansas City
Awesome tools and organization. Looks like you are getting some good use out of the new printer.

Nice work!
 
OP
S

slodat

ALLIANCE MEMBER
Joined
Feb 6, 2010
Messages
3,679
Location
Central-ish, WA
Thank you, oober!

Modified the vacuum table of the cnc router today. The mdf spoil board has been curling up and making it a hassle to get sucked down when I go to use the machine. When the company I bought it from was here setting up the machine I asked them what they do to hold the spoil board down to the table. They suggested wood screws into the vacuum table. Needless to say this project has been on the back of my mind for coming on three years.

First I had to draw the machine bed in cad. This went well considering I didn’t do any probing. I added brass threaded inserts to the vacuum table so I can bolt the spoil board down. While I was at it I switched to using strips so the t-tracks are exposed for clamping. Last thing was a X0 Y0 fence to make setups quicker.

Tomorrow I will do a bit of cleanup on the fence so the t-tracks are clear. I’m thinking I’ll look into getting probing working soon.

1011b75f964496faf2d955e0d1705cba.jpg

17d9542025621c7a47ba9c8c795f223c.jpg

5e38a37bf991cd4d8697a9fca7d23a8b.jpg

4277e0c218c0a32df3c4d1f88f8b3a39.jpg

5e28d56624388e0f6e17a0656cd0aa88.jpg
 

Attachments

  • 1011b75f964496faf2d955e0d1705cba.jpg
    1011b75f964496faf2d955e0d1705cba.jpg
    1.6 MB · Views: 0
  • 17d9542025621c7a47ba9c8c795f223c.jpg
    17d9542025621c7a47ba9c8c795f223c.jpg
    350.5 KB · Views: 0
  • 5e38a37bf991cd4d8697a9fca7d23a8b.jpg
    5e38a37bf991cd4d8697a9fca7d23a8b.jpg
    1.7 MB · Views: 0
  • 4277e0c218c0a32df3c4d1f88f8b3a39.jpg
    4277e0c218c0a32df3c4d1f88f8b3a39.jpg
    1.3 MB · Views: 0
  • 5e28d56624388e0f6e17a0656cd0aa88.jpg
    5e28d56624388e0f6e17a0656cd0aa88.jpg
    1.4 MB · Views: 0
Last edited:
OP
S

slodat

ALLIANCE MEMBER
Joined
Feb 6, 2010
Messages
3,679
Location
Central-ish, WA
Reworked the fence a bit. I didn’t realize until after I made the first fence that the Y axis section doesn’t have an attachment point at one end because the X axis section is using that bolt. And, I needed to clear out the X axis fence section so clamps would slide in t-tracks.

Yesterday’s attempt.. dowel.
fac44aedd4efe0989e56198b684ed8e9.jpg

Today’s better solution. Domino. Worked out well.
4738987d57535fc9f096b851e1efd4d2.jpg

This shows how this fence is used. Makes for quick setup most of the time.
29e964f3e64570ec3b78da903686dd5a.jpg

New fence parts bolted down. Dry fit domino between X and Y in the corner.
2856bc6889ae3ad08c2bfd255519a890.jpg

Outside profile and surfacing done on the machine.
f2b871aea946c03c233fa447c5bde94b.jpg

Fun project. Learned a lot. And, the spoil board no longer fights me when I start the vacuum pumps.
 

Attachments

  • f2b871aea946c03c233fa447c5bde94b.jpg
    f2b871aea946c03c233fa447c5bde94b.jpg
    592.2 KB · Views: 0
  • fac44aedd4efe0989e56198b684ed8e9.jpg
    fac44aedd4efe0989e56198b684ed8e9.jpg
    1.5 MB · Views: 0
  • 4738987d57535fc9f096b851e1efd4d2.jpg
    4738987d57535fc9f096b851e1efd4d2.jpg
    1.3 MB · Views: 0
  • 29e964f3e64570ec3b78da903686dd5a.jpg
    29e964f3e64570ec3b78da903686dd5a.jpg
    1.4 MB · Views: 0
  • 2856bc6889ae3ad08c2bfd255519a890.jpg
    2856bc6889ae3ad08c2bfd255519a890.jpg
    603.4 KB · Views: 1
OP
S

slodat

ALLIANCE MEMBER
Joined
Feb 6, 2010
Messages
3,679
Location
Central-ish, WA
I’ve wanted a cnc milling machine (and lathe) for a long time. After converting my router to Centroid Acorn, I knew I wanted my other machines to run their control as well. I just got this machine home. Was 150 miles away. Weighs 6000 pounds, CAT40 spindle taper, oiler, coolant, Baldor DC servos, 7.5 HP spindle. I think it’s a perfect candidate for control retrofit and will be a great first cnc mill for my shop. Seller needed it out of his shop. I got it for scrap value or a little under.

ef004b791a1cdaa44c37c2dce94b82b5.jpg

9785670f15814a13dbbf60d83f1bce79.jpg

389f18f1486853e825116e9c564df4f9.jpg

241a98ec0710343d1fead215b662283a.jpg

ff30e5417d9963f39f9dc608af0c9e4c.jpg

Made it to my shop without incident.

2206cff712c50a4ca17ad199876ed442.jpg

Delta 20 control.
 

Attachments

  • ef004b791a1cdaa44c37c2dce94b82b5.jpg
    ef004b791a1cdaa44c37c2dce94b82b5.jpg
    1.8 MB · Views: 1
  • 9785670f15814a13dbbf60d83f1bce79.jpg
    9785670f15814a13dbbf60d83f1bce79.jpg
    1.7 MB · Views: 1
  • 389f18f1486853e825116e9c564df4f9.jpg
    389f18f1486853e825116e9c564df4f9.jpg
    1.6 MB · Views: 0
  • 241a98ec0710343d1fead215b662283a.jpg
    241a98ec0710343d1fead215b662283a.jpg
    328.2 KB · Views: 1
  • ff30e5417d9963f39f9dc608af0c9e4c.jpg
    ff30e5417d9963f39f9dc608af0c9e4c.jpg
    1.9 MB · Views: 1
  • 2206cff712c50a4ca17ad199876ed442.jpg
    2206cff712c50a4ca17ad199876ed442.jpg
    1.3 MB · Views: 1
OP
S

slodat

ALLIANCE MEMBER
Joined
Feb 6, 2010
Messages
3,679
Location
Central-ish, WA
Got the mill in the shop. Looks like good bones. Needs a thorough cleaning and a complete electrical rebuild. Lots of useable parts.

c60f60a5488d083312e33051ae8d5d56.jpg

b884e203c7a2ee2093c98abb4a28ff3a.jpg

ab263f7927a3d99299c6ddb9672104c1.jpg
 

Attachments

  • c60f60a5488d083312e33051ae8d5d56.jpg
    c60f60a5488d083312e33051ae8d5d56.jpg
    1.5 MB · Views: 0
  • b884e203c7a2ee2093c98abb4a28ff3a.jpg
    b884e203c7a2ee2093c98abb4a28ff3a.jpg
    1.6 MB · Views: 0
  • ab263f7927a3d99299c6ddb9672104c1.jpg
    ab263f7927a3d99299c6ddb9672104c1.jpg
    1.7 MB · Views: 0

matt_i

Well-known member
Joined
Mar 14, 2008
Messages
10,717
Location
SE Michigan
Trees are pretty cool machines, the Cat40 spindle is a big upgrade over an R8. Nice heavy machine too.

Only downside is the tool-changer is You, but that can be overcome :)

I'm not totally sure how Tree processes G-code, I'm guessing it has something like a paper-tape drive or an RS-232 port (?)

I used these guys to add a USB port to my Fadal so I can code on a laptop and push the program (its a .txt file) to the processor memory via flash drive. That has been a very useful feature over typing while standing at the machine....

http://www.calmotion.com/usb-to-cnc.html

Shop is looking good from checking out the last few pages!
 
OP
S

slodat

ALLIANCE MEMBER
Joined
Feb 6, 2010
Messages
3,679
Location
Central-ish, WA
Thanks, Pat! It is a good score for me. Not a lot of guys wanting a machine this big that doesn’t run. I’ve been on the lookout for one for a few years.

Matt, I’m replacing the control. I don’t want to mess with the Delta 20. Thanks for the info!

Spend several hours and a gallon of cleaner scrubbing the coolant and grime off the mill today. Will need another pass. After getting a closer look, I’m still happy with the machine. Should work well for my needs.

e0ebd8b3f2741deecefa2bf8d1fb6197.jpg

523dac19ec33ef45eb8d89dba1838eb2.jpg

05013bcc9bffee9745c304c3cee45164.jpg

63f1bd0b32610be8ae2079c934f4827f.jpg

62f0bd4694160c4263b7e37ce03adcd0.jpg
 

Attachments

  • e0ebd8b3f2741deecefa2bf8d1fb6197.jpg
    e0ebd8b3f2741deecefa2bf8d1fb6197.jpg
    1.5 MB · Views: 0
  • 523dac19ec33ef45eb8d89dba1838eb2.jpg
    523dac19ec33ef45eb8d89dba1838eb2.jpg
    1.6 MB · Views: 0
  • 05013bcc9bffee9745c304c3cee45164.jpg
    05013bcc9bffee9745c304c3cee45164.jpg
    1.4 MB · Views: 0
  • 63f1bd0b32610be8ae2079c934f4827f.jpg
    63f1bd0b32610be8ae2079c934f4827f.jpg
    1.3 MB · Views: 0
  • 62f0bd4694160c4263b7e37ce03adcd0.jpg
    62f0bd4694160c4263b7e37ce03adcd0.jpg
    1.5 MB · Views: 0

Riley

Well-known member
Joined
Feb 18, 2007
Messages
398
Just curious, how the heck did you move 6K lbs around? Got a fork lift hiding somewhere?

It's amazing watching you put these spaces together. Low budget, top quality!
 
OP
S

slodat

ALLIANCE MEMBER
Joined
Feb 6, 2010
Messages
3,679
Location
Central-ish, WA
The seller had a 4k forklift. It took everything it had to get the mill loaded on the trailer.

62e4c4e922c43285f76086a343da9e46.jpg

Picked from the top with both forks together. Two straps and a clevis mostly leveled the load.
97b817992e0b46547aee8a694b9205f5.jpg

Lifting it to get the steel bar cribbing out was the limit of the forklift.
91c4ebad09c46ab64e308437f1945d87.jpg

Load was in the sweet spot for the trailer.
d9546f86605f4d30f5575e46fc1fcbc1.jpg

Tied down secure and ready to roll.
4255bdaf88877084476b8d944229c2df.jpg

11f085ef853f2851cf6af2c53d7873cc.jpg

Stopped to check things out. No issues. Drove between 30 and 55 mph on two lane backroads the whole way home.

9b0774a3b0309dd69086692c0ea26b30.jpg

Made it home just as the sun set. Twelve hours round trip.
46f9252682cdc987b8b4f61635ecaf4b.jpg

Rented a 10k telehandler to unload.
ac4f7c64fc85ec7ea6651e781e1100cd.jpg

Same rigging as the day before to pick it.
78fbd6cec1312f7b42febd6a0350101d.jpg
3f36c03d8972c4ca20fde8e45dd222d0.jpg
d0cbb3251a5e50f11a6f4934d7e66105.jpg
d90616a52ee89988655193ed34e423f7.jpg

Coming up to the shop door.
c84fbd0a27cc952b86d90719367536ef.jpg

We set it back on the 3” square tubing it was on at the sellers shop and picked it up from the bottom and drove it in the shop. It’s sitting on the tubing now. I’ll lower it off the tubing onto round bar with a toe jack and roll it into place on the bar. Once it’s in place the toe jacks lift and set it on the ground.
 

Attachments

  • 78fbd6cec1312f7b42febd6a0350101d.jpg
    78fbd6cec1312f7b42febd6a0350101d.jpg
    2.1 MB · Views: 0
  • d9546f86605f4d30f5575e46fc1fcbc1.jpg
    d9546f86605f4d30f5575e46fc1fcbc1.jpg
    1.7 MB · Views: 0
  • 4255bdaf88877084476b8d944229c2df.jpg
    4255bdaf88877084476b8d944229c2df.jpg
    1.8 MB · Views: 0
  • 11f085ef853f2851cf6af2c53d7873cc.jpg
    11f085ef853f2851cf6af2c53d7873cc.jpg
    1.8 MB · Views: 0
  • 9b0774a3b0309dd69086692c0ea26b30.jpg
    9b0774a3b0309dd69086692c0ea26b30.jpg
    1.8 MB · Views: 0
  • 46f9252682cdc987b8b4f61635ecaf4b.jpg
    46f9252682cdc987b8b4f61635ecaf4b.jpg
    1.9 MB · Views: 0
  • ac4f7c64fc85ec7ea6651e781e1100cd.jpg
    ac4f7c64fc85ec7ea6651e781e1100cd.jpg
    1.6 MB · Views: 0
  • 3f36c03d8972c4ca20fde8e45dd222d0.jpg
    3f36c03d8972c4ca20fde8e45dd222d0.jpg
    2 MB · Views: 0
  • d0cbb3251a5e50f11a6f4934d7e66105.jpg
    d0cbb3251a5e50f11a6f4934d7e66105.jpg
    1.9 MB · Views: 0
  • d90616a52ee89988655193ed34e423f7.jpg
    d90616a52ee89988655193ed34e423f7.jpg
    2.1 MB · Views: 0
  • 91c4ebad09c46ab64e308437f1945d87.jpg
    91c4ebad09c46ab64e308437f1945d87.jpg
    1.7 MB · Views: 1
  • 97b817992e0b46547aee8a694b9205f5.jpg
    97b817992e0b46547aee8a694b9205f5.jpg
    1.7 MB · Views: 1
  • 62e4c4e922c43285f76086a343da9e46.jpg
    62e4c4e922c43285f76086a343da9e46.jpg
    429.4 KB · Views: 1
  • c84fbd0a27cc952b86d90719367536ef.jpg
    c84fbd0a27cc952b86d90719367536ef.jpg
    1.8 MB · Views: 1
Last edited:

Riley

Well-known member
Joined
Feb 18, 2007
Messages
398
Ah ha...the telehandler is a great answer! It did look as though the f150 had a bit of tongue weight on it. Looking forward to seeing you get it up and moving.
 
To avoid these ads, REGISTER NOW!
Top Bottom