
You are using an out of date browser. It may not display this or other websites correctly.
You should upgrade or use an alternative browser.
You should upgrade or use an alternative browser.
Between 265 & 485 SQ/FT Nick's Two-Car Detached Vdub Garage
- Thread starter nicholam77
- Start date
Workspaces sized between 265 and 485 squarefeet.
OP
nicholam77
Well-known member
Thanks for the input everyone, definitely gave me some ideas!
I had not thought about putting them in the rafters. I'll keep this idea in mind.
4 sets!! Must be nice to have all that space out in Afton
To a degree, yes, and I do use that space.
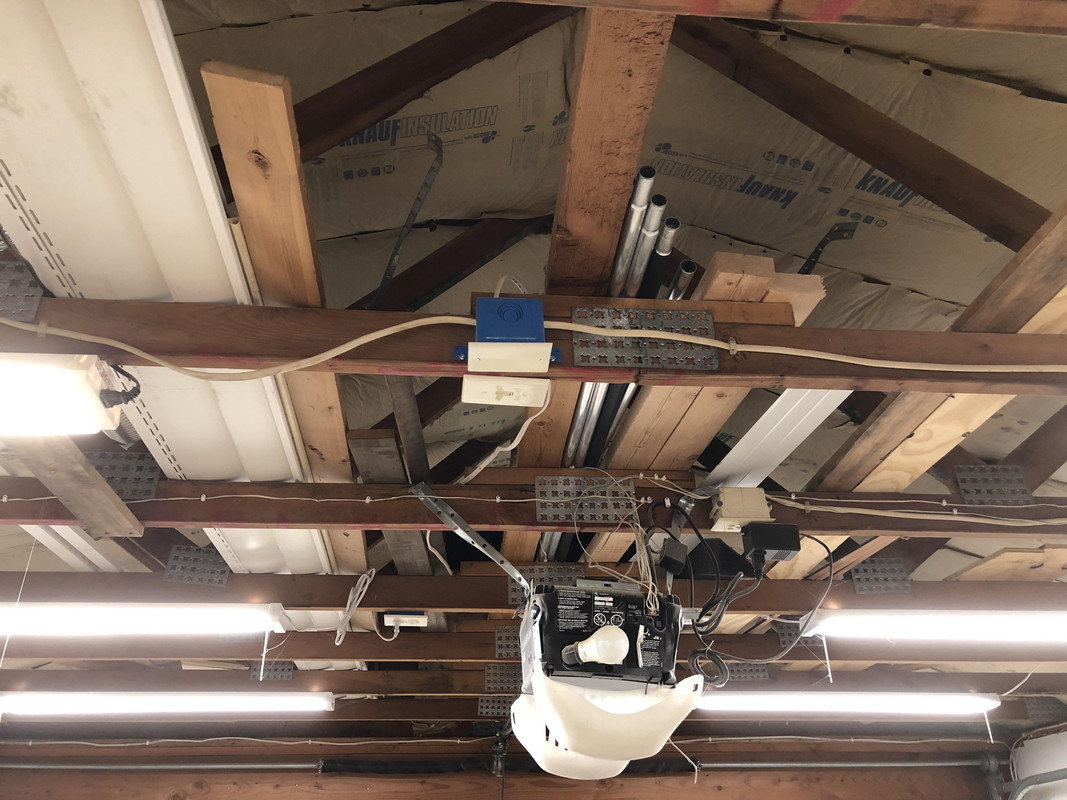
But I am determined to use the racks I just made, and I also want my nicer lumber more visible so I can see at a glance what I have to work with.
It's a good idea, though, that I sometimes forget about.
Thank you, I figure might as well make it nice and practice techniques on shop furniture I can maybe use on real furniture one day. Spoiler alert, this is what I've done with the tires for now... to my wife's dismay. More "****" in the shed!
I've gone with the green box (see below). The in-progress pics are an ongoing debate for me, whether every little step is interesting or not. It's definitely some extra work, so it's nice to hear you enjoy it!
That's a great idea but I don't have the clearance. 8' walls and the overhead door gets pretty close to the rafters when open.
_________________________________________
So as you may have realized, the tire rack has come down. So long, tire rack.
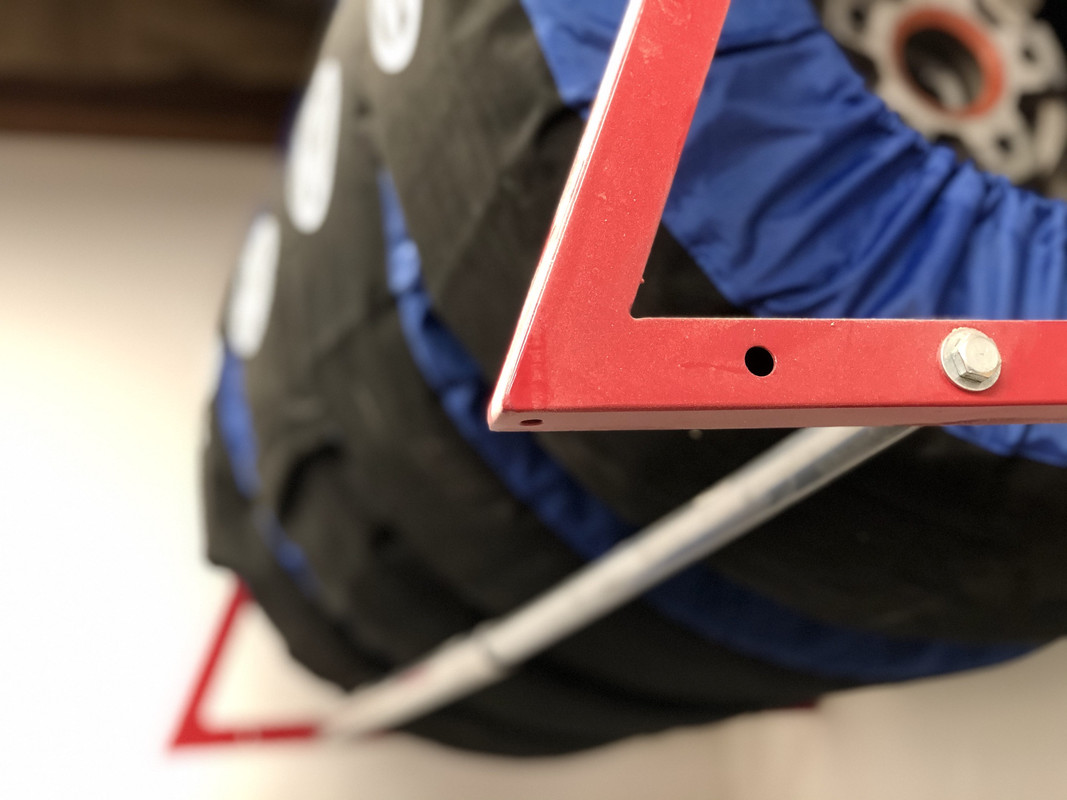
It was one of the first things I put in the garage, back when I thought it was going to be solely a space for the GTI. But it was never ergonomic, protruding from the wall as much as it did, and honestly was somewhat dangerous (my dad banged his head on a steel corner at least once).
In fact it went in even before I painted, so I have some touch up to do:
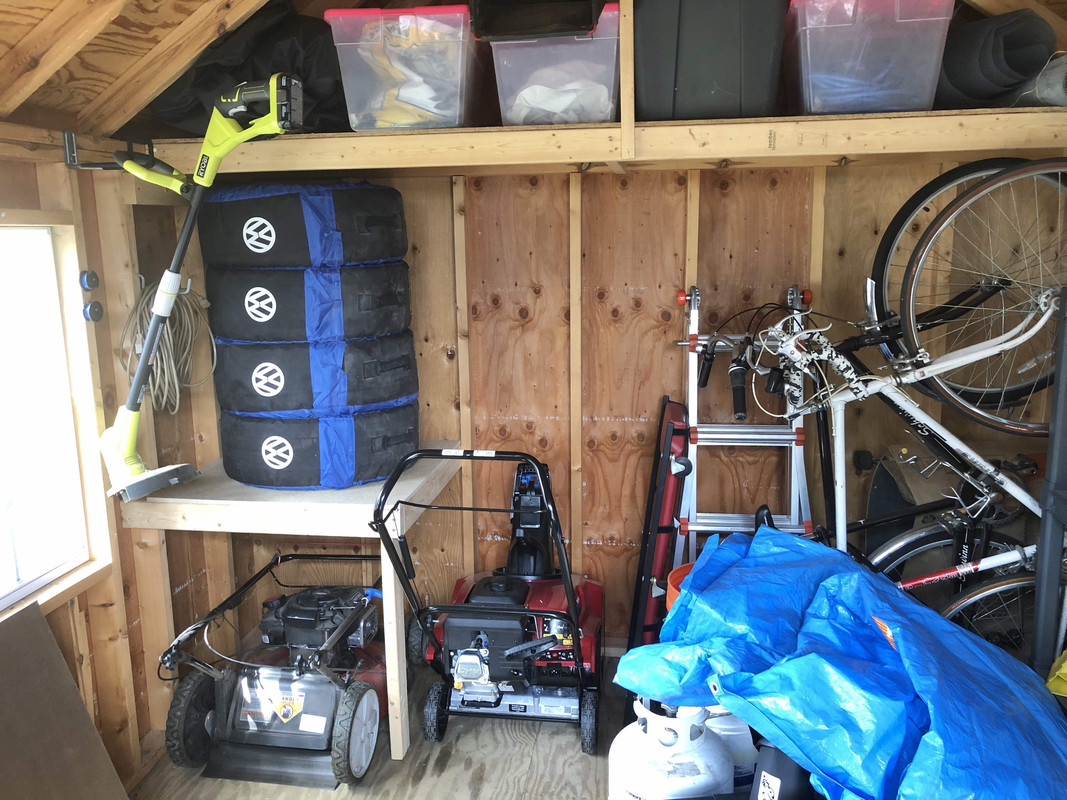
This is where they are for now. I will think on all your suggestions and see if there is a better spot, but for now this is acceptable. Maybe when I can tackle the clusterfudge that is the shed I will figure out a different storage for them.
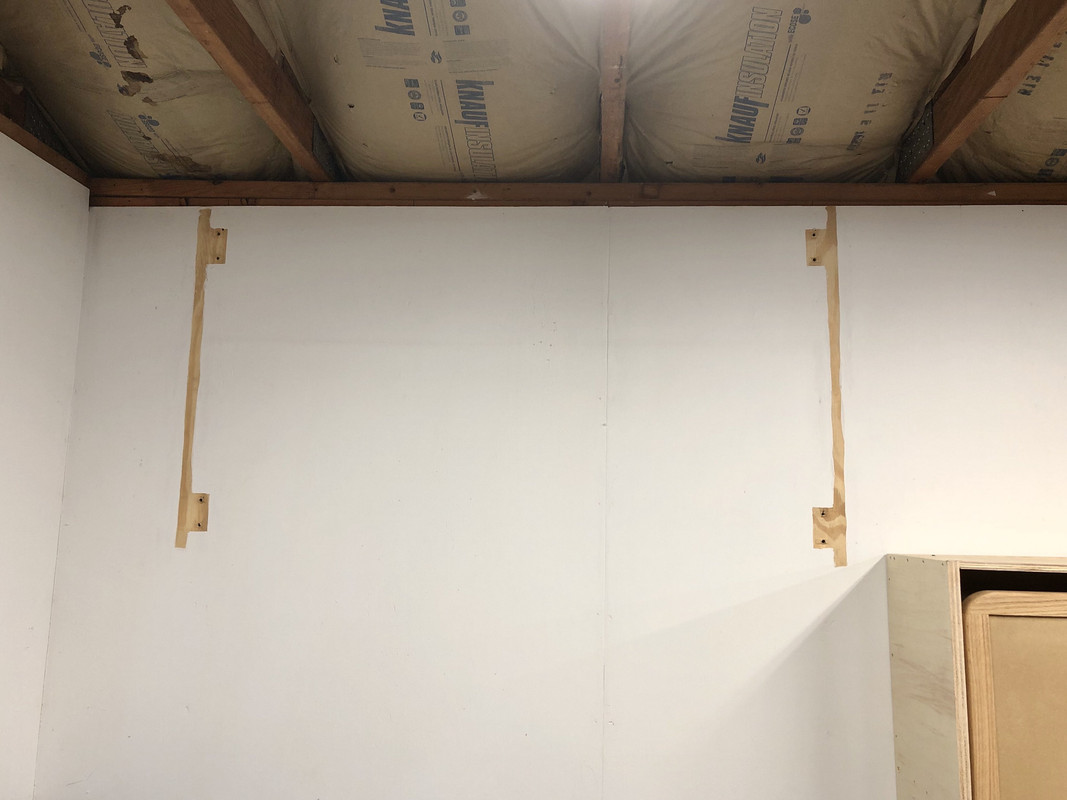
I spent some time sorting through the massive pile of boards on my workbench, sorting by size and type of wood, and weeding out some stuff I didn't want. Scrap cutoff clutter is one of those things that can really get out of hand quick!
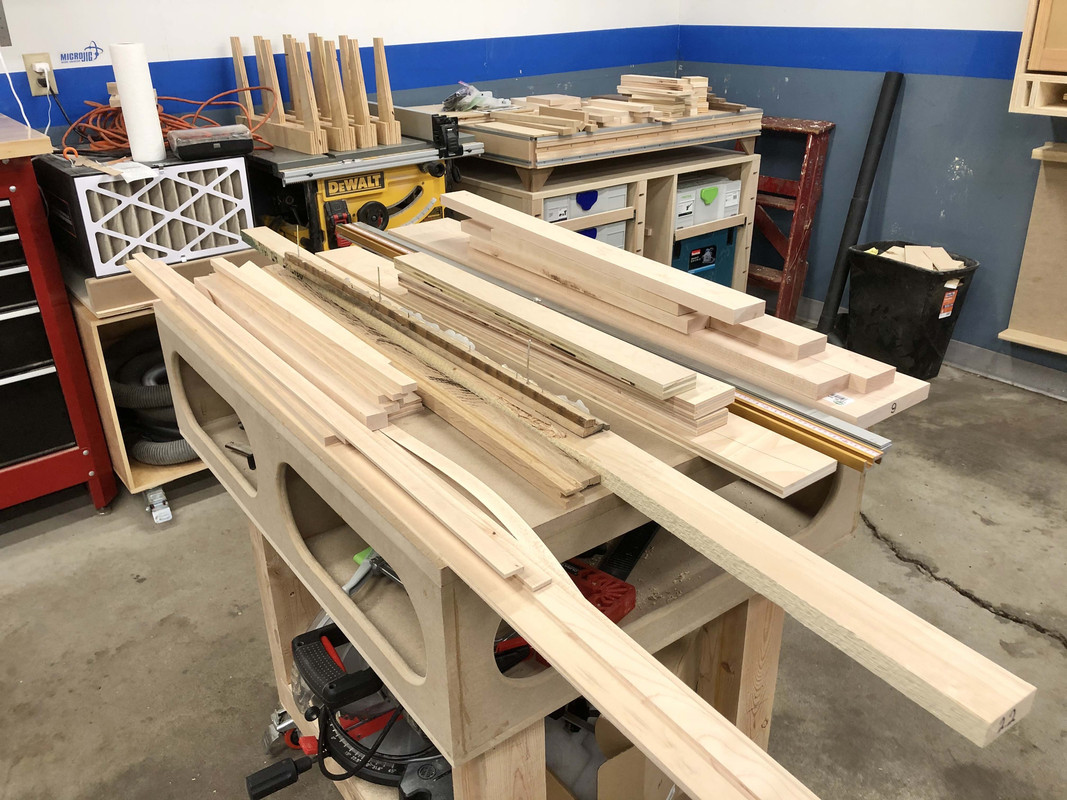
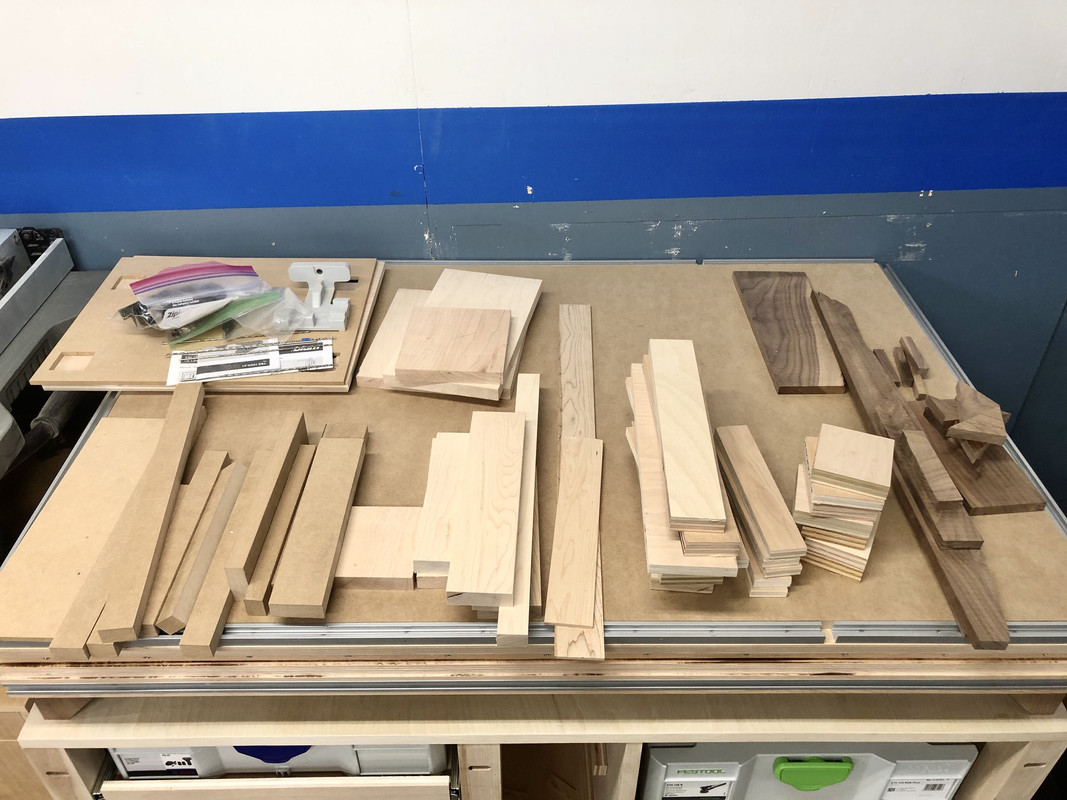
I do like having some scrap on hand as it is often useful, but it was time to get a better system. The lumber rack will be for longer pieces, and I'll have to come up with a future solution for short bits.
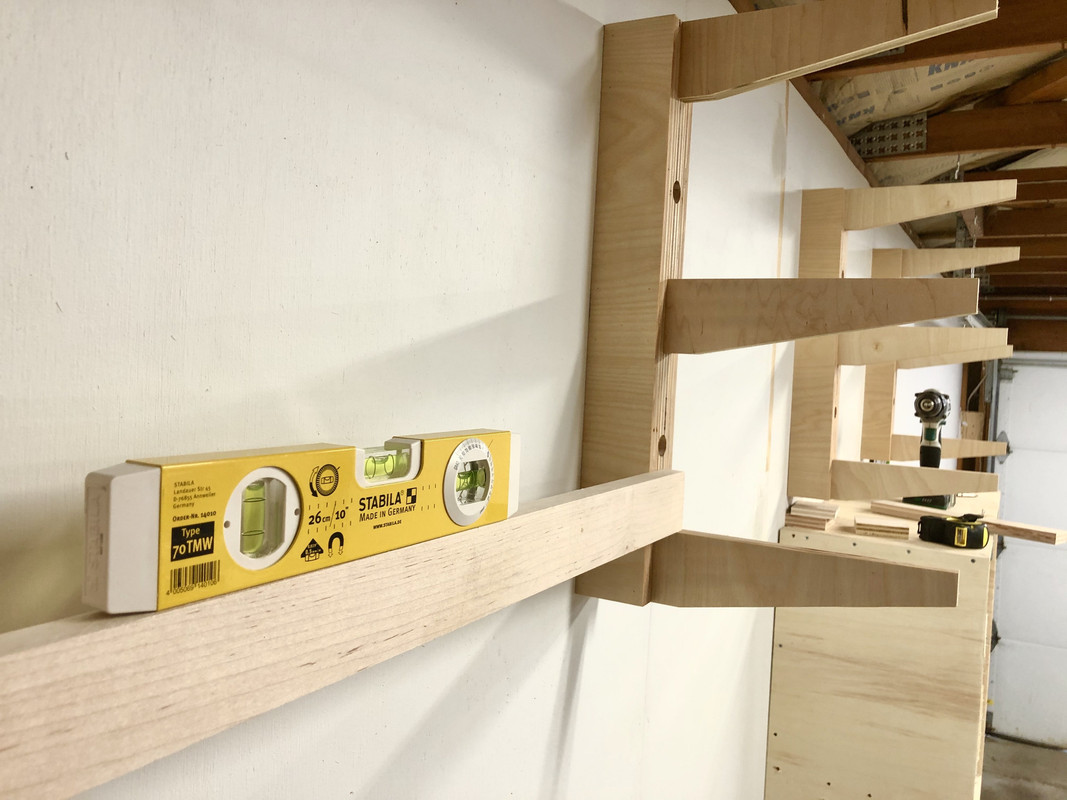
Got the racks installed nice and level with the help of this adorable little Stabila:
Loaded 'er up:
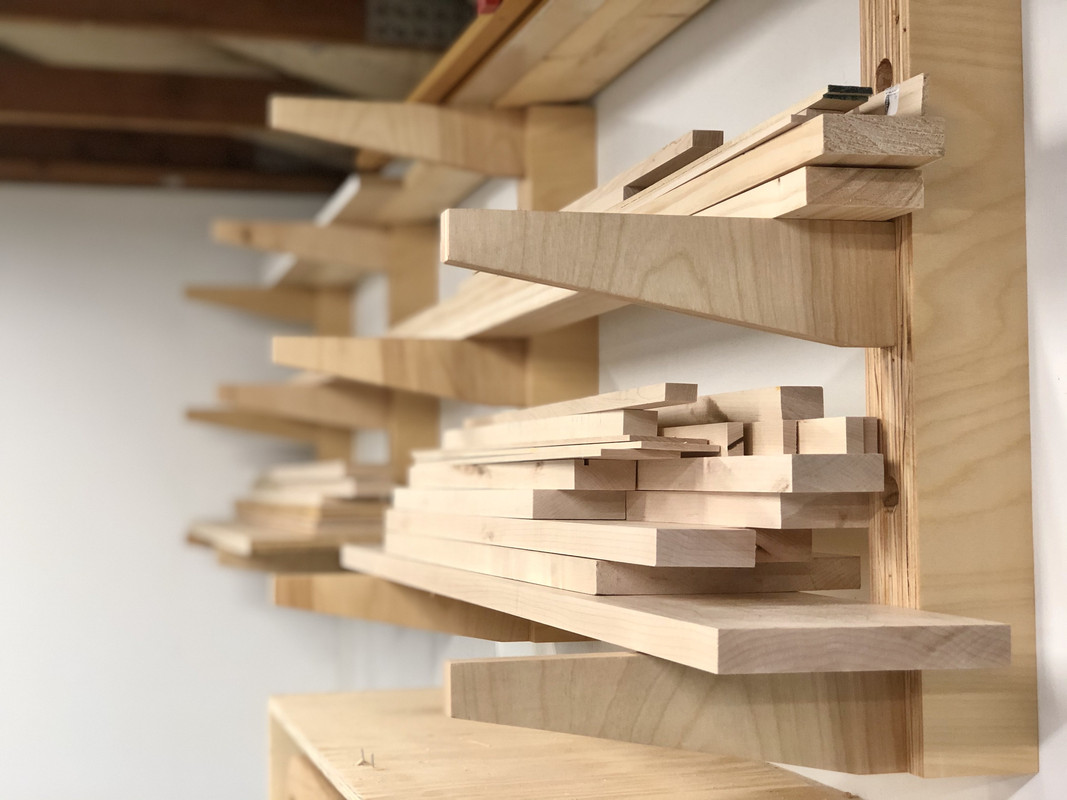
I like the way it looks and it even feels more spacious without the tire rack in there.
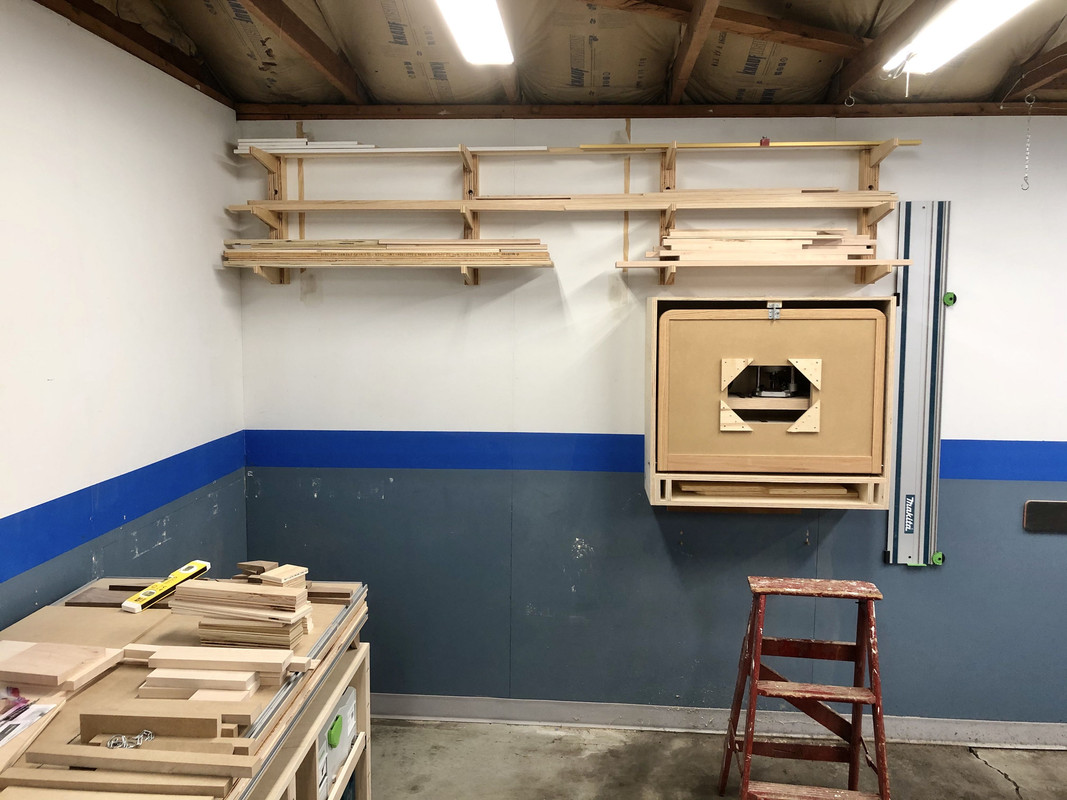
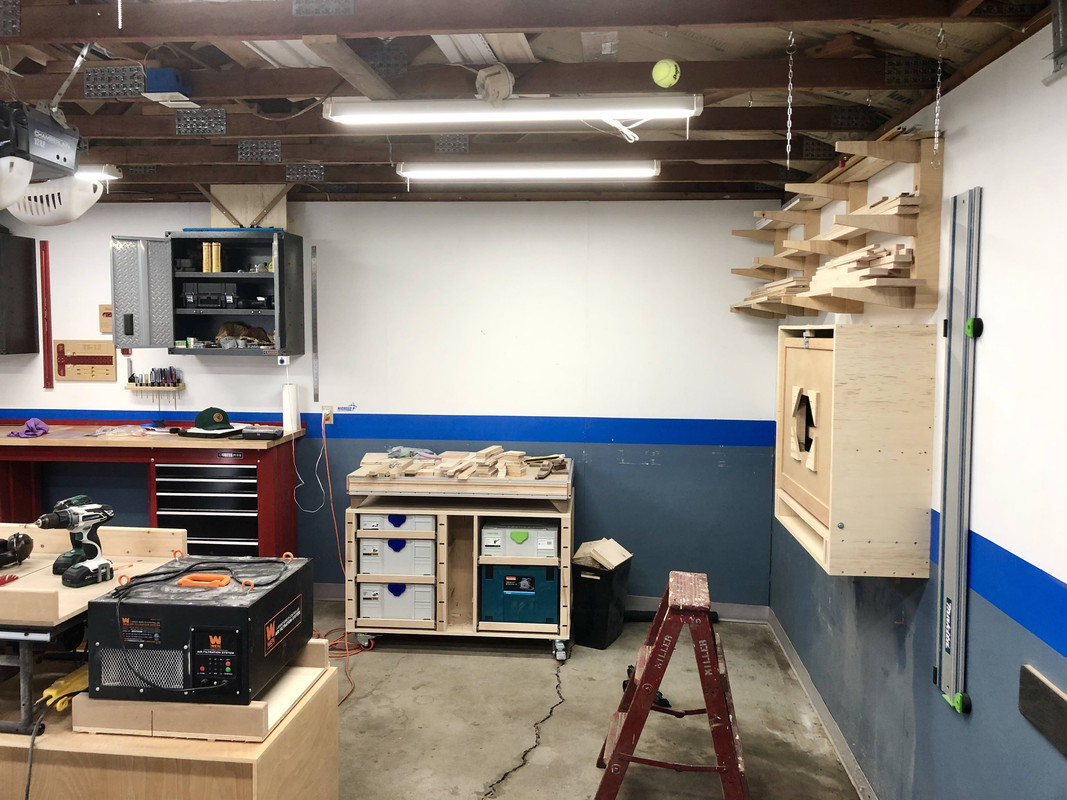
And I can finally see my workbench again.
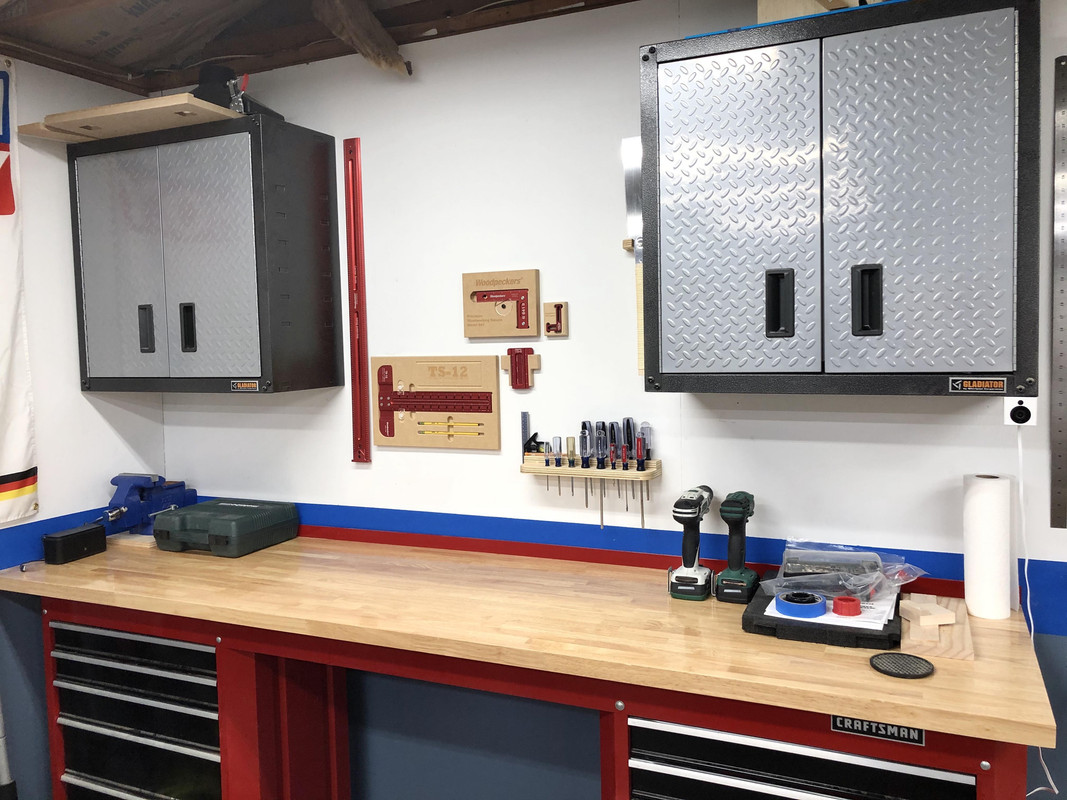
There are so many shop improvement / organizational projects I've wanted to get to for a long time, and I'm going to make an effort to knock a few of them out this summer. So far quarantine has been useful in giving me some extra time.
Just curious, for the tire rack, instead of having the tires four across could you have them set up 2x2 in a new cradle that can be lifted into the rafter area to get them out of the way?
I had not thought about putting them in the rafters. I'll keep this idea in mind.
Tire storage is so tough... Especially when you have more than one vehicle with snows/summers, in my case I have four sets of tires in storage... Good stuff
4 sets!!
Must be nice to have all that space out in Afton Would not be able to use that nice rack you just made, but could lumber go up above, in the “attic?”
To a degree, yes, and I do use that space.
But I am determined to use the racks I just made
, and I also want my nicer lumber more visible so I can see at a glance what I have to work with.It's a good idea, though, that I sometimes forget about.
Nick, you have the nicest garage storage furniture I've ever seen! Maybe the tires can move to the storage shed
Thank you, I figure might as well make it nice and practice techniques on shop furniture I can maybe use on real furniture one day. Spoiler alert, this is what I've done with the tires for now... to my wife's dismay. More "****" in the shed!
I’d mount the lumber rack in the green box. Although all of your stuff is on wheels, it seems the right wall would provide easier access.
[...]
Also... I admire your dedication to taking progress pics while you are working. It’s fun to follow along. I’m bad at this, I only end up taking pics at the end of the day.
I've gone with the green box (see below). The in-progress pics are an ongoing debate for me, whether every little step is interesting or not. It's definitely some extra work, so it's nice to hear you enjoy it!
I can't recall of your garage had the clearance, but I built a shelf that is above the tracks of my garage door. I lay two wheels on their sides on each side of the garage door. (Your exposed rafters wouldake it easy to mount) I also built racks for my ladders on the ceiling above the garage doors. I stole my last space saver from sakurama (mid century moto meca) and hung the tracks for my TS and my long level on the inside of the garage door.
That's a great idea but I don't have the clearance. 8' walls and the overhead door gets pretty close to the rafters when open.
_________________________________________
So as you may have realized, the tire rack has come down. So long, tire rack.
It was one of the first things I put in the garage, back when I thought it was going to be solely a space for the GTI. But it was never ergonomic, protruding from the wall as much as it did, and honestly was somewhat dangerous (my dad banged his head on a steel corner at least once).
In fact it went in even before I painted, so I have some touch up to do:
This is where they are for now. I will think on all your suggestions and see if there is a better spot, but for now this is acceptable. Maybe when I can tackle the clusterfudge that is the shed I will figure out a different storage for them.
I spent some time sorting through the massive pile of boards on my workbench, sorting by size and type of wood, and weeding out some stuff I didn't want. Scrap cutoff clutter is one of those things that can really get out of hand quick!
I do like having some scrap on hand as it is often useful, but it was time to get a better system. The lumber rack will be for longer pieces, and I'll have to come up with a future solution for short bits.
Got the racks installed nice and level with the help of this adorable little Stabila:
Loaded 'er up:
I like the way it looks and it even feels more spacious without the tire rack in there.
And I can finally see my workbench again.
There are so many shop improvement / organizational projects I've wanted to get to for a long time, and I'm going to make an effort to knock a few of them out this summer. So far quarantine has been useful in giving me some extra time.
Very nice looking racks, I'm jealous of the double drawer workbench. And the tires look toe like they've found the perfect home. I know what you mean by their old protrusion being a problem, I'm having a similar issue with the bike above my workspace. Might have to use you as inspiration
OP
nicholam77
Well-known member
Very nice looking racks, I'm jealous of the double drawer workbench. And the tires look toe like they've found the perfect home. I know what you mean by their old protrusion being a problem, I'm having a similar issue with the bike above my workspace. Might have to use you as inspiration
Thanks, Joel. The double drawer workbench is filled up, but I really need to organize it and use it better. I don't really use that workbench for work, so it is just for accumulating project supplies on the surface. Sometimes I think I would be better of with a smaller tool chest and more space for a bandsaw or something like that.

OP
nicholam77
Well-known member
Tracksaw Bench Update:
My Festool rail guide supports came in the mail! Took about 2 months. Maybe part of that is due to the virus? In any case, they showed up.
Eager to test them out, right away I realized the dado that they were supposed to fit in was too shallow:
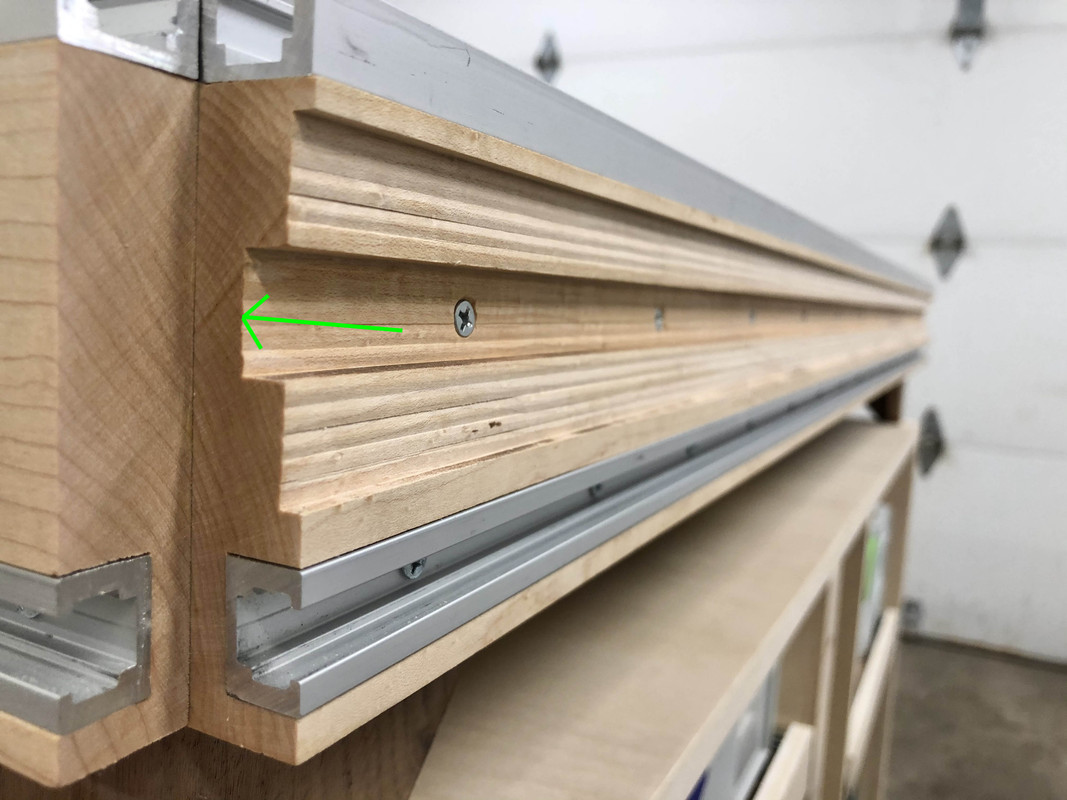
I was mostly building these rails based off someone else's build, so I just copied their specs, hoping it should work. Well it needed to be 1/2" deep instead of 3/8". So I popped the top into the clamping system:
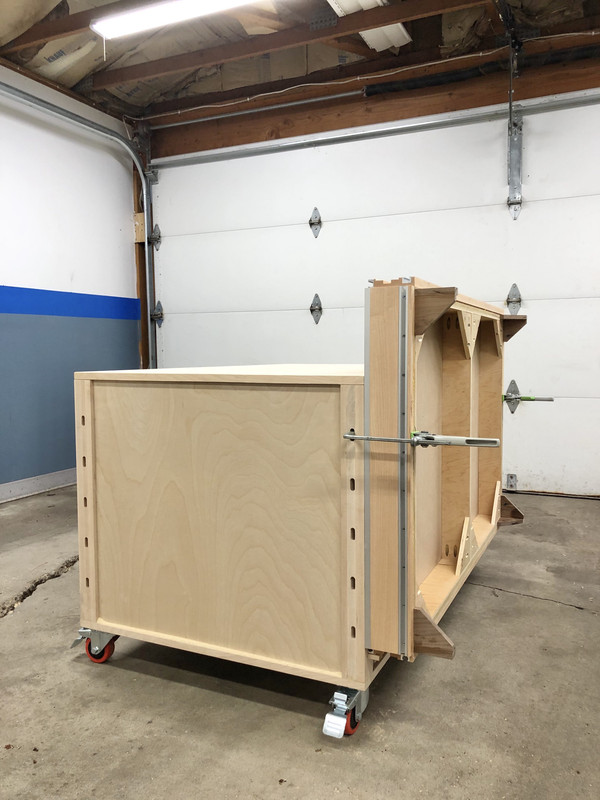
Removed the screws and routed it a bit deeper with the router.
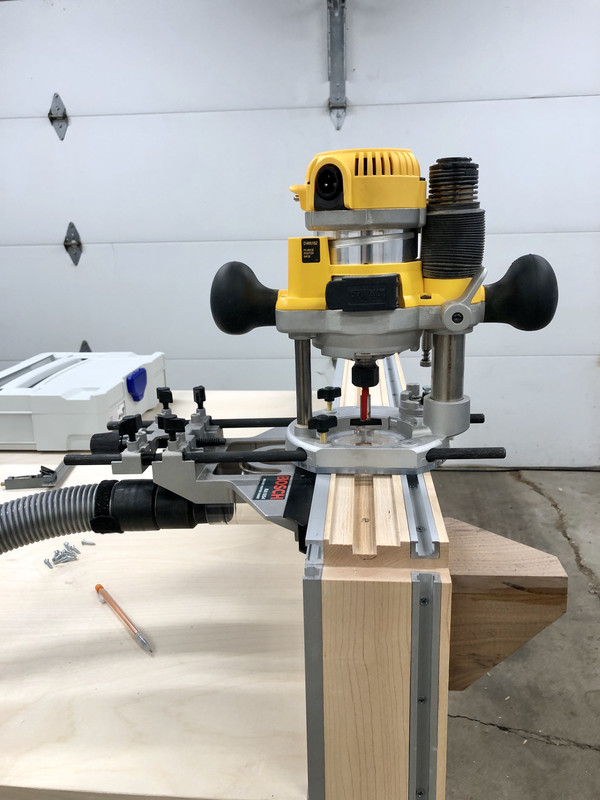
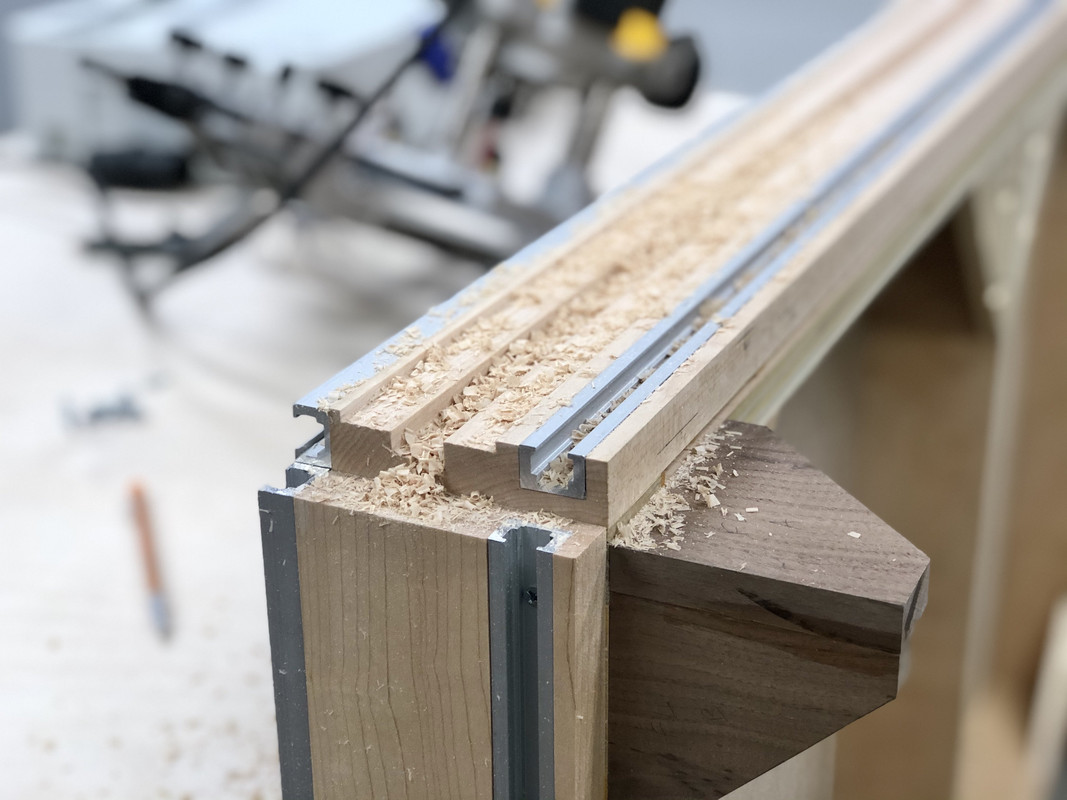
Next I cut the aluminum bar to length and fastened it to the channels.
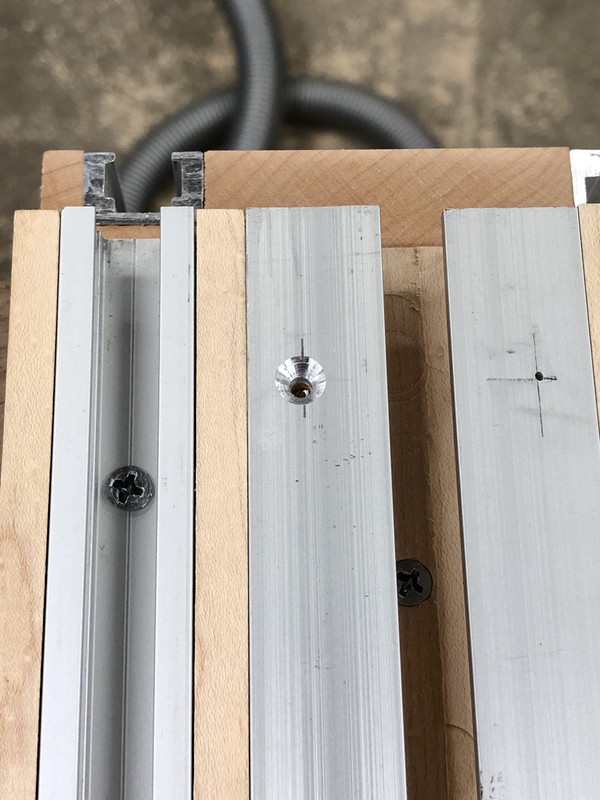
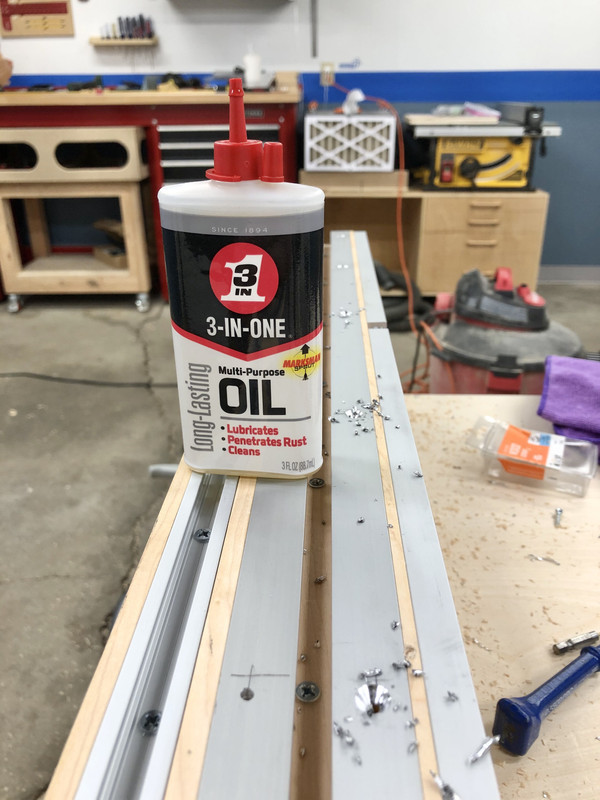
I haven't really done much with metal before, and it was a learning opportunity. I broke 1 drill bit, broke off a few screws in the wood, and my countersink kept gumming up. I thought aluminum would be soft enough to drill normal, but I ended up running up to the hardware store to get some lubricant which made things much better.
The Festool rail guides then slide in the dado and clamp to the aluminum bar.
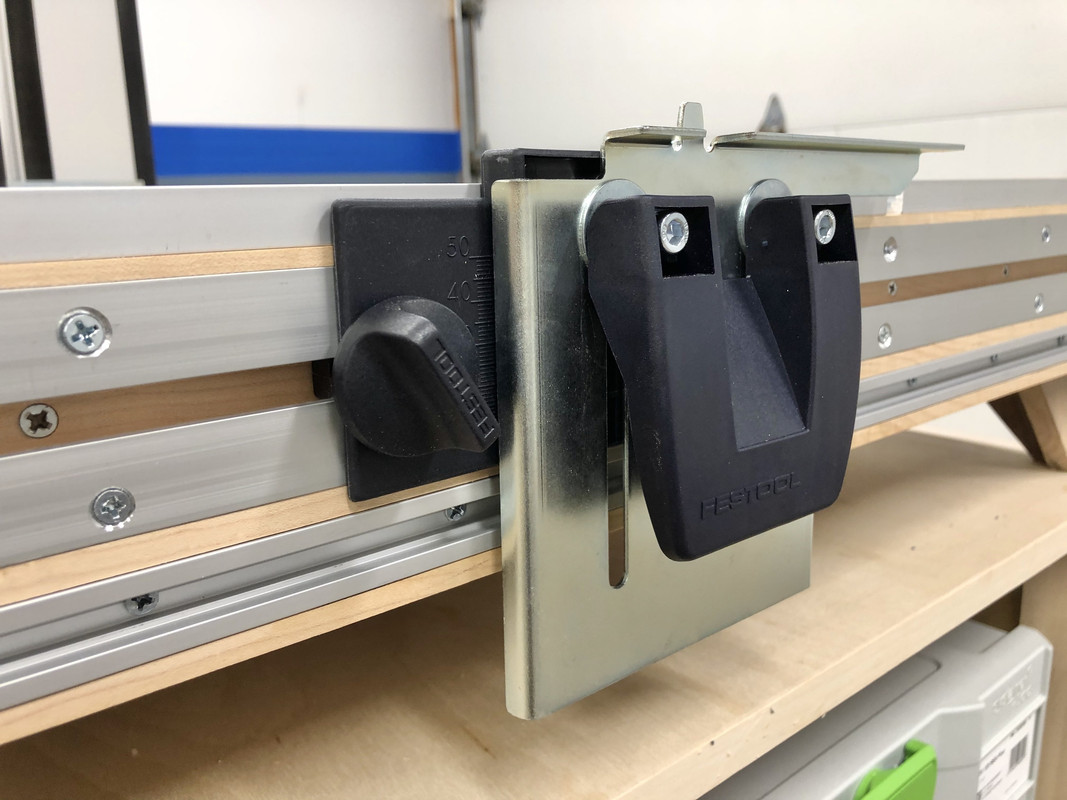
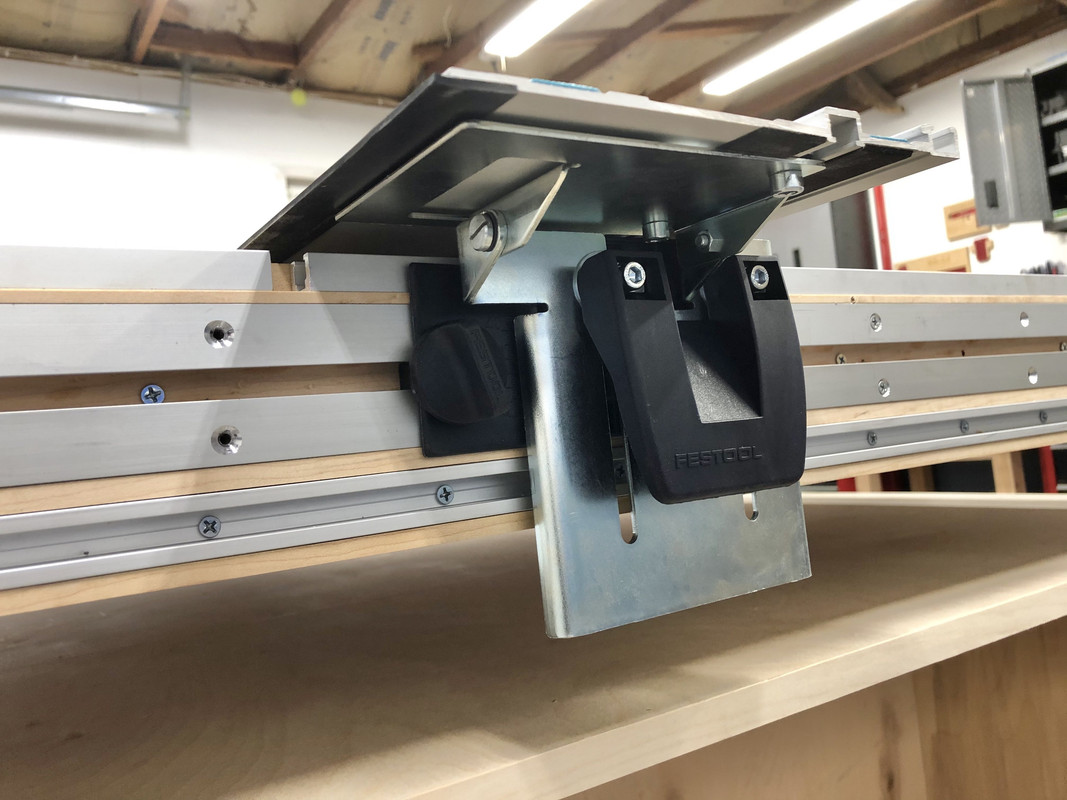
I used 1/8" aluminum bar based on the video I watched, but it was an extremely tight fit after screwing them down, so if I could re-do I would use 1/16" and then the guides would slide more easily.
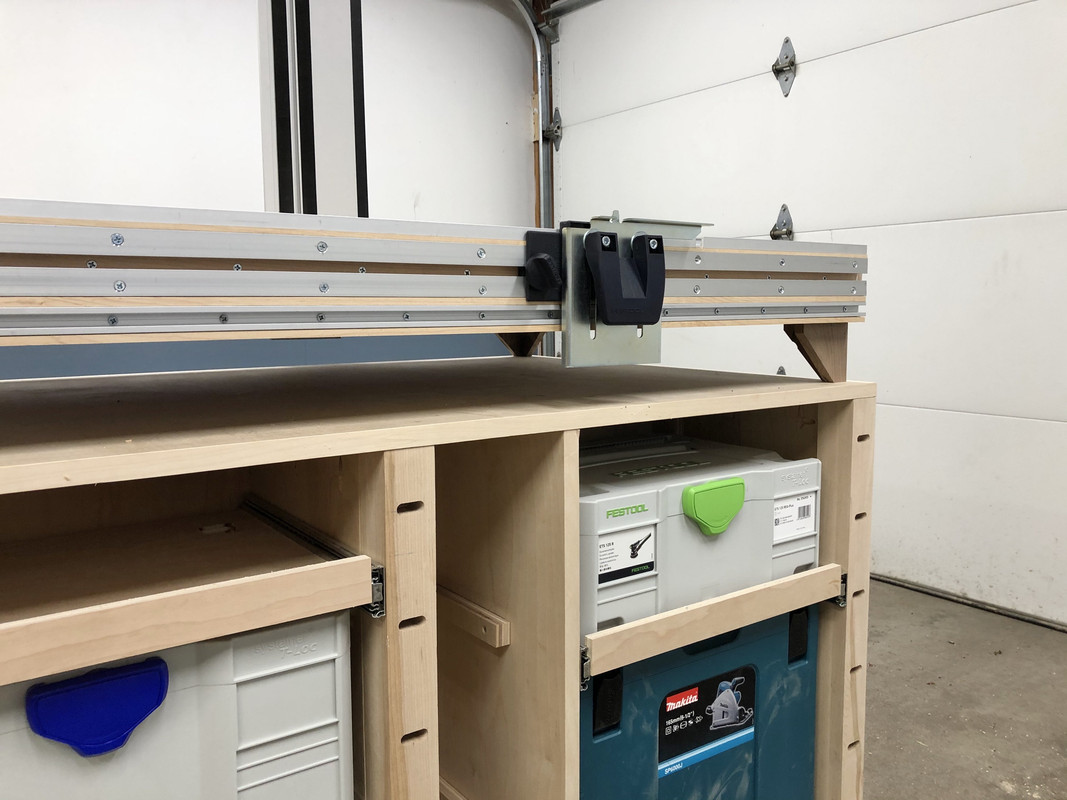
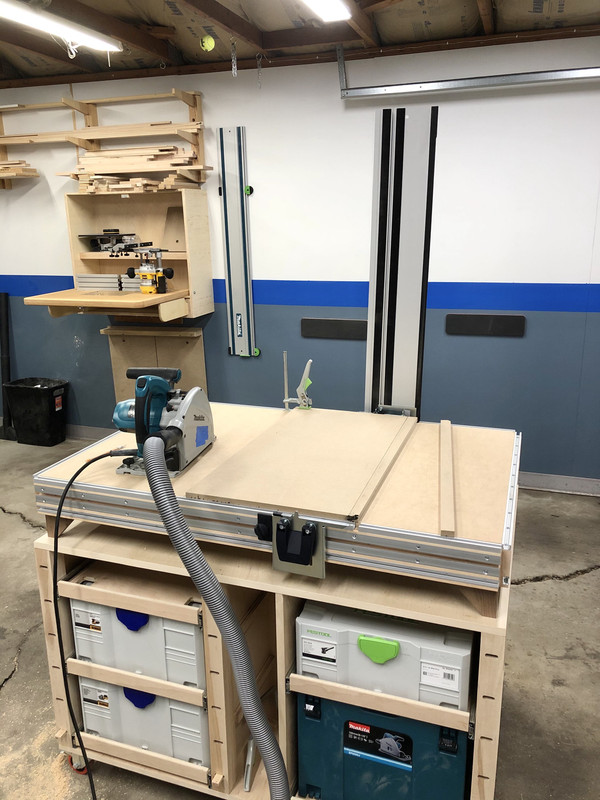
Excited to try it out I positioned the guides where they will stay, and cut the kerf line in the worksurface as well as some test cuts.
Here is a short video as proof of concept (click thumbnail):
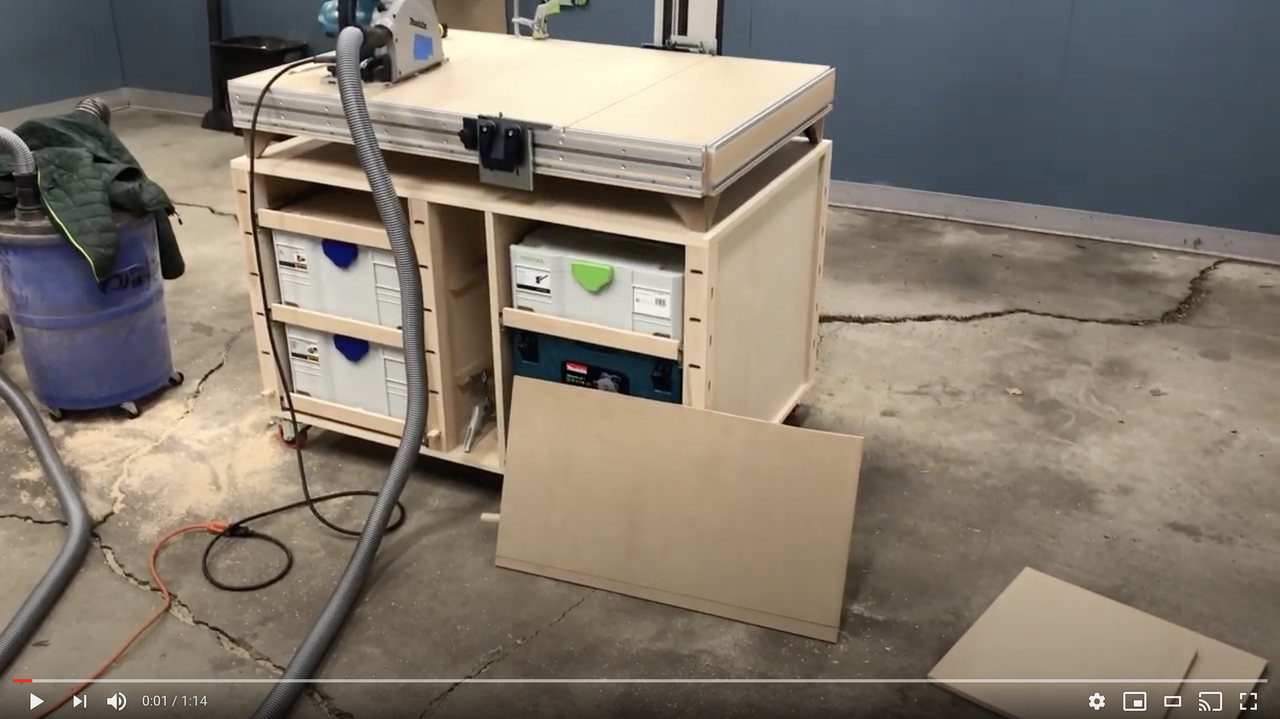
Near dustless cuts in MDF. 29" crosscut capacity. Zero tear out. Glue ready edge.
Still lots to do but it has me feeling excited.
In a future post I would like to breakdown the cost of what I spent to make it, review the rail guides, talk about changes I would make if I could do it over, etc.

My Festool rail guide supports came in the mail! Took about 2 months. Maybe part of that is due to the virus? In any case, they showed up.
Eager to test them out, right away I realized the dado that they were supposed to fit in was too shallow:
I was mostly building these rails based off someone else's build, so I just copied their specs, hoping it should work. Well it needed to be 1/2" deep instead of 3/8". So I popped the top into the clamping system:
Removed the screws and routed it a bit deeper with the router.
Next I cut the aluminum bar to length and fastened it to the channels.
I haven't really done much with metal before, and it was a learning opportunity. I broke 1 drill bit, broke off a few screws in the wood, and my countersink kept gumming up. I thought aluminum would be soft enough to drill normal, but I ended up running up to the hardware store to get some lubricant which made things much better.
The Festool rail guides then slide in the dado and clamp to the aluminum bar.
I used 1/8" aluminum bar based on the video I watched, but it was an extremely tight fit after screwing them down, so if I could re-do I would use 1/16" and then the guides would slide more easily.
Excited to try it out I positioned the guides where they will stay, and cut the kerf line in the worksurface as well as some test cuts.
Here is a short video as proof of concept (click thumbnail):
Near dustless cuts in MDF. 29" crosscut capacity. Zero tear out. Glue ready edge.
Still lots to do but it has me feeling excited.
In a future post I would like to breakdown the cost of what I spent to make it, review the rail guides, talk about changes I would make if I could do it over, etc.
Nice! Kind of like a radial arm saw, but safer.
My apologies if you already mentioned this and I missed it, but any thoughts of making extensions that mount to the t-tracks on the ends? Might be handy to have a bit more infeed/outfeed if you are ever cutting big panels. Also, why 29"? Is that some sort of magic cabinet building number?
My apologies if you already mentioned this and I missed it, but any thoughts of making extensions that mount to the t-tracks on the ends? Might be handy to have a bit more infeed/outfeed if you are ever cutting big panels. Also, why 29"? Is that some sort of magic cabinet building number?
sawduststeve
Well-known member
Hi Nick
Good to see you still in the garage/workshop making life easier for yourself.
Nice rack to keep the off cuts tidy, although thats where a real fire comes in useful, I've found.
I was getting a little bored with seven weeks lockdown so treated myself with a couple of purchases. I only gave the wife the price minus the tax and also blamed you, I think i'm in the clear. I do have a couple of jobs coming up where its gonna be useful though.
Stay safe
Steve
https://www.garagejournal.com/forum/attachment.php?attachmentid=1010689&stc=1&d=1589472984
Good to see you still in the garage/workshop making life easier for yourself.
Nice rack
to keep the off cuts tidy, although thats where a real fire comes in useful, I've found.I was getting a little bored with seven weeks lockdown so treated myself with a couple of purchases. I only gave the wife the price minus the tax and also blamed you, I think i'm in the clear.
I do have a couple of jobs coming up where its gonna be useful though.Stay safe
Steve
https://www.garagejournal.com/forum/attachment.php?attachmentid=1010689&stc=1&d=1589472984
Attachments
OP
nicholam77
Well-known member
Nice! Kind of like a radial arm saw, but safer.
My apologies if you already mentioned this and I missed it, but any thoughts of making extensions that mount to the t-tracks on the ends? Might be handy to have a bit more infeed/outfeed if you are ever cutting big panels. Also, why 29"? Is that some sort of magic cabinet building number?
Thanks! I suppose it is like a radial arm saw! But it has a lot of advantages over one, though, for me anyways, including dust collection, portability, the saw can be used to cut much larger pieces, and cutting angles could be a possibility with a protractor jig/attachment.
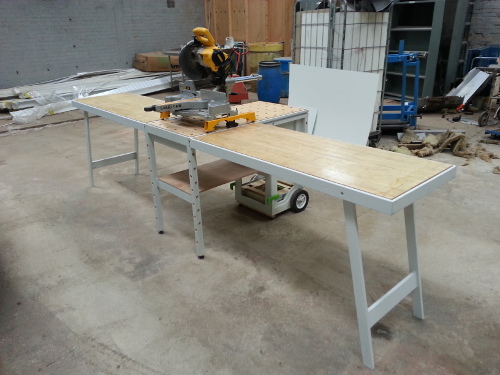
Good eye on the side t-tracks, I don't know if I mentioned before, but yes that is what they are for. I suppose they could be used for vertical clamping, too, but the main idea was "attachments". Infeed and outfeed wings are for sure going to happen, but I have lots of other ideas, like a "holster" for the tracksaw between cuts, little pencil/drill/bit/glue bottle holders, small trim router add-on, etc. For the infeed and outfeed I will likely make them a width so they can be double up on the front or back to create more of a large workbench to support a full 4x8 sheet, or put one on each side more like a miter station. Picture something like this for inspiration:
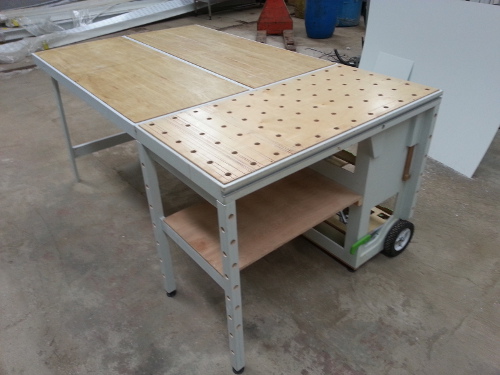
Even without the infeed/outfeed extensions I am able to clamp long boards down with the top-facing t-track. I'll try to get a pic of this later.
29" inches is the magic number for still being able to get my wife's car in the garage.
Or rather the bench is 30" deep but realistically after I add a fence the actual cut capacity will be more like 28.5" I think. Should be enough for 95% of cabinets I would think!Hi Nick
Good to see you still in the garage/workshop making life easier for yourself.
Nice rack
I was getting a little bored with seven weeks lockdown so treated myself with a couple of purchases. I only gave the wife the price minus the tax and also blamed you, I think i'm in the clear.
Stay safe
Steve
https://www.garagejournal.com/forum/attachment.php?attachmentid=1010689&stc=1&d=1589472984
Thanks, Steve! Unfortunately I can't burn the plywood but I did burn some maple off-cuts recently!

Wow Steve, good for you on the new toys! Doing your part to keep the economy alive I see! Let me know what you think of the vac, is that the MIDI? I've been eyeing the new CT15 because my shop vac suction is too much for the sander, and it would be awesome to have a small, hepa vac, that I can take inside the house, too. And also a dedicated vac for the new tracksaw station, and keep the the shop vac/separator for the table saw. But I haven't been able to convince myself yet.
Anyways, that's a pretty sweet haul, consider me jealous!Looking like a professional setup! Any projects on the horizon for it?
Thanks, Joel! My wife is wondering the same thing. "Are you ever going to be finished with that bench and make something for the house?"
Generally speaking, yeah there are a lot of things I have planned. Bookcases/bookshelves for daughter's playroom, floating shelves for her room, floating shelves for kitchen, fireplace built-ins, floating shelves above that. And we've never really discussed my basement much since it's last in priority, but I want to do an entertainment home theater area with built-in cabinets, as well as some closets, a new office desk, play tables for the kid. Really the list could go on a long time.
But if there's one thing I'd really like to get done this summer it's the fireplace built-ins. Need to revisit it but this was the rough design I made well over a year ago: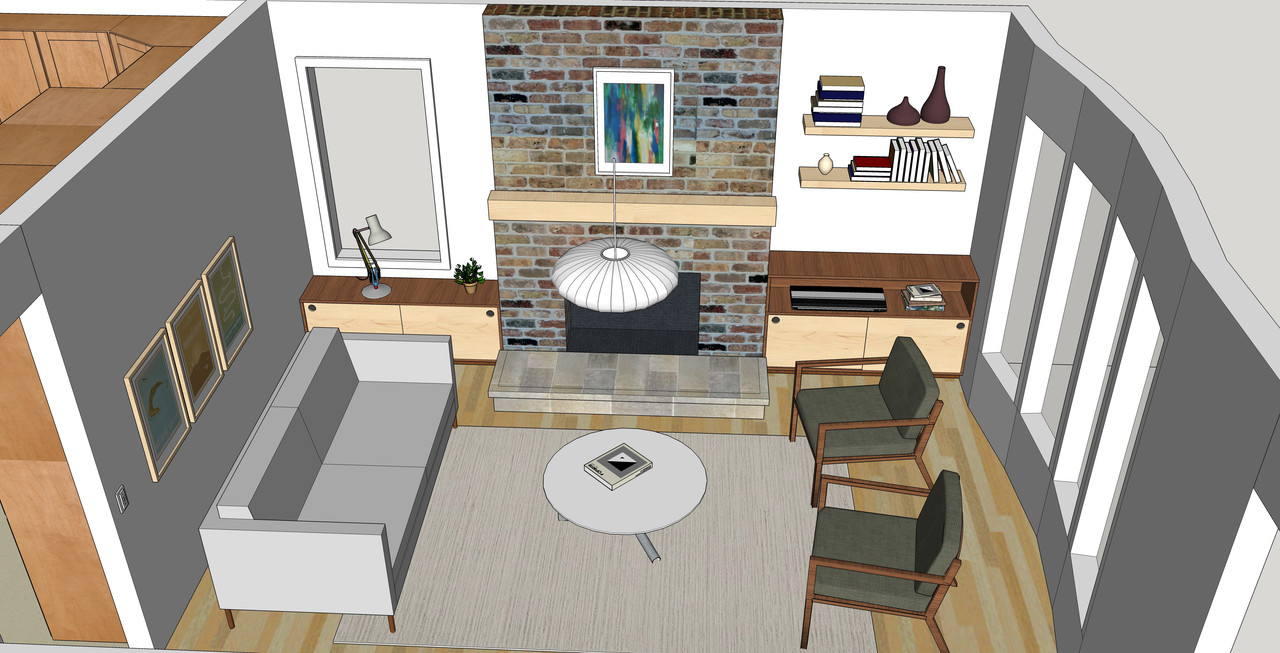
A lot of these projects are larger and will happen over a long period of time, I'm sure, but I'm hoping the bench will serve me well.
OP
nicholam77
Well-known member
Workbench came out great Nick.
Bret
Thanks, Bret!
The rendering looks awesome! What program did you use? I've dabbled in several but never committed to one.
The fireplace built-ins look great in the concept drawing. I'll look forward to seeing them come to life.
Thanks! It's just the free Sketchup. I've modeled my whole main floor, plus some ideas for a potential future addition off the kitchen. A lot of the textures I just Google image searched and loaded in. Everything is pretty dimensionally accurate.
I have some slight work to do on the built-ins design before I dive into making them, like what the insides will look like (shelving, etc), and the sliding door pulls will be centered to prevent binding. But overall pretty simple boxes that the tracksaw station should handle nicely. The one on the left has to be kinda short to go under the window, and originally I came up with an asymmetric design, but then my dad (retired architect) suggested mirroring the doors so they visually look symmetric even though one is taller. I liked this idea quite a bit.
Grumblebum
Well-known member
Your MFT's look great. I think I understand how the tracksaw one works now that I've watched Guys video and gone back over your pics. So basically you can rip pretty much anything up to 29" wide and as long as needed if you add on in/out feed extensions hence overcoming some of the issues trying to do those cuts on the table saw which gets a bit dodgy.
The tenon system for assembly I definitely think I'll try to integrate into my cart builds, drives me nuts trying to keep everything aligned for cabinet assembly, that is a really good solution.
I may have something incoming soon All the tool suppliers here are pretty competive so they are all the same price.
Is the vacuum hose you have from the saw a generic one or a makita branded one ?
GB
The tenon system for assembly I definitely think I'll try to integrate into my cart builds, drives me nuts trying to keep everything aligned for cabinet assembly, that is a really good solution.
I may have something incoming soon
All the tool suppliers here are pretty competive so they are all the same price.Is the vacuum hose you have from the saw a generic one or a makita branded one ?
GB
Last edited:
OP
nicholam77
Well-known member
Your MFT's look great. I think I understand how the tracksaw one works now that I've watched Guys video and gone back over your pics. So basically you can rip pretty much anything up to 29" wide and as long as needed if you add on in/out feed extensions hence overcoming some of the issues trying to do those cuts on the table saw which gets a bit dodgy.
The tenon system for assembly I definitely think I'll try to integrate into my cart builds, drives me nuts trying to keep everything aligned for cabinet assembly, that is a really good solution.
I may have something incoming soon
Is the vacuum hose you have from the saw a generic one or a makita branded one ?
GB
Thanks GB!
Yes, I think you pretty much have it correct. The one thing it can't do is break down large sheet goods. So there will still be a process for that, possibly still involving the table saw. For example, out of a full sheet of plywood, I could use the tracksaw (on it's own with 55" track) to cut a 48" x 24" piece off. This would be pretty unmanageable to further process *squarely*, so I could then place that piece with the straight edge that was ripped on the tracksaw against the fence on the tracksaw workbench. Then crosscut into smaller sections as needed. And then square up the final edge either by ripping those smaller pieces through the table saw, OR again using the tracksaw workbench if they are less than 29". It can serve other purposes but the main purpose in my eyes is to get square panels out of sheet goods for cabinet construction, as well is tear out free edges in plywood.
And yes, just like a chop saw, I can use it to crosscut extremely long boards like trim boards, 8ft pieces of lumber, etc that would be tricky to manage without a miter saw setup.
The tenon system seems to work well, but is not infinitely adjustable, so if you are trying to line up cabinet pieces you could also consider just installing a T-Track in the legs that has some sort of stop you could tighten down anywhere on the leg. I will say making the mortises "Domino" shaped was a LOT of work, and you could achieve the same utility with circular holes and dowels.
Guy's video is informative. Here are a few other videos and links I've used for inspiration:
Timothy Wilmot's System Workbench (good example of tenon system in use)
Klavier Atelier (in German, multi-part series, incredible MFT style bench with interesting alternative to Festool rail hinges that are DIY)
Alabama Woodworker Outfeed Table (another well-thought-out hybrid MFT workstation with clamping and track saw functions)
Paoson Woodworking Multi-Function Workbench (another really great bench with some great ideas)
Justin Michael MFT Sysport Cart Festool Owner's Group (Heavily based the design of my bench on this one)
Hope that is interesting to you or anyone looking to replicate a similar functionality, there are a lot of brilliant makers out there and lots of ways to skin a cat as they say.
Looking forward to see what's coming in the mail, GB!
The vac hose I have is actually by Bosch. It's not anti-static, but it fits a lot of my tools without adapters, is long, and fairly cheap! I got it on Amazon.
https://www.amazon.com/gp/product/B0000AV78B/ref=ppx_yo_dt_b_search_asin_title?ie=UTF8&psc=1
Grumblebum
Well-known member
Thanks Nick, that was a great viewing list. So many ideas!
Also thanks for the link on the vacuum hose. I'll see what I can source.
GB
Also thanks for the link on the vacuum hose. I'll see what I can source.
GB
OP
nicholam77
Well-known member
Thanks Nick, that was a great viewing list. So many ideas!
Also thanks for the link on the vacuum hose. I'll see what I can source.
GB
No problem, GB.

OP
nicholam77
Well-known member
Been slowly chipping away at these bad boyz for awhile, amidst all the other projects:
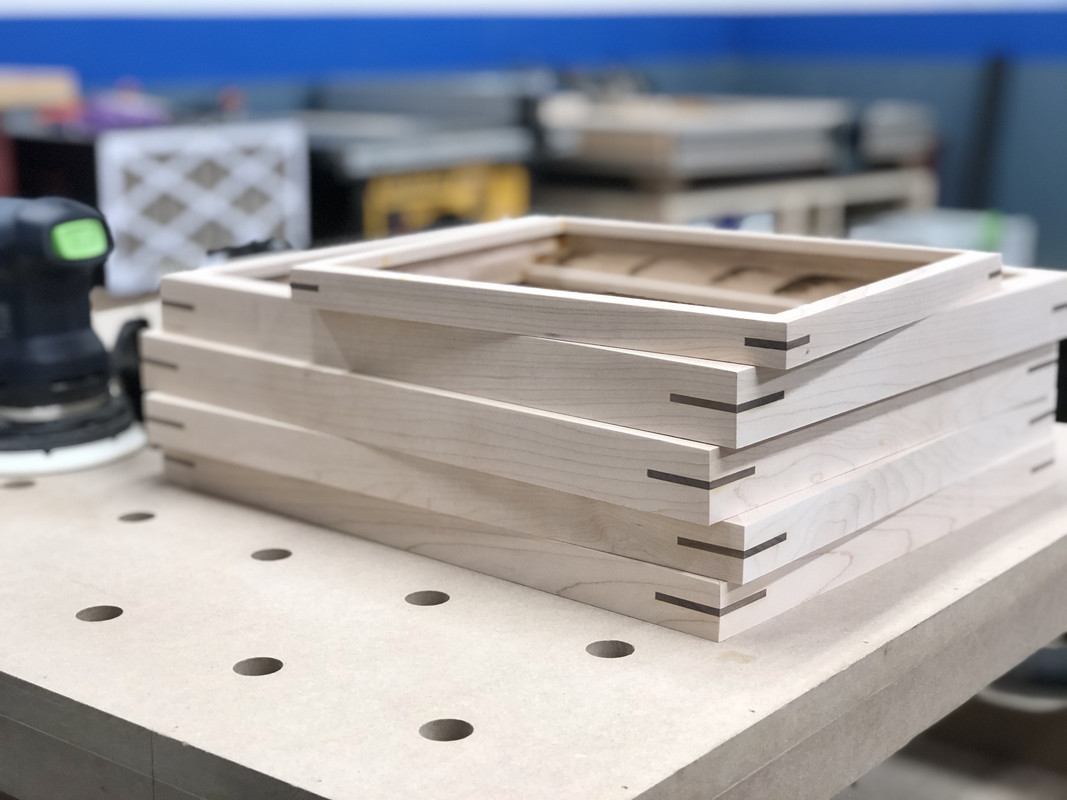
When we were in Hawaii the wife and I picked up some new arts, so I of course wanted to make the frames for them. I debated branching out design-wise, but in the end I made them all the same style as I've done before, this time maple with walnut splines. I wanted to do cherry splines for a lighter look but I only had walnut material and didn't want to try to find a lumber store open during the quarantine.
Today I finished up sanding them.
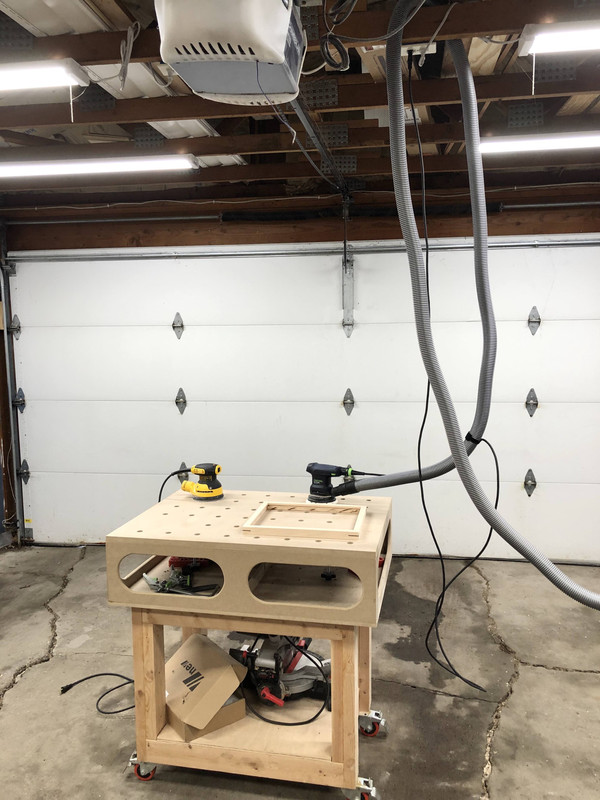
A discovery I've made is my benches are too low for sanding. I have to bend over and it hurts my back.
And then first coat of polyurethane. Wipe-on Minwax, surprise! I liked how it looked on the tracksaw bench top rails so much I wanted to use it again.
Speaking of, T-tracks coming in handy already... fashioned myself a temporary "drying rack".
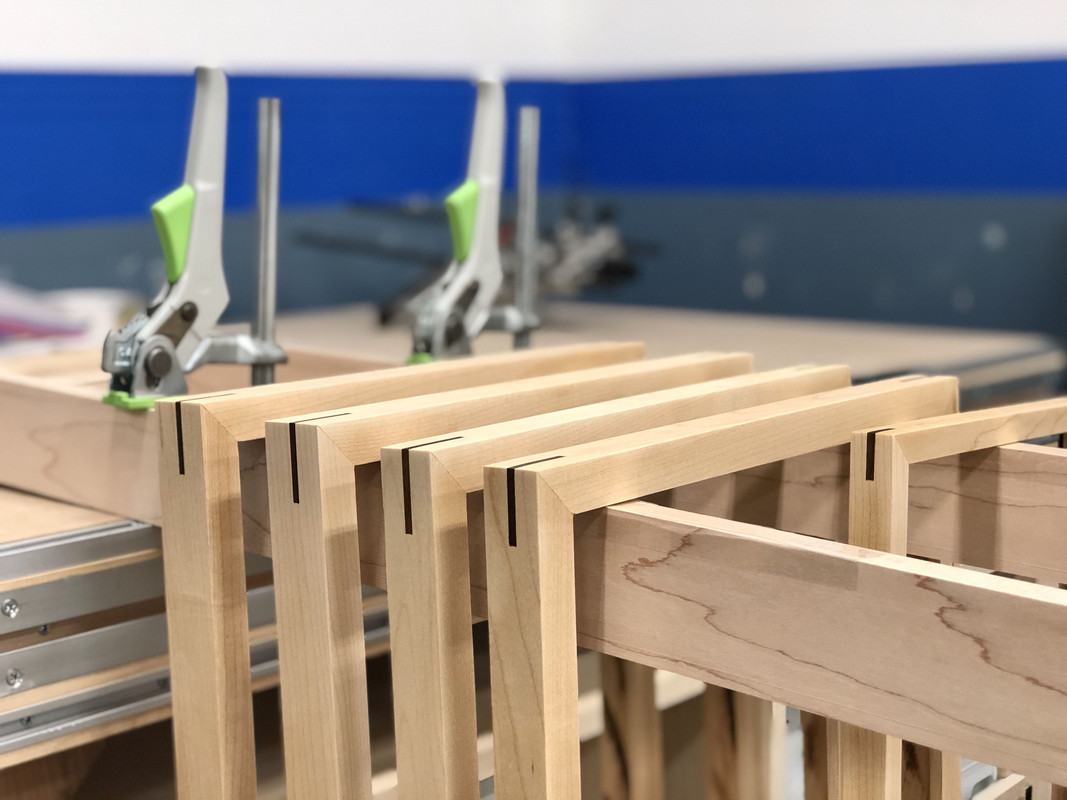
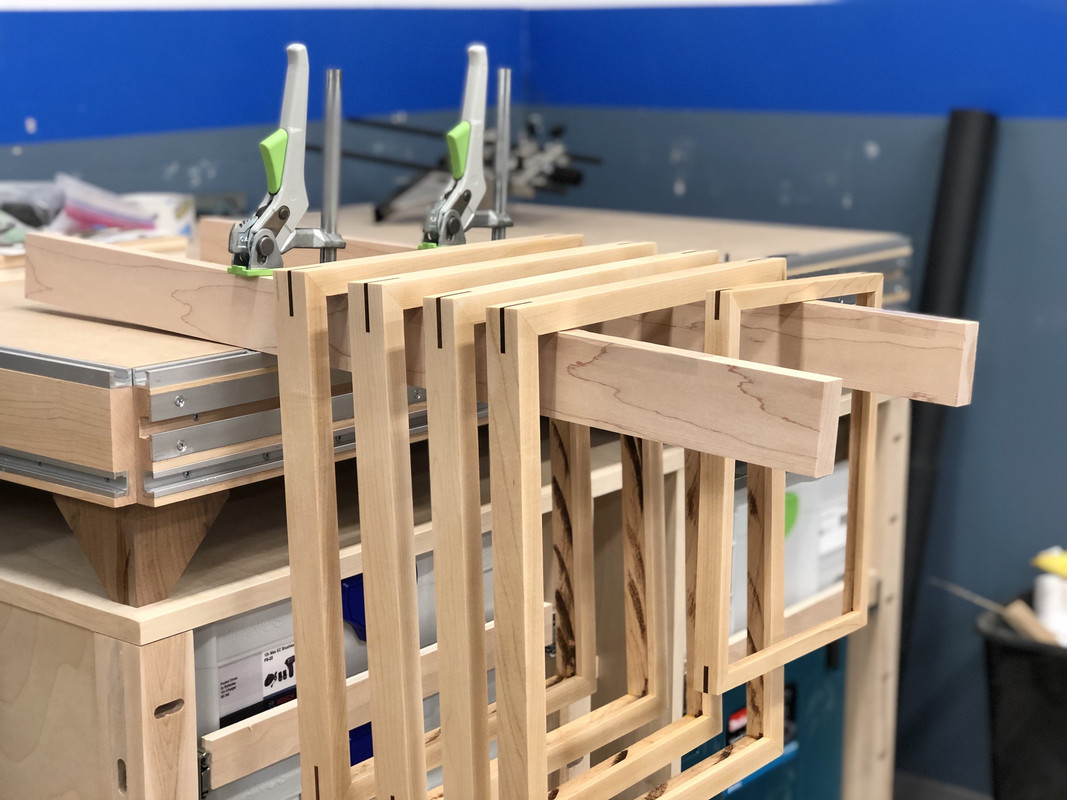
Hope everyone is staying busy!
When we were in Hawaii the wife and I picked up some new arts, so I of course wanted to make the frames for them. I debated branching out design-wise, but in the end I made them all the same style as I've done before, this time maple with walnut splines. I wanted to do cherry splines for a lighter look but I only had walnut material and didn't want to try to find a lumber store open during the quarantine.
Today I finished up sanding them.
A discovery I've made is my benches are too low for sanding. I have to bend over and it hurts my back.
And then first coat of polyurethane. Wipe-on Minwax, surprise! I liked how it looked on the tracksaw bench top rails so much I wanted to use it again.
Speaking of, T-tracks coming in handy already... fashioned myself a temporary "drying rack".
Hope everyone is staying busy!
greyghost18t
Well-known member
Nick - What are you using for shop vac?
OP
nicholam77
Well-known member
Nick - What are you using for shop vac?
It's a just Shop Vac brand 5 gallon / 5.5 "peak horsepower" connected to a Rockler Dust Right chip separator.
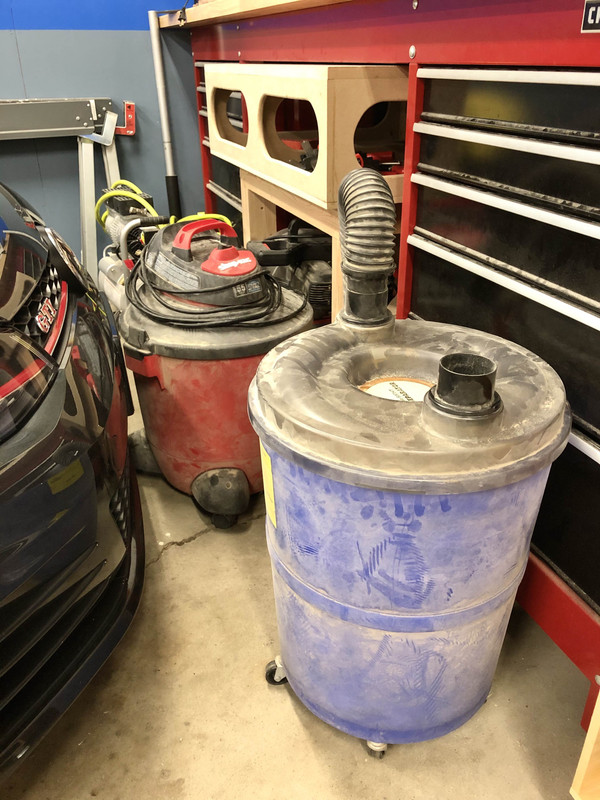
It works well for the most part. But due to the way the Festool sander collects dust the suction is too powerful. And the whole thing with separator is a bit unwieldy and now with the new bench I don't have a great spot for it as you can see by how close the GTI parks.
greyghost18t
Well-known member
It's a just Shop Vac brand 5 gallon / 5.5 "peak horsepower" connected to a Rockler Dust Right chip separator.
It works well for the most part. But due to the way the Festool sander collects dust the suction is too powerful. And the whole thing with separator is a bit unwieldy and now with the new bench I don't have a great spot for it as you can see by how close the GTI parks.
Thanks.. I am looking at purchasing a wet dry vac that can handle cars, sanding, and water in the basement when it floods. Every review has different ones it seems and nothing is consistent.
...And the whole thing with separator is a bit unwieldy and now with the new bench I don't have a great spot for it as you can see by how close the GTI parks.
Have you considered putting the vacuum in the rafters? Fast forward to the ~2 minute mark...
Thanks.. I am looking at purchasing a wet dry vac that can handle cars, sanding, and water in the basement when it floods. Every review has different ones it seems and nothing is consistent.
GG you can't go wrong with a Ridgid shop vac. I have 2. One has been in the woodshop for 15 years and still going strong. And it used alot. I do recommend whatever you get buy a Cleanstream filter you won't regret it.
Bret
OP
nicholam77
Well-known member
Have you considered putting the vacuum in the rafters? Fast forward to the ~2 minute mark...
I have! Wasn't sure if it was crazy or not, so it's cool to see someone else's setup. It would definitely save me some space. I thought about that or trying to put it in the shed and plumb a PVC line through the siding.
If I can find some more things laying around the house to sell on eBay my plan *might* be to get the Festool CT15 for track saw / sanders / biscuit joiner / inside the house mobility / car cleaning -- and stick the shop vac + separator in the rafters and plumb PVC drop for the table saw and router table.
GG you can't go wrong with a Ridgid shop vac. I have 2. One has been in the woodshop for 15 years and still going strong. And it used alot. I do recommend whatever you get buy a Cleanstream filter you won't regret it.
Bret
I'm gonna have to check out that Cleanstream filter now...
Thanks.. I am looking at purchasing a wet dry vac that can handle cars, sanding, and water in the basement when it floods. Every review has different ones it seems and nothing is consistent.
Sounds like Bret has you covered. 15 years is much longer than I've had mine, but FWIW I have no complaints about the Shop Vac, either. I even used it for wet pickup once when my laundry room drain backed up. The crevice tools are a little bulky for car seats but that's probably the same with any shop vacuum. The separator makes a huge difference in keeping the filter clean from sawdust.
Unruh
Well-known member
That work bench came out great! I’m curious about the shop vac in the rafters thing. I have a separator on my system and I only get fine dust into my shop vac. May be an idea. I know Mikita sells a nice shop vac that competes with Festool, and is a couple hundred cheaper.
OP
nicholam77
Well-known member
That work bench came out great! I’m curious about the shop vac in the rafters thing. I have a separator on my system and I only get fine dust into my shop vac. May be an idea. I know Mikita sells a nice shop vac that competes with Festool, and is a couple hundred cheaper.
Thanks Unruh! I have a separator as well. I'll let you know how it works if I ever get it up in the ceiling. I think I've seen the Makita dust extractors before, they are also pretty expensive. The particular Festool I'd consider is the base model they just came out with which is far cheaper than most of their vacs, it think it's even be cheaper than the Makita offerings. But I'm still undecided on that.
OP
nicholam77
Well-known member
Some small updates --
I finished my picture frames:

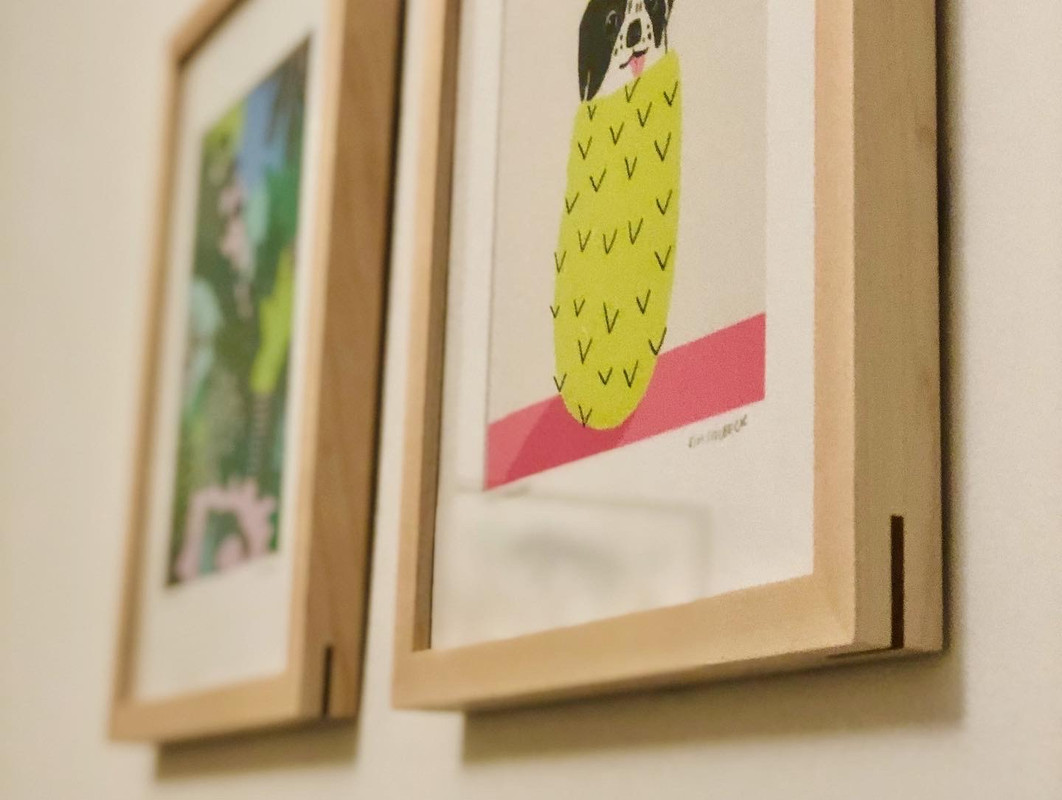
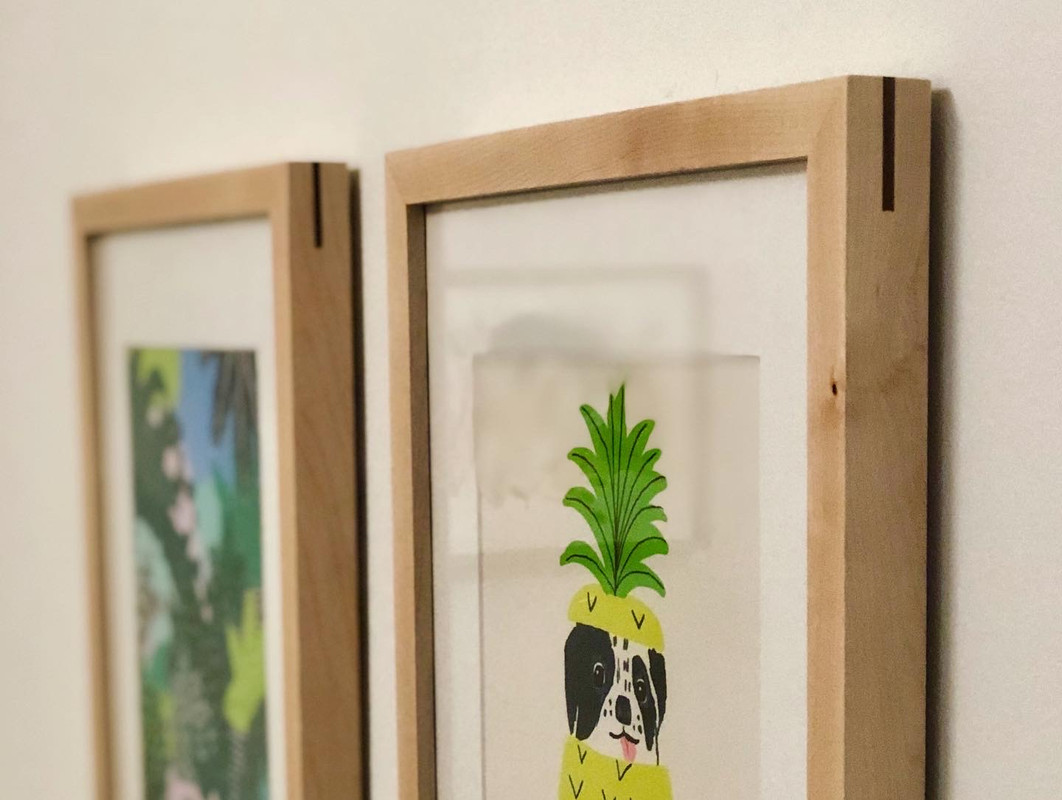
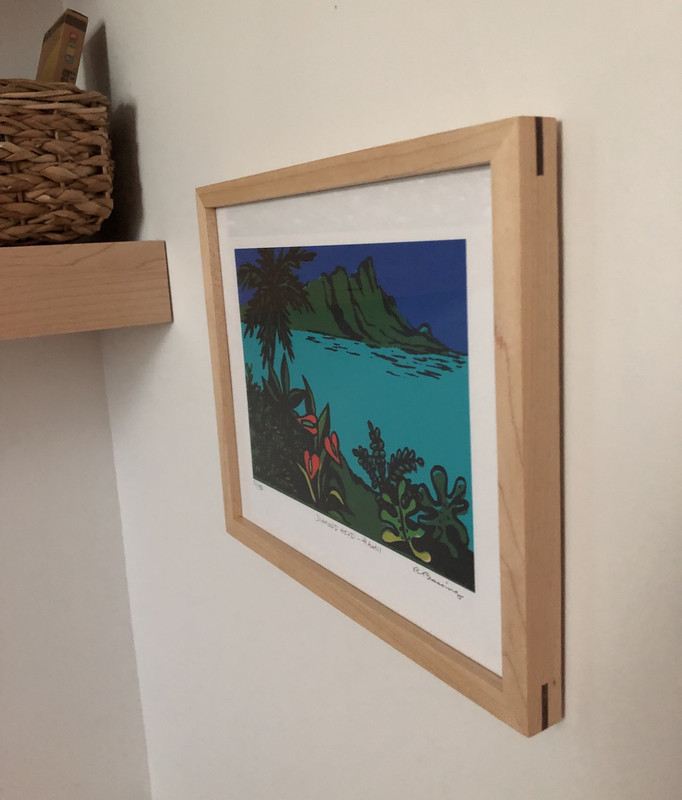
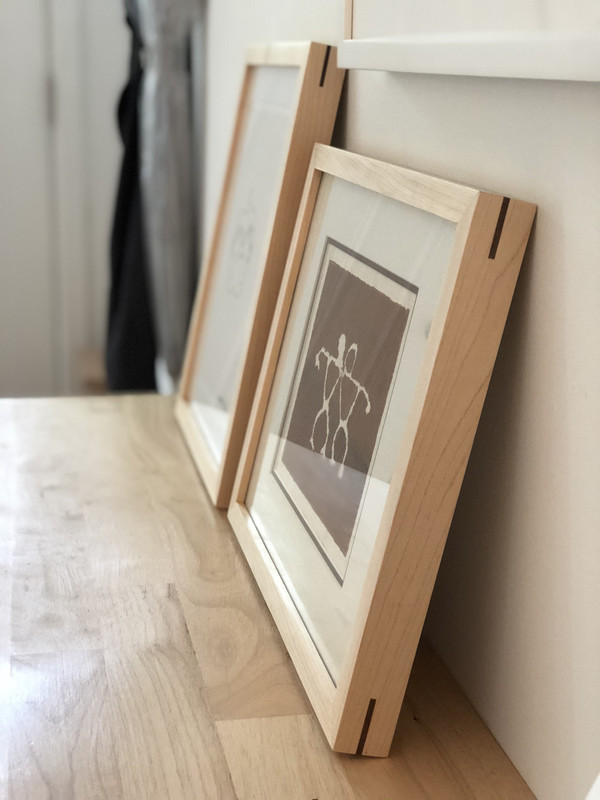
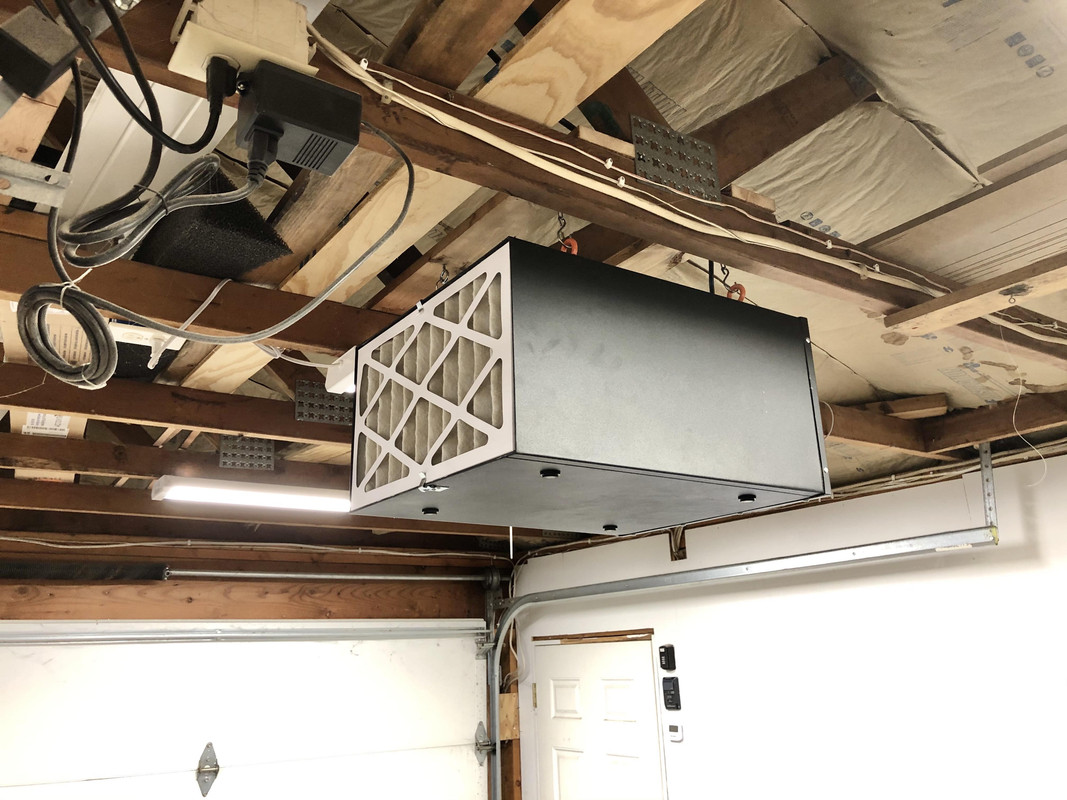
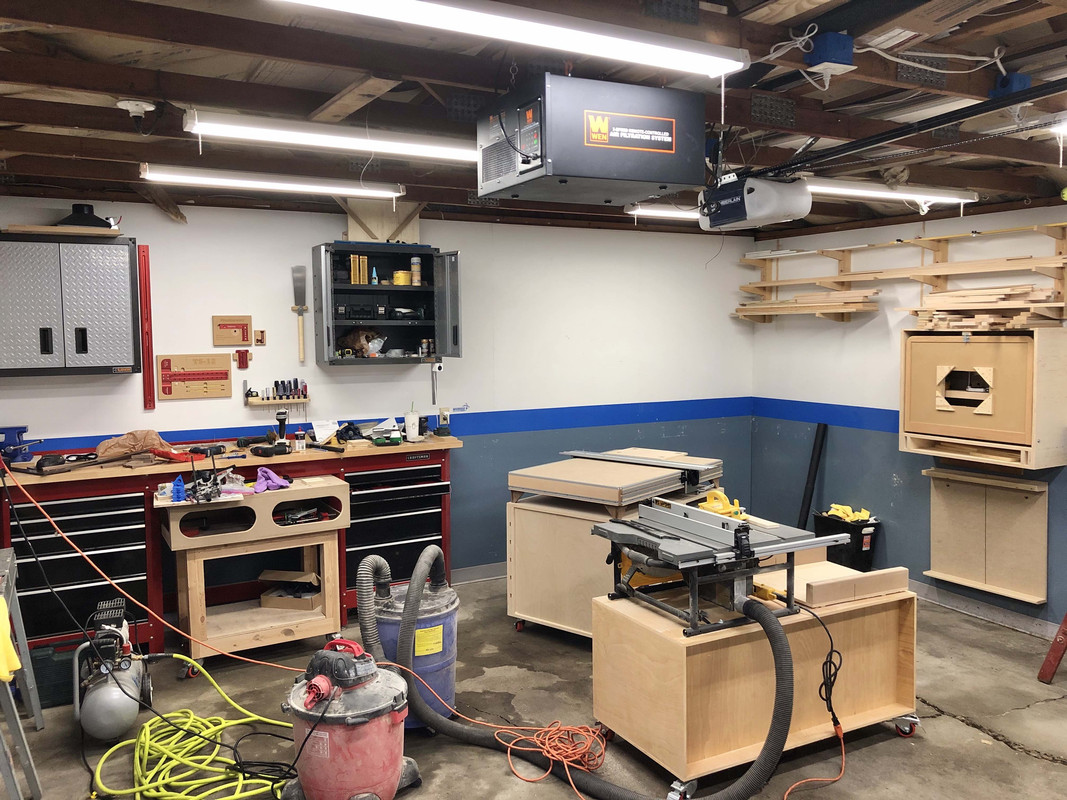
Next I finally got the air cleaner hung. I haven't really been using it a ton and it's been in the way. Now it's nice and convenient.
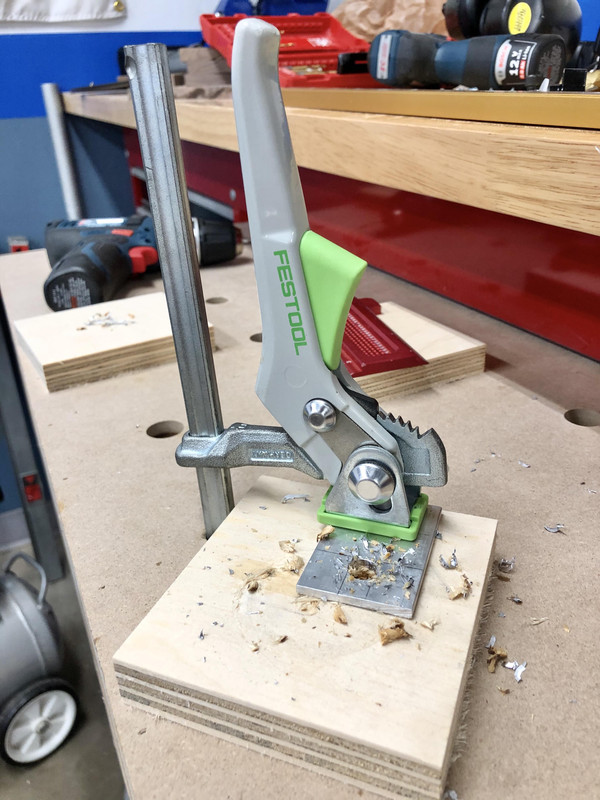
I attempted to make fence brackets for the tracksaw bench fence but it was kind of a fail.
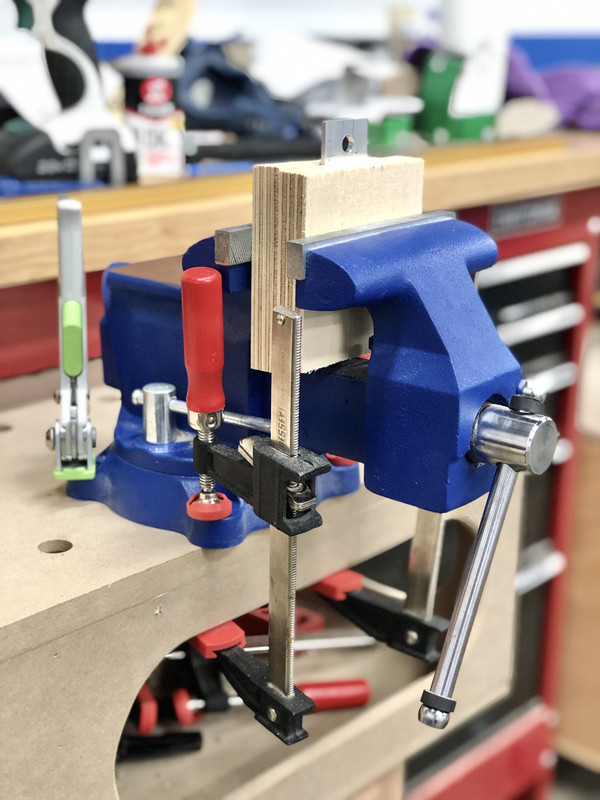
I have no mount for my vice which makes it difficult to use so I'm working on a remedy for that, too.
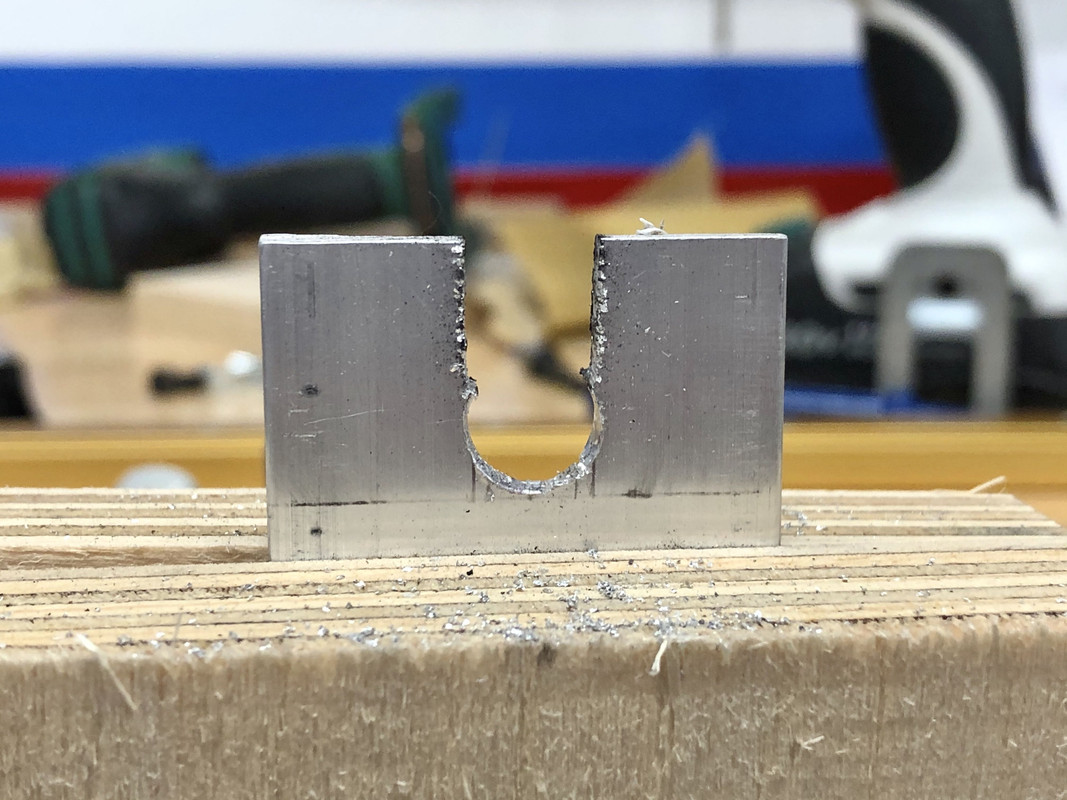
Don't own any files so kind of a messy hack job.
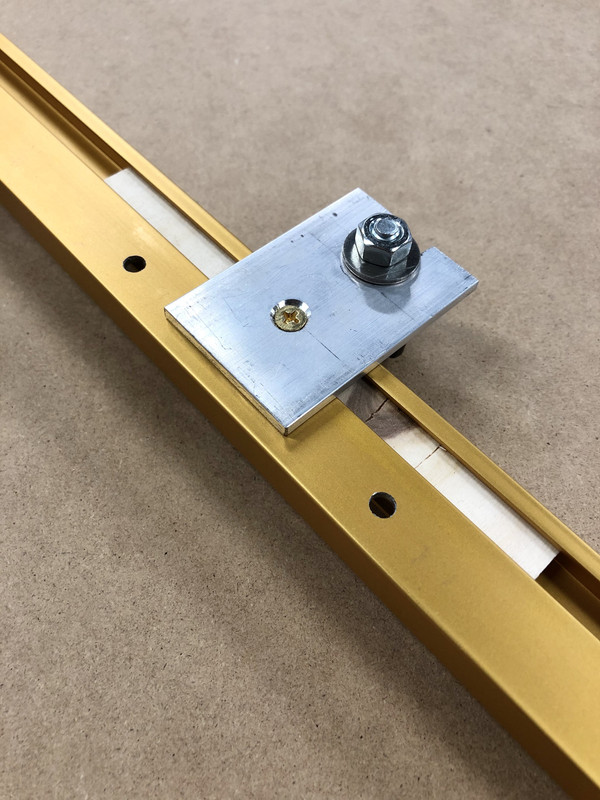
This is the idea of how they were supposed to work:
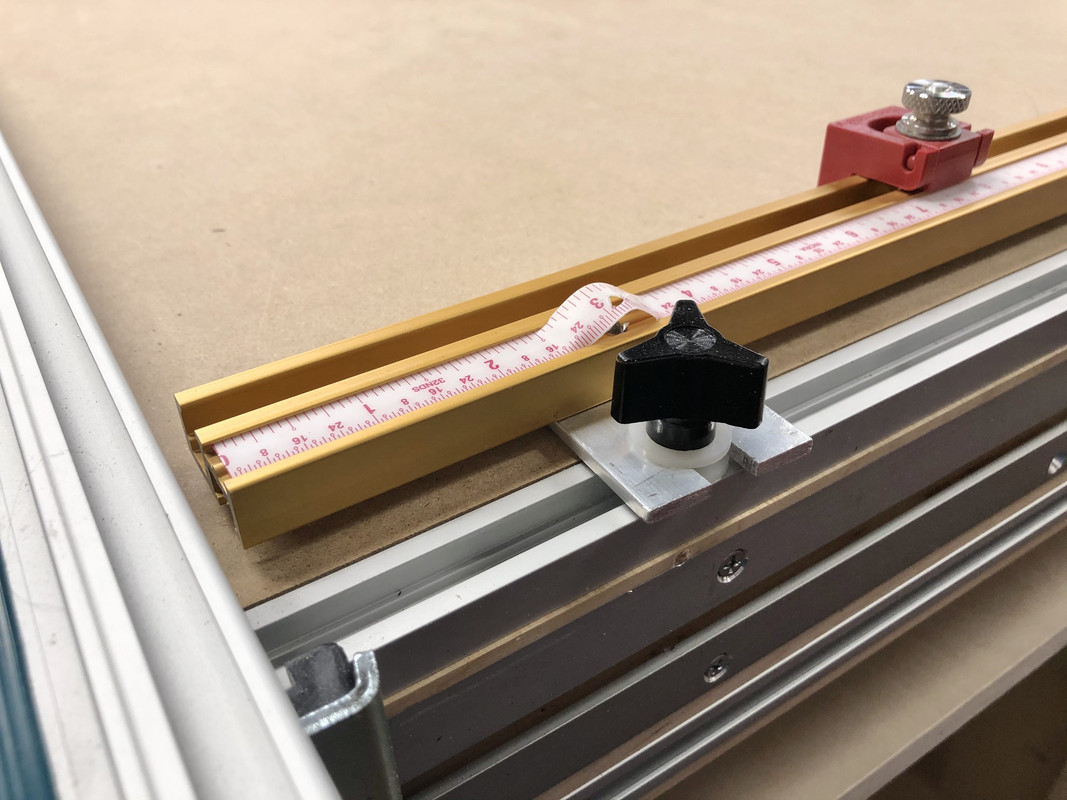
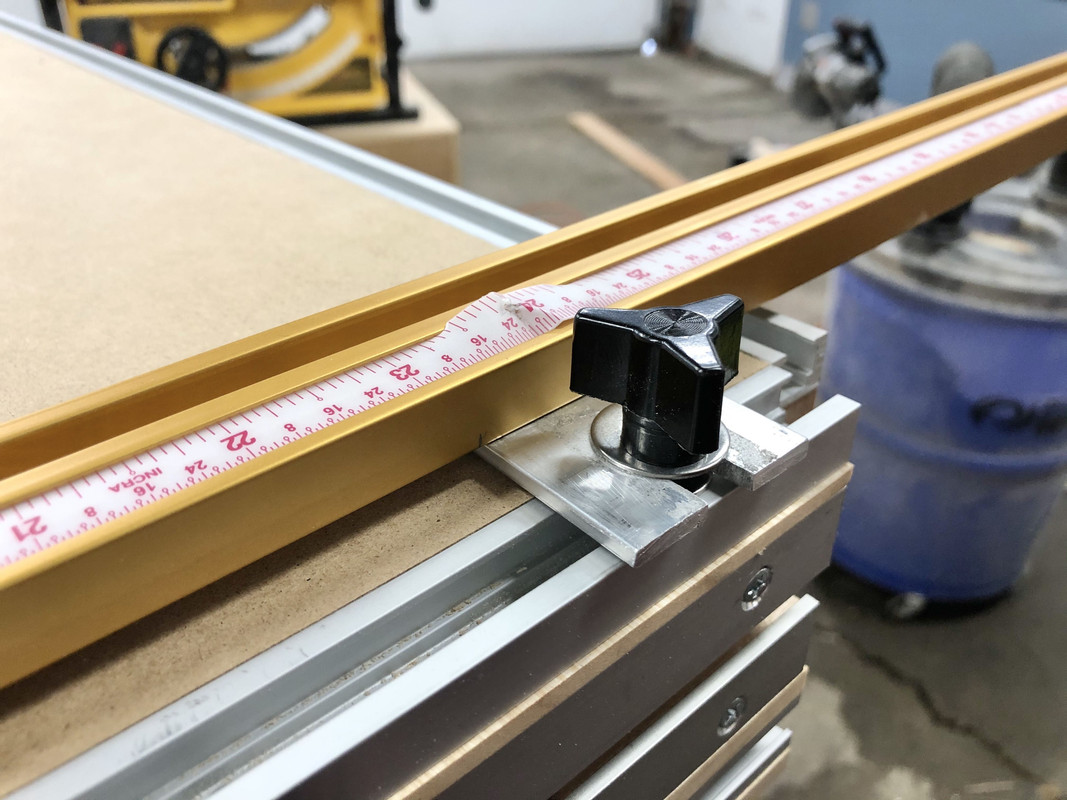
My screws were too long so I drilled through the incra track back side, but accidentally drilled into the tape measure and wrecked it.
Also, the brackets have play in them, an unacceptable amount to make square cuts.
So unfortunately I wasted 4 hours and it's back to the drawing board. Sometimes that's the way it goes.
And one last shop improvement project:
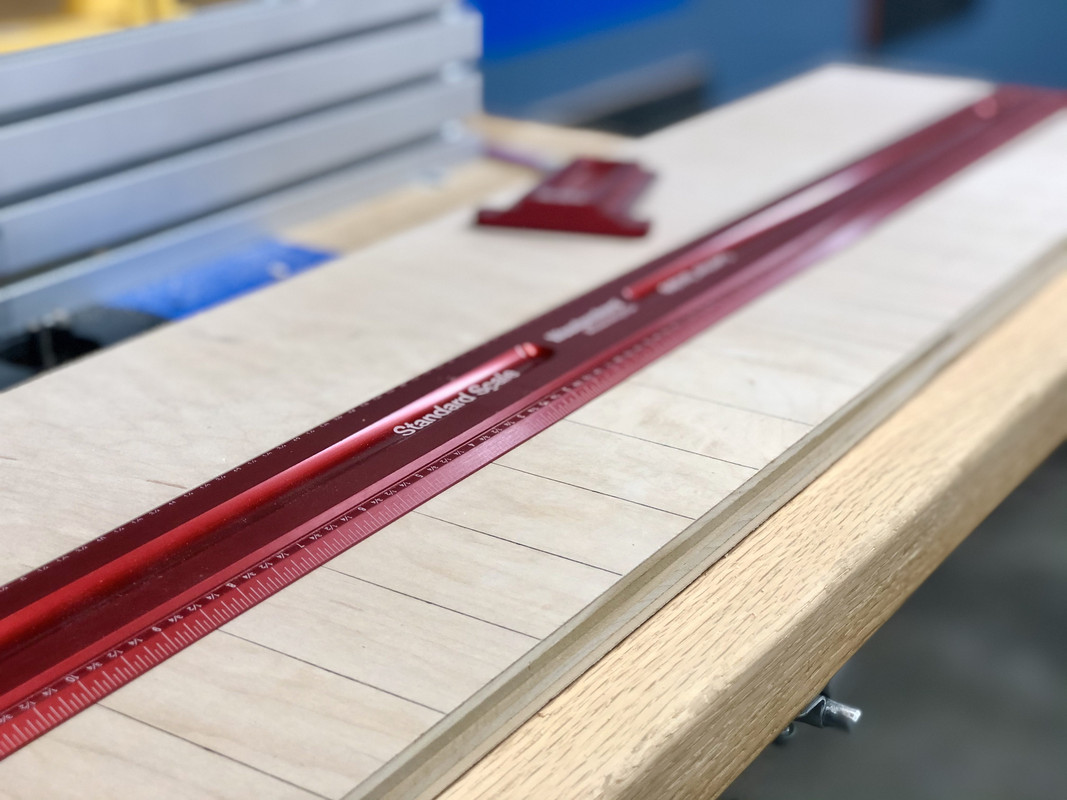
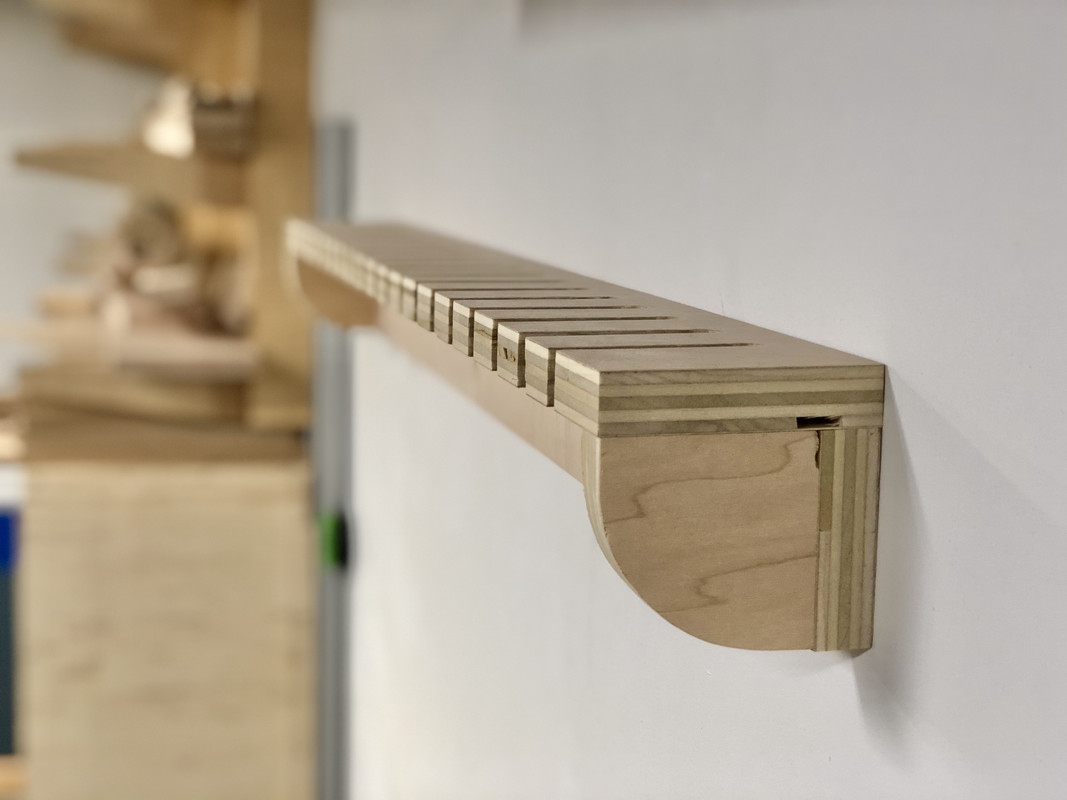
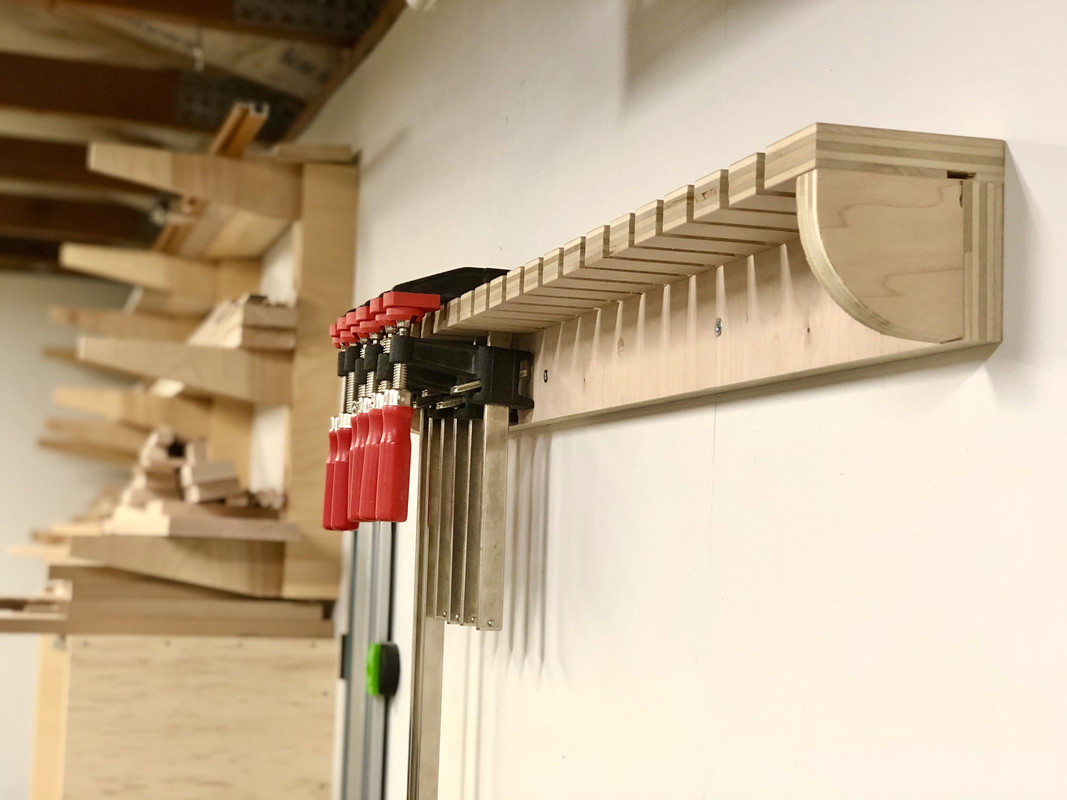
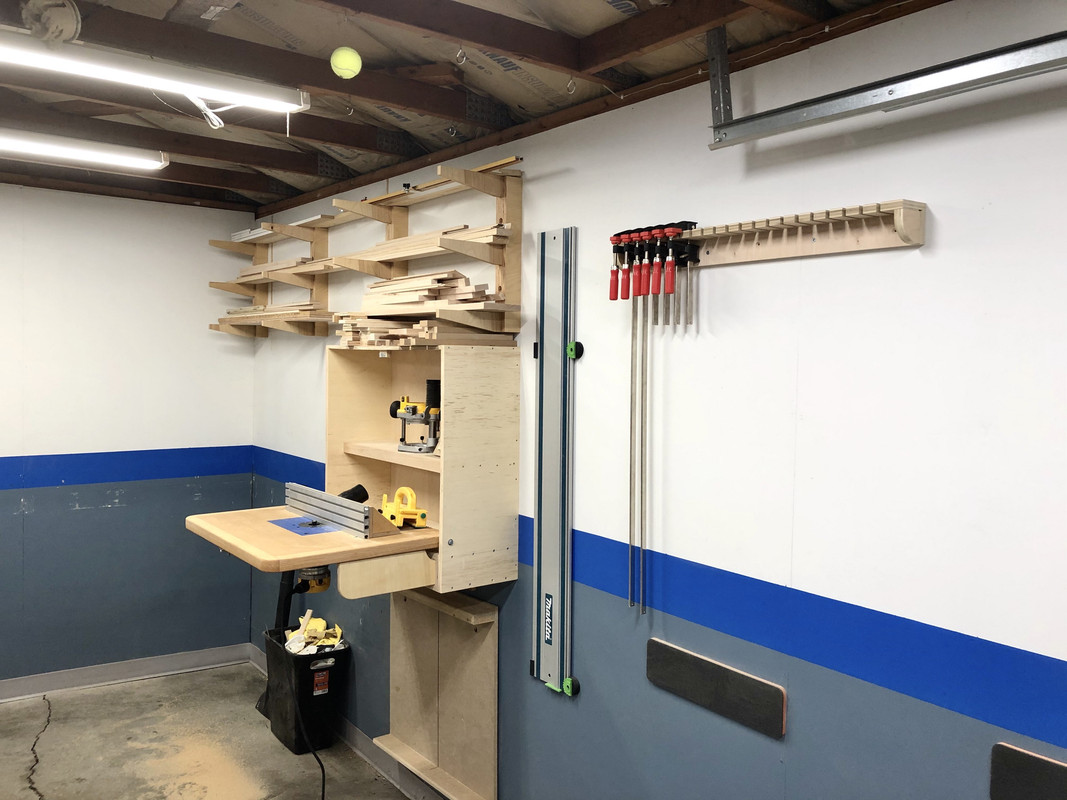
I've needed a clamp rack for awhile. This one has 20 slots for F-clamps. I'll need to make others for my pipe clamps and harbor freight bar clamps.
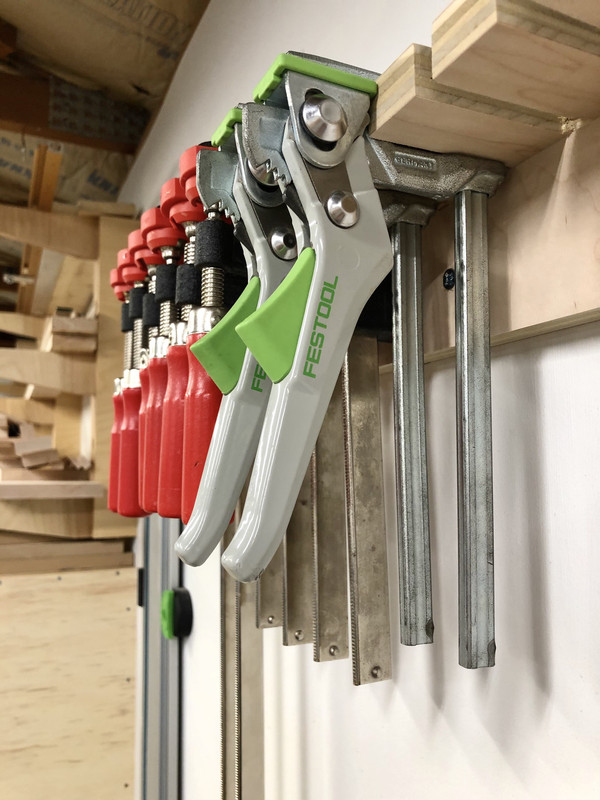
Didn't plan for this but it can hold the Festool quick clamps as well. Although realistically these will stay with the MFT.
If any Minneapolis peeps are reading this, stay safe out there!
I finished my picture frames:
Next I finally got the air cleaner hung. I haven't really been using it a ton and it's been in the way. Now it's nice and convenient.
I attempted to make fence brackets for the tracksaw bench fence but it was kind of a fail.
I have no mount for my vice which makes it difficult to use so I'm working on a remedy for that, too.
Don't own any files so kind of a messy hack job.
This is the idea of how they were supposed to work:
My screws were too long so I drilled through the incra track back side, but accidentally drilled into the tape measure and wrecked it.
Also, the brackets have play in them, an unacceptable amount to make square cuts.
So unfortunately I wasted 4 hours and it's back to the drawing board. Sometimes that's the way it goes.
And one last shop improvement project:
I've needed a clamp rack for awhile. This one has 20 slots for F-clamps. I'll need to make others for my pipe clamps and harbor freight bar clamps.
Didn't plan for this but it can hold the Festool quick clamps as well. Although realistically these will stay with the MFT.
If any Minneapolis peeps are reading this, stay safe out there!
Bummer on the brackets - do you just need a complete redesign, or are your tolerances too loose? If I understand what you are trying to do, I think you'd want to have two screws in that plate to prevent the bracket from racking.
If its just a matter of loose tolerances, here's another option for making brackets - other GJers have had good luck with this outfit.
https://sendcutsend.com/
Also, how do you like that dust collector? I've been looking at the same one for my shop. My apologies if that is a repeat question, I can't remember if I've asked you that already, or just keep meaning to ask and never do.
If its just a matter of loose tolerances, here's another option for making brackets - other GJers have had good luck with this outfit.
https://sendcutsend.com/
Also, how do you like that dust collector? I've been looking at the same one for my shop. My apologies if that is a repeat question, I can't remember if I've asked you that already, or just keep meaning to ask and never do.
sawduststeve
Well-known member
Hi Nick
Just checking in, hope you are all safe and sound.
The picture frames look good as does the clamp rack.
It’s sometimes the little jobs ticked off that are really satisfying.
A little update, I’ve used the Festool plane and CTL1 on site, and I
have to say it’s brilliant, worth every penny. I’ve planned in the room I’m working in and no dust or chips escape. I’m looking at what else I can get away with buying to hook up to the CTL. The auto start is really good, probably not needed but quite cool.
Stay safe
Steve
Just checking in, hope you are all safe and sound.
The picture frames look good as does the clamp rack.
It’s sometimes the little jobs ticked off that are really satisfying.
A little update, I’ve used the Festool plane and CTL1 on site, and I
have to say it’s brilliant, worth every penny. I’ve planned in the room I’m working in and no dust or chips escape. I’m looking at what else I can get away with buying to hook up to the CTL. The auto start is really good, probably not needed but quite cool.
Stay safe
Steve
OP
nicholam77
Well-known member
Bummer on the brackets - do you just need a complete redesign, or are your tolerances too loose? If I understand what you are trying to do, I think you'd want to have two screws in that plate to prevent the bracket from racking.
If its just a matter of loose tolerances, here's another option for making brackets - other GJers have had good luck with this outfit.
https://sendcutsend.com/
Also, how do you like that dust collector? I've been looking at the same one for my shop. My apologies if that is a repeat question, I can't remember if I've asked you that already, or just keep meaning to ask and never do.
I think like you said the single screw was a big factor. Stupid of me but thanks for pointing that out. I was able to add extra screw holes to the existing pieces. I also re-made the wood pieces within the T-Track with a much tighter fit for less slop.
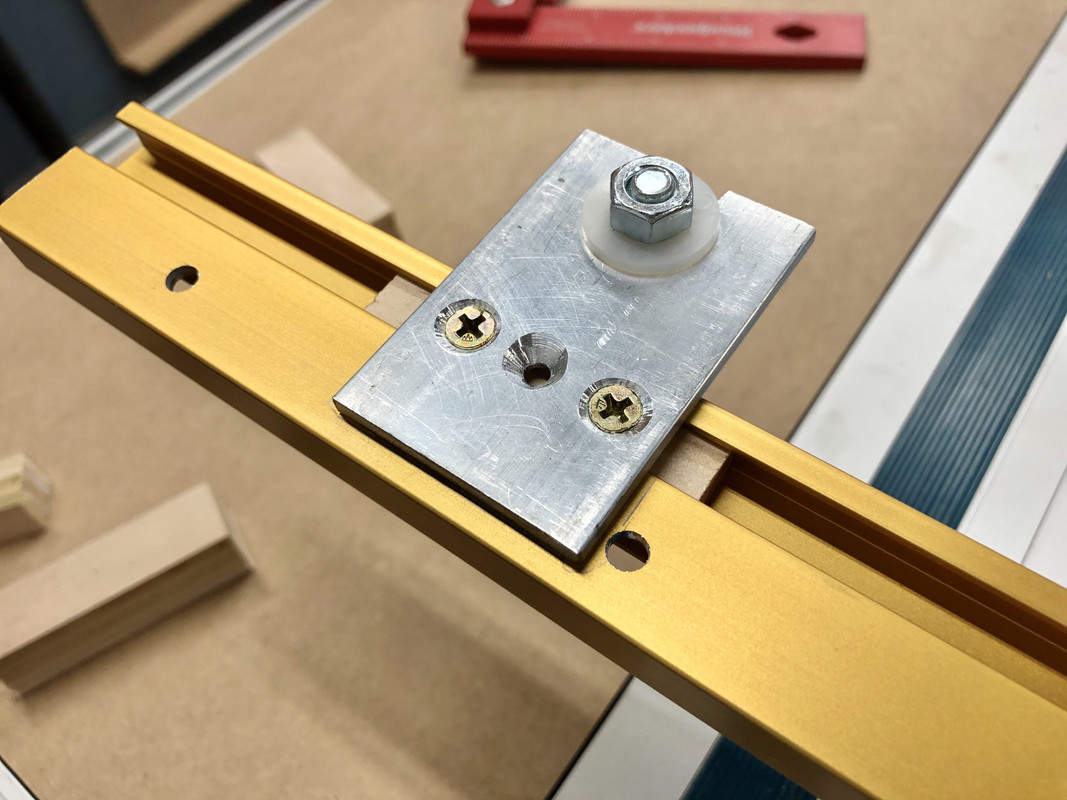
This solved any racking or movement and they feel solid now.
I did a bunch of test cuts attempting to square the whole rig. Essentially the tracksaw rail is locked down in a fixed position. The way the fence brackets are designed allows for some play in the angle the fence can be positioned. So when setting up, I mount the tracksaw rail, hold a known square against it and the fence, and then tighten the fence brackets down while in the square position.
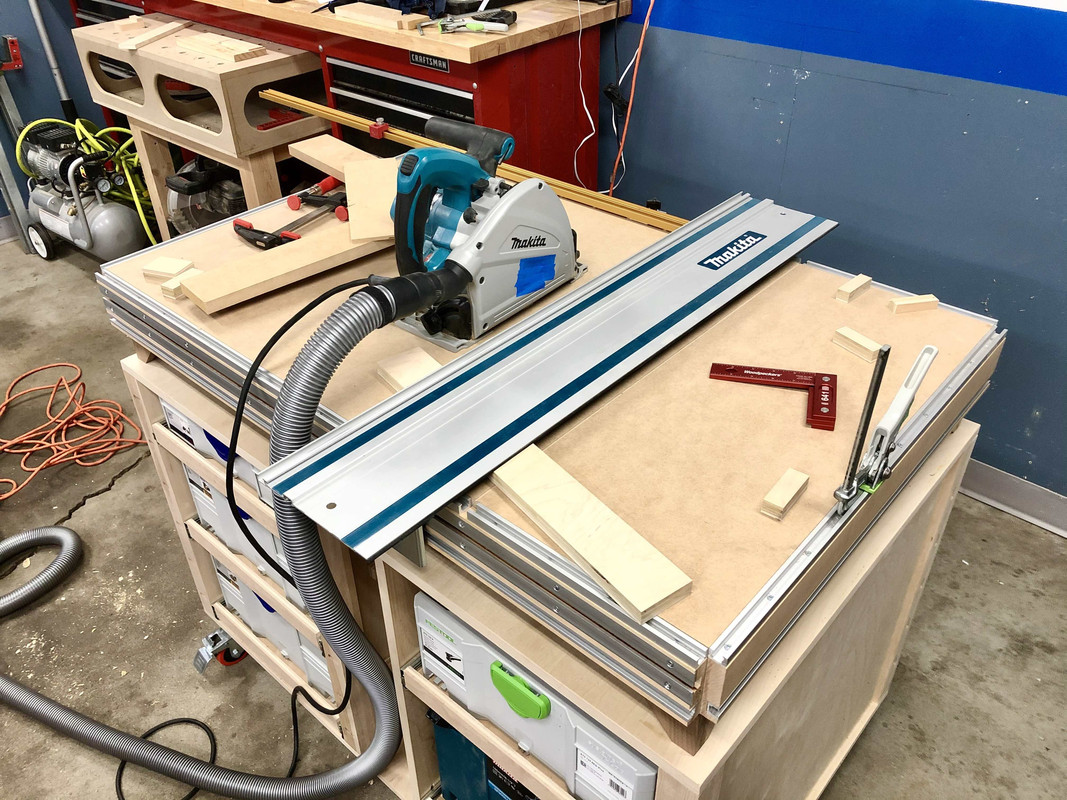
Unfortunately I never achieved perfect square on the resulting cut. I'm not sure what the issue is but I got frustrated and gave up testing it. The MFT rear rail support does have some play in the little post that indexes the rail, so I might try to eliminate that, but I'm not sure if that's the cause or I'm just having trouble squaring the fence. But I need to get it more reliable and quicker to set up!
Thanks for the sendcutsend link, that's awesome! There have definitely been times I've wanted a custom part but don't have the tools or skills to fab it.
Re: the dust collector I assume you mean the hanging WEN air cleaner? If so, my review is that it does work. Idk that it gets everything. I'd for sure still wear a dust mask and use vacuum collection at the tool. But the filter gets dirty... so it is for sure pulling stuff out of the air. Idk how it compares to a shop made one in terms of CFM and level of filtering, but it's compact and I'm glad I have it vs. nothing. The timer feature is nice.
Hi Nick
Just checking in, hope you are all safe and sound.
The picture frames look good as does the clamp rack.
It’s sometimes the little jobs ticked off that are really satisfying.
A little update, I’ve used the Festool plane and CTL1 on site, and I
have to say it’s brilliant, worth every penny. I’ve planned in the room I’m working in and no dust or chips escape. I’m looking at what else I can get away with buying to hook up to the CTL. The auto start is really good, probably not needed but quite cool.
Stay safe
Steve
Hey Steve, yes all safe and sound here! Mostly just peaceful protests at this point. I don't want to politicize this thread in any way, but as a Minneapolis resident it's been a heavy, emotional, frustrating week to say the least. Puts things like trying to get my track saw bench squared up in massive perspective.
Back to the gear, that's awesome to hear you are happy with your new Festool stuff!
I'm in no rush as I have a lot of other things to sort out in "the shop", but if I do ever grab the CT15 vac I'll be sure to blame you Just a few thoughts...
Are you using that small square to try and square the fence to the rail? If so, I would definitely look to get a larger square. What looks perfect at 4-6" might be out 1/16" or more at at 24". If you don't have anything larger, picking up a ~$10 framing square might not be a bad idea to get you going. Just make sure keep it hidden in a corner so your Woodpeckers don't see it and get mad. Also, if you do get a framing square, be sure to check for square before using it (pretty simple process, how-to's can be found with a quick search).
Second, this may seem silly, but have you checked both your t-rail and your fence extrusions for straightness? Holding a straight edge to it, or looking down it from the end should reveal pretty quickly if it is bowed or not. I know Incra is pretty good about precision, but you never know. If both look good, it might also be worth checking the fence while installed to make sure that the brackets and knobs aren't affecting anything.
I understand your frustration. I've spent many hours of my life chasing my tail on stuff like this. More with metal than with wood, but the principles are the same.
Are you using that small square to try and square the fence to the rail? If so, I would definitely look to get a larger square. What looks perfect at 4-6" might be out 1/16" or more at at 24". If you don't have anything larger, picking up a ~$10 framing square might not be a bad idea to get you going. Just make sure keep it hidden in a corner so your Woodpeckers don't see it and get mad. Also, if you do get a framing square, be sure to check for square before using it (pretty simple process, how-to's can be found with a quick search).
Second, this may seem silly, but have you checked both your t-rail and your fence extrusions for straightness? Holding a straight edge to it, or looking down it from the end should reveal pretty quickly if it is bowed or not. I know Incra is pretty good about precision, but you never know. If both look good, it might also be worth checking the fence while installed to make sure that the brackets and knobs aren't affecting anything.
I understand your frustration. I've spent many hours of my life chasing my tail on stuff like this. More with metal than with wood, but the principles are the same.
frojoe
Well-known member
This thread is just great. I just bought my first home, with an attached 20x20 garage, and a doored/attached 17x13 rec room next to it. My cars are a bit bigger (1972 Nova, 2001 740i) but considering I plan to put my workbenches in the attached room, your garage is a GREAT proportional frame of reference for what can be done in a "smaller" garage (instead of all these other lucky guys with 24x30.. 30x40.... 50x140 "garages" hahaha).
Subscribed!
Subscribed!
Keep trucking man, these are small and frustrating setbacks, but you’re on the right path.
Single screw = point of rotation. You’ve found the fix already.
Wood insert - consider getting a chunk of HDPE plastic (cutting board material) from amazon or McMaster. It’s cheap, dimensionally stable, easy to machine, and self lubricating so it slides well.
Took addition - if you don’t own a set already, grab a set of Nicholson files. Super affordable and with some practice, make it easy to sneak up on a line when machining metal or plastic.
Checking square - no need to get a big framing triangle. High school trig is your friend, measure out a 3,4,5 triangle on your stock to check for square.
Single screw = point of rotation. You’ve found the fix already.
Wood insert - consider getting a chunk of HDPE plastic (cutting board material) from amazon or McMaster. It’s cheap, dimensionally stable, easy to machine, and self lubricating so it slides well.
Took addition - if you don’t own a set already, grab a set of Nicholson files. Super affordable and with some practice, make it easy to sneak up on a line when machining metal or plastic.
Checking square - no need to get a big framing triangle. High school trig is your friend, measure out a 3,4,5 triangle on your stock to check for square.
OP
nicholam77
Well-known member
Just a few thoughts...
Are you using that small square to try and square the fence to the rail? If so, I would definitely look to get a larger square. What looks perfect at 4-6" might be out 1/16" or more at at 24". If you don't have anything larger, picking up a ~$10 framing square might not be a bad idea to get you going. Just make sure keep it hidden in a corner so your Woodpeckers don't see it and get mad. Also, if you do get a framing square, be sure to check for square before using it (pretty simple process, how-to's can be found with a quick search).
Second, this may seem silly, but have you checked both your t-rail and your fence extrusions for straightness? Holding a straight edge to it, or looking down it from the end should reveal pretty quickly if it is bowed or not. I know Incra is pretty good about precision, but you never know. If both look good, it might also be worth checking the fence while installed to make sure that the brackets and knobs aren't affecting anything.
I understand your frustration. I've spent many hours of my life chasing my tail on stuff like this. More with metal than with wood, but the principles are the same.
Again, good comments, thanks! I actually have 2 big box metal framing squares, but neither of them are perfectly square. I know this because I've attempted to use them to square my crosscut sleds with less than stellar results. I have some large plastic carpenter square's as well but didn't try those.
I was mainly attempting to use my picture frame miter jig, which is essentially a perfect 90. At least it was when I made it. It was cut on my small crosscut sled which had been dialed in with the 5-cut method. The only good square I have to check it is the small Woodpecker's square but that shows no gaps. And yes I did attempt with the Woodpecker's square, too, but I totally get what you're saying about it being on the small side.
Ultimately I was planning on getting something like this to use:
https://www.amazon.com/dp/B077KR9X22/?tag=atomicindus08-20
Of course Woodpecker's makes one too for a small fortune.
Or maybe something like 16x10 or 19x16 Kinex:
https://taytools.com/products/kinex-2-piece-din-875-1-machinist-squares?variant=18087098286131
After you mentioned it I did check the rail and extrusions.
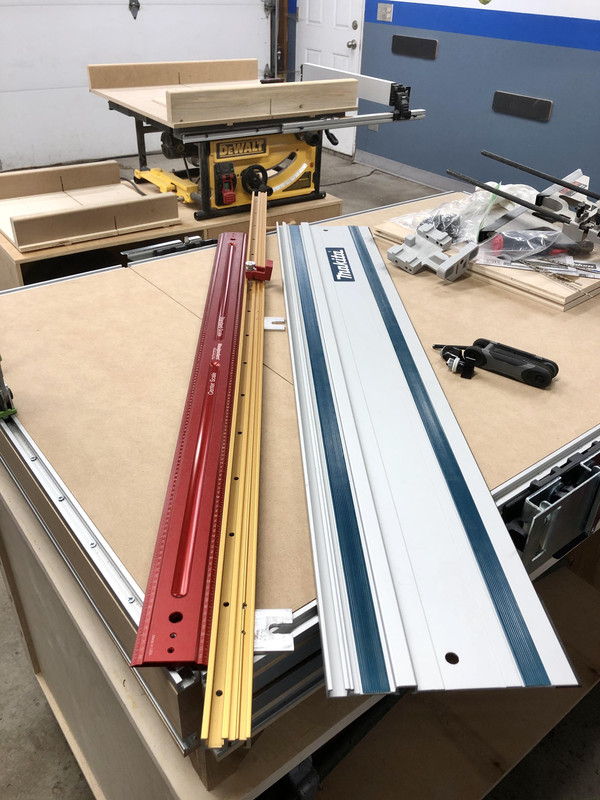
The straightest reference I have is my 36" Woodpecker's rule, at least I think it's straight! The Makita rail checked out just fine. The Incra TT+ extrusion did have some bow in the center, and actually is not completely flat, either. Which would be consistent with the direction of the error (resulting cut was less than 90). So that might be part of my problem. It doesn't look like a ton, but could be enough to throw it off I suppose. The little flip stop I got for it doesn't work great either, so I'm thinking I might try and go a different router completely with a heftier extrusion.
This thread is just great. I just bought my first home, with an attached 20x20 garage, and a doored/attached 17x13 rec room next to it. My cars are a bit bigger (1972 Nova, 2001 740i) but considering I plan to put my workbenches in the attached room, your garage is a GREAT proportional frame of reference for what can be done in a "smaller" garage (instead of all these other lucky guys with 24x30.. 30x40.... 50x140 "garages" hahaha).
Subscribed!
Thank you, and congrats on your home! Sounds like a great setup with the attached room. Having a storage shed has been key for me to preserve precious space in the garage. Even if it feels small you can definitely make a nice workshop for yourself, there are tons of great small shops out there. On this forum, user cash68 put together a nice list of small garages if you haven't seen it:
https://www.garagejournal.com/forum/showthread.php?t=360107
Thanks for stopping in!
Keep trucking man, these are small and frustrating setbacks, but you’re on the right path.
Single screw = point of rotation. You’ve found the fix already.
Wood insert - consider getting a chunk of HDPE plastic (cutting board material) from amazon or McMaster. It’s cheap, dimensionally stable, easy to machine, and self lubricating so it slides well.
Took addition - if you don’t own a set already, grab a set of Nicholson files. Super affordable and with some practice, make it easy to sneak up on a line when machining metal or plastic.
Checking square - no need to get a big framing triangle. High school trig is your friend, measure out a 3,4,5 triangle on your stock to check for square.
Thank you, this is helpful. HDPE did actually cross my mind, although at this point I'm trying to do whatever possible to stop adding costs to the setup. It'll be a future post... but damn this thing got expensive. I'd love to try HDPE though, so I'll keep it in mind.
Any brand you'd recommend for an inexpensive set of files? Or does it not really matter?
It is a bit frustrating since I've spent a lot of time and money on this project, but I am expecting close to perfect results. The bench overall serves a lot of functions -- storage, clamping, assembly, outfeed, etc -- but the one thing it has to do is provide square track saw cuts for sheet goods. It was my primary reason for building it so I'll figure it out one way or another.
OP
nicholam77
Well-known member
Some quick goings-on in the shop today.
First an update on the track saw fence situation. I did some research and came across what looks like a solid solution from the Alabama Woodworker's bench (YouTube). As a result I ended up ordering some Misumi Engineering aluminum extrusions and brackets. Misumi is an alternative to 80/20 Inc. I realize I could go as simple as a piece of wood for the fence, but I'm really going for accuracy and close tolerances. I wanted something that will stay straight even in the severe humidity and temperature changes my garage experiences. Amazed at how bowed and not straight the Incra TT+ was (I swear it was straight when I bought it!) I wanted something beefier.
Anyways... that should be here in a week or two.
Outside of that, my wife has given me strict orders to finish the kitchen trim. All that's left is the curved toe kick sections. I've really been dragging my feet on this because I figured it would be a PITA.
I found some 8' x 4.5" toe kicks from Menards special order that were MDF core with nice and clear maple veneer. I figured I would attempt to stain them to match the orangy-red-golden color of our cabinets.
I brought a sample piece with me to the store, but even so, matching is tricky. But it only took me two tries and two trips to get it pretty dang close. Good enough for a toe kick!
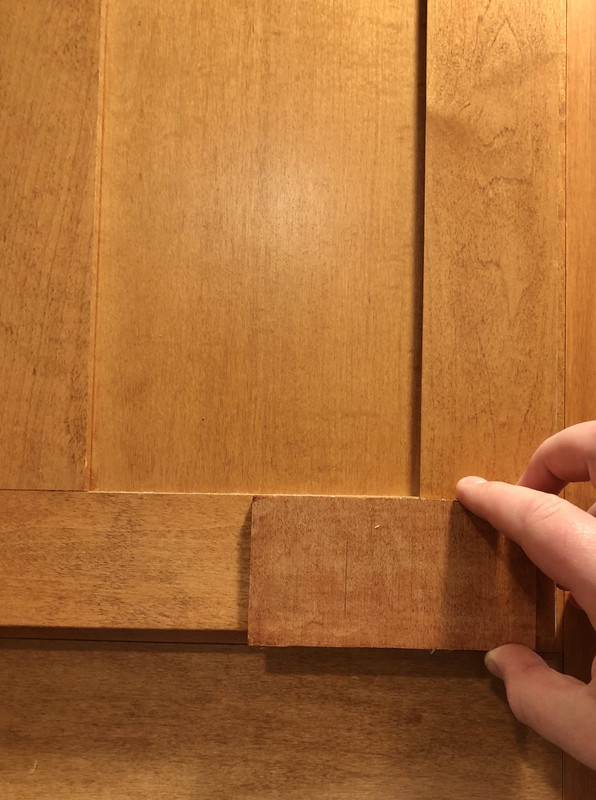
After knowing the stain would work via a sample piece I then took some kitchen measurements and ripped the toe kicks to height.
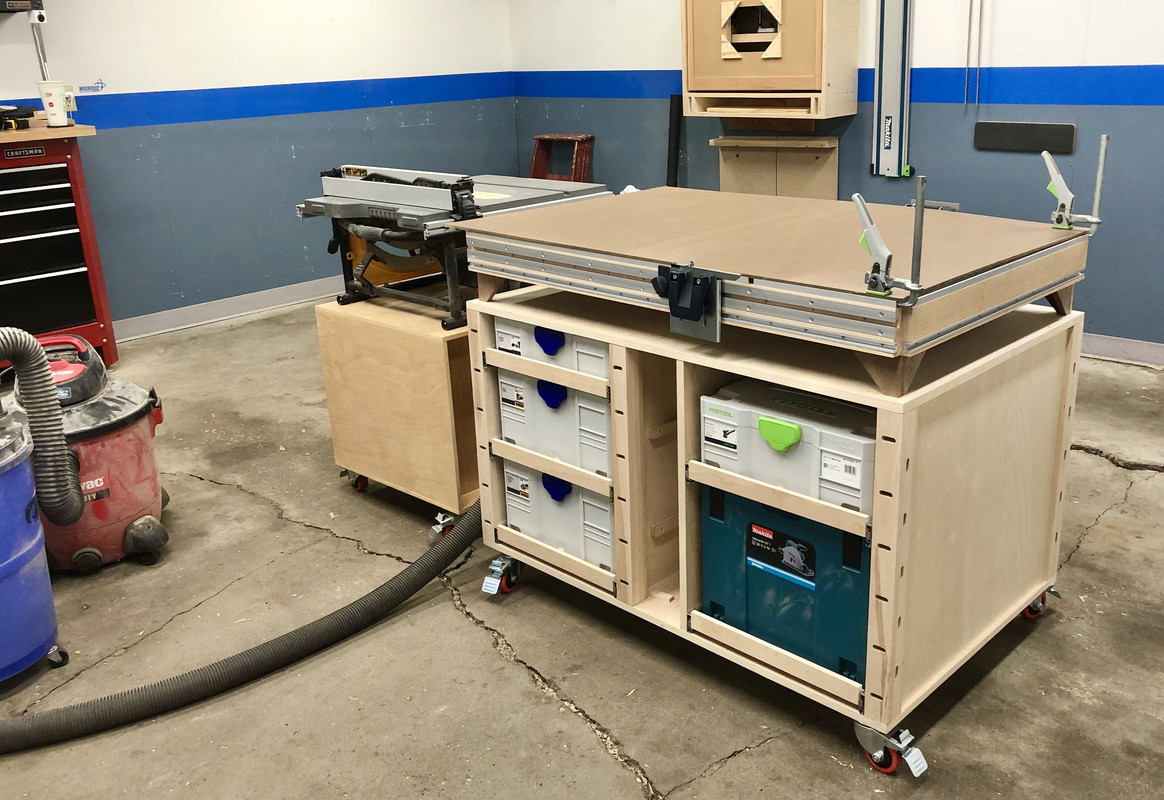
Here I am using the new MFT station as an outfeed table for the first time! I have a piece of 1/4" hardboard on the top to flush it with the table saw and protect the MDF surface.
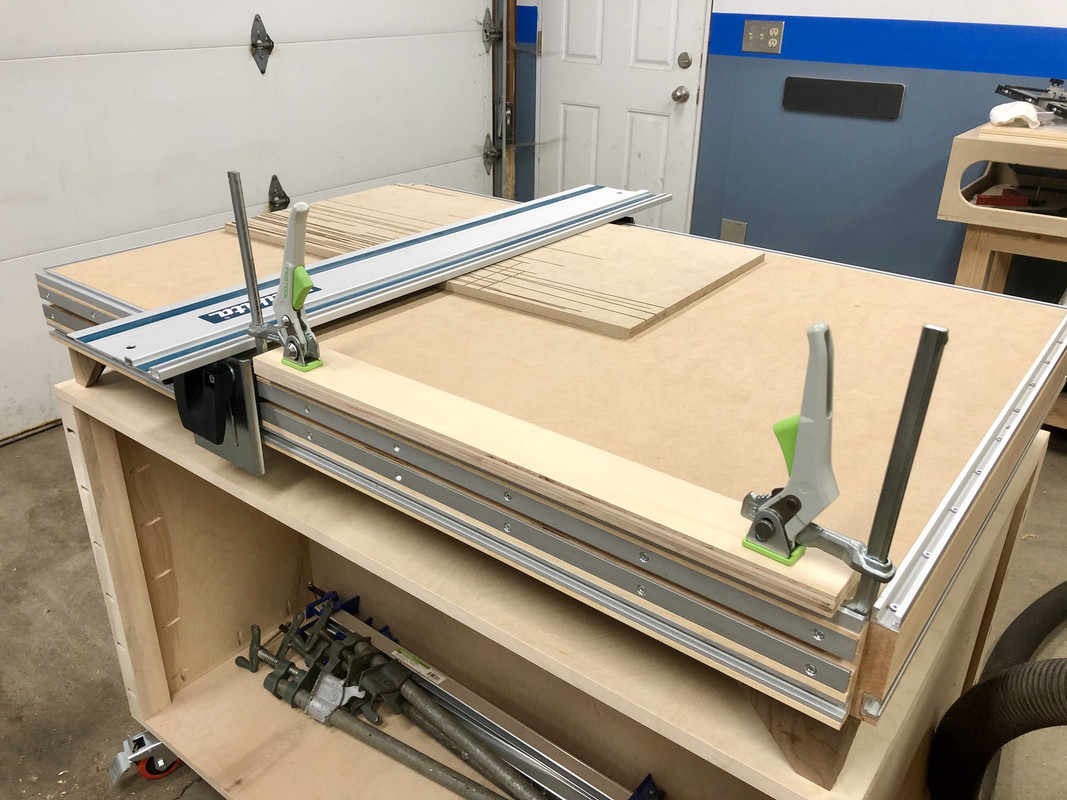
Next I needed to cross cut to rough length and make the kerf relief cuts for the curves. Being 8' long, thin, veneered MDF, this would have been frustrating on my small table saw and cross cut sled. So here comes the inaugural project use for the track saw station.
With the fence not sorted yet, I just clamped a straight piece of plywood. I don't know if it was perfect 90 degrees but for this project close enough was good enough.
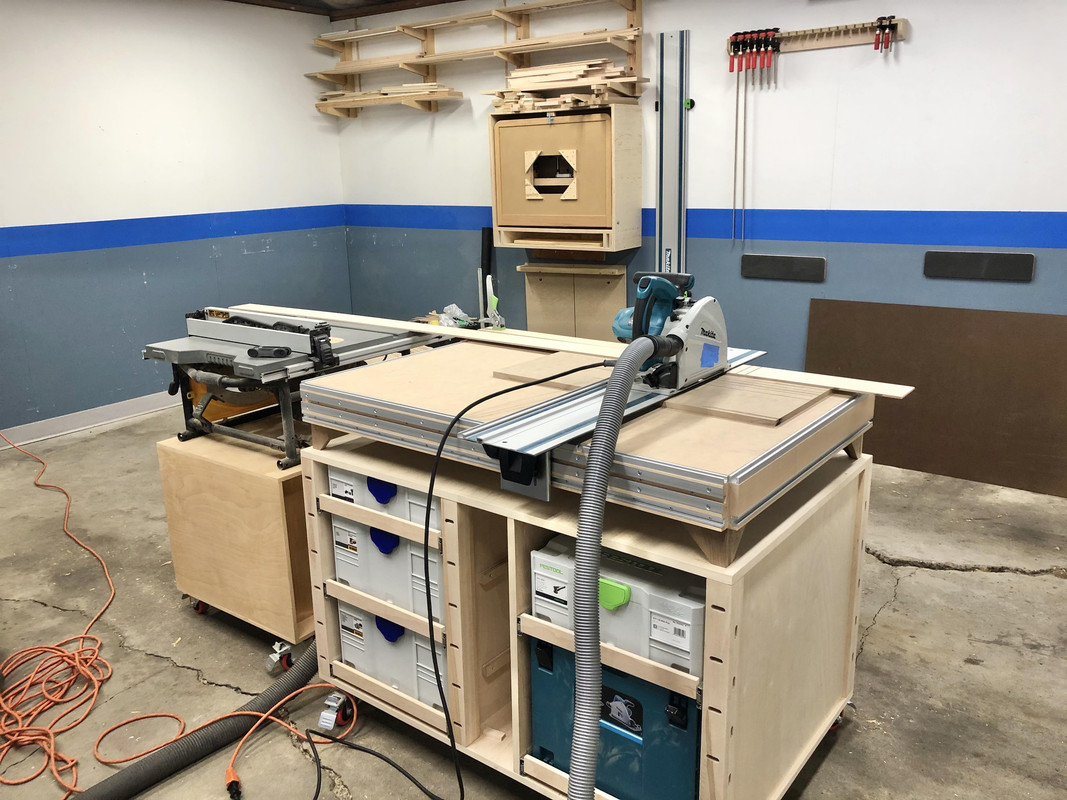
In the pic above you can see the kerf relief cuts are towards one end. This would have been near impossible to support in the table saw.
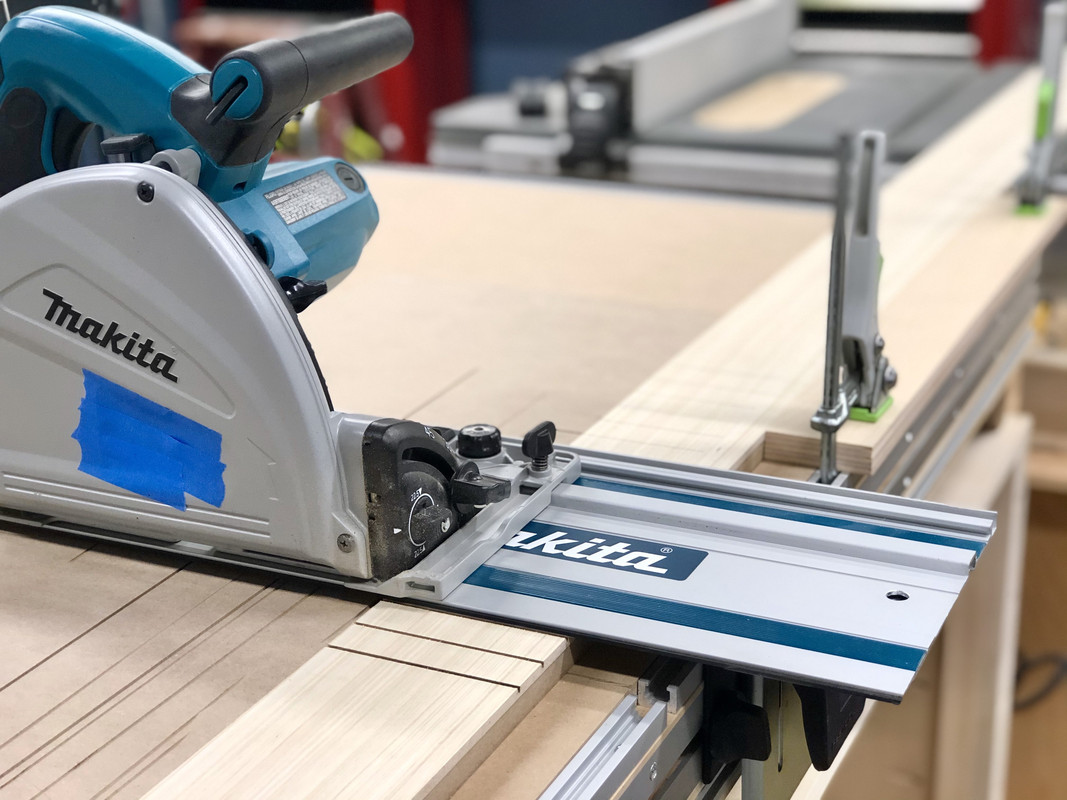
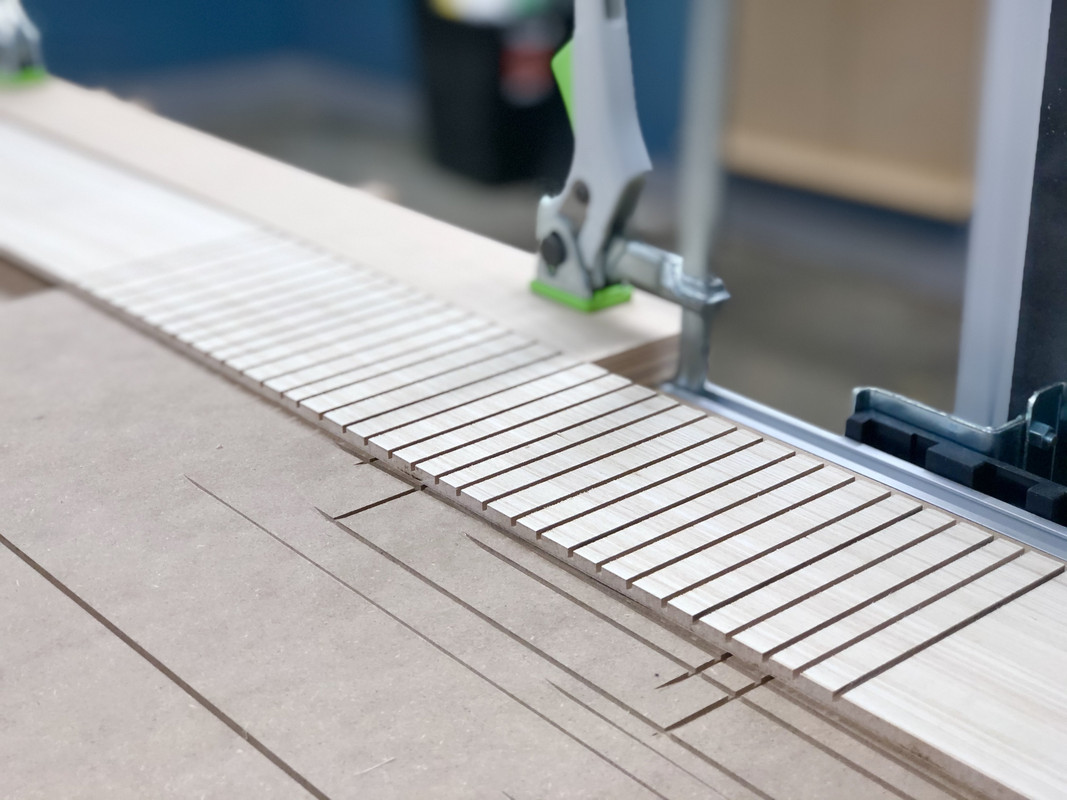
Happy to say it was mostly fast, efficient, and dustless. Felt like my tools were actually working for me instead of fighting me. So far so good.
In the kitchen, the floor has a hump, so what I wanted to be one section I had to cut in order to keep it snug to the flooring. Going to eyeball a corrective angle where the two pieces **** join, hopefully it works. Below you can see the single piece in place where it is touching the floor on the right and about 1/2" high near the oven.
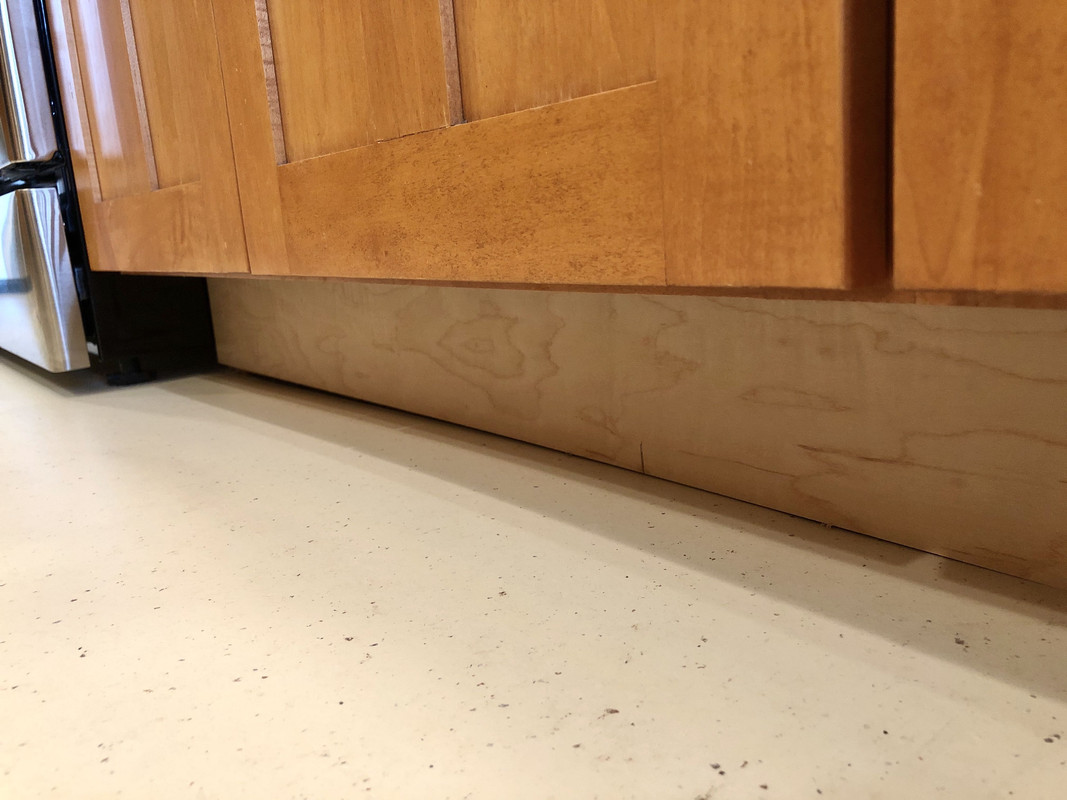
Nothing can ever be easy, right??
Happy with how the pieces were test fitting I stained them all.
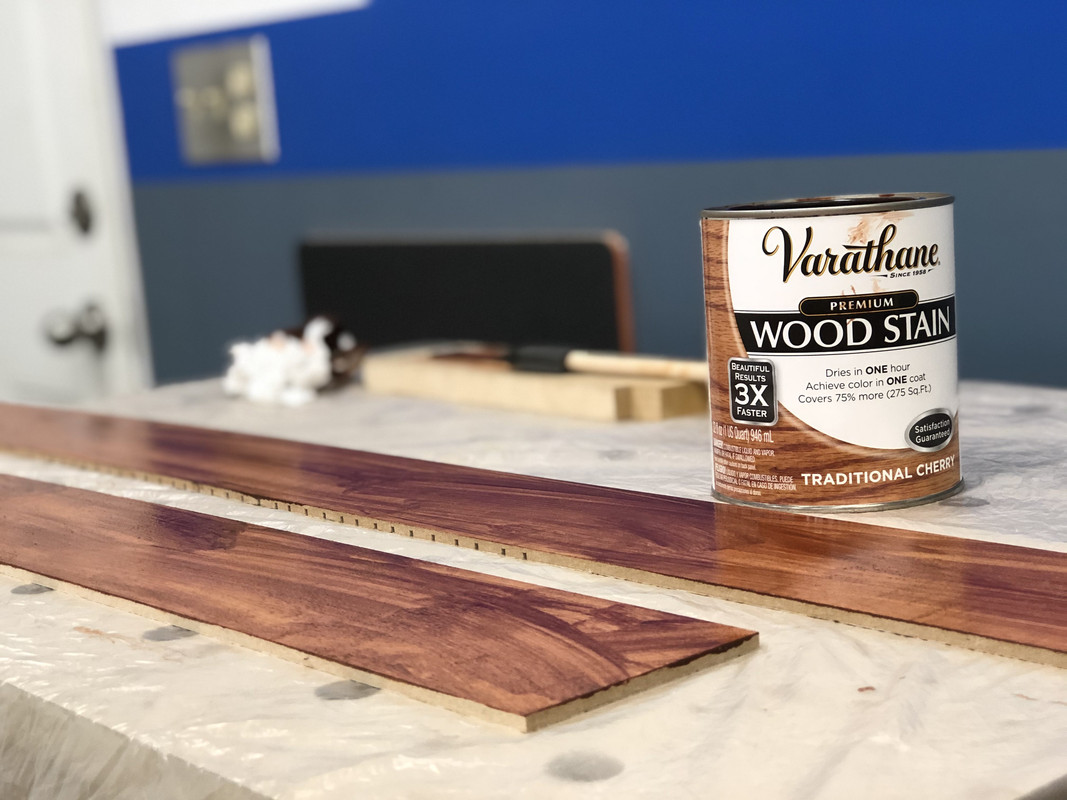
This was my first time staining anything, but it worked well.
Hoping to get them attached tomorrow.
First an update on the track saw fence situation. I did some research and came across what looks like a solid solution from the Alabama Woodworker's bench (YouTube). As a result I ended up ordering some Misumi Engineering aluminum extrusions and brackets. Misumi is an alternative to 80/20 Inc. I realize I could go as simple as a piece of wood for the fence, but I'm really going for accuracy and close tolerances. I wanted something that will stay straight even in the severe humidity and temperature changes my garage experiences. Amazed at how bowed and not straight the Incra TT+ was (I swear it was straight when I bought it!) I wanted something beefier.
Anyways... that should be here in a week or two.
Outside of that, my wife has given me strict orders to finish the kitchen trim. All that's left is the curved toe kick sections. I've really been dragging my feet on this because I figured it would be a PITA.
I found some 8' x 4.5" toe kicks from Menards special order that were MDF core with nice and clear maple veneer. I figured I would attempt to stain them to match the orangy-red-golden color of our cabinets.
I brought a sample piece with me to the store, but even so, matching is tricky. But it only took me two tries and two trips to get it pretty dang close. Good enough for a toe kick!
After knowing the stain would work via a sample piece I then took some kitchen measurements and ripped the toe kicks to height.
Here I am using the new MFT station as an outfeed table for the first time! I have a piece of 1/4" hardboard on the top to flush it with the table saw and protect the MDF surface.
Next I needed to cross cut to rough length and make the kerf relief cuts for the curves. Being 8' long, thin, veneered MDF, this would have been frustrating on my small table saw and cross cut sled. So here comes the inaugural project use for the track saw station.
With the fence not sorted yet, I just clamped a straight piece of plywood. I don't know if it was perfect 90 degrees but for this project close enough was good enough.
In the pic above you can see the kerf relief cuts are towards one end. This would have been near impossible to support in the table saw.
Happy to say it was mostly fast, efficient, and dustless. Felt like my tools were actually working for me instead of fighting me. So far so good.
In the kitchen, the floor has a hump, so what I wanted to be one section I had to cut in order to keep it snug to the flooring. Going to eyeball a corrective angle where the two pieces **** join, hopefully it works.
Below you can see the single piece in place where it is touching the floor on the right and about 1/2" high near the oven.
Nothing can ever be easy, right??
Happy with how the pieces were test fitting I stained them all.
This was my first time staining anything, but it worked well.
Hoping to get them attached tomorrow.
Last edited:
Grumblebum
Well-known member
Nick you keep sending me down youtube rabbit holes lol.
Have been looking over Peter Millards tracksaw vids last night, I think I'll make some parallel guides too.
https://m.youtube.com/playlist?list=PL7S6M0i1Mz9pf2uo5SpFSWrQOu0qpjeIs
So I have my saw and the 118" bigboy track (and it's indeed a bigboy - not sure where to store it yet), hopefully get to play this coming weekend.
Will be great to see how that curve turns out in the kitchen. I've not seen stain that dries in 1 hour and single coat, how did it come up ?
Cheers GB
Have been looking over Peter Millards tracksaw vids last night, I think I'll make some parallel guides too.
https://m.youtube.com/playlist?list=PL7S6M0i1Mz9pf2uo5SpFSWrQOu0qpjeIs
So I have my saw and the 118" bigboy track (and it's indeed a bigboy - not sure where to store it yet), hopefully get to play this coming weekend.
Will be great to see how that curve turns out in the kitchen. I've not seen stain that dries in 1 hour and single coat, how did it come up ?
Cheers GB
OP
nicholam77
Well-known member
Nick you keep sending me down youtube rabbit holes lol.
Have been looking over Peter Millards tracksaw vids last night, I think I'll make some parallel guides too.
https://m.youtube.com/playlist?list=PL7S6M0i1Mz9pf2uo5SpFSWrQOu0qpjeIs
So I have my saw and the 118" bigboy track (and it's indeed a bigboy - not sure where to store it yet), hopefully get to play this coming weekend.
Will be great to see how that curve turns out in the kitchen. I've not seen stain that dries in 1 hour and single coat, how did it come up ?
Cheers GB
Well now you're sending ME down a youtube rabbit hole because I haven't seen the Peter Millard videos and they look intriguing. I think you're going to have a better understanding of the track saw's uses and shortcomings out of the box by watching all that stuff.
Congrats on the new saw and you'll have to let me know how the 118" track is (i.e. is it straight?). I actually have an upcoming build where I'll need to rip a 4'x8' sheet of plywood the long way a few times so I'm not sure what I'm gonna do. The 118" track is dang expensive so I'm thinking about getting another 55" inch and connector in the future but I've heard pretty mixed reviews on that method.
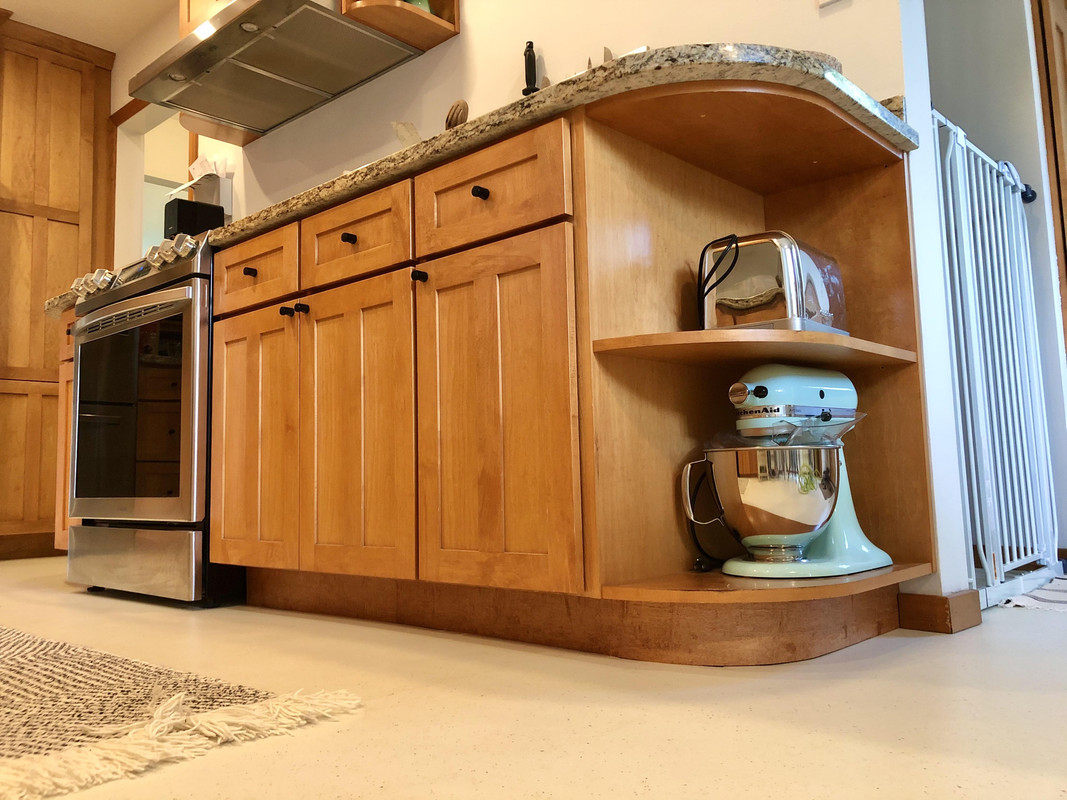
The stain worked really well. The veneer was maple so a few spots got a little dark, but just because of the wood. It was easy as wipe on liberally, wait 2min, wipe off the excess, and let it dry for an hour. I let them dry overnight to be sure.
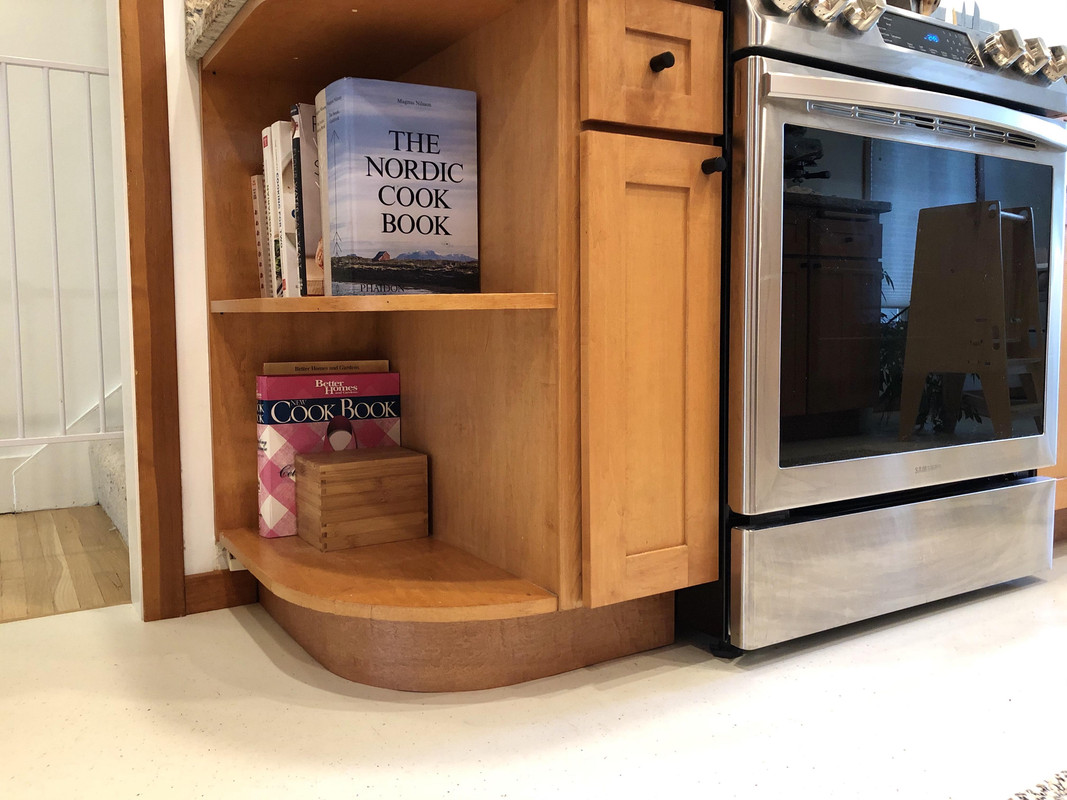
I got them installed this morning and I have to say I am super pleased with the color and grain, it matches the cabinets and other existing toe kicks very, very well.
Unruh
Well-known member
Wow! Nick that looks great!
Trapps
ALLIANCE MEMBER
Nick you keep sending me down youtube rabbit holes lol...
Cheers GB
What he said!
OP
nicholam77
Well-known member
Nick that looks fantastic!
Bret
Wow! Nick that looks great!
Thank you guys!
What he said!
YouTube is basically just one big rabbit hole! Not really your typical "how to" or shop video, but these are some of my favorite woodworking channels:
Mike Farrington
Ishitani Furniture
Blake Weber