OP
Hephaestus29
Well-known member
Looks nice and very similar to The Paulding Hammers.

OK,
Time for measurements and how you did the head to handle!!!
Bill
Looks nice and very similar to The Paulding Hammers.
 First is a coffee tamper. I have a friend who is crazy about his coffee and has a very nice Canadian made tamper: the one on the left, which is made by Reg Barber who does VERY nice work. So for fun while I was in school and practicing G-code on a CNC I made him the one on the right. Sadly we didn't have any stainless or big enough aluminum, so I had to get the base powder-coated. Not sure if he'll use it much but he made us each a damn-good coffee and with his comments on it I'll probably make him another in the future out of a better material. Maybe even with a brass handle if he's reeeeeeeeally nice to me...
...
The first plate needs a 1/2" concave and the second plates that are a lot smaller (Only about 7 inches) need a 1 1/2" concave...
Actually I quite like the El Camino's--had a '68.
Assuming you mean 1/2" radius, and sticking with just a mill, a 1" drill bit could very easily produce it by leaving the plate over-size until the hole is drilled. Or by using a 1" end mill or hole saw. The 1-1/2" radius could be produced using a hole saw or boring bar/head. Of course you could also do it using a straight end mill and rotary table.
You don't need a bull-nosed end mill for either size.


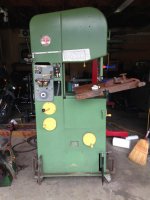
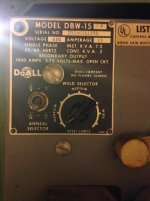
Took a break from the Mill today and something else followed me home.
Uh....why?
Uh....why?
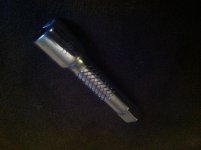
Hi all, first post here.
I bought this blackhawk extension for a dollar at the flea market. Decided to try try and improve it by cutting some knurling In using my Logan 200.
Took about an hour to find a change gear setup that would work.


How about parts for a double-barreled paintball gun?

I made every piece shown, on manual machines.
Doc.
dimple dies
https://scontent.**.fbcdn.net/hphotos-xtp1/v/t1.0-9/11391221_10153394772654168_2620943207217622891_n.jpg?oh=a322cce1cc37da6ac345fcf83e803c99&oe=568A9705[IMG][/QUOTE]
Nice! Don't the receptacles need a matching chamfer recess? Do you sell these?