To avoid these ads, REGISTER NOW!

Between 265 & 485 SQ/FT The Scooter Workshop

Workspaces sized between 265 and 485 squarefeet.
OP
M

Modern Jess

Well-known member
Joined
Jan 2, 2011
Messages
1,362
Location
Bay Area, California
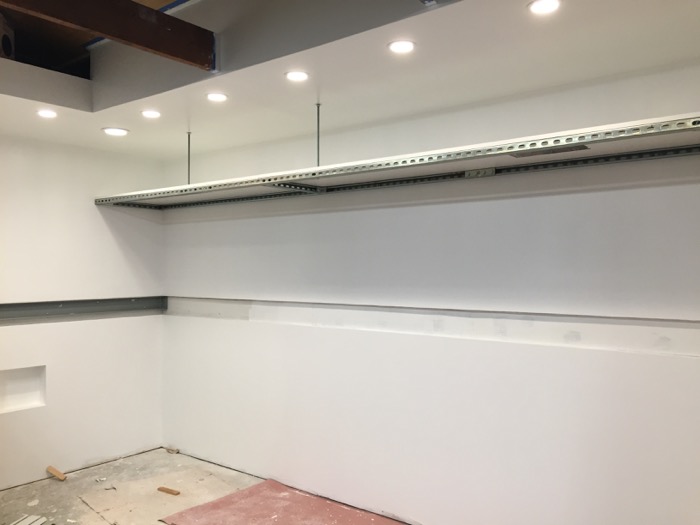
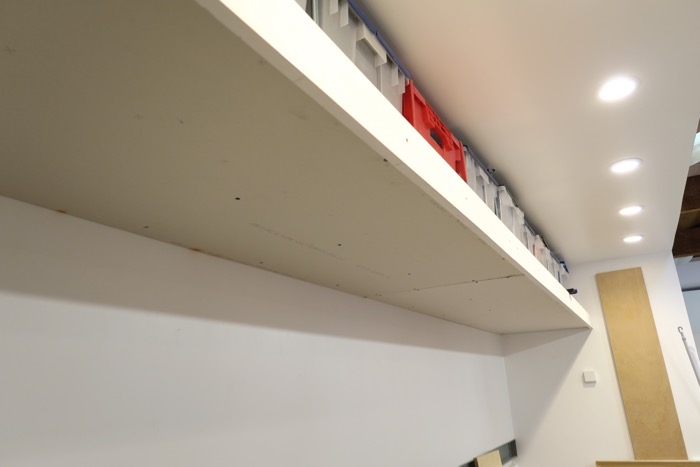
Jess, looking forward to your thoughts on the track saw. It's next on my list of tool acqusitions. The ceiling looks really rich and warm.

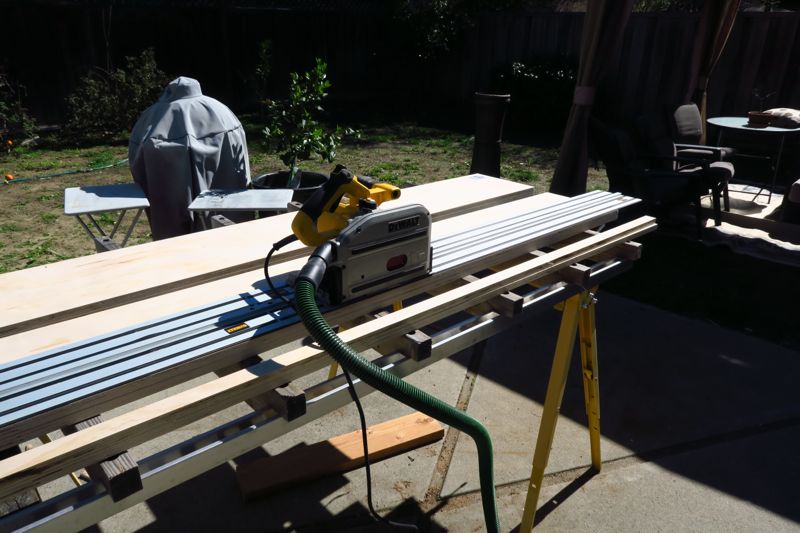
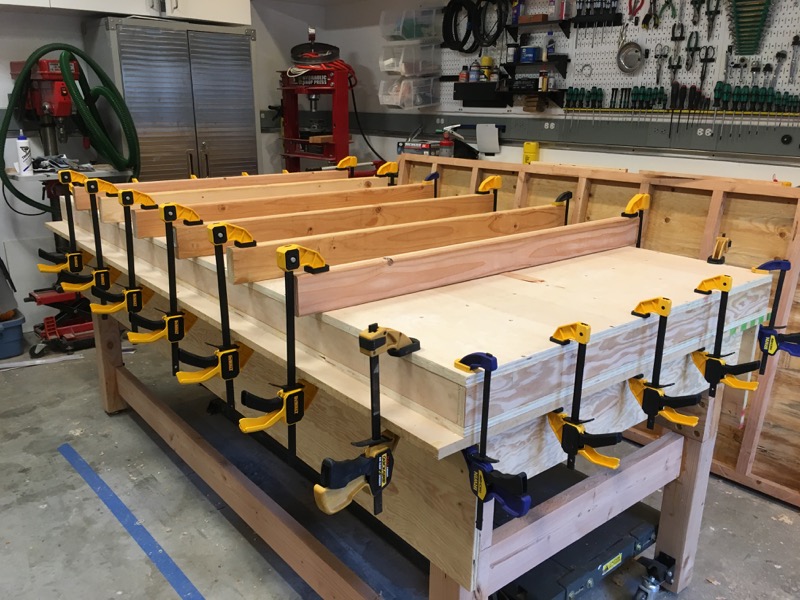
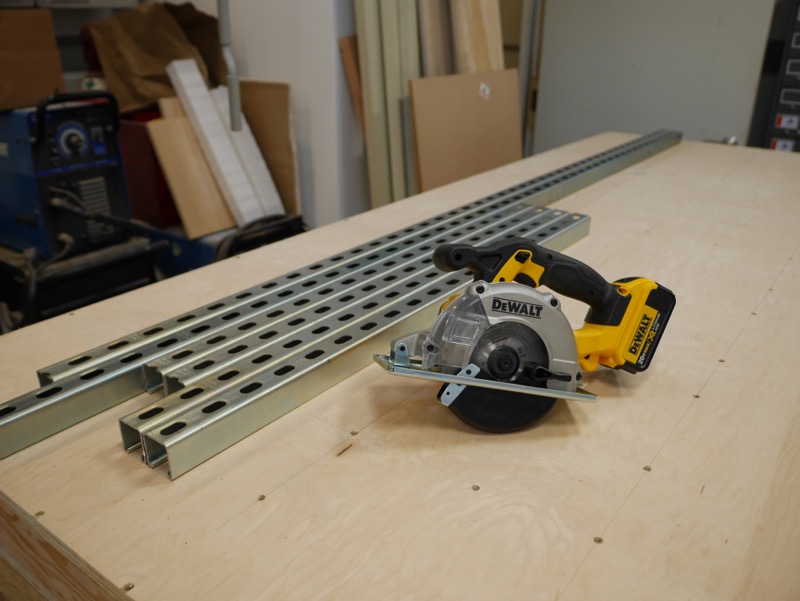
I've been using it for the last year or so, just with two smaller pieces of track joined together. Tracksaws are awesome for sheet goods -- just so much better than maneuvering a giant sheet of plywood onto the table saw. And the finish of the cut is superb, about as good as a table saw. I still use my table saw, but I would give it up before I gave up my tracksaw.

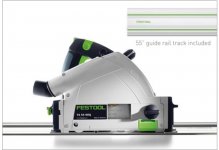
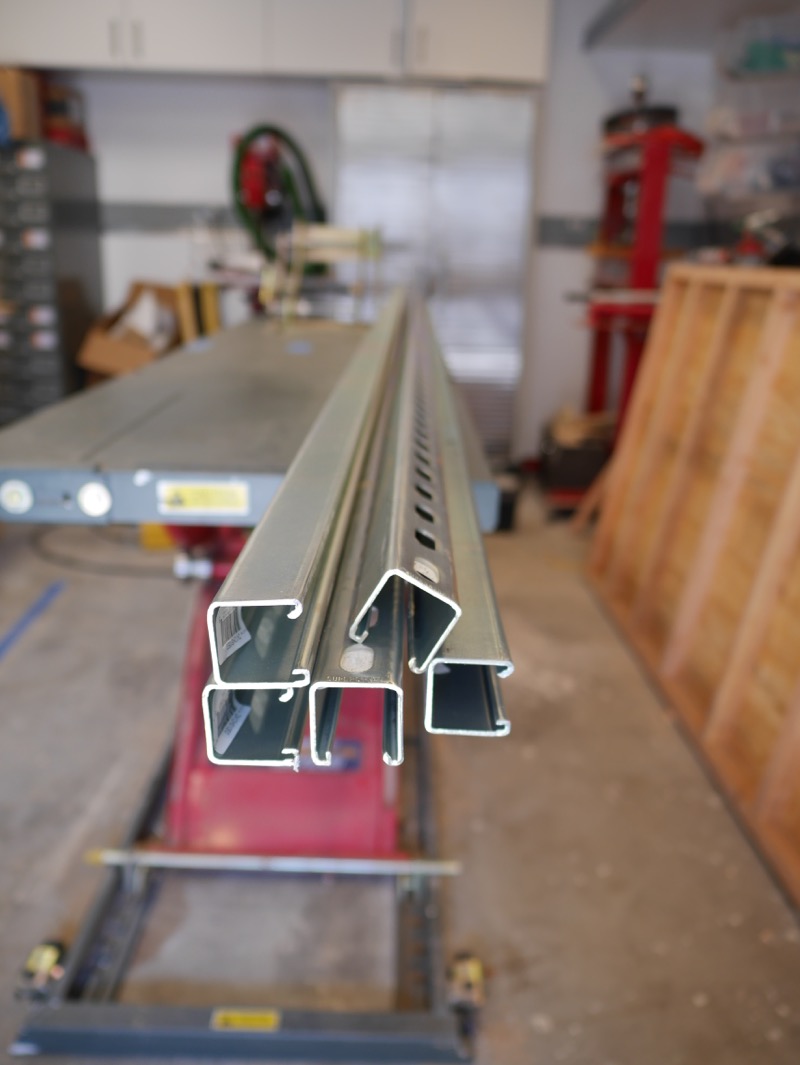
102" track will be great for breaking down sheet goods. If memory serves, you are a Festool fan as well - what made the DeWalt a better choice for you?

Heh. Yep. You know, it's funny: I was struggling with which one to buy. I read the reviews, and the head-to-head comparisons, and was kind of stuck. The Festool was outrageously expensive, and the DeWalt was merely expensive. I didn't know how awesome tracksaws in general could be, and I only sort-of knew how awesome Festool was.

As it happens, in the middle of me trying to make a decision, Festool had a safety recall on the TS-55 REQ, and took them all off the market for a month or two. And that cinched it. Not that I didn't think they would make good, but I needed it sooner than they could deliver it.

So DeWalt it was.
 
To avoid these ads, REGISTER NOW!
OP
M

Modern Jess

Well-known member
Joined
Jan 2, 2011
Messages
1,362
Location
Bay Area, California
Is this a horizontal saw or vertical?

Technically neither, but generally horizontal. You just lay the track on the sheet of plywood, and the saw rides the track all the way through. The edge of the track is rubber, and ends up being a zero-clearance anti-chip fence. There's also a riving knife behind the blade.
 
OP
M

Modern Jess

Well-known member
Joined
Jan 2, 2011
Messages
1,362
Location
Bay Area, California
So does it take a special saw or can you use any saw?

(sorry for the delayed response, had a friend over for beers)

Tracksaws are generally a "system". The three main ones available in the US are from DeWalt, Festool, and Makita, and they are a special circular saw and a special track. The DeWalt saw will run on the DeWalt track or the Festool track, but the Festool saw will only run on the Festool track. I don't know anything about the Makita model.

The DeWalt looks something like this:

cabinet-01.jpg


And here's Festool's version:

attachment.php
 

Attachments

  • festool.jpg
    festool.jpg
    79.3 KB · Views: 2,678

Strouty

Well-known member
Joined
Mar 21, 2010
Messages
38,208
Location
Southern Maine
Thanks for that info. I remember being at an auction and they had a large panel saw setup. It sold for $50 and I always thought it would have been neat to buy. I was a ways from home and did not have an easy way to transport it, so I didn't buy it. That was years ago, back when I let my rational side stop me from making purchases like that.
 
OP
M

Modern Jess

Well-known member
Joined
Jan 2, 2011
Messages
1,362
Location
Bay Area, California
Thanks for that info. I remember being at an auction and they had a large panel saw setup. It sold for $50 and I always thought it would have been neat to buy. I was a ways from home and did not have an easy way to transport it, so I didn't buy it. That was years ago, back when I let my rational side stop me from making purchases like that.

Panel saws are a good comparison, though I think the cut is much smoother on a track saw. Also, it doesn't take up a whole wall in the workshop. :)
 
OP
M

Modern Jess

Well-known member
Joined
Jan 2, 2011
Messages
1,362
Location
Bay Area, California
A while back, I was asked about how I attached drywall to the underside of my unistrut shelves. Since I'm in the process of doing exactly that on the second shelf, I thought I'd take some detailed pictures to show exactly how I did it.

Here's the shelf in question, just after I finished putting it up:
drywalltostrut-1.jpg


Realistically, you need some wood to attach drywall to. You could certainly attach the drywall directly to the strut channel, if you're willing to pre-drill the strut for screws, and then somehow find those holes on the other side of a sheet of drywall. I don't have that kind of patience, so I use wood.

There are two main techniques that work with the specific dimensions of strut channel. Which one you use really depends on which side of the strut channel you want to attach to, and what happens to the be on the other side of it. I use both techniques here.

First technique: attaching a 2x2 to the strut channel with standard strut-channel hardware. I'm using 1/4" hardware here, which is plenty strong for this application:
drywalltostrut-2.jpg


A 2x2 (at 1 1/2") fits nicely in the same space as a piece of strut (1 5/8"). If you want one edge to line up (as I did here) then you can just drill the holes at 5/16", which gives you about enough slop to get the edges aligned, depending on how accurate your centerline is:
drywalltostrut-3.jpg


The second technique -- useful mainly if you want to attach to the back-side of the strut channel -- is to slip a 1x2 into the slot. At an actual size of 3/4" x 1.5", it fits perfectly in the slot:
drywalltostrut-4.jpg


This gives you a nice wood backing to screw something through from the other side:
drywalltostrut-5.jpg


More detailed views:
drywalltostrut-6.jpg


drywalltostrut-7.jpg


drywalltostrut-9.jpg


You can then screw something through the other side, in this case a small filler piece. For this application, this filler piece provides a place to attach the outer edge of drywall to the shelf. A trim piece will then cover the edge of the drywall.
drywalltostrut-8.jpg


Then it's just a matter of toenailing some cross beams between the two sides of wood -- the 2x2s on the left, and the 1x2s inside the channel slot on the right:
drywalltostrut-10.jpg


I put the trim on, followed by drywall attached to the underside:
drywalltostrut-11.jpg


And back to mudding:
drywalltostrut-12.jpg
 
Last edited:

timdp

Well-known member
Joined
Jan 7, 2015
Messages
203
Location
Northern California
Amazing build Jess! Far beyond clean...

Re a 20 ton benchtop press, there doesn't seem to be any reason you could not shorten a press like the one in the pic to make it a bench top version...

Tim

What I really want is a bench top 20-ton press, but I haven't found any of those.

attachment.php
 
OP
M

Modern Jess

Well-known member
Joined
Jan 2, 2011
Messages
1,362
Location
Bay Area, California
Amazing build Jess! Far beyond clean...

Thanks very much! It's actually a wreck at the moment, as I've been doing the last bit of drywall and painting, but it'll return to order soon enough.

Re a 20 ton benchtop press, there doesn't seem to be any reason you could not shorten a press like the one in the pic to make it a bench top version...

I've been thinking along those lines, as it happens. I need neither the height nor the width of the one I have, so in addition to shortening it, I might cut down the width as well. That could only make it stronger.
 

timdp

Well-known member
Joined
Jan 7, 2015
Messages
203
Location
Northern California
Thanks very much! It's actually a wreck at the moment, as I've been doing the last bit of drywall and painting, but it'll return to order soon enough.

The floor might be a mess, but I suspect that anything above 4' is pretty much unmessable.

[/QUOTE]
I've been thinking along those lines, as it happens. I need neither the height nor the width of the one I have, so in addition to shortening it, I might cut down the width as well. That could only make it stronger.[/QUOTE]

Could be a two stage project.
Stage 1: Cut down the height and try it out...
Stage 2: Narrow it if needed.

If you make it small enough, you might get your 40 ton press. :D

Tim
 

akdiesel

Well-known member
Joined
Aug 8, 2008
Messages
2,617
Location
Wasilla, AK
Jess

Nice work and illustration on you shelving build.
Strong and easy access.
I like your lighting too. I am thinking of testing some 6" can led lights in place of my 8' fluorescent tube lighting. Looks like they give you great lighting.
How high are they from the floor and what wattage are they?
 

SWA Guy

Well-known member
Joined
Dec 12, 2006
Messages
111
Location
Sacramento, CA
Happy Thanksgiving everyone!

Besides eating a fantastic dinner prepared by my lovely Wife of 28 years, I spent a good portion of the day reading this entire thread from start to finish. Many many great ideas that I may use. Thanks MJ!

Now if we could only get an update. I (we) hope that everything is alright and you're simply too busy enjoying the shop (or your new Tormach?) to spend time banging away on the keyboard.
 

1/2 Cup

Member Emeritus
Joined
Apr 28, 2012
Messages
19,283
Location
Shepparton. Victoria. Australia
Happy Thanksgiving everyone!

Besides eating a fantastic dinner prepared by my lovely Wife of 28 years, I spent a good portion of the day reading this entire thread from start to finish. Many many great ideas that I may use. Thanks MJ!

Now if we could only get an update. I (we) hope that everything is alright and you're simply too busy enjoying the shop (or your new Tormach?) to spend time banging away on the keyboard.

Agree, we need an update.:thumbup:
 
To avoid these ads, REGISTER NOW!
OP
M

Modern Jess

Well-known member
Joined
Jan 2, 2011
Messages
1,362
Location
Bay Area, California
I suppose it's time to end my self-imposed exile from being online. I've had an extensive online presence for the last 11 years, and I think I just hit the wall in terms of the effort involved in that. Plus, I got seriously burned out on the workshop after several years of sustained effort. And if all that weren't enough, I developed a nasty, nasty cough last year that made life pretty miserable at all times of the day and night. Took many months, many trips to the doctor, and many (apparently wrong) diagnoses before it finally cleared up on its own.

Sorry to all for being gone for so long. The short version of the shop is that all the drywall has long since been finished. There's still a few bits of trim that need paint, but... well, trim painting isn't high on my list of enjoyable activities, so I haven't gotten to that yet.

I've done a few additional projects to the shop -- I set up an AppleTV hooked up to an LCD display up in the corner (for music), I've made a whole series of messes, and the shop has been functioning as intended -- as a workshop, a place to do all the little (and big) projects around the house.

There are a few things still holding me back, though: I don't have any air lines run, because I don't have a big air compressor, because I don't have a good power feed to the shop yet. My welders aren't functional, because I don't have a good power feed to the shop yet. And I don't have the Tormach mill, because I don't have good power feed to the shop yet.

Are you seeing the trend here? Yeah. Me too.

The other thing holding me back has been the lack of a functional workbench. I'm in the middle of remedying that, and it has turned into a mini-obsession (like everything else I do). I designed a bench, started building it, and then decided that the designer was a pinhead and the builder was an idiot (both of which, of course, were me). So I got it built up enough to slap a sheet of MDF on top as a temporary (and very flat) surface, and I'm now building a proper torsion box using that flat surface. Once I get that done, I'll take a second stab at the frame, using a different design and (if I can find it) kiln-dried wood, instead of the green stuff that split and twisted on me while I was still building it.

Pictures to follow.
 

tjpavlov

Well-known member
Joined
May 18, 2012
Messages
1,276
Location
Providence, RI
So good to hear from you. You have been missed. This is one of my all time favorite threads and is always an inspiration.
 

Brian R

Well-known member
Joined
Dec 1, 2009
Messages
591
Location
Chestertown, MD
Sometimes I don't know which is more amazing, the projects that you do or the effort you put into documenting it. :beer:

Welcome back.
 

E12-535iTurbo

Well-known member
Joined
Feb 27, 2014
Messages
492
Location
The Netherlands
I'm really happy to see you back here! There are definatelly some things where you've inspired me. I'm going to take some alternative appoach but you definatelly planted the seed :).

Can't you just weld that bench together. It'll be very sturdy. Then put a nice thick wooden top on there and you're done. It's what I did and it cost me some where around 120 euro's. It's made out of two steel cabinets + frames with adjustable feet. For the table top I got two 'antique' oak wooden tables of which I took the table tops. These are 7cm white oak! It's sturdy believe me. (Although I topped it with an 2mm stainless steel top ontop.)
 
OP
M

Modern Jess

Well-known member
Joined
Jan 2, 2011
Messages
1,362
Location
Bay Area, California
Sometimes I don't know which is more amazing, the projects that you do or the effort you put into documenting it. :beer:

It's funny, I've often had the impression that I wasn't doing a very good job documenting things, though there are occasional bursts of detail. Thanks for the positive feedback.

Welcome back.

:)


I'm really happy to see you back here! There are definatelly some things where you've inspired me.

Having been inspired by so many other builds here, I know what that feels like. At the same time, it feels weird to be considered in that same category. Me? My little project? Surely you have me confused with someone else. ;)

Can't you just weld that bench together. It'll be very sturdy. Then put a nice thick wooden top on there and you're done.

Yep. I could, and have considered that. But until I get the electrical service to the house upgraded, and then a portion of that fed to the shop, my welders are idle. I just don't have enough power in the shop to fire them up.

After reading again: I will hate you for this. You're in it for about 1.5-2k of those bins right?

I think it's more, with the extra cups I bought. I try not to think about it, though. The good (bad) news is: Sortimo changed their distribution scheme in the US, and now distribution of Sortimo in the US appears to be in the hands of Knapheide, who are utterly incapable of actually selling these to anyone except people outfitting work trucks. So it appears I can no longer buy these, without finding an eBay seller in Europe and paying as much in shipping as the trays themselves cost.

I'll love you again for this.

And I turn my hate to you again for the finish of the ceilings and storage shelves.

So, is this a love-hate relationship? ;)
 

dhubbard422

Well-known member
Joined
Jan 16, 2011
Messages
472
Location
Texas Hill Country
ModernJess,

It's nice to see an update! I can relate to retreating from an active online presence, but please post a pic or two of your shop when you can. I'd be interested in seeing how you are using your space; I always appreciated seeing and reading about your approach & solutions to your workshop project!

I hope you can get the electrical power you want - soon! I know my project feels like laying out a set of dominos so that I can just knock 'em over, i.e. start using my shop.

Don
 
OP
M

Modern Jess

Well-known member
Joined
Jan 2, 2011
Messages
1,362
Location
Bay Area, California
It's nice to see an update! I can relate to retreating from an active online presence, but please post a pic or two of your shop when you can. I'd be interested in seeing how you are using your space; I always appreciated seeing and reading about your approach & solutions to your workshop project!

Ah, there's a familiar avatar! ;)

Here are some teaser pics of what I've been working on, as recently as this afternoon:

workbench_ii_design-3.jpg


workbench_torsion_box_top-5.jpg


workbench_ii-1.jpg


workbench_ii-2.jpg


workbench_ii-4.jpg


workbench_ii-5.jpg
 
Last edited:

sakurama

Well-known member
Joined
Oct 10, 2010
Messages
1,458
Location
Portland - the cool one.
Nice to see you post again!

I saw in the workbench thread the shots of your bench with all your tools hung. I'd love to see more as I don't remember seeing it before. The way people store and organize tools is endlessly fascinating to me.

Nice job.

Gregor
 

Bunk

Well-known member
Joined
Oct 25, 2008
Messages
262
Location
Alexandria, VA
Unistrut! Love that stuff. Great shop and great job. Your shelves played a major part in the inspiration of mine.
 
OP
M

Modern Jess

Well-known member
Joined
Jan 2, 2011
Messages
1,362
Location
Bay Area, California
Nice to see you post again!

Nice to be missed. :)

I saw in the workbench thread the shots of your bench with all your tools hung. I'd love to see more as I don't remember seeing it before. The way people store and organize tools is endlessly fascinating to me.

Oh gosh -- it's not something I put all that much thought into. It kind of grew organically as I figured out which tools I used most often. I'll try to get some better pictures.

Nice job.

:thumbup:
 

dhubbard422

Well-known member
Joined
Jan 16, 2011
Messages
472
Location
Texas Hill Country
Ah, there's a familiar avatar! ;)

Here are some teaser pics of what I've been working on, as recently as this afternoon:

Want to see more? I've actually posted a whole thread on my workbench project:

http://www.garagejournal.com/forum/showthread.php?t=336728

See, this is what I was talking about! I learn something new from most of your posts - in this case I learned about a "torsion-box" table. That looks like a great way to build a flat and stable workbench.

FWIW, I'll also follow along on your workbench thread. I think we have similar, yet somewhat different goals for our motorcycle lift table, storage & workbench... but I expect that I can learn from your approach. My thought has been to build a motorcycle lift table that can accommodate storage beneath it (rolling carts/tool boxes to store the parts for the motorcycle that is on the table) yet, also allow the table to raise and lower in order to easily roll the bike on and off the table... typically, the mechanisms for raising and lowering the table conflict with using the space beneath the table top for storage...

Again, welcome back and thanks for posting!

Don
 
OP
M

Modern Jess

Well-known member
Joined
Jan 2, 2011
Messages
1,362
Location
Bay Area, California
I saw in the workbench thread the shots of your bench with all your tools hung. I'd love to see more as I don't remember seeing it before. The way people store and organize tools is endlessly fascinating to me.

As promised, here's a sequence of shots of the pegboard. As I said, it kind of grew organically, and was influenced by what I was working on at the time -- mostly mechanical. I've filled in a few bits here and there, and sometimes I just get lazy and stick a magnet to the board (metal pegboard rocks!) and stick the tool to that. I've also experimented around with lots of different hooks, and I currently prefer the Talon hooks to just about anything else -- they stay in place. Always.

Starting on the left, we have some belts for automatic scooters, various spray fluids, and misc and sundry bits that get used frequently but don't have a better home:

metal_pegboard-1.jpg


Next are stainless steel screwdrivers (to avoid ferrous contamination), regular screwdrivers, pliers, snips, scissors, hemostats, and so on. The screwdrivers at the bottom are resting on a strong magnetic tool bar that I've screwed to the pegboard -- the dimensions of the tabs actually fit perfectly to pegboard, even spanning across multiple pieces:

metal_pegboard-2.jpg


After comes wrenches, socket drivers, hex and torx drivers, and good-old-fashioned imperial nut drivers. Note the clips below the wrenches on the right, which are meant for socket drivers. Completely empty. Also, at the top center, next to the wrenches on the right: a very fancy oil filter grabber, designed and built by one of my scooter club buddies.

metal_pegboard-3.jpg


Sockets, natch. My small drill and driver (I've got bigger ones that live elsewhere -- these are the ones I use the most), lots of tape, an awesome flashlight that runs on the DeWalt battery system and stays on forever, and various bits and bobs. Notice that on the yellow magnetic bar, we've now transitioned to various hex bit holders and bits. Having these all here in one place has reduced my aggravation level by several orders of magnitude, and I'm not even kidding.

metal_pegboard-4.jpg


And finally, hammers. I have many more, but these are the ones that I use most often, and/or in proximity to the vise that sits directly below this picture. I was thinking of Jack Olsen's "Compliance Station" when I put these hammers up.

I'm particularly fond of the little one at the bottom, which has copper screw-in faces that have weathered quite a lot of abuse. This hammer was a gift from a friend who bought an eBay lot of them.

metal_pegboard-5.jpg
 

hazexban

Active member
Joined
Sep 11, 2013
Messages
44
Location
Boonton, NJ
I just spent the last hour reading through this whole thing. All I can say is AMAZING!

I have no patience or vision to do what you do, or lot of stuff I see on the forum for that matter, but this is just AMAZING!

Seriously impressive stuff. Glad you recovered from the cough.
 

TRS63

Well-known member
Joined
Aug 5, 2011
Messages
128
Location
Stuttgart, Germany
I had a bit of free time (in the office:D:lol:) and I read all your topic..all I can say is: WOW:eyecrazy::drool::thumbup:
Man, that is a top notch work here, you made yourself an amazing shop and the documentation of everything is a pleasure to read..thanks a lot for sharing it!

Antoine
 
To avoid these ads, REGISTER NOW!
Top Bottom