To avoid these ads, REGISTER NOW!

Tooling (Re)Organization

BoilermakerFan

Well-known member
Joined
Apr 17, 2006
Messages
2,188
Location
Indianapolis, Indiana
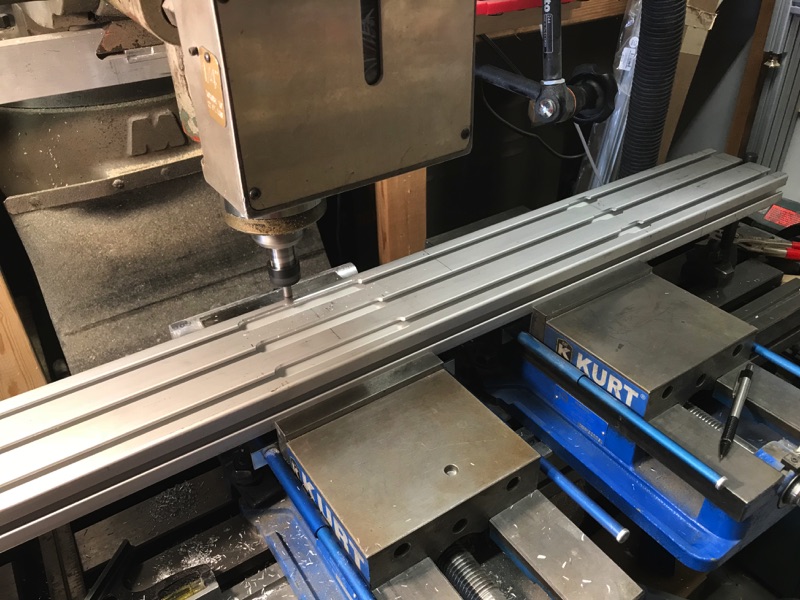
Regarding my stuff count - it’s acquired capability. Lathe Tooling as an example - nearly 2 dozen tools but they all have a purpose. I usually don’t just buy tools...I says to my wife.

Regarding being organized - LOL. I was not always, I just realized one day that I had a choice - the space can work for me or it can work against me. Having spent years moving things to make just enough space to do something on the bench, or dig in a pile of tools only to still not find the one I’m looking for, or to make a trip to the store to buy a tool only to find 3 of them here and there a year later...shop time doesn’t have to be painful but to get there requires effort. As a rule of thumb, I spend 1/2 my shop time on the shop.


I think this is more key than most realize. Inspect the reason you’re holding on to a specific item. I used to justify the retention of most stuff with nothing more than “just in case”. I had on to ~200 lbs of junk nuts and bolts just in case. Know how many times that bolts bin has saved me? Maybe a dozen. Now would I trade the space of that huge *** drawer, to store and organize other things, for 12 trips to the store? Yes.


I’ve had this conversation almost exactly. Unfair to use hopes and dreams of the future to negotiate the outcome of the present. Get it in writing. [emoji6]

If it’s real, you gotta look within - hey me, could I really sell my CNC knee and my Mori lathe for a CNC tormach mill and lathe?!


Sent from my iPhone using Tapatalk Pro

I think we're on the same wavelength, you're just a few steps ahead of me regarding organization, but you also have a lot more stuff that you use regularly. My main hobbies now are restoring and customizing motorcycles and building my own audiophile gear. I don't need a lot of tools to do those things. I've found guys that can make seats and custom gas tanks for me, or custom machined parts while I get back up to speed on CAD/CAM.

I've come to the mindset of QUALITY over quantity. I teach a college class during the spring semesters. In years past it's always been seniors so one of the Life Tips I give them at the end of the semester is "Life is too short to drink cheap alcohol, learn to appreciate the finer things in life, even if you have to have less of them." One student asked, "But what if I like to drink a LOT of beer?" I told him to learn to brew his own and get really good at it. Then he could have a larger quantity of higher quality beer for the same cost as the cheap stuff. Cheap tools falls under that advice too.

Regarding the Tormach mill, I don't even need a mill or lathe right now. I can use the HAAS machines at the university any time I need them. :)
 
To avoid these ads, REGISTER NOW!
OP
L

lilscorpion

Well-known member
Joined
Mar 15, 2010
Messages
3,599
Location
Colorado
BoilermakerFan said:
I've come to the mindset of QUALITY over quantity.

Initially it’s a solid plan. After years of quality purchase it becomes difficult to fend off quantity. The real lesson, IMO, is to buy quality when you’re young, never waiver on your acquisition strategy, and let time do its thing.

BoilermakerFan said:
Regarding the Tormach mill, I don't even need a mill or lathe right now. I can use the HAAS machines at the university any time I need them. :)

You ****, the end.
 

BoilermakerFan

Well-known member
Joined
Apr 17, 2006
Messages
2,188
Location
Indianapolis, Indiana
You ****, the end.

:spit: :lol_hitti

Oh I’m not giving up, I’m recognizing that Boilermaker ***** for having assess to full size CNC at his school.

:thumbup:

am automatic tooling changer, more z-axis travel, and a larger cutting area would be sweet.

Oh yeah, did I mention the HAAS SL20 CNC lathe has the milling head on one of the stations on the tool changer? So I can make my own splined driveshafts or flute barrels. :bounce:

Now I just have to get proficient at Inventor and all the other AutoDesk sw so I can actually design the parts I want to make.

This winter, I want to buy a 3D printer, that is definitely on the agenda.

DO IT! I'm building a big RailCore II 3D printer when they release the BOM for it. 300mm x 300mm x 600mm print area. I'll be keeping my Prusa i3 MK2 for a while after the RC II is done, but eventually I'll donate it to my son's middle school... It will probably be replaced with the next generation Prusa once it's released... maybe... might just build even bigger printer.
 
OP
L

lilscorpion

Well-known member
Joined
Mar 15, 2010
Messages
3,599
Location
Colorado
BoilermakerFan said:
Oh yeah, did I mention the HAAS SL20 CNC lathe has the milling head on one of the stations on the tool changer? So I can make my own splined driveshafts or flute barrels. :bounce:

Now I just have to get proficient at Inventor and all the other AutoDesk sw so I can actually design the parts I want to make.

At one point, just before I started my machine shop, I was “gathering capabilities” and wanted a CNC lathe (still do but that’s another Oprah). I sold a bunch of projects (vehicles) and tools, so much stuff that I had about $30k. I started looking at CNC lathes and found my way to the Haas SL and TL series. For whatever reason I felt I had to have a lathe that could also be run in manual mode so I settled in the TL-2. I went as far as to go to the local distributor and fill out the order paperwork...and got cold feet. Had this concern about the rigidity of the ways...didn’t order.

While I had the business, I’d occasionally run into some dudes who had either an SL or TL. One guy was using a SL20 for making parts for custom motorcycles. I walked past it while it was running parts...memories.

After reading your response last night I started shopping again. The manual Mori I have is truly a beautiful machine but I really really need a CNC. Just noticed they redesigned the TL series lathes and removed the hand wheels. Sweet.
 

b-dog

Well-known member
Joined
Apr 24, 2015
Messages
238
Location
Lakewood, CO
After reading your response last night I started shopping again. The manual Mori I have is truly a beautiful machine but I really really need a CNC. Just noticed they redesigned the TL series lathes and removed the hand wheels. Sweet.

And now I'm shopping :lol_hitti

Silly though, a TL is nowhere in my near future haha.
 

b-dog

Well-known member
Joined
Apr 24, 2015
Messages
238
Location
Lakewood, CO
I think we’re doing the same kind of shopping [emoji6]

What's funny is that I thought, "What the heck am I doing, these are going to require 3ph". Sure enough, they have single phase options. Doh!

I'm not sure what your requirements are but years ago I ran a Trak lathe with an LX2 controller. A used one of those would give you profiling capabilities within a small footprint and a reasonable cost.

And now I guess I'll go shopping again. :headscrat
 
OP
L

lilscorpion

Well-known member
Joined
Mar 15, 2010
Messages
3,599
Location
Colorado
The last pair of slides didn't show up last week so, in order to keep things rolling, I needed to move on to another project. Here’s a 80/20 assembly table I built about 5 years ago. At the time I wanted a larger table so I could use it in two modes:

1) I could lay a 3/4-inch sheet of material on it and fabricate full sized cabinets on it.

2) Swap out the sheet for a torsion box too that would allow me to use it as a super huge fabrication table/bench

The idea was great in theory but I found that it was just clumsy enough setting up and breaking down that I’d only use it in the really big projects where the garage would be in build mode for months. Now, it’s current configuration, it’s 6-feet long by 42-inches wide.

IMG_4050.jpg


I was thinking that it would be cool if the thing was somehow attached to the wall in a way I could flip it down, use it, and flip it up. I started shopping around for some hinges that could handle the weight and found these builder heavy duty weld-on fence hinges.

IMG_4053.jpg


Originally I had built this cabinet to just replace the smaller one that was there previously but the more I look at it, the more I think I’d like it to find a way to make better use of this space.. Most of this time I set up the miter-saw 2-feet off this wall but there’s no reason why it couldn’t be another work space if I had a bench top. If I did, it would need to fold down so I can get the Jeep in the garage.

IMG_3891.jpg


I was really liking the idea but some simple measurements indicated that the fold down work surface, when in the up position, would be higher than usual for my benches and sit about 40-some inches off the ground. I kinda liked the idea of a higher work surface though. Quite frequently I find myself hunched over a 36-inch high top so adding 4 inches didn't seem like that big of a deal. I liked the idea so much, I just went for it and started disassembling the bench.

IMG_4055.jpg


With the bench completely disassembled, I now needed to plan out where it would mount on the walls and how wide it could actually be.

IMG_4057.jpg


I marked out all the studs and doodled some work surface heights until I found a good compromise which left it wide enough to be useful yet still clear the foundation when folded down.

IMG_4117.jpg


Now to machine the attachment holes for the hinges. On one side I’ll have two which will attach to the extrusion. Two on the extrusion side because they’ll force the hinge to sit perfectly perpendicular to the extrusion.

IMG_4062.jpg


A couple of gratuitous Mill pics - first one I’m center drilling the hinge for the extrusion side.

IMG_4077.jpg


Now for the wall side. I measure the bolts I have and they’re 3/8-inch. I’ll drill a centered hole for just one so I can sink it right in the middle of each stud.

IMG_4102.jpg


A flashback moment - I’m reminded why I enjoy wood so much more.

IMG_4104.jpg


T-nuts are installed on the hinge.

IMG_4106.jpg


And then the hinges are slid on to the bottom of the extrusion.

IMG_4105.jpg


I then measure out and mark the spacing of the studs I noted earlier from the wall.

IMG_4108.jpg


Slide the hinges down to the marks

IMG_4112.jpg


And locate them so the hole for the lag screw is perfectly aligned with the hole (which are aligned perfectly with the studs).

IMG_4113.jpg


Do this three more times until all of the hinges are in place.

IMG_4116.jpg


After mounting it to the wall, I verify the plan is good by making sure the table can be as wide as I thought. I get out my Dewalt miter saw and set the stop. I’m cut down the table spreaders to 22-inched which should net me a total finished width of 25-inches

IMG_4119.jpg


After cutting them down, I take a pass or two on the mill to ensure the ends are square.

IMG_4123.jpg


Cutting them down requires that the shortened end gets the-tapped so I get out my impact, my tapping fixture, and knock ‘em out.

IMG_4141.jpg


One by one I reinstall the pieces back to the main assembly.

IMG_4150.jpg


Until I can add the front rail back.

IMG_4154.jpg


Folded down. It’s just barely wider than the foundation lip.

IMG_4155.jpg


It's easier to visualize now but the next trick will be in mounting the legs. At exactly 6-feet in length and about 36-inches off the ground, the legs will be too long to fold up in either direction. I'm going to have to do something special here to make it all work.
 
Last edited:

Strouty

Well-known member
Joined
Mar 21, 2010
Messages
38,208
Location
Southern Maine
Could you have the legs fold at an angle and make it work? They may fit within the two rectangles you have made.
 
OP
L

lilscorpion

Well-known member
Joined
Mar 15, 2010
Messages
3,599
Location
Colorado
Could you have the legs fold at an angle and make it work? They may fit within the two rectangles you have made.


That’s what I’m thinking. In order for the table to fold nicely against the wall, the legs need to fold up into the cavity and sit flush with the bottom. On the angle the legs can be almost exactly 36” long (which is how long they need to be) and sit flush but I’m not sure the 90-degree living hinge will be able to rotate the full 90-degrees with how exactly 36” it is. The challenge will be to figure out how to mount the leg brackets which attach parallel to the extrusion.

IMG_4051.JPG
 
Last edited:

Strouty

Well-known member
Joined
Mar 21, 2010
Messages
38,208
Location
Southern Maine
I was thinking you may mount them on those inside corner braces, you may even have to remake the braces as the angles probably won't match up due to the leg length.
 
OP
L

lilscorpion

Well-known member
Joined
Mar 15, 2010
Messages
3,599
Location
Colorado
Pivot and fold.

Sent from my LG-TP450 using Tapatalk


If I could get them to pivot, I’d probably skip going all the way to the ground and attach them to the foundation. Unfortunately they’d not be long enough to mount this way otherwise. Need ~34”, have 27”.

IMG_4152.jpg
 
OP
L

lilscorpion

Well-known member
Joined
Mar 15, 2010
Messages
3,599
Location
Colorado
I was thinking you may mount them on those inside corner braces, you may even have to remake the braces as the angles probably won't match up due to the leg length.


Been thinking about how to do this. I could machine them out of aluminum angle and use a piece of 1515 to support it from above/inside. All I’d have to do is machine the ends to complementary angles and it should work. Would have to get fancy on attaching it to the frame using standard 80/20 attaching methods though.

IMG_4155.JPG
 
To avoid these ads, REGISTER NOW!

Grumblebum

Well-known member
Joined
Aug 10, 2015
Messages
1,940
Location
Wollongong Australia
If I could get them to pivot, I’d probably skip going all the way to the ground and attach them to the foundation. Unfortunately they’d not be long enough to mount this way otherwise. Need ~34”, have 27”.

IMG_4152.jpg

What about triangular shaped pivots out of ply attached to the wall (vertically) that fold out and support the top ? Roughly as where you have drawn the red lines. You would have to shim out the hinges from the wall so it would still fold back down over the thickness of them though.
 
OP
L

lilscorpion

Well-known member
Joined
Mar 15, 2010
Messages
3,599
Location
Colorado
What about triangular shaped pivots out of ply attached to the wall (vertically) that fold out and support the top ? Roughly as where you have drawn the red lines. You would have to shim out the hinges from the wall so it would still fold back down over the thickness of them though.


80/20 has plans that utilize the method you’re recommending. If I had started out with thinner extrusions I’d probably go this route. I’m keeping this idea in my pocket for now as a fall back. I’d like to keep it as close to the wall as possible even if that means i have to get creative with the legs.

Hm...but the “flaps” could mount to the underside of the table and serve the same function...interesting.
 
OP
L

lilscorpion

Well-known member
Joined
Mar 15, 2010
Messages
3,599
Location
Colorado
That was my thought as well. You could even use smaller 80/20 to make the wings.


Think that’s going to be plan B. I have so much “extra” stuff left over after reducing the size (I now have 4 legs, 2 cross-supports, a bunch of gussets, and a grip of hardware). Im thinking I should start with laying it all out on the bench and see if I can come up with a way to solve the problem with the parts I have. Spending more feels wasteful.

Plywood is on hand so it wouldn’t cost more. Concern I have is the table is so damn strong they way it is, using only plywood seems like a paradox
 

Duker

Well-known member
Joined
Sep 25, 2010
Messages
10,861
Location
Livingston, TX
What about triangular shaped pivots out of ply attached to the wall (vertically) that fold out and support the top ? Roughly as where you have drawn the red lines. You would have to shim out the hinges from the wall so it would still fold back down over the thickness of them though.


I like GB’s idea as you mount the pair of leg supports on edge with a hinge outside of the table which keeps them at the same width as the table. You could then mill a slot in the legs so that they could stay attached as the table swings up and you could use a threaded knob to tighten keeping it all very compact.


Sent from my iPad using Tapatalk Pro
 
OP
L

lilscorpion

Well-known member
Joined
Mar 15, 2010
Messages
3,599
Location
Colorado
Back to work on the flip up bench.


IMG_4155.jpg


With the basic construction of the bench complete, I disassemble it so I can make a few modifications. I use Festool ratchets clamps quite frequently so I decided to cut some slots that would allow me to more quickly slide them into the extrusion. The 3-flute aluminum end mill makes quick work of what’s just slightly thicker than .250.


IMG_4202.jpg


It just so happens that I have a radius end mill that has the same radius as the edges of the 15-series extrusion so I use it to break the edges of the slots.


IMG_4207.jpg


These slots turned out beautifully.


IMG_4215.jpg


With a loose grip, single hand, and barely paying attention the clamp heads easily enter the slots.


IMG_4212.jpg


IMG_4213.jpg


On what to do with the front rail. I want to add two sets of these clamp access slots. I’m also going to add a set of shorter slots about 14-inches away so I can make fixtures for the bench later. I have a few ideas I’ll continue to think through but, for now, I’ll cut the slots and move on.


IMG_4216.jpg


With the 6-foot rail supported, I cut the slots.


IMG_4219.jpg


Flip it end for end and cut the next set. This will leave me with perfectly symmetrical slots.


IMG_4225.jpg


And finish the slots the same way I did on the sides by rounding them over.


IMG_4223.jpg


Alright, now for the fold-up legs. I wanted to start out attempting to use parts I had so I laid overlying out on the bench and did some thinking. About the only way the legs can be the length they need to be is if they fold up sideways into the table. The legs need to be 36-inches long and the table is 60-inches long total. I started by making some simply arms which would support the brackets and mounted them all the way to the edge of the table.


IMG_4234.jpg


With the brackets in place, I needed a set of legs. The previous legs were too short to use on this bench but I was able to use two of the previous cross members which were only a few inches too long. After cutting them down, i only needed to run the tap in an inch on one end so foot could adjust all the way in.


IMG_4161.jpg


With the set of legs, I now was able to actually see what I'm up against. I realized that if I offset one of the legs 1/5" then they'd fold up next to each other. Out of dumb luck the middle x-member was a 1530 (not 1545 like the perimeter of the top) which allowed the legs to fold up inside. Almost like I planned this all along.


IMG_4236.jpg


I used the drop from the original 1530 x-member to make the spacer. I cut it to be the same size as the angle brace and drilled through-holes so I could attach it to the face.


IMG_4198.jpg


Time to mount the front rail


IMG_4241.jpg


I didn't get a great picture of the spacer but you can see it in there. The only downside is it adds just a little unnecessary weight. I'll live.


IMG_4240.jpg


Looks sweet. I’ll have to machine some custom caps for the ends at some point.


IMG_4242.jpg


Installed the legs and leveled the bench. Holy **** is it strong. The 1545 beams are super over-kill for such a small bench. I'd bet that 1530's would be plenty.


IMG_4243.jpg


Folded up, it only sits slightly more off the wall than it did before. The pivot brackets of the legs stick out the bottom by about 1/2-inch. I could slot the drywall I suppose if I really really wanted it to sit flush. It's good enough.


IMG_4247.jpg


This is kinda neat unintended feature. I can now store clamps on the bench while it’s folded up. There’s just enough space between the MFT and the table so I can access them up or folded down. From now on I'll keep 3 here.


IMG_4250.jpg


Getting a little closer. Next will be the top.


IMG_4251.jpg
 
Last edited:

BoilermakerFan

Well-known member
Joined
Apr 17, 2006
Messages
2,188
Location
Indianapolis, Indiana
Whatcha buildin?

I need to build a lightweight but strong fold up spray "booth" against my back wall. Mostly open framing to hold filters to catch powder from powder coating.

I will also be building some adjustable height legs for my CertiFlat fab table top.

I won't be using 80/20, but the T-Slots extrusion instead. Same profiles, different supplier.
 
OP
L

lilscorpion

Well-known member
Joined
Mar 15, 2010
Messages
3,599
Location
Colorado
I need to build a lightweight but strong fold up spray "booth" against my back wall. Mostly open framing to hold filters to catch powder from powder coating.

I will also be building some adjustable height legs for my CertiFlat fab table top.

I won't be using 80/20, but the T-Slots extrusion instead. Same profiles, different supplier.

Cool...I need a spray booth...and a welding table. It’s moments like this that I’m disappointed I talked the Mrs out of moving.
 

Strouty

Well-known member
Joined
Mar 21, 2010
Messages
38,208
Location
Southern Maine
If you had a much bigger space, we probably wouldn’t have this cool thread and your stuff would be everywhere like mine.
 
OP
L

lilscorpion

Well-known member
Joined
Mar 15, 2010
Messages
3,599
Location
Colorado
If you had a much bigger space, we probably wouldn’t have this cool thread and your stuff would be everywhere like mine.


I think my organizational strategy would be somewhat the same. The primary difference
Is I would now have space for all those machines that I’ve never had space before previously. Jointer, planner, shaper, tig, plasma table, router table, forklift, ibeam crane spanning the entire shop...drool.

Think I could still manage content to make reading interesting. [emoji57]
 

BoilermakerFan

Well-known member
Joined
Apr 17, 2006
Messages
2,188
Location
Indianapolis, Indiana
Cool...I need a spray booth...and a welding table. It’s moments like this that I’m disappointed I talked the Mrs out of moving.

I'm not building a true spray booth since I don't have room for one. This is more of an open framework to support the weight of the motorcycle frames and parts. The back, sides, top, and bottom will be open and sized to accept filters to catch any powder overspray so it can be reused.

Then if I do need to actually spray paint or ceramic coatings, the filters will be swapped out with disposable units. The key to spraying paints and ceramic coatings will be HVLP guns to minimize bounce and overspray.

I haven't decided if I will build a dedicated welding table or just use my fabrication table top. I want the legs for it to be folding so it will take up less floor space when not in use.
 

BoilermakerFan

Well-known member
Joined
Apr 17, 2006
Messages
2,188
Location
Indianapolis, Indiana
I think my organizational strategy would be somewhat the same. The primary difference
Is I would now have space for all those machines that I’ve never had space before previously. Jointer, planner, shaper, tig, plasma table, router table, forklift, ibeam crane spanning the entire shop...drool.

Think I could still manage content to make reading interesting. [emoji57]

Some of those machines take up way too much space. I almost bought a used shaper. Then I decided it was just too big for how little I would actually use it.
 
OP
L

lilscorpion

Well-known member
Joined
Mar 15, 2010
Messages
3,599
Location
Colorado
BoilermakerFan said:
Some of those machines take up way too much space. I almost bought a used shaper. Then I decided it was just too big for how little I would actually use it.


To have the space enough so you could have them if you want...
 
To avoid these ads, REGISTER NOW!
Top Bottom