To avoid these ads, REGISTER NOW!

Tooling (Re)Organization

OP
L

lilscorpion

Well-known member
Joined
Mar 15, 2010
Messages
3,599
Location
Colorado
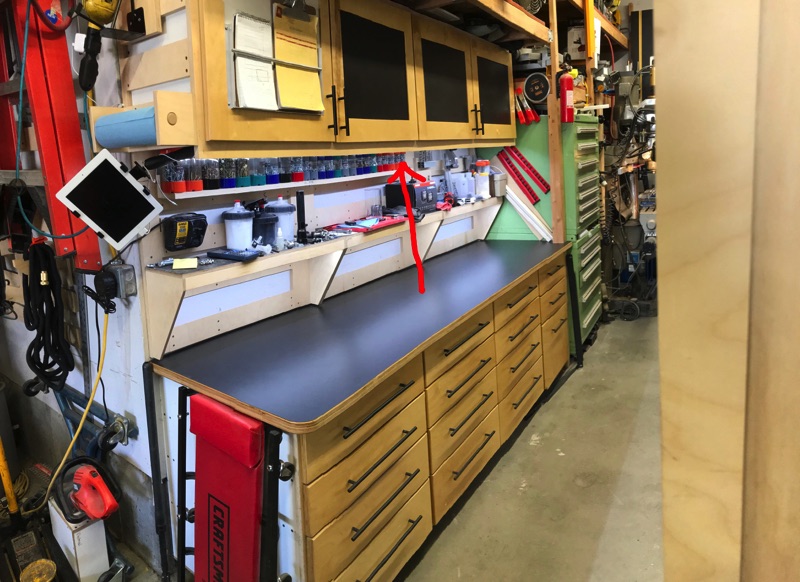
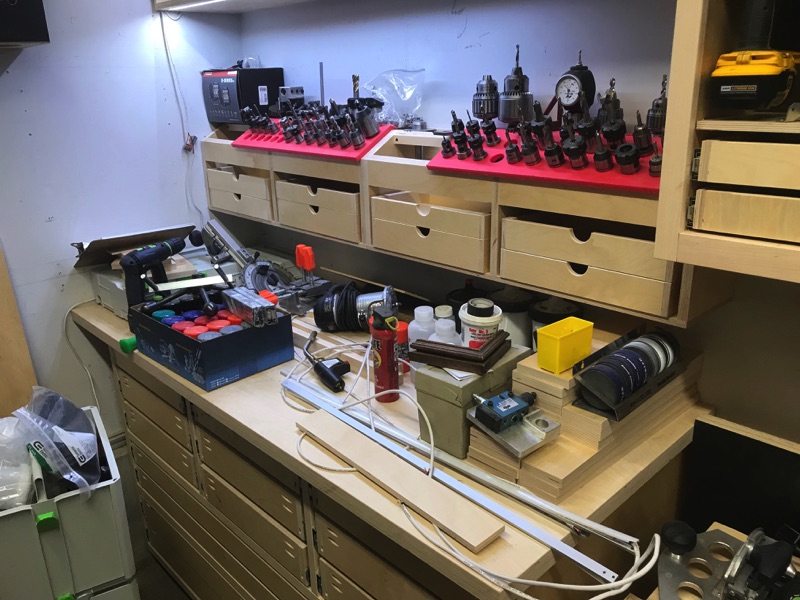
Moving In - Tooling Bench

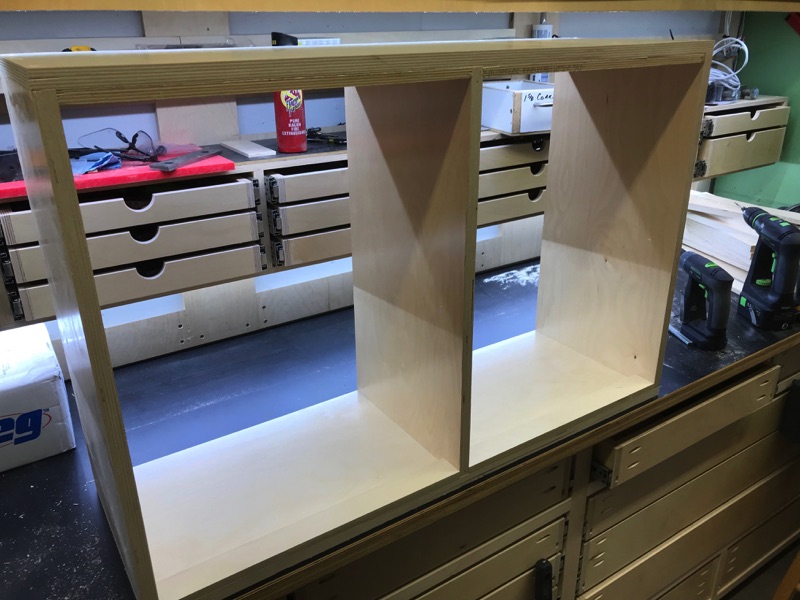
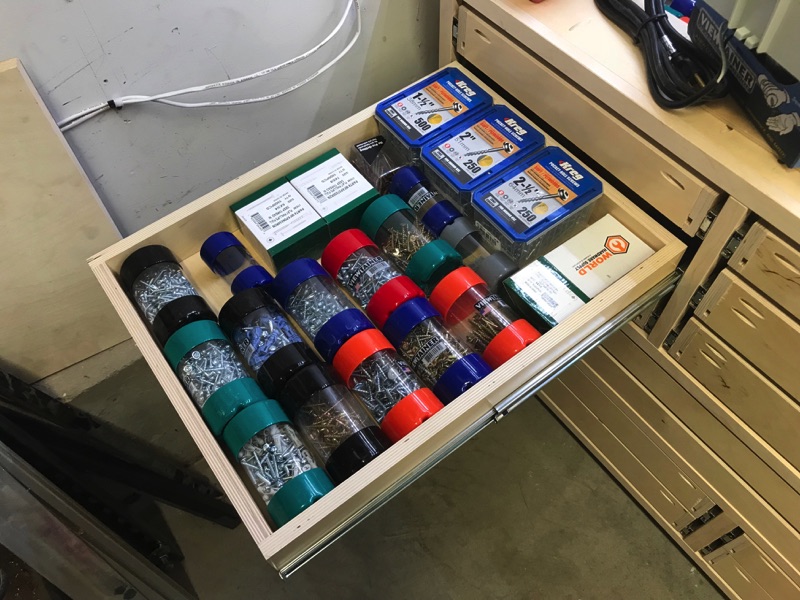
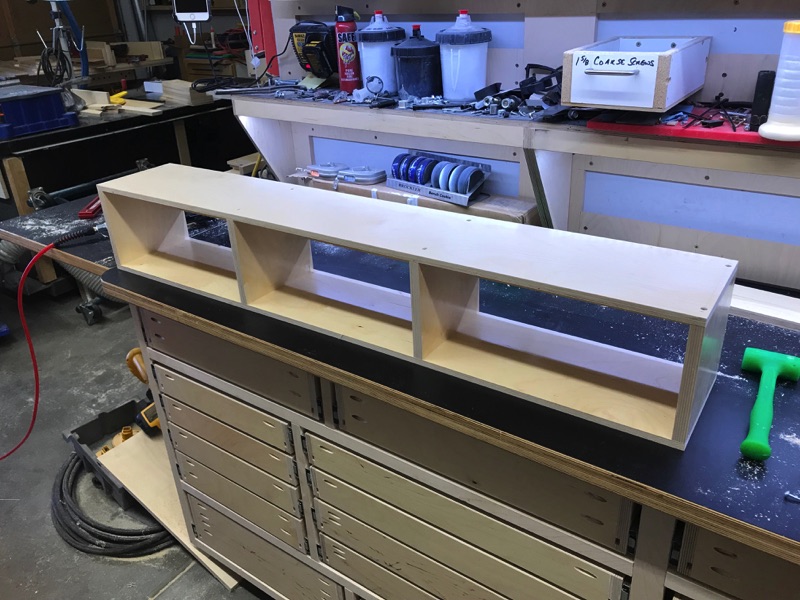
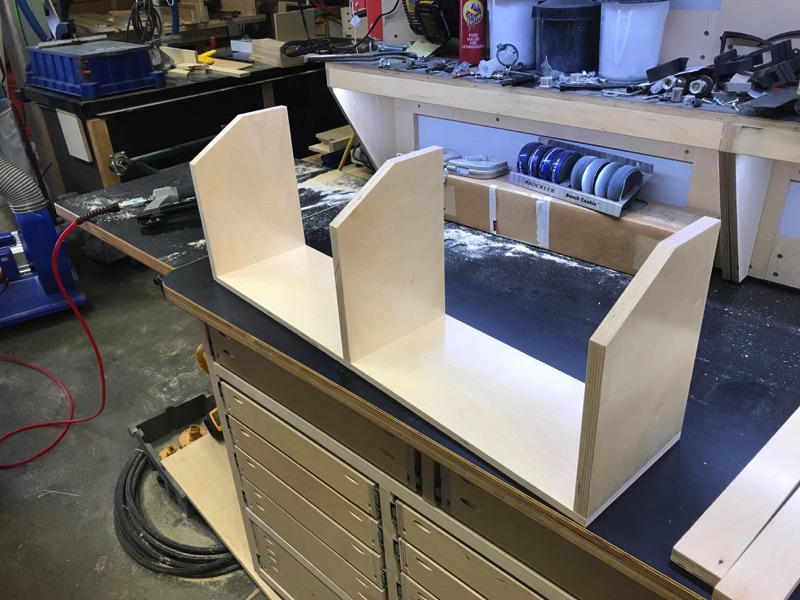
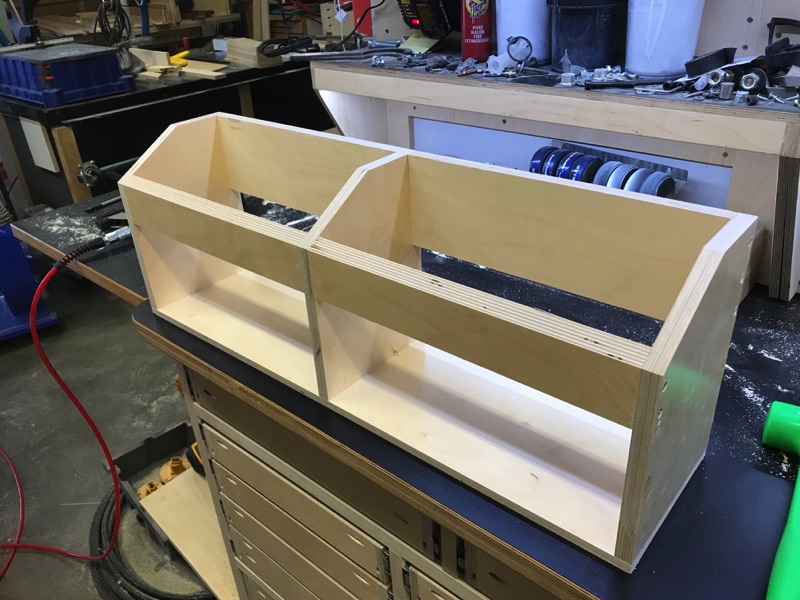
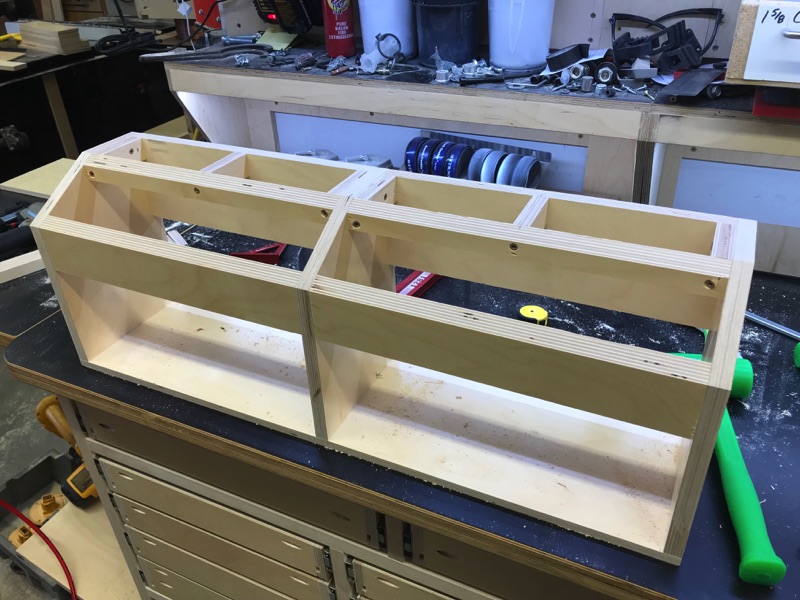
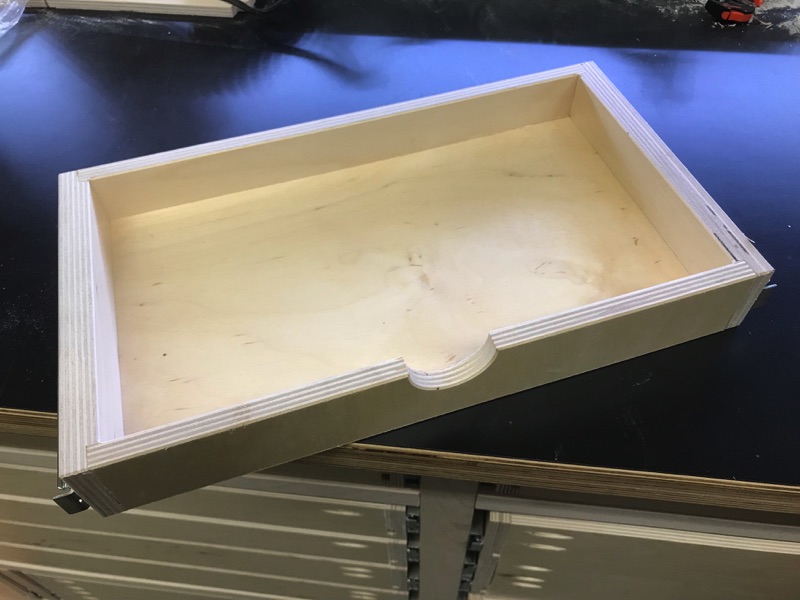
Got (mostly) moved into the tooling bench as well. After having moved in I'm not totally sure why I'm calling it the tooling bench. It would more appropriately be named the hardware bench. These two drawers are nearly the same since you last saw them. Both were designed to the specific depth of the two sizes of view-tainers that I use.

IMG_2589.JPG


In these drawers are screws, cabinet hardware, and other misc hardware that I tend to have in bulk.

IMG_2590.JPG


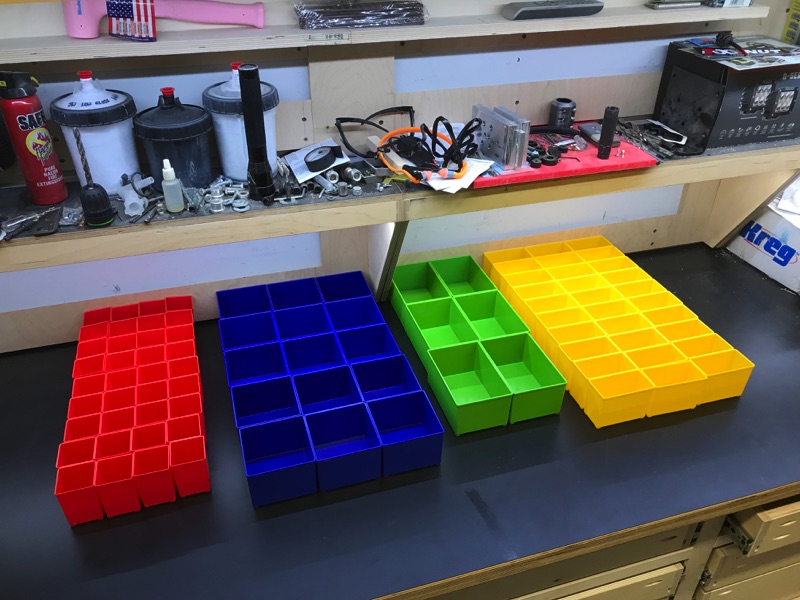
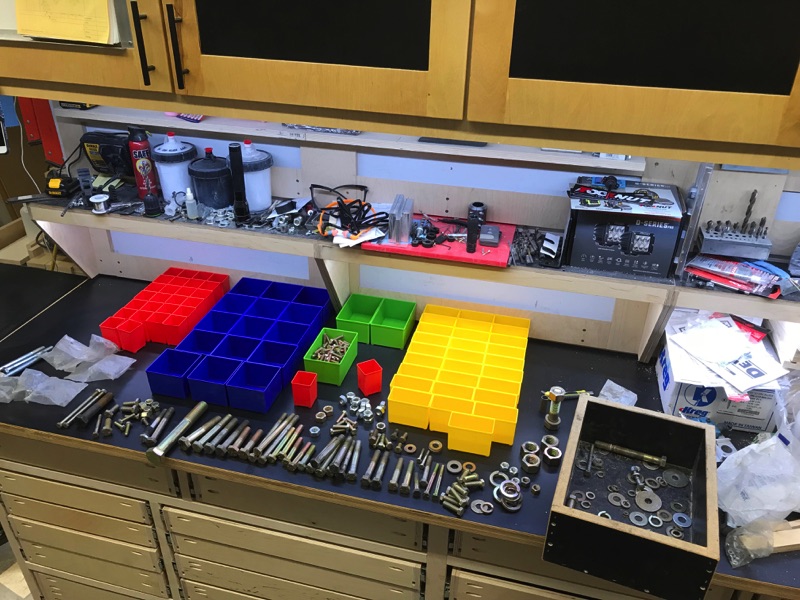
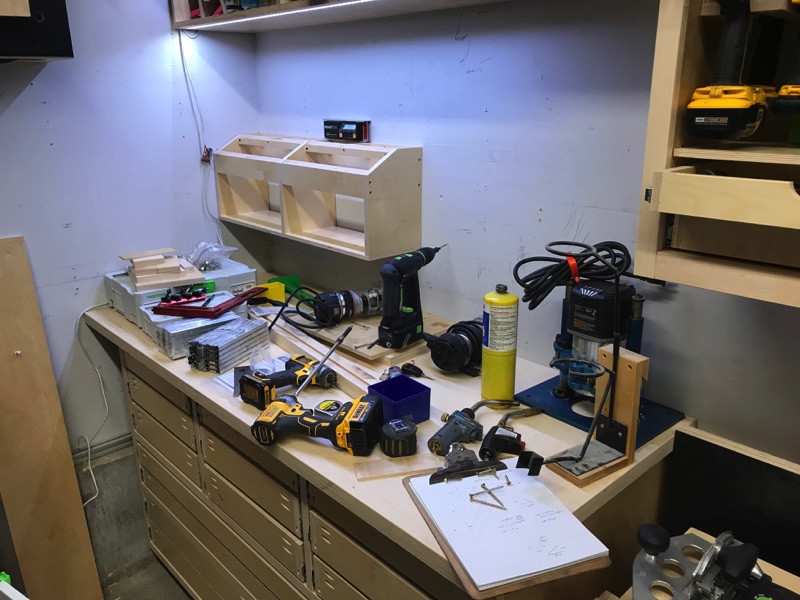
The rest of the organization will be done with plastic containers. For consistency, I decided to go with the festool containers that come in various sizes. I ordered kind of blindly making assumptions on quantities.

IMG_2622.JPG


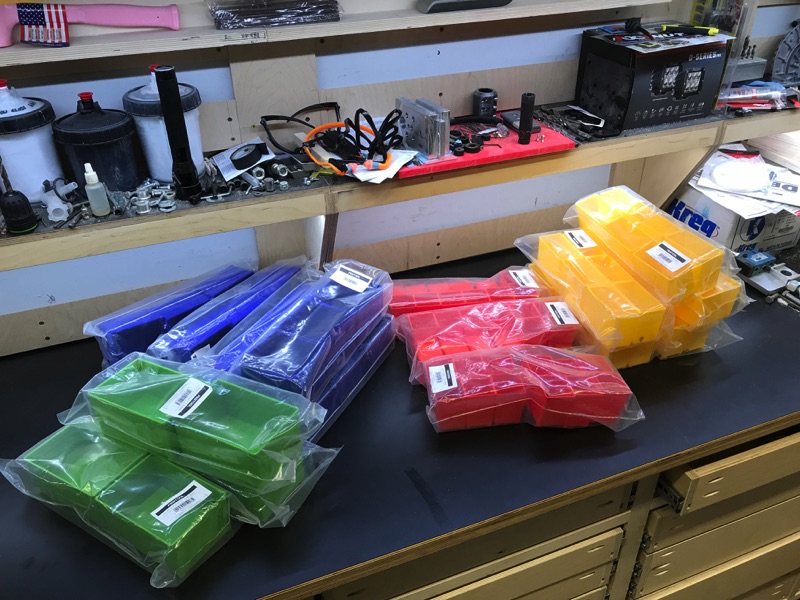
After removing them from the wrappers I, for a moment, felt like maybe I ordered way too much.

IMG_2623.JPG


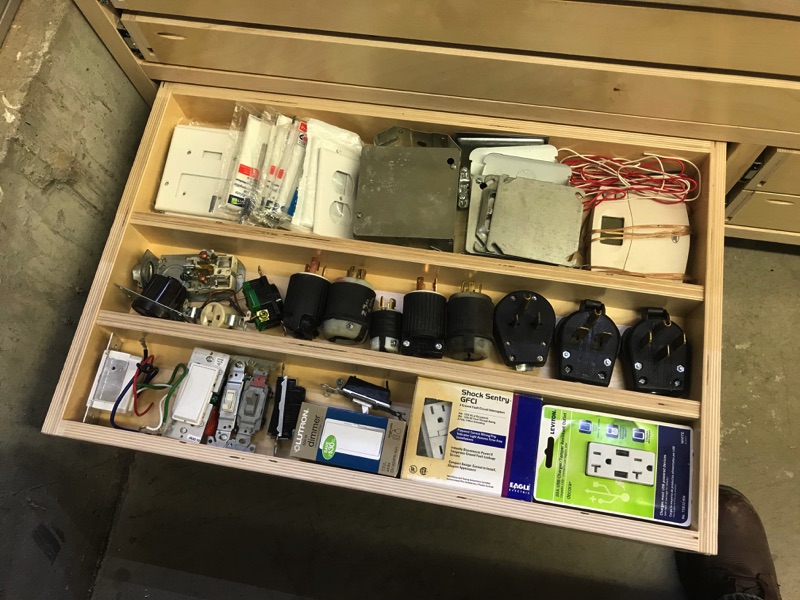
I started with my electrical drawer. The quantity of an item dictated the size of container to use. Seemed to end up fairly well. There's no way that they're the right size if I have to buy a package more of any one thing though. This setup is currently perfect for what I have not what I'll have over time. I'll have to come back to it when there's a good reason.

Second electrical drawer has mostly plugs, outlets and outlet covers. Unfortunately this shows just how many 3ph 220 plugs I ended up with after moving out of the business.

IMG_2586.JPG


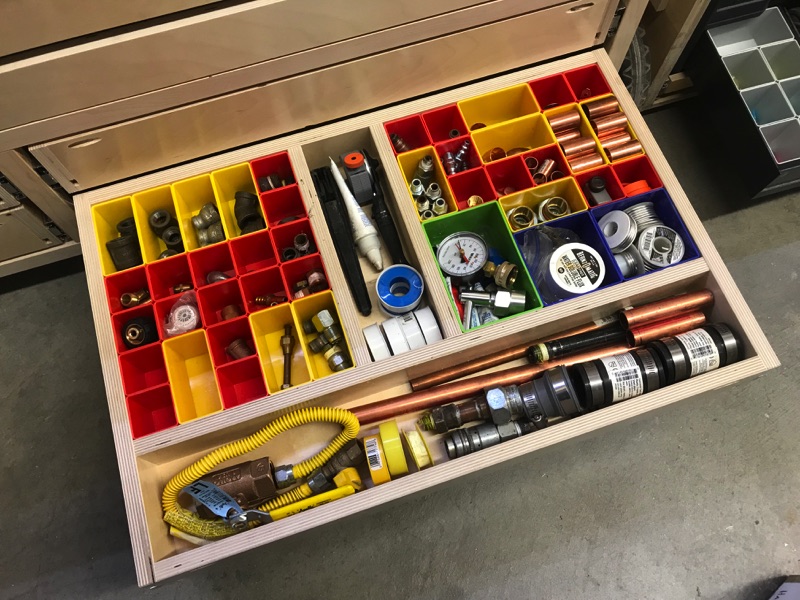
Similar outcome with the plumbing drawer only I had room for expansion.

IMG_2587.JPG


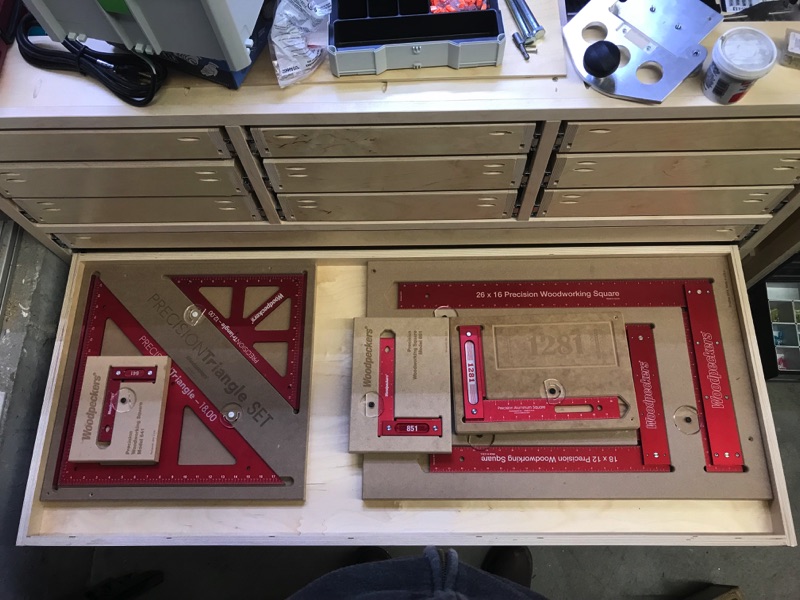
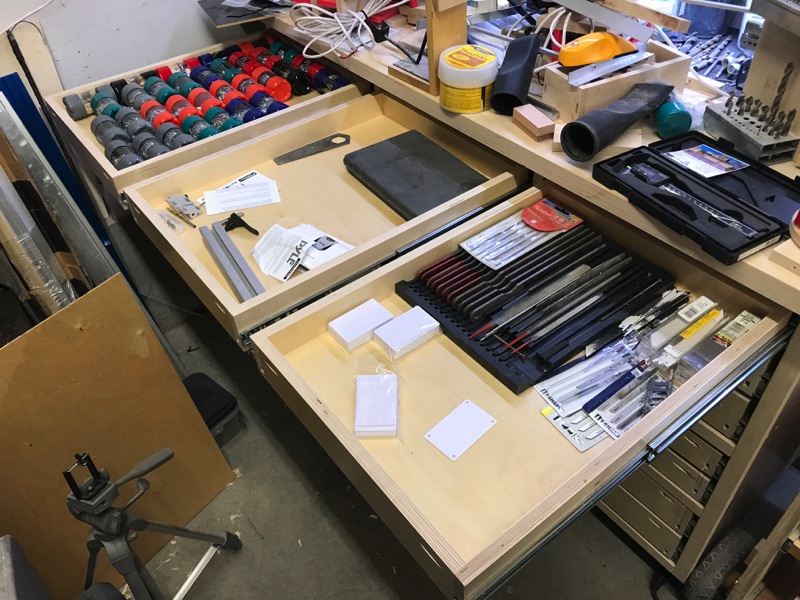
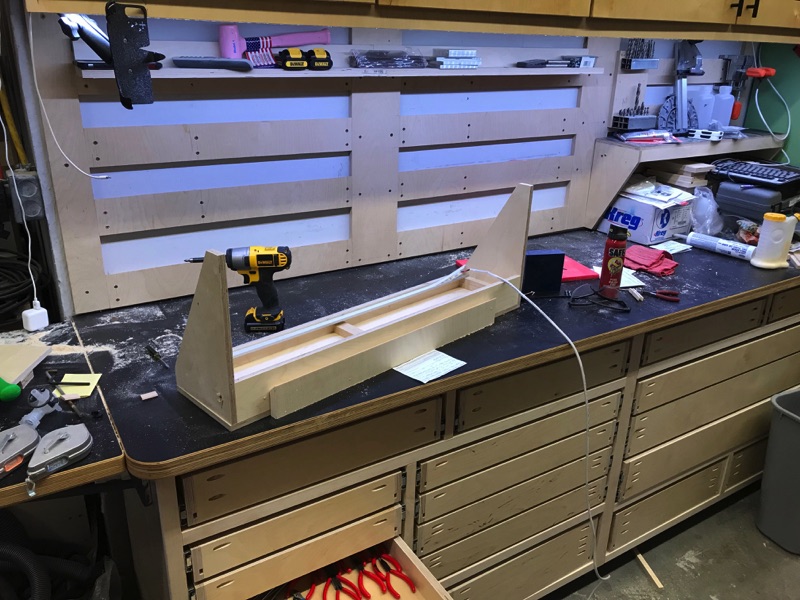
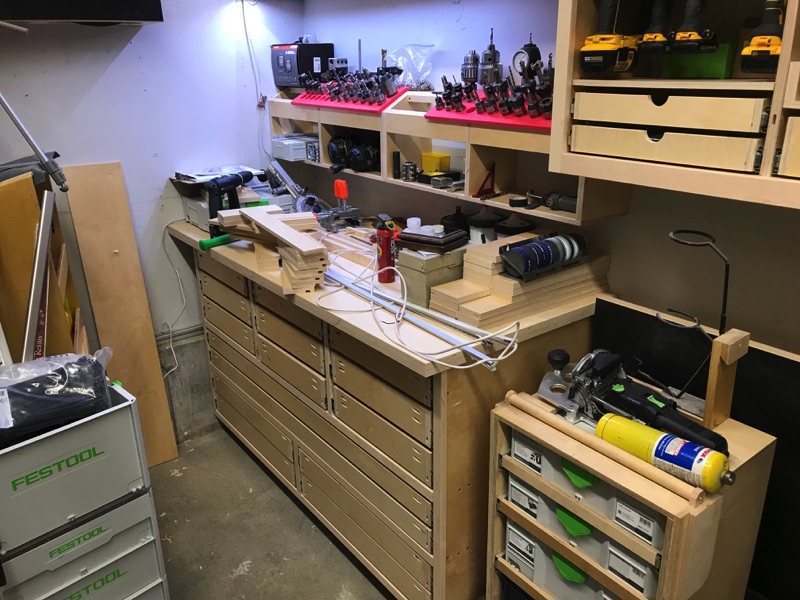
This is one of the super long drawers. The way the MDF ruler holders work creates a bunch of waste and makes it difficult to get at most of them without moving one of the others. Once I get time I'll cut some custom kaizen foam inserts for this drawer which will make all of them easily accessible.

IMG_2588.JPG


This drawer, though it looks mostly empty today, will be where I keep all of my aluminum fixtures and smaller measuring utilities. It looks like the drawer will be barely used however I actually have a mess of fixtures that aren't in here today. I'll do a writeup just on organizing this and the other ruler drawer when I get to them.

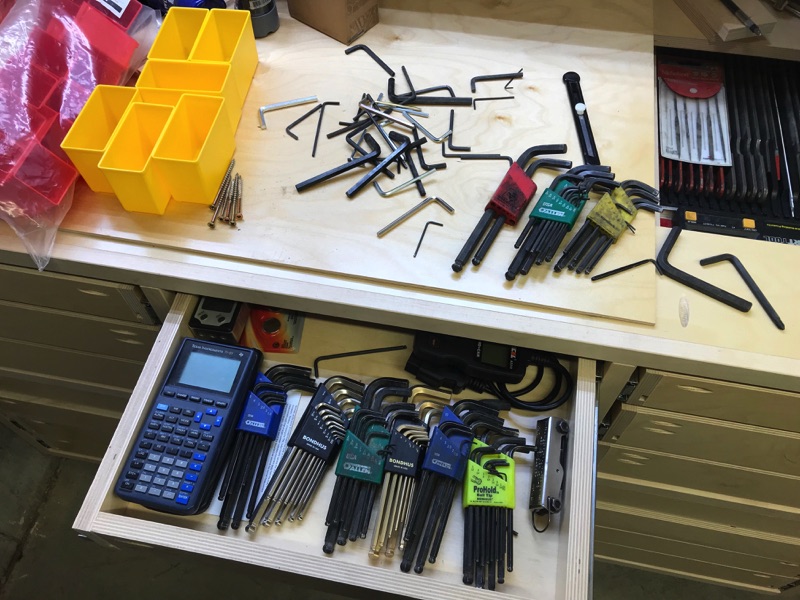
Next came the sorting of my hardware drawer(s). I had to take everything out and then figure out what I did and didn't want in these drawers. I decided to put everything 1/2-inch and smaller in these drawers (and smaller than 13MM in metric).

IMG_2627.JPG


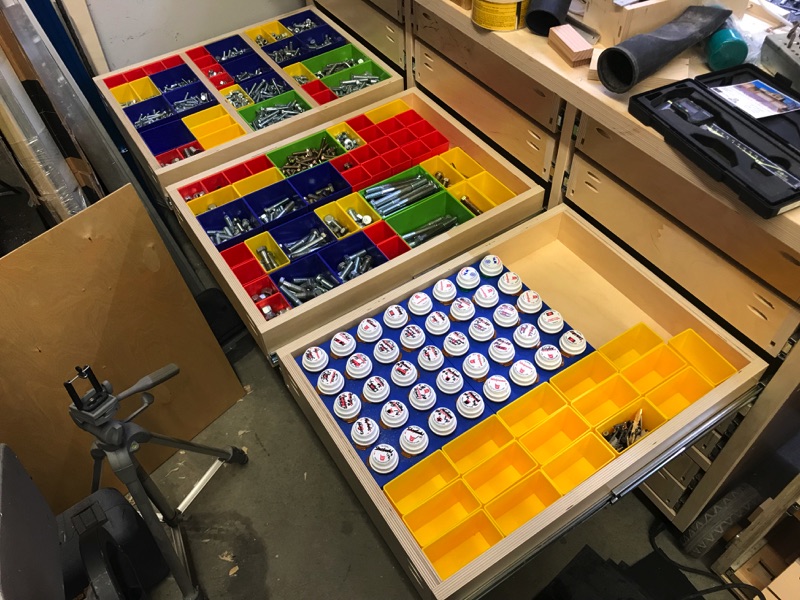
I'll save you from the time it took to go through the various buckets and bins but, in the end, everything became right there in front of me. No more heading to the hardware store for something I think I don't have only to find 25 of them later the same day. Even though I thought I had way too many bins, I turned out not to have enough. I did choose to continue forward with the medicine bottles for the smaller hardware because it had worked so well in the past and the containers were already clearly labeled.

IMG_3619.JPG


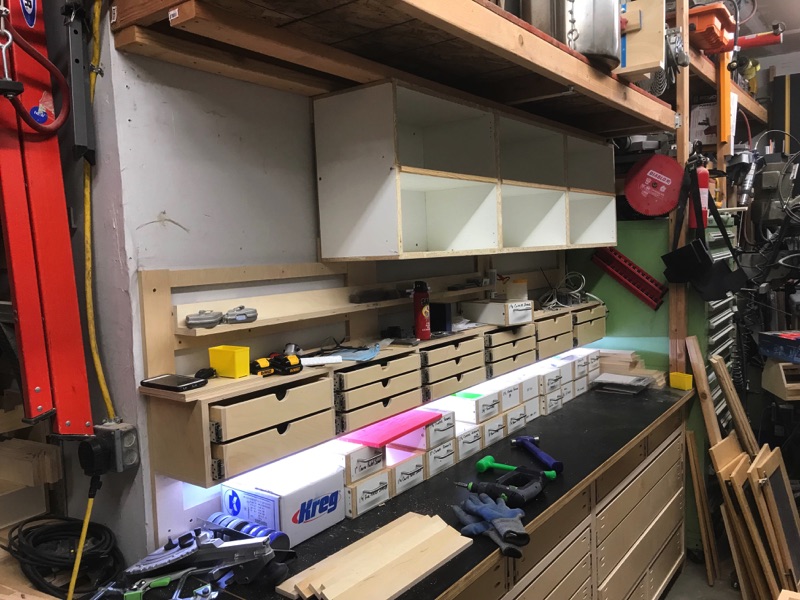
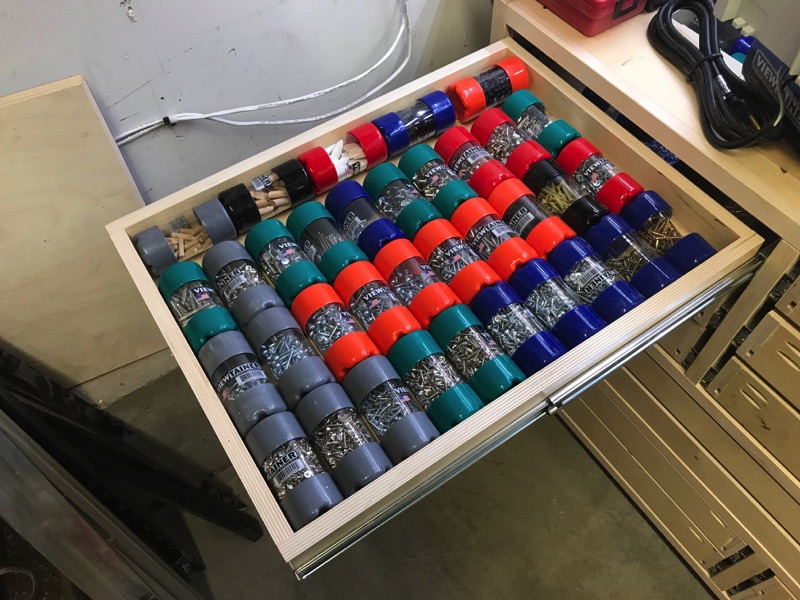
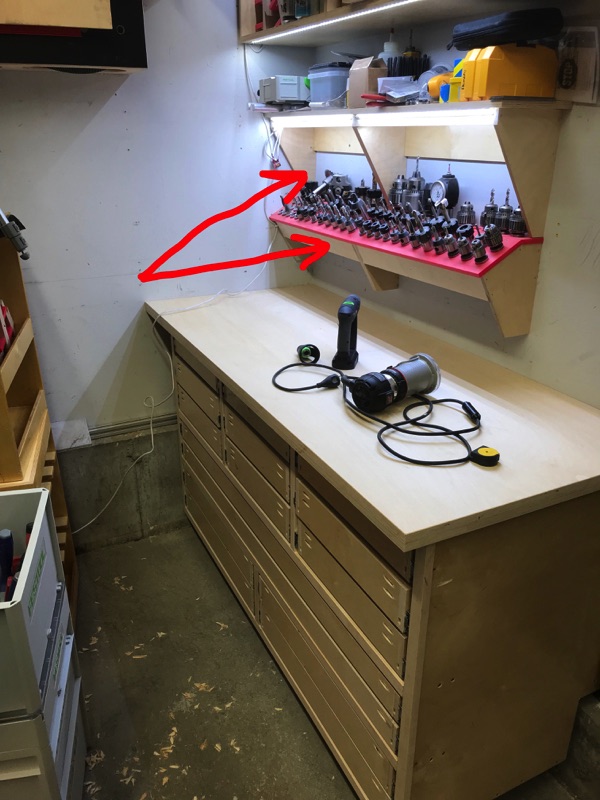
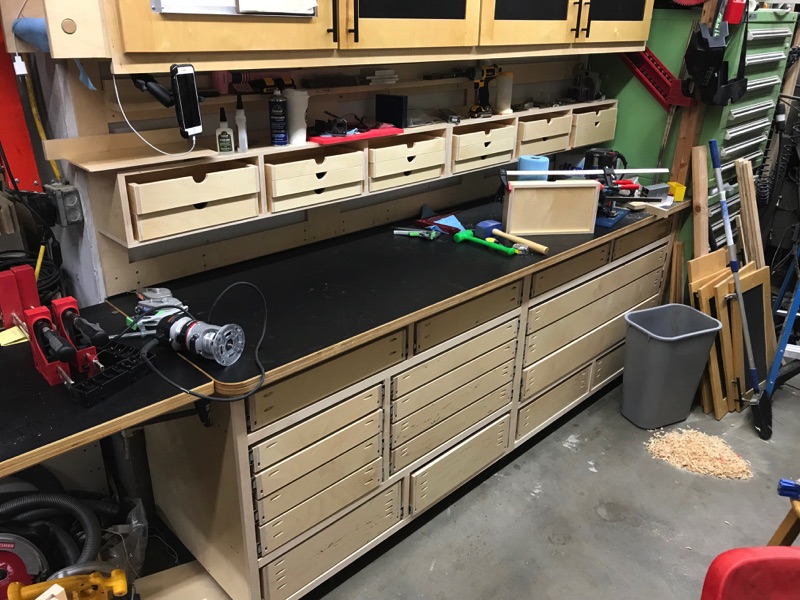
Middle drawers are still a work in progress. Far drawer is the large view-tainer drawer from earlier in this post. The middle drawer has my various parallels sets for milling. The closest drawers a temporary staging spot for most of the tools that will end up going above in the rack once I re-macihne the tops.

IMG_3620.JPG


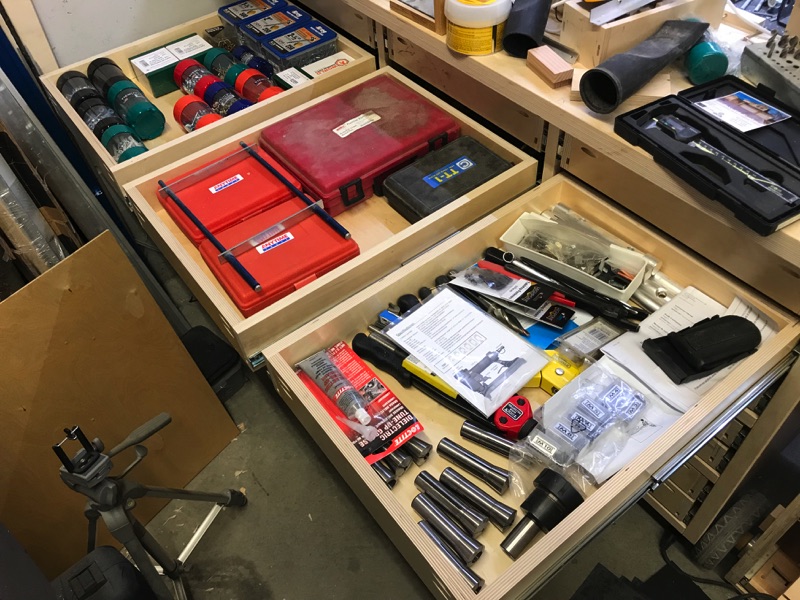
As I was loading the top middle drawer I kinda had an epiphany. Most of what I was putting in this drawer was "small stuff". To take full advantage of the drawers I found myself stacking things on top of each other which defeated the purpose of the depth of the drawer (felt wasteful). What was worse is when I closed the drawer, the stuff shifted and ends dup in piles.

IMG_2580.JPG


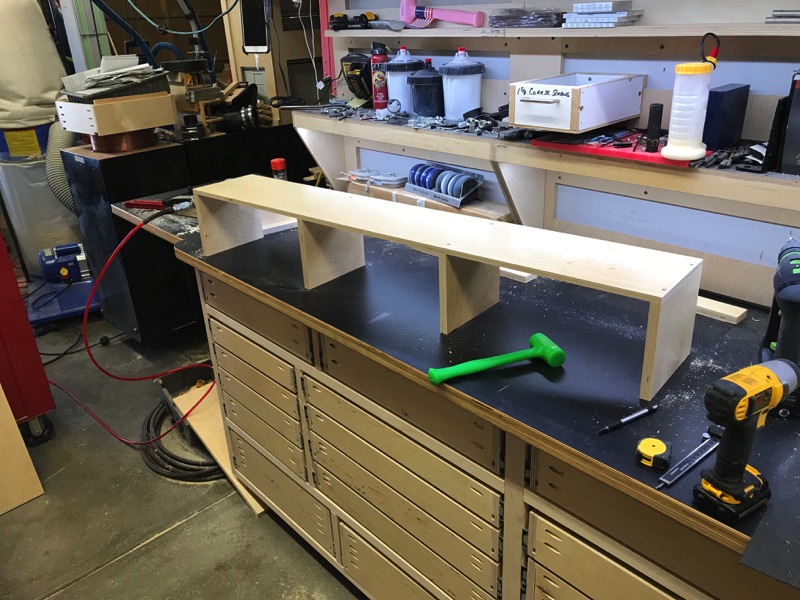
So I had a choice - either make dividers to control everything or do something different...it was then I had my next idea which caused me to pull everything back out. I ordered some parts and plan to implement it this weekend.

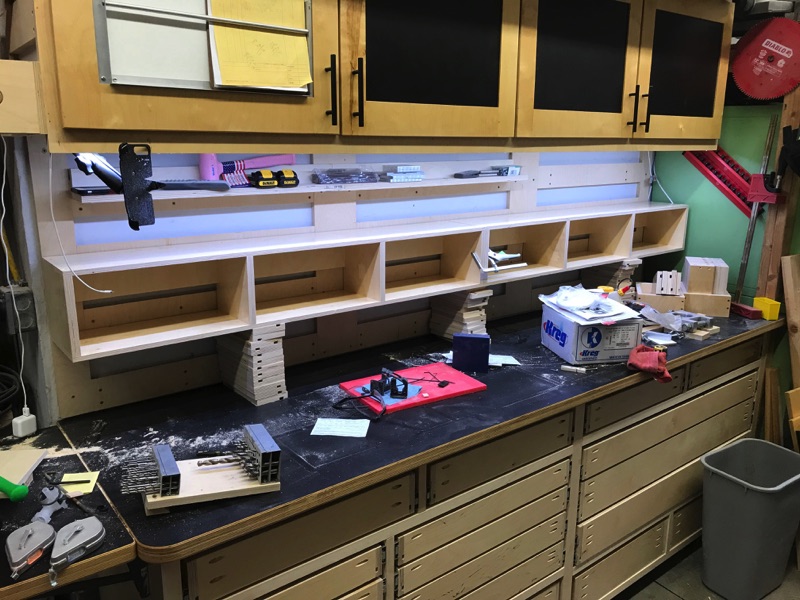
Until then, here's what the drawers look like now. Far drawer is the small view-tainer drawer from earlier. Middle and now the right two drawers have a substantial amount of room to grow into

IMG_3621.JPG


I now have about 75% of what I'd planned to move, moved.
 
To avoid these ads, REGISTER NOW!

neilc

Well-known member
Joined
Jan 17, 2014
Messages
94
Location
Chicagoland
Do you make shop calls?!

The thinking and process is amazing to see unfold. Thanks for the detailed photos and tips!
 
OP
L

lilscorpion

Well-known member
Joined
Mar 15, 2010
Messages
3,599
Location
Colorado
neilc said:
Do you make shop calls?!

The thinking and process is amazing to see unfold. Thanks for the detailed photos and tips!


I wonder if it would be possible to walk into someone else’s shop, assess their stuff, and design a workspace fo be efficient and organized. I think it would be tough. Some systems and setups are universal but some would need to be tailored to the shop users style and preferences. Since it’s taken me hundreds of hours to accumulate ideas and formalize a plan, I suspect I’d probably not do that well unless the goal was to clone what I’ve done and simply re-implement them in a new space.

As some of my ideas materialize I do think that many could be developed into products. Maybe not enough to build a business around...maybe one could.

“Ultra Extreme Shop Cabinet System designed for those who are looking for creative ways to store their tools at prices no one could afford!!”

I know you were mostly joking and I took that another place. [emoji41]
 
Last edited:

Stuart in MN

Well-known member
Joined
Sep 8, 2005
Messages
22,975
Location
Minneapolis
Well, there are professional closet organizer people - it's not a stretch to think the same thing could be done with a shop.
 
OP
L

lilscorpion

Well-known member
Joined
Mar 15, 2010
Messages
3,599
Location
Colorado
Well, there are professional closet organizer people - it's not a stretch to think the same thing could be done with a shop.


Totally agree. I was trying to decide if my Mental process was capable of being applied that way...for business.


Sent from my iPhone using Tapatalk Pro
 

Nuts

Well-known member
Joined
Jan 31, 2010
Messages
376
Location
Baker City, Or
Well you do have many years experience in shop organization that most don't.
And the drive to make it better.

I'm always thinking on how to be more efficient in my shop space.
 

BoilermakerFan

Well-known member
Joined
Apr 17, 2006
Messages
2,188
Location
Indianapolis, Indiana
Totally agree. I was trying to decide if my Mental process was capable of being applied that way...for business.

I'll send you pics of the current state of my garage... you might decide that the stress of dealing with other's messes isn't worth the time or money. :bounce:

One of these smilies would pretty much would sum up your reaction: :spit: or :scared:
 
OP
L

lilscorpion

Well-known member
Joined
Mar 15, 2010
Messages
3,599
Location
Colorado
Well you do have many years experience in shop organization that most don't.
And the drive to make it better.

I'm always thinking on how to be more efficient in my shop space.

True. Interestingly enough, I think it's easier to organize a shop after having done it before and it gets easier every subsequent time after that (I mean the same shop). Suppose that's also experience.

I'll send you pics of the current state of my garage... you might decide that the stress of dealing with other's messes isn't worth the time or money. :bounce:

One of these smilies would pretty much would sum up your reaction: :spit: or :scared:

I wouldn't want to start from scratch again. I think that was the point of this build. My shop, once done, will be movable to another location so I don't have to. Getting organized takes so much time...

You're right, I probably don't want to see your mess. I don't know how some of you live with yourselves. :lol_hitti
 
OP
L

lilscorpion

Well-known member
Joined
Mar 15, 2010
Messages
3,599
Location
Colorado
After seeing the chaos drawers come together, I realized something - smaller drawers are ideal for storing smaller stuff and I’m going to waste a ton of space if I put things like pens and pencils in a bigger drawer even if I build inserts. While cleaning up I realized that my mid-shelf design on my main bench could have easily had drawers built into them without taking away from the bench usability.

IMG_0232_2.JPG


Relative to the cabinets these will be a relatively fast and simple upgrade with small and manageable assemblies so I can knock them out quickly with mostly scrap leftover from he other cabinet assemblies.

IMG_3147.JPG


Brad nails are used to hold the pieces in place while I counter drill and screw them together.

IMG_3150.JPG


Since I needed to build an extension for the R8 Collet rack anyway I decided to rebuild the racks all together and add in drawers here as well. They’ll be perfect for chucks, keys ,etc.

IMG_3127_1.JPG


The R8 rack boxes are a little more complicated but I have the benefit of copying angles and taking basic measurements from the previous R8 racks. With only a few tweaks, They go together quickly. IIRC, the first set took me half a day. These took me a total of a hour and a half.

IMG_3152.JPG


IMG_3154.JPG


IMG_3156.JPG


The mid-shelves on the main bench are extremely easy to uninstall since they were attached using cleats. I plan to recycle the LED lights so I remove them as I go.

IMG_3159.JPG


And just like that, the new mid-cases are in place.

IMG_3161.JPG


Now I’m back to building drawers I guess. Again I dig through my scrap and come up with a design that enables me to optimize my use of scrap.

Sidebar on scrap material: I’ll be honest, a scrap-inspired design is not usually the approach I take when building things. I’m not too good to use scrap, I just realized one day that most of the scrap that I’d been hanging on to is worth less than the value shop space that it occupies. As a result, I tend to burn my waste/left-overs within 30 days of a project ending.

Back to the build…I have a bunch of 1/2-inch drops left over from the drawer bottoms and a few 3/4-inch drops. After some fast math it looks like I have just enough 3/4-inch to use it on the sides, more than enough 1/2-inch for the fronts and the backs, and plenty narrow 1/4-inch drops I can use for the bottoms. Using the 1/2-inch on the sides is ideal because it will allow me to run longer screws on the drawer slides. Here’s a completed assembly -

IMG_9991.JPG


The little finger notch is added so I can more easily open them until I get around to making the drawer fronts for them. That was a lesson I’ve already learned on the base cabinets. Some of the drawers are really difficult to get open without pulls. Anyway, simple short term solution. I happened to have a single slide left over from one of the bathroom builds so i mocked it up. it’s a 8-inch, full extension, 100lb-rated Accuride slide. The odds of these drawers having 10 lbs of stuff in them is probably 5% so I’ll have to see if I can find something that’s not as heavy duty but quality enough that it has a nice glide feel like these do.

IMG_9992.JPG


With the design set, I hammered out some drawer parts sticking them in their slot to stay organized and make sure I don’t lose count.

IMG_3163.JPG


Spent the rest of the day assembling little drawers. As they completed I dropped them in their hole keeping them in order and ready for the slides.

IMG_3167.JPG


Shifting over now to the tooling bench, the swap is also easy.

IMG_3157.JPG


Since I don’t really have a good way to store that much tooling without the rack, I re-installed the previous HDPE sheets so I have a place for about 95% of the tooling to live until I get around to making the new pieces.

IMG_3164.JPG


Back to assembling drawers. Getting a little tired of completely destroyed work surfaces. Pictures make my shop look exactly like the mess that it is for the record.

IMG_3172.JPG


Now I’m bummed that I hadn’t planned in advance on these. Had I known this is what I’d be doing I would have had the slides here already. Oh well, if I’m lucky they’ll be here by next weekend. I did do a little shopping…for the money it looks like I might as well just order more of these 100lb slides. Anything less expensive looked like junk..
 

BoilermakerFan

Well-known member
Joined
Apr 17, 2006
Messages
2,188
Location
Indianapolis, Indiana
True. Interestingly enough, I think it's easier to organize a shop after having done it before and it gets easier every subsequent time after that (I mean the same shop). Suppose that's also experience.


I wouldn't want to start from scratch again. I think that was the point of this build. My shop, once done, will be movable to another location so I don't have to. Getting organized takes so much time...

You're right, I probably don't want to see your mess. I don't know how some of you live with yourselves. :lol_hitti

Oh, you know all too well! How many YEARS have you been working on this?

And in my defense... uh... Well, the plywood was free and I had to get it when I did or he was going to burn it all. And a lot of the other stuff in my garage will have a place in a big tool chest once I can fit that in the garage... and well, then there is my big honkin' workbench that belongs in the basement once it's completed enough to move out of the garage, which I haven't been able to finish because of the **** weather for the last four months. Yeah, that's the ticket!

And do you really think a buyer of your current place is going to let all of that kick a$$ cabinetry and organization leave the garage? :lol_hitti I guarantee it will be a contingency of the sale that it would stay.


All the new little drawers and their locations look great. I can't believe you didn't think of that until now... and you wanted to go pro! -SMH-


:lol::lol::lol::lol:
 
OP
L

lilscorpion

Well-known member
Joined
Mar 15, 2010
Messages
3,599
Location
Colorado
BoilermakerFan said:
Oh, you know all too well! How many YEARS have you been working on this?
Wife says FOREVER.


BoilermakerFan said:
And in my defense... uh... Well, the plywood was free and I had to get it when I did or he was going to burn it all. And a lot of the other stuff in my garage will have a place in a big tool chest once I can fit that in the garage... and well, then there is my big honkin' workbench that belongs in the basement once it's completed enough to move out of the garage, which I haven't been able to finish because of the **** weather for the last four months. Yeah, that's the ticket!
Defense rests, no further questions.

BoilermakerFan said:
And do you really think a buyer of your current place is going to let all of that kick a$$ cabinetry and organization leave the garage? :lol_hitti I guarantee it will be a contingency of the sale that it would stay.
It won’t matter what they write in a contingency. There will be a discloser that my realtor will have that says if they want the cabinets, they can make me an offer after we close on the house. Won’t even consider offers until then. I have too much in them to let them go so I can sell the house for asking price. If possible I’ll move the shop before we put the house on the market.

BoilermakerFan said:
All the new little drawers and their locations look great. I can't believe you didn't think of that until now... and you wanted to go pro! -SMH-
:lol::lol::lol::lol:


No kidding. I can’t believe I worked in the shop for a couple years without it even crossing my mind.


Sent from my iPhone using Tapatalk Pro
 

niget2002

Well-known member
Joined
Oct 2, 2012
Messages
11,112
Location
Josephine, TX
This is looking really nice. All I got done this weekend was to face the spoilboard on my little CNC machine. I had a nice big weekend planned in the garage and never got to do any of it.
 

Bob Heine

ALLIANCE MEMBER
Joined
Oct 24, 2009
Messages
10,703
Location
Boca Raton, Florida
It won’t matter what they write in a contingency. There will be a discloser that my realtor will have that says if they want the cabinets, they can make me an offer after we close on the house. Won’t even consider offers until then. I have too much in them to let them go so I can sell the house for asking price. If possible I’ll move the shop before we put the house on the market.
Lilscorpion, the only flaw in your plan is the custom storage you have now built won't fit perfectly into your next home, unless you duplicate the layout in this home. If the new wall is four inches too short for those cabinets, are you going to be happy just shortening one end four inches? I suspect you will have to adjust the size of each drawer and opening to maintain symmetry.

I like the idea of a separate offer on the cabinetry. I know you could sell it for more than the cost of materials -- for your new custom cabinets.

Once you finish this (Re)Organization you may decide to stay in this house forever.
 
OP
L

lilscorpion

Well-known member
Joined
Mar 15, 2010
Messages
3,599
Location
Colorado
Bob Heine said:
Lilscorpion, the only flaw in your plan is the custom storage you have now built won't fit perfectly into your next home, unless you duplicate the layout in this home. If the new wall is four inches too short for those cabinets, are you going to be happy just shortening one end four inches? I suspect you will have to adjust the size of each drawer and opening to maintain symmetry.

I like the idea of a separate offer on the cabinetry. I know you could sell it for more than the cost of materials -- for your new custom cabinets.

Once you finish this (Re)Organization you may decide to stay in this house forever.


I guess, conceivably, it’s possible that a new garage layout would create such problems with my cabinets that I did have to start over. The upper cabinets are built following basic and semi-standard dimensions. Multiples of 18” and 22” in length, 13” or 15” in depth, and 30” or 60” in height. Since the cabinets were dry assembled, a 36” long cabinet could be revised to be an 18” in less than a half hour. With that level of flexibility I’d bet that I’d be able to incorporate most of what I have in a new layout as long as it actually had walls. You’re right on the cabinet bases. There’s no ability to adjust at all without serious redesign and work. Life has a way of teaching me lessons though so I would be surprised at all to encounter a situation where all bets are off..

We’ll stay in this house as long as we can or until we have a really good reason otherwise (ahem, 8 car garage?!). [emoji857]


Sent from my iPhone using Tapatalk Pro
 
OP
L

lilscorpion

Well-known member
Joined
Mar 15, 2010
Messages
3,599
Location
Colorado
Really enjoy all the new pics, looks like it's coming together slowly but surely...


Thanks. I’m having a lot of fun on this build compared to the last one. More fab and less finishing. Still it takes baby steps.


Sent from my iPhone using Tapatalk Pro
 

niget2002

Well-known member
Joined
Oct 2, 2012
Messages
11,112
Location
Josephine, TX
Thanks. I’m having a lot of fun on this build compared to the last one. More fab and less finishing. Still it takes baby steps.


Sent from my iPhone using Tapatalk Pro
Can I talk you into doing some drawer fronts? Seeing all those pocket holes is driving me nuts :)

Sent from my VS987 using Tapatalk
 
OP
L

lilscorpion

Well-known member
Joined
Mar 15, 2010
Messages
3,599
Location
Colorado
niget2002 said:
Can I talk you into doing some drawer fronts? Seeing all those pocket holes is driving me nuts [emoji4]

Sent from my VS987 using Tapatalk


The pocket hole look is kinda growing on me. Was thinking about not even making fronts now..


Sent from my iPhone using Tapatalk Pro
 

blatterjr

Well-known member
Joined
Nov 21, 2011
Messages
157
As a design architect, I see the common solutions day-in-day-out, so I always try to push people to look for progression; new ways of doing the same thing to, maybe, alter their lifestyle in some way to accommodate new ideas or ways of approaching their design problem.

I like to look at what these guys are doing. While it's not 'new', it's different and they have an approach to solving problems that is exemplary. https://kerfdesign.com/

I, too, use french cleats for adjustable storage and seeing your setup, I thought you might be interested in seeing some of their projects. Instagram might be a better place to see images, but their website has some information about their process.
 
To avoid these ads, REGISTER NOW!

Strouty

Well-known member
Joined
Mar 21, 2010
Messages
38,206
Location
Southern Maine
Where did you order the festool bins from? I still don't understand how you can take an amazing space and make it more amazing, but you seem to be able to do it again and again.
 
OP
L

lilscorpion

Well-known member
Joined
Mar 15, 2010
Messages
3,599
Location
Colorado
Strouty said:
Where did you order the festool bins from? I still don't understand how you can take an amazing space and make it more amazing, but you seem to be able to do it again and again.


Thanks. I may spend more time thinking about the processes in a project than they project themselves. I also tend to spend hours trying to figure out how to make something better. Sometimes if feels like a curse. I pretend the goal is to get to some ideal state where using the space is euphoric. I think the goal is always be in a state of redesign.

Festool Containers - Last order was www.toolnut.com. Festool uses a fixed pricing model so the best one can do is find a place that offers free shipping and no tax. Amazon does sell them but now charges tax (to me anyway).

They’re not names the same everywhere as well. Some call them “compartments” and some call them “boxes”

Part Numbers:

Red boxes 1x1 - 498038
Yellow boxes 2x1 - 498039
Blue boxes 2x2 - 498040
Green boxes 3x2- 498041


Sent from my iPhone using Tapatalk Pro
 

Strouty

Well-known member
Joined
Mar 21, 2010
Messages
38,206
Location
Southern Maine
Might want to look at Schaller boxes for drawer boxes. Much better pricing.

http://www.schallercorporation.com/products/

Ron

I use those, but I really like blue and green, Schaller quoted me something like an additional $1000 for each color, but they can and will do them in colors. They also needed a 1000 minimum of each size box. I seriously considered it, figuring I might find other GJ members to share in the costs.
 

Clemson13

Well-known member
Joined
May 30, 2015
Messages
425
Now i just need to build/buy myself the giant box I want to I can fill it with those drawers lol
 
OP
L

lilscorpion

Well-known member
Joined
Mar 15, 2010
Messages
3,599
Location
Colorado
Zippercat said:
The Drawer Builder Tool on their site looks pretty handy!


That’s a cool idea. The mobile version doesn’t work right so I’ll try it when I get home from a desktop. Ill have to order some of them and see the quality.


Sent from my iPhone using Tapatalk Pro
 

BoilermakerFan

Well-known member
Joined
Apr 17, 2006
Messages
2,188
Location
Indianapolis, Indiana
Uline has Akro-Bin clones with the open fronts and these divider containers:

https://www.uline.com/BL_8821/Divider-Boxes

There are a couple that aren't so tall that might work for custom drawers.

I have a few Lyon small drawer containers, their 332 model, but they are only available in yellow or black.


I use the big Akro/Uline bins on my open shelves in the garage and the small ones are great for my reloading press and come with the Inline Fabrication kits.
 

Nuts

Well-known member
Joined
Jan 31, 2010
Messages
376
Location
Baker City, Or
These bins are cool. Wish they had a 12-inch long set. The 15’s are too long for both of my cabinet depths. I do like the divider concept.


Sent from my iPhone using Tapatalk Pro


There's three sizes that when turned sideways are approximately 11".
 
OP
L

lilscorpion

Well-known member
Joined
Mar 15, 2010
Messages
3,599
Location
Colorado
Main Bench Upper Cabinets

I hadn’t planned on replacing the cabinets above the main bench since they’ve seemed to work just fine however I’ve been eyeballing them as I walk around the shop for weeks trying to make a final decision.

IMG_0232_1.jpg


I felt like the design was good (enough) and they worked fairly well for how I used them though I rarely pulled the bins out of them so they ended up being used more as long term storage than they existed as part of the shop flow. The two largest bins (marked “irrigation” and “PVC Fittings”) have never been removed from the cabinet since I put them there. the PVC fittings were left-overs from the shop I had where i had all of my shop air lines plumbed in PVC until I learned why I shouldn’t (boom). I probably have 20-something fittings of every style in that bin and I’ll never use them again. Not sure why I’ve allowed $50 in materials to occupy valuable shop space for so many years. After peeking in the other bins I came to the conclusion that most of it had to go or be stored elsewhere. The space is getting repurposed.


IMG_2659.jpg


1 by one I pull the doors, strip the face frames, and demo the car-cases.


IMG_3209.jpg


Removing these cabinets is a different experience. As the wall gets more and more bare, the space begins to feel less and less like my shop. I’m so used to the bench looking a certain way. I did not get this feeling while demo’ing the opposing wall over the lathe which is equally strange. Maybe there’s something more personal about the workbench space.


IMG_3210.jpg


With all the cabinets down, I pull the tape to get some rough measurements. One of the challenges of shifting towards Systainers is storing those tools that are larger than the standard/normal systainer format. An example of these tools is the sawmill which is a few inches too long. Tanos (mfg of the systainer) must have seen me coming so they offer a MIDI version of the systainer which is about 3-inches longer and perfect for the sawzall (they actually have an insert specific to the sawzall). Up until now all of the upper have been the same width (increments of 18”). In the case of the MIDI, the cabinet needs to be a little wider (~23). I now have a justification to build a new sized cabinet. In the space above the main bench adding a new width to my standard cabinets makes total sense. The space is just big enough for 2 @ 36 and 1 @ 23 and the single 23 would accommodate at least 3 MIDi sustainers before I’ll need another. Plenty for now.


IMG_3194.jpg


On to the two cabinets at regular dimensions. By now I can put them together in my sleep (meaning I still have the fixtures, the work itself is not any easier or faster).


IMG_3198.jpg


New cabinets going up. The new cabinets give the bench space a slightly different feel. It’s the wood contrast I suppose or maybe it’s just me justifying the replacement of cabinets that really didn’t need to be replaced.


IMG_3217.jpg


With the cabinets up, I’m now able to move things around as I build inserts. The storage feels to have doubled and the ability to add a shelf wherever I want makes the effort worth it. For now the bins go back up on the shelf however only temporarily. With the hardware drawers in the new tooling bench there’s little to no need to have so many hardware bins up on the shelf anymore. Some of this stuff will move to long(er) term storage and some will go away entirely.


IMG_3220.jpg
 

Strouty

Well-known member
Joined
Mar 21, 2010
Messages
38,206
Location
Southern Maine
I completely understand the thought process. I redo things when they irk me or just don't seem to work. The cost of storage is definitely not always considered, you are absolutely considering it!
 

elise111

Member
Joined
Mar 7, 2011
Messages
15
Enjoying your progress! Question on the small drawer slides- are these Accuride 3832-E8? I didn't find 8" slides on the ahturf site, where did you end up getting these?
 
OP
L

lilscorpion

Well-known member
Joined
Mar 15, 2010
Messages
3,599
Location
Colorado
elise111 said:
Enjoying your progress! Question on the small drawer slides- are these Accuride 3832-E8? I didn't find 8" slides on the ahturf site, where did you end up getting these?


The filter doesn’t work well on their site. When you select 8” it narrows down to all of the slides that have an 8 in the number (like 18, 28, etc) and then the ordering is weird. The 8” ones are on the very last page at the bottom. Here’s the link directly to the ones I used -

http://ahturf.com/store/index.php?route=product/product&product_id=18241


Sent from my iPhone using Tapatalk Pro
 

BoilermakerFan

Well-known member
Joined
Apr 17, 2006
Messages
2,188
Location
Indianapolis, Indiana
The new cabinets are a great change, especially since you had just the right length to add the 23" Midi cabinet.

Take the PVC fittings to your local Habitat ReStore and donate them for the tax write-off, or see if your local schools want them. Teachers could use them for any number of projects. Either way, you get a tax write off.
 
To avoid these ads, REGISTER NOW!
Top Bottom