To avoid these ads, REGISTER NOW!

Tooling (Re)Organization

OP
L

lilscorpion

Well-known member
Joined
Mar 15, 2010
Messages
3,599
Location
Colorado
yeah, no pics at the moment...

shakes begin in 3, 2, 1.... :)

My business is very important to my provider. They thank me for holding while the look into my situation...

SO

Garage Journal is very important to me. I thank it's readers for supporting me and my thread. I'm sure "customer service" will figure it out without having to open a ticket with one of their technical support staff :spit:
 
To avoid these ads, REGISTER NOW!

beelsr

Well-known member
Joined
May 6, 2007
Messages
1,324
Location
NE PA, USA
OMG, all your photos are gone... :shocking:

For a US-based server, I point people to www.digitalocean.com for a first look. You have to spin up your own server and manage it but you have complete control. If all you're doing is hosting pictures, then it would be a pretty vanilla server. And $5 a month is a steal.

You might get better reccs if you give more detail on what exactly you're looking for and how hands-on you want to be with it.

Regardless, I don't know your old filenaming scheme but if you could replicate the naming on the new site, then you'd only have to change the servername in the URLs, which would be a much easier task than the whole url.
 
OP
L

lilscorpion

Well-known member
Joined
Mar 15, 2010
Messages
3,599
Location
Colorado
beelsr said:
OMG, all your photos are gone... :shocking:

For a US-based server, I point people to www.digitalocean.com for a first look. You have to spin up your own server and manage it but you have complete control. If all you're doing is hosting pictures, then it would be a pretty vanilla server. And $5 a month is a steal.

You might get better reccs if you give more detail on what exactly you're looking for and how hands-on you want to be with it.

Regardless, I don't know your old filenaming scheme but if you could replicate the naming on the new site, then you'd only have to change the servername in the URLs, which would be a much easier task than the whole url.

The inter-webs is still there, I promise! I can access them via FTP and see them. My hosted email still works at the same URL so my domain resolves. They just **** the bed from a web hosting perspective.

I don’t want to become a sys admin, I just want to host pics. I have my domain, email, ftp, and now just pictures. If I could have a site again, I’d want it to be windows/iis/.Net...though I’m losing interest in fighting these foreign hacks who spend their nights compromising my site so they can redirect it to their fake Rolex watch scam business.

Unfortunately I’ve been with the same hosting Co for about 15 years and have tolerated their decline in stability. I may have to let them go.
 
Last edited:

beelsr

Well-known member
Joined
May 6, 2007
Messages
1,324
Location
NE PA, USA
pretty much all webhosters will let you pick your OS, or POS if you want windows. :)

the "problem" is that 99% of managed hosting providers are personal blog (e.g., bluehost) or smallbiz all-in-one packages (e.g., wix) so all the ads and editorials and such focus on those two 900 pound gorillas of use case.

but hosting photos is easy, you just dump them in a folder hierarchy inside the website folder structure and they get served. same for ftp if you're using that to send and store files. you can password protect it too, if you're storing your own CAD files or backups or something like that (although I wouldn't store backups like this!).

a couple pointers that should answer 99% of your questions as to provider-fit.
https://www.pcmag.com/article2/0,2817,2424725,00.asp
https://www.cnet.com/web-hosting/

don't know your level of (non-)service now but the big decision is really shared or vps hosting. if you want hands-off, shared is where it's at. and unless you're serving more than a few thousand page hits a day, it should be fine from a performance perspective.
 
OP
L

lilscorpion

Well-known member
Joined
Mar 15, 2010
Messages
3,599
Location
Colorado
Now I can add the second half of the weekend's progress. I also expanded my Sys-Port so I could move my vacuum clamps off of the shelf and into sliding drawer assemblies.

In December of 2012 I “happened across” an opportunity to remove an APC from where I worked to save the company from having to pay for a company to remove it. For me it was a good deal because the unit worked just like it was new. My idea was to attach it to the wall in the shop and use it to evacuate the shop. I used the wall cavities as the duct work and added vents all around it so it could pull air from the room. Neat way to remove fumes, dust particles…you name it. The thing flowed 2200 CFM and moved some air. I’m sure I had it in my Tooling Organization thread.

RackFan1.jpg


Even looked cool.

RackFan2.jpg


The reason I’m pulling these old crappy pics back to the top is because I’m bringing you full circle…the end of the idea. I never did put the custom ducts in the attic to vent the exhaust air out through the soffit. Even if I had, I hadn’t solved the intake issue either. When you move that much air out of the shop you have to figure out how to get air in the shop otherwise it creates a low pressure condition (puts pressure on the garage door and makes it interesting opening the door from the house, etc. Usually I’d crack the garage BUT, when it was summer, I’d pull hot air into the garage off of the driveway which actually had a heating effect. In the winter…cold. I’m thinking ahead here. If I sell the house, it would have to go…so it goes now and I’ll use the space for better things and save all of the work I never did.

img_3274.jpg


Of course I didn’t have enough drywall to fill the hole so I had to run to the store and buy a sheet.

img_3279.jpg


I had little to no patience today so I got out the propane heater to flash cure the mud. I was chuckling nearly the entire time the heater was running.

img_3280.jpg


And I’ll extend the sys-ports over the patch. I’ll have to finish the patch above them later when it’s a little warmer b/c I ran out of propane.

img_3282.jpg


Since I kept all of my spacers, I can quickly add the slides for the inserts.

img_3285.jpg


And the sustainers have a home.

img_3297.jpg


On all of the drawer bottoms in the Sys-Port I cut in the feet so the sustainers can’t slide off when opening or closing them since the drawer are essentially flat pieces of plywood. Since I have a template, it's really easy to make more. The whole intent of this expansion was to create space for the systainers that house the Sys Vac (the bottom 4 in the above pic). But these systainers are the classic version which have much different feet than the t-loc style (all of my other systainers). In order for these to stay on the trays/shelves, I needed to create a template so I could cut in this new foot pattern.

img_3303.jpg


Using a router with a pattern bit I have the 4 I need fairly quickly..

img_3304.jpg


No more fan, no more hole, way more storage. Now all of my wood working tools are easily accessible and yet completely out of the way when needing to use the garage.

img_3309.jpg
 
OP
L

lilscorpion

Well-known member
Joined
Mar 15, 2010
Messages
3,599
Location
Colorado
Shelving Solution

It was late march when I first put together the first upper cabinets for the new build. At that time I cut the systainer foot pattern into a shelf so it would help keep them looking organized (they'd auto-locate in the exact same spot on every shelf) and so they'd not be un-intentionally leave the shelf since the shelving has no lip. One of the replies was by rviecili who accurately summed up my initial thoughts -

rvieceli said:
...having to lift that systainer out of the dimples rather than just slide it off a smooth shelf would make me crazy after a few times.

As luck would have it, I'v only had to remove systainers from the shelves (which had the cut in feet pattern) maybe a half dozen times since then. Each of the times I swore it was a dumb *** idea and each of the times I was reminded I needed to spend some time thinking about how to solve for it. Since I'll be needing to make dozens of shelves in the up coming few weeks, I figured the timing was right to work through my little issue.

Here's the starting point - When removing a systainer from a shelf with the footprint cut in it’s easy enough to lift up the front feet however getting the rear feet to lift up in the same motion was difficult unless your lifting movement was nearly straight up. Since the tool box is on a shelf and above my head, lifting up is actually kind of difficult. In review, the previous template that I used for the feet locations looks like this -

img_0236.jpg


After spending some time thinking about it, this design that has been used over and over again by I don’t know how many people, is very poor for this use case. The design is most frequently used to keep the systainer on a shelf of a moving vehicle - either an automobile or a movable work station. They work very well when they’re combined with drawer slides where you’re able to pull out the systainer

img_3658.jpg


And use the handle to lift directly up.

img_3660.jpg


Here’s how the feet are designed on a systainer. To set context, the right of the photos are the front of the systainer so, in removing it from the shelf, I will always be pulling int to the right in the picture. This is the front foot. The edge that is to the front of the systainer (to the right) is nearly square.

img_3663.jpg


Here’s the rear foot. The leading edge is angled forward at about a 45* angle (didn’t measure, just guessing). That leading edge should allow it to free itself from the rear pocket if the front of the systainer is tilted up.

img_3664.jpg


Contained within the shelf, the systainer has a limited amount of up-travel. What’s more difficult is that I have to lift using part of the systainer like the t-loc/knob which isn’t really easy and certainly not efficient.

img_3672.jpg


I can easily solve that by machining out the bottom of the shelf in such a way that I can get my hand under the systainer. A quick program on the mill and cut a profile that allows me to get my hand under the systainer.

img_3370.jpg


With access now to the bottom, I can lift it up more easily and get a better grip on it.

img_3400.jpg


So back to the limited up-travel. In my design just under 1/2-inchs worth.

img_3675.jpg


I tested to see how much up-travel it would take to make the rear feet lift out of the rear pockets. Now I couldn’t measure, hold up the systainer, and take the pic at the same time but i think it’s clear that it’s much more than I have height-wise between shelves. Probably at least double. Now I could begin to space the sustainers further apart but that’s not a desirable solution (wasteful actually).

img_3398.jpg


Given the way that the front feet are shaped (nearly square on the leading edge), I realized that using pockets to locate the rear feet isn’t necessary. the front feet are all that are really needed. If I elongated the rear recesses into longer slots which allowed the systainer to slide forward as soon as the front feet clear their holes. The rest may just have been dumb luck. I arbitrarily picked a length and stretched the holes in a new template.

img_3403.jpg


Here’s the view from the bottom showing the Systainer seated fully in/on the shelf. Front feet are locked in place and the rear feet tracking in the slots.

img_3495.jpg


Now rotate it 90*.

img_3493.jpg


This is where it gets really cool. The slit length I picked, when the systainer is slid forward, kinda pins the feet in such a way that they’re captured in such a posting where the weight is still mostly over the shelf. Fully loaded or empty, it won’t and can’t rock forward.

img_3494.jpg


This new position now allows me to change my hand position or grab it with 2 hands if I think I need to.

img_3396.jpg


In this position, the only thing that’s necessary to dislodge it from the shelf and physically remove it is to slightly tilt it forward. This causes the rear feet to lift out of the rear pocket and the entire systainer easily free’s itself from the shelf.

img_3497.jpg


Looks good too.

img_3499.jpg


Pattern works and the concept is good enough to make some shelves today.

img_3388.jpg
 

Strouty

Well-known member
Joined
Mar 21, 2010
Messages
38,206
Location
Southern Maine
That does look like an improvement. I was thinking what about just making two slots? That way you would not need to lift them at all.
 
OP
L

lilscorpion

Well-known member
Joined
Mar 15, 2010
Messages
3,599
Location
Colorado
That does look like an improvement. I was thinking what about just making two slots? That way you would not need to lift them at all.


Slots would work. Honestly none of it is really necessary for a shelf in a home shop garage. Where they’re really useful is in a work truck so the systainers don’t hop off the shelf when the driver Beau and Luke Duke’s it. They’re the ones that it should really resonate with.

My issue is thinking. Once I get going I sometimes can’t let go of an idea. If something like this seems neat, I try it. If I do it on a couple shelves the OCD kicks in and I have to do it on every shelf. 🤪
 

Strouty

Well-known member
Joined
Mar 21, 2010
Messages
38,206
Location
Southern Maine
Ebay had another 15% off code, so I bought a bunch of ER collets with some adapters. Got both R8 and 5C both in ER32 and ER40 sizes. They I bought one set of ER32 metric collets, figure it would be smart to have them. Since my lathe has a 5C collet closer, I figured it would be worth it to have them as work holders, plus I bought a set of square and hex 5C collet blocks. Also found a deal on a MT2 adapter with a 14N jacobs chuck.
 

Stuart in MN

Well-known member
Joined
Sep 8, 2005
Messages
22,976
Location
Minneapolis
I happened across a website last night for a place that sells modular workbench storage systems for model makers,and it reminded me of this thread: http://www.hobbyzone.pl They have a variety of shelves, storage drawers, tool holders, etc. that you can mix and match, they all stack together and are held in place with little magnets. Their stuff is a lot smaller and more delicate than what is being done here, but it is a pretty cool system.
 
To avoid these ads, REGISTER NOW!
OP
L

lilscorpion

Well-known member
Joined
Mar 15, 2010
Messages
3,599
Location
Colorado
Hope you had a great Fourth.

Any new updates?

the 4th was good, the following weekend was meh. in my infinite wisdom, I chose to have my back porch's concrete pad replaced. The crew said 1 1/2 days to demo the old one, 1 day for forms, 1 day for pouring/finishing. Then they learned that the back pad was REALLY thick which turned the 1 1/2 days demo into 4 days demo. most of it was more than 6-inches thick. Wish I'd know that, I woulda put a lift in the backyard. :lol_hitti

Anyway...The entire weekend was nothing but jack hammers 7am - 5pm. Hardly restful though It did give me some time in the garage with earplugs so I decided to wrap up the machine work on the systainer shelves and drawers...draw-a-thon!

img_3870.jpg


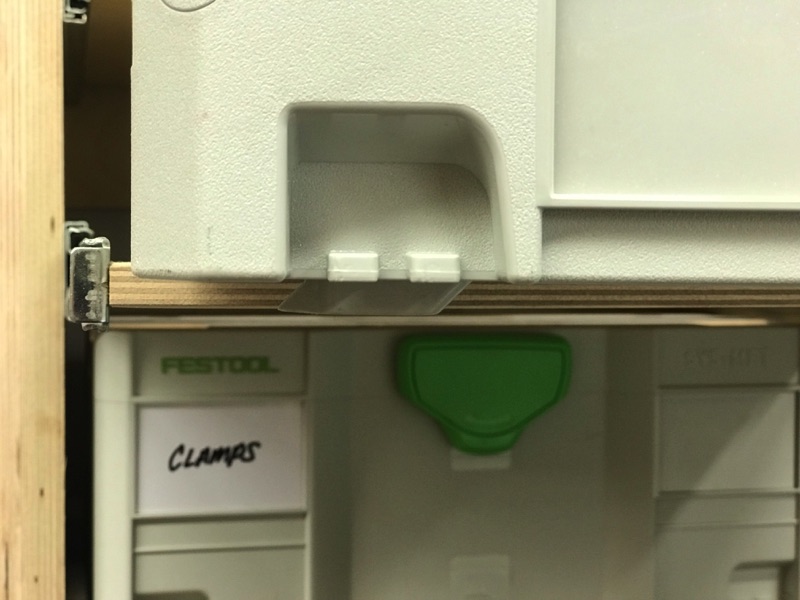
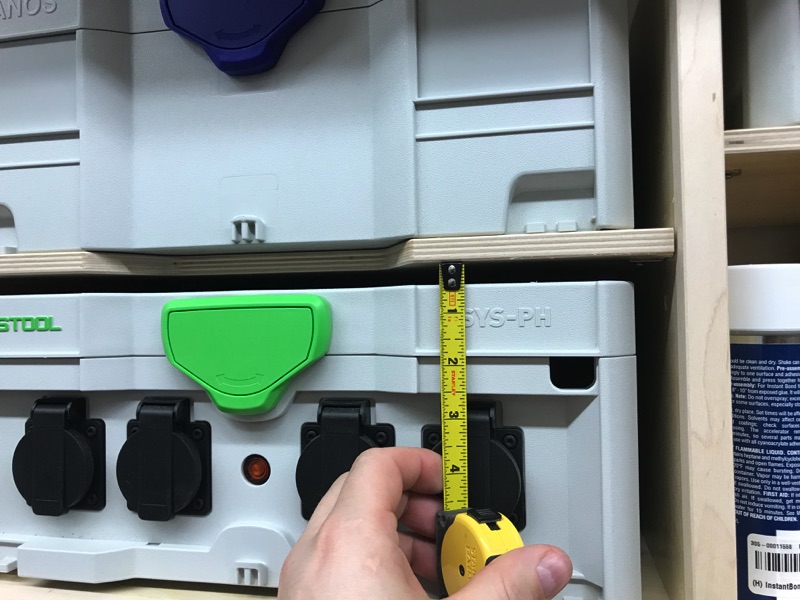
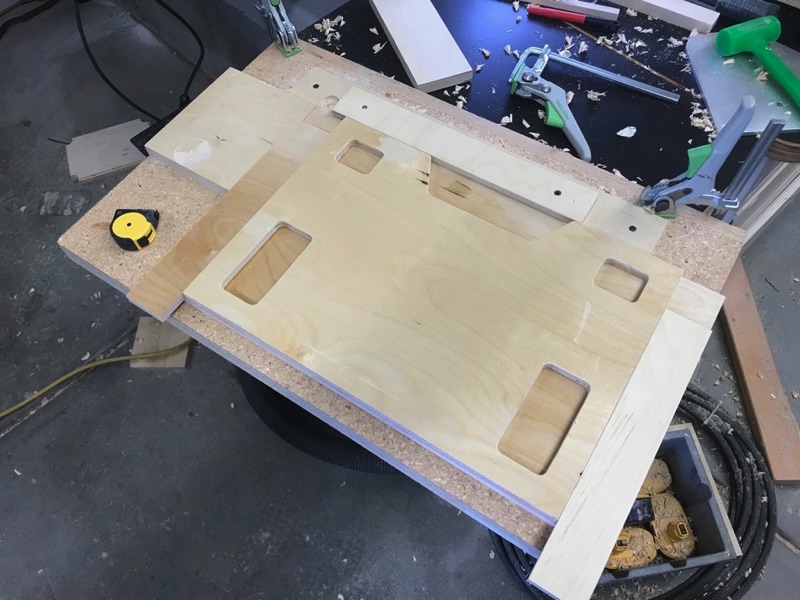
For those of you who have been following along, I've also added cabinets the correct width for the Systainer Midi's which requires a special width shelf and, they have different feet too. As luck would have it, the foot pattern is really just a modification of the smaller t-loc foot pattern.

img_3871.jpg


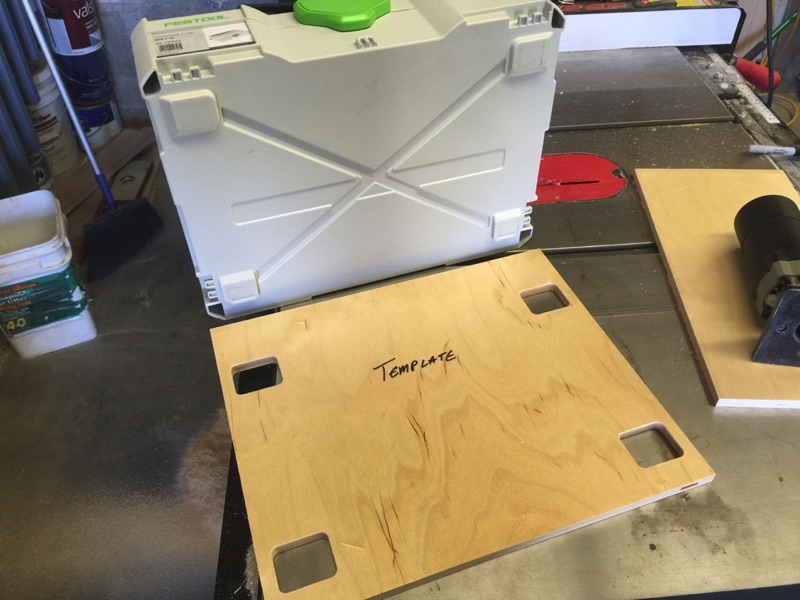
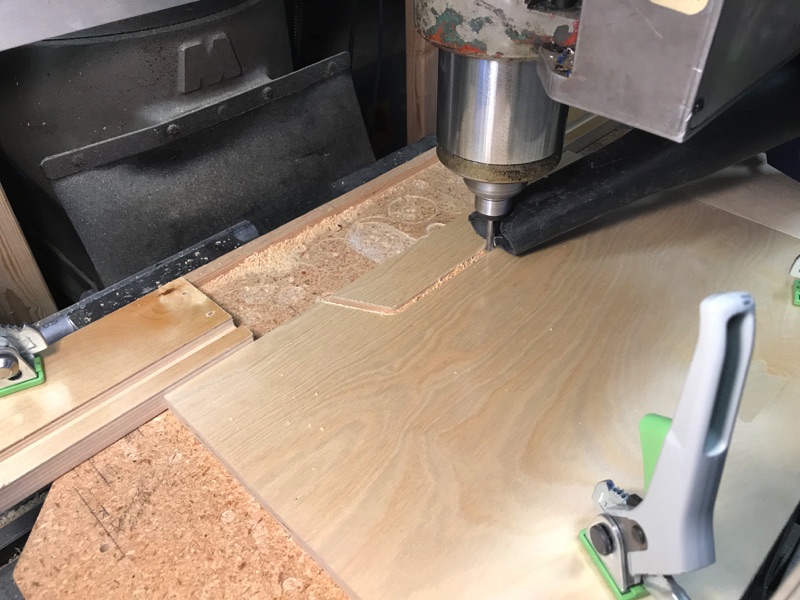
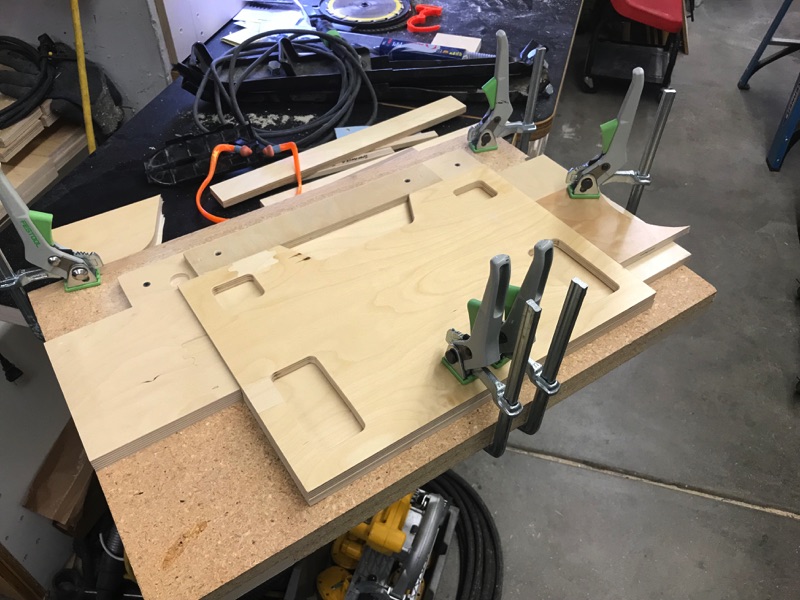
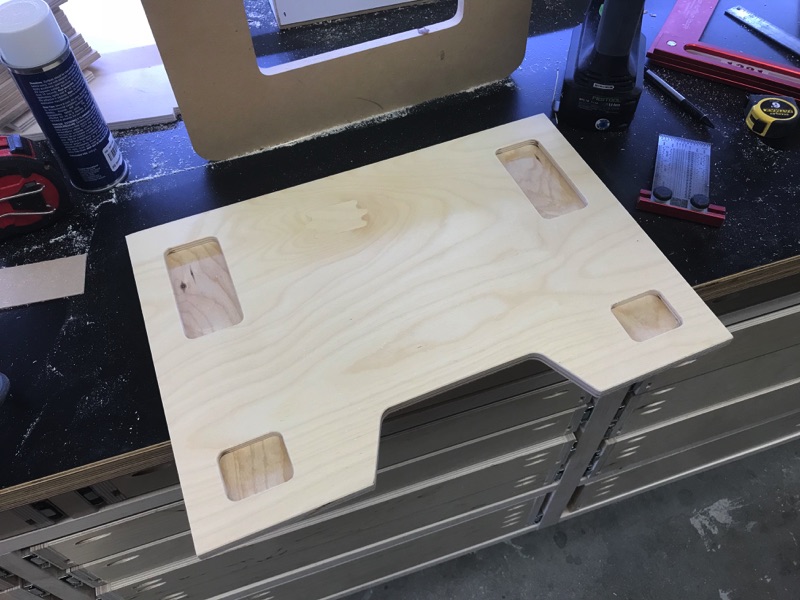
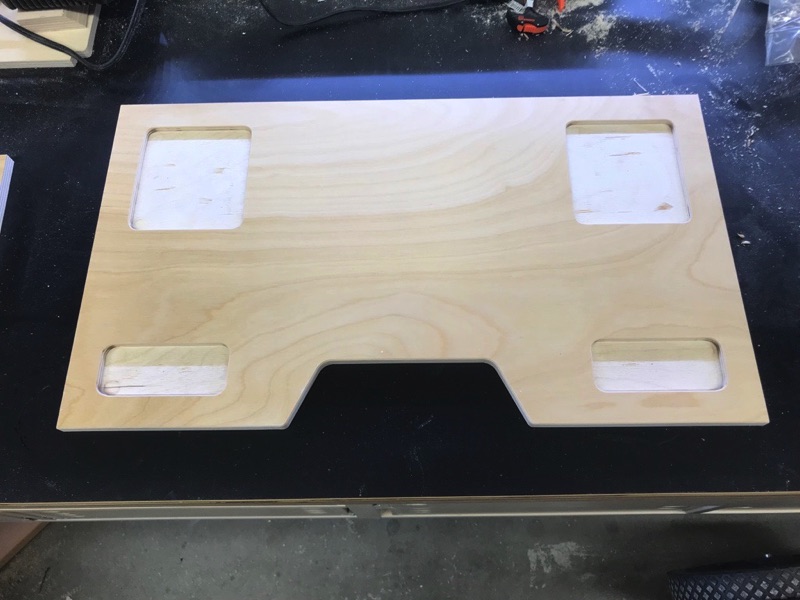
After taking a few measurements, I started by making spacers that centered the existing template (that much was identical between the two sizes. I then cut the pattern into the wider blank.

img_3874.jpg


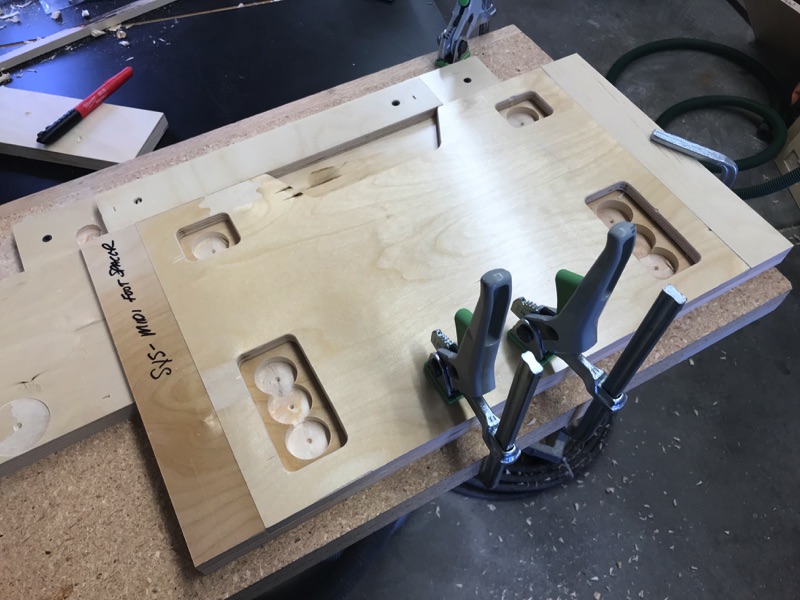
Here's where it got a little crazy. I then realized that if I slid the template over half the difference of the shelf sizes like so

img_3878.jpg


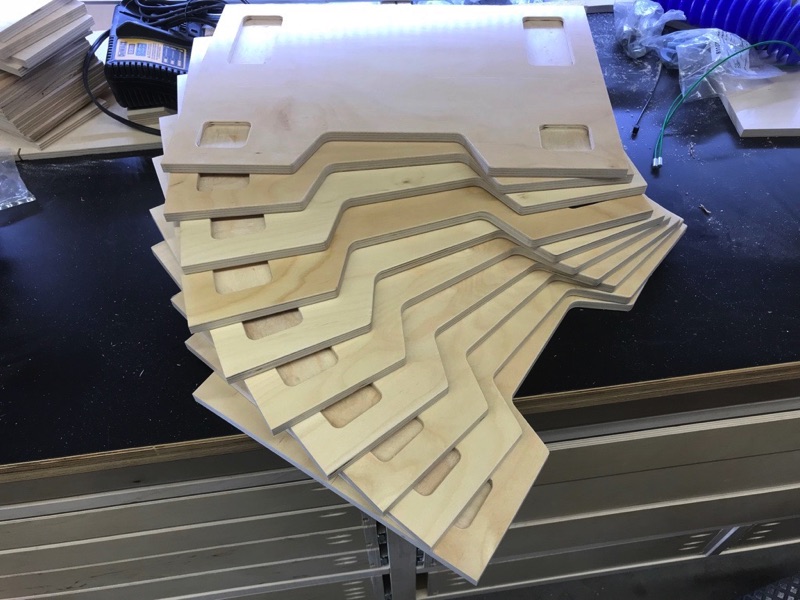
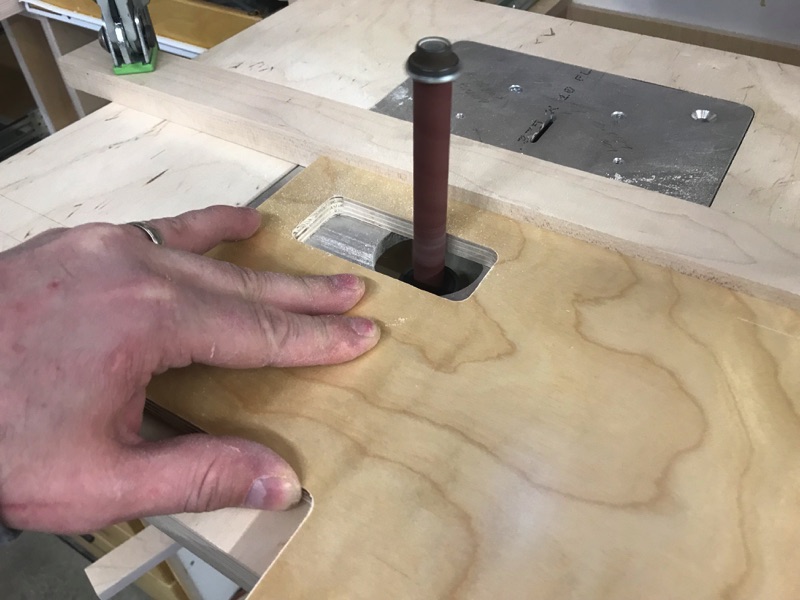
And recut the profile taking a second to clean up the transition between the two cuts on the occulting spindle sander

img_3880.jpg


it looked like this

img_3882.jpg


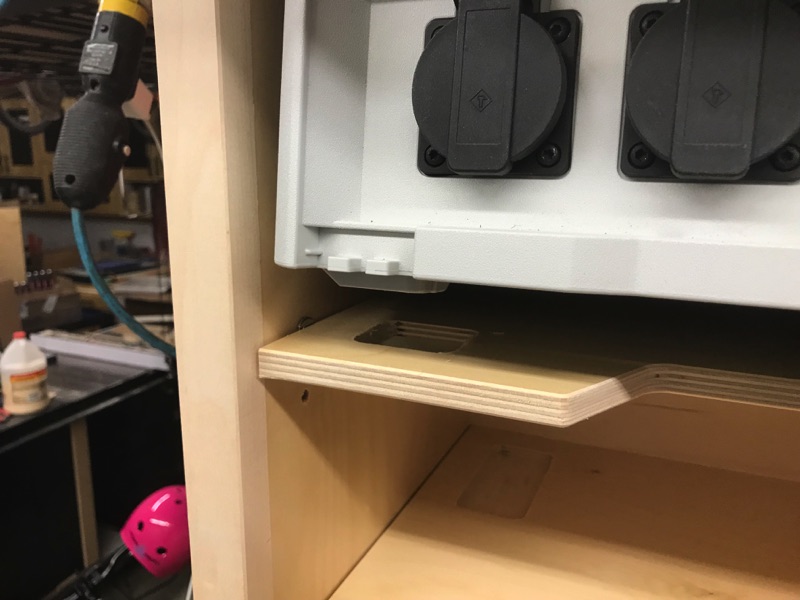
I got a near perfect fit.

img_3883.jpg


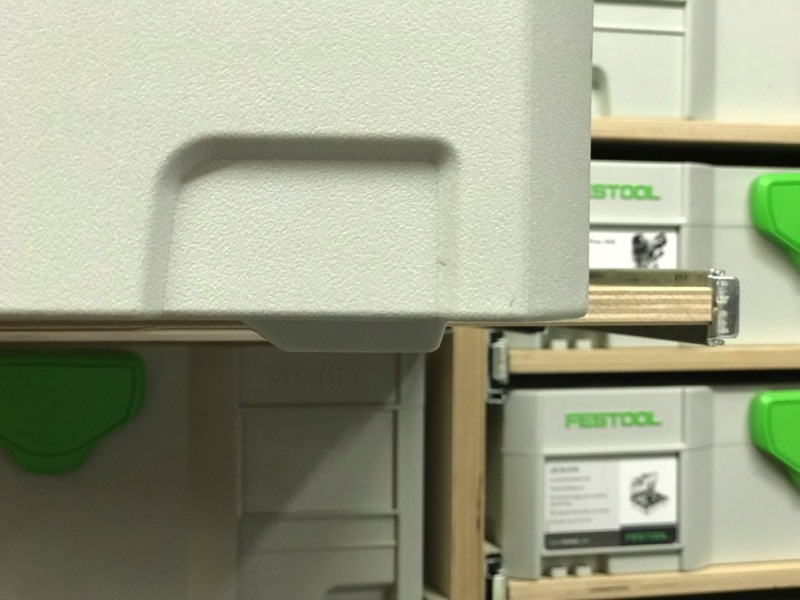
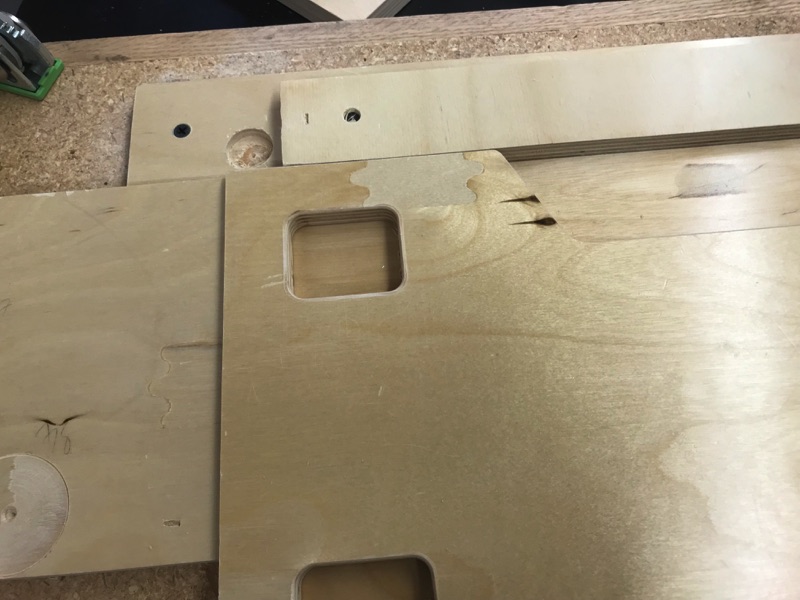
And the second position works just like on the standard T-Loc.

img_3884.jpg


With the template ready, I can now make a few of these. Only really need half a handful.

img_3888.jpg


Back in the jig over a fresh blank and trace with the router..

img_3889.jpg


Vola.

img_3890.jpg


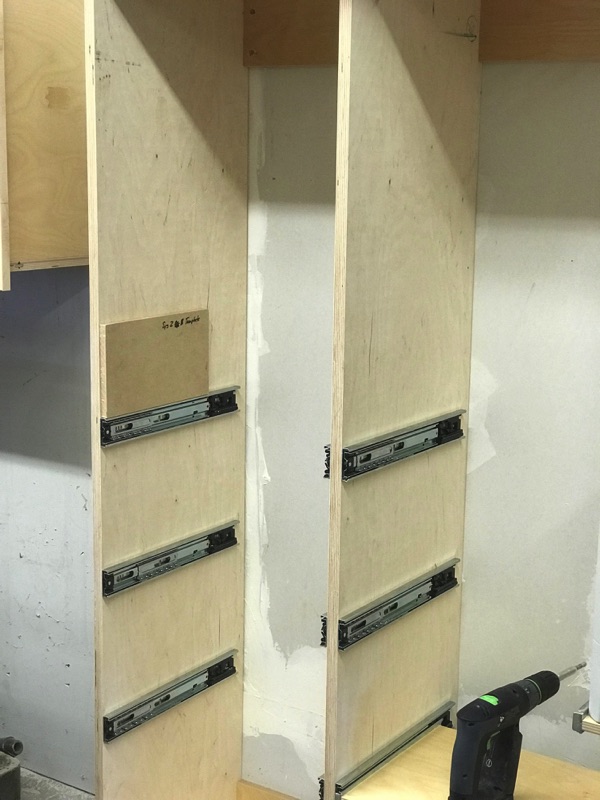
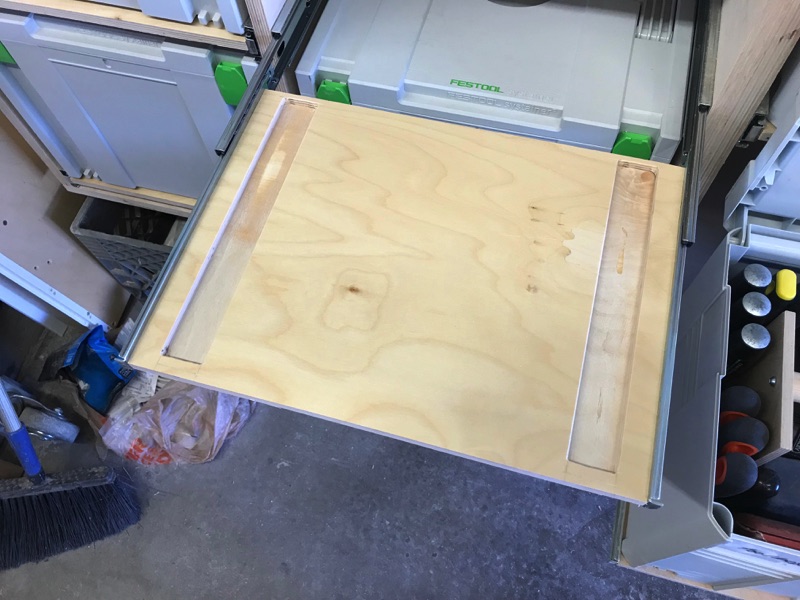
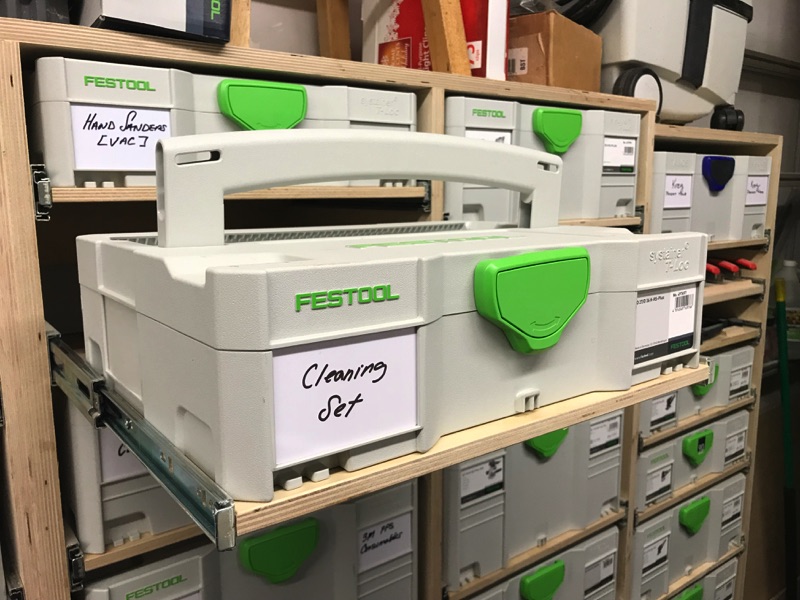
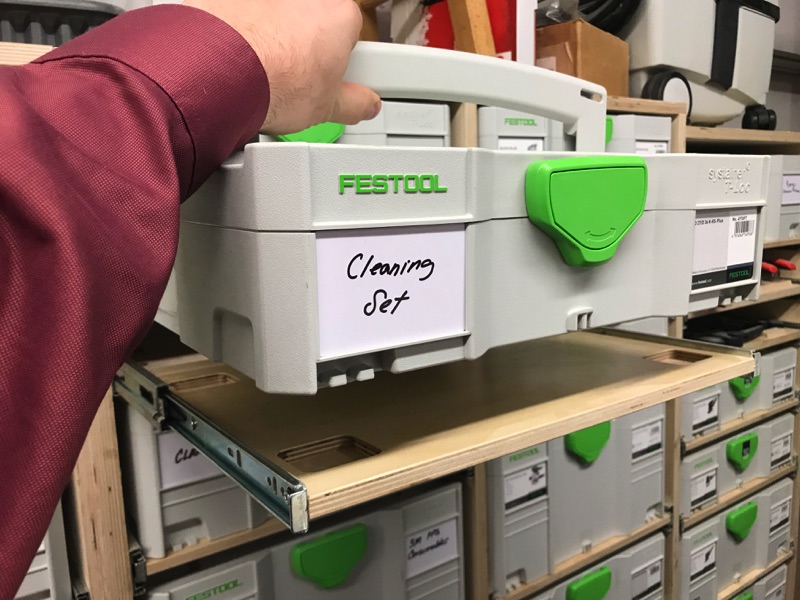
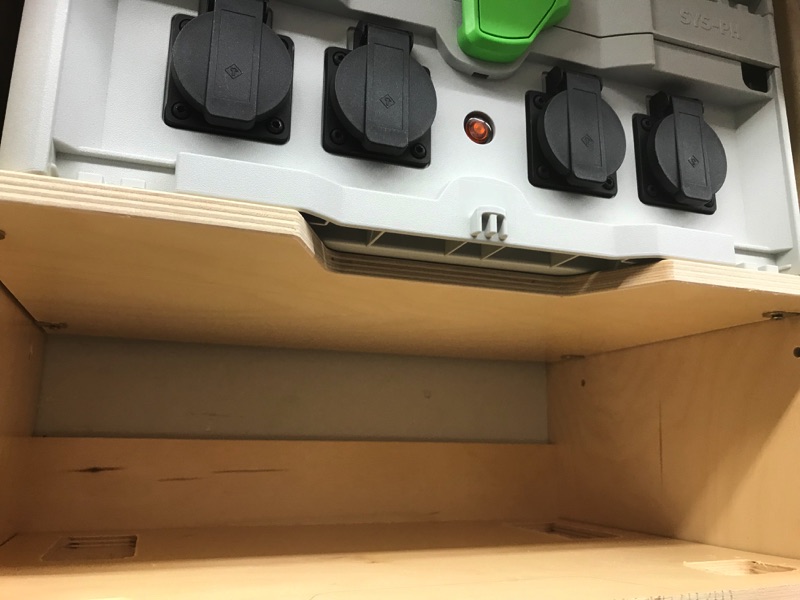
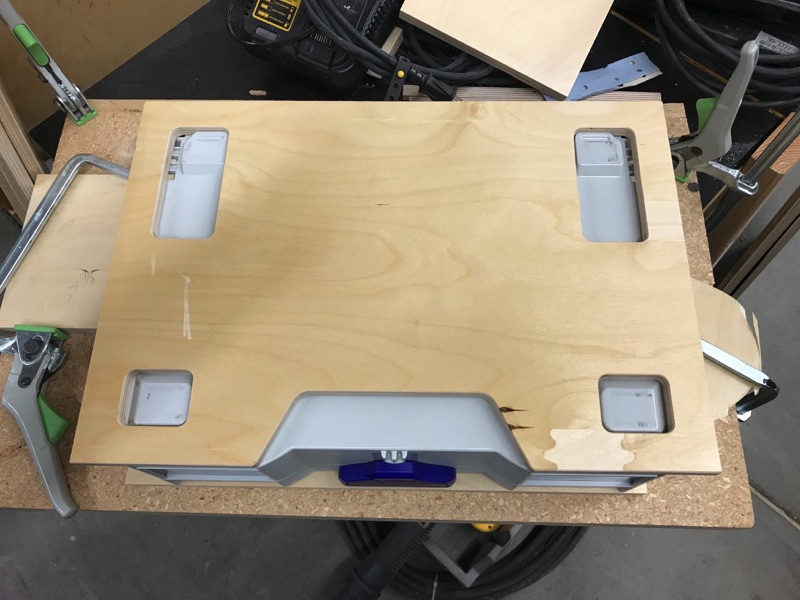
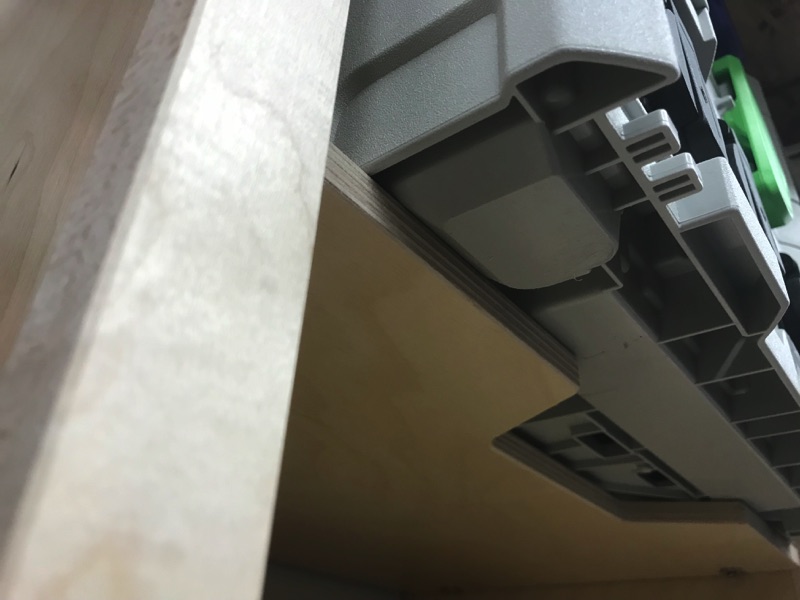
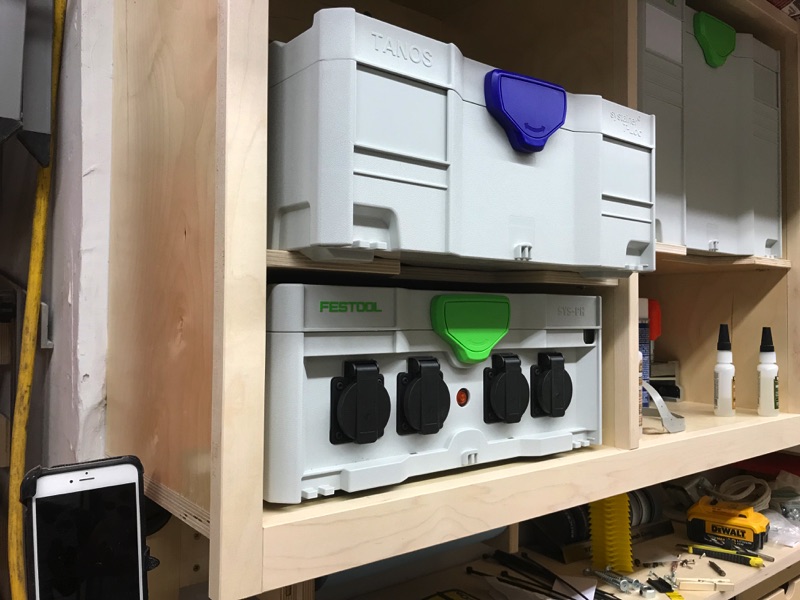
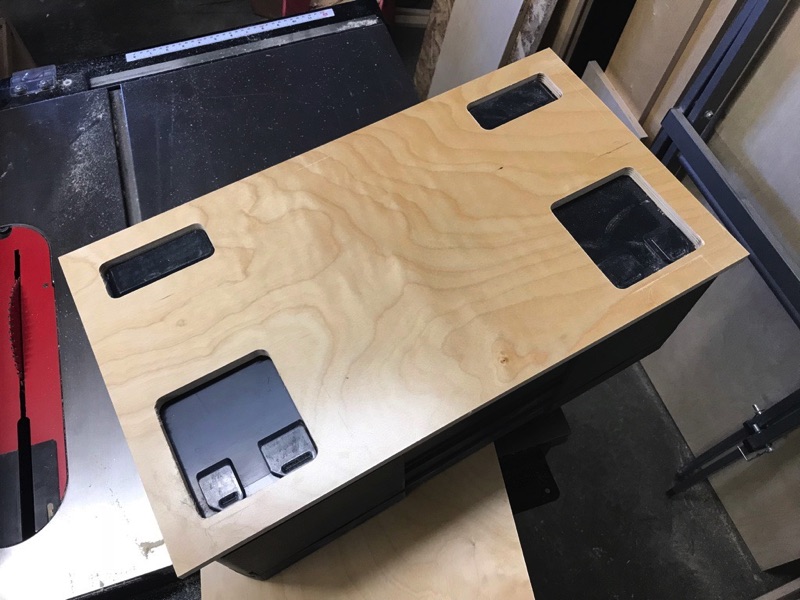
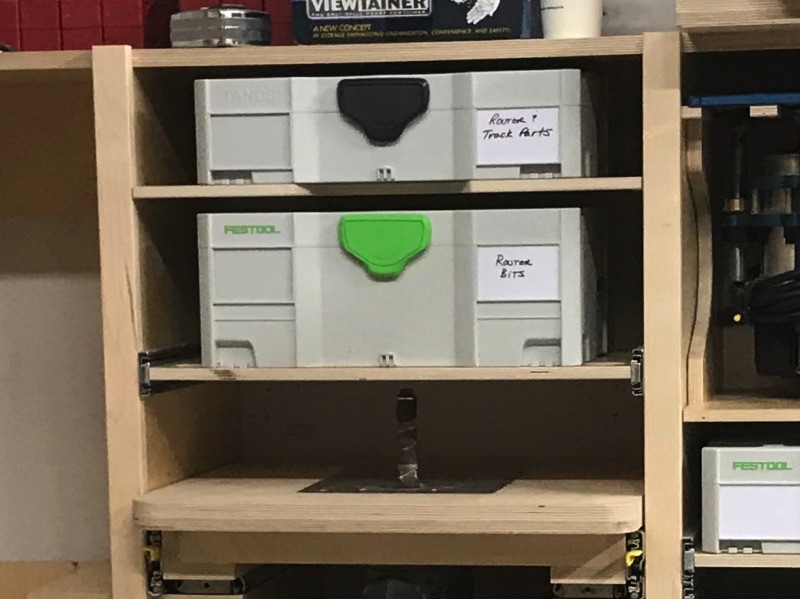
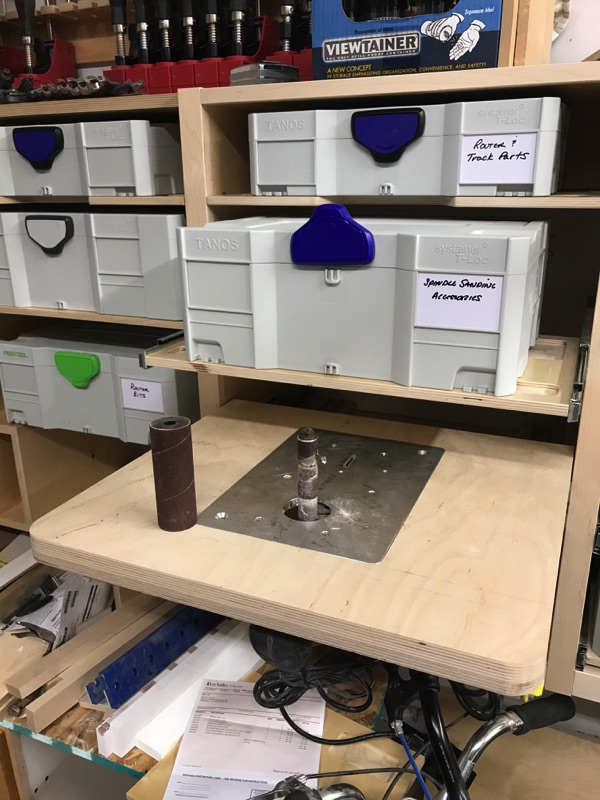
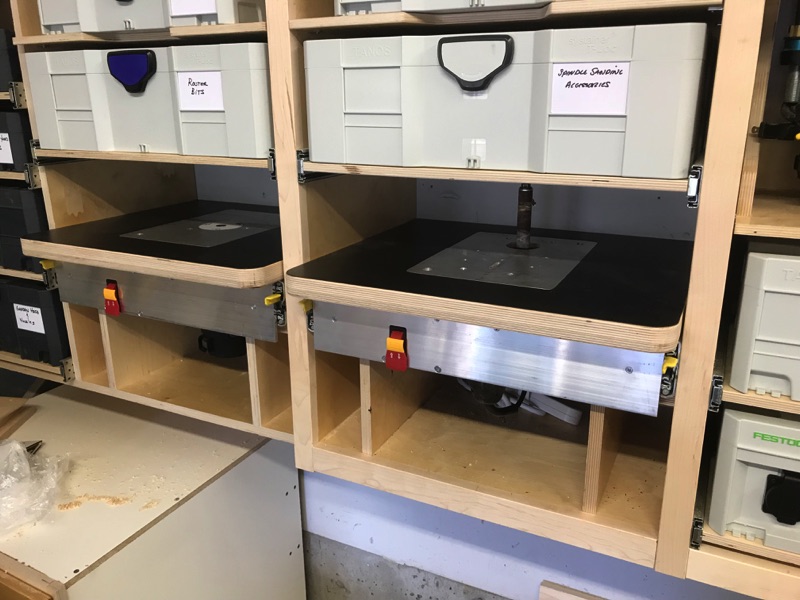
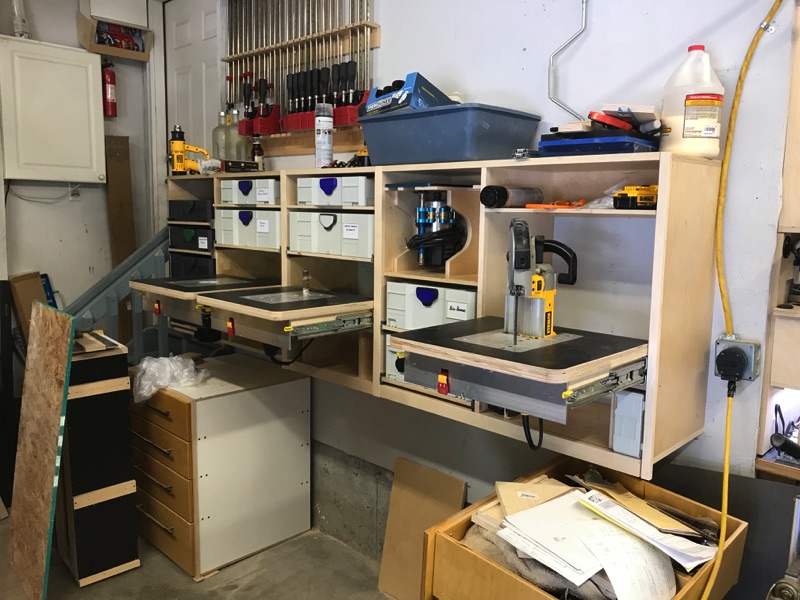
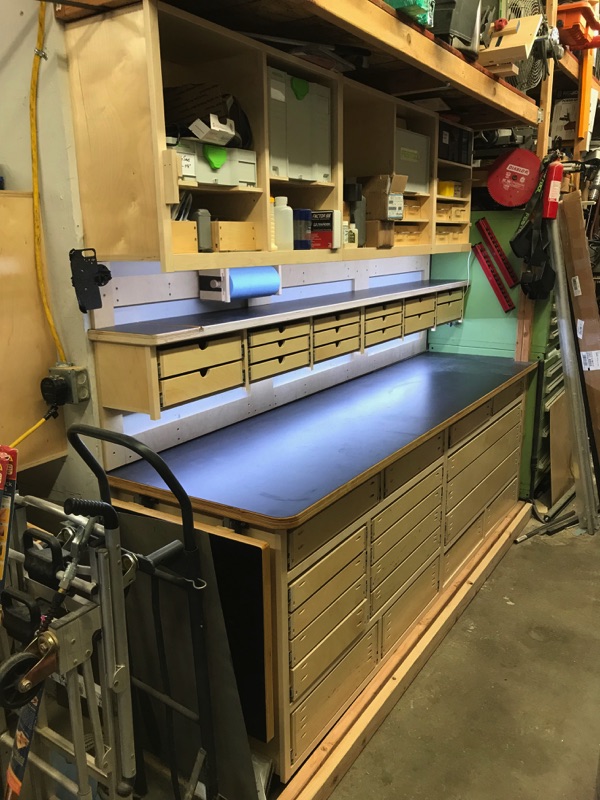
Finally received the backordered pair of drawer slides this week so I can pick up where I left off on the Sys-Port Workstation. Since I've made just a few shelves since then, I figure I'll do the easy stuff first. I start by setting the Systainer Midi shelves. Here's one that's push-release and one that's fixed with the standard sized Systainers to show perspective on the size difference.

img_3898 2.jpg


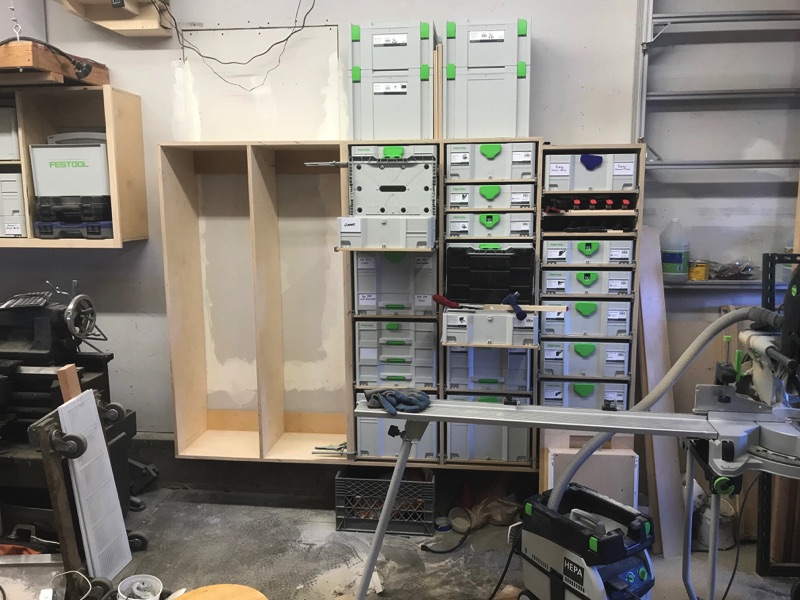
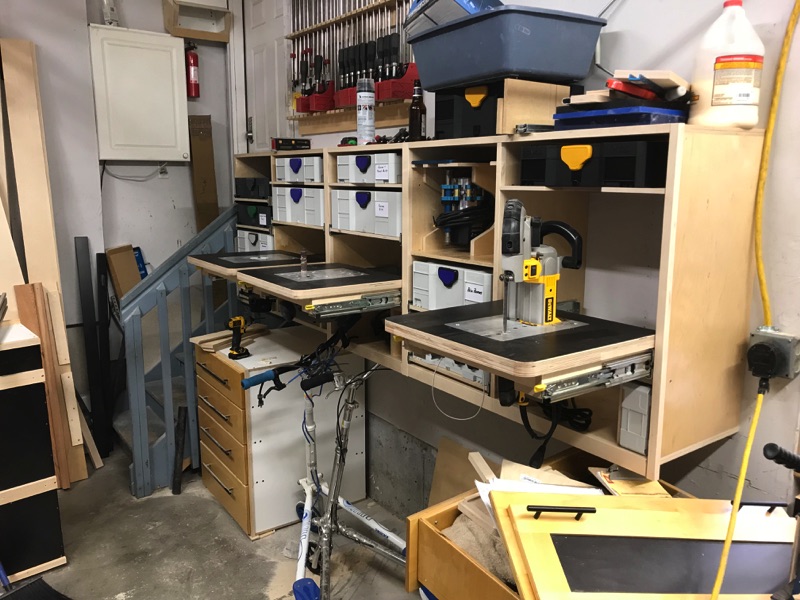
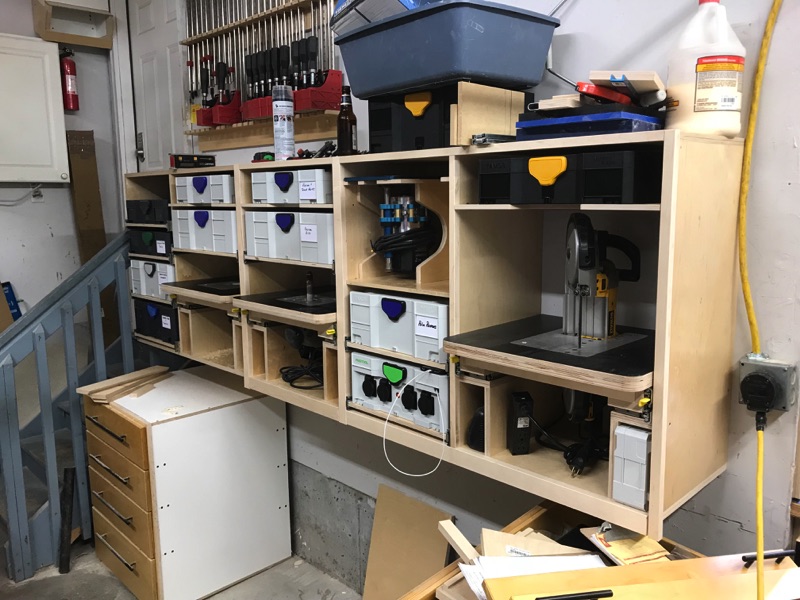
With the shelves in place, I can get a better view of it coming together and it becomes (just a little) more usable.

img_3898.jpg


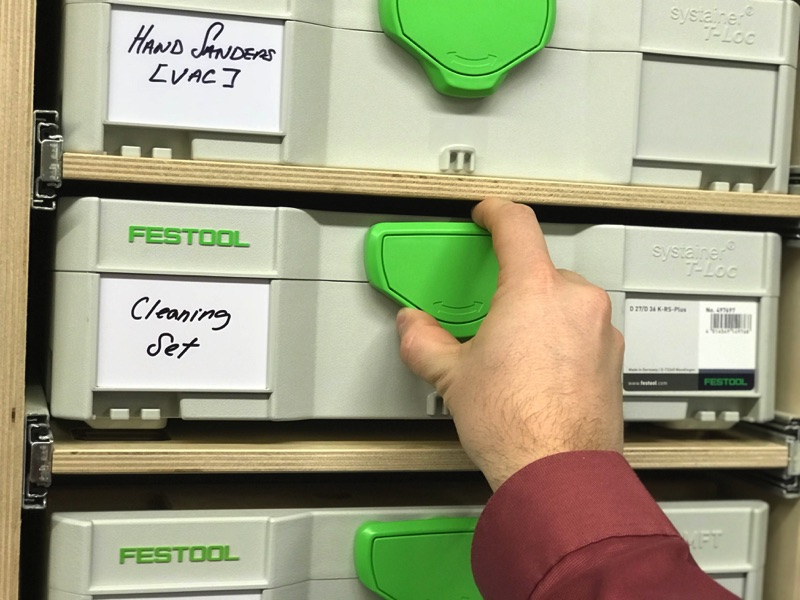
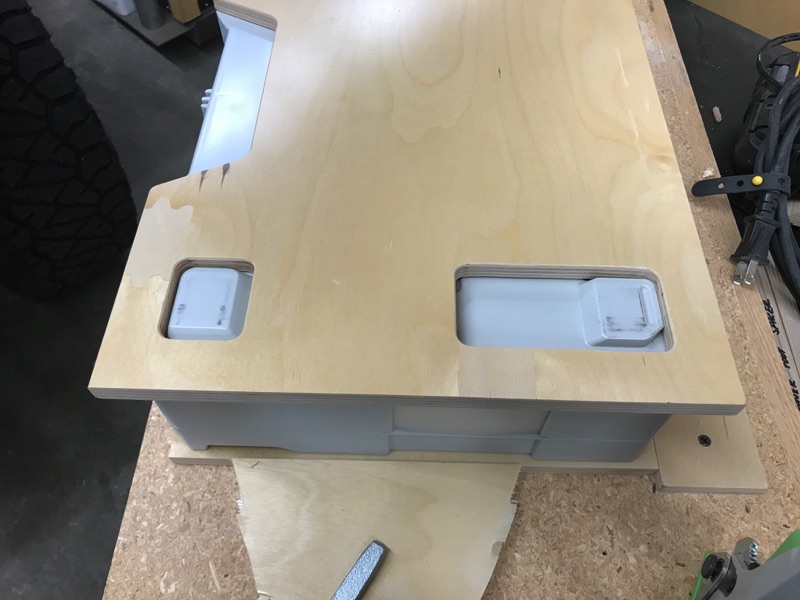
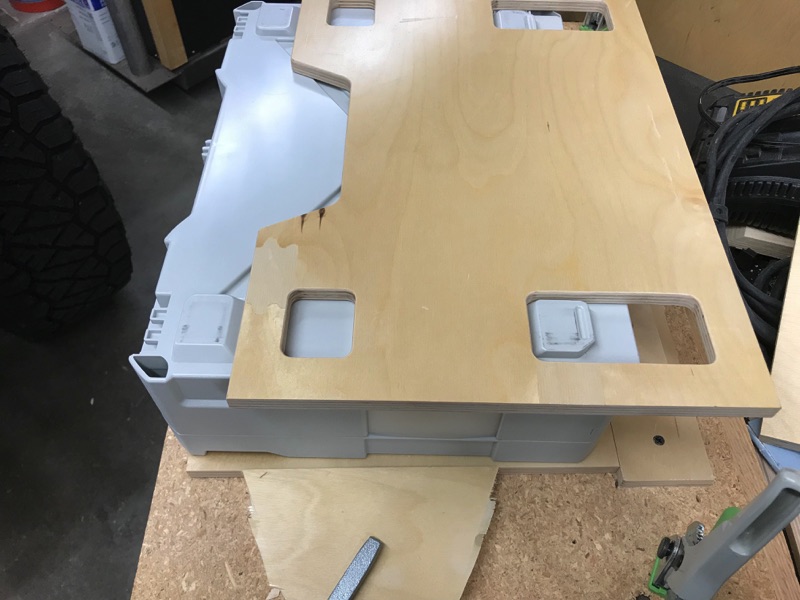
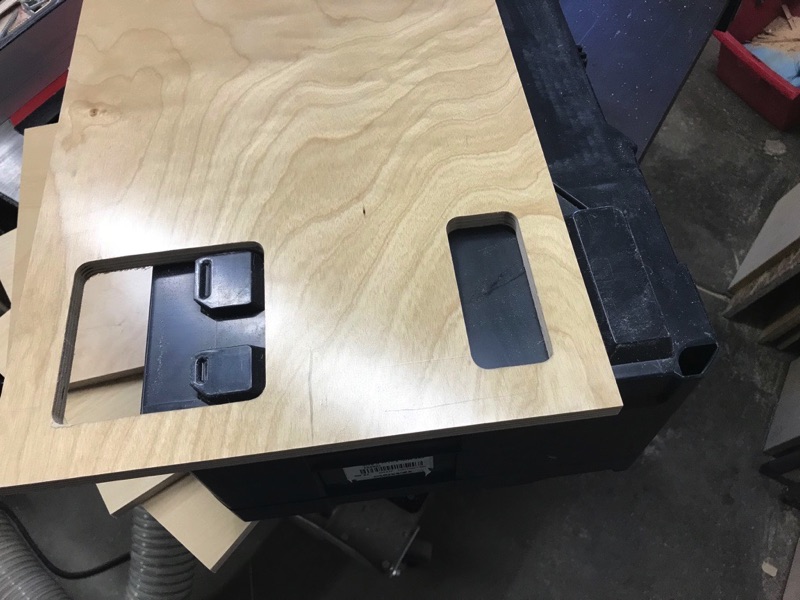
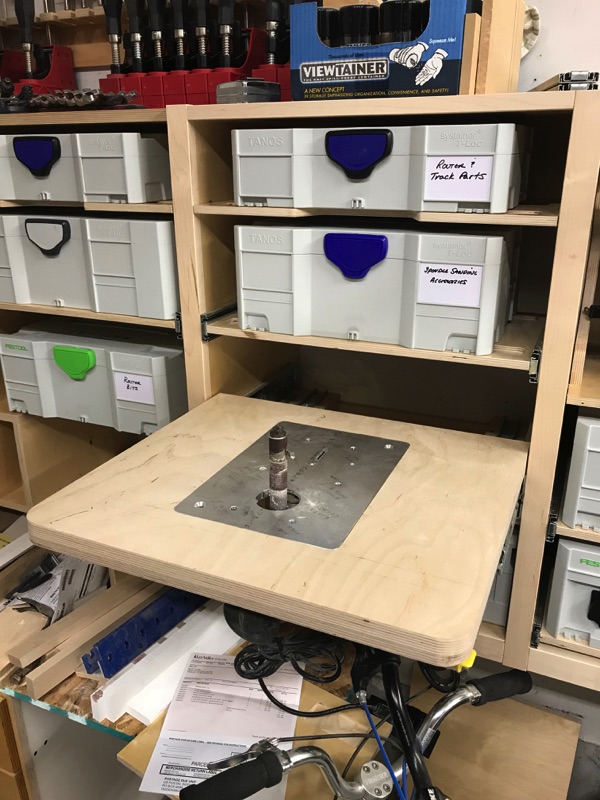
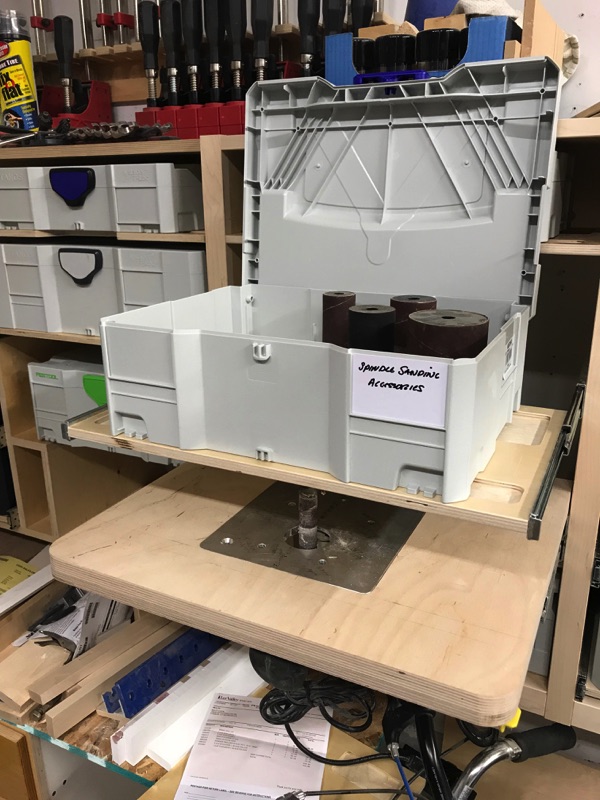
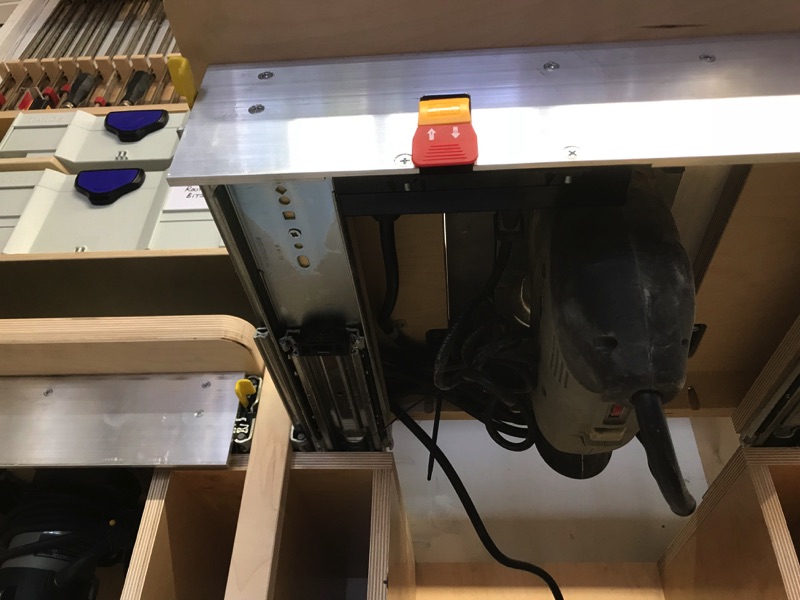
With the shelves in place, I can how show how the accessories can be nearly in the same place as the power tool. In the case of the spindle sander, all of the accessories can be stored right above the sander. Pretend the the sander is in use and I want to refresh the paper.

img_3998.jpg


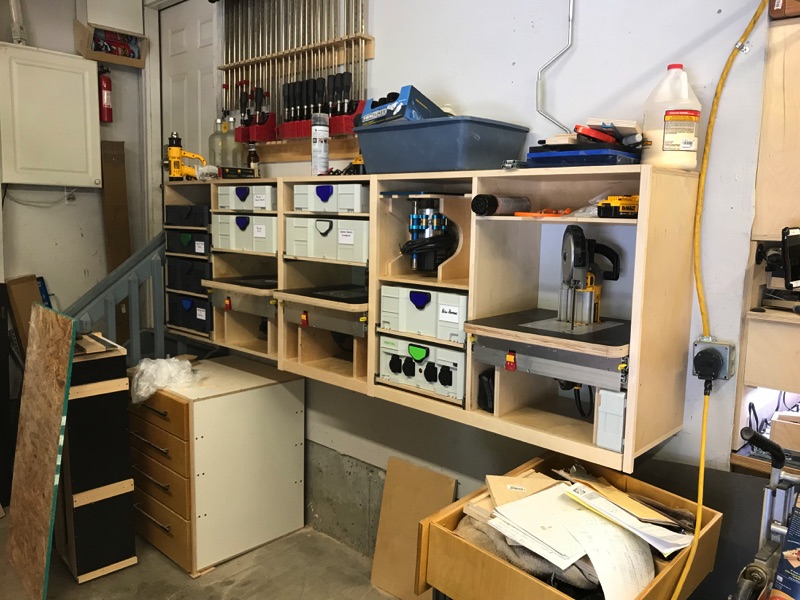
Without putting away the spindle sander, I can slide out the accessories, find the one I want, and remove it and the wrench from the systainer above without having to go anywhere.

img_4001 2.jpg


Then, half close the systainer, swap in the accessory, and then put it all away.

img_4002 2.jpg


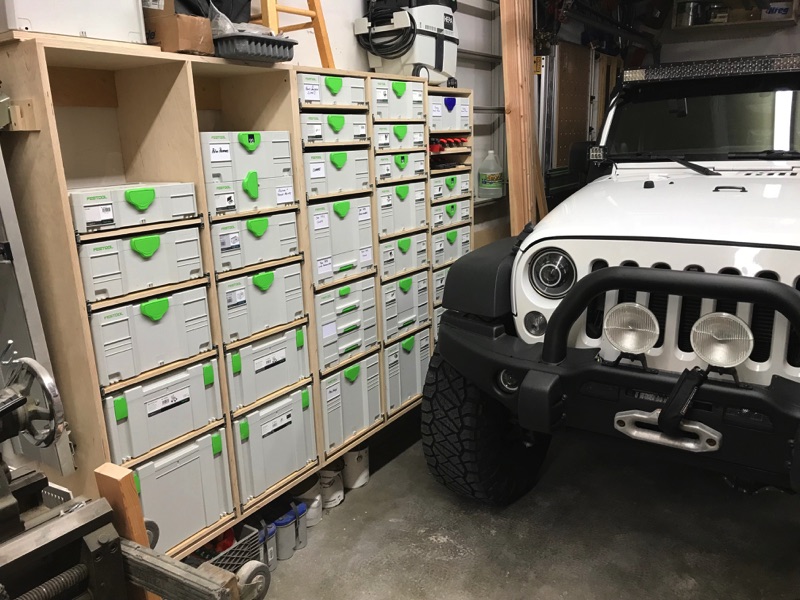
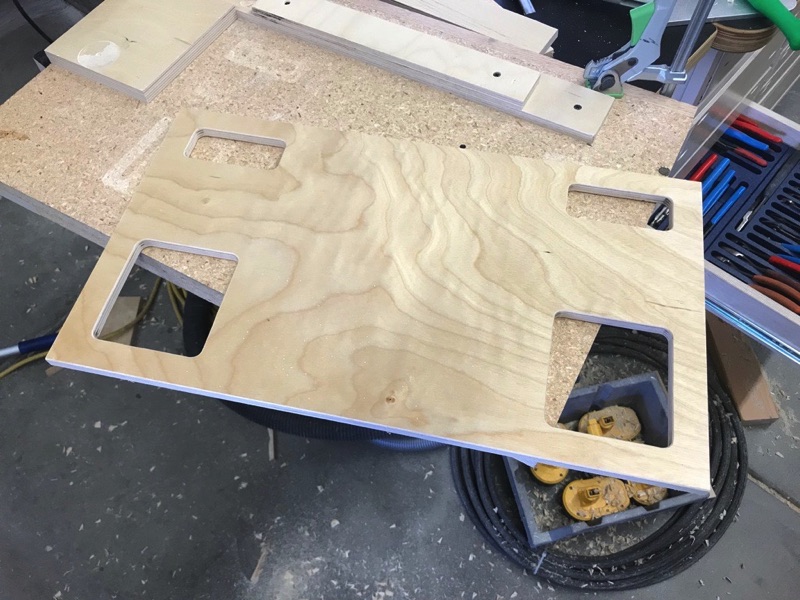
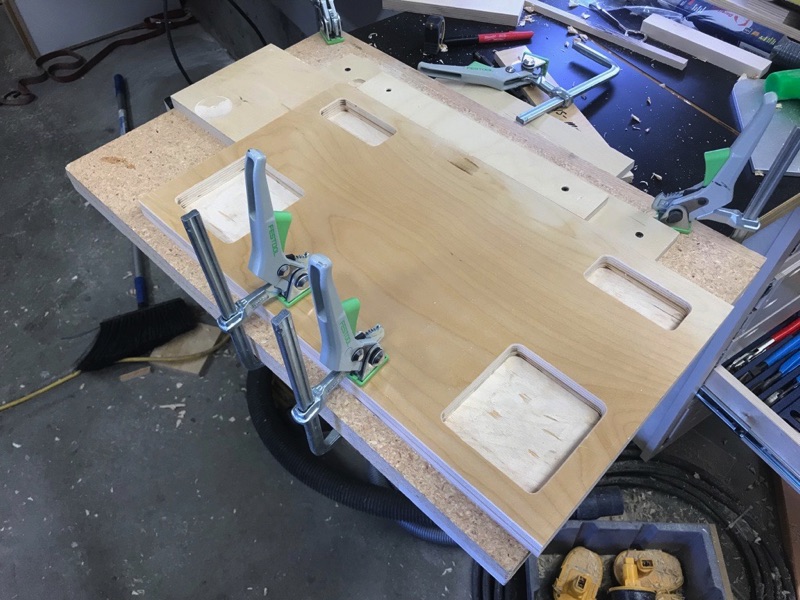
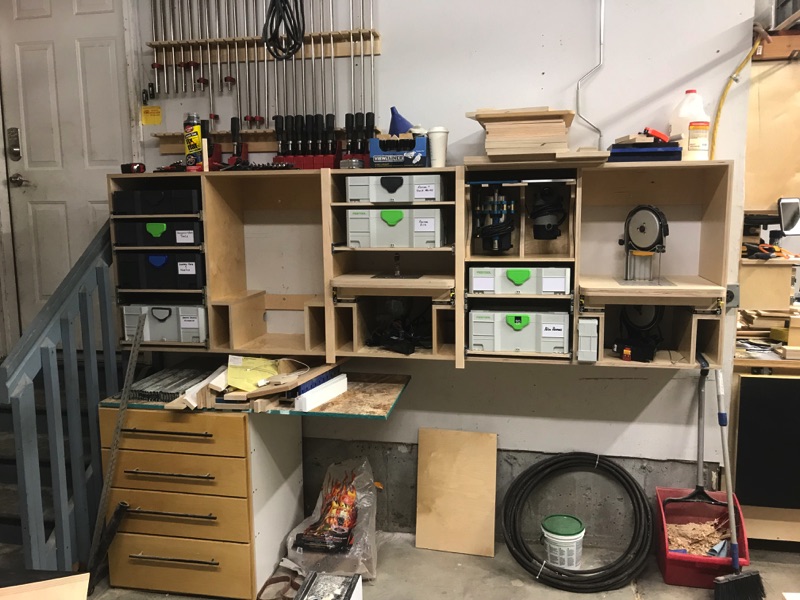
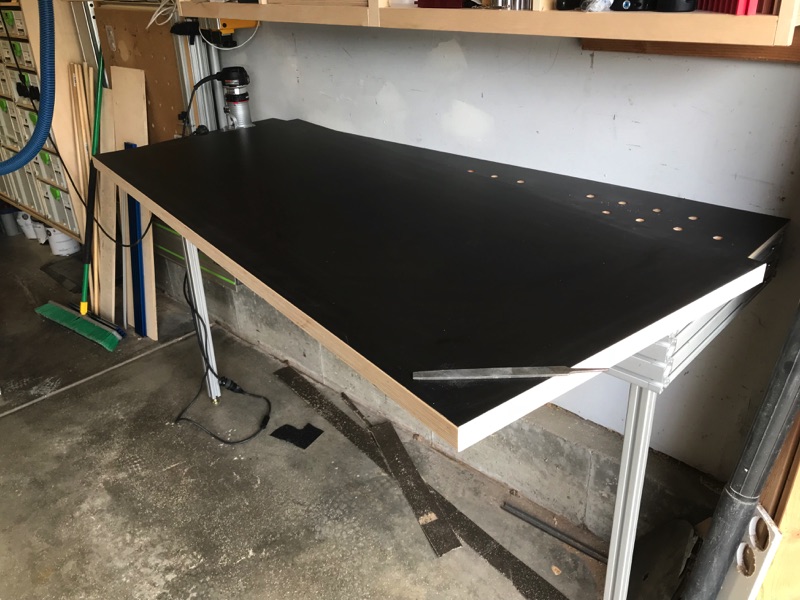
After getting all of the drawer and shelves in place, I finished the 3rd pull out and laminated all three.

img_4336.jpg


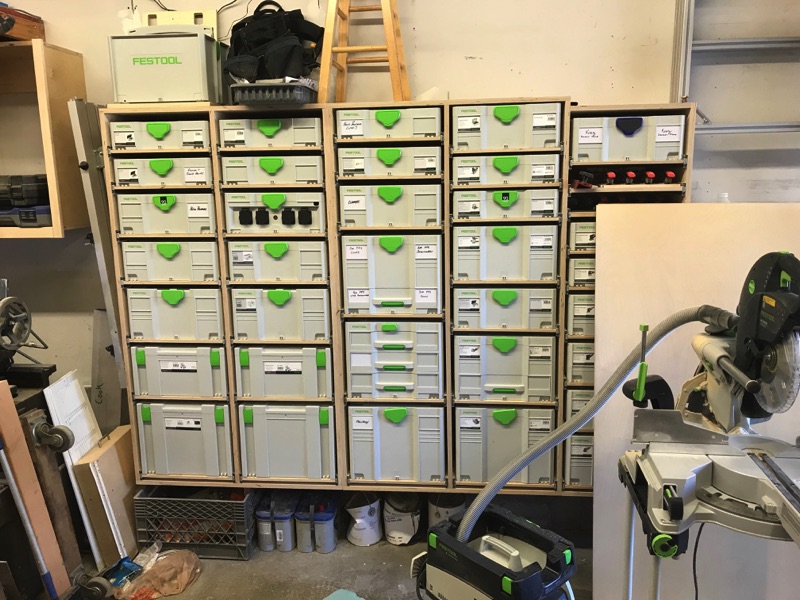
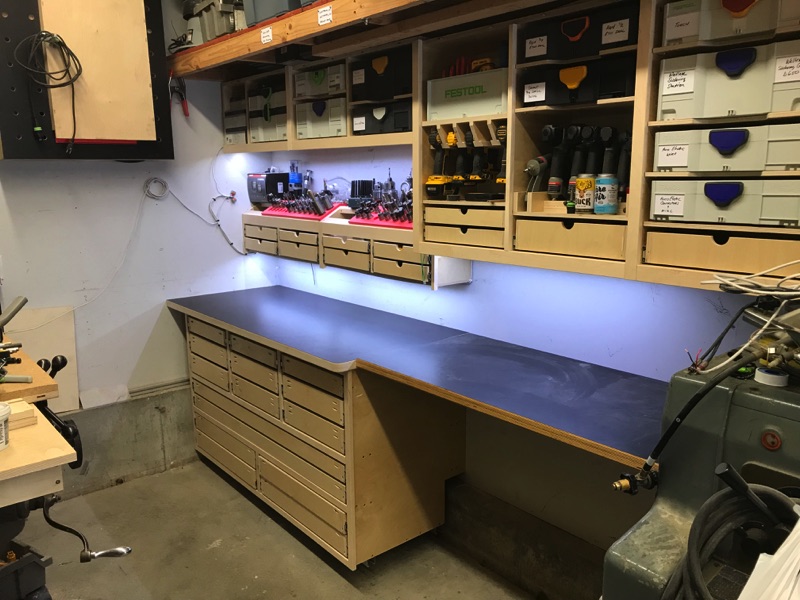
The concept is nearly completed. With the tools tucked away, I now have a fully functioning Sys-Port Workstation.

img_4342.jpg


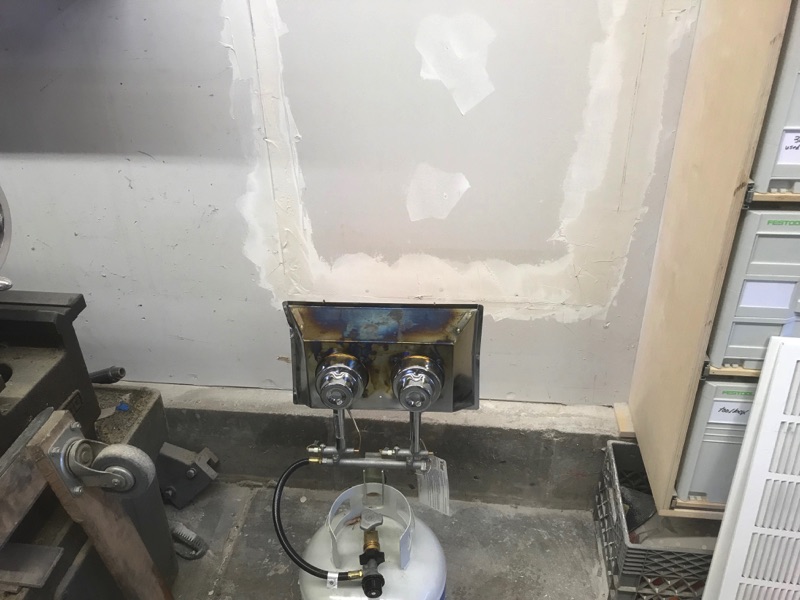
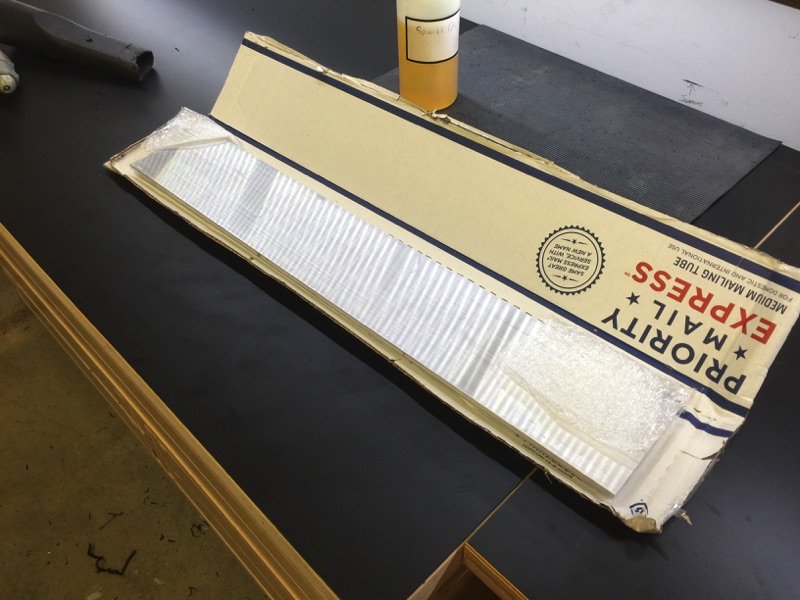
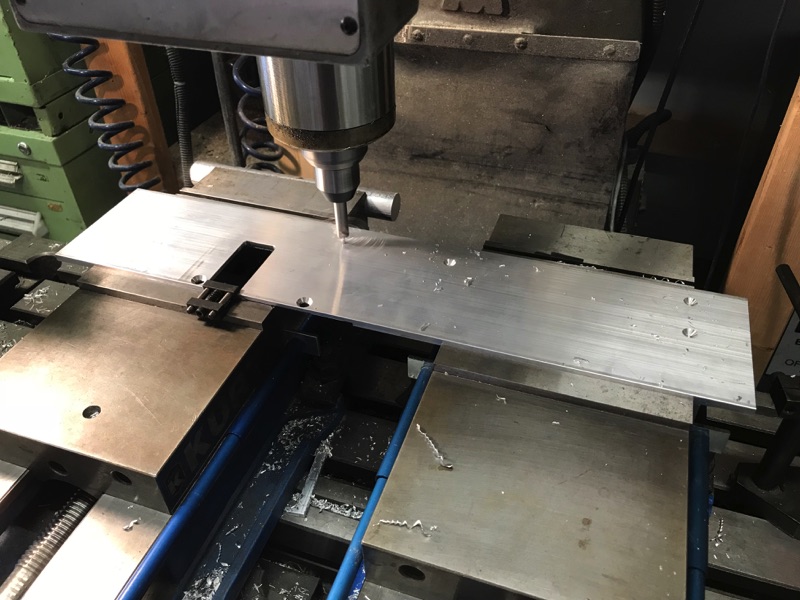
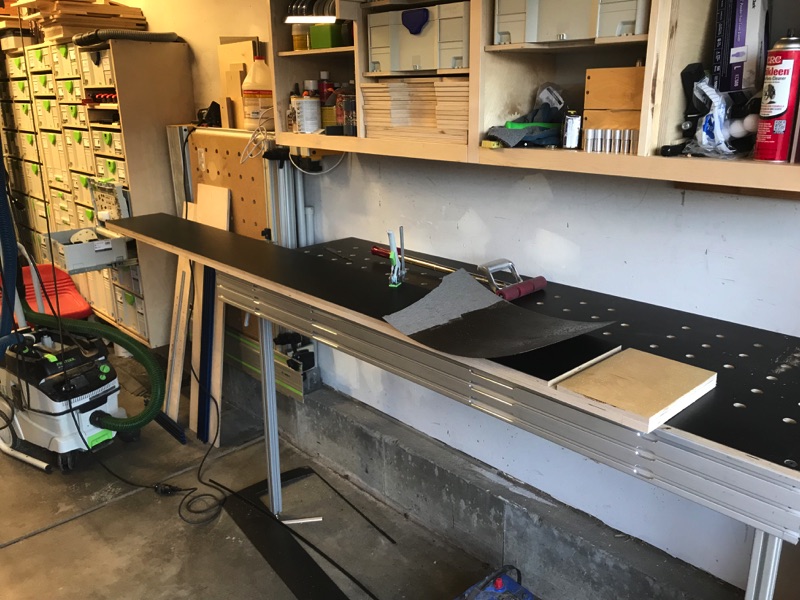
I've been using the Kreg power tool switches for my stationary router table for years so I decided to use the same one for all three of these power tools. It took me a few weeks to figure out exactly how I wanted to mount the switch and I settled on making a faceplate out of 1/4-inch 6160 for each of the slide out tables. I ordered 4. 1 to screw up as a test piece and 3 for the real deal.

img_0043.jpg


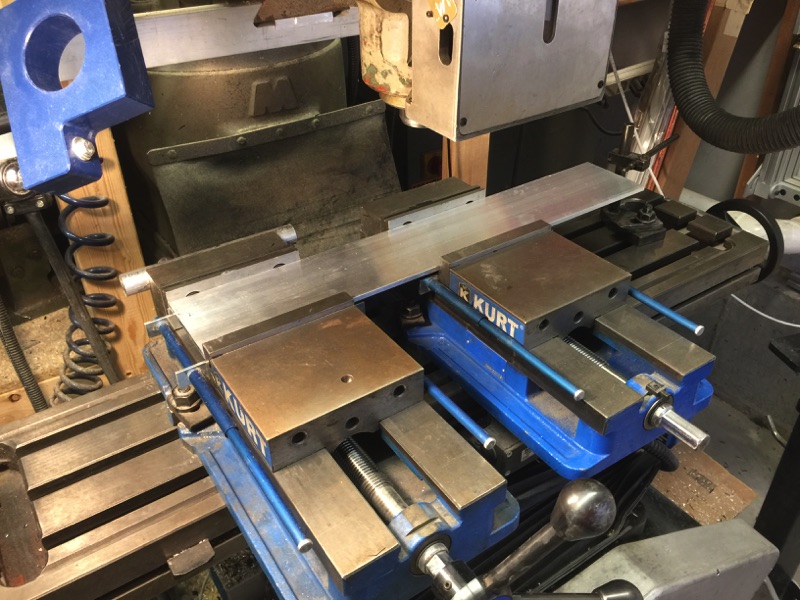
I was trying to hurry so I dropped the plate in, set a stop and got to machining.

img_0044.jpg


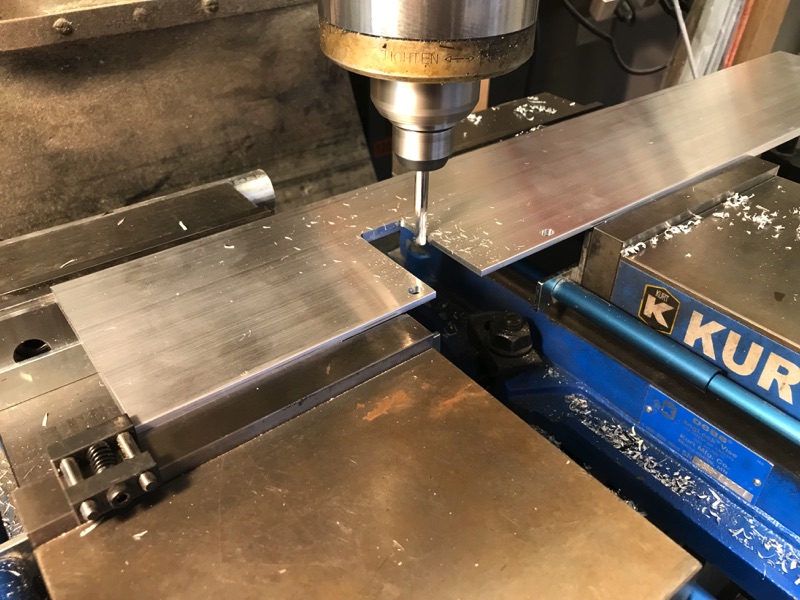
I needed to recess the switch into the plate so that the switch was easy to lift. I machined a pocket the size of the box leaving only about .100 of thickness. I figured I'd do one operation at a time so I banged out all 4 since I had it setup.

img_4516.jpg


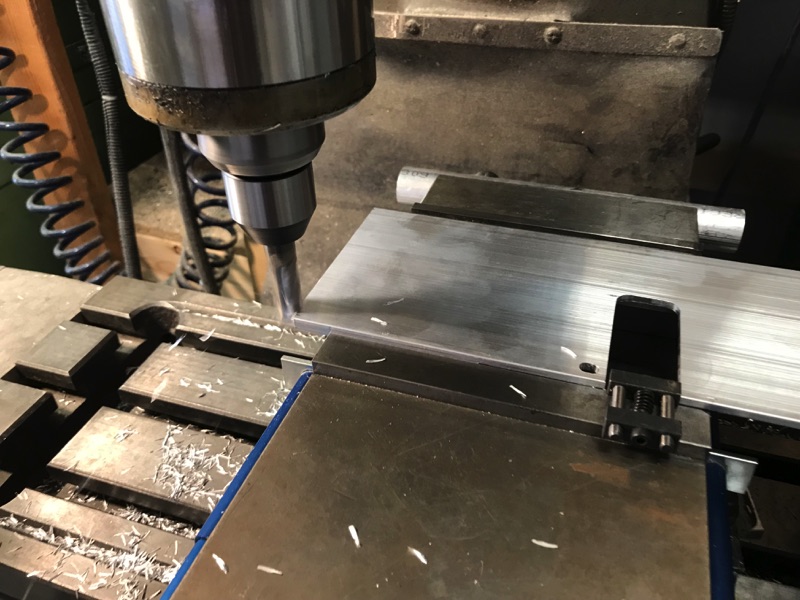
When I went to square the first end, I realized the error in my ways. By cutting the pocket and switch hole first, I realized that I had used the rough cut ends of the blanks to locate them against the stop on the far side making the pockets locate at varying locations in the blanks. Damn it, I always machine a reference edge first, I'm hurrying. After a little putzing around, I realized that I had left enough to either side of the hole to let the hole to become the new reference so I set a vise stop mid-vise so that all parts could not be aligned to it. Then I squared the left edge. Back on track.

img_4505.jpg


There was no need to remove the parts for the rest of the operations so I consolidated them into a single cycle. This is the last step where i countersink the holes for the attaching screws so they sit flush.

img_4522.jpg


and test fitting the first one right off the mill.

img_4523.jpg


And the other 2

img_4527.jpg


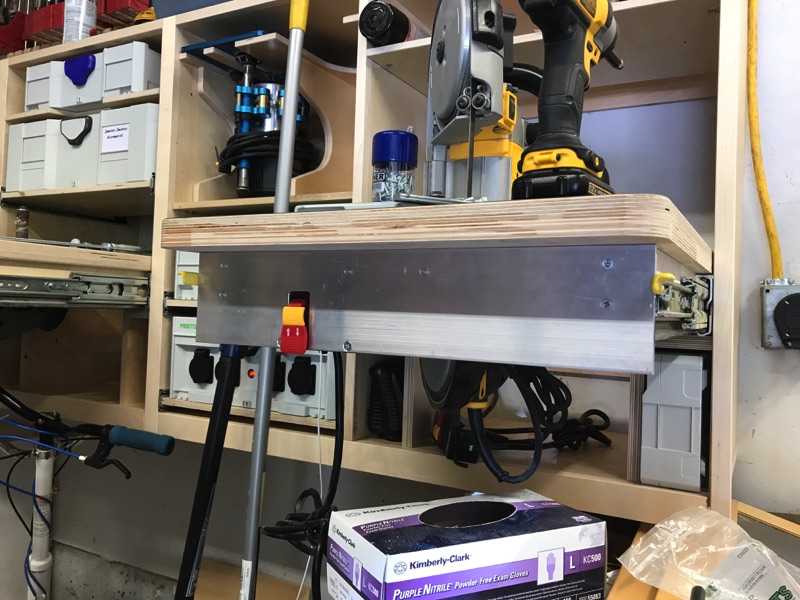
A little cable management to get the wires up and out of the way. Had to be creative and figure out how to make the switch wires permanent and the tool's wires temporary.

img_4530.jpg


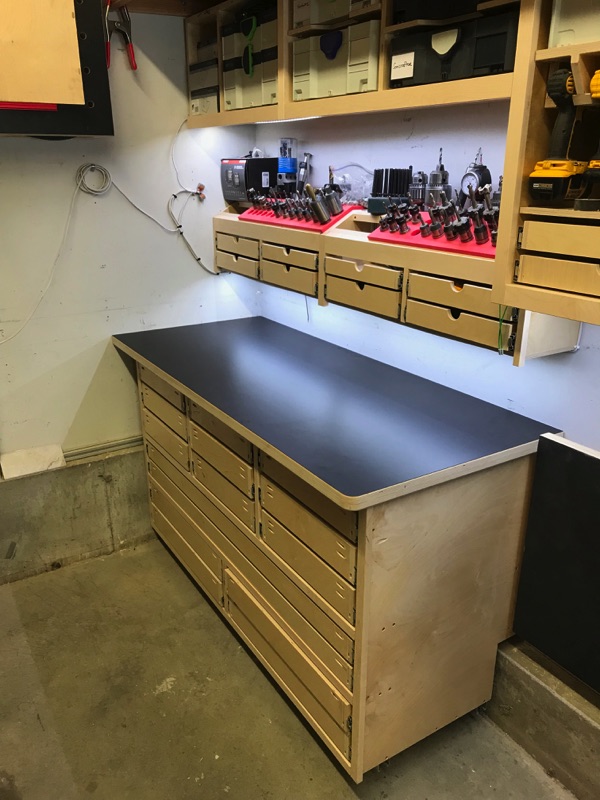
Minus a few trim boards, it's done.

img_4525.jpg


img_4524.jpg
 
OP
L

lilscorpion

Well-known member
Joined
Mar 15, 2010
Messages
3,599
Location
Colorado
Looks like I'm getting some of these pictures posted slightly out of order but here's the wrapping up of the bench surfaces. laminated the top and did a quick round-over of the edge.

IMG_4422.jpg


IMG_4424.jpg


With the flip-up top in the up position, this is now the work surface I have adjacent to the mill. 2x the surface to keep clean too I suppose.

IMG_4425.jpg


Mid-Uppers on the main bench have had a few random drops as a temporary top which worked just fine but left things feeling incomplete. Turning it into all one piece with laminate fills the void.

IMG_4531.jpg


Did something a little different here. The laminate sheets I can get locally at the big box store are only 8-feet long. To avoid having a seam, I decided to add a t-track slot so I can attach stuff in the future. Maybe something like a tools rack for a dead blow hammer, tape measure, marking utensils...ideas?

IMG_4543.jpg
 
OP
L

lilscorpion

Well-known member
Joined
Mar 15, 2010
Messages
3,599
Location
Colorado
Firebrick43 said:
Can you share some details of your spindle sander?


I when looking for router table ideas a few years ago I stumbled across this picture on images.google.com. Shows a router plate with a portable spindle sander attached to it. Had to have one.

eb3505251d704a2a69425ed80af7f32a.jpg

During research, found that it’s the Porter Cable 121.

bcf9c73a47a761368d1589ecaec8f2ca.jpg


It’s mounted in a Rockler woodworking PC121 router plate. Even a few years ago both the spindle sander and the router table plate had been discontinued. I found mine used on EBay for about $200 in near new condition and then made a router table adapter plate for it.

After getting mine I learned very quickly that the Spindle sander is very difficult to use freehand, I tried it a few times. That’s probably why it was disco’d.

Today you can still find them in very good condition on eBay for between $200 and $300. The plate isn’t easy to find however, I just looked and someone is selling a spindle sander and plate combo right now for $300. Not a bad deal - https://rover.ebay.com/rover/0/0/0?mpre=https://www.ebay.com/ulk/itm/192586971181

Consumables can still be had. As luck would have it, many if the bench top spindle sanders use the same consumables. Steelex makes a variety of grits -

2c7ba65c45921d62953006f8fc7fcc25.jpg

Powertech also sells their version (probably made in the same place)

ca6bd80b4c761e2d196f5878ad78c356.jpg

The paper cylinders mount on rubber cylinders and Powertech’s version works on the PC121

69de511174d5424d1ee70c2553c61b18.jpg

Mounted in a table I find it beyond exceptionally useful. Most other spindle sanders are constrained by a fixed table and some kind of machine casing. This little thing can be in a full sized table and then move to a small table top unit a few minutes later.
 

Attachments

  • 69de511174d5424d1ee70c2553c61b18.jpg
    69de511174d5424d1ee70c2553c61b18.jpg
    138 KB · Views: 0
  • ca6bd80b4c761e2d196f5878ad78c356.jpg
    ca6bd80b4c761e2d196f5878ad78c356.jpg
    137.7 KB · Views: 0
  • 2c7ba65c45921d62953006f8fc7fcc25.jpg
    2c7ba65c45921d62953006f8fc7fcc25.jpg
    148.8 KB · Views: 0
  • bcf9c73a47a761368d1589ecaec8f2ca.jpg
    bcf9c73a47a761368d1589ecaec8f2ca.jpg
    158.3 KB · Views: 0
  • eb3505251d704a2a69425ed80af7f32a.jpg
    eb3505251d704a2a69425ed80af7f32a.jpg
    282.1 KB · Views: 0
Last edited:

Firebrick43

Well-known member
Joined
May 12, 2015
Messages
13,971
Location
West central Indiana
Thank you very much!

Looks like mlcs, grizzly, and triton have recently come out with something similar to the porter cable. Wonder if a custom made play could attach to them? I will have to look into it.

Thanks once again
 
OP
L

lilscorpion

Well-known member
Joined
Mar 15, 2010
Messages
3,599
Location
Colorado
Firebrick43 said:
Thank you very much!

Looks like mlcs, grizzly, and triton have recently come out with something similar to the porter cable. Wonder if a custom made play could attach to them? I will have to look into it.

Thanks once again


I do t think anyone is making a hand held unit like the PC 121 but I did find this one that clearly could be mounted to a plate by drilling and tapping maybe half a dozen holes.

2095f8252404eec4cb7144f93a066c36.jpg

1695b4ede4b1cebb6a9b20c4d403d174.jpg

You’d lose the taper adjustment though..

580f7ac9974604f4fd09eaa679a8cf67.jpg
 

Attachments

  • 580f7ac9974604f4fd09eaa679a8cf67.jpg
    580f7ac9974604f4fd09eaa679a8cf67.jpg
    140.9 KB · Views: 0
  • 1695b4ede4b1cebb6a9b20c4d403d174.jpg
    1695b4ede4b1cebb6a9b20c4d403d174.jpg
    149.7 KB · Views: 0
  • 2095f8252404eec4cb7144f93a066c36.jpg
    2095f8252404eec4cb7144f93a066c36.jpg
    163.6 KB · Views: 0

Firebrick43

Well-known member
Joined
May 12, 2015
Messages
13,971
Location
West central Indiana
OP
L

lilscorpion

Well-known member
Joined
Mar 15, 2010
Messages
3,599
Location
Colorado
Firebrick43 said:

Wow, haven’t seen those yet. That’s really cool someone is making them now. I’m sure they have a replaceable shoe so they’d have to be helps on by screws. If they are, a router plate is easy money. Awesome find.

Edit: it had nearly the same screw configuration on the shoe..

0fee66074be98beb60a27ecd930b5580.jpg
 

Attachments

  • 0fee66074be98beb60a27ecd930b5580.jpg
    0fee66074be98beb60a27ecd930b5580.jpg
    167.2 KB · Views: 0

Bob Heine

ALLIANCE MEMBER
Joined
Oct 24, 2009
Messages
10,703
Location
Boca Raton, Florida
I've always used my drill press with a drill mount drum but it doesn't oscillate. I don't need one that often but the MLCS spindle sander on sale with free shipping is too good to pass up. It will be attached to an aluminum Bosch router plate.
 
OP
L

lilscorpion

Well-known member
Joined
Mar 15, 2010
Messages
3,599
Location
Colorado
I've always used my drill press with a drill mount drum but it doesn't oscillate. I don't need one that often but the MLCS spindle sander on sale with free shipping is too good to pass up. It will be attached to an aluminum Bosch router plate.

I don't need one and yet I find myself surprisingly tempted to order one anyway. Would fit nicely in a systainer as a portable unit.
 
OP
L

lilscorpion

Well-known member
Joined
Mar 15, 2010
Messages
3,599
Location
Colorado
I ordered mine.


Me too. Looking forward to seeing how good it is for only $75 all in. Didn’t realize until after that these use 3” long sandpaper cylinders instead of the 4” long ones my Porter Cable SS uses. This now means that I either need to cut the 4-inchers down or keep both sizes on hand.
 
OP
L

lilscorpion

Well-known member
Joined
Mar 15, 2010
Messages
3,599
Location
Colorado
Can you fit them all in the same bin?

I was tempted to order one too, but I resisted, so far.


There’s plenty of room to fit the sander and both sizes of consumables in the Systainer MIDI above the pull out sanding table. The new one I’ll use in a portable fashion though so I may decide to put it in its own Systainer. Think I need to use it first before I’ll make up my mind.
 
OP
L

lilscorpion

Well-known member
Joined
Mar 15, 2010
Messages
3,599
Location
Colorado
Been out of town and busy for most of July... The progress on the new shelves looks good.

How's the FT-5 build going?


Haven’t made progress on it since the last update. I’ve been stuck (haven’t found them yet) at needing to get two 80/20 90* internal connectors to set the motor mount rack (the right way)
 

Strouty

Well-known member
Joined
Mar 21, 2010
Messages
38,206
Location
Southern Maine
There’s plenty of room to fit the sander and both sizes of consumables in the Systainer MIDI above the pull out sanding table. The new one I’ll use in a portable fashion though so I may decide to put it in its own Systainer. Think I need to use it first before I’ll make up my mind.


If there is plenty of room for it, I would keep it together rather than taking up another systainer for essentially the same thing. It isn’t like you will get confused as to whether the 3” or 4” is the same.
 
OP
L

lilscorpion

Well-known member
Joined
Mar 15, 2010
Messages
3,599
Location
Colorado
If there is plenty of room for it, I would keep it together rather than taking up another systainer for essentially the same thing. It isn’t like you will get confused as to whether the 3” or 4” is the same.


Plenty of room. I plan to make an insert to organize the consumables too so keeping the sizes and grits together (or separate depending on your view) shouldn’t be a problem. Agreed that all of it should be together or I’m deviating from my consolidation plan immediately.
 
To avoid these ads, REGISTER NOW!
Top Bottom