To avoid these ads, REGISTER NOW!

Vintage Craftsman Table Saw Thread

Joined
Sep 13, 2020
Messages
148
Location
Canton, MI
Wow, that's a heckuva setup!
Thanks!

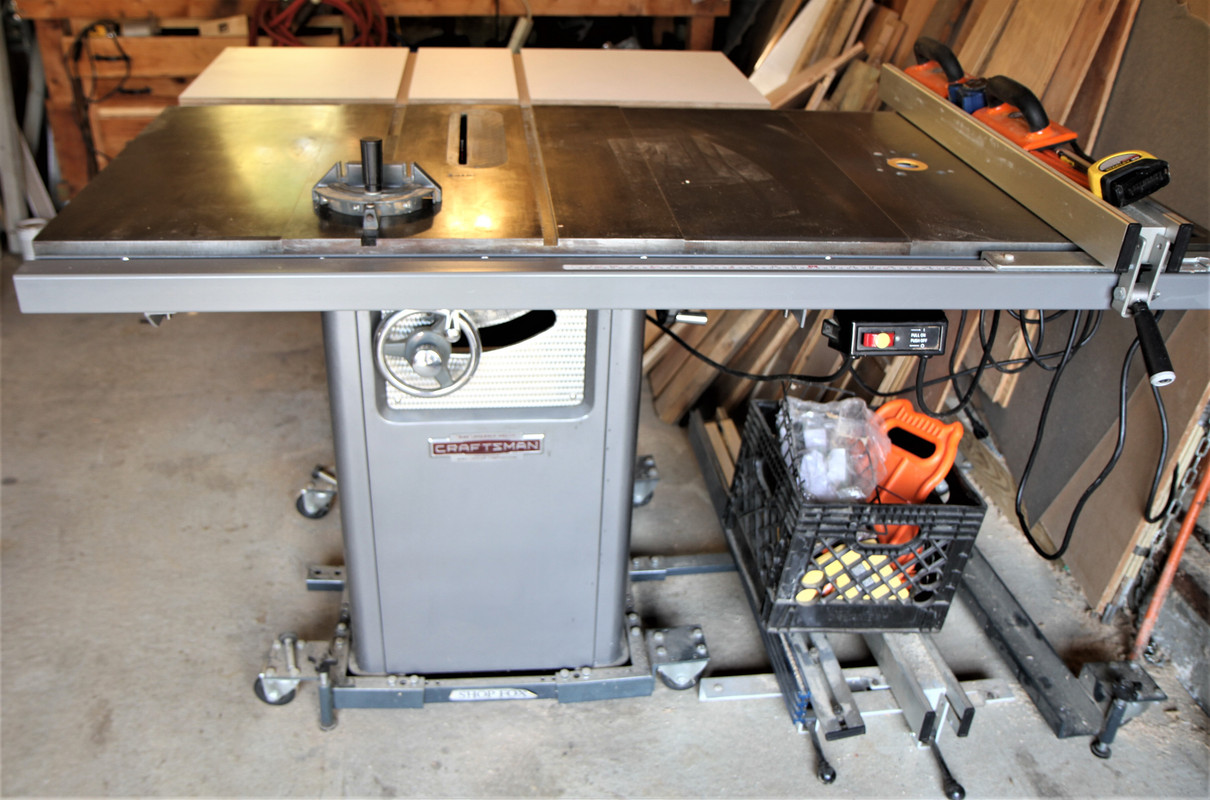
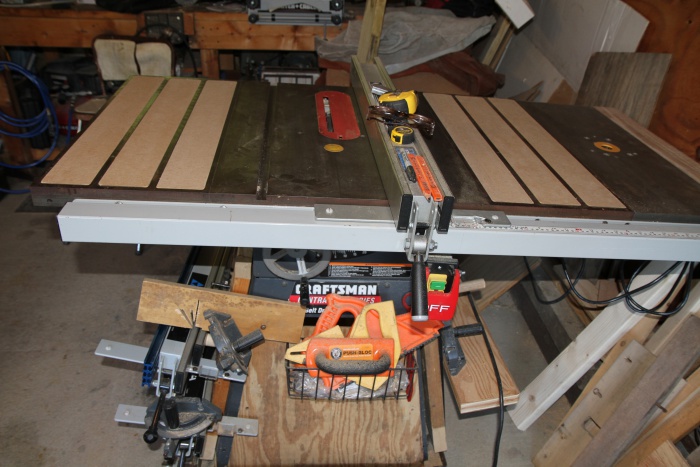
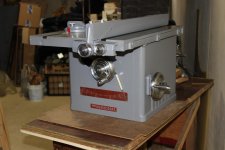
I work in my basement, so everything needs to be on wheels. This has got a Shop Fox base with an extra set of casters (6 total) that will allow the whole thing to rotate 360 degrees

The best mods were the Vega Pro 40 fence, 2 additional cast iron table extensions (eBay purchases), folding outfeed table (how did I ever get by without one?) and the SharkGuard system. The saw cuts well for only 1hp, but anything super hard/thick, will cause it to bog down a bit.

I've got most of the saw dust under control now with the upper intake, and a lower collection:

y4mpFKJ1Fa-YduQJj5dqsW4_I0-0guWDVyZQG2x1fdtej8s_yz1USd5YsQmNx0qeHpQK6U0-yADzj0pK-3z1oYS3wFcOF7zkRg9c3Cnf6X8if8fStPupGYY7N-G72aPF9URizcF25b6yRkF-LY-h3aKPTTGgju8kQ_1LDopWIjaoj0Bbl5MLkqkMhcJxxGZ5oEp


A bit of a hijack (I apologize):

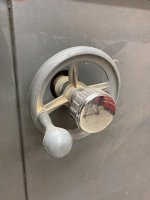
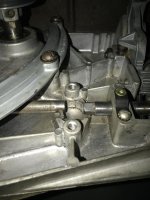
I plumbed my dust collector, a Harbor Freight 2hp that has been modified with a lager (Rikon) impeller and Dust Deputy:

y4mVJtBvniX6aIA9heUvT3eMaDq12AG5f99k1c117PJNHDUekwfEytUq1UvDimSRkXvFMXgHfCKtVGsgmvEvXWE0OCFIHOysreuPmRSgKbw0WY_KLOqMIyOW5gURaG_uN39aXadQJFbeDI1iHyqka60Oc9bfBy4vfjV_IkOWznP7bPNwqa60E10OZHr7XwsYwDM


y4mt2tHO_ZrJtwLpKgN3n9s0YkRU_7o0MJR_Nspda1Ncc_BeWek2ClTBiwCR0hG0PngC5UZ4SMOM78Mum8xjAiA0lllC-Uj-sj_Dcyafoq1G6iigWozJfHfm0GdCllqsvf9v-lOoAW9pdv1IzptoBqQ7Uk8v7kiepKSWgBnUzPM9Fm92kNpSMhO6okAcR4BVQfc


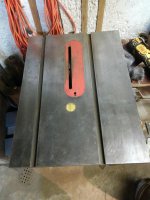
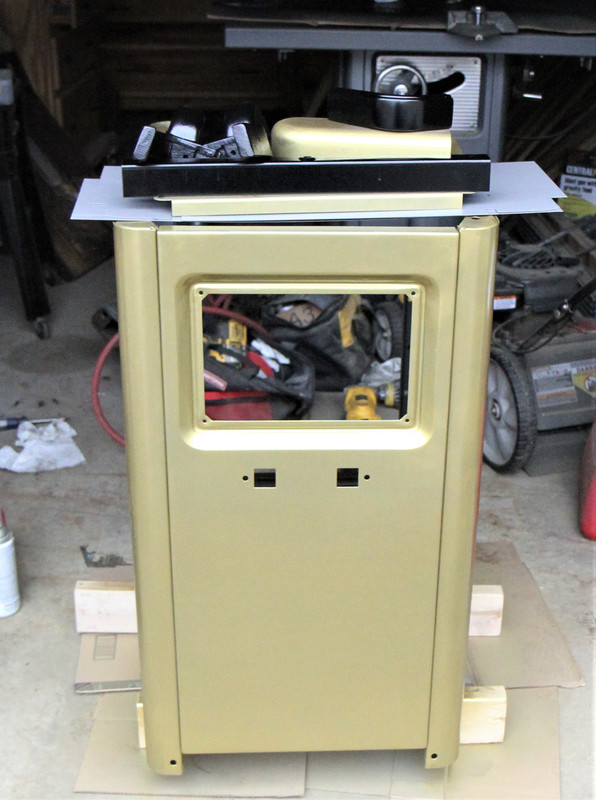
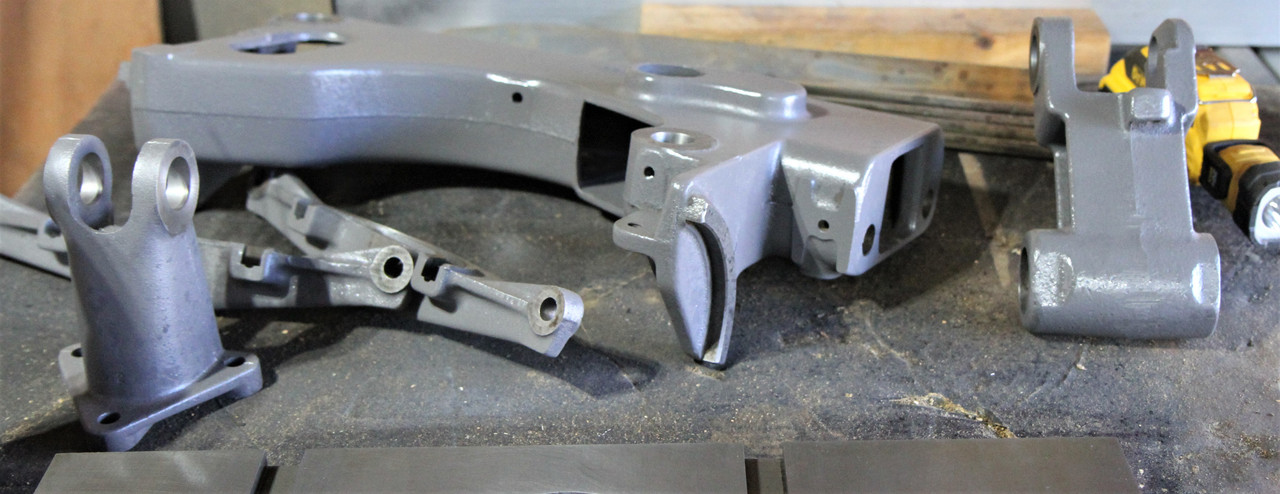
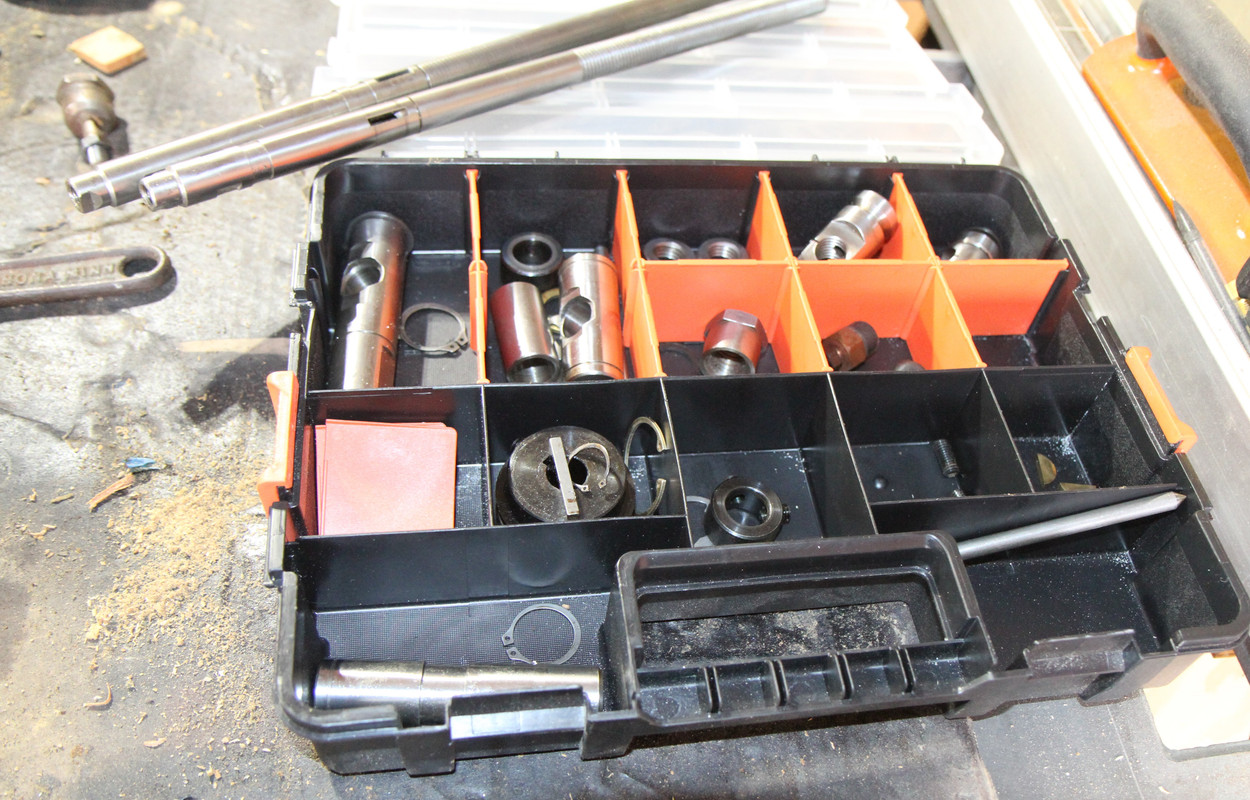
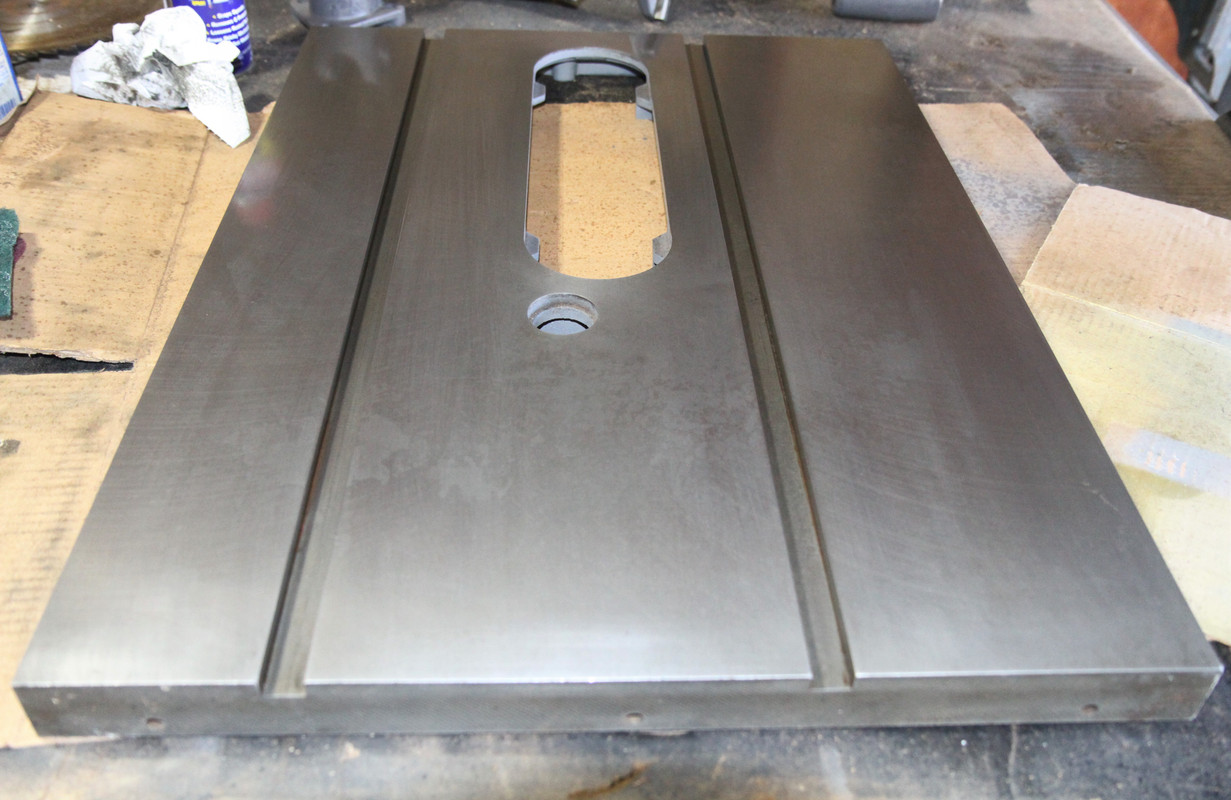
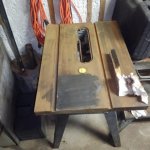
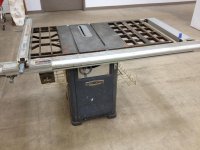
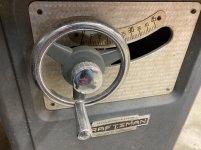
I'm just finishing up the resto/mod of an older Craftsman radial arm saw. I inherited this from my wife's father, who bought it new back in the 60's. I was debating whether to keep it, or set it back to Emerson for the $100 (due to the recall/settlement). It's been sitting in my basement shop for the last 30 or so years. I decided to keep it, restore/mod it, and put it into use.

y4msXmYebCtipVsdJYG1kDV8Je_quk7eZlMr0rHW3Aoma6PeeZtTOio41chmO9B_Ndn5x-btyOuJ1-7QfjB9l0Fb6fuBiRPvo_90jBV5LUjkIDb-lRYQ1ZOKsmDtg13cq5WNawgDSknmnsAVEVRqOhhmvaXuIGiz_-e3hDli-3_1_9TFAL8PDdVzs4XAe-twxBd
 
To avoid these ads, REGISTER NOW!

smyrna5

Member
Joined
Oct 21, 2013
Messages
6
Location
Smyrna, GA
Hey guys. I'm trying to restore this old Craftsman 8" tablesaw I picked up for $30 a year ago. I want to get an extension wing for it, but am trying to keep the price under an arm and leg. The table measures 20" from front to back. A guy on eBay claims this one is 20", but the ruler he put in front makes it 21" to my eye and math. What say you guys. I know the part numbers don't match my manual. Sorry about the poor quality of the picture. The table runs from 9.5 to 30.5 on the ruler but I messaged the fuy and he says that's 20". Do these tables com in a 21" size?

5B77582E-B96B-4285-BB01-60A2508FEDCD.jpg
 
Last edited:

southwow

Well-known member
Joined
Mar 15, 2011
Messages
52
I've been sitting on a craftsman 100 (113.29992) restore for about 2 years. Looking forward to starting in 2021. The saw I bought was used continuously since birth and is still all there and in really good shape. I even got the O.G. stand and an extra set of cross-rails/supports and hold down hardware. Only thing it was missing was blade guard (mount post was even there)... HAHAHA Safety 3rd!

I've also got the most unwanted table saw in history; the 10" flex-drive Emerson/craftsman saw from the mid-late 80's with the weed-eater style shaft drive. It is still going strong... Inherited this from my Dad. Worst drive idea coupled with the worst fence design in table-saw history. LOL

Even my 'new' direct drive ryobi/craftsman is a dinosaur by today's standards. LOL.
 

southwow

Well-known member
Joined
Mar 15, 2011
Messages
52
Hey guys. I'm trying to restore this old Craftsman 8" tablesaw I picked up for $30 a year ago. I want to get an extension wing for it, but am trying to keep the price under an arm and leg. The table measures 20" from front to back. A guy on eBay claims this one is 20", but the ruler he put in front makes it 21" to my eye and math. What say you guys. I know the part numbers don't match my manual. Sorry about the poor quality of the picture. The table runs from 9.5 to 30.5 on the ruler but I messaged the fuy and he says that's 20". Do these tables com in a 21" size?

5B77582E-B96B-4285-BB01-60A2508FEDCD.jpg

I think those are the correct wings for the 8". The 10" had diagonal bracing AFAIK. Maybe someone is more knowledgeable here can confirm.

My 10" had a homemade extension wing on one side and the standard craftsman on the other. Someone spent a LOT of time welding that puppy up!
 

RandyIA

Well-known member
Joined
Oct 19, 2020
Messages
142
Location
Iowa
I have a 113.298150 that I need to take apart and get in the basement. I picked it up seemingly complete off an online auction for $40. I'm reasonably certain I paid too much because it's spent a good amount of time out in the weather and is fairly covered in rust. But it turns smoothly and doesn't seem to have any wobbles anywhere.

The main problem I can see...I've never owned a TS of my own in my life. I'd always had access to a complete wood shop through work. But I don't work at that company any more. I want to stress that I am in no way a qualified or talented carpenter, I built concrete forms for walls, tanks, and bridges for over 20 years (the early years were made by 2x's and plywood, bridge beams were always done the same way. I can cut and bang sticks together and make it strong, but making it nice and pretty is not in my bag of tricks.

My initial question is; does anyone know what rhyme or reason Craftsman/Sears had with this model numbering system?

Next question; is taking one apart a problem?
I just need to get enough off of it so I can get it in the basement on my own. I'm thinking that will be mostly taken apart.
 
Last edited:

RandyIA

Well-known member
Joined
Oct 19, 2020
Messages
142
Location
Iowa
The motor and top come off pretty easy. From there I'd think you could carry it down a piece at a time.

Thanks, I know I could have braved the ice cold rain to run out to the shed about 100feet behind the house but just thought it would be easier to ask.

One more lazy question that I can't find or have missed every time I look at the online owners manual, where is the arbor nut wrench stored on the machine? That is the only part I can't find. It's not important but if there was a place it was stored it might still be there. I haven't looked closely at this machine since i got it off the pickup. It sat on the forklift arms for two weeks before I even set it down when I needed the tractor for something else.
 

smyrna5

Member
Joined
Oct 21, 2013
Messages
6
Location
Smyrna, GA
Thanks Southwow. It became a moot point when I found a much better price on a pair of extensions and a seller who sent me pictures with a ruler laying on the side so I could measure the bolt holes. It was shipped today, so I am happy.
 

Outlawmws

Well-known member
Joined
Aug 9, 2011
Messages
39,136
Location
The Badlands
Sorry Randy I've never had a TS that had a factory Arbor nut wrench. I've got three from the thirties and had, and then sold a couple of 113's - one from the fifties and one from the sixties (didn't prevent them from being bolted together into a super wide double saw..)
 

mikegt4

Well-known member
Joined
Sep 12, 2005
Messages
3,265
Location
sw ohio
Sears sold 8" table saws for several decades, table depth could be 20", 22" or in the case of model #2424X, 17". My Dad had a 24242, it is a really small saw.

Here is a typical 1950's 8" saw, 103.22161, showing extensions like in Smyrna5's post.
http://vintagemachinery.org/photoindex/detail.aspx?id=21769

Look through the Vintage Machinery photo index for your saw model and you will find several examples with side extensions, might be able to verify that they at least look the same.
http://vintagemachinery.org/mfgindex/detail.aspx?id=222&tab=4&sort=3&th=false&fl=Table Saw

EDIT, Didn't see the second post, it is still fun to look at the photo index.
 

RandyIA

Well-known member
Joined
Oct 19, 2020
Messages
142
Location
Iowa
Sorry Randy I've never had a TS that had a factory Arbor nut wrench. I've got three from the thirties and had, and then sold a couple of 113's - one from the fifties and one from the sixties (didn't prevent them from being bolted together into a super wide double saw..)

No problem, you've already told me more than i knew before. I'll get out there soon and do a complete look over on it. I might even try to knee down and look underneath it.

Thanks for all the help! I'll be back once the reassembly in the basement begins. That might be a while though. it's got a lot needed TLC to be done to it first.
 

RandyIA

Well-known member
Joined
Oct 19, 2020
Messages
142
Location
Iowa
Update- I got the beast apart and down in the basement...I think it's going down with the ship when this house falls apart! That beast is HEAVY! Or I'm even more out of shape than I thought... Using a two wheeled truck I had to sit down on the stairs to keep it from pulling me down with it.

I started wire brushing the rust off. I'm not sure but there seems to be some type of coating under the rust...paste wax maybe? Regardless, the rust is stuck pretty good. I ordered a Dewalt 20volt max 8-hole orbital sander today. I'm going to try the scotchbright pads.

I plugged the motor in and it runs nice and quiet. I spun the blade after I took the motor off and even with a slow spin it keeps going for minutes and is also quiet, but there's just enough noise to inform me that it could possibly use some lube.

Overall I think it's a keeper. I won't be building cabinets with it that's a certainty. Mostly just shelving and maybe ripping 2x's for lath.
 

Attachments

  • KIMG1331.jpg
    KIMG1331.jpg
    104.4 KB · Views: 24
  • KIMG1332_1.jpg
    KIMG1332_1.jpg
    92.7 KB · Views: 24
Last edited:

jonshonda

Well-known member
Joined
Jul 17, 2017
Messages
4,733
Location
Wisconsin
Based on advise from GJ I bought one at a garage sale. It was in good used condition, but the oem fence just wasn't cutting it. Found another one with a Biesemeyer fence that was in worse condition. Brought it home, removed the Biesemeyer parts, and sold it.

I wasn't happy with some of the angle iron pieces that the fence system uses, to I sourced some 7ga stuff from work. I went through the entire saw, cleaned everything up the best I could. I made a wider stand out of 2x4's w/ 5" swivel casters. Squared it up, and installed the fence and made a router table insert. It's a pretty decent saw now. I am still wanting to add an 80/20 fence to allow more attachments like feather boards and such, and a folding outfeed table would be nice.
 

fartymarty

Well-known member
Joined
Nov 9, 2012
Messages
1,348
Location
Fort Worth
I wasn't happy with some of the angle iron pieces that the fence system uses, to I sourced some 7ga stuff from work. I went through the entire saw, cleaned everything up the best I could. I made a wider stand out of 2x4's w/ 5" swivel casters. Squared it up, and installed the fence and made a router table insert. It's a pretty decent saw now.

You know the old saying, this post is worthless without pictures. I could post up what I plan to do with my two old Craftsman saws too, but it's not happening until I do it and can prove it with photos. I'm not accusing you of doing that, no really I'm not....unless that would make you give us some photos of your saw, in which case...I don't believe you did all that to your saw. you're just typing out your plan for "someday" in the past tense. :p
(I hope that worked.) :D
 

RandyIA

Well-known member
Joined
Oct 19, 2020
Messages
142
Location
Iowa
Got the supplies from town finally to get the rust off. First stage complete, now I have to polish it a bit more, it still has staining. It proved difficult to get the built up rust/grime out from the deep machined swirl marks that are original. It was a good excuse to get some more power tools...like the oscillating tool in the picture and the Dewalt 20volt ROS. Both on sale with my wife's discount were very affordable. Even so, I didn't think 80 grit would be a good choice so I didn't get any. Was I wrong! 120 grit took three hours of sanding! Manual wire brushing with a new wire brush barely touched it. I had an open mesh drywall 4"x6" sanding block that worked good, but didn't find that until it was nearly done. My sinuses are thanking me today too.
 

Attachments

  • 14863.jpg
    14863.jpg
    85.6 KB · Views: 21
Last edited:

Cradaydg

New member
Joined
Nov 7, 2020
Messages
2
Location
PA
I just found this thread and I'm hoping for a little help. I have a Craftsman 103.20002 table saw, but I'm missing the arbor nut for it. I've managed to find the wrong part on ebay. Does anyone have a replacement or know of something that will fit?
 

RandyIA

Well-known member
Joined
Oct 19, 2020
Messages
142
Location
Iowa
All I can suggest is measuring the arbor and thread pitch and finding a nut the same size. Mine is a 10" 113.** series so may not be the same as yours.
 

subroc

Well-known member
Joined
Apr 22, 2017
Messages
781
Location
Dover, NH
I like the old Craftsman stuff...a lot. There are some great examples here of saws as well as restorations. I went through all 21 pages. Figured I would add to it.

Anyway, my current saw is a Craftsman Floor Model Table Saw model 103.27270. Here is an image of that saw. This was mostly a functional restoration. I painted it. New bearings. It has a later 1.5HP Craftsman Contractor Saw motor. The 2 solid extension tables came to me on a non working Craftsman 113.27520. The router extension was on my last Craftsman Contractor Saw. There is one of the original extensions from this saw on the far right. The rolling base I picked up on CL. I made the rails for the Delta T-Square fence so the saw could cut 36" to the right side of the blade. Has a Starret tap. This saw is my daily driver.

IMG-4534-2.jpg


Here is a project currently in the works. It is a Craftsman Floor Model Saw model 103.22450
Saw case and associated parts waiting for assembly
IMG-5467-2.jpg

Cast parts cleaned painted waiting for assembly
IMG-5530-2.jpg

Saw parts, pins, rods, spacers, clips, etc. after cleaning readuy for reassmbly
IMG-5511-2.jpg

Saw top after cleaning waiting for assembly.
IMG-5525-2.jpg
 
Last edited:

RandyIA

Well-known member
Joined
Oct 19, 2020
Messages
142
Location
Iowa
I like the old Craftsman stuff...a lot. There are some great examples here of saws as well as restorations. I went through all 21 pages. Figured I would add to it. ...

Nice work!

Do any of your tables have the machined swirl marks of the original finish? Mine looks like it was surface ground with a fly cutter that had a diameter of maybe 10 or 12 inches. Just curious as to how everyone dealt with that. My first in my life table saw. Slowly bringing it to being usable and presentable (not a restoration by a far sight!).
 
Joined
Sep 13, 2020
Messages
148
Location
Canton, MI
I've also got the most unwanted table saw in history; the 10" flex-drive Emerson/craftsman saw from the mid-late 80's with the weed-eater style shaft drive. It is still going strong... Inherited this from my Dad. Worst drive idea coupled with the worst fence design in table-saw history.
I still have the same saw. Bought it brand new back in the day, and it's still going strong. Check my post on this thread for pics.

I did manage to snag a used flex-drive shaft off eBay for it, so just incase the original snaps, I've got a backup. And have a few places that can repair or duplicate that parts, since they are no longer available new.
 
To avoid these ads, REGISTER NOW!

subroc

Well-known member
Joined
Apr 22, 2017
Messages
781
Location
Dover, NH
Nice work!

Do any of your tables have the machined swirl marks of the original finish? Mine looks like it was surface ground with a fly cutter that had a diameter of maybe 10 or 12 inches. Just curious as to how everyone dealt with that. My first in my life table saw. Slowly bringing it to being usable and presentable (not a restoration by a far sight!).

Well, truth be told I find those swirl's, at some level, desirable. Not so much so that I would seek them out but it just illustrates, to me anyway, that the top is little used and little worn. I expect there are purist out there that would be critical of the machining and consider it less than finished. Far be it for me to argue with that. I have cleaned maybe 10-12 pieces of cast iron machined surfaces between table saws, band saws, drill presses, table saw extensions, router extension, etc over the years. So, my experience is limited to those pieces. I don't remember my contractor saws having them nor does either of these floor saws. I have had a few band saw tops that had them. I am cleaning a band saw top from a 103.24280 now and it has them.

Anyway how your deal with them and what you think of them is up to you.

I wish you luck on your saw. Just putting the saw into service is good enough and should be very satisfying. Get it set up for your own particular needs and space available. What model saw is it?
 

Outlawmws

Well-known member
Joined
Aug 9, 2011
Messages
39,136
Location
The Badlands
Rarely are the cutter marks an issue. In fact, they may be an aid for sliding material across the surface.

Two perfectly machined surfaces can lock together (vacuum) and those cutter marks prevent a vacuum from doing so.

Just get the Rust off (a Safety razor works well for machined CI) and call it good.
 

RandyIA

Well-known member
Joined
Oct 19, 2020
Messages
142
Location
Iowa
Well, truth be told I find those swirl's, at some level, desirable. Not so much so that I would seek them out but it just illustrates, to me anyway, that the top is little used and little worn. I expect there are purist out there that would be critical of the machining and consider it less than finished. Far be it for me to argue with that. I have cleaned maybe 10-12 pieces of cast iron machined surfaces between table saws, band saws, drill presses, table saw extensions, router extension, etc over the years. So, my experience is limited to those pieces. I don't remember my contractor saws having them nor does either of these floor saws. I have had a few band saw tops that had them. I am cleaning a band saw top from a 103.24280 now and it has them.

Anyway how your deal with them and what you think of them is up to you.

I wish you luck on your saw. Just putting the saw into service is good enough and should be very satisfying. Get it set up for your own particular needs and space available. What model saw is it?

I wasn't wanting to eliminate those swirls but getting it all clean and shiny is a problem so far. I guess I'll stop trying while I'm ahead and give it a coat of wax. The model number is
 

Attachments

  • KIMG1286.jpg
    KIMG1286.jpg
    100.9 KB · Views: 13
  • KIMG1331.jpg
    KIMG1331.jpg
    104.4 KB · Views: 22
Last edited:

RandyIA

Well-known member
Joined
Oct 19, 2020
Messages
142
Location
Iowa
Rarely are the cutter marks an issue. In fact, they may be an aid for sliding material across the surface.

Two perfectly machined surfaces can lock together (vacuum) and those cutter marks prevent a vacuum from doing so.

Just get the Rust off (a Safety razor works well for machined CI) and call it good.

:rocker:
 

Attachments

  • KIMG1332.jpg
    KIMG1332.jpg
    92.7 KB · Views: 23
  • 14863.jpg
    14863.jpg
    85.6 KB · Views: 35
Last edited:

subroc

Well-known member
Joined
Apr 22, 2017
Messages
781
Location
Dover, NH
Well, there is rust, pitting and staining. At least that is how I break it down. It is only going to get so good. After all, the few recent ones I have done are 60+ years old. I reach a point where I say good enough. If you look at post 418 in this thread you can see some staining in the lower center/left quarter of the saw top. Not trying to remove any more on this particular top. That particular top is "good enough" or at least as good as I am going to make it.

Here is the process I use.

My process has simplified to tell the truth. The first change I made was not "dreading" the work. I don't love doing them to be sure but I approach it as just another job and get to work. A good clean top is a satisfying result, so there's that. These days there are just a few things on the bench when I clean something cast. A roll of paper towels or some rags, a razor scraper, WD-40, green and red scotch-brite and just occasionally naval jelly and a bit of water if that particular surface has a lot of staining and I think it will help. I just carefully scrape the rust off the thing and start scrubbing a WD-40 soaked top with the green scrubbie. In the end, it matters what you started with. If the surface has lived out doors under a maple or pine tree for 8 years and is covered in pitch, sap, rust and beer can rings or was it just sitting in an unheated garage or barn with just some surface rust and grime.
 

RandyIA

Well-known member
Joined
Oct 19, 2020
Messages
142
Location
Iowa
Thanks for that!

I don't think this saw spent a great deal of time outside but it was outside when I bought it and had a good surface rust going. It also has some very slight pitting but nothing to worry about. It's actually hard to see.

I might have started off wrong but it's cast iron, it'll still do what it's supposed to do.

My initial go-to was a hand held wire brush, that barely removed any rust or gunk so I goofed out of impatience and grabbed a roloc medium grit 2" wheel on a die grinder (the picture shows that result). So I waited for my new Christmas presents to arrive- two Dewalt tools; a osculating tool and a random orbital sander. I started with the ROS and 180 grit. It did OK but i was worried about maintaining the sharp corners of the miter slots so I did the edges with the osculating tool and the triangular sander. Then moved to 220 and went over it again. Then I used some liquid wrench (an old can I'm trying to waste) and some 2 aught steel wool under the ROS pad to polish it some and then went over that again with 4 aught. I finished up with red scotchbright under the ROS.

Obviously I have zero clue about this. It's clean, just isn't shiny.

I just hand wire brushed the grooves. I brought in my 4-1/4' angle grinder with a knotted wire wheel but I'm reconsidering how aggressive that might be since it's not a variable speed grinder. As I said...leave well enough alone.
 

subroc

Well-known member
Joined
Apr 22, 2017
Messages
781
Location
Dover, NH
Well, I am not going to comment on your method. There are many ways to clean a top. I told you mine. That said, you are down to bare metal. There really isn't anywhere else to go. Take the finest material you have, give it a once over by hand and then put a coat or 2 of paste wax on it.
 

mcmlvif100

Well-known member
Joined
May 2, 2010
Messages
627
Location
Northern Indiana
Picked this one up at the local HFH ReStore a few years ago. Model 103.27270 with 1 HP model 113.19063 motor. Original except for the fence. Couldn't pass it up. Really deserves a nice restoration but still pretty low on the list.
 

Attachments

  • Craftsman Cabinet Saw - 1.jpg
    Craftsman Cabinet Saw - 1.jpg
    144.5 KB · Views: 68
  • Craftsman Cabinet Saw - 2.jpg
    Craftsman Cabinet Saw - 2.jpg
    136.9 KB · Views: 37
  • Craftsman Cabinet Saw - 3.jpg
    Craftsman Cabinet Saw - 3.jpg
    125.4 KB · Views: 29

subroc

Well-known member
Joined
Apr 22, 2017
Messages
781
Location
Dover, NH
Picked this one up at the local HFH ReStore a few years ago. Model 103.27270 with 1 HP model 113.19063 motor. Original except for the fence. Couldn't pass it up. Really deserves a nice restoration but still pretty low on the list.
Looks like you got a great saw and a great project as well.

Is that a Powr Panl for a switch? Nice.

The handwheels don't look original, at least the front one doesn't. Did you replace it or did it come replaced. If you replaced it, what did you use? I have a 3rd one of these saws and that one is less than complete needing handwheels. I have ideas for replacements to be sure but always looking for options.

While I like my floor saw a lot I have nothing bad to say about My Craftsman Contractor Saw that I had for several years. Here is an image. It eventually had an outfeed table. Those slats covering the grid are MDF. Basic set up. A good working saw.

image.jpg
 
Last edited:

mcmlvif100

Well-known member
Joined
May 2, 2010
Messages
627
Location
Northern Indiana
Looks like you got a great saw and a great project as well.

Is that a Powr Panl for a switch? Nice.

The handwheels don't look original, at least the front one doesn't. Did you replace it or did it come replaced?

Correct. It came with a Craftsman Powr Panl switch box.

The handwheels are as I found it. To your point, the front doesn't match the one on the side. I assumed that one of them was a replacement but wasn't sure which.

Edited to add pictures of the handwheels.
 

Attachments

  • IMG_2644.jpg
    IMG_2644.jpg
    58.9 KB · Views: 24
  • IMG_2642.jpg
    IMG_2642.jpg
    149.6 KB · Views: 23
Last edited:

mcmlvif100

Well-known member
Joined
May 2, 2010
Messages
627
Location
Northern Indiana
Took some pictures of the Craftsman Powr Panl switch box. Seemed awfully light duty for a 1 HP saw, so I've put it away for future use. Have other similar vintage Craftsman power tools where it might be better -- bench top drill press or the 6 x 48 belt sander w/ 9 in. disc.

Stamping on the back reads "POWER LINE", "MOTOR", and "WORK LIGHT"
 

Attachments

  • IMG_2637.jpg
    IMG_2637.jpg
    95.1 KB · Views: 34
  • IMG_2638.jpg
    IMG_2638.jpg
    107.5 KB · Views: 33
  • IMG_2639.jpg
    IMG_2639.jpg
    148.1 KB · Views: 35

subroc

Well-known member
Joined
Apr 22, 2017
Messages
781
Location
Dover, NH
Correct. It came with a Craftsman Powr Panl switch box.

The handwheels are as I found it. To your point, the front doesn't match the one on the side. I assumed that one of them was a replacement but wasn't sure which.

Edited to add pictures of the handwheels.

The one shown on the front is correct. The other, I am not sure what saw it comes from. I have a pair of the others here. While the hub diameter appears to be similar especially with the set screw boss the hub length is short, at least by my calculations, 1-5/8 compared to 7/8. Does the end of the shaft protrude beyond the end of the handwheel on that one?


Thanks
 

subroc

Well-known member
Joined
Apr 22, 2017
Messages
781
Location
Dover, NH
Took some pictures of the Craftsman Powr Panl switch box. Seemed awfully light duty for a 1 HP saw, so I've put it away for future use. Have other similar vintage Craftsman power tools where it might be better -- bench top drill press or the 6 x 48 belt sander w/ 9 in. disc.

Stamping on the back reads "POWER LINE", "MOTOR", and "WORK LIGHT"
I only have 1 powr panl here. It is a rat. All rusted out. I removed it from a stand that I recently restored. It is a raised letter version, probably early. I did test it. It appears that one line is switched and the other line is hot. I see your point about light duty. I was more concerned that the switch wasn't grounded and lacked a specific neutral like a modern configuration.

I like the idea of a powr panl or switched extension cord. My routers are set up that way as well as a band saw. The band saw has a Rousseau switch and the routers have a couple electrical receptacle boxes bolted together with a paddle switch on one end and receptacle on the other.
 

david.larson.eod

New member
Joined
Dec 24, 2020
Messages
1
Location
WA
Hi all. I have a 1938 10" Bench Saw, part 101.02161. It's in overall great shape, but my motor base is broken (part number S10-5, forged by Atlas Press Co.). I'd really like to get it running again, but have no idea how to find that part short of having a new one milled.
Any suggestions?
 

Outlawmws

Well-known member
Joined
Aug 9, 2011
Messages
39,136
Location
The Badlands
Do you have all the pieces? Pics? - I think that is the same as one of my saws - I had the same problem - I wound up buying No. 2 to get the part.
 

mikegt4

Well-known member
Joined
Sep 12, 2005
Messages
3,265
Location
sw ohio
I just finished a TS resto, an 8" Delta 34-500. Several people have submitted suggestions on removing rust from the table top, I used a gasket scraper that holds a razor blade. It cleaned the rust off rather quickly, I found that holding the scraper at a steep angle did the best job. Depending on the amount of rust your results may vary.
 

Attachments

  • IMG_2705.jpg
    IMG_2705.jpg
    115.7 KB · Views: 36
  • IMG_2704.jpg
    IMG_2704.jpg
    111.7 KB · Views: 34
  • IMG_20201119_164240969.jpg
    IMG_20201119_164240969.jpg
    73.2 KB · Views: 38

bill dingman

New member
Joined
Jan 1, 2021
Messages
2
Location
NH
hello all. this is my first post so hopefully i'm in the right place- i scored a pretty decent model 80 i believe (103.22161). aside from missing the motor (i got it for free) everything seems solid, other than the blade height adjustment. is this how it's supposed to look inside? what does yours look like? i peeked at the manual but couldn't make out how this was supposed to be set up. any help would be greatly appreciated
 

Attachments

  • 9BD43A50-CB74-42B6-B5C2-F17CA27F7731.jpg
    9BD43A50-CB74-42B6-B5C2-F17CA27F7731.jpg
    93.1 KB · Views: 40
  • 72AB48B2-C57D-4DE5-A017-2A68D62A9830.jpg
    72AB48B2-C57D-4DE5-A017-2A68D62A9830.jpg
    89.5 KB · Views: 39
  • BAC4BDE0-5F4A-4CED-A790-696C901866DE.jpg
    BAC4BDE0-5F4A-4CED-A790-696C901866DE.jpg
    90.8 KB · Views: 42
  • BDFC3DE5-4F11-4802-BC3F-852B83E9C29B.jpg
    BDFC3DE5-4F11-4802-BC3F-852B83E9C29B.jpg
    97.1 KB · Views: 38

subroc

Well-known member
Joined
Apr 22, 2017
Messages
781
Location
Dover, NH
hello all. this is my first post so hopefully i'm in the right place- i scored a pretty decent model 80 i believe (103.22161). aside from missing the motor (i got it for free) everything seems solid, other than the blade height adjustment. is this how it's supposed to look inside? what does yours look like? i peeked at the manual but couldn't make out how this was supposed to be set up. any help would be greatly appreciated

I don't know all that much about them. But, I am aware that the double gear in the first image is often broken. and is pretty much unobtainium. The fact that the one in your saw appears to be in excellent condition is a plus. I have also read that the handwheel can be stripped on those. Check the arbor bearings. It looks like you got a nice saw for no money. Good luck with it.
 

fartymarty

Well-known member
Joined
Nov 9, 2012
Messages
1,348
Location
Fort Worth
i scored a pretty decent model 80 i believe (103.22161)..... aside from missing the motor (i got it for free) everything seems solid, other than the blade height adjustment. is this how it's supposed to look inside?

I don't have one, nor any special knowledge, but searching online it appears that you are missing the ball end to the shaft marked 79 on the attached drawing and perhaps a 3/8" steel ball marked 48 on drawing. (unless you removed them before taking photo #2?) Other than that I'd say no, that isn't how a free saw should look, every free saw or free piece of woodworking equipment I ever received was filled with sawdust, gunk, and grease. Yours is way too clean. :lol_hitti

http://vintagemachinery.org/pubs/222/4258.pdf
 

Attachments

  • missing part.jpg
    missing part.jpg
    113.4 KB · Views: 33
To avoid these ads, REGISTER NOW!
Top Bottom