To avoid these ads, REGISTER NOW!

Vintage Craftsman Table Saw Thread

bill dingman

New member
Joined
Jan 1, 2021
Messages
2
Location
NH
thanks for the speedy replies. yeah, i guess i am missing the steel ball and whatever else should be in there. it's strange because it's in good shape everywhere else, i just don't get why someone removed/lost that part while keeping everything else looking untouched? i doubt i'll be able to find a replacement so my plan is to rig something up from scratch, i just don't know how that whole assembly works since i'm missing the parts for it. still considering myself lucky though. after picking up the saw i was gifted a crusty 150 drill press full of pine needles & peanuts. down the rabbit hole we go :willy_nil
 
To avoid these ads, REGISTER NOW!

subroc

Well-known member
Joined
Apr 22, 2017
Messages
781
Location
Dover, NH
thanks for the speedy replies. yeah, i guess i am missing the steel ball and whatever else should be in there. it's strange because it's in good shape everywhere else, i just don't get why someone removed/lost that part while keeping everything else looking untouched? i doubt i'll be able to find a replacement so my plan is to rig something up from scratch, i just don't know how that whole assembly works since i'm missing the parts for it. still considering myself lucky though. after picking up the saw i was gifted a crusty 150 drill press full of pine needles & peanuts. down the rabbit hole we go :willy_nil

I have one here in the stack of stuff. I flipped it over, pulled the screw and had a look.

There is a square female drive on the ball to receive that shaft.

The part as it sits disengaged

20210108-153252.jpg


The part as it sits engaged

20210108-153303.jpg


What are you planning on doing with the 150?
 

Outlawmws

Well-known member
Joined
Aug 9, 2011
Messages
39,156
Location
The Badlands
I've posted this saw before; its an old 7" Craftsman - Companion Tilting table bench saw. It shows up in the 1935 and 36 catalogs (at least), as Craftsman, this one has the Companion decal? :dunno:

I'm redoing it as the old stand (possibly original isn't doing it for me - I bought it to get the old and small Parker vise that was also attached - so the Tsaw was "free"... I needed a saw for a quick cut, and kept doing that til I realized that it was about all I needed! (and sold the double (bolted together) 10" craftsman Table saws I had that were too much work to pull out every time)

The stand is an old typing table with the foot operated castors.


Here is a WIP pic - I've removed it from the (original?) wood base.

attachment.php


The sawdust here is from cleanup inside... The motor will go under the table top and have gravity tension. (hinge mount)

I have a 3/4" piece of ply to stiffen the top, and I'm NOT cutting a hole for the sawdust to drop through, I'm adding a dust collection port for a shop vac and bucket mounted dust separation trap.

So small but its done a LOT! Here is is setup for doing finger joints (One part removed to show the guide and cuts):

attachment.php


The first sample joints:

attachment.php


Setup for milling recycled oak pallet slats straight - you can see the original stand pretty well. Motor is behind it here:

attachment.php


I'll be posting more on this as I progress later.
 

whateg01

Well-known member
Joined
Mar 13, 2006
Messages
11,214
Location
doo dah, kansas, usa
I don't know all that much about them. But, I am aware that the double gear in the first image is often broken. and is pretty much unobtainium. The fact that the one in your saw appears to be in excellent condition is a plus. I have also read that the handwheel can be stripped on those. Check the arbor bearings. It looks like you got a nice saw for no money. Good luck with it.

I wish I could make a living making those unobtainium parts! I enjoy making them just to keep old iron alive, but nobody would pay what it would cost to do it. I wish they would have used a better material than zamac for their gears, but I guess most do last a long time, so maybe it was a good choice.

Dave
 

whateg01

Well-known member
Joined
Mar 13, 2006
Messages
11,214
Location
doo dah, kansas, usa
I've posted this saw before; its an old 7" Craftsman - Companion Tilting table bench saw. It shows up in the 1935 and 36 catalogs (at least), as Craftsman, this one has the Companion decal? :dunno:

I'm redoing it as the old stand (possibly original isn't doing it for me - I bought it to get the old and small Parker vise that was also attached - so the Tsaw was "free"... I needed a saw for a quick cut, and kept doing that til I realized that it was about all I needed! (and sold the double (bolted together) 10" craftsman Table saws I had that were too much work to pull out every time)

The stand is an old typing table with the foot operated castors.


Here is a WIP pic - I've removed it from the (original?) wood base.

...


The sawdust here is from cleanup inside... The motor will go under the table top and have gravity tension. (hinge mount)

I have a 3/4" piece of ply to stiffen the top, and I'm NOT cutting a hole for the sawdust to drop through, I'm adding a dust collection port for a shop vac and bucket mounted dust separation trap.

So small but its done a LOT! Here is is setup for doing finger joints (One part removed to show the guide and cuts):

...

The first sample joints:

...

Setup for milling recycled oak pallet slats straight - you can see the original stand pretty well. Motor is behind it here:

...

I'll be posting more on this as I progress later.

That's a great use for those smaller saws. I have several 10" a couple 9" and an 8". I also have an 8" dado blade that I hate taking on and off of the 10" I mainly use. Why didn't I think to put it on the little saw?

Dave
 

JoCoSawdust

Well-known member
Joined
Nov 19, 2018
Messages
2,416
Location
Eastern NC
thanks for the speedy replies. yeah, i guess i am missing the steel ball and whatever else should be in there. it's strange because it's in good shape everywhere else, i just don't get why someone removed/lost that part while keeping everything else looking untouched? i doubt i'll be able to find a replacement so my plan is to rig something up from scratch, i just don't know how that whole assembly works since i'm missing the parts for it. still considering myself lucky though. after picking up the saw i was gifted a crusty 150 drill press full of pine needles & peanuts. down the rabbit hole we go :willy_nil

I've got the guts out of four of those 80 saws Bill. Message me a list of what you need off that parts list that was posted. As long as it's small items, I'll just send it to your address. If you need larger parts, they're yours for the cost of shipping.
 

JoCoSawdust

Well-known member
Joined
Nov 19, 2018
Messages
2,416
Location
Eastern NC
This saw was purchased new by my wife's grandfather. It came to me in pretty rough condition with no accessories. It traveled to my son in law last weekend to go back to work.

attachment.php
 

Attachments

  • IMG_9913.jpg
    IMG_9913.jpg
    149.2 KB · Views: 495

DaveOBrien

New member
Joined
Nov 29, 2015
Messages
1
I like the old Craftsman stuff...a lot. There are some great examples here of saws as well as restorations. I went through all 21 pages. Figured I would add to it.

Anyway, my current saw is a Craftsman Floor Model Table Saw model 103.27270. Here is an image of that saw. This was mostly a functional restoration. I painted it. New bearings. It has a later 1.5HP Craftsman Contractor Saw motor. The 2 solid extension tables came to me on a non working Craftsman 113.27520. The router extension was on my last Craftsman Contractor Saw. There is one of the original extensions from this saw on the far right. The rolling base I picked up on CL. I made the rails for the Delta T-Square fence so the saw could cut 36" to the right side of the blade. Has a Starret tap. This saw is my daily driver.

IMG-4534-2.jpg


Here is a project currently in the works. It is a Craftsman Floor Model Saw model 103.22450
Saw case and associated parts waiting for assembly
IMG-5467-2.jpg

Cast parts cleaned painted waiting for assembly
IMG-5530-2.jpg

Saw parts, pins, rods, spacers, clips, etc. after cleaning readuy for reassmbly
IMG-5511-2.jpg

Saw top after cleaning waiting for assembly.
IMG-5525-2.jpg

Hi Subroc,
What paint did you use on the power bronze? Looks fantastic!
 

Jim Pelosi

Well-known member
Joined
Nov 30, 2015
Messages
79
Cool thread. I'll bite. I restored this 100% this past summer. She's a joy to use.47ccb7432f1b6b0e9e1ad512dd7790a0.jpg

Sent from my moto e6 using Tapatalk
 

Attachments

  • 47ccb7432f1b6b0e9e1ad512dd7790a0.jpg
    47ccb7432f1b6b0e9e1ad512dd7790a0.jpg
    163.4 KB · Views: 24

whateg01

Well-known member
Joined
Mar 13, 2006
Messages
11,214
Location
doo dah, kansas, usa
I know there's nothing technically wrong with it, but it always seems strange to me to see more than one extension on one side of the table. I see some on marketplace from time to time that have a mix of stamped and cast extensions and there might be 3 or 4 on the right and none on the left.
 

Jim Pelosi

Well-known member
Joined
Nov 30, 2015
Messages
79
I know there's nothing technically wrong with it, but it always seems strange to me to see more than one extension on one side of the table. I see some on marketplace from time to time that have a mix of stamped and cast extensions and there might be 3 or 4 on the right and none on the left.
Depends what you do with the saw mostly. I have it like that for wide rips of sheet goods.

Sent from my moto e6 using Tapatalk
 

subroc

Well-known member
Joined
Apr 22, 2017
Messages
781
Location
Dover, NH
Hi Subroc,
What paint did you use on the power bronze? Looks fantastic!

Thanks. It is a Rustoleum product called Vintage Gold. This happens to be a satin finish. I don't know if there is a real good replacement for Power Bronze. But this will do.
 

subroc

Well-known member
Joined
Apr 22, 2017
Messages
781
Location
Dover, NH
I know there's nothing technically wrong with it, but it always seems strange to me to see more than one extension on one side of the table. I see some on marketplace from time to time that have a mix of stamped and cast extensions and there might be 3 or 4 on the right and none on the left.
As time has gone on I, on the other hand, am more surprised when I see a saw with limited cut capacity when there is an extension and some rail space available. Clearly we all set up our saws the way we want within the space available, how many extensions we have, how long our rail system is, and the work we expect to do but limiting a saw to 18 inches or so of cut capacity when we can have more seems like a waste to me. I used my saw today. I cut all 4 sides of a rectangle finish sized 19 X 23. If I could only cut 18 inched to the right side of the blade, I wouldn't have been able to use the table saw fo any of those cuts.
 

Outlawmws

Well-known member
Joined
Aug 9, 2011
Messages
39,156
Location
The Badlands
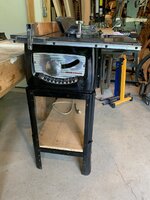
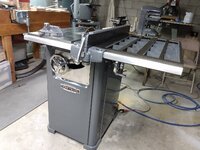
The Dinky T-saw is getting there:


I've had the T-saw mounted and unmounted a couple of times fitting things - in particular for drive bent slot. Two days ago I:

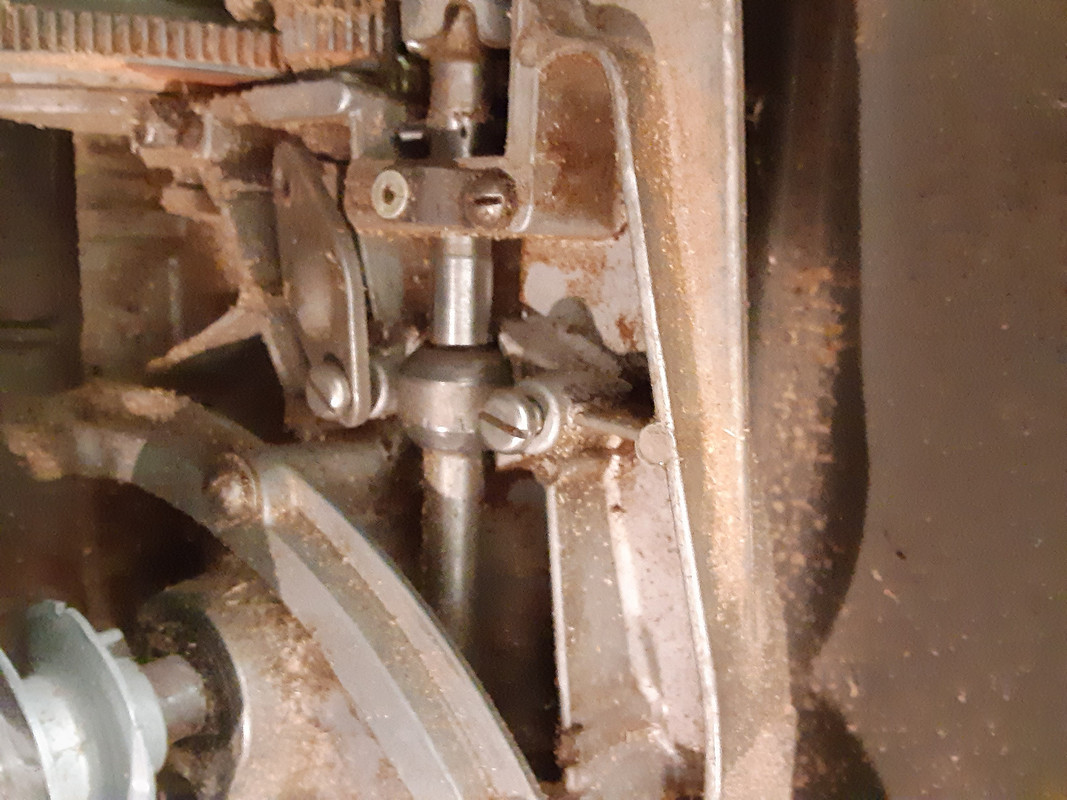
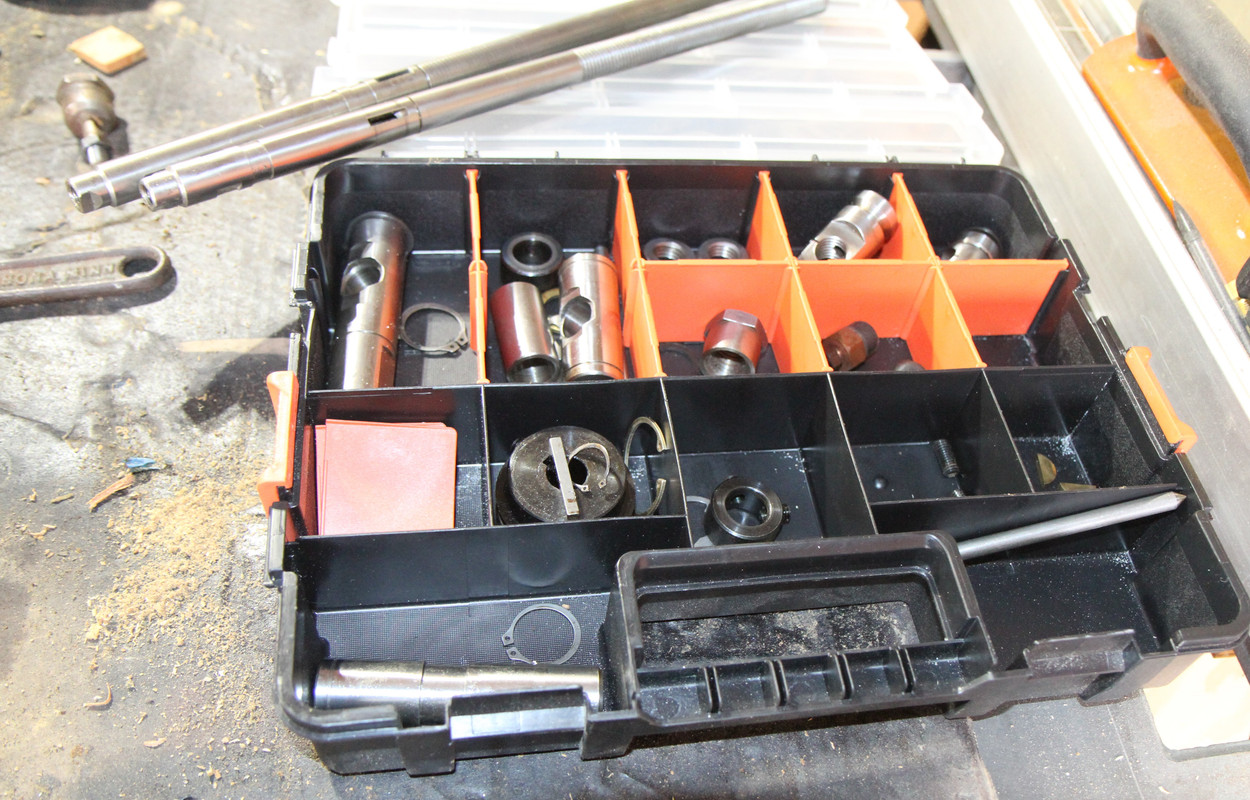
o Disassembled the T-saw project AGAIN...
o Corrected the belt slot on the T-saw,
o Reassembled - NOW the belt Clears!
o took the old power cord/switch apart - the plug disinterested (one prong fell out...), the white line is crumbling apart - I think this is the ORIGINAL cord only two prongs so no ground (on the old stand I wasn't worried as long as I didn't touch the motor, as the rest was insulated from the motor by the wood stand...) - The switch also stopped working - (looks to be original from the 30's? Art Deco on the switch case...) The cord from the motor to the switch in fine and is three wire so probably from the 60's/early 70's (crown Craftsman logo) I need to verify its grounded inside the motor...
o I spent some time figuring out how and where I want the new switch and what kind to power the saw.

I'd like a mushroom head E-Stop switch, but those seem pretty iffy for inexpensive ones on line... I have a slap off toggle from an old Radial arm I scrapped, so how to do that?:

o I settled on mounting the switch to the folding extension on the "front" side of the saw, and using an extension box for house it, then another extension box on that with a duplex receptacle.
o Power cord to the switch:
o Switch to the receptacle and
o The motor plugs into one receptacle.

This also allowed me to put the extension in the up position and still easily use the switch!

I needed to buy the two boxes, and a metal duplex cover (under $10)


The old parts - Plug was rock hard rubber, and the screw fell out that held one blade. the switch is now dead, (I used this saw and switch just recently...) and the white wire is just scary... (Black is still flexible as is the outer sheath? :dunno: ):

attachment.php


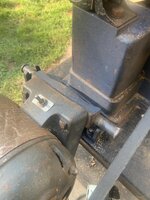
Back side of the old switch:

attachment.php


The "New parts as I was deciding what to do for the power and switch:

attachment.php


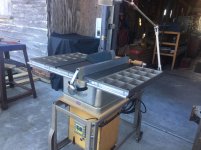
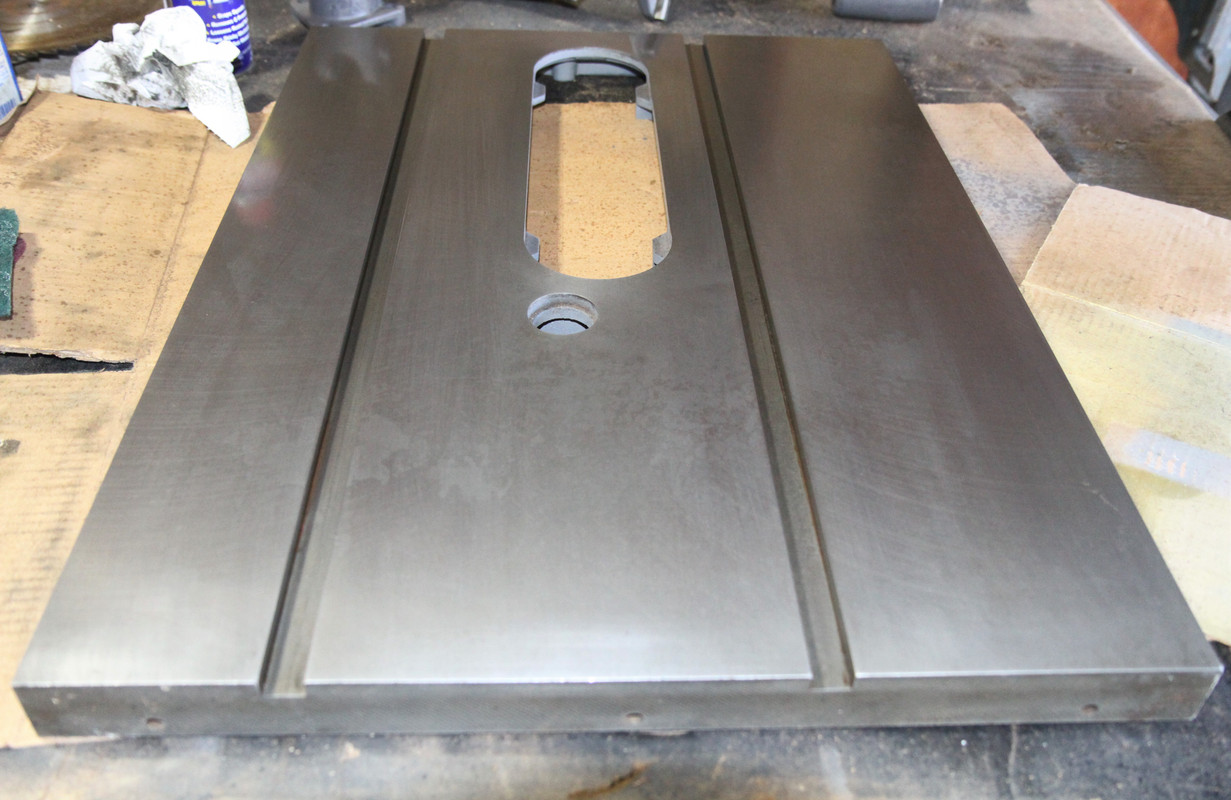
The Saw where I am now with the new belt ready to start cutting...:

attachment.php


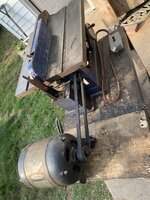
And the start of the "dust collection" (I need some plastic, and to sort out the vac hose connector...):

attachment.php


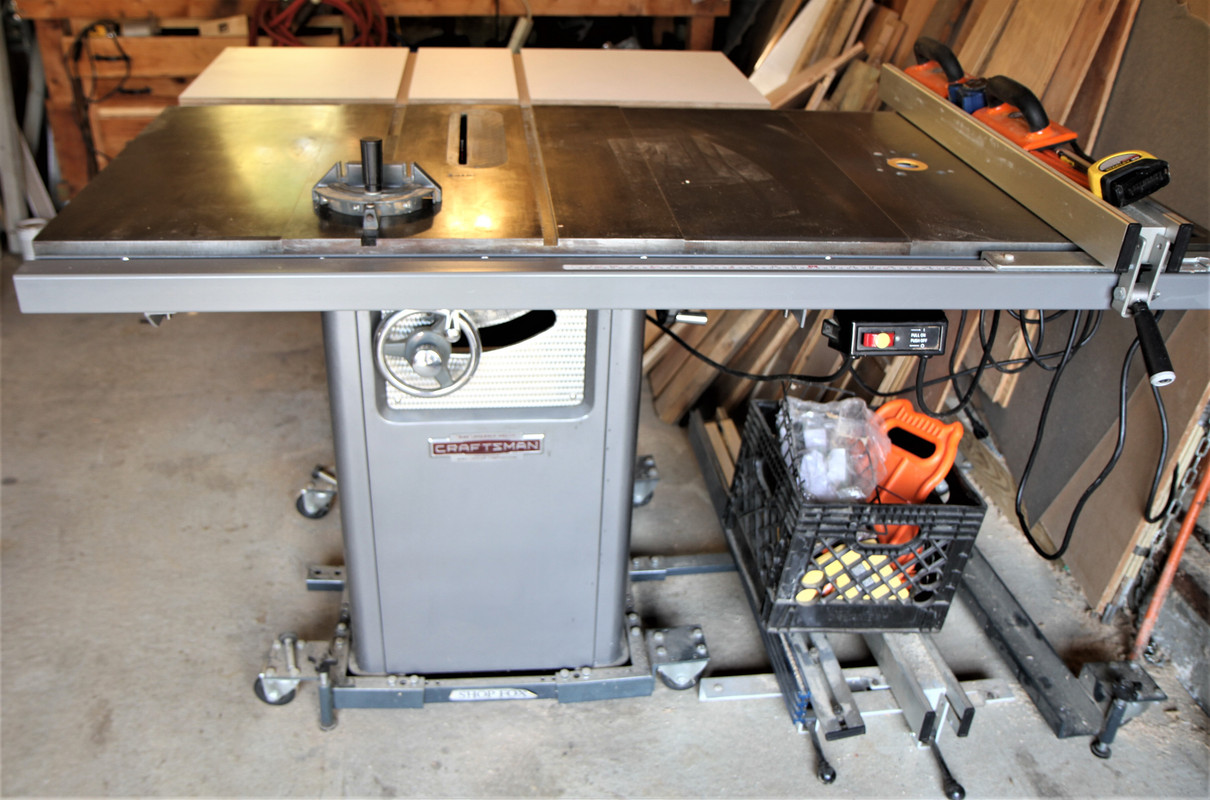
Today I got the power sorted on the T-Saw - This whole thing has been a "design in place", as many of my projects are. I'm satisfied with the result - the power switch is in reach with the side table (I guess its now a "front" table) up or down, the legs and supports don't interfere with the cords in use or movement. It's grounded finally, the cords and plug aren't rotting away and I think its actually quieter in this configurations that on the old wood stand:


The power parts (less the cord) - The switch is the "slap off" type (salvage from a Craftsman RA saw) and I wired the poles in parallel so it should last. It needed that rectangular hole do after layout I used the Nibbler to make it so.

attachment.php


The inner holes are for the switch, the outer to hold the first box on.

The second box houses the receptacle, and the black wire goes through the switch. the white neutral and ground goes right to the receptacle.


Switch done - Power ready (I even tested the receptacle with a polarity tester) its height here is perfect for tapping off with my knee if needed.

attachment.php


And in the Up position - still pretty handy

attachment.php


And the boxes mounted:

attachment.php


Still a ways to go - I did NOT cut a huge hole in the table top for sawdust as I want this one attached to the shop vac. I also need to make belt guards, and do some things underneath, for blade and accessory storage.
 

subroc

Well-known member
Joined
Apr 22, 2017
Messages
781
Location
Dover, NH
...o I settled on mounting the switch to the folding extension on the "front" side of the saw, and using an extension box for house it, then another extension box on that with a duplex receptacle.
o Power cord to the switch:
o Switch to the receptacle and
o The motor plugs into one receptacle....
I like to set them up similar to that when I can. Essentially, a switched extension cord with a male plug on the motor.

You seem to have a solid plan. Looking good.
 

Diana Morningstar

New member
Joined
Apr 9, 2021
Messages
1
Location
New York
I have an vintage table saw as well. I am not sure what year, or what to do with it. I would like to sell - all suggestions helpful - thanks!
 

Xaquin

New member
Joined
Apr 8, 2021
Messages
3
Location
My Basement =p
I'm currently restoring this:

https://scontent-lga3-1.**.fbcdn.net/v/t1.6435-9/130045072_10158975974318279_1863881865597517299_n.jpg?_nc_cat=108&ccb=1-3&_nc_sid=0debeb&_nc_ohc=uLuzA1tNAt0AX8A3LEG&_nc_ht=scontent-lga3-1.**&oh=2e45ae069200f044c40876dcde923911&oe=6095F692

It's going well except the paint (thankfully not lead) is like glue. Nothing seems to work on it except wasting a lot of sand paper. I guess that's how it is sometimes
 
To avoid these ads, REGISTER NOW!

maseh2os

New member
Joined
Nov 23, 2021
Messages
4
Hey all,

New to the forum here and was recently gifted an old craftsman table saw from my father in law. He doesn’t know much about it (year, model, etc), and hadn’t done much with other than build kind of a neat movable stand for it.

Anyway, I’m interested in possibly doing some restoration/upgrades to it, which let me to this awesome thread with all of your great saws.

If there’s still anyone following, it would be greatly appreciated if I could get a little guidance on whether this unit is worth putting much time/energy/money into.

Model number on the base is 113.22411, model on the motor is 113.19050. Fairly sure it’s a 10” unit, and the motor is 3/4 hp. Going to try to add some pictures of it if I can.

Thanks in advance!
1D43B3CB-4EAE-4C2D-AFB6-CA0F9D6D244A.jpeg26BF74C7-A782-4AF3-B80A-9AF90A17E0DD.jpeg
E60FF5E8-A069-462B-A247-59C677FE259B.jpeg
 

Outlawmws

Well-known member
Joined
Aug 9, 2011
Messages
39,156
Location
The Badlands
Those 10" King Seeley units are good solid table saws. that one looks to be 50's based on the heritage logo and turned front plate. (Later the changed the "Look" but not the size in the 60's)

Main weakness is the fence, but I used that fence the entire time I had both of nine, (I had 2 bolted together side by side; one 50's one 60's) I just made sure it was square by measuring both ends to the edges and made sire the blades were paralleled as well. If you so a lot of TS work a fence system upgrade may be worth it. (Heck, my "fence" on my current TS is a piece of angle iron, one long for long rips adn one short for smaller pieces.)

Side and out-feed extensions can be nice to have, and fairly easy to find, if expensive on Eprey, - but that's not the only source (heck I stil see these given away or dirt cheap on CL...)

Clean and lube the gear racks, the raise/lower angle the blade, razor scrape any rust on to and maybe wax it with paste wax should be all you need, it looks in nice shape.

You may want a plastic insert or two if you use a dado of needs a "zero clearance" blade insert, or you can make them from wood,
 

fartymarty

Well-known member
Joined
Nov 9, 2012
Messages
1,348
Location
Fort Worth

Attachments

  • 2203.pdf
    2.8 MB · Views: 9

maseh2os

New member
Joined
Nov 23, 2021
Messages
4
Thanks for the replies guys! Lots to think about.

Outlaw, thank you for the good info and tips! you have a good source to get the zero clearance inserts for this saw? Is it a pretty standard size?

Agreed on the fence, I was thinking I might try to build the one someone mentioned earlier in this thread from ibuildit, seen here:

E1D2FCAD-DFC3-4558-B555-144E918E0F96.png

Seems like a pretty good project, not sure I have the skills but we’ll see I guess! And you mentioned the side and outfeed extensions, and I would really love to build it up like the one in the picture above. I managed to source a couple of the cast iron webbed extensions here locally for a good price, but was disappointed when I got them home and found the holes in them too high so the extensions sit about a 1/4” below the table. Might take them to work and turn those holes into slots on the mill.

It doesn’t have much rust on the table but some on the base, motor, and internals. Might have to tear it down and clean everything up.

Haha Marty! You had me going for just a second there. Thank you for the link! I was wondering how to find that, sure it will come in handy.

And yes I think the stand is kind of a cool build he did. Has a sawdust drawer, little pullout blade hangers, and foot pedal cams that put it up on casters or let it settle onto the ground.

I do have a couple questions for y’all:

-Is that 3/4 hp motor powerful enough? Or should I be looking for a replacement?

-Right now it runs pretty quietly but there’s a fair bit of vibration going on. The belt is pretty trashed so I’m guessing that’s part of it. Anything else I should be looking for? I’ve seen where some guys are putting new pulleys and an adjustable v-belt on there, does that seem like a good idea?

Thanks again guys. I’m definitely in over my head but would love to end up using this.
 

Outlawmws

Well-known member
Joined
Aug 9, 2011
Messages
39,156
Location
The Badlands
Belt is likely the vibration issue. try it with the belt off to verify its not he motor.

3/4 HP should be sufficient, depending on the work you are doing. if something binds it can bog the motor, but start using it and you will soon know. My 7" (with 7-1/4 blades and even 3 stacked for dados) gets by just fine with a 1/2 HP... I use a LOT of oak and no problems. A fair bit of ripping as well -even 2" thick wet pine hasn't been a real issue.
 

maseh2os

New member
Joined
Nov 23, 2021
Messages
4
Thanks again outlaw. I’ll do that motor without the belt test tomorrow. Is it possible it’s something to do with the blade and/or how it’s attached?

Good to know about the lower hp motor hopefully not being an issue. Just for a quick test I ripped a couple of chunks of 3/4” ply I had laying around and it didn’t seem to notice.

I’m hoping to get it fixed up and get more into the hobby, but based on what you’re able to run through your smaller saw I don’t see myself needing to do anything in the near future that this saw can’t do.

Oh and I forgot to re-ask my earlier question about the zero clearance inserts. Is there a good place to get those for this saw?

Thanks again!
 

Meursault74

Well-known member
Joined
Apr 1, 2019
Messages
21,920
Location
Southern California
First Time I looked through this thread. I have a vintage CM table saw that I use. It's my only table saw. I'm not sure how old it is, maybe 40's. My Father bought it used likely in the 60's or 70's but I'm not sure. Anyone know when this was made?
I've repaired it and maintained it, but don't plan on restoring it to a museum piece. I use it to cut wood. I even have a dado blade set for it.

DSCF0352.JPG
DSCF0351.JPG
DSCF0350.JPG
 

TexTJ209

Well-known member
Joined
Feb 16, 2012
Messages
167
Location
Tejas
That saw went through a bunch of minor revisions in the late 30s and early 40s that are all reflected in the catalogs. They went from a C-Channel style fence rail from 1939-1941, to a solid rectangular bar style in 1942, to a round bar style after that. Yours has the solid bar, so I'd say 1942, but the fence on yours doesn't match up with the normal fence for that saw from the era, so it may be a replacement. Looks like it might be off a slightly later (late 40s) model 80 saw.

Here's my 39-41 model, with the earlier style fence rail and fence.

122099317_10119026322524024_3993867961371348533_n.jpg
 

11b30b4

Well-known member
Joined
Jul 16, 2020
Messages
1,029
Location
GA
I did not know we had a thread for the Craftsman table saw or I would have posted here earlier. Looking through this thread, there are some amazing rebuilds here on GJ.

Back in May 2021 I snagged a 10” Craftsman Emerson table saw. This is one of the transition TS when Emerson took over production from King Seeley. My motor 1 HP motor is dated 1955 and that is likely the date of the TS as well. The model number for the table saw is 113.27520 and the motor is 113.196063. I got this TS at an estate sale along with another classic Craftsman 150 drill press. I paid $50.00 each.

full


I have been attempting to acquire and rebuild most if not all of the classic Craftsman pedestal mounted tools for some time now. I purchased a pedestal base for this rebuild off ebay. The TS came mounted on some sort of heavy cart (mostly likely a welding cart) along with a Powr Panl.

For the rebuild I cleaned, stripped and repainted everything. I converted the Powr Panl for 3 prong grounded wiring. I replaced all the bearings and added a new cogged belt and blade. The saw runs perfectly, and I am very happy with how everything turned out.

full


full


full


full


If anyone is interested, I created a full thread of the rebuild here:


Many of the same people on this thread have already commented on my thread, I appreciate the comments and complements.
 

maseh2os

New member
Joined
Nov 23, 2021
Messages
4
Quick question for you guys. I think I saw it mentioned on here earlier in the thread but has anyone used the PALS system on the CM table saw? Will they work on pretty much any of them? Here’s a link for reference:


TexTJ209

Well-known member
Joined
Feb 16, 2012
Messages
167
Location
Tejas
I think M74's saw is an 8" in the 1938 catalog. All the fence features fit.

TX, Nice restore! Yours too 11b!

Ah, yep! I'd agree, didn't go that far back. Nice find!

Mine isn't a restore ha, that's all original! But thanks!
 

11b30b4

Well-known member
Joined
Jul 16, 2020
Messages
1,029
Location
GA
Maseh2os, I considered the PALS micro adjustment system when I rebuilt my TS but after I reassembled the saw I quickly decided that I was able to adjust my saw just fine without it. I believe the $20.00 for the PALS is well worth it and I am fairly sure the system will work on the 10" at least. Although, I believe I would need longer trunnion mounting bolts to account for the L brackets thickness. Please let us know if you decide to try the system out.
 

wrenchguy

Well-known member
Joined
Sep 22, 2011
Messages
4,697
Location
NW Indiana
Nice looking vintage POWR KRAFT table saw, Photos hacked from MP. Is the fence & stand correct to the saw?

edit, sorry wrong thread, removing photos.
 

JosephLaur

Member
Joined
Jun 3, 2022
Messages
9
I have 2 Craftsman table saws. One is a 1940s 113.27520 with a 2ph motor and this one is my current project. It is a 103.20003 with an original 1hp motor. There are are not too many of these 9" saws floating around or at least not well documented and specific parts are harder to find. I wasn't looking for another project but it was given to me and I have since really gotten into it. I was fortunate to have an original Blade guard laying around my shop. It really gives the saw a cool vibe even if it is a little useless. I also had to paint the faceplate as it was badly mangled and didnt feel like sourcing a cleaner one of Ebay. I used a hammered paint and it turned out pretty good. Anyhow, I can't find an original blade insert and I am missing the motor pulley. I just wanted to share as we have the same saw and maybe we can be helpful to one another. There are only a couple on the OWWM registry


image112_zpsvzqnevyt.jpg
image37_zps62yajcsm.jpg
image113_zpsv5bxyr6j.jpg
image115_zpsfxasizn5.jpg
image114_zpstio89isa.jpg
image213_zpsatmityhc.jpg
Nice saw! Here’s a 103 9” table saw/jointer combo I just refurbished for a friend. Waiting on a retrofit blade guard and going to make a guard for the jointer from some scrap oak.
 

Attachments

  • 485498A2-1975-41EE-B395-4D25339D1287.jpeg
    485498A2-1975-41EE-B395-4D25339D1287.jpeg
    308.4 KB · Views: 34
  • 3329A3D0-F0EA-44CA-9ADE-D935F1181E19.jpeg
    3329A3D0-F0EA-44CA-9ADE-D935F1181E19.jpeg
    320.9 KB · Views: 37

motorcitykid

Well-known member
Joined
Dec 3, 2022
Messages
421
Location
Detroit River
Here's my 113 10" I picked up a couple years back, I bought it and a matching 150 drill press. I didn't paint it but if it works.
 

Attachments

  • 377092882_313141954718234_4718370880287258522_n.jpg
    377092882_313141954718234_4718370880287258522_n.jpg
    171.9 KB · Views: 23

motorcitykid

Well-known member
Joined
Dec 3, 2022
Messages
421
Location
Detroit River
This Tilty 8" was acquired a few days ago, man passed 40 years ago wife just kept it in the basement and she passed a year ago. Kids said it was started a couple times but it wouldn't do anything but smoke, I don't believe it was ever setup right. Because the old Sunlight 1/2 hp wouldn't do anything but throw the breaker, I got it home and swapped it with a nice running 3/4 blue Cman and they were right it was a mess the way it was setup. I wanted to try it as it was but with the table there was no way I could get it at the right angle with the arbor raised. Removed the table extension and hung it off the side, but it still needs some tweaking I think I am going to reposition it on the table to offer myself a little more room. Getting closer but not useable yet.
 

Attachments

  • 376600444_324452443321408_594316867729114873_n.jpg
    376600444_324452443321408_594316867729114873_n.jpg
    154.4 KB · Views: 20
  • 377094975_612224094325697_7242866634916429924_n.jpg
    377094975_612224094325697_7242866634916429924_n.jpg
    302.9 KB · Views: 16
  • 377107608_266412199558242_291557162406592342_n.jpg
    377107608_266412199558242_291557162406592342_n.jpg
    185.8 KB · Views: 16
  • 377092046_716627096957951_1456853024511489875_n.jpg
    377092046_716627096957951_1456853024511489875_n.jpg
    245.4 KB · Views: 15
  • 376600529_611457064483827_782533425253241094_n.jpg
    376600529_611457064483827_782533425253241094_n.jpg
    130 KB · Views: 15
  • 376575724_3633806353570542_7180518955234935888_n.jpg
    376575724_3633806353570542_7180518955234935888_n.jpg
    181.9 KB · Views: 15
To avoid these ads, REGISTER NOW!
Top Bottom