ez-duzit
Well-known member
For $400 I couldn't pass it up.


EZ: great looking mortising machine and hope to see pictures of yours soon maybe with a few cuts in some wood too...


Craptain: not that i didn't want to read all 900 of the posts on Ned's thread, but any idea when the wood storage was posted? or a post #? thanks
 To be honest I'm impressed if folks just look at a few of the pictures. Ha!
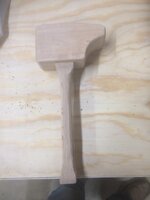
It will likely be months before the table for the mortiser arrives. I'm in no particular hurry--done without one for 73 years.
The scroll saw doesn't get that much use; mostly for model building. But it is a nice machine, with digital speed readout, and it regularly saves me from changing blades on the bandsaw. Bought it for $350 IIRC.


Jim, I'm starting to think you should be using my screen name.
I also have a right angle brace in my tool collection. Inherited from my grandfather so it holds a special place in my tool collection. And it has a roll-up cloth (canvas?) bit holder with most of the bits still in it. I've even had to use it a few times in tight spots.Sometimes you need a hole in an awkward area. Here is where the right angle brace and the right angle brace attachment come in handy.


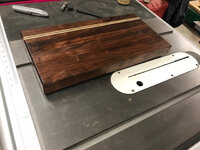
Mtn--I had to rub the sleep out of my eyes to make sure I was seeing correctly. Your curvy cutting board is clever. We all know how difficult those curves can be.


You don't need a jointer. I'm a professional woodworker and don't have one. But you won't go far with no hand planes. Though you can do a lot of work on a table saw with a sled, for small projects like that.

I would not touch a refurbished plane. Save your money and find something decent. A low-angle block plane, a shoulder plane, perhaps a jack plane.
Try the sled.