Shiftless
Well-known member
383
Great fastener storage drawers. Way better than those plastic drawer cabinets that most of us use.
Great fastener storage drawers. Way better than those plastic drawer cabinets that most of us use.


ALL:also for those of you that use files is there a preferred method of cleaning them, storing them and what is an easy way to tell if the file is past it's prime? i usually pick up files by the handfuls and mainly cause i've heard and seen a few clients, friends and members make knives out them if they were no longer any good as a file. probably could do an entire thread on files, but just wanted basic information on how to keep our saws, planes and tools sharp and ready to cut wood and not be a WOOD BUTCHER like i have been in the past.
cheers and good morning all.


Schor: i have a kitchen to remodel in a year or two and i'd love to learn how to and make all the kitchen cabinets. do you (or anybody) have pictures of how you made the cabinets and i like the sound of doweled and screwed. glued too?
...
...
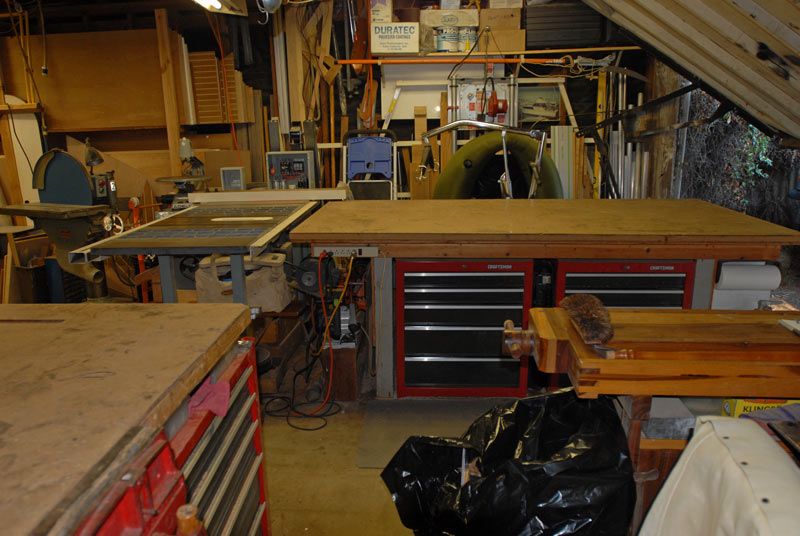
But it would make me crazy to try to work with collections of stuff covering my work surfaces. Though sometimes things do get out of hand. Looks like it's time to organize storage.

...EZ: in JIM's defense i put the idea in his head to start this thread this last week and he was maybe in the middle of 3 or 4 or so vise restorations...
). And sadly I don't have too many photos--it always seems I am otherwise too preoccupied, when building stuff, to take photos. But I'll try to see if there are any other photos around. At any rate I will also try to get some photos posted of my shop/tools. Ez--Sorry for the mess but you should have seen it before I cleaned up.
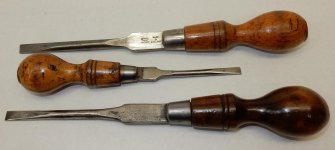
CRS--The screwdrivers in picture 3 are often referred to as English Cabinetmaker screwdrivers. The good ones have boxwood handles--OK ones have beech handles. The good ones are turned so that the handpiece in cross section is oval so that it fits the hand better.


CRS: i love all your wood handled tools so post more up if you have any and have some time. also Shift mentioned that you might make handles for those that you find broken or missing them and i've got several in the first pictures where the wood is damaged beyond PATINA range. i saw a post on another thread where a member (was it you) made a new wood oak handle for one of his.
QUOTE]
Drives: Most of the handles I have made were for socket chisels. The handles of socket chisels are tapered to fit into the tapered socket. As the tool ages and the wood gets dryer the handles shrink and don't fit tightly into the sockets anymore. That leads to them getting separated from the chisel and lost. When the handle is gone some people continue using the chisel and the constant hammering will mushroom the rim of the socket. Sometimes that is correctable but often it's too far gone. I always look because sometimes the remaining iron has a famous name on it - like Swan. It's pretty cool to get a Swan chisel for 25 cents. I have done a bunch of them but didn't take pictures. Now that I think of it they are in a drawer just below the newly cleared bench top. That should make a good place to photograph them. Oh, I just remembered that I made a handle for a hexagonal brass hammer head. I'll photograph that too.


vartz: I'm glad you found this thread. I'm only vaguely aware of the Wood Whisperer. What is a kitchen helper? Is it a stand for machinery like a mixer or microwave? I noticed that you used pocket screws for joining the wood. I have to admit that they don't sit right with me. It is essentially a **** joint. I'm trying to have an open mind about it. I can easily imagine someone's great great granddaddy saying, "Screws? Those are for guys who don't know how to clench nails!" And his great great granddaddy saying, "Nails? Boy, don't you know that joints are pegged?" And his ancestor saying, "Pegs? Those are for people who don't know how to properly lash wood together!" You get the picture. Let me know how they work out for you. I'm genuinely curious. BTW I'm going to use that flexible sander tip. Thanks
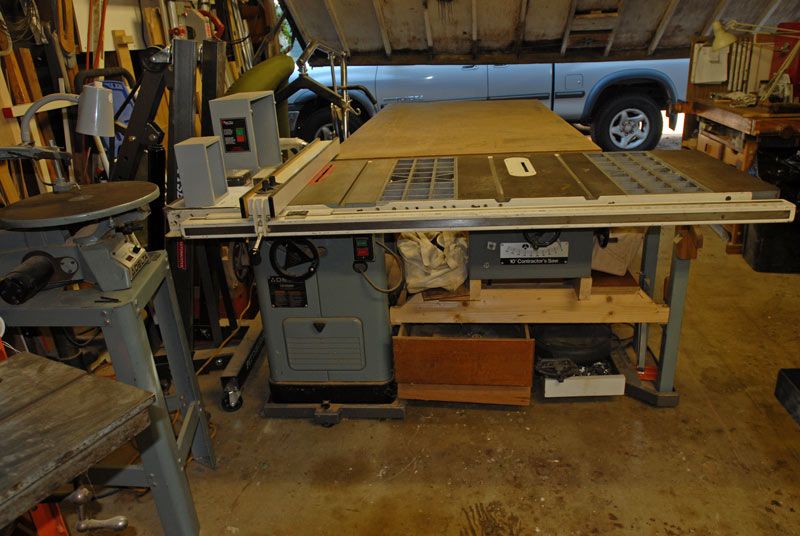
 ). As you'll see, it is quite cluttered, the floor hasn't been swept, there's sawdust and chips everywhere. And there are bits of material stored in every likely and unlikely space. And there are even some rusted machine tables. So you're welcome to give me the hell I deserve. But realize it is a working, one-man shop.
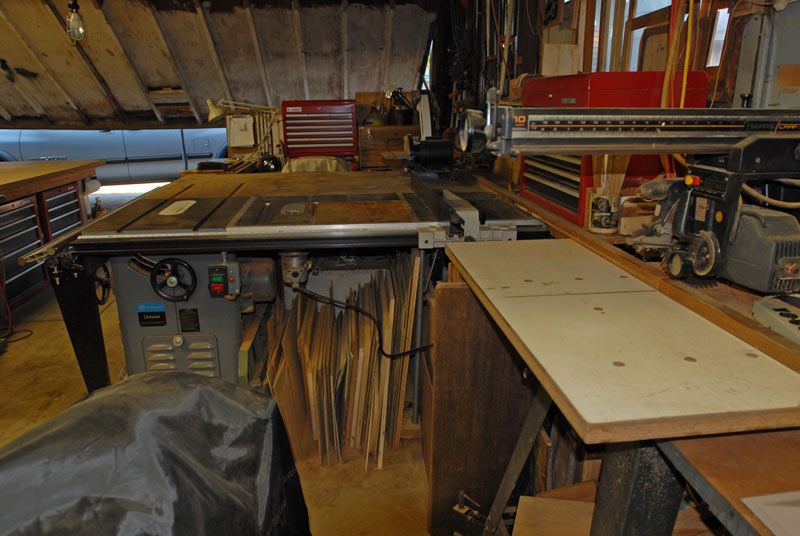


 ), is a vertical panel saw.