CAN THIS PLANE BE SAVED
Special note: I have written this assuming a basic or beginner level of knowledge. It is Woodworking 101 after all. Don't be put off too quickly if it seems too elemetary.
PHASE 2- Disassembly and Assessment
See original post #1582
Due to the limitations on the number of pictures that can be attached to a GJ post, I had to break Phase 2 into three parts.
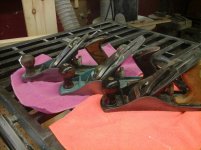
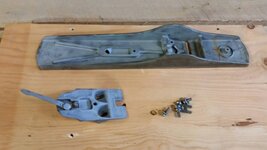
In Phase 1 we gave the plane a quick once-over. It was made by National and it's 5 1/2, a size that does not show up at sales very often. The wooden parts were in good shape with no splits, breaks or gouges. The casting is 5/32ths thick, the same as a Stanley No.6. The sole is smooth and it has no gouges. The mouth opening is regular and is not damaged. There is a fine layer of rust and dust over all the metal parts but it is not pitted. The paint on the interior of the bed is 90%-95% intact. With these positives showing, the plane was purchased for $15.
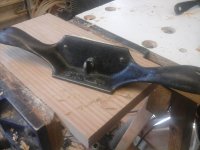
In Phase 2 the plane will be completely disassembled and each part will get a thorough inspection. Let's get to it.
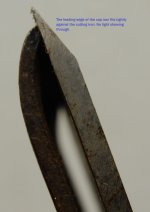
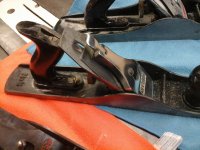
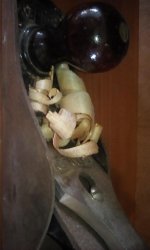
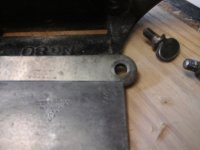
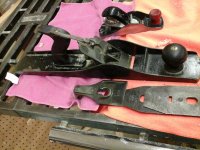
Phase 2A - Cap Iron and Cutting Iron
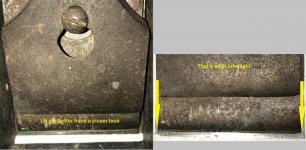
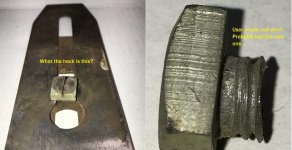
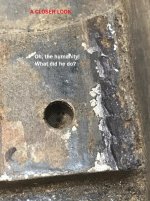
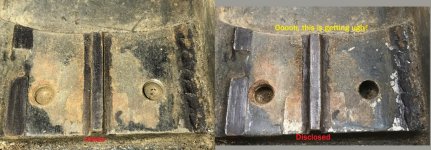
The first picture is an annotated drawing of plane anatomy. I added it so that we're all speaking the same language. I'll let the rest of the pictures speak for themselves. This plane's "quirks" started to show up here.
Special note to EZ: Notice the dark background on picture 4? Great tip. Thanks!
Phase 2B - "The Frog" coming next.
I'd like to read anyone's comments, questions, suggestions, or reactions.