To avoid these ads, REGISTER NOW!

Woodworking 101--Tools and Tips

To avoid these ads, REGISTER NOW!

CRSINMICH

Well-known member
Joined
Aug 15, 2015
Messages
2,397
Location
Southeastern Michigan
Normally I don't buy any tools that need a great deal of restoration, though there have been some notable exceptions, like my Powermatic 720HD mortising machine!!! I would have scraped the old **** off and probably left them bare or sealed them with clear acrylic sealer.

EZ: It was also in my mind that if they looked a little cleaner and newer they might not get thrown away in coming years when they're passed on to someone else. I'll probably take your approach with the 8 inch hand screw. It's chewed up but will still clamp tightly. I have a 6 x 48 Rockwell belt sander that I re-did. That was fun and a different kind of project for me.
 
Last edited:

cheechi

Well-known member
Joined
Feb 29, 2012
Messages
4,384
Location
Triad, NC
I would have just cleaned up the threads, but more out of laziness as they would have been functional otherwise. I don't consider collectibility or collector value for tools I use.
 
OP
J

jimreed2160

Well-known member
Joined
Aug 7, 2016
Messages
3,589
Location
Tallahassee FL
Rrich1--Great job on your remodel. Nice room.

CRS--I think you did a good job with your woodscrews. Sometimes they need a little touch up.

Here is one that my dad purchased in the 1950s. It still looks new.

DSCN2394.jpg


And here is one that I purchased in the late 1960s. No name but it has a great patina.

DSCN2393.jpg


And here is a basket case I found recently. It looks like it came out of a factory. I think it was regularly coated with linseed oil and then it went through a small fire.

DSCN2391.jpg


I cleaned gunk and char off with a Scotchbrite pad. It was just too nasty to use and I wanted to clean it without destroying the patina.

DSCN2392.jpg


After the pad, I wiped it good with turpentine and then waxed it after a few days. It is still pretty ugly but that's OK because it gets the ugly jobs.

I don't like too much finish on woodscrews but if they need it, I will rub them down lightly with boiled linseed oil and turpentine (20-80 mix). Too much BLO and they will darken like the one above.
 

CRSINMICH

Well-known member
Joined
Aug 15, 2015
Messages
2,397
Location
Southeastern Michigan
MORE ABOUT HAND SCREWS​
This is from a 1950 Hargrave catalog. Notice that the jaws are made from seasoned maple and they are oiled. A 1974 catalog has the same information. The 712 like the one I just refinished sold for $27 a dozen. That's $2.25 each. I was robbed!
 

Attachments

  • 1950 Hargrave catalog page.jpg
    1950 Hargrave catalog page.jpg
    129 KB · Views: 63
Last edited:

drivesitfar

Well-known member
Joined
Oct 23, 2013
Messages
36,007
Location
Pacific Northwest
Jim: i'm assuming your mix is 20% BLO and 80% Turpentine? or do i have that backwards? also excuse my ignorance cause i'm not great at this stuff yet and can you substitute mineral spirits for turpentine or any other chemicals like a Japan dryer i hear so much about?

ALL: i might have found a solution for my DAD's Shopsmith i don't have room for. since my dad doesn't drive anymore (he's 84 and not very mobile these days and GOD ONLY KNOWS which wires are working upstairs) so he should probably sell his old Lincoln Towncare and i'll make a woodshop out of his 12 x 40 garage that is perfectly dry and just needs more power.

STAY TUNED cause i have my MOM on board with the idea. when my Dad bought the Shopsmith new about 20 or 30 years ago i'm sure he wanted to do more than the one or two projects on it so maybe i'll get him turning some wood for a bowl, table leg or just a new file handle. not only would it give me room for my woodworking tools, but i'd get to spend time with my parents more often.

hope you are all having a great weekend.
 
OP
J

jimreed2160

Well-known member
Joined
Aug 7, 2016
Messages
3,589
Location
Tallahassee FL
Drives--20% boiled linseed oil and 80% turpentine. Raw linseed oil does not dry. I have used it (raw) before on tool handles. It works OK, but stays oily for a long time. BLO has japan driers and will get gummy if you put on too much. I wipe down at 30 minutes, 2 hours, and next day. Depending on weather and temps.

I have used mineral spirits to clean wooden tools. It is a solvent and strips everything and leaves the wood dry to the touch. Turpentine leaves a slight residue and maintains the patina of the surface. It also smells good. Here is a tip. Wipe something down with turpentine an hour or so before you have the grandchildren over for a shop tour. They will really like the faint aroma.

Good luck with your shop plan. I'll bet dad will enjoy his shoptime with son.
 

Tom99

Well-known member
Joined
Feb 16, 2017
Messages
73
Rrich1: Nice job on the bathroom! Well designed and I like the colors too.

Tom
 

drivesitfar

Well-known member
Joined
Oct 23, 2013
Messages
36,007
Location
Pacific Northwest
Tom: great looking shop and i bet even if it's not always that clean it's a great layout and some great tools too. what do you build or make or do you you like restorations?

Rich: nice looking vanity and wondering why such a dark stain if you went to the expense of making it out of CHERRY? also any during pictures and tips on how to make a VANITY? are those foot soak trays on the bottom shelf or do tell if you don't mind? looks like your new design was made to accommodate them and great spot for the TP too? nice work

CRS: i personally like the cleaned up clamp cause i bet after you cleaned up the screw it actually works like it was meant too. the patina is fine too on the cleaned up one, but did you add anything to the BLO to keep it from being sticky or just a very light coat that maybe you worked in with the steel wool? nice job
 

Tom99

Well-known member
Joined
Feb 16, 2017
Messages
73
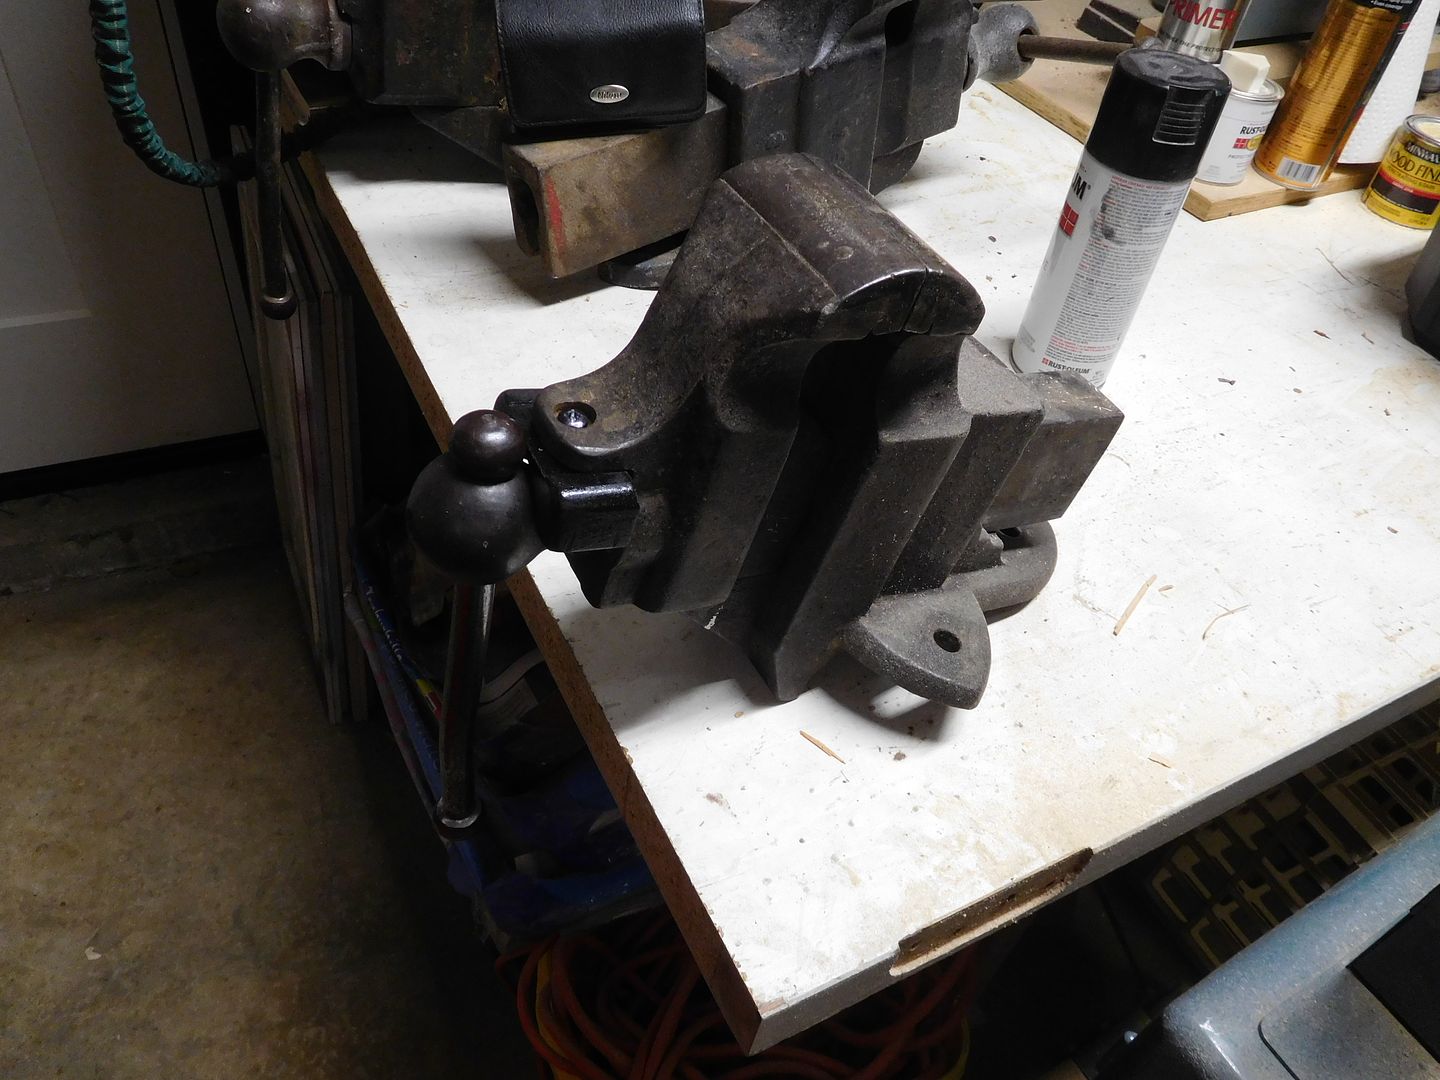
Tom99: Geeze, you were really holding back on the vise thread. Very very nice! Do you have any pictures of your projects?
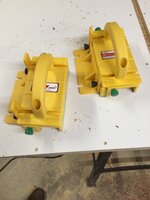
Thanks. I've been lazy lately with my projects. I've got a bed project about half done that I can't get motivated to finish. That's part of it sitting on my bench.

But here's a drafting table I made a couple years ago that I really like. Cherry, sort of a mission / arts and crafts design. The green surface is vinyl sheet made for drafting boards.

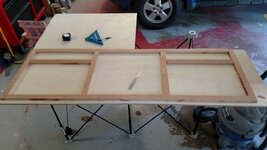
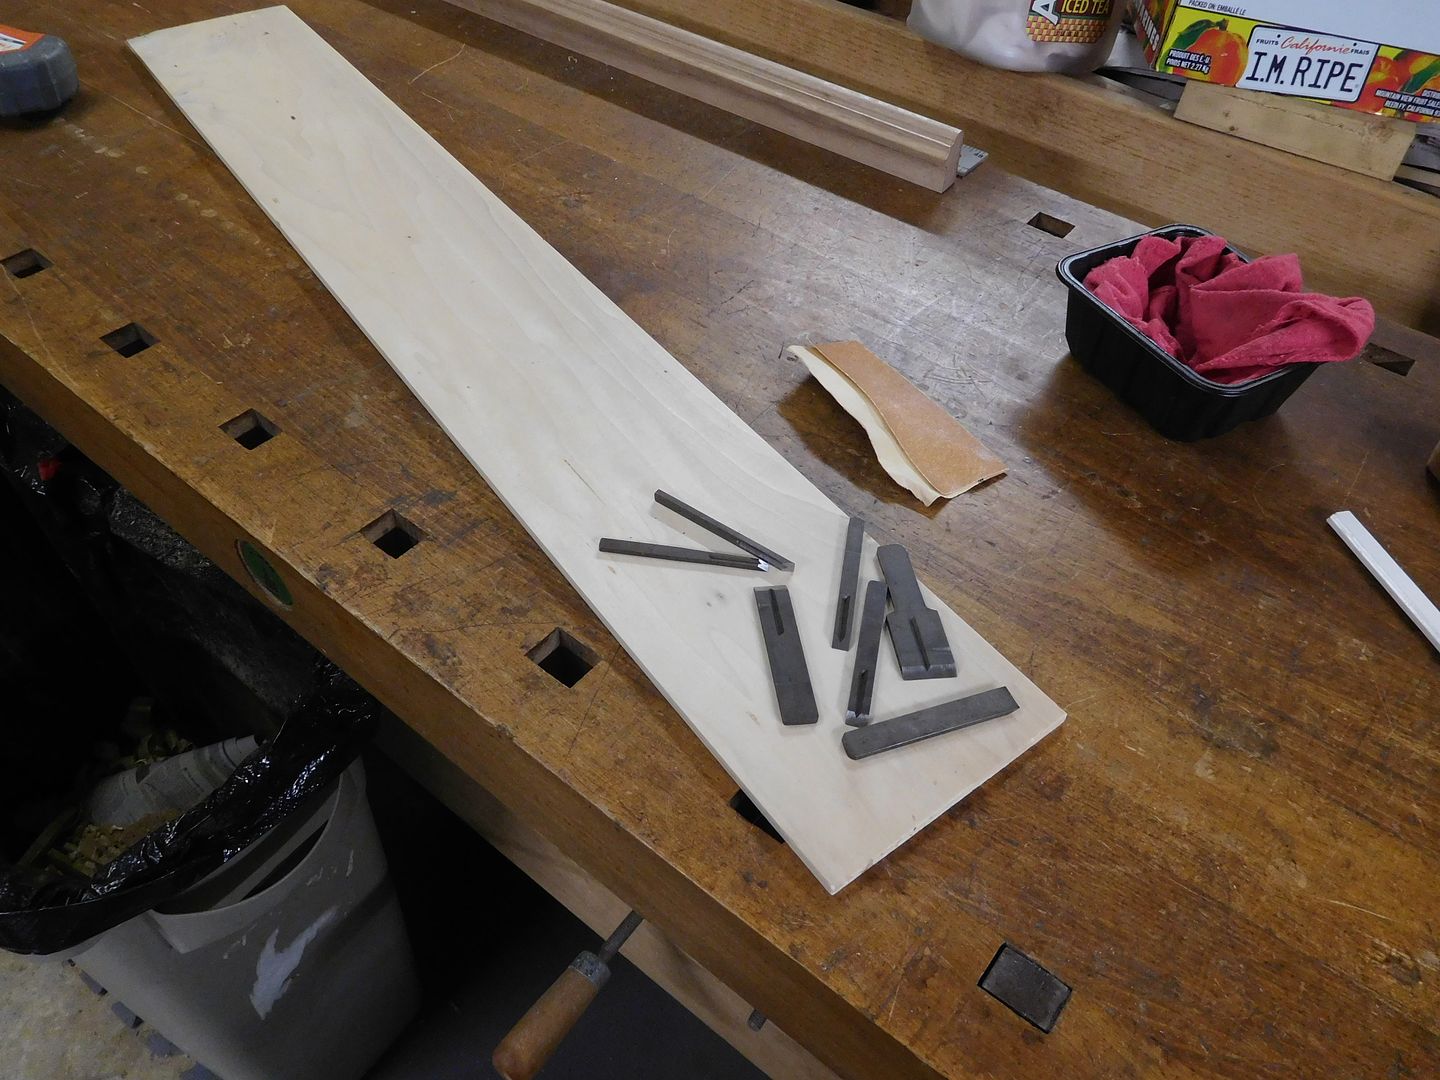
drafting table 007 by Thomas Rausenberg, on Flickr

drafting table 004 by Thomas Rausenberg, on Flickr

drafting table 012 by Thomas Rausenberg, on Flickr
 

CRSINMICH

Well-known member
Joined
Aug 15, 2015
Messages
2,397
Location
Southeastern Michigan
Drives: Yeah, the metal screws are slick and smooth. I used 0000 steel wool dipped in BLO to gently scrub the grime off the wooden parts. I wiped and dried each side with a shop towel as I finished working on it then went over the whole thing with a dry towel once again before I set it to dry.

Jim: After you posted about your father's hand screw I remembered that I gave one to my father in the early 60's so I dug it out. It wasn't quite as clean as the one your father had but it was clean. I gave it a light wiping with your BLO/Turp mixture and it revealed a faded Cincinnati Tool stamp.

Tom: That drafting table is a lovely piece of furniture and it's useful. Kudos! Now, get at that bed!
 
Last edited:
OP
J

jimreed2160

Well-known member
Joined
Aug 7, 2016
Messages
3,589
Location
Tallahassee FL
Tom--Nice table. One of the great things about being a ww is being able to make custom furniture for yourself. It is even better if your skill level is high like yours.

CRS--I am sure your clamp appreciated the TLC. Legacy tools are nice to have around the shop.
 
OP
J

jimreed2160

Well-known member
Joined
Aug 7, 2016
Messages
3,589
Location
Tallahassee FL
Parker vise collar

I acquired this vise recently at a great price because it was incomplete and looked different. It looked very Parker like to me so I took a chance. Here is what I received.

DSCN2396.jpg


DSCN2397.jpg


As you can see, it is missing its collar. And the collar attachment is unconventional. Turns out that this is a VERY early Parker vise. Patent dates are stamped all over the jaws. This is a great vise in outstanding condition for its age. Previous owner used a bolt as a makeshift collar. I have been pondering it for awhile and decided that today was the day.

Pollen season has kicked my behind hard and the meds just cloud my brain, or what is left of it. All I want to do is watch tv and nap. But I guess the coffee had extra caffeine today because I ran out into the shop like my pants were on fire. I took a sheet of aluminum foil with me.

DSCN2398.jpg


I used it to make a mould of the needed collar.

DSCN2399.jpg


And here it is.

DSCN2400.jpg


My plan is to make a wooden collar. It should work OK because the collar is needed only to keep the leadscrew from unwinding. It does not get much pressure. Since my brain was still foggy, I elected to mould the needed part rather than try to visualize a 3-D REVERSE image. Once I had my mould, I went to work on a prototype. I used a piece of construction lumber. Here is the trial fit.

DSCN2401.jpg


DSCN2402.jpg


Then all I had to do was recreate it in walnut.

DSCN2404.jpg


The piece of walnut fit like a glove and worked well. So well, in fact, that it got stuck in place.

DSCN2406.jpg


Next I cut it off and began finish shaping. Here is where the story gets interesting. I was able to use my old Parker carriagemakers vise to hold the part for shaping. So it was one Parker helping out his ole Parker buddy.

DSCN2407.jpg


After some shaping and sandpaper.

DSCN2408.jpg


Then I got hungry for lunch. I think I will paint it black so it will match the vise. More later.
 

drivesitfar

Well-known member
Joined
Oct 23, 2013
Messages
36,007
Location
Pacific Northwest
Jim: i'm not really sure what to think about putting on a piece of wood to fix a 150 year old vise. since it's a Parker and not one of my favorites (they are great vises BTW) it's not like you are making something for one of my Rock Islands or Reeds.

I'm watching closely to see if your fix works and see how long it holds up. at worst cast scenario you can take your wood piece to a college or trade school and maybe have a bronze or cast iron piece using it as the mold.

i love your almost kid like ENTHUSIASM.
 
OP
J

jimreed2160

Well-known member
Joined
Aug 7, 2016
Messages
3,589
Location
Tallahassee FL
Drives--As one who appreciates vises, I understand how this unconventional repair makes your head explode. But it really does work and sure beats the BOLT that came with the vise. Let's just say that it is a work in progress.

Here is where it stands tonight.

DSCN2409.jpg


Not too bad from a distance.

DSCN2411.jpg


BUT it does look a little shifty up close.

DSCN2410.jpg


If it holds up for a few months, maybe I will shape it a little better on the outside to make it "pretty". Otherwise, it is time for this little vise to go to work. With 3 1/4" jaws it should be handy for small stuff.
 
OP
J

jimreed2160

Well-known member
Joined
Aug 7, 2016
Messages
3,589
Location
Tallahassee FL
Rainy day project

Some projects start with figured hardwoods and sometimes they start with construction lumber.

DSCN2412.jpg


The Stanley Bedrock #605C is pulling nice shavings today. It is fun to use.

DSCN2414.jpg


DSCN2416.jpg


Now I have a chance to use my dovetail layout marker. One of my ww buddies made me a set of them years ago.

DSCN2419.jpg


Just lay it on the corner and mark away. In this case, I just need a little decoration.

DSCN2420.jpg


Next is the #65 chamfer plane. This one has a snazzy brass blade holder.

DSCN2421.jpg


It is making nice chamfers on the 2x4.

DSCN2422.jpg


DSCN2423.jpg


Now I have some decoration on the bottom edge. I need to add some buttons to cover up the screw holes. They go in place easily with my little persuader.

DSCN2424.jpg


Almost done. Stay tuned.
 
OP
J

jimreed2160

Well-known member
Joined
Aug 7, 2016
Messages
3,589
Location
Tallahassee FL
Rainy day project continued

Today's project was a hatrack. I gave my daughter the halltree because it took up too much space. But then I had nowhere to put my hats. That is pretty important to me because my boonie caps are supposed to prevent future skin cancers. Here is what I finally came up with.

DSCN2425.jpg


And here it is in place.

DSCN2426.jpg


I found an empty spot on the side of my Lonnie Byrd Kentucky cabinet. The hat rack hooks onto the top moulding. It holds my caps but the best part is that the Queen likes it.

DSCN2427.jpg


Construction lumber, sheetrock nails, buttons, and shaker style pegs.
 

Autonomous

Well-known member
Joined
Dec 26, 2015
Messages
66
Jim thanks for the hat rack project idea. It's now on my list, but my space is different so shapes will change. I have too many hats and too little holders.
 
To avoid these ads, REGISTER NOW!

ztorres

Well-known member
Joined
Sep 22, 2016
Messages
195
Location
Iowa
If there is ever a jig worth buying it's a Micro Jig Gripper. My parents got me a couple as a late birthday gift and they arrived today. I forgot how much I really like this jig. Makes cutting smooth and easy. I would recommend this jig to anyone, and is worth ever penny. This set cost around $120 with shipping. There are plenty of additions that can be bought but the basics are the plenty.
79eb1a2e25b012af963937150815bcd5.jpg


Sent from my iPhone using Tapatalk
 

Attachments

  • 79eb1a2e25b012af963937150815bcd5.jpg
    79eb1a2e25b012af963937150815bcd5.jpg
    498.4 KB · Views: 1

rrich1

Well-known member
Joined
Oct 7, 2015
Messages
793
tom99: thanks! Wife put some turquoise accents in it to make it pop. I'd put up more pics of the tiles shower but that is for another thread.

Jimreed2160: thank you. We like it a lot.

Rich: nice looking vanity and wondering why such a dark stain if you went to the expense of making it out of CHERRY? also any during pictures and tips on how to make a VANITY? are those foot soak trays on the bottom shelf or do tell if you don't mind? looks like your new design was made to accommodate them and great spot for the TP too? nice work
Thanks. The stain looks darker in the pic. I made it to where you can still see the grain pattern through it (see last attached pic). I wanted the hardness of cherry and my store has 4/4 cherry at a good price and I like the grain of cherry a lot. The green and blue things are steps for the kids (4 and 2). Supposedly they are supposed to go back when they are done with them...I did design the vanity to fit them in there. Here are a few pics of it while it was on progress. Still a movie with much to learn. I'm sure there are better ways that I could have built it but it is solid and suits our needs.
d2e808eb77f3047a363d74f4484a6b1a.jpg513c09ce580bb6a783d6e096fecb95ac.jpge482389f62d49d3a9f30ced0328e307d.jpg635fd6b3965596d55f22dd9328778d8c.jpg7a715357c327b78b66cf6827d2cb6194.jpg60489e79f51889d968bb8ec307be0a76.jpg


Sent from my Pixel XL using Tapatalk
 

Attachments

  • 635fd6b3965596d55f22dd9328778d8c.jpg
    635fd6b3965596d55f22dd9328778d8c.jpg
    79.4 KB · Views: 0
  • e482389f62d49d3a9f30ced0328e307d.jpg
    e482389f62d49d3a9f30ced0328e307d.jpg
    75.4 KB · Views: 0
  • 513c09ce580bb6a783d6e096fecb95ac.jpg
    513c09ce580bb6a783d6e096fecb95ac.jpg
    103 KB · Views: 0
  • 7a715357c327b78b66cf6827d2cb6194.jpg
    7a715357c327b78b66cf6827d2cb6194.jpg
    88.5 KB · Views: 0
  • 60489e79f51889d968bb8ec307be0a76.jpg
    60489e79f51889d968bb8ec307be0a76.jpg
    91.2 KB · Views: 0
  • d2e808eb77f3047a363d74f4484a6b1a.jpg
    d2e808eb77f3047a363d74f4484a6b1a.jpg
    86.3 KB · Views: 0
Last edited:

rrich1

Well-known member
Joined
Oct 7, 2015
Messages
793
For anyone looking to add table saw accessory space or for people with router tables in there table saws a wing box is probably my favorite shop project. Holds so much stuff and gives me places to put all the accessories you don't always use all the time. b0c1845c231c6deef0078efa4ab62da1.jpg79a74c339dc530241abea33927ad9c41.jpg4121a141ee56217c63a96bd026c82cbb.jpg3ed2b29177b0908e179098206d057414.jpg

Sent from my Pixel XL using Tapatalk
 

Attachments

  • b0c1845c231c6deef0078efa4ab62da1.jpg
    b0c1845c231c6deef0078efa4ab62da1.jpg
    91.9 KB · Views: 0
  • 79a74c339dc530241abea33927ad9c41.jpg
    79a74c339dc530241abea33927ad9c41.jpg
    69.1 KB · Views: 0
  • 4121a141ee56217c63a96bd026c82cbb.jpg
    4121a141ee56217c63a96bd026c82cbb.jpg
    83.4 KB · Views: 0
  • 3ed2b29177b0908e179098206d057414.jpg
    3ed2b29177b0908e179098206d057414.jpg
    62.4 KB · Views: 0
OP
J

jimreed2160

Well-known member
Joined
Aug 7, 2016
Messages
3,589
Location
Tallahassee FL
Small project gets finished

I put away my ww tools back in the early 1980s when my daughters were young. All projects in the works were put on ice. After they grew up and left the payroll, I reopened my workshop. But then the day job got in the way and minor projects were left untouched.

When I cleaned up my lathe table I found one of those old projects and moved it to the top of the list. It was a simple spaghetti server that I carved from cherry. Might not show, but I spent hours on that thing. I roughed it out with the bandsaw and started whittling and carving.

DSCN2430.jpg


It needed some sharpened dowels.

DSCN2428.jpg


Here is a quick way to cut them safely.

DSCN2431.jpg


So it was sharpen, cut and repeat four more times.

DSCN2429.jpg


Then it was a simple job to make a few holes and glue the dowels in place.

DSCN2432.jpg


DSCN2433.jpg


Of course, I had to sign it.

DSCN2434.jpg


And now it is on its way to a pair of pasta loving granddaughters. It was a small project but was some of the most fun I have had in the shop in awhile. It was a real treat to crank out a surprise for some people I love.
 

mefast

Well-known member
Joined
Sep 1, 2015
Messages
99
Location
Southwestern, Ontario
Nice projects everyone! I'm getting closer to finishing my shelf (time is hard to find between being at work all day and looking after our 4 month old son in the evenings). Once the shelf is all done, I'll post up photos.

In the meantime, I've been trying to figure out layouts in the garage. Most of it has been done inside my head while holding a screaming child.

What size is everyone's wood working areas?

The area I'm planning on working in will be about 14' x 12'. I know that's not very big, but I should be able to contain shavings and saw dust within it to keep our vehicles and other areas of the garage tidy. Thoughts?
 

CRSINMICH

Well-known member
Joined
Aug 15, 2015
Messages
2,397
Location
Southeastern Michigan
mefast: My shop is an 8'x10' corner of the basement with a table saw in the garage. The dimensions of your shop sound like a roller rink compared to what I'm used to. Do roller rinks still exist?
 
OP
J

jimreed2160

Well-known member
Joined
Aug 7, 2016
Messages
3,589
Location
Tallahassee FL
Mefast--On shop layout I have just one word--wheels.

OK. Maybe a few more words. I have mobile bases with wheels, shelving units with wheels, tool chests with wheels, and my air compressor is on a furniture dolly. Having so many things mobile really helps me in my tight spaces.
 

ztorres

Well-known member
Joined
Sep 22, 2016
Messages
195
Location
Iowa
I thought I had a small shop at 18x25. But I too have everything on wheels


Sent from my iPhone using Tapatalk
 
OP
J

jimreed2160

Well-known member
Joined
Aug 7, 2016
Messages
3,589
Location
Tallahassee FL
Making a traditional plane cutter box

Cast iron multi-planes were introduced in the late 19th century and most manufacturers made cutter boxes for the assortment of blades. These boxes are very handy because they reduce rust (from condensation) and also keep all of the cutters in one place. They are not too hard to make.

I have a Hamler bronze reproduction of the early Stanley Miller plane. Paul sold these without blades so I made a few sets for me and my ww buddies. That was a long time ago. Now I need a box.

I started with some 1/4" basswood from HD.

DSCN2435.jpg


Laid out the blades to determine the size.

DSCN2436.jpg


I cut two pieces and then found a scrap for the middle of the sandwich. The blades are 1/8" thick and the center needs to be 5/32 or 3/16 so the blades do not bind.

DSCN2437.jpg


Sides are glued on first.

DSCN2438.jpg


DSCN2439.jpg


Then the top and bottom are glued on.

DSCN2440.jpg


Then it is lunch time. The glue needs to set for a few hours.

After lunch, it is time to finish the box glue up. Here is where we are. Notice the gaps. More on that later.

DSCN2441.jpg


Simple matter to glue on the front. Pay attention and make sure the grain lines up.

DSCN2442.jpg


Time for another break so the glue can dry. Stay tuned.
 
OP
J

jimreed2160

Well-known member
Joined
Aug 7, 2016
Messages
3,589
Location
Tallahassee FL
Blade box continued

In my haste to complete the glue up, I neglected to pay attention to the gaps. Now I have to pay the price. Time to whittle a little plug.

DSCN2443.jpg


Time passes as glue dries. When it is sufficiently dry, I remove the clamps and square off the top and bottom on the table saw. The grain runs from top to bottom so the top and bottom are end grain. The table saw does a nice job finishing the end grain. For the sides, however, I like to use a handplane. Here is my #62 in action.

DSCN2444.jpg


Before

DSCN2447.jpg


After

DSCN2449.jpg


With all of the edges clean, our next step is to mark the box for a cut. Traditionally the tops of these blade boxes is held on by the blades themselves. So the box needs to be cut about 1/3 of its length from the top.

DSCN2450.jpg


The box cut is easily made with the table saw. Here are the blades in their new home.

DSCN2453.jpg


DSCN2452.jpg


DSCN2451.jpg


OK. Project done. Woodworking is fun.
 

derosa

Well-known member
Joined
Oct 19, 2010
Messages
1,078
Location
Oceanside, NY
Got a pic of the underside of the router wing? That's on this week's list of things to make so I can get some chairs made. I don't have the insert nor the cash for one right now so just a 3/4" particle board top with quarter sawn red oak sides and was thinking of using some cabinet plywood to stiffen up the whole thing but running strips from one side to the other. My hitachi has a fixed base I plan to permanently mount, just haven't worked out a decent dust collection.
 

rrich1

Well-known member
Joined
Oct 7, 2015
Messages
793
Got a pic of the underside of the router wing? That's on this week's list of things to make so I can get some chairs made. I don't have the insert nor the cash for one right now so just a 3/4" particle board top with quarter sawn red oak sides and was thinking of using some cabinet plywood to stiffen up the whole thing but running strips from one side to the other. My hitachi has a fixed base I plan to permanently mount, just haven't worked out a decent dust collection.
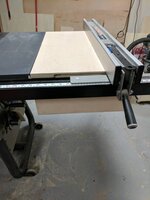
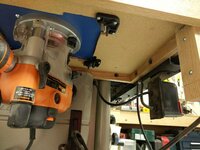
Here you go. When I did mine I messed up and ended up having to get the corner levelers. The sides are oak and the center is the top from an old desk. No sagging so far. I wish I would have moved the insert plate a little closer to the table saw side or extended the wing another inch. I don't have a miter track in there right now and am unsure if I really have enough room to put one in. 83abe518c7e8b0e1e823b561eed2414e.jpg01c82774513ca3f8a81fc8a0cb3201fc.jpg

Sent from my Pixel XL using Tapatalk
 

Attachments

  • 83abe518c7e8b0e1e823b561eed2414e.jpg
    83abe518c7e8b0e1e823b561eed2414e.jpg
    213.1 KB · Views: 0
  • 01c82774513ca3f8a81fc8a0cb3201fc.jpg
    01c82774513ca3f8a81fc8a0cb3201fc.jpg
    242.4 KB · Views: 0
Last edited:

rrich1

Well-known member
Joined
Oct 7, 2015
Messages
793
mefast: my vehicles get placed in the garage unless I am actively working on a project then mine can stay out, wife's can stay in. My area where my tools are is 7' deep by just under 12' wide. Get creative with your spacing like router table in a table saw and flip top table stands to reduce footprints on tools. 76c21c1b8c97a484cdd1da78a22efcce.jpgbb7e0e98e24d2f2ab1118c3dfda44350.jpg

Sent from my Pixel XL using Tapatalk
 

Attachments

  • 76c21c1b8c97a484cdd1da78a22efcce.jpg
    76c21c1b8c97a484cdd1da78a22efcce.jpg
    109.1 KB · Views: 0
  • bb7e0e98e24d2f2ab1118c3dfda44350.jpg
    bb7e0e98e24d2f2ab1118c3dfda44350.jpg
    104.4 KB · Views: 0

mefast

Well-known member
Joined
Sep 1, 2015
Messages
99
Location
Southwestern, Ontario
CRS, Jim, Zach and Rich,

Thanks for all of your responses about shop size and how to best utilize the space I do have. The main area of my garage is actually about 24' long by 40' wide, but 14' of that width is an add-on lean to and I try to park as many vehicles as I can fit in the remaining 26'. The woodworking area would share the lean-to with the furnace room that I eventually hope will be a home gym and tire storage.

My plan was to add castors to both the woodworking bench and a yet-to-be-built bench to house my contractors table saw and a router table. Tuck the lathe as close to the wall as possible, yet still be functional. Then within the two benches, have tool storage and build cabinets for the upper walls to house anything else that doesn't have a spot. Being able to multi-purpose the portable miter saw stand for other stationary tools is another idea that I've been thinking about.

Any tips for woodworking shop layouts? In kitchens, the recommended thought is to make a triangle between the fridge, sink and stove. Other than having a good bench in a central location, I've never really heard of something similar for woodworking.
 

ez-duzit

Well-known member
Joined
Jun 24, 2013
Messages
5,096
Location
Marina del Rey
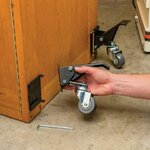
...My plan was to add castors to both the woodworking bench and a yet-to-be-built bench to house my contractors table saw and a router table...

These are probably the worst choices for having wheels as you really need them to be stable and not move around on you while in use, though I have a pair of (joined) table saws on a mobile base that is rather stable. My big bandsaw is on a mobile base, which isn't too bad.

Your benches need to transfer forces directly to the floor, as in planing and similar operations.

My shop is roughly 2 double garages in tandem, minus a storage room which is about 8' x 14' IIRC. That makes it way overcrowded.
 

eba3317

Active member
Joined
Dec 17, 2013
Messages
36
He could use something like these which allows the workbench to be rolled around but physically on ground when released

4d327a441054f8ea2dd76b8e79bb084c.jpg

Eric
 

Attachments

  • 4d327a441054f8ea2dd76b8e79bb084c.jpg
    4d327a441054f8ea2dd76b8e79bb084c.jpg
    102.2 KB · Views: 0
To avoid these ads, REGISTER NOW!
Top Bottom