kazlx
Well-known member
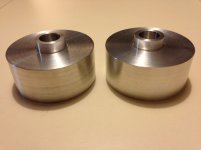
Bought some 6AL-4V Ti today to experiment with. Rings are an easy round object to make on the lathe.


Last edited:


Nothing fancy here. Just some tooling I needed. But, except for slotting a couple holes, this is my first job for my new/old Index mill. A great first experience.
In order to bend a mirror polished 1-1/2" 316 stainless pipe, I had to replace the steel rollers in my HF pipe bender with saddles, so there would be no point contact to damage the polished finish.
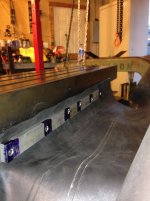
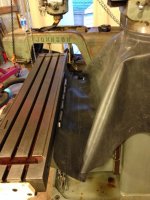
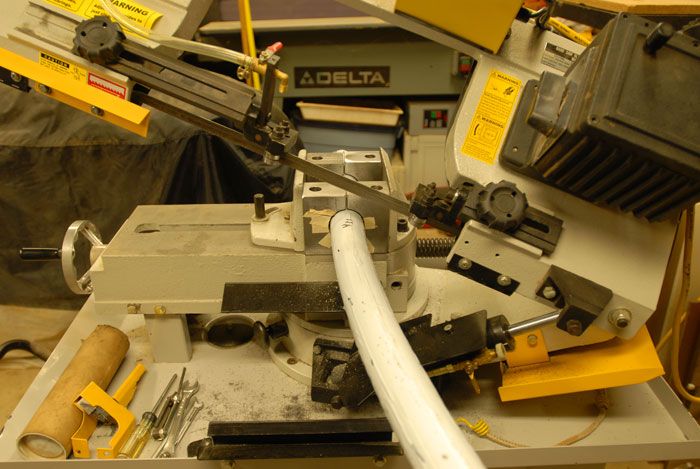
Beginning with a large block of steel, 2" thick, I first bandsawed the block in two. Then milled about 1/2" off the long edge, so it would fit inside the bender's frame. As one face of each block was pretty beat up, I fly-cut those. Centered on each block I drilled a 7/8" hole, which I then bored to 1-1/2", because my boring head maxed out; here I cheated and had a friend open the bores to 2.08. After cross drilling them for the bender axles, I bandsawed both blocks in two. This made two sets, so I could pair them when used for clamping.
note: So the blocks could accommodate both 1-1/2" pipe (1.90 OD) and 2" tube (2.00 OD), I chose 2.08 for the nominal bore size, so I could line them with .030" thick aluminum shims, as required, to protect the polished surface.
Photos show the blocks used for clamping in the mitering bandsaw; tape holding aluminum shims. Bender.

The bandsaw is made by Vectrax (Taiwan) and sold by MSC.
http://www.mscdirect.com/product/details/00923011
It is identical to the Baileigh here, except for color.
http://www.baileigh.com/horizontal-and-vertical-band-saw-bs-712ms
Mine was purchased as an eBay auction, in new condition, with the blade wheels missing and of course no blade, for $800 + $400 shipping from a Florida based industrial recycler. The blade wheels were ordered through MSC for ~$150, and shipped from Taiwan. It has a geared head, so speed changes are the flip of a lever.
I am so very pleased with this saw. And glad that I was careful to properly break in the Starrett blade. The cut it produces looks like it was machined. And it will cut extremely thin slices of structural shapes, like slicing bologna.
The only drawback I have found is that the machine, though incredibly heavy, really needs outriggers for stability when cutting more radical miters.
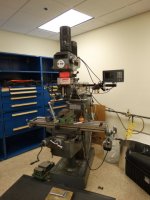
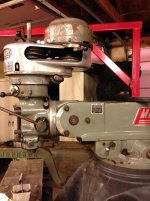
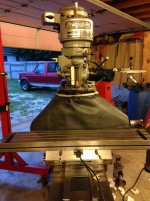
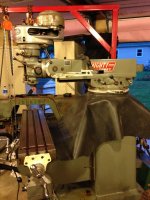
I've been wanting a vertical mill for a while now. I came across a Lagun FTV-1
It was in an R&D shop . It has a DRO ,vice and a few other parts. Its a 10 hr drive
$1800 what do you guys know about Lagun.
Thanks!
Rick


Bought some 6AL-4V Ti today to experiment with. Rings are an easy round object to make on the lathe.
That's pretty cool. How hard to machine is it?
What else would make a good ring?

That has the collet rack on it, but I did think about using it, and doing something else with the collets.Almost all of the ones I have messed with have the arm bolted on top of the ram where it looks like you have a tube mounted already then it hangs on the right side. The right side is the 'normal' spot and feels natural to me. What is on the 1x2" ish rect tube bolted to the top of the ram?
 )
)Super slow at work right now, so took some scrap and made a soft-face hammer. Brass handle, non-mag stainless steel head, brass spacers, and plastic and aluminum replaceable faces. Sounds like a guy I know might buy this one off me though, so I'm making a new one (It's going to be even cooler
Sorry for the ****** pictures.
https://scontent-sea1-1.**.fbcdn.net/hphotos-xfa1/v/t1.0-9/11666047_10153440951774581_7351846186237896232_n.jpg?oh=5142635677804dea7ad5c640dca945e8&oe=5626A8FB
https://scontent-sea1-1.**.fbcdn.net/hphotos-xpa1/v/t1.0-9/10501802_10153441939209581_2138555416661399194_n.jpg?oh=ef2a28c6a8c0d7833ed7284731d3397c&oe=5615BF19
Beautiful hammer.
How do you thread to a shoulder without a relief groove?
Super slow at work right now, so took some scrap and made a soft-face hammer. Brass handle, non-mag stainless steel head, brass spacers, and plastic and aluminum replaceable faces. Sounds like a guy I know might buy this one off me though, so I'm making a new one (It's going to be even cooler
Sorry for the ****** pictures.
Beautiful hammer.
How do you thread to a shoulder without a relief groove?


 (well, then i had to pay another 400 for a moving company to move it)


Beautiful work.
Mike.
Wow.... What a cool hammer. If you were to sell one, how much would it cost? I love one-off tools like this.
Mike
Beautiful hammer.
How do you thread to a shoulder without a relief groove?
I don't know how he did it on that job but when I have done it I use one of two methods. I either spin it reverse from left to right or I thread it traditionally and use a soft stop to disengage the lead screw or turn it off and thread the last turn or so by hand.
I am curious how he chose to do it as I am always up for new ideas.
Mike.
Low speed, quick hand on the half nuts and cross slide. A indicator on the ways or a DRO helps as most thread dials don't high resolution. If the machine has a ton of back lash in the cross slide screw/nut it can be a pain to do.
Very nice. One thing to possibly consider for future renditions. Use a threaded stud in the hammer head. That way all you have to do is tap the back of the face vs turning down and threading. Granted it is a catch 22 as with the one piece faces you can turn them down to reface numerous times without worrying about hitting a tapped hole.
Thanks, Mike! I take that as high-praise coming from you, I've seen some of the stuff you've made and am always impressed.
Thank you. I appreciate that.
Haha these are good guesses, but the answer is much MUCH simpler: I used a thread-die. I wanted to make sure that even if I some day don't have access to a lathe it would be manageable to make replacement faces if I needed to, so the answer was to just tap the head and use a die for the faces. That way I know that I can always just go out and grab another die (I used 3/4-10 UNC)
Spoiler alert!!! I thought for sure that you single pointed those threads. Nice work anyways, even if you didn't use the lathe for the threads.
Haha these are good guesses, but the answer is much MUCH simpler: I used a thread-die.

Haha sorry to disappoint, Mike! [emoji14] I would have rather used the lathe to do the threads since I could use the practice (still pretty new to all this) but this just made sense for this project.
Jar, you must think I work at a better machine shop than I do. [emoji14] We don't have a tailstock die holder, I went low-tech and used a regular die handle.
Thanks again guys, I didn't have a chance to finish the second hammer yesterday but I'll post it when I do.
Sent from my B15 using Tapatalk
OK,
Time for measurements and how you did the head to handle!!!
Bill
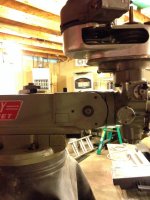
some neat stuff here. I recently picked up my first mill. bridgeport clone from what i can tell.
1997 supermax mill with dro
came with lots of extras too.
kirt vise, bunch of endmills, full collet set and some extra tools. not bad for 500 bucks