To avoid these ads, REGISTER NOW!

Between 265 & 485 SQ/FT Nick's Two-Car Detached Vdub Garage

Workspaces sized between 265 and 485 squarefeet.

bdbecker

ALLIANCE MEMBER
Joined
Nov 18, 2015
Messages
5,564
Location
Iowa
...Thanks for the advice guys. I took a look at the base and the column has a flange that the mounting bolts go through, so it can't be turned. I managed to get 'er upside down and let some WD40 sink in to no avail. After 45min of wrestling with it, whacking it with a dead blow hammer, etc, I realized there is a second set screw.

:eyecrazy:

After I loosened that it turned no problem. :lol::lol::lol:

Guess I shoulda looked at the manual closer.

Lol... we've all been there. Glad you got to the bottom of it.

Is there a set screw on both sides? I downloaded the manual to specifically look to see if that might be the issue, but no mention other than the "5mm screws" being plural. Even the pic doesn't help a whole lot either.

View media item 106214
Nice work on the drill cart!
 
To avoid these ads, REGISTER NOW!

loganb

ALLIANCE MEMBER
Joined
Dec 29, 2011
Messages
5,533
Location
Omaha, NE
Thanks! Wow you pulled the trigger on the saw fast, nice! Did you get the cordless? You'll have to let me know how it works.

Ya my daughter is 2 yrs in a couple weeks, fine in the crib still but thinking ahead to potty training and potential climbing out. I've learned with DIY stuff it's good to plan ahead, otherwise while my wife loves it when I make stuff for our family, if we need it 'yesterday' then it ends up getting purchased instead. She showed me that Sprout bed for $250 or whatever and asked me to make similar. Should just be the $55 for the sheet of plywood.

I didn't go cordless....using the same logic that I was going to have the vac attached I stuck with corded and will use that savings to buy another vac instead :) Haven't really cut anything that matters with it....but the 1 piece of plywood I did cut down I liked it so looking forward to a real project with it!

And good luck with the daughter...our's is 2 in October! My head is turning on bed...bathroom stools etc and what tools do I "need" to make those projects and looking forward to watching your bed progress!
 

bj383ss

Well-known member
Joined
Sep 29, 2011
Messages
3,166
Location
TX
Nick I am a few update posts behind on your thread but IMHO you got a great drill press to start with. One of the most important things to look at for woodworking with a drill press is how much motor you have(3/4hp) is great. It has enough power to run just about an hole saw you can throw at it. And second the length of quill. I looked yours up in the manual and it is 3" which is great. My first drill press had a 1/3 hp motor and only 2 " of quill. Besides having a week motor the short quill made alot of ordinary projects very difficult. I was able to get by with it for almost 10 years. It is sitting quietly in the corner while a find a new home for it.

In addition to the rolling cart for it I recommend a good table with a fence and stop blocks. Another project for you to add to your list.

Bret
 

Unruh

Well-known member
Joined
Aug 12, 2017
Messages
1,431
Location
Silverdale, Washington
Lot’s of great updates. That drill press is a great score. I have always liked Grizzley products. That stand is gonna be nice and the extra drawer space is always welcome!
 

Trapps

ALLIANCE MEMBER
Joined
Feb 10, 2017
Messages
2,002
Location
The Detroit Zoo
This thread keeps on delivering. I'm impressed with how useful, functional and flexible the MFT is and your ability to use it with skill.

Not sure what options you have nearby, but I have made the switch to Menard's (8 miles) over Lowes (2 Miles) and HD (3 Miles) just based on quality of lumber. Their plywood appears to be a step or two above the L & HD stuff.

Great job Nick!:beer:
 

loganb

ALLIANCE MEMBER
Joined
Dec 29, 2011
Messages
5,533
Location
Omaha, NE
Not sure what options you have nearby, but I have made the switch to Menard's (8 miles) over Lowes (2 Miles) and HD (3 Miles) just based on quality of lumber. Their plywood appears to be a step or two above the L & HD stuff.

Great job Nick![emoji481]

For me, Menards has a larger selection than the others for sure and I am a fan of their prefinished plywood as it seems to be better/more consistent even if I don't need the prefinished. Still got mixed feelings about quality of plywood at all of them. For me its fine for garage and storage purposes but not yet sure if I'll use it for house "furniture" purposes...I'm a ways away from furniture projects though so may give it a shot on some upcoming toddler furniture.

Sent from my SM-N986U1 using The Garage Journal mobile app
 

bdbecker

ALLIANCE MEMBER
Joined
Nov 18, 2015
Messages
5,564
Location
Iowa
...Not sure what options you have nearby, but I have made the switch to Menard's (8 miles) over Lowes (2 Miles) and HD (3 Miles) just based on quality of lumber. Their plywood appears to be a step or two above the L & HD stuff...

I'd second that, at least when it comes to cabinet grade plywood. HD sells the ply that has a very thin face layer that looks nice, but you can sand through if you aren't careful. Menards is a little more expensive, but has the more traditional full thickness outer layers that you'd expect to see from a baltic birch product.

https://www.menards.com/main/buildi...07409-c-13334.htm?searchTermToProduct=1253102
 
OP
N

nicholam77

Well-known member
Joined
Dec 18, 2016
Messages
2,659
Location
Minneapolis, MN
Great work as always. Your shop and tool collection is really coming along! Love all the custom benches and carts you've created over time. They will all go a long way in increasing your efficiency for future woodworking projects.

Thanks man! If I'd known the utility of custom benches I probably would have planned things out differently from the beginning, but hey, it's an evolution. Efficiency has always been super important to me because 1) time is short 2) I have to set up and break down to park the cars.


Is there a set screw on both sides? I downloaded the manual to specifically look to see if that might be the issue, but no mention other than the "5mm screws" being plural. Even the pic doesn't help a whole lot either.

It's the other black screw about 4" directly above the one pictured in the manual. I agree... it's not very clear!

I didn't go cordless....using the same logic that I was going to have the vac attached I stuck with corded and will use that savings to buy another vac instead :) Haven't really cut anything that matters with it....but the 1 piece of plywood I did cut down I liked it so looking forward to a real project with it!

And good luck with the daughter...our's is 2 in October! My head is turning on bed...bathroom stools etc and what tools do I "need" to make those projects and looking forward to watching your bed progress!

Ah gotcha. Well the corded should be rock solid. My original desire was to make everything for her... but it just hasn't been possible for me with the hours in the day. She's two Oct 12 so very similar! Still aiming to make a few things I can feel proud that I contributed but it's a whirlwind working full time and raising a kid. It does feel great though when she is proud "dada" made something for her. Good luck to you as well!

Nick I am a few update posts behind on your thread but IMHO you got a great drill press to start with. One of the most important things to look at for woodworking with a drill press is how much motor you have(3/4hp) is great.
[...]
In addition to the rolling cart for it I recommend a good table with a fence and stop blocks. Another project for you to add to your list.

Bret

Thanks Bret! I am excited about it. Tbh I'm probably gonna be drilling 3/4 plywood 90% of the time, so yeah, it should be good! :lol::lol: But the specs were what drew me to it, glad to hear from your experience it should hold up!

DP table and fence are definitely on the list!

Lot’s of great updates. That drill press is a great score. I have always liked Grizzley products. That stand is gonna be nice and the extra drawer space is always welcome!

Thanks! I am planning on using the drawers to offload some stuff from my red Craftsman tool bench and do some reorganizing. Should be useful!

This thread keeps on delivering. I'm impressed with how useful, functional and flexible the MFT is and your ability to use it with skill.

Not sure what options you have nearby, but I have made the switch to Menard's (8 miles) over Lowes (2 Miles) and HD (3 Miles) just based on quality of lumber. Their plywood appears to be a step or two above the L & HD stuff.

Great job Nick!:beer:

:rocker:

The materials for the MFT set me back ~$500, and probably over 100 hrs to build. Granted, some of the same features could be implemented for a lot less. Many times during the process I questioned "is this worth it?" But I have to say it's lived up to my expectations of it and it is truly multi-function like it's name sake.

I've actually never used Menards (nicer) plywood, but I've looked at it before. It does look nice. A bit more expensive than HD where I'm at. Biggest factor for me is Home Depot is closer and I can stay within the 75min $19 truck rental. But maybe I'll have a better solution for that in the future.

For me, Menards has a larger selection than the others for sure and I am a fan of their prefinished plywood as it seems to be better/more consistent even if I don't need the prefinished. Still got mixed feelings about quality of plywood at all of them. For me its fine for garage and storage purposes but not yet sure if I'll use it for house "furniture" purposes...I'm a ways away from furniture projects though so may give it a shot on some upcoming toddler furniture.

I'd second that, at least when it comes to cabinet grade plywood. HD sells the ply that has a very thin face layer that looks nice, but you can sand through if you aren't careful. Menards is a little more expensive, but has the more traditional full thickness outer layers that you'd expect to see from a baltic birch product.

https://www.menards.com/main/buildi...07409-c-13334.htm?searchTermToProduct=1253102

Agree with you guys. I've been using the Columbia Forest Products birch ply from HD. It's around $56 a sheet here and is not true baltic birch. I find it totally adequate and attractive for shop furniture, but I've actually been agonizing over what to use for my fireplace built-ins I keep talking about but never making. :lol: I'll have to take a closer look at Menards.
 
OP
N

nicholam77

Well-known member
Joined
Dec 18, 2016
Messages
2,659
Location
Minneapolis, MN
Kid's Bed - part 1 - templates

Since it seems there are 1 or 2 people interested in the bed I am going to try and document it well. At least how I am approaching it.

It's just five pieces (2x long sides, 2x short sides, mattress support). These were all dimensioned during the plywood breakdown process depicted earlier.

Tonight I decided to tackle making templates for the ends of the sides, as this is how I am choosing to tackle the shaping of those. The templates will then be used to flush-trim route the actual pieces.

It's not that complicated, but to copy the inspiration bed, there are some rounded intersections and kind of a softness to it.

To start I ripped some scrap MDF to the same height as the side pieces, 11".

Looking at the reference photo I laid out some quick guidlines in Sketchup, jotted some notes to bring to the shop, and laid them out on the MDF.

Liv-Bed.jpg


IMG-2282.jpg


IMG-2281.jpg


Next I drew the radiuses, which can be created from any circular shape on hand - varnish cans, washers, etc.

IMG-2280.jpg


To cut out the straight portions, I think you know what tool I used: :lol:

IMG-2285.jpg


This just leaves the curves:

IMG-2287.jpg


For which I used the jigsaw -- cutting close to the line but leaving a little room:

IMG-2294.jpg


Because the tracksaw blade is circular the straight cuts need to be extended on the back side with a hand saw, so I threw the templates in my MFT "vise":

IMG-2290.jpg


Lastly I smooth out the curves with... the drill press!! Inaugural use! Sanding down to the pencil line.

IMG-2296.jpg


IMG-2297.jpg


So the results were excellent. But one thing that has me worried -- the sanding drum had some wobble. And the doweling brad point bid the other day seemed to have some wobble / run out. Can any of the drill press experts weigh in? If I have an issue would this be fixable with a new chuck potentially, or is it maybe installed crooked?

Here you can see what a mated corner of the bed will look like based on the templates:

IMG-2298.jpg


Next will be cutting and flush trimming the actual pieces, just gotta find time to get to it!
 

bj383ss

Well-known member
Joined
Sep 29, 2011
Messages
3,166
Location
TX
Nick you can pull the Chuck out of its taper. It might have some trash or something in the taper causing it not to run true. Clean up both surfaces and then reseat it see if that helps it. There also could be something inside the chuck itself. Trying cleaning it out as well.

As far as the sanding drum it is usable on the drill press, but the drill press is not designed for side load like a milling machine.

The more I see you use your MFT I want one. But I have no were to put it. I would have to rebuild my entire workbench. I have already done that 3 times so I probably won't. I will just live vicariously through yours.

Bret
 

loganb

ALLIANCE MEMBER
Joined
Dec 29, 2011
Messages
5,533
Location
Omaha, NE
Assuming this is the right model, you should be able to pop the chuck assy out by making a taper punch shown as item 73(assuming it didn't come with yours as they rarely do when used) out of a piece of scrap hardwood or metal to tap the chuck assuming out via the slot in the quill...shouldn't take a ton of force

Once the chuck is out you can check to clean all surfaces up and see if that helps with your "run out". If not, may need to remove the chuck from the arbor to clean those surfaces as well...or it may just be a bit "sloppy" in the quill and not much that can be easily doneScreenshot_20200902-104042_Photos.jpg

Sent from my SM-N986U1 using The Garage Journal mobile app
 
OP
N

nicholam77

Well-known member
Joined
Dec 18, 2016
Messages
2,659
Location
Minneapolis, MN
Nick you can pull the Chuck out of its taper. It might have some trash or something in the taper causing it not to run true. Clean up both surfaces and then reseat it see if that helps it. There also could be something inside the chuck itself. Trying cleaning it out as well.

As far as the sanding drum it is usable on the drill press, but the drill press is not designed for side load like a milling machine.

The more I see you use your MFT I want one. But I have no were to put it. I would have to rebuild my entire workbench. I have already done that 3 times so I probably won't. I will just live vicariously through yours.

Bret

Thanks for the advice! I was very gentle with the sanding drum, hardly any pressure. I figured since it was just MDF and I was being careful it would be alright.

I don't know that the MFT (or any MFT concept bench) can do anything a traditional bench can't, but it works for me. If you wanted to add something like it that was space saving, you could look at something like the Stanton Bench if you haven't encountered it, although you probably have since I know you're all over the interwebz following all kinds of woodworking content!

Assuming this is the right model, you should be able to pop the chuck assy out by making a taper punch shown as item 73(assuming it didn't come with yours as they rarely do when used) out of a piece of scrap hardwood or metal to tap the chuck assuming out via the slot in the quill...shouldn't take a ton of force

Once the chuck is out you can check to clean all surfaces up and see if that helps with your "run out". If not, may need to remove the chuck from the arbor to clean those surfaces as well...or it may just be a bit "sloppy" in the quill and not much that can be easily doneScreenshot_20200902-104042_Photos.jpg

Sent from my SM-N986U1 using The Garage Journal mobile app

Thanks for the detailed advice. Tbh I've barely used the drill press, just something I've seemed to notice. I'll have to do more testing and probably take it apart and clean it to make sure.
 
OP
N

nicholam77

Well-known member
Joined
Dec 18, 2016
Messages
2,659
Location
Minneapolis, MN
Kid Bed - part 2 - template routing the sides

With the MDF templates made I could use them to route the plywood.

This is fairly straightforward stuff but I will document it in case anyone wants a "how to". 1st step was lining up the template, and tracing it in pencil onto the plywood.

IMG-2317.jpg


Then I cut close to the line with a jigsaw, but leave an 1/8" to 1/4" past the pencil line. Less is better, but I went more like 1/4" since I don't trust myself with a jigsaw. :lol:

IMG-2318.jpg


IMG-2319.jpg


Then put the template back in place, and secure with double-sided tape.

IMG-2322.jpg


Now it can be pattern-routed with a flush trim bit at the router table (bearing rides on template, cutter copies the shape). This could also be done handheld, but I like controlling the workpiece at the table more.

IMG-2323.jpg


IMG-2325.jpg


Last step was to "connect the dots" and cut the middle section between the legs straight. Track saw with it's plunge action made perfect sense for this, although a table saw could be used as well, raising the blade through the material.

IMG-2326.jpg


After making one full side, I use that as the "template" for the other side, so they end up identical.

With the short sides done, rinse and repeat for the long sides:

IMG-2329.jpg


IMG-2331.jpg


Chip collection was non-existent for this task, I really need to make a downdraft box, but the router table was very enjoyable to use for this process.

IMG-2332.jpg


And here are the routed parts for all the sides:

IMG-2333.jpg


They will still get a 1/4" roundover and substantial sanding to smooth them out. Unfortunately with the plywood there are some voids I'll need to fill, too.

Back at it when I can.

:rocker:
 
OP
N

nicholam77

Well-known member
Joined
Dec 18, 2016
Messages
2,659
Location
Minneapolis, MN
Drill Press Cart - part 3 - staple mania

Small end-of-Labor-Day-Weekend update.

Had a busy weekend with family. Mostly around the house but Labor Day was my wife's birthday so we had some extra celebration.

During naptime today I had a chance to do some more quick work on the drill press cart, switching gears from the bed.

I got some 1/4" ply for the drawer bottoms, so I cut that. I cut them all with pencil marks and track saw. Don't need to to be super precise as long as they fit.

I've only every built drawers one way. I think I learned it from Jay Bates on YouTube. Dado/groove sides and front to accept the bottom. Back is cut short and bottom overlaps it -- then fasteners through bottom into the back. Drawer bottom is plywood so stability is not an issue, and it is free-floating in the dado on the other 3 sides.

Here is that depicted with the drawer upside down, back facing towards you.

IMG-2338.jpg


Normally I use countersunk screws to fasten the bottom, but with 5 drawers I decided to try my staple gun which I've never used but came with the set.

IMG-2355.jpg


IMG-2356.jpg


Some trial and error setting the depth, but went fast and easy.

With leftover 1/4" ply, I made a panel for the back of the cabinet. This will provide additional support to keep it square and prevent racking. Since I had the staple gun ready to go I tacked that on as well:

IMG-2357.jpg


source.gif


I intentionally made it slightly oversized, so I could then use the router to flush-trim it to the sides and top.

IMG-2358.jpg


IMG-2359.jpg


IMG-2360.jpg


This method works great to achieve an exact fit.

Unfortunately I already had cut the top panel before adding the thin back panel, so it doesn't overhang it:

IMG-2361.jpg


:mad:

I think I'm going to cover up this mistake with some hardwood edge banding around the top.

A couple years ago I dug up some overgrown shrubs on the alley side of the garage and planted some raspberry bushes. They have taken over nicely and give a nice little yield from time to time. My daughter likes to eat them when we pass by in the stroller. :lol:

IMG-2347.jpg


IMG-2349.jpg


IMG-2350.jpg


Hope everyone had an amazing weekend filled with productivity, relaxation, or both!
 
Last edited:

Mr. Roboto

Well-known member
Joined
Dec 11, 2012
Messages
2,160
Location
New Hampshire
The cart and bed are looking great. Thanks as always for taking the time to outline all the steps. I always learn something, or see a tool or gadget you use that I wish I had. Sorry if you already mentioned it, but what are you planning to do fro a finish on the bed?
 
OP
N

nicholam77

Well-known member
Joined
Dec 18, 2016
Messages
2,659
Location
Minneapolis, MN
The cart and bed are looking great. Thanks as always for taking the time to outline all the steps. I always learn something, or see a tool or gadget you use that I wish I had. Sorry if you already mentioned it, but what are you planning to do fro a finish on the bed?

Thanks, man! (I've learned lot's of stuff from your thread too!). Most of my "tips" are regurgitated tidbits from YouTube videos I've watched :spit: . But it is absolutely my hope that others find it useful or interesting at times!

For a finish I'm going to be boring and use the same General Finishes High Performance water-based polyurethane satin again. Same thing I used on the toy cubby. Mostly because they will likely be in the same room eventually so I want them to match. But also I like the way it looks on the birch ply -- keeps it honest and raw. And being kids furniture it doesn't hurt that it's very durable.
 
OP
N

nicholam77

Well-known member
Joined
Dec 18, 2016
Messages
2,659
Location
Minneapolis, MN
Drill Press Cart - part 4 - installing the drawers

Got some things done!

To finish the drawers I needed to install dowels so I cut some oak dowel stock. I had wanted walnut or cherry or something like that, but didn't have time to go to a specialty store and just got some at Home Depot.

IMG-2371.jpg


Clamp the drawers for security:

IMG-2375.jpg


Spread some glue and wham bam bam with the hammer!

IMG-2374.jpg


IMG-2376.jpg


I did just one side at a time since they need to lay on their side to be installed easily.

Trimmed them flush with the Japanese pull saw.

IMG-2381.jpg


I wiped some water on a finished one to see the end grain pop:

IMG-2420.jpg


Then on the cart I put the casters on. No pics but self-explanatory I think.

Then I fastened the top to the cart. Just a bunch of screws up through the stretchers.

IMG-2407.jpg


IMG-2408.jpg


Drawer slides from Amazon showed up this afternoon so I got the drawers installed, too.

As with previous drawer-cabinet-builds, I ripped some scrap spacers from particle board to assist installing the slides and drawers evenly.

IMG-2412.jpg


In the above photo you can also see the little plywood block in the Kreg clamp being used to set back the drawer slides 1" repeatably.

The process actually went relatively quickly.

IMG-2415.jpg


The drawers are super long. :lol:

IMG-2416.jpg


Earlier you may have been wondering -- why set back the slides a whole inch? Well I got side mount slides and didn't want to cover up the dowels I worked so hard on. :lol::lol::lol: Yeah, didn't really think that one through.

IMG-2417.jpg


Good news is the car still fits but the bad news is just barely.

IMG-2418.jpg


And the cart blocks the Craftsman bench drawers on that side. And the drill press will need to be rolled a bit away from it every time I want to use it. And now I can't walk past that side when the car is in the garage.

I'll get to the finishing bits of course, but as it is now it's more or less functional.

Funny thing is plywood was ~$60, drawer slides were $40, hardware to mount the drill press and dowel stock was ~$15, casters were ~$24. Do some quick math (yuck!) and that comes out to $139.

For an extra $139 I probably could have just found a floor model!

:lol_hitti
 

bdbecker

ALLIANCE MEMBER
Joined
Nov 18, 2015
Messages
5,564
Location
Iowa
...Good news is the car still fits but the bad news is just barely...

Well, I guess once the next tool purchase is made, you'll just have to tell your wife to start parking in the street.

...For an extra $139 I probably could have just found a floor model!

Yeah, but then it wouldn't have been mobile and you wouldn't have those extra drawers for storage. Trust me, the first time you need to drill a hole in the middle of some long piece of stock, you are going to be really glad you can just roll your drill press to the middle of the room.

Cart looks great! Looking forward to seeing it all buttoned up with faces and pulls.
 
OP
N

nicholam77

Well-known member
Joined
Dec 18, 2016
Messages
2,659
Location
Minneapolis, MN
Well, I guess once the next tool purchase is made, you'll just have to tell your wife to start parking in the street.

Lol! Need to make room for that planer / jointer / bandsaw :lol:

Let's just say before we got the house our apartment only had one garage space... can you guess who got it and who parked outside?

I actually wouldn't mind parking outside in the summer if I had a usable driveway, but I don't like parking overnight on the street because it is not lit well and I worry about getting hit.

Yeah, but then it wouldn't have been mobile and you wouldn't have those extra drawers for storage. Trust me, the first time you need to drill a hole in the middle of some long piece of stock, you are going to be really glad you can just roll your drill press to the middle of the room.

Cart looks great! Looking forward to seeing it all buttoned up with faces and pulls.

All true! I'm going to have to be VERY careful rolling it over the cracked floor.

Now all you need is a "Proper" Dub to put in the garage.


Could be useful to transport sheet goods :D

How did I not know about these? Love that blue...
 
To avoid these ads, REGISTER NOW!

bj383ss

Well-known member
Joined
Sep 29, 2011
Messages
3,166
Location
TX
Oh Nick. I love the new drill press cart. And the work you have accomplished in the last week.

I hate to be the bearer of bad news but I once had a 2 car garage that had 2 cars parked in it. And then later when I acquired all the tools I wanted both cars were in the driveway! :D

Bret
 
OP
N

nicholam77

Well-known member
Joined
Dec 18, 2016
Messages
2,659
Location
Minneapolis, MN
Oh Nick. I love the new drill press cart. And the work you have accomplished in the last week.

I hate to be the bearer of bad news but I once had a 2 car garage that had 2 cars parked in it. And then later when I acquired all the tools I wanted both cars were in the driveway! :D

Bret

Thanks Bret! We'll see what happens re: the cars :bounce:
 
OP
N

nicholam77

Well-known member
Joined
Dec 18, 2016
Messages
2,659
Location
Minneapolis, MN
Drill Press Cart - part 5 - drawer faces

I was able to get in some more work the past couple of nights. A few mistakes were made, but it's shop furniture so I'm not too butthurt. And a few things went well, too.

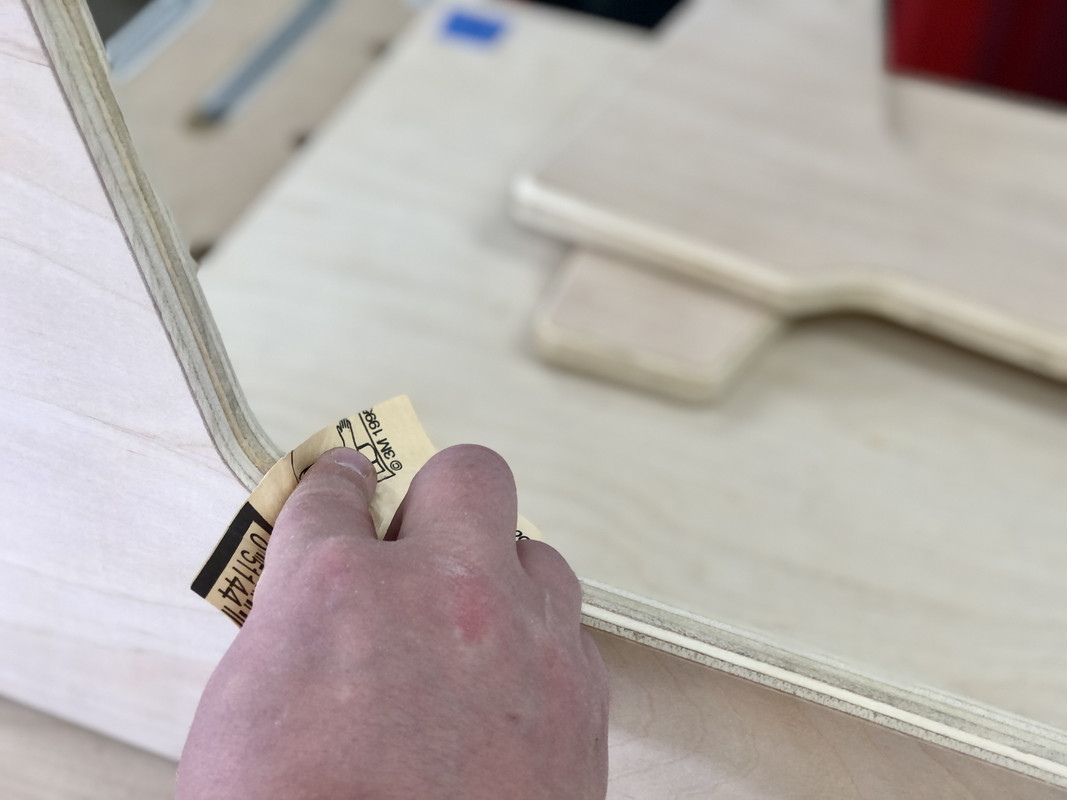
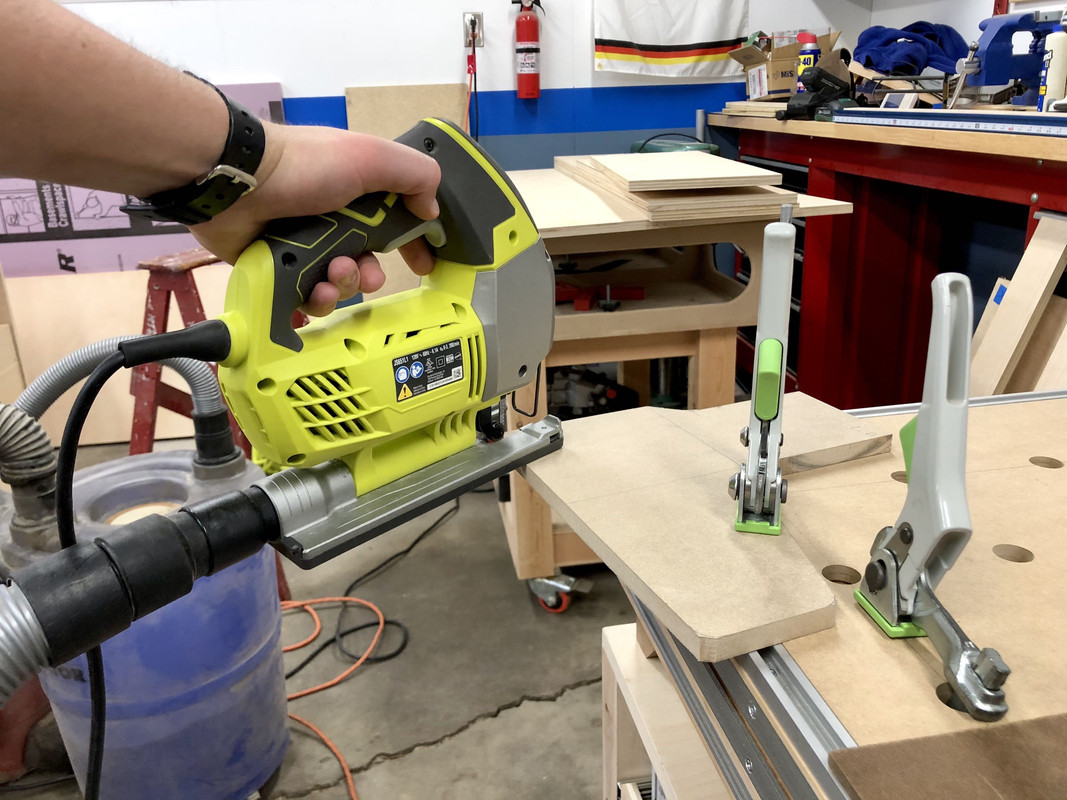
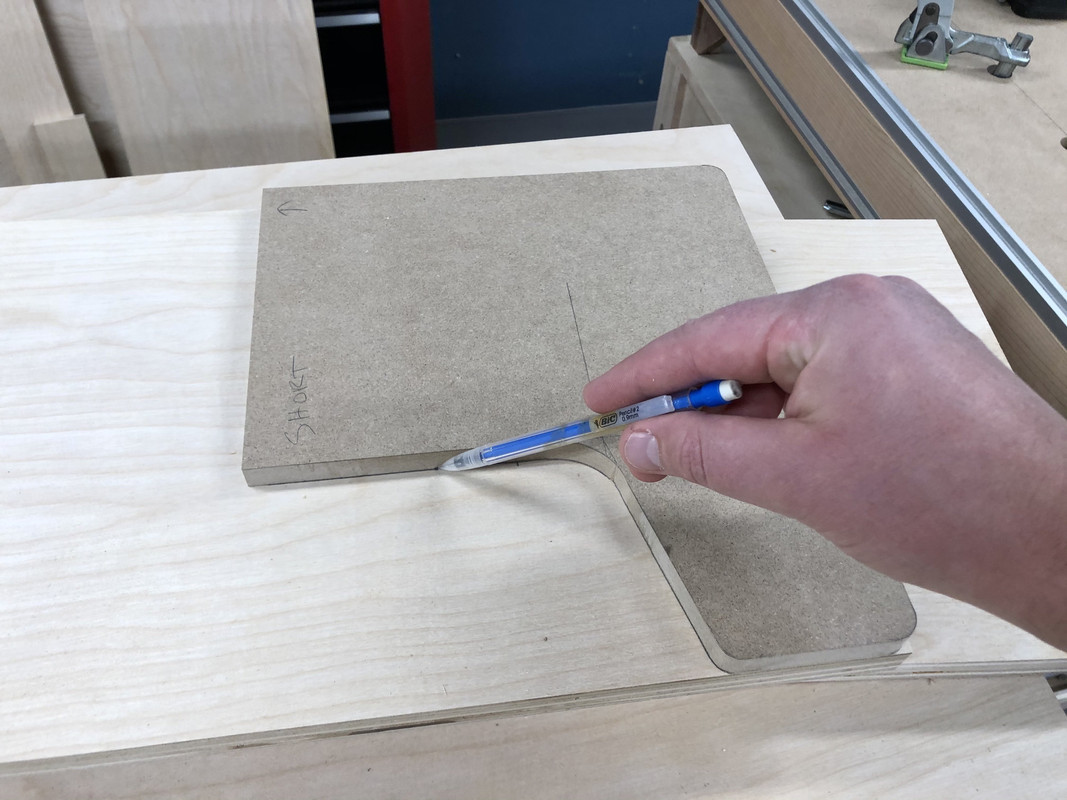
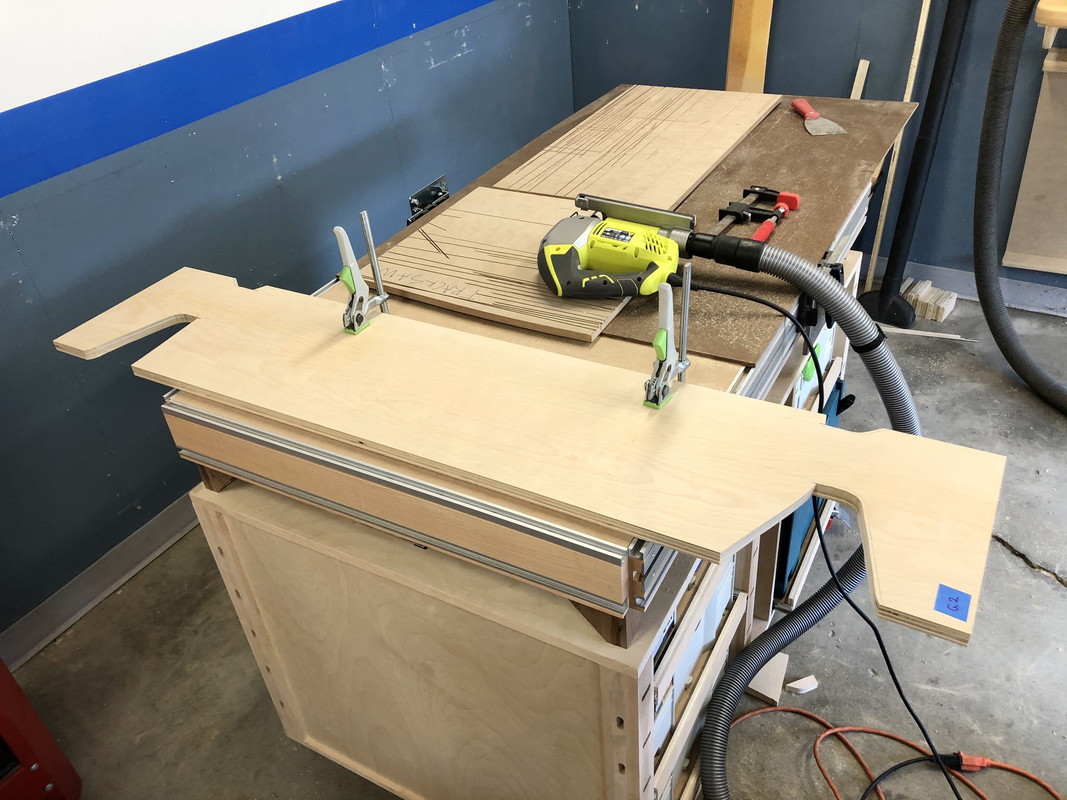
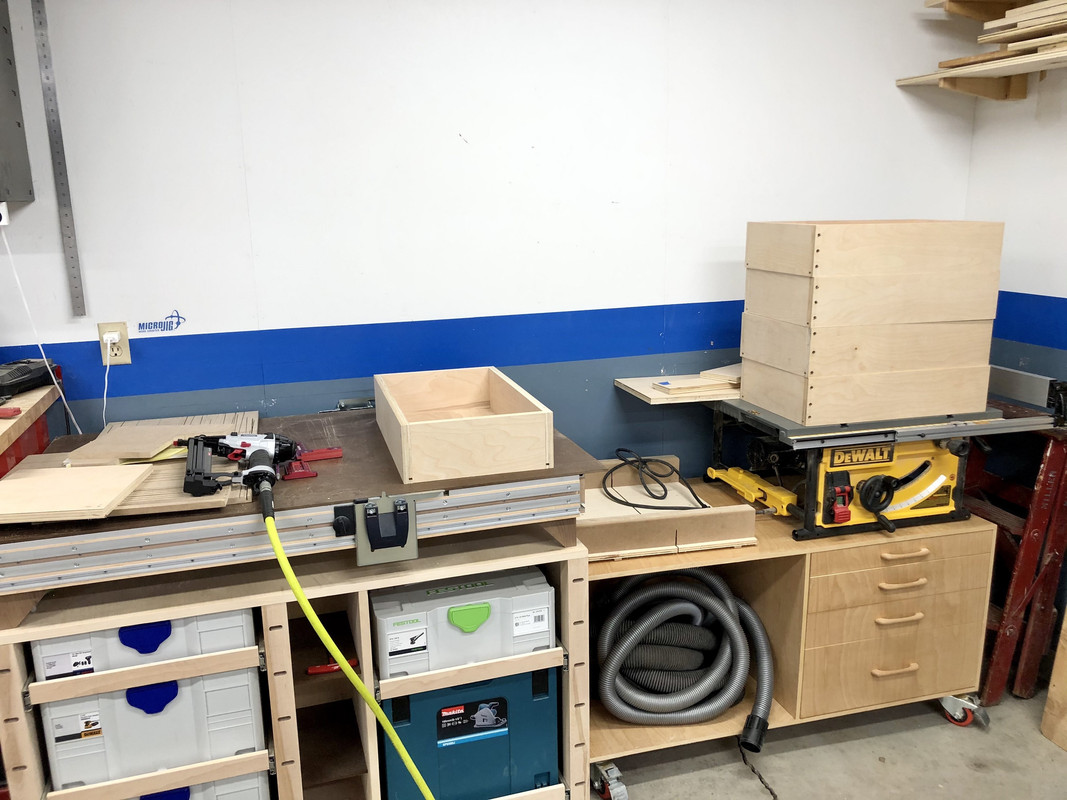
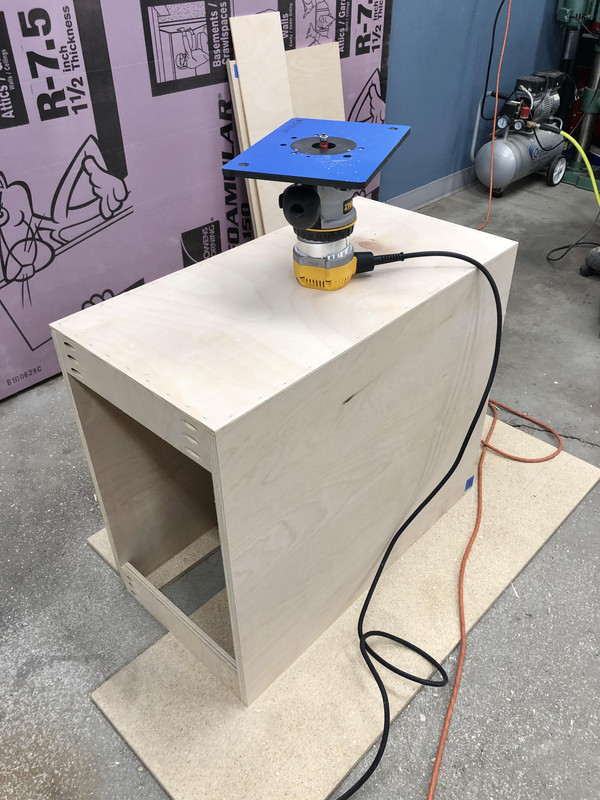
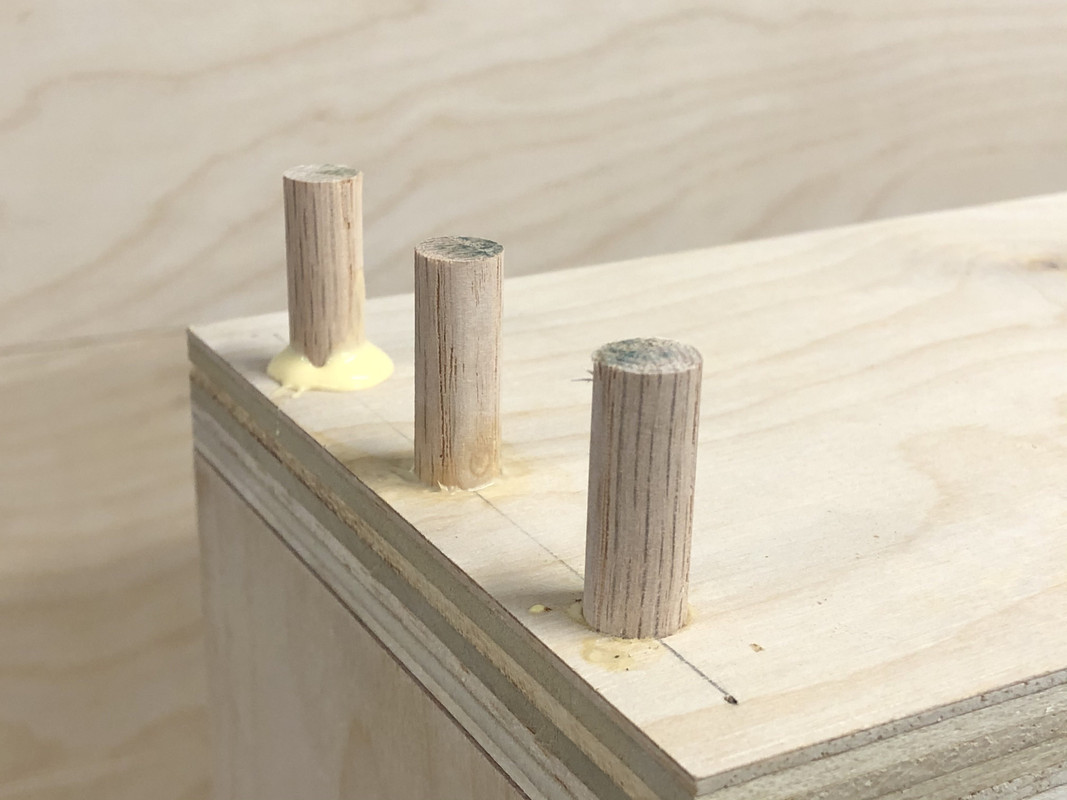
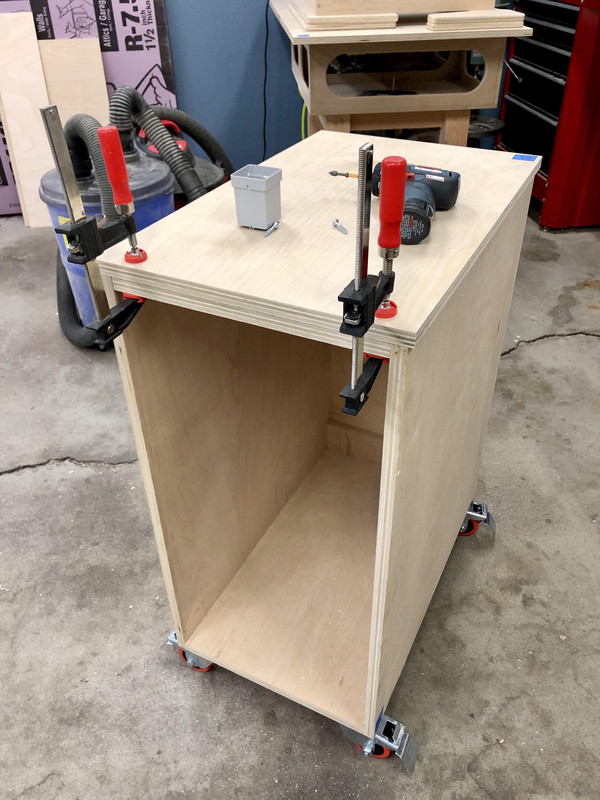
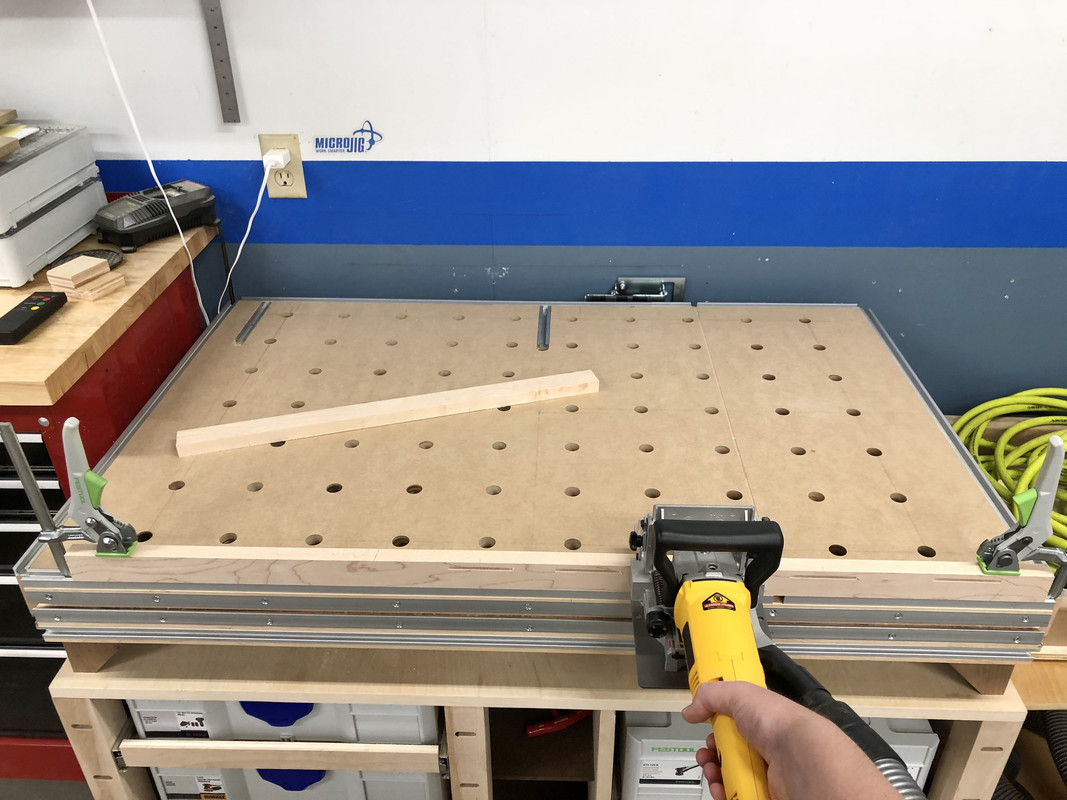
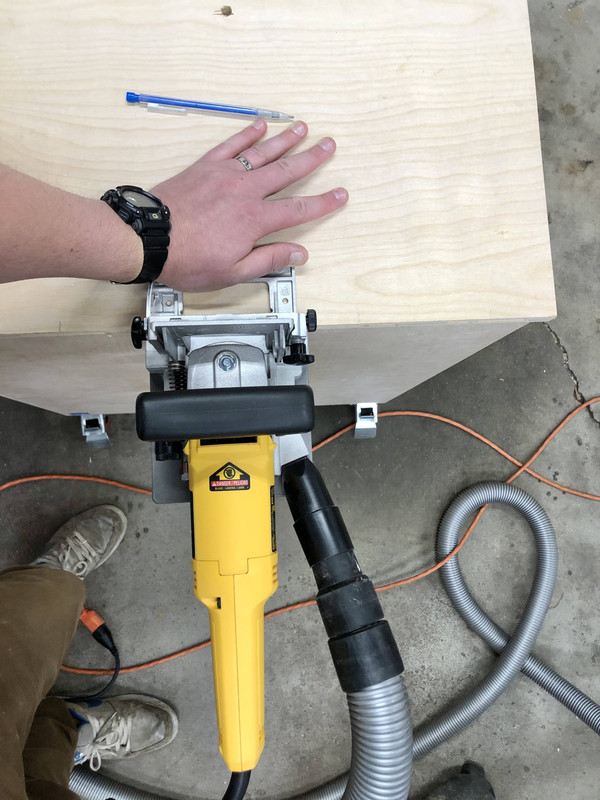
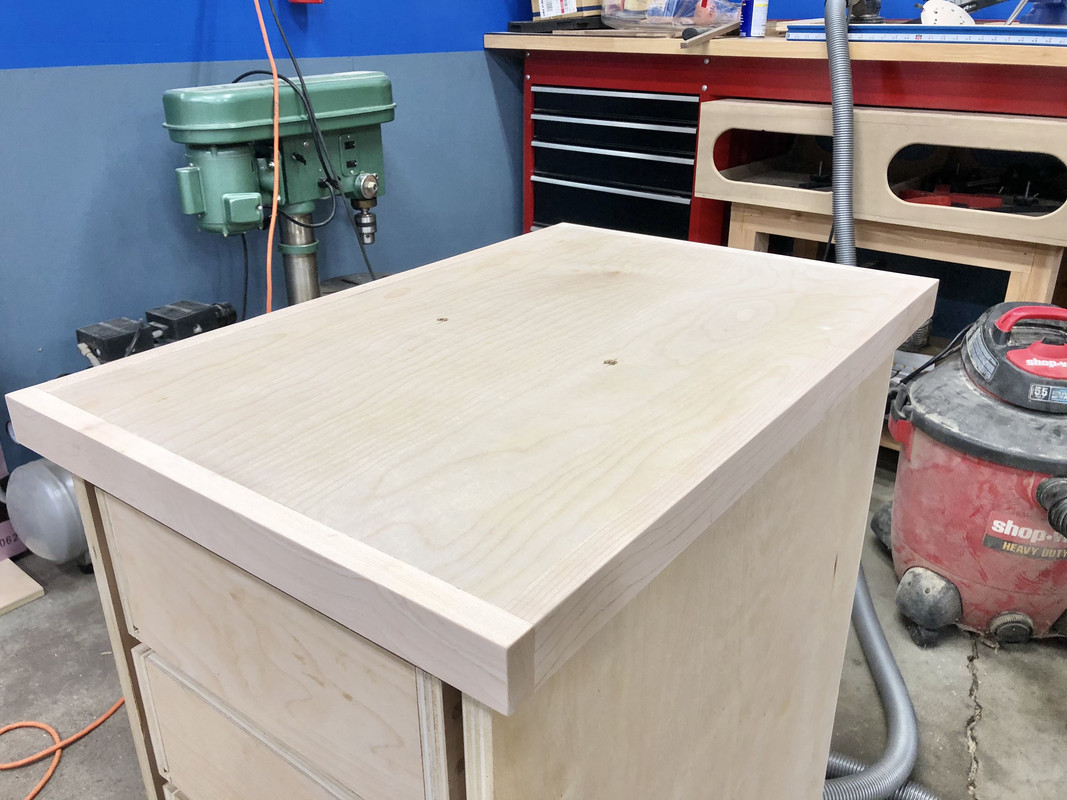
First task was edgebanding the top of the cart. Not necessary, but had some extra maple from HD so why not. I ripped it, cross cut it long, and marked out some biscuits for alignment:

IMG-2477.jpg


IMG-2478.jpg


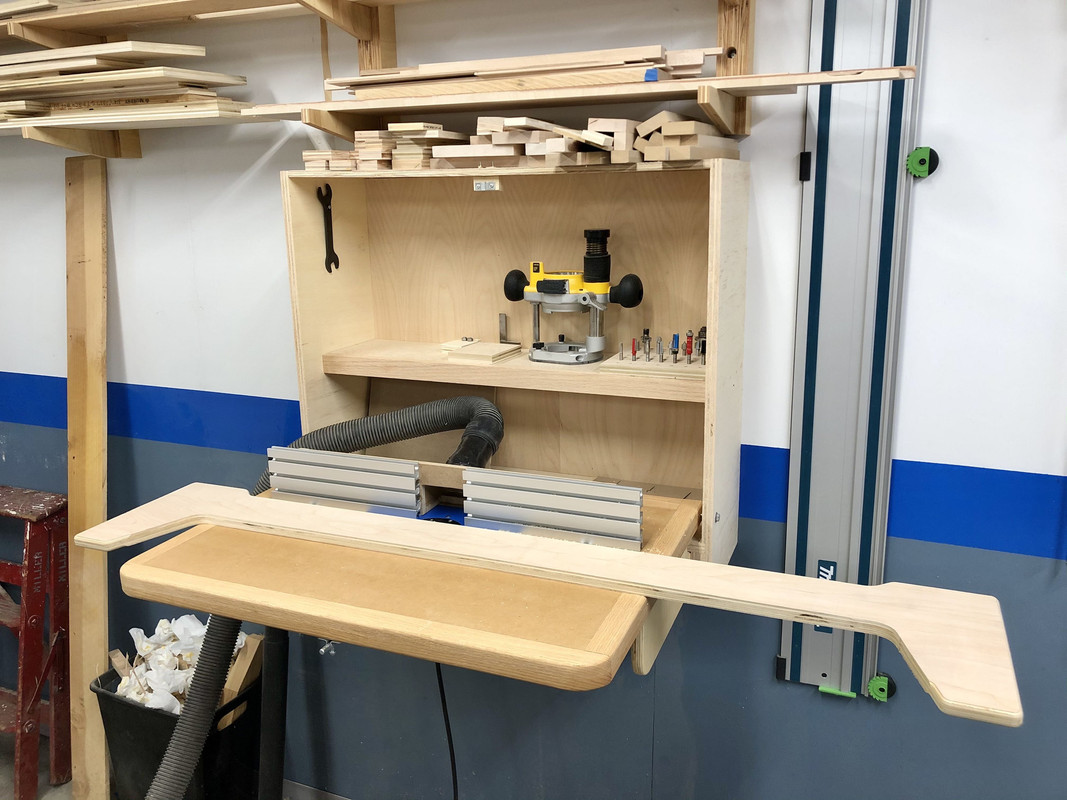
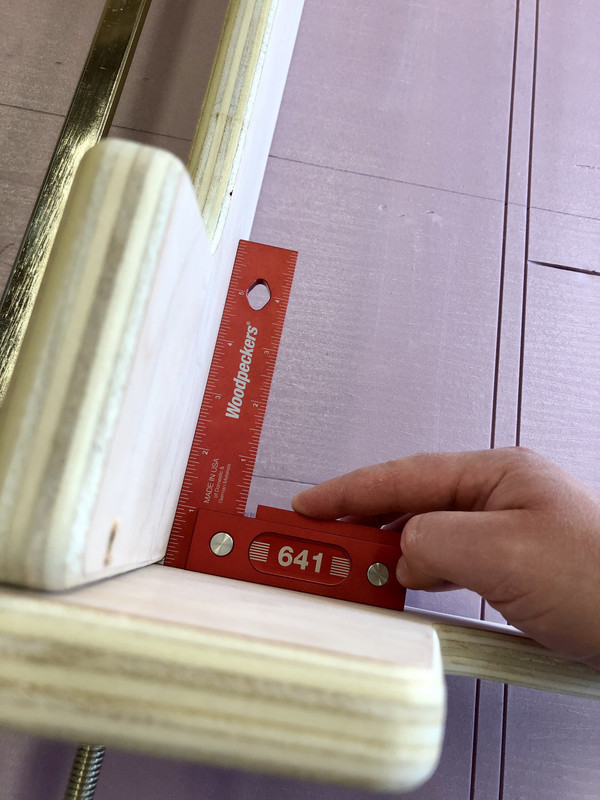
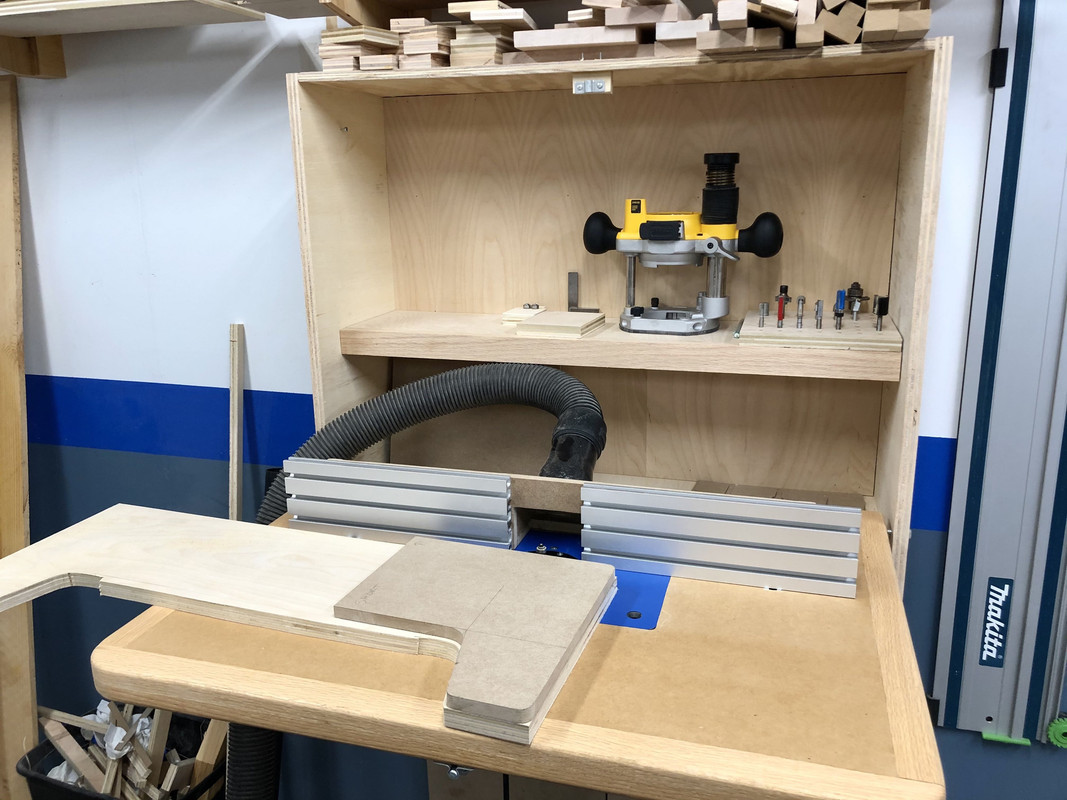
Once again the home-brewed MFT proving its worth. With the old Paulk cart I still ran into situations I couldn't clamp easily. So far so good with this one.

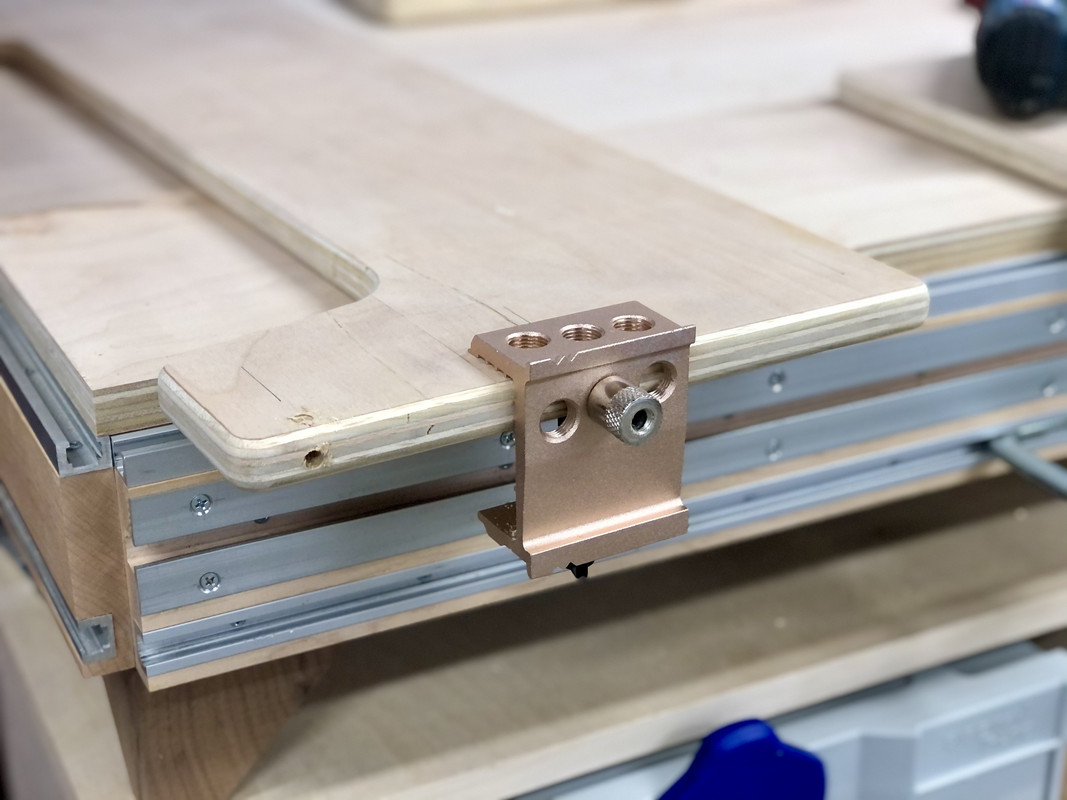
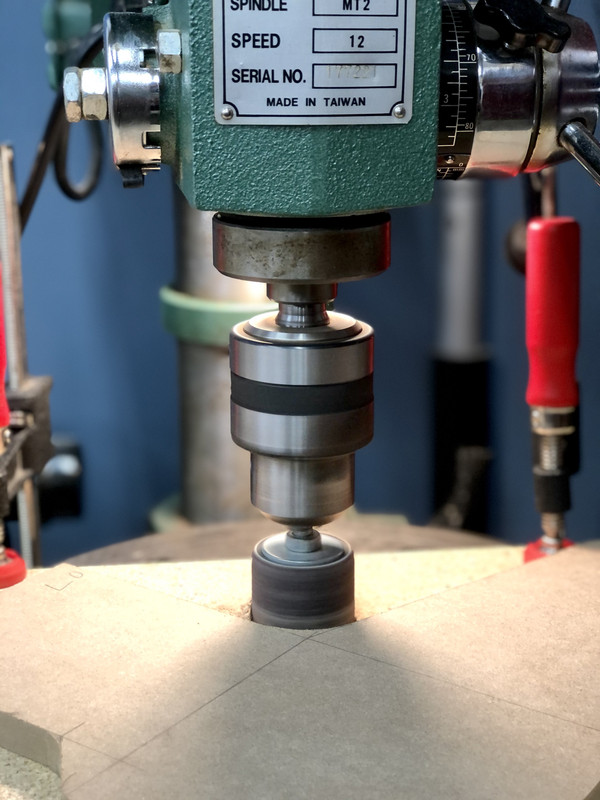
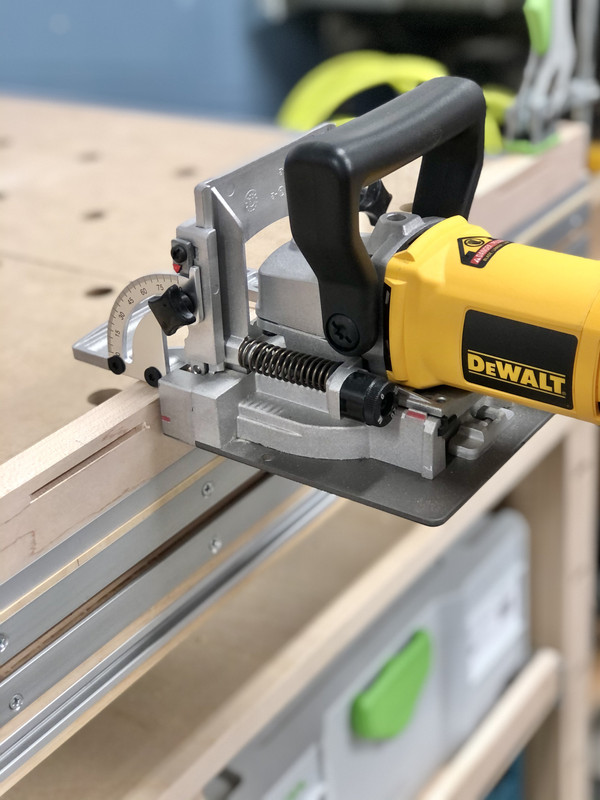
Then I made corresponding biscuit cuts in the cart top:

IMG-2479.jpg


I know they are somewhat controversial, but the biscuit joiner is FUN to use.

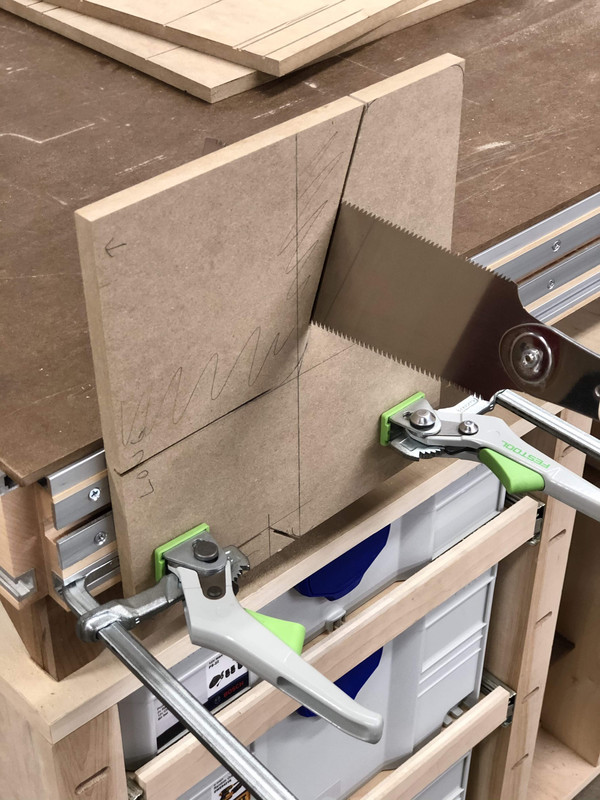
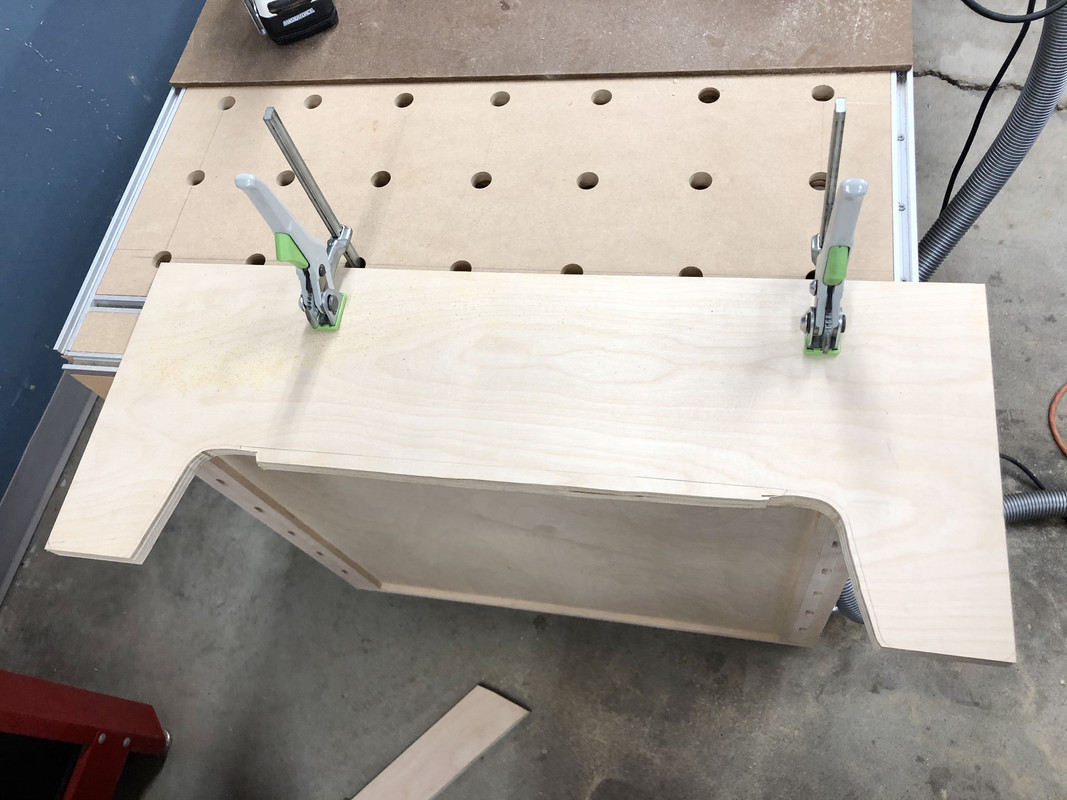
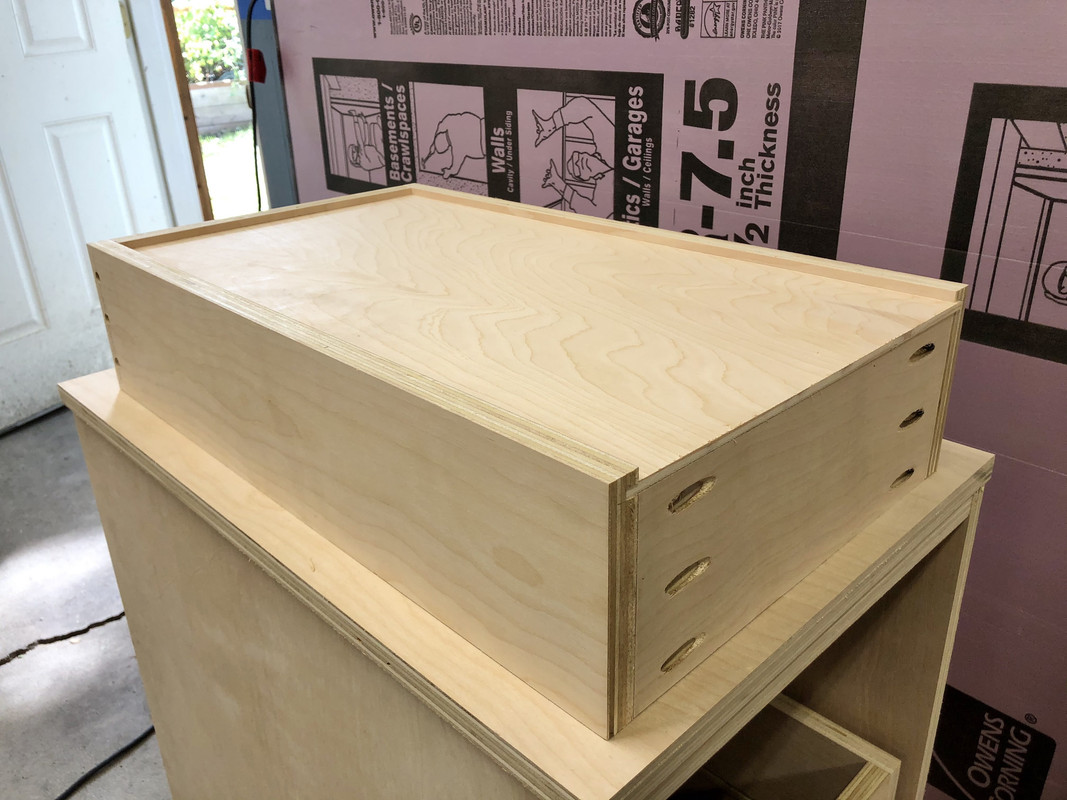
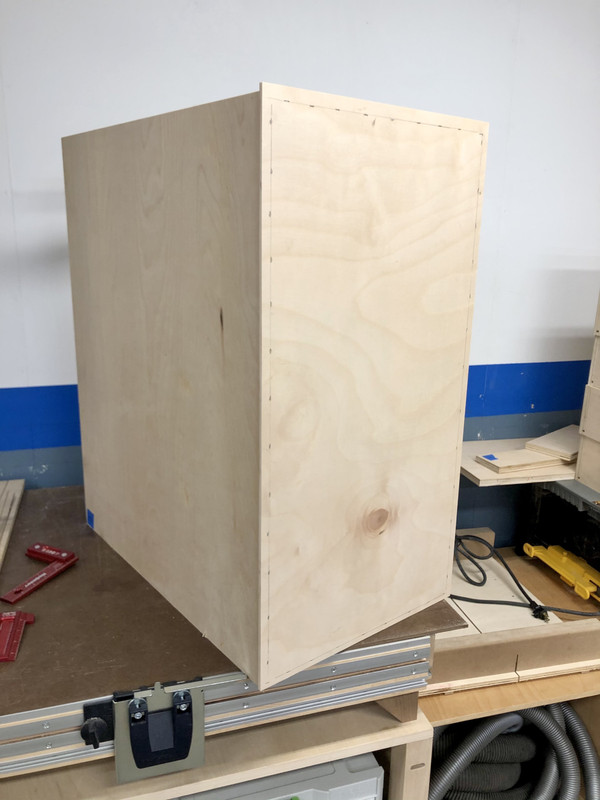
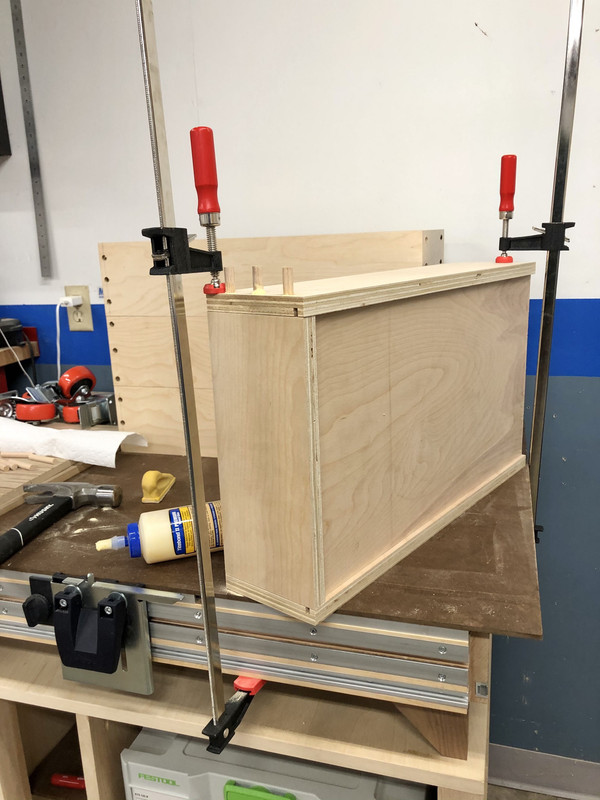
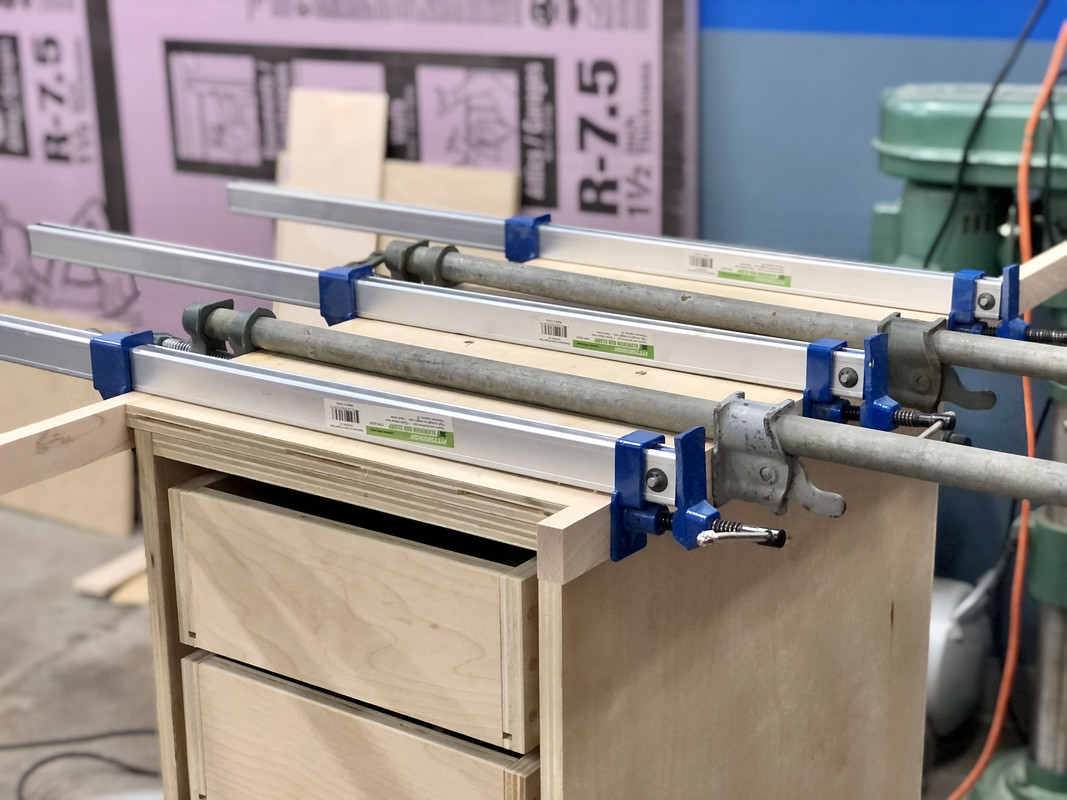
I glued and clamped the sides first:

IMG-2481.jpg


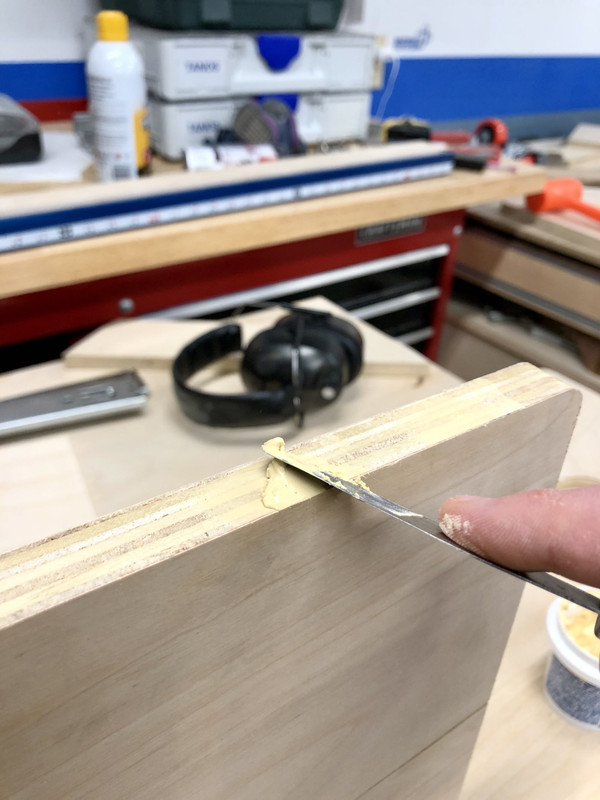
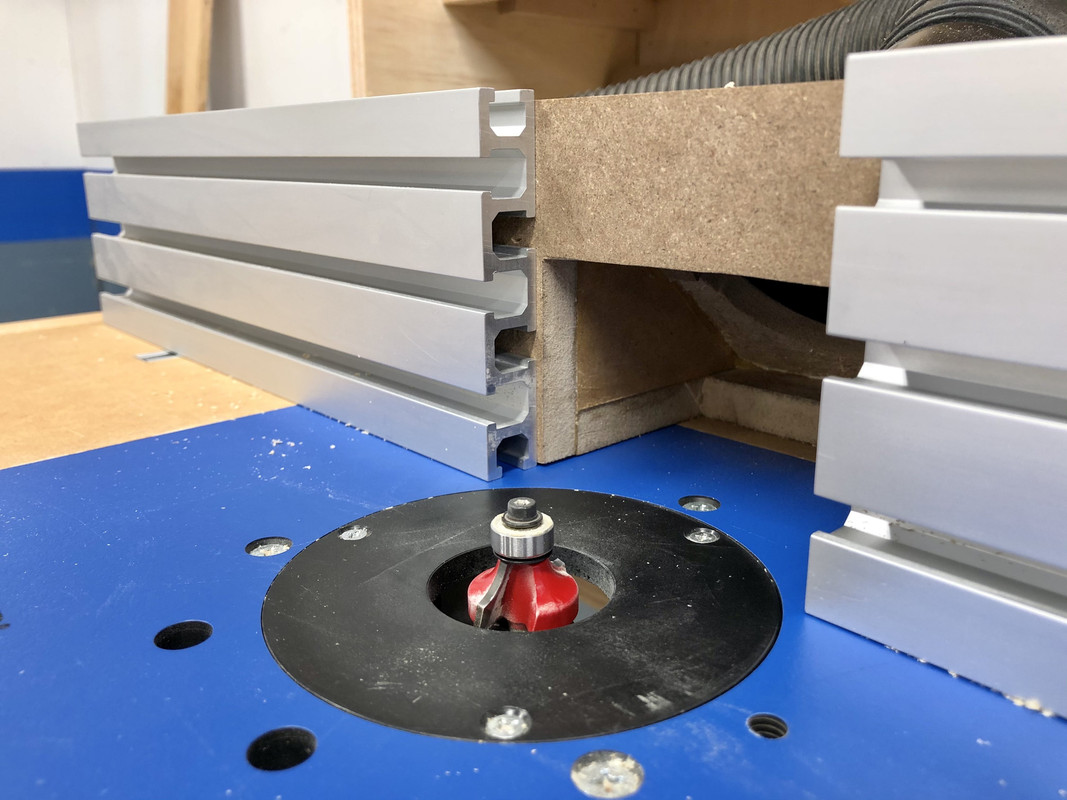
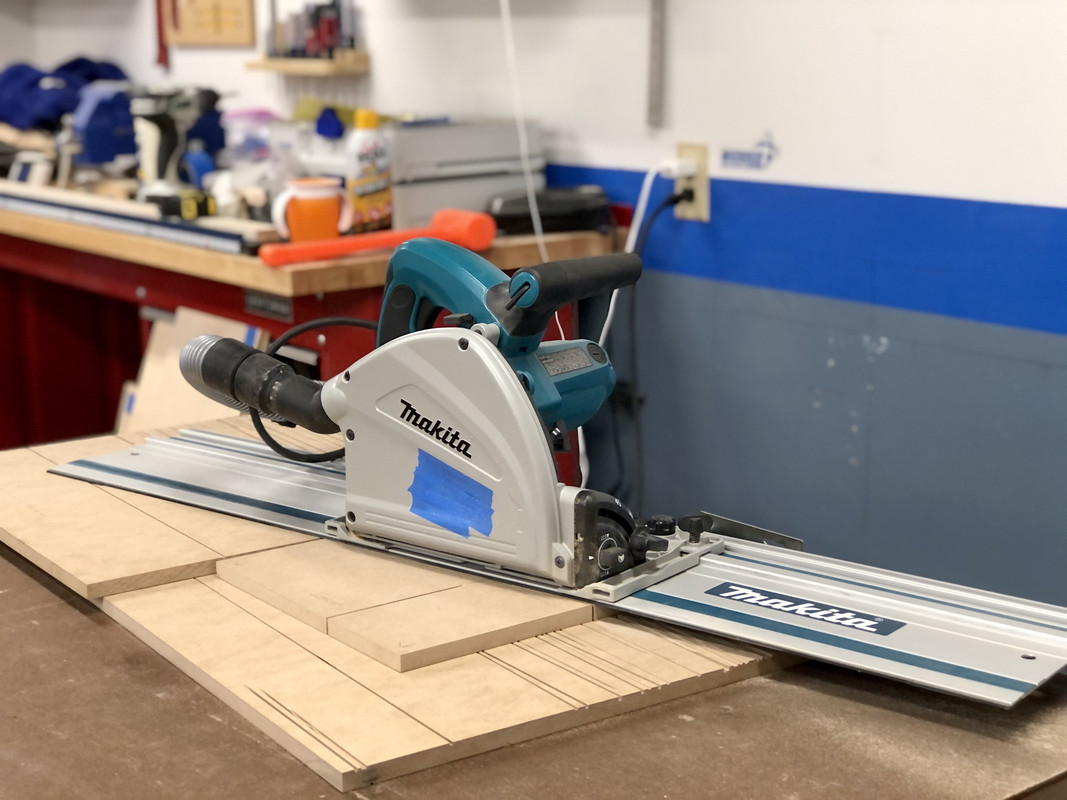
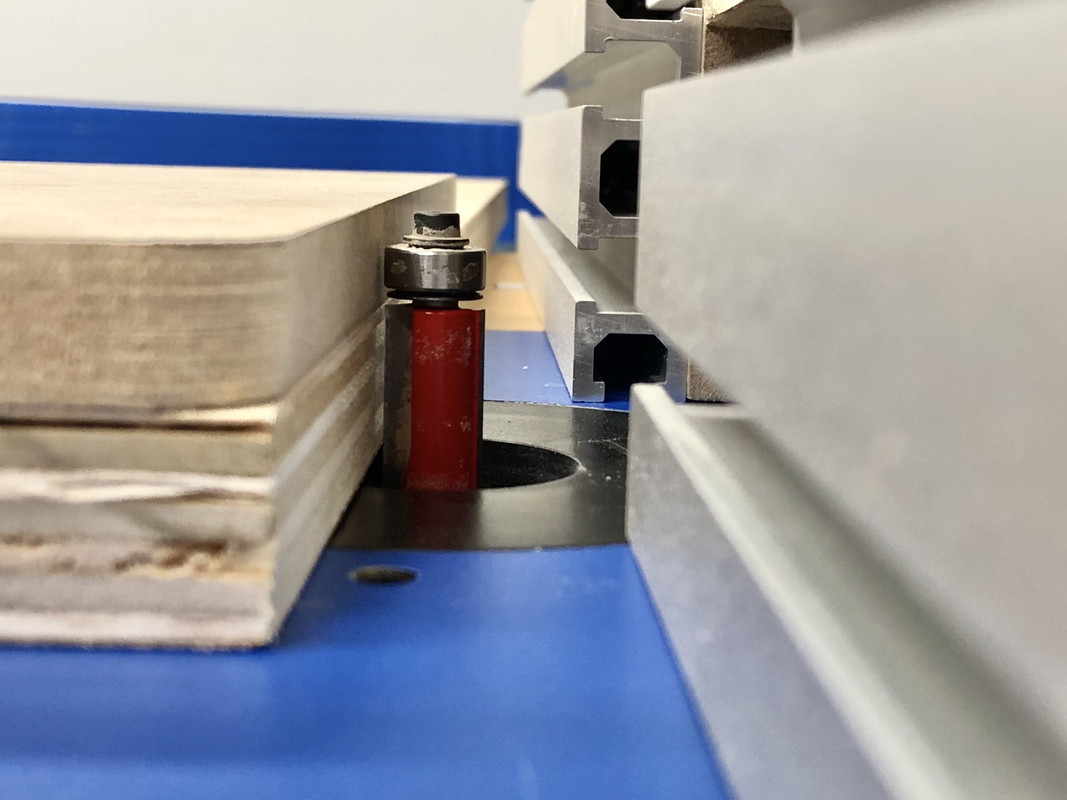
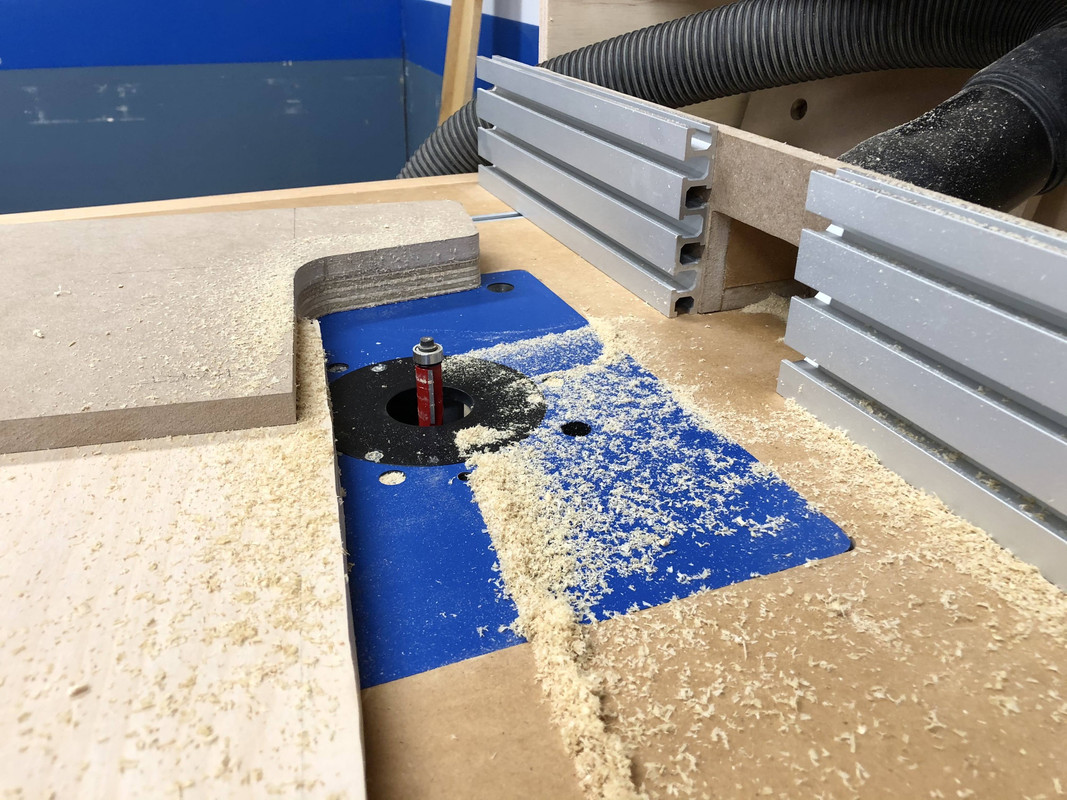
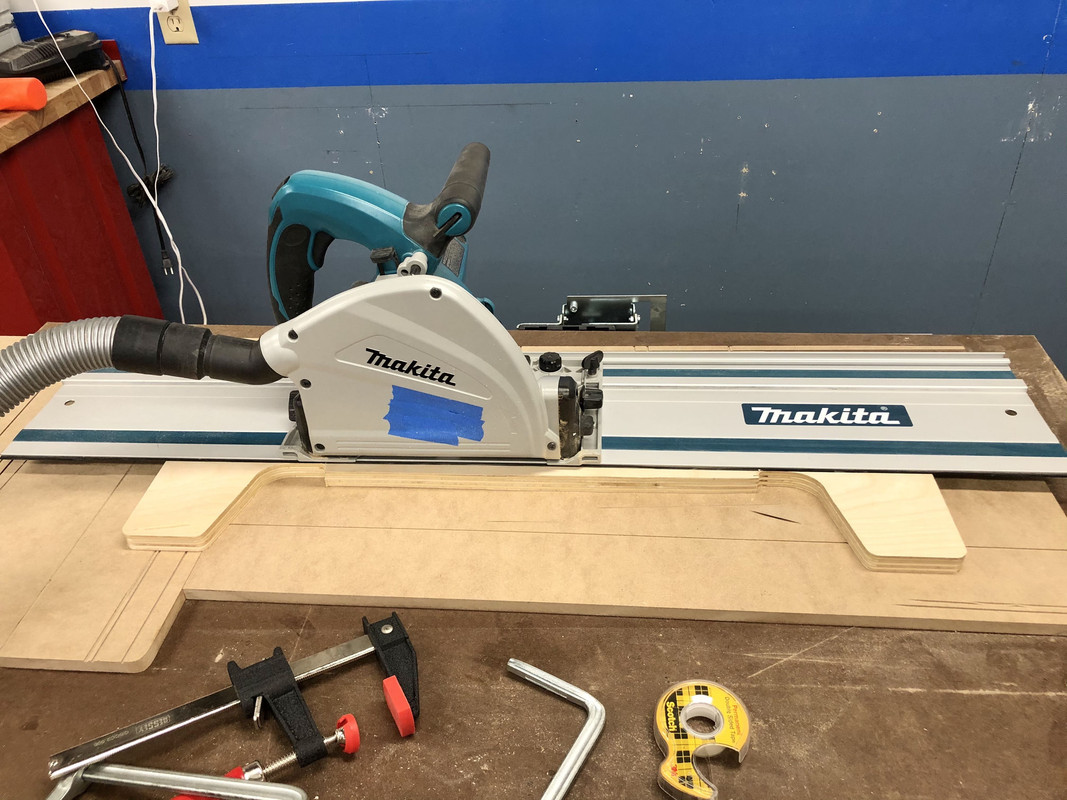
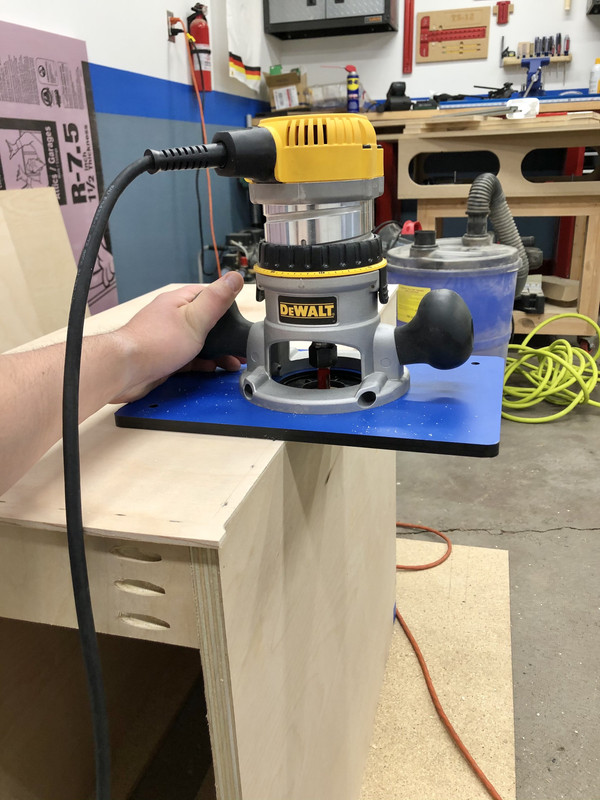
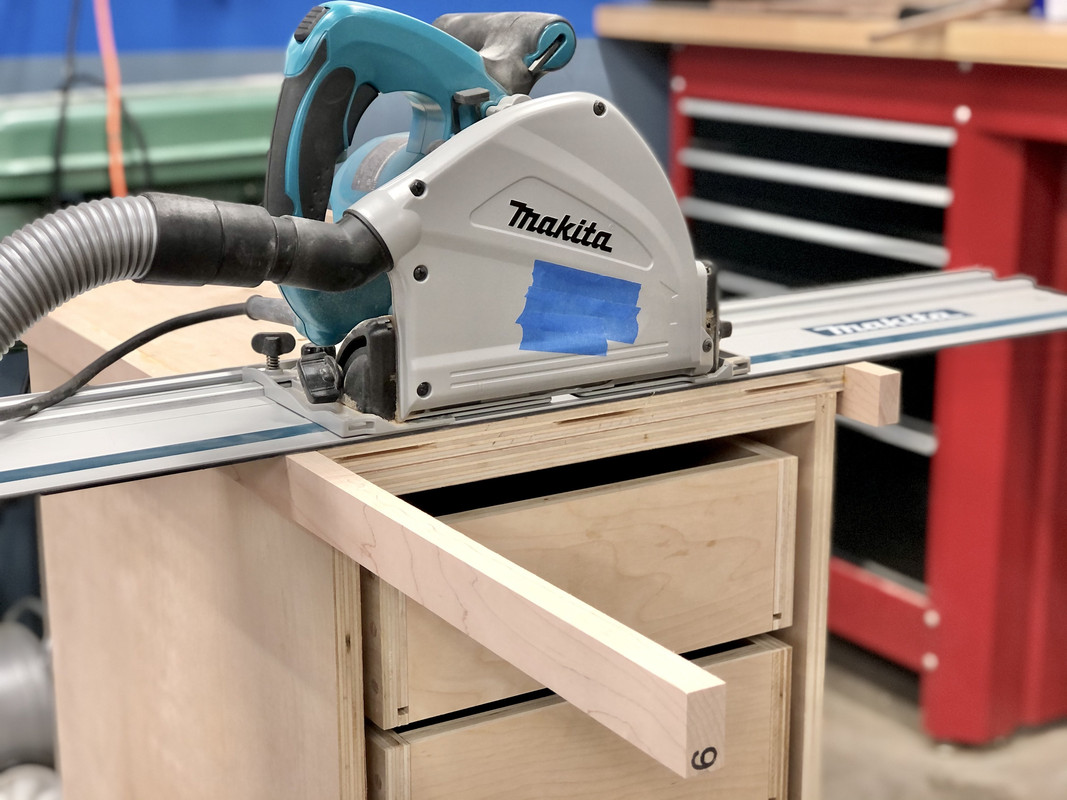
Because I left the edgebanding long, I trimmed it up with the track saw. Instead of pre-crosscutting it to length, this way I didn't have to worry about aligning it perfectly during the glue up. Trim after.

IMG-2492.jpg


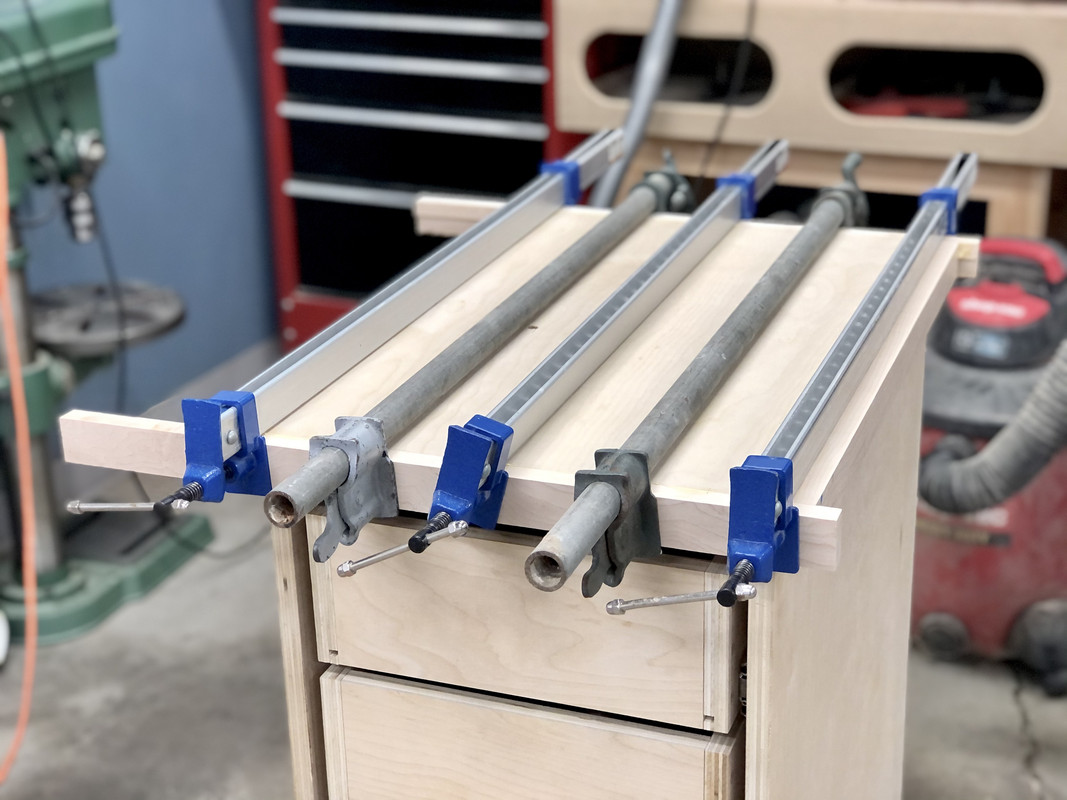
Rinse and repeat for the front and back. I thought about mitering the corners, but decided to not make more work for myself and just overlap them.

IMG-2494.jpg


IMG-2495.jpg


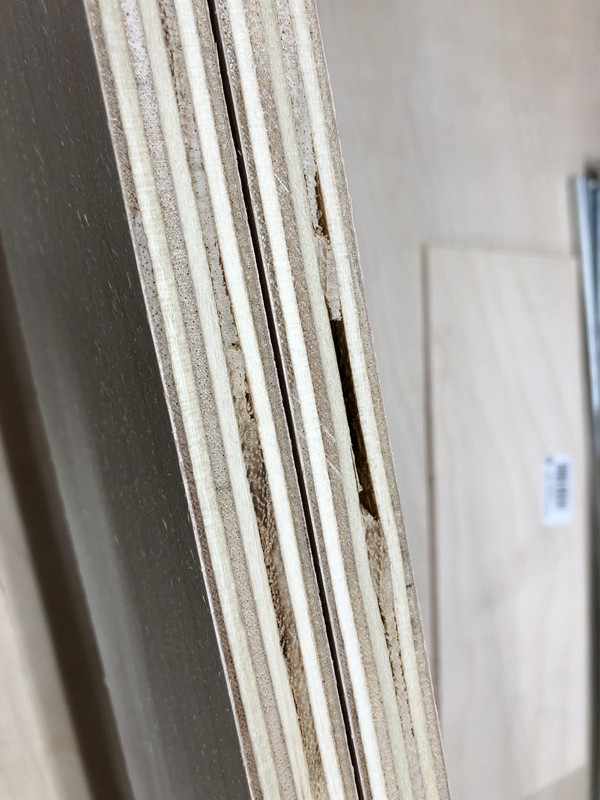
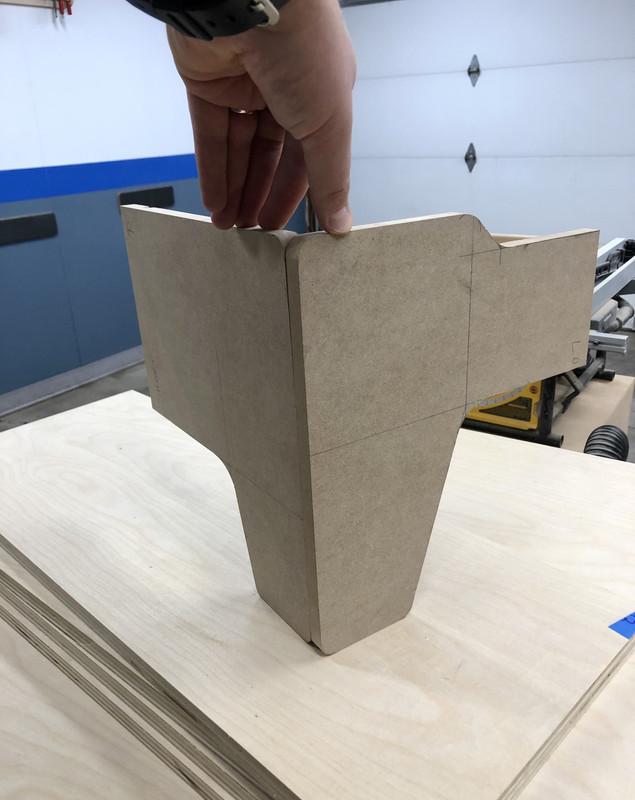
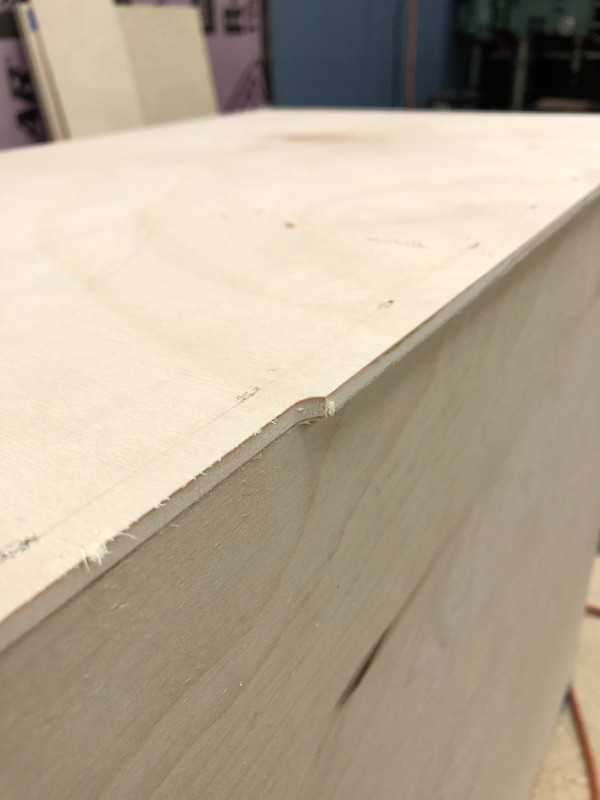
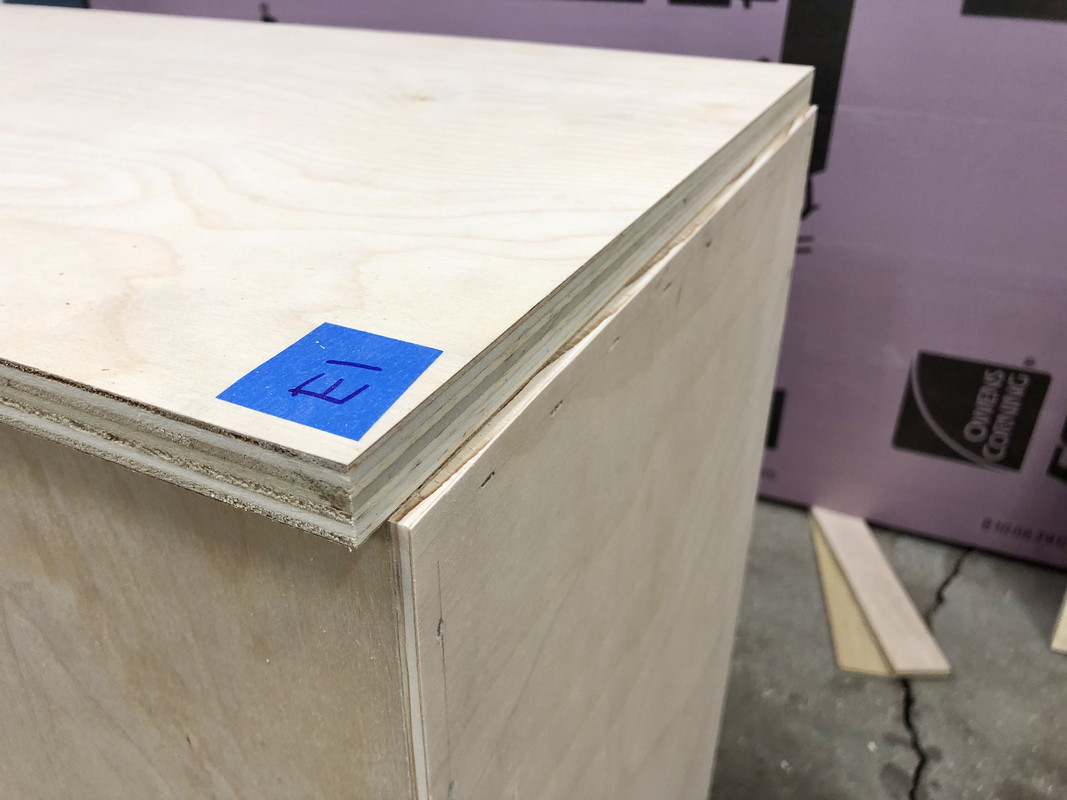
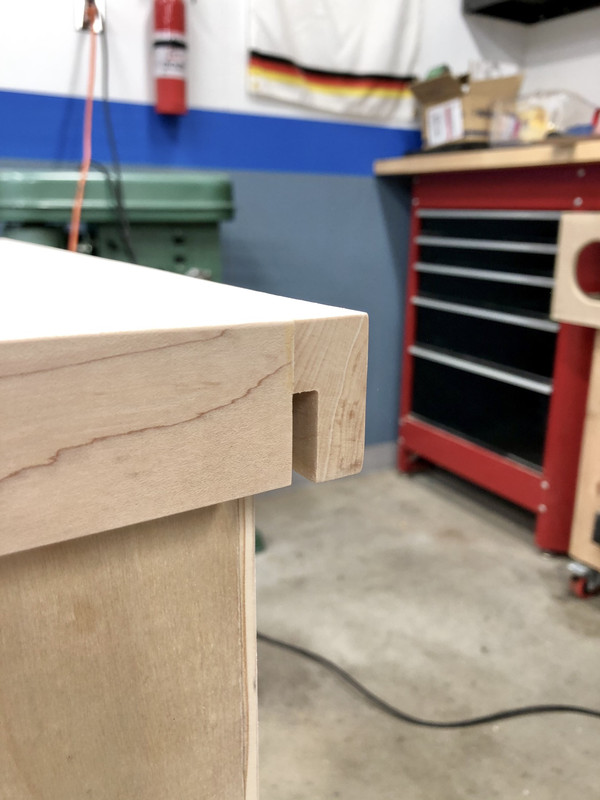
One booboo I made was the rear piece I had to rabbet out the bottom to account for the cabinet backing panel sticking out (an earlier mistake I made). I forgot the rabbet would show on the side -- I should have had the sides overlap the back piece.

IMG-2496.jpg


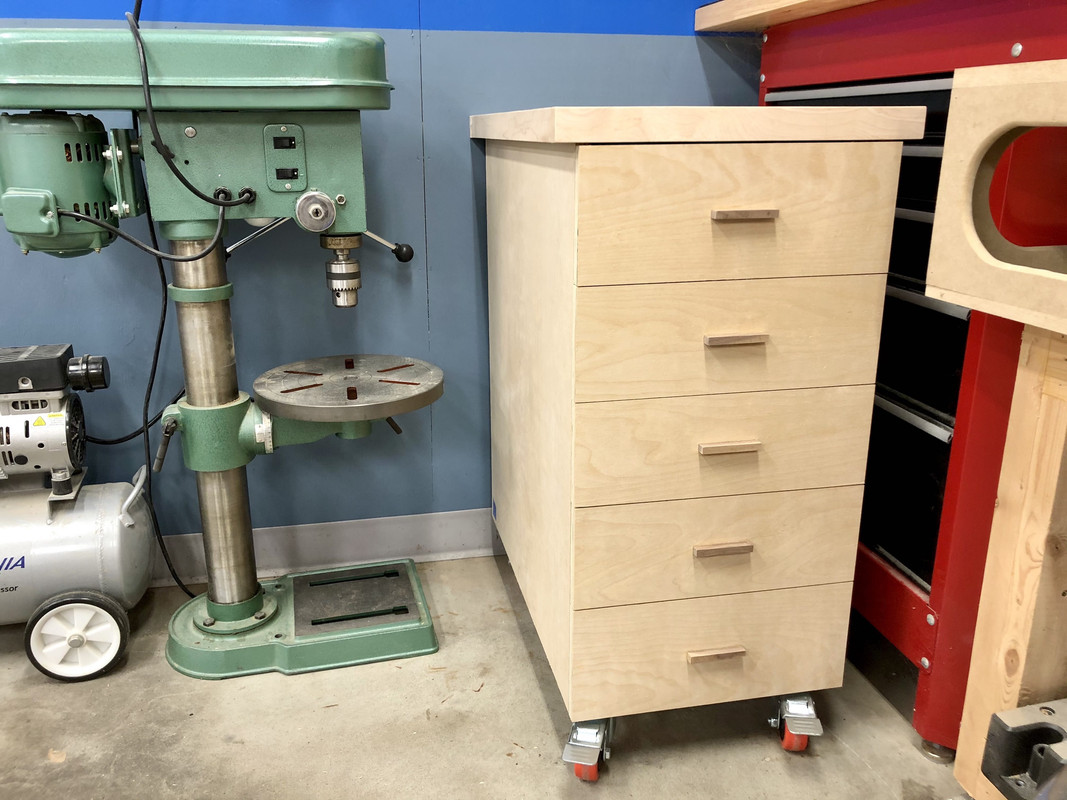
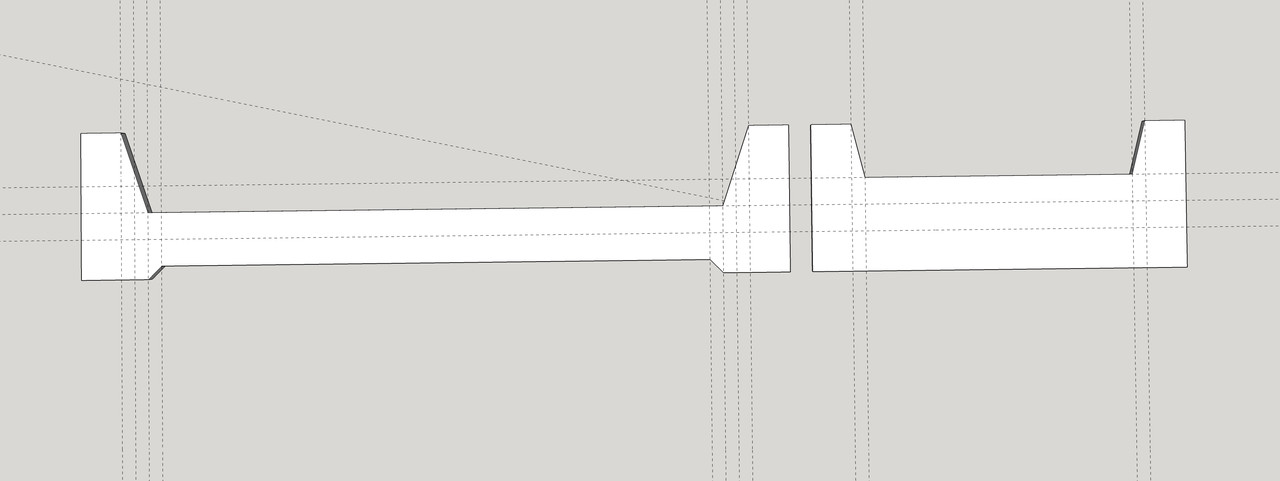
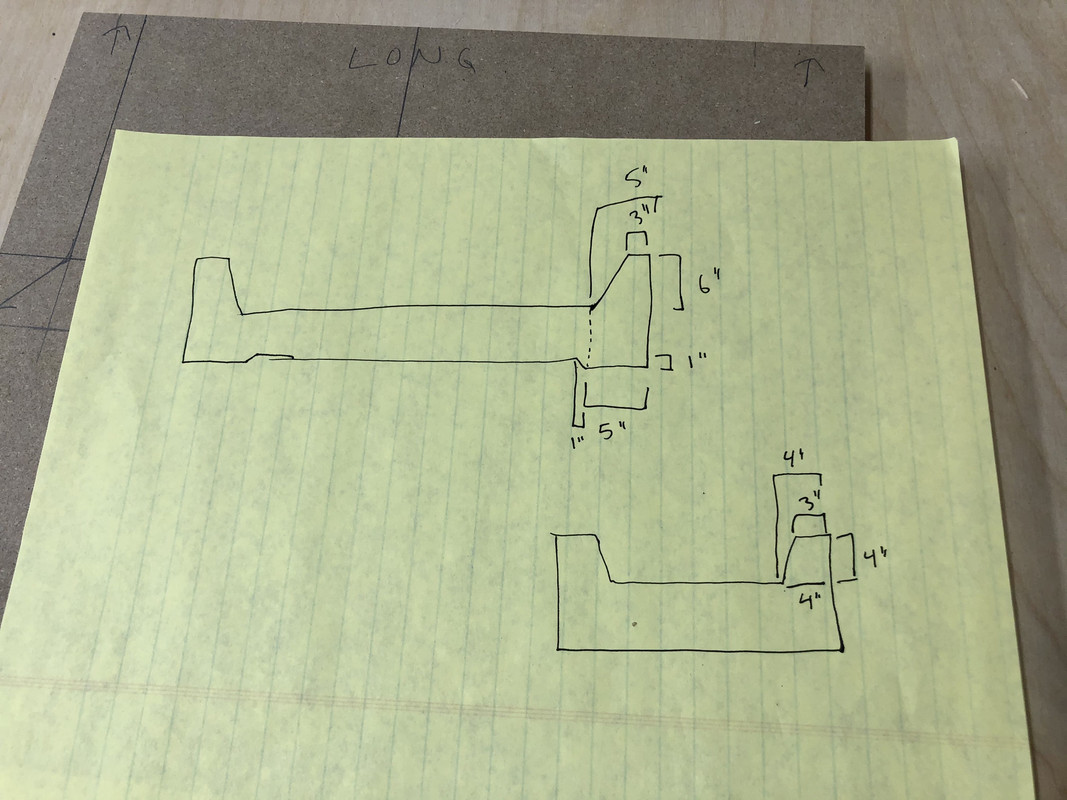
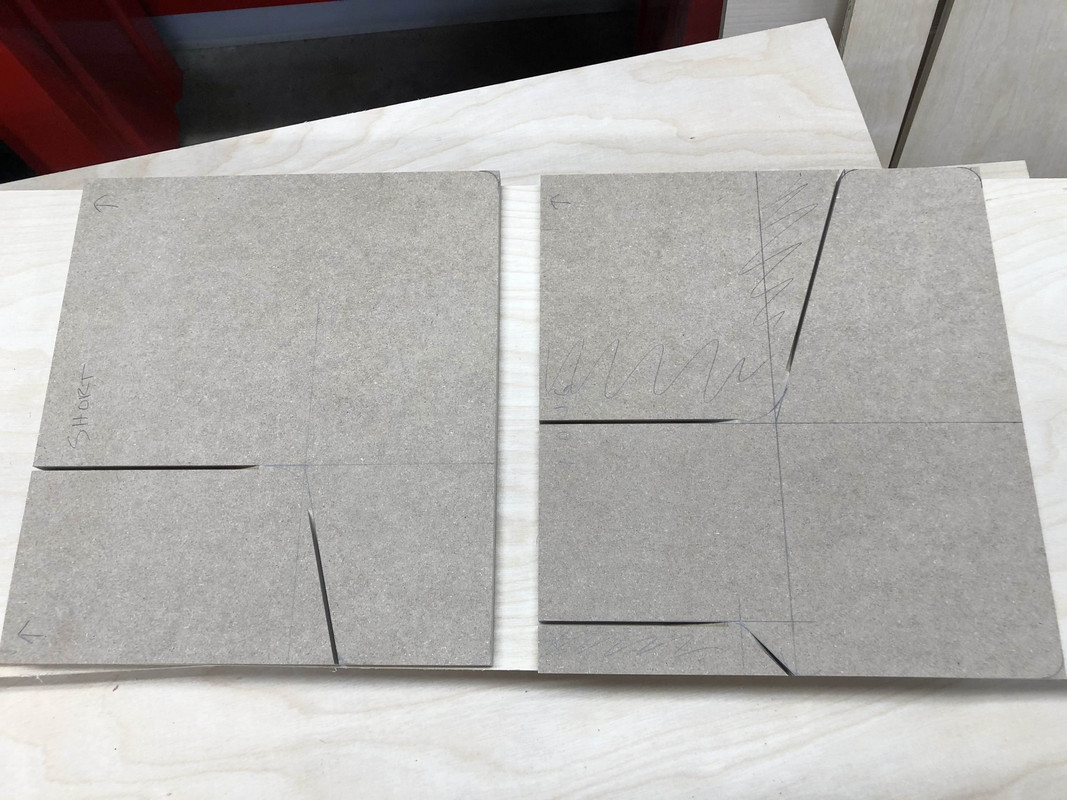
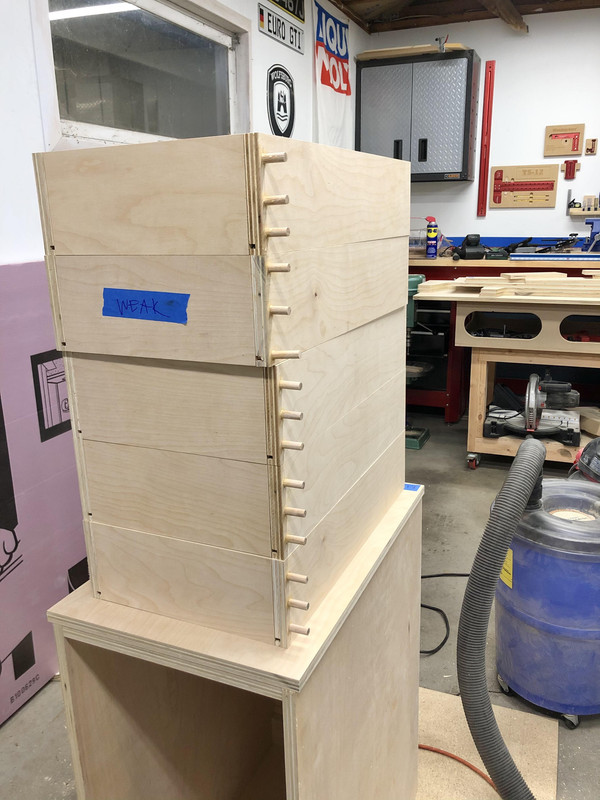
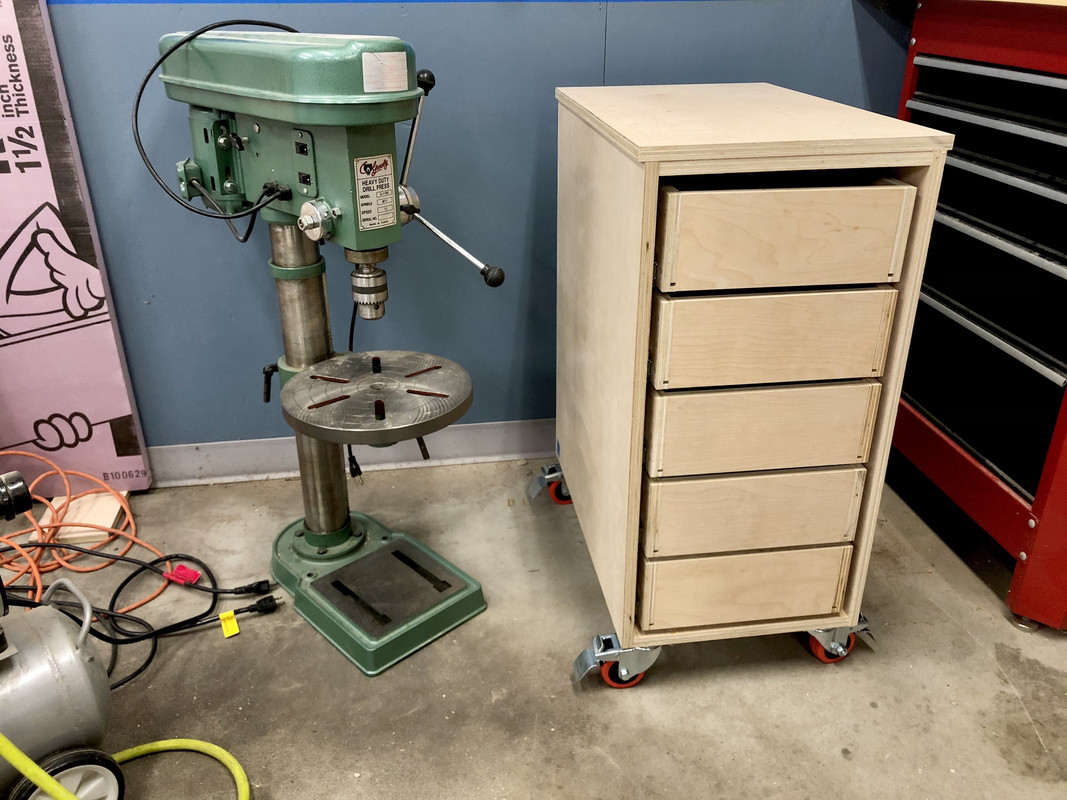
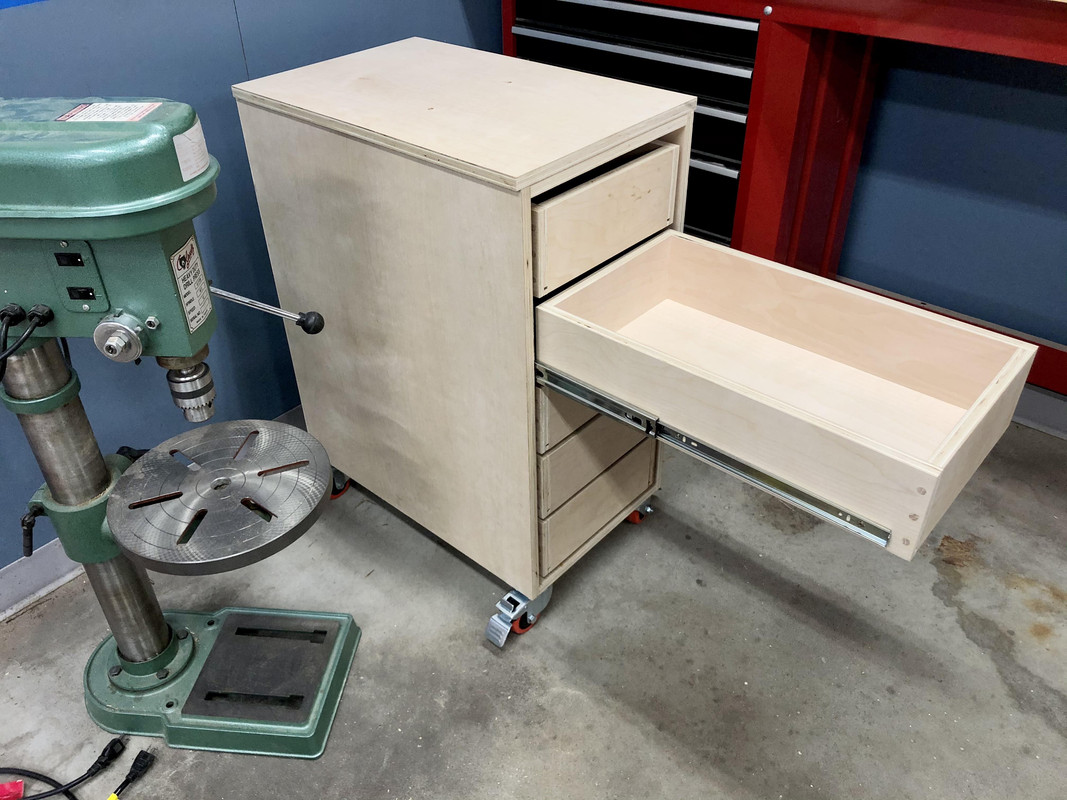
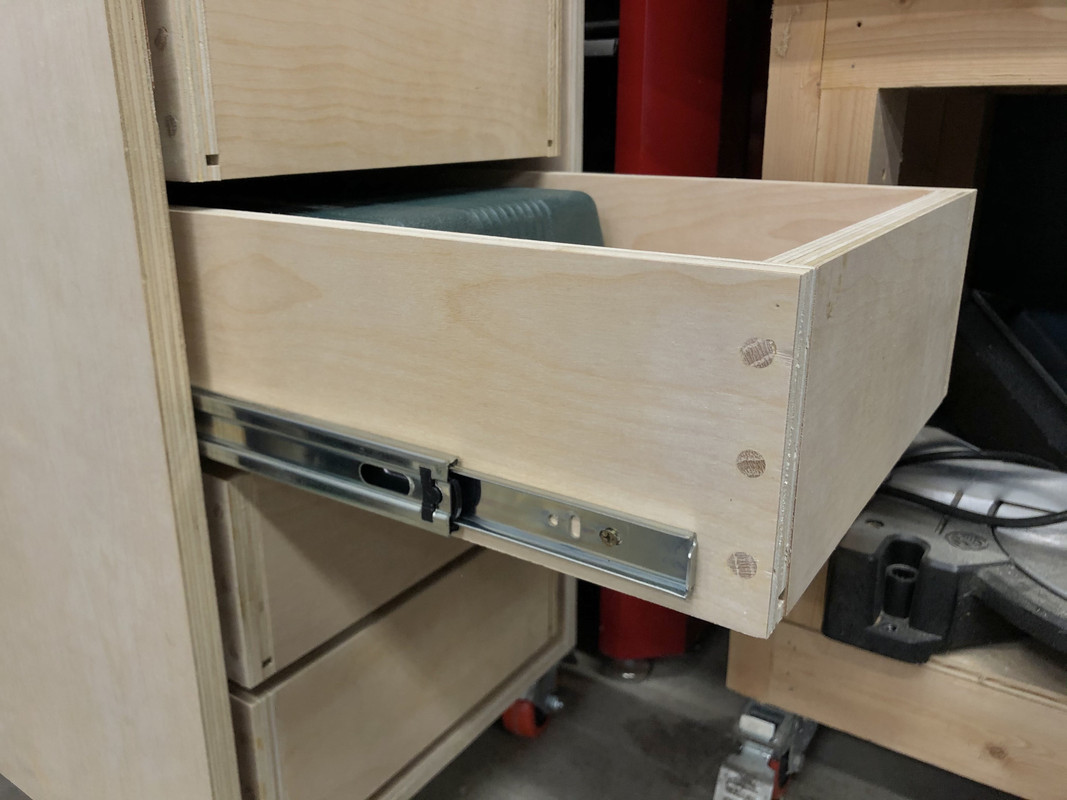
Second task was the false fronts on the drawers. I cut these from a single piece of ply for grain continuity, although I oriented it horizontally and it's a bit busy so I don't think it really comes across that well.

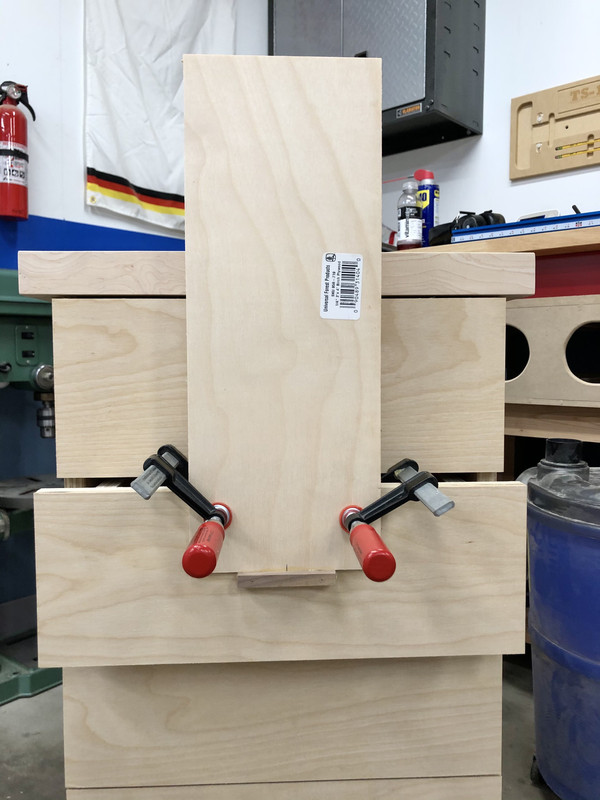
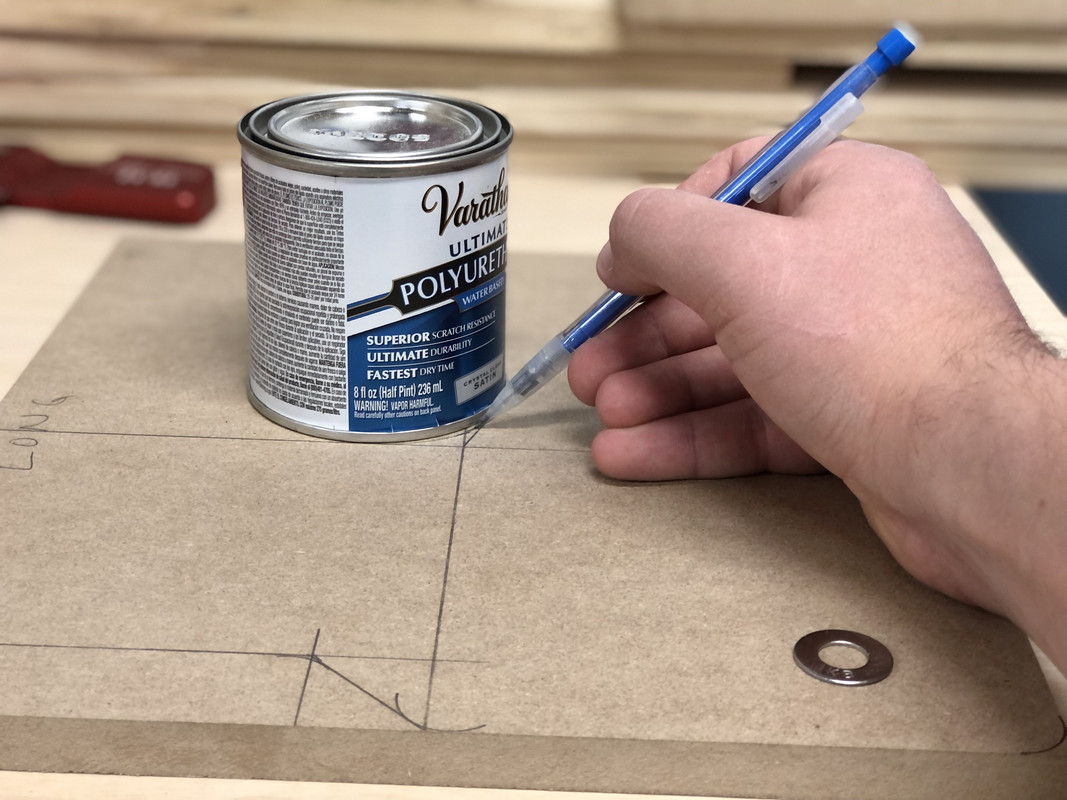
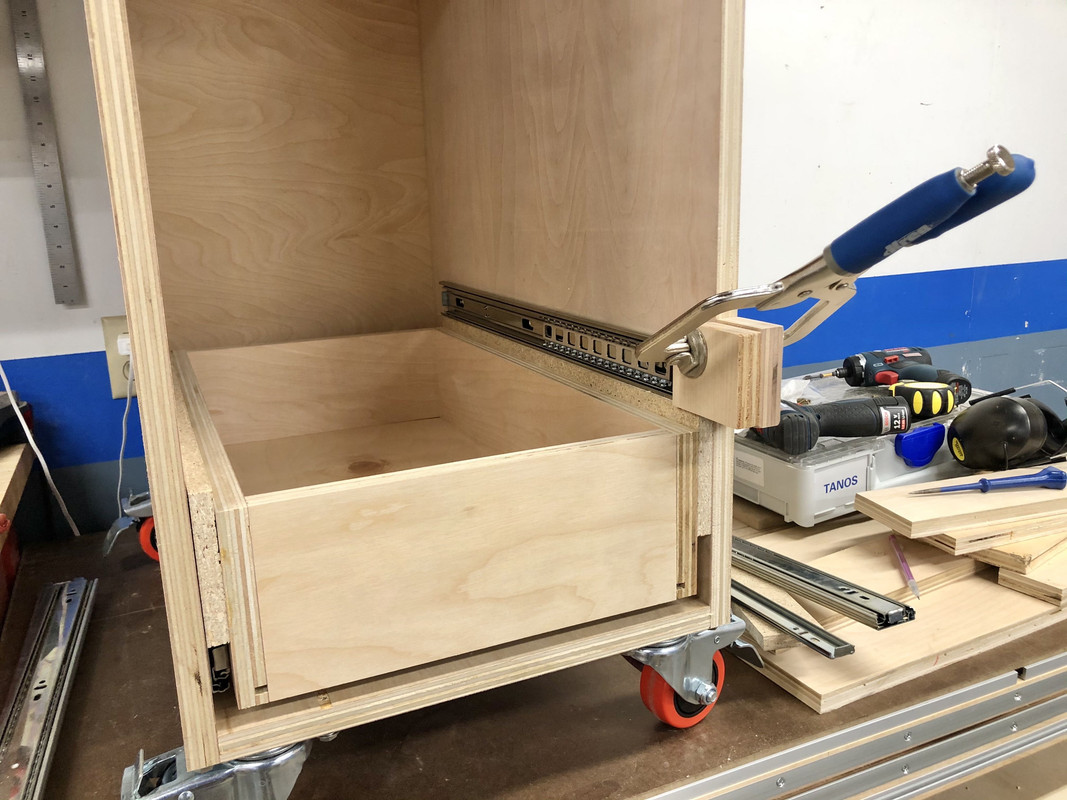
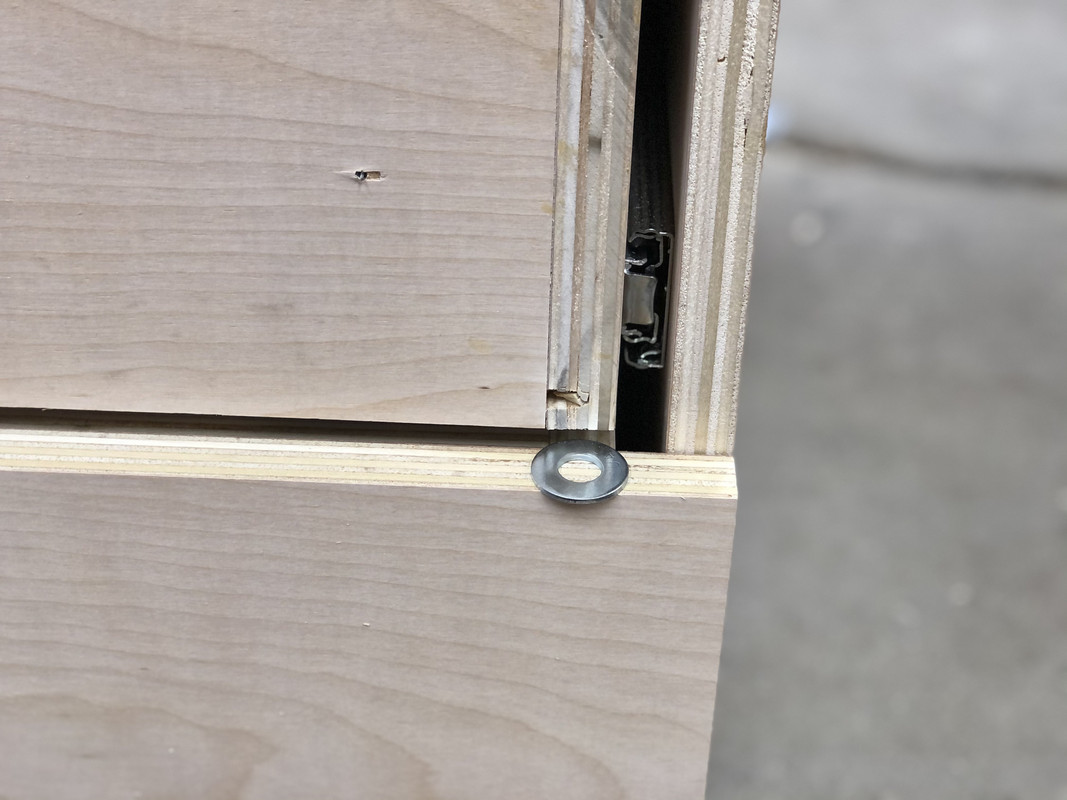
I use some washers to set the drawer spacing evenly.

IMG-2498.jpg


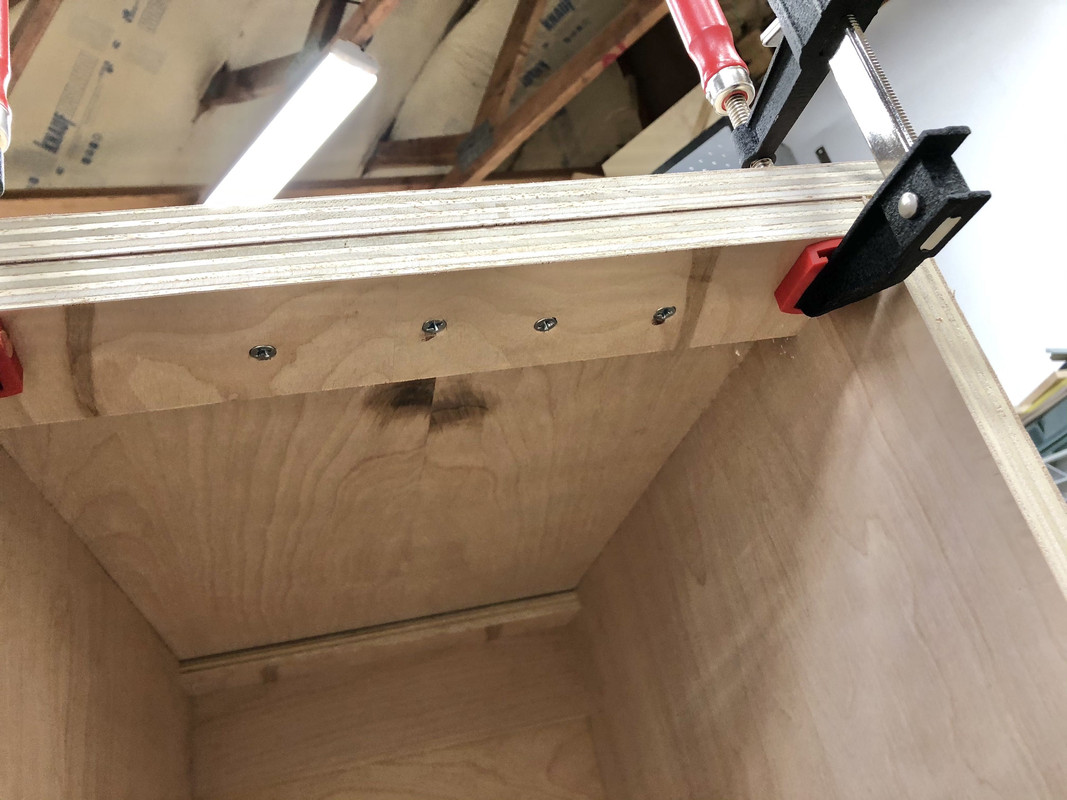
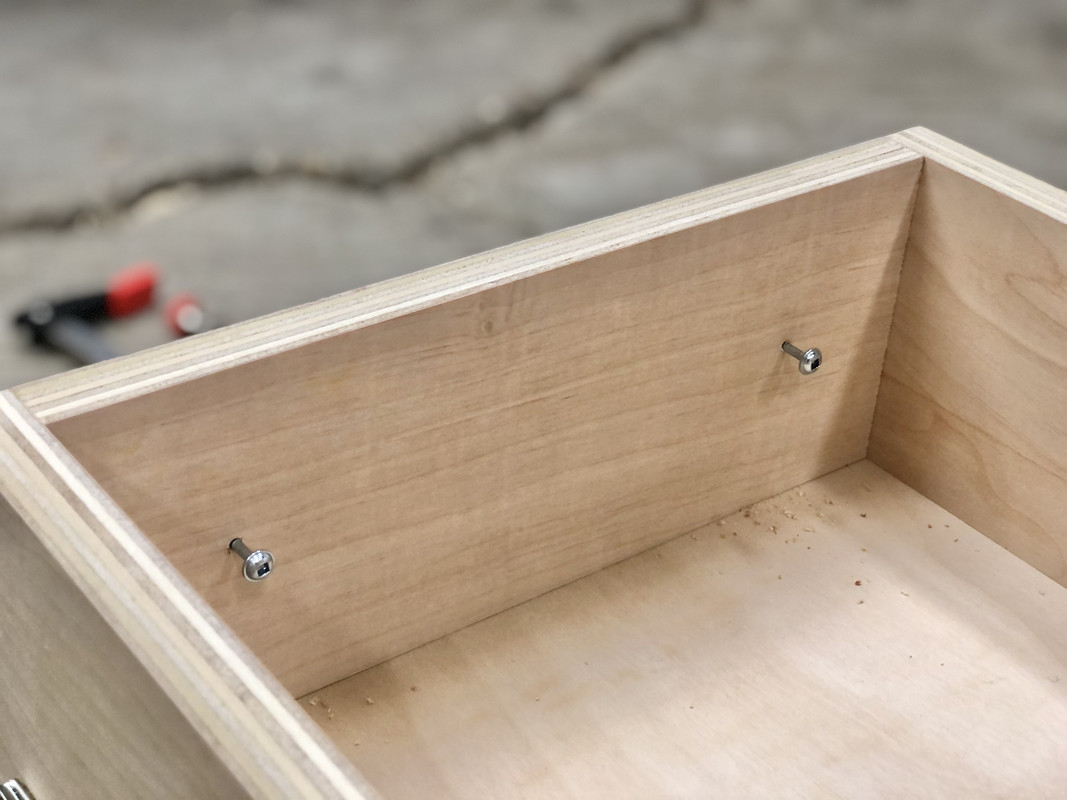
And the same trick of inserting the screws so the points just protrude and then making an impression on the false front.

IMG-2500.jpg


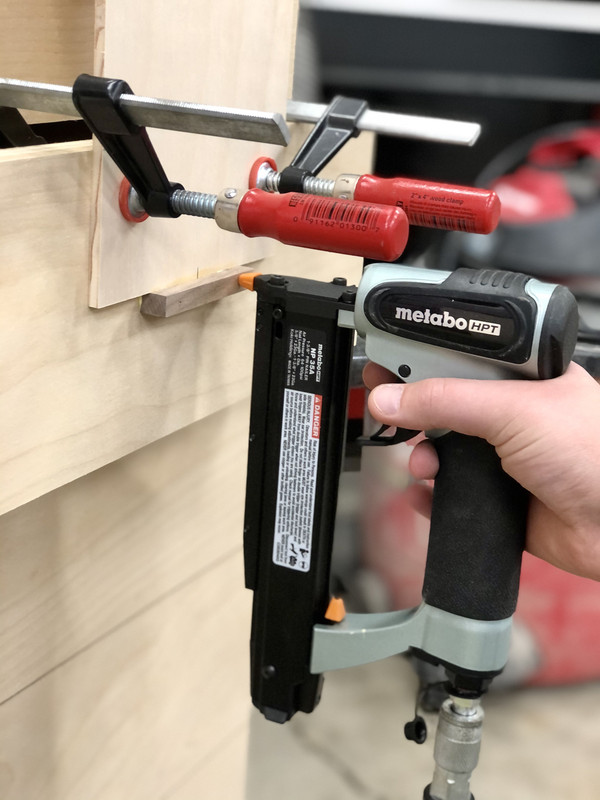
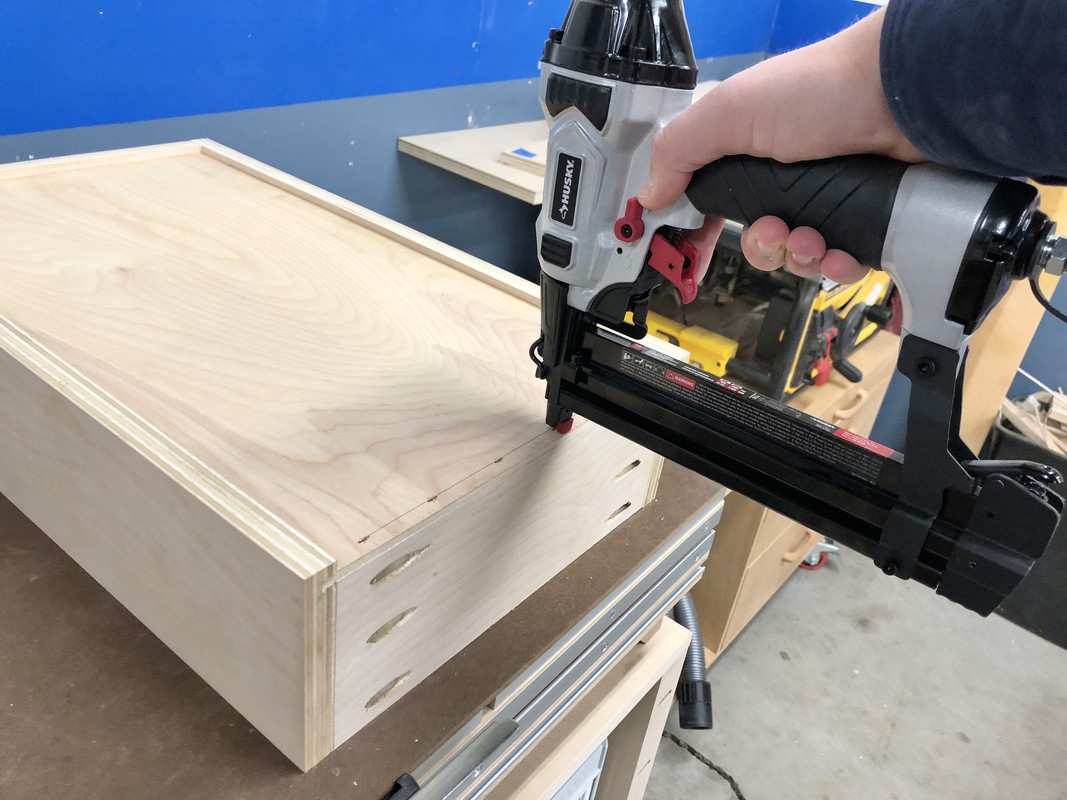
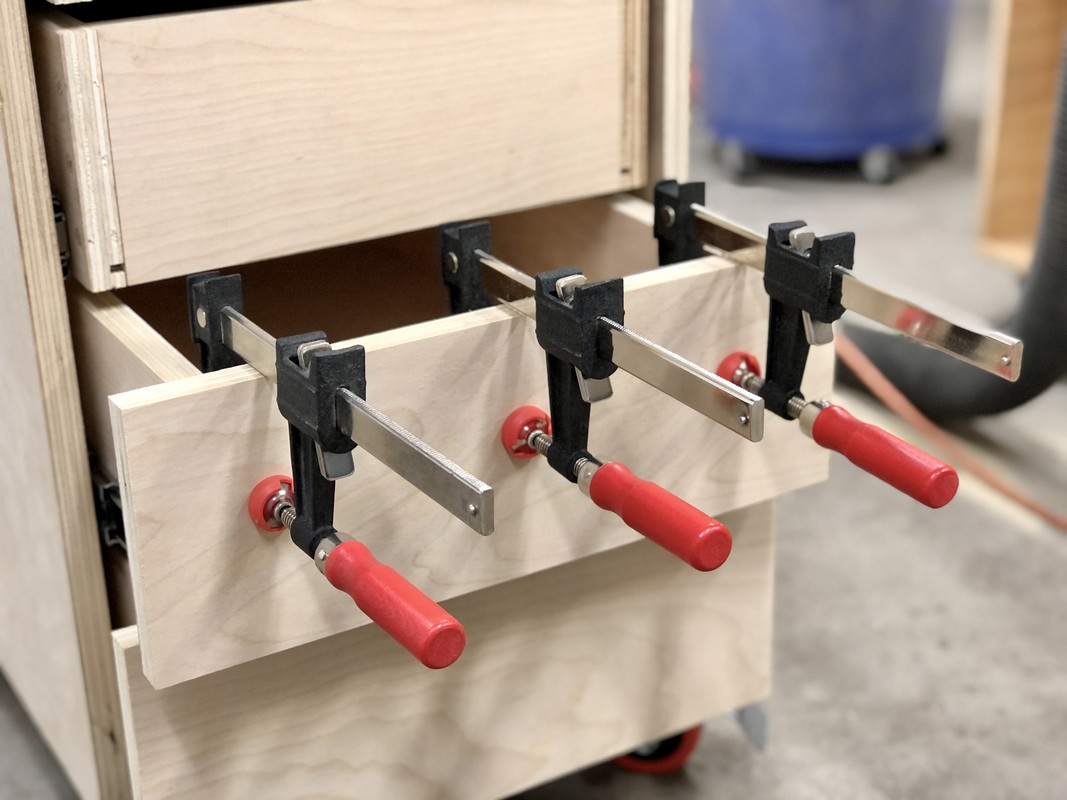
This time I didn't pre-drill the false fronts and clamped them tight so they didn't wander while sending the screws home:

IMG-2502.jpg


Side note: I used Kreg pocket screws to attach the fronts. Sometimes Kreg screws can be useful outside of pocket screw applications. They have a nice, flat, wide head, and these particular ones have coarse thread for plywood.

It worked great.

IMG-2504.jpg


IMG-2506.jpg


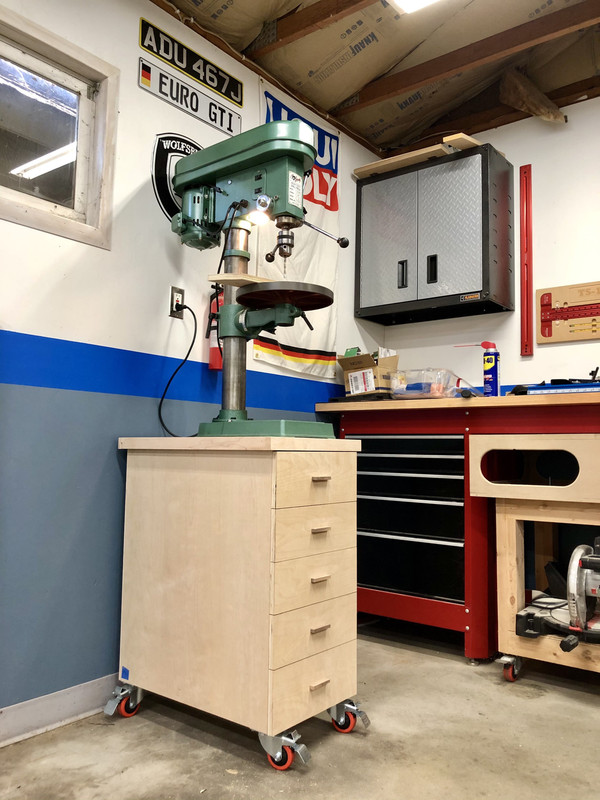
Not really a mistake, but I would comment that I think the top would look better if it overhanged the drawers in the front like it does the sides.

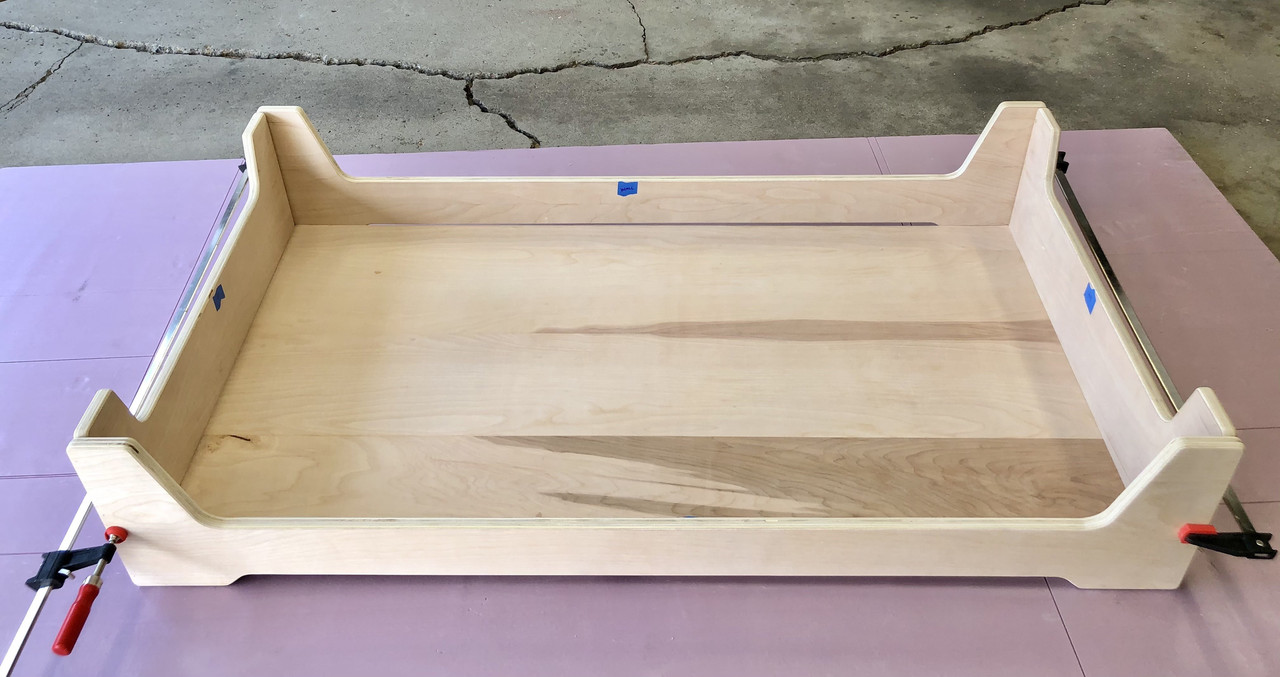
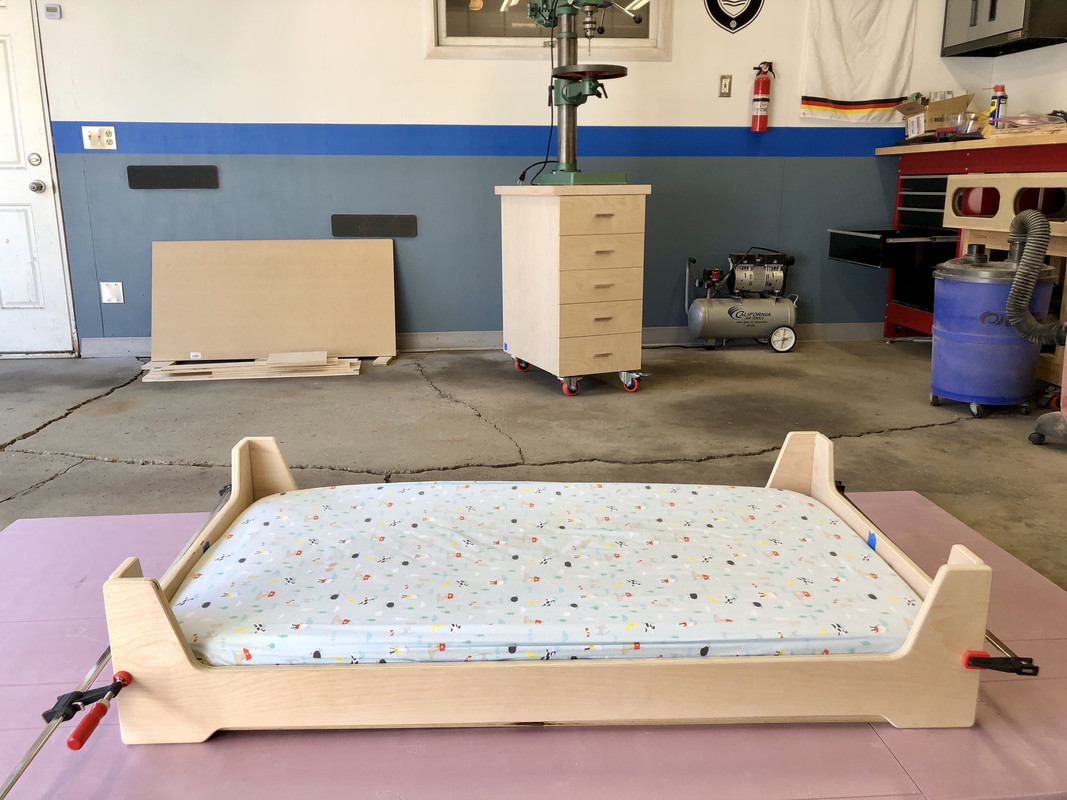
From here... I'll probably have one more post with the finishing touches on this, and then back to my daughter's bed.

:beer:
 
OP
N

nicholam77

Well-known member
Joined
Dec 18, 2016
Messages
2,659
Location
Minneapolis, MN
Looking wonderful sir!

Sent from The Garage Journal mobile app

Nick, the cart turned out great :thumbup: 
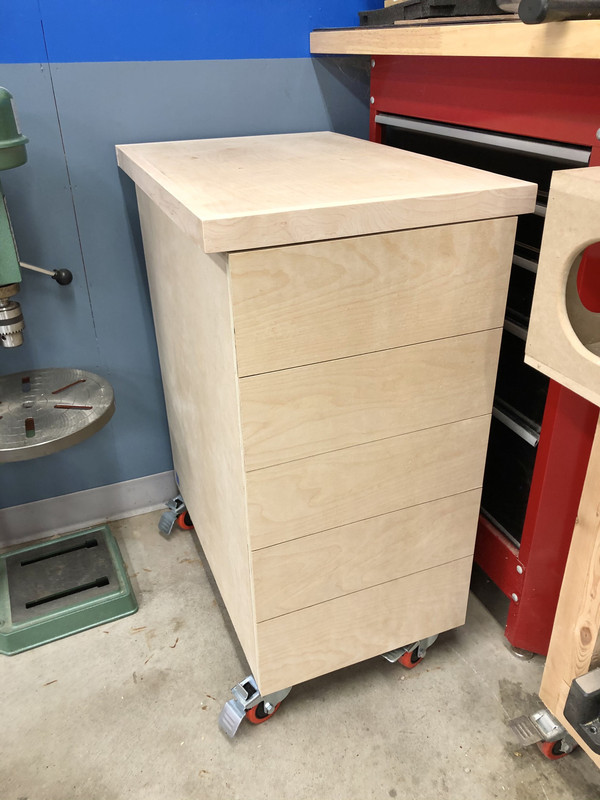
I like the flush front too.

Thanks, guys!

An itsy bitsy teenie weenie update from the weekend:

I was planning on buying some firewood for fall / winter, but my dad offered I could take most of his. My parent's as of late usually only burn a fire at Thanksgiving and the holdidays, so I took almost everything they had :D and it's probably 4 years or more old so nice and seasoned, including a birch tree from their yard. A mix of birch and oak.

I don't have a great place to store firewood on our property so I stacked it by the back door. Don't love it right by the house but will be convenient. To do so I whipped up a quick cedar base from some leftover fencing material.

IMG-2514.jpg


Did my best to stack it nice and neat.

IMG-2515.jpg


IMG-2517.jpg


It's not a ton of wood, about a 4'x4'x16" pile, so about 1/4 face cord. We don't rely on fire for heat or anything, it's just a cozy wintertime ritual I'd like to pursue more, but I hope to get through the pile this season.

Need to get me an axe!

Second small task was adding pulls to the drill press cart drawers, which I accomplished during nap time.

With scrap walnut because I had it on hand from the bath vanity floating shelf and thought it would look cool. :lol:

IMG-2532.jpg


I went with thin, squared off strips. The only way I came up with to attach (clamps wouldn't reach) was to position with a "jig" aka piece of ply, and then glue and pin nail. No screws but I think it should be enough.

IMG-2531.jpg


IMG-2530.jpg


Hope everyone had a great weekend!
 

Matias

Well-known member
Joined
Feb 28, 2015
Messages
616
Location
Finland
That's a very nice cart!

Depending on the fireplace you have, you can go through a lot of wood in one go, or not that much. We use the fireplace for the ambience, but also to help with the heating and hopefully bring down the electricity bill a little bit in the winter. If you haven't used the fireplace for a long time, I think a good idea is not to not max it the first time it gets heated.
 

jonshonda

Well-known member
Joined
Jul 17, 2017
Messages
4,742
Location
Wisconsin
Nice work! Just a word of caution on wood piles being that close to your house. Lots of critters like to make wood piles their home, and they might consider moving into your home seeing as its so close!
 
OP
N

nicholam77

Well-known member
Joined
Dec 18, 2016
Messages
2,659
Location
Minneapolis, MN
That's a very nice cart!

Depending on the fireplace you have, you can go through a lot of wood in one go, or not that much. We use the fireplace for the ambience, but also to help with the heating and hopefully bring down the electricity bill a little bit in the winter. If you haven't used the fireplace for a long time, I think a good idea is not to not max it the first time it gets heated.

Thanks!

I have a masonry fireplace clad in chicago brick. I don't think it's very efficient. It leaks cool air in the winter and having a fire does not warm up the room considerably.

Great looking cart. I’m not the best with drawers, so seeing someone do them right always impresses me.

Ha, it didn't go perfectly, somehow despite using spacers the got off a bit on one side, but I'm getting better!

Nice work! Just a word of caution on wood piles being that close to your house. Lots of critters like to make wood piles their home, and they might consider moving into your home seeing as its so close!

True true. I did think about that. Critters (especially centipedes, spiders, and mice) like to come into the home in the fall anyways due to the changing temps. But I don't like having the pile so close to the house for that reason. Maybe I will move it. I don't know if I'll have a chance to build a little firewood shelter this year so it's a bit tricky to find a spot that's relatively close for easy access, that won't get buried in snow, etc.
 
OP
N

nicholam77

Well-known member
Joined
Dec 18, 2016
Messages
2,659
Location
Minneapolis, MN
No new projects to report. Was busting my *** the past 3 weeks on a job for work, then took a week vacation with the in-laws to Charleston, SC. Personally I wouldn't have traveled right now but they were treating us to the trip and aside from the flights it was quite secluded.

IMG-2622.jpg


IMG-2685.jpg


It was very nice to be outside, by the ocean, largely away from people, enjoying some last bits of warm weather as it's getting cold back here in MN.

Another random pic to add -- GTI fall vibes:

IMG-2691.jpg


I hope to get back to regular programming soon, but I have a growing list of "before winter maintenance projects" I have to get through.

:beer:
 

Terranova

Well-known member
Joined
May 12, 2008
Messages
854
Location
Grove City, OH
Great cart. (What I would consider) extra steps (biscuits) Really make sure the execution is well done.

Love Charleston and Isle of palms.

Gonna have to spend some time back tracking on your thread.
 
OP
N

nicholam77

Well-known member
Joined
Dec 18, 2016
Messages
2,659
Location
Minneapolis, MN
Great cart. (What I would consider) extra steps (biscuits) Really make sure the execution is well done.

Love Charleston and Isle of palms.

Gonna have to spend some time back tracking on your thread.

Thank you! Yes, I like the biscuits because they make it easy to put together. And not too much extra effort to do.

Good eye -- we were indeed in Isle of Palms! First time for me on the east coast other than NYC, I enjoyed it very much!

I located your thread... looks like I have some reading to do as well!

:beer:
 
OP
N

nicholam77

Well-known member
Joined
Dec 18, 2016
Messages
2,659
Location
Minneapolis, MN
Drill Press Cart - part 5 - mounting the drill press

Probably some are wondering, Nick, are you sure that's a drill press cart you made? The cart seems to be done but the drill press is still on the floor?

I've been waiting for the right time to get a helping hand since it's ~150 lbs, but today I just sucked it up and did it on my own. One hernia and some bolts and washers later and she's installed!

IMG-2705.jpg


Despite a previous post questioning the spindle, it seems to be drilling straight. :thumbup:

IMG-2702.jpg


I wouldn't call it a deep clean or anything, but I spent a few minutes wiping it down with some damp paper towels.

IMG-2707.jpg


IMG-2708.jpg


Pretty happy with it and looking forward to using it on some projects. Now just gotta figure out a clamping table + fence!
 
OP
N

nicholam77

Well-known member
Joined
Dec 18, 2016
Messages
2,659
Location
Minneapolis, MN
Nice job on the drill press clean up @nicholam77
I’ve been eyeing building my own version of this out of birch ply and using 1/4-20 hold downs from McMaster


https://www.infinitytools.com/infinity-tools-plycore-drill-press-table-w-fence-hardware

Nice! I don't have a 100% plan for the table yet, trying not to spend too much on this thing. Was thinking of making a sandwiched plywood / MDF / or melamine table but I'm not sure which material would be best.

Woodpecker's sells a track + fence + hardware kit similar to the Infinity Tools for the same price actually, so I have my eye on that to use with a homemade table.

https://www.woodpeck.com/drill-press-table-track-kit.html
 

Mr. Roboto

Well-known member
Joined
Dec 11, 2012
Messages
2,160
Location
New Hampshire
The final product of your drill press and stand came out great! Well done. Now you have a drill press at a comfortable height for use, with the added benerit of some storage.

Happy to hear you enjoyed some time away with the family as well. It’s never a bad thing.

Keep it up!
 

bdbecker

ALLIANCE MEMBER
Joined
Nov 18, 2015
Messages
5,564
Location
Iowa
Be honest... did you remember to lock your casters before trying to set the drill press on the cart, or did you have to awkwardly chase it around your garage for a few moments while hoping you didn't drop your drill press? I always seem to do the latter.

...Despite a previous post questioning the spindle, it seems to be drilling straight...

Even if there is some runout, it can still drill straight. The main thing to keep an eye on is your hole diameter. If the bit is wobbling, your holes may be slightly oversized. You'll also notice it may be difficult to start holes in the right spot when running longer bits as they amplify the runout over the increased distance.

I only mention these things so you have them in the back of your mind. If it ever gets bad, there are a few things you can try that will make it better. However, if you are happy with how its running, I wouldn't do anything. This is one of those things where chasing perfection can often lead to frustration.
 
Last edited:
OP
N

nicholam77

Well-known member
Joined
Dec 18, 2016
Messages
2,659
Location
Minneapolis, MN
The final product of your drill press and stand came out great! Well done. Now you have a drill press at a comfortable height for use, with the added benerit of some storage.

Happy to hear you enjoyed some time away with the family as well. It’s never a bad thing.

Keep it up!

Thanks Roboto! I will try to keep the momentum going.

Be honest... did you remember to lock your casters before trying to set the drill press on the cart, or did you have to awkwardly chase it around your garage for a few moments while hoping you didn't drop your drill press? I always seem to do the latter.

Lol, thankfully I remembered to lock them. Or I woulda been in real trouble.

Even if there is some runout, it can still drill straight. The main thing to keep an eye on is your hole diameter. If the bit is wobbling, your holes may be slightly oversized. You'll also notice it may be difficult to start holes in the right spot when running longer bits as they amplify the runout over the increased distance.

I only mention these things so you have them in the back of your mind. If it ever gets bad, there are a few things you can try that will make it better. However, if you are happy with how its running, I wouldn't do anything. This is one of those things where chasing perfection can often lead to frustration.

Good to know. It seems to be accurate enough but I will keep an eye on it as it gets more use.
 
OP
N

nicholam77

Well-known member
Joined
Dec 18, 2016
Messages
2,659
Location
Minneapolis, MN
Kid Bed - part 3 - sanding + joinery

Most of this work was done awhile ago, just catching up to post.

With all the sides of the bed cut, next I added a round over. But before doing that, I spend a fair amount of time filling voids in the plywood.

IMG-2378.jpg


I think bdbecker and some others commented that there are better true baltic birch options at Menards vs. the PureBond stuff I get at Home Depot. I would agree with that and next time I do a furniture-y project I'll definitely be looking at a different source.

IMG-2380.jpg


IMG-2379.jpg


My round over bit was given to me by my dad and has seen better days, so I picked up a new one for this project with a better bearing, too. Figured it's something I'll use a lot.

IMG-2390.jpg


IMG-2389.jpg


The router table handled the somewhat skinny pieces nicely.

Then I did a lot of sanding. In order to preserve the nice roundover I painstakingly sanded that by hand.

IMG-2483.jpg


For awhile I pondered how to put this thing together without visible joinery. In the end I settled on doweling the 4 sides.

I don't use my Woodpecker's T-Square that often, but when it makes sense it sure is awesome. To lay out the dowels I indexed the bottom of each mating side with the "T", and then marked along the scales that run up both sides of the square. Since all edges had a round over at this point, it was quite useful in getting matching marks.

IMG-2729.jpg


I think I got this little dowel jig at Rockler and while the quality is so-so it produces pretty decent results.

IMG-2728.jpg


I dry fit it and surprisingly, it was square as can be!

IMG-2730.jpg


I tried to think of an (easy) way to attach the floating mattress support without visible fasteners, but in the end made the compromise of pocket screws on one side.

IMG-2735.jpg


The mattress support is not attached (just sitting on the floor) but here is a sneak peak of the final form:

IMG-2732.jpg


IMG-2734.jpg


The whole time I've been working on this I've had a prodding in the back of my mind -- "Did I measure the mattress correctly?" It's a relief that it fits!

Next up is applying finish. Realistically the wife and I are having second thoughts of transitioning our daughter out of the crib until absolutely necessary. So not sure when I'll get some pics in situ.

:lol:
 
To avoid these ads, REGISTER NOW!
Top Bottom