To avoid these ads, REGISTER NOW!

BEFORE & AFTER....A Tool Polisher's Haven

OP
J

JMLangford

Well-known member
Joined
Jun 25, 2014
Messages
1,119
Location
Upstate SC
Is it just me or do you all wish we had more pics being uploaded!!! I love this thread. I don’t actually do any tool polishing but this is one of my favorite threads on GJ....

O.K. guys.....I know I've been slackin' off here lately....here's a couple more Before & Afters....

BEFORE:
Found this little J.H. Williams B50 double headed ratchet from the '30's....
JHWR1.jpg JHWR2.jpg JHWR3.jpg JHWR4.jpg JHWR5.jpg JHWR6.jpg

I was extremely lucky to have found the 3/8" drive insert....I understand they are usually missing when you find the ratchet....

I cleaned the outside , then took it apart to clean and lube the innards....
JHWR7.jpg


.
 
Last edited:
To avoid these ads, REGISTER NOW!
OP
J

JMLangford

Well-known member
Joined
Jun 25, 2014
Messages
1,119
Location
Upstate SC
Cleaned up the drive cog (I used one of my bronze bore brushes to clean the inside drive area... :thumbup:)
JHWR8.jpg

Next, the pin, spring, and screw....
JHWR9.jpg

Then, shined up the inside of the head...
JHWR10.jpg JHWR11.jpg

AFTER:
All lubed and back together....
JHWR12.jpg JHWR13.jpg


.
 
Last edited:
OP
J

JMLangford

Well-known member
Joined
Jun 25, 2014
Messages
1,119
Location
Upstate SC
One more quickie....

BEFORE:
Picked-up these two pipe wrenches last year....one is a 10" no-name Made In U.S.A. and the other is a 10" Hercules...
PWR1.jpg

AFTER:
Now, this is one of those "remove the rust...keep the patina" cleanings where I shined up the exposed metal but didn't repaint the red area.....THAT may change this summer :beer:...
PWR2.jpg PWR3.jpg PWR4.jpg PWR5.jpg PWR6.jpg

PENDING:
Now, the Hercules is patiently waiting his turn this summer....
PWR7.jpg


(I think I'm starting to break out in hives....:lol_hitti)


.
 
Last edited:

don long

Well-known member
Joined
Mar 31, 2012
Messages
8,841
Location
southern california
Here is a little project I did last week.
It is a blow torch oven tool. I have no idea how it was used but it is made with very good quality brass so I had to clean it up

38872551745_9be3d88492_b.jpg2018-01-15 16.07.43 by don long, on Flickr

38872527685_eac30f8dc8_k.jpg2018-01-15 16.08.23 by don long, on Flickr

38872579635_70fd611bc6_b.jpgIMG_2466 by don long, on Flickr

38872574015_17da73a056_b.jpgIMG_2465 by don long, on Flickr

So here was the process
!. glass bead blasted to clean the pocket

2. grind down the casting marks using a 2" grinding pad on my die grinder

3. start the long tedious sanding process with a 3" velcro pad on my pistol grip polisher 80* , 120* , 180* , 220* , 320* ,400* , 600* , 800* and finally 1200*

By the time the 1200* sanding was complete the piece had a dull mirror finish

Next was the buffer using the green bar first on a hard wheel then the red bar on a soft wheel.

Now it shines with a deep reflection.

Last: to save the shine I sprayed the piece with a brass saving liquid called brass saver.

Now it's ready to put on display in the party garage
 

trijeff

Well-known member
Joined
Jan 21, 2015
Messages
1,359
Location
Northern Cali
Looks great Don! Green/stitched and then red/loose for brass ... definitely noting this because that finish is outta site
 

Swingpress

Well-known member
Joined
Mar 16, 2017
Messages
537
Oh! Come on Don! We all know you buy that stuff brand new! You ain't fooling me!

Lol in all seriousness, killer work brother! That is on a whole new level.


Facebook Group: TheCatalog Live Auctions
 

cweidert03

Well-known member
Joined
Oct 19, 2015
Messages
417
Location
New Castle, IN
One more quickie....

BEFORE:
Picked-up these two pipe wrenches last year....one is a 10" no-name Made In U.S.A. and the other is a 10" Hercules...
PWR1.jpg

AFTER:
Now, this is one of those "remove the rust...keep the patina" cleanings where I shined up the exposed metal but didn't repaint the red area.....THAT may change this summer :beer:...
PWR2.jpg PWR3.jpg PWR4.jpg PWR5.jpg PWR6.jpg

PENDING:
Now, the Hercules is patiently waiting his turn this summer....
PWR7.jpg


(I think I'm starting to break out in hives....:lol_hitti)


.


That red handle would look nice in my box!!


Sent from my iPhone using Tapatalk
 

FMC1959

Well-known member
Joined
Feb 9, 2014
Messages
2,305
Location
Montreal, Canada / Upstate NY
Some beautiful stuff on this thread. Don or anyone else who knows, I have seen many different colors for the buffing compounds, like white, green, grey, black and red. I have a green bar and IIRC it is fine. From Don's process, it would seem like red is an extra fine.

Is this usually the case, red will be more fine than green and some of the other colors might be coarser or even more fine than red?

Or depending on the brand or MFR, color has no bearing on the coarseness of the compound?
 

1953mercury

Well-known member
Joined
Nov 25, 2012
Messages
701
Location
Steamboat Springs CO
Reworking the The X,Y, and knee feed nuts and bearings on my Bridgeport, and decided as long as it was apart I would do a little polishing on the handles and related parts. Didn't get to carried away like I would on engine cases and such, but they didn't come out to bad for an abbreviated job. Mike
 

Attachments

  • P1010671.jpg
    P1010671.jpg
    137.2 KB · Views: 196
  • P1010672.jpg
    P1010672.jpg
    137.5 KB · Views: 214
  • P1010673.jpg
    P1010673.jpg
    135.3 KB · Views: 3,581
  • P1010674.jpg
    P1010674.jpg
    135.4 KB · Views: 212

littleponderosa

Well-known member
Joined
Sep 27, 2014
Messages
864
Location
MONTANA
Ok. If I'm gonna get started down this road I need an equipment list.
Please chime in with suggestions - I'm outta the $700 baldors league till I can justify it - and a priority list.
I'll have time over money on this project.
Bill
 

eric.holmslice

Well-known member
Joined
May 28, 2015
Messages
99
BEFORE & AFTER....A Tool Polisher's Haven

Proud of my old school Atlas restoration. Nearly complete. All bare metal has been polished or being polished. I need to get some better compound for the stainless parts. I even polished bolt heads. I’m learning a lot from this forum. What is a good compound and buff for stainless steel? I’ve sanded all parts, but my wheel polish just isn’t cutting it on the stainless.

e185478ea3453291daa4a22dd38f4eda.jpg

ca2c07cfe4e857bc60e9866e40b71c2f.jpg

ded65335fd516da417fe991fb90e8b22.jpg


47985760e086977a6597b9cab04c1123.jpg


First thing I did was polished all three pulleys prior to the tear down. Basically pretended they were spinning on a lathe.

514ecd0ceb05cd863bdd87756f5c1285.jpg

b2ef3c6cbf0b03d70a0384c537b4daec.jpg

9e7067327d07b2239d2873a99b39dc6d.jpg

5f4fe6b9e24620d2adba8d136ff3fa08.jpg


766b4d0c766f2bf67625b24dd0147d9c.jpg


Sent from my iPhone using Tapatalk
 

Attachments

  • b2ef3c6cbf0b03d70a0384c537b4daec.jpg
    b2ef3c6cbf0b03d70a0384c537b4daec.jpg
    495.6 KB · Views: 5
  • 766b4d0c766f2bf67625b24dd0147d9c.jpg
    766b4d0c766f2bf67625b24dd0147d9c.jpg
    478.9 KB · Views: 6
  • 5f4fe6b9e24620d2adba8d136ff3fa08.jpg
    5f4fe6b9e24620d2adba8d136ff3fa08.jpg
    602.5 KB · Views: 6
  • e185478ea3453291daa4a22dd38f4eda.jpg
    e185478ea3453291daa4a22dd38f4eda.jpg
    568.2 KB · Views: 7
  • ca2c07cfe4e857bc60e9866e40b71c2f.jpg
    ca2c07cfe4e857bc60e9866e40b71c2f.jpg
    600.2 KB · Views: 7
  • 9e7067327d07b2239d2873a99b39dc6d.jpg
    9e7067327d07b2239d2873a99b39dc6d.jpg
    443.3 KB · Views: 4
  • 514ecd0ceb05cd863bdd87756f5c1285.jpg
    514ecd0ceb05cd863bdd87756f5c1285.jpg
    475.9 KB · Views: 4
  • 47985760e086977a6597b9cab04c1123.jpg
    47985760e086977a6597b9cab04c1123.jpg
    552.1 KB · Views: 4
  • ded65335fd516da417fe991fb90e8b22.jpg
    ded65335fd516da417fe991fb90e8b22.jpg
    525 KB · Views: 4
Last edited:

trijeff

Well-known member
Joined
Jan 21, 2015
Messages
1,359
Location
Northern Cali
Ok. If I'm gonna get started down this road I need an equipment list.
Please chime in with suggestions - I'm outta the $700 baldors league till I can justify it - and a priority list.
I'll have time over money on this project.
Bill
Look for a Craftsman block grinder 1/2hp or above, it'll take care of wire wheeling and buffing. You can go cheapo on wheels and buffers at Harbor Freight but I would recommend spending just a few more bucks on made in USA goodness, you won't be disappointed. In between rhe wire wheeling and buffing you'll need to do some filing and/or sanding in increasingly finer grits ... see Don's post on that a few back. And you have the number one thing this takes already ... time ;)
 

trijeff

Well-known member
Joined
Jan 21, 2015
Messages
1,359
Location
Northern Cali
Re: BEFORE & AFTER....A Tool Polisher's Haven

Proud of my old school Atlas restoration. Nearly complete. All bare metal has been polished or being polished. I need to get some better compound for the stainless parts. I even polished bolt heads. I’m learning a lot from this forum. What is a good compound and buff for stainless steel? I’ve sanded all parts, but my wheel polish just isn’t cutting it on the stainless.

e185478ea3453291daa4a22dd38f4eda.jpg

ca2c07cfe4e857bc60e9866e40b71c2f.jpg

ded65335fd516da417fe991fb90e8b22.jpg


47985760e086977a6597b9cab04c1123.jpg


First thing I did was polished all three pulleys prior to the tear down. Basically pretended they were spinning on a lathe.

514ecd0ceb05cd863bdd87756f5c1285.jpg

b2ef3c6cbf0b03d70a0384c537b4daec.jpg

9e7067327d07b2239d2873a99b39dc6d.jpg

5f4fe6b9e24620d2adba8d136ff3fa08.jpg


766b4d0c766f2bf67625b24dd0147d9c.jpg


Sent from my iPhone using Tapatalk
Now THAT is absolutely amazing work right there, holy camole!!
 

Attachments

  • 47985760e086977a6597b9cab04c1123.jpg
    47985760e086977a6597b9cab04c1123.jpg
    259.3 KB · Views: 4
  • 514ecd0ceb05cd863bdd87756f5c1285.jpg
    514ecd0ceb05cd863bdd87756f5c1285.jpg
    213.7 KB · Views: 4
  • ded65335fd516da417fe991fb90e8b22.jpg
    ded65335fd516da417fe991fb90e8b22.jpg
    237.6 KB · Views: 4
  • ca2c07cfe4e857bc60e9866e40b71c2f.jpg
    ca2c07cfe4e857bc60e9866e40b71c2f.jpg
    282.3 KB · Views: 4
  • b2ef3c6cbf0b03d70a0384c537b4daec.jpg
    b2ef3c6cbf0b03d70a0384c537b4daec.jpg
    222.2 KB · Views: 5
  • e185478ea3453291daa4a22dd38f4eda.jpg
    e185478ea3453291daa4a22dd38f4eda.jpg
    265.7 KB · Views: 6
  • 5f4fe6b9e24620d2adba8d136ff3fa08.jpg
    5f4fe6b9e24620d2adba8d136ff3fa08.jpg
    287.4 KB · Views: 6
  • 9e7067327d07b2239d2873a99b39dc6d.jpg
    9e7067327d07b2239d2873a99b39dc6d.jpg
    189.5 KB · Views: 4
  • 766b4d0c766f2bf67625b24dd0147d9c.jpg
    766b4d0c766f2bf67625b24dd0147d9c.jpg
    226.1 KB · Views: 6

chrisnazzy

Well-known member
Joined
Apr 20, 2013
Messages
1,671
Location
Arizona
I have recently acquired both of these and the plan is to make the Baldor my buffer. I've polished alot of aluminum stuff over the years but my venture into vises over the last year leaves me wanting to up my polishing game.

Seems like an appropriate place to ask if one of you can recommend what buffing wheels I should get if results and quality were more important than price. Should I get 6" or 8"? Also could use a rec for good compound. I'm already exploring some sanding solutions down to very fine grit.3a7c53981443dc9c1e920c1bcbb48c10.jpgda94abb16e80af20332695a772cad2aa.jpg

Sent from my SM-G930P using Tapatalk
 

Attachments

  • 3a7c53981443dc9c1e920c1bcbb48c10.jpg
    3a7c53981443dc9c1e920c1bcbb48c10.jpg
    61.5 KB · Views: 5
  • da94abb16e80af20332695a772cad2aa.jpg
    da94abb16e80af20332695a772cad2aa.jpg
    107.2 KB · Views: 3

bonneyman

Well-known member
Joined
Apr 22, 2010
Messages
8,752
Location
Desert SW
Cleaned up the drive cog (I used one of my bronze bore brushes to clean the inside drive area... :thumbup:)
JHWR8.jpg

Next, the pin, spring, and screw....
JHWR9.jpg

Then, shined up the inside of the head...
JHWR10.jpg JHWR11.jpg

AFTER:
All lubed and back together....
JHWR12.jpg JHWR13.jpg


.

Nice "water wheel drive" ratchet! :thumbup:
 
To avoid these ads, REGISTER NOW!

cweidert03

Well-known member
Joined
Oct 19, 2015
Messages
417
Location
New Castle, IN
Re: BEFORE & AFTER....A Tool Polisher's Haven

Proud of my old school Atlas restoration. Nearly complete. All bare metal has been polished or being polished. I need to get some better compound for the stainless parts. I even polished bolt heads. I’m learning a lot from this forum. What is a good compound and buff for stainless steel? I’ve sanded all parts, but my wheel polish just isn’t cutting it on the stainless.

e185478ea3453291daa4a22dd38f4eda.jpg

ca2c07cfe4e857bc60e9866e40b71c2f.jpg

ded65335fd516da417fe991fb90e8b22.jpg


47985760e086977a6597b9cab04c1123.jpg


First thing I did was polished all three pulleys prior to the tear down. Basically pretended they were spinning on a lathe.

514ecd0ceb05cd863bdd87756f5c1285.jpg

b2ef3c6cbf0b03d70a0384c537b4daec.jpg

9e7067327d07b2239d2873a99b39dc6d.jpg

5f4fe6b9e24620d2adba8d136ff3fa08.jpg


766b4d0c766f2bf67625b24dd0147d9c.jpg


Sent from my iPhone using Tapatalk


That is very nice work! I’d imagine looks much better than when it left the factory


Sent from my iPhone using Tapatalk
 

Attachments

  • 514ecd0ceb05cd863bdd87756f5c1285.jpg
    514ecd0ceb05cd863bdd87756f5c1285.jpg
    213.7 KB · Views: 2
  • 766b4d0c766f2bf67625b24dd0147d9c.jpg
    766b4d0c766f2bf67625b24dd0147d9c.jpg
    226.1 KB · Views: 2
  • 47985760e086977a6597b9cab04c1123.jpg
    47985760e086977a6597b9cab04c1123.jpg
    259.3 KB · Views: 2
  • ded65335fd516da417fe991fb90e8b22.jpg
    ded65335fd516da417fe991fb90e8b22.jpg
    237.6 KB · Views: 2
  • ca2c07cfe4e857bc60e9866e40b71c2f.jpg
    ca2c07cfe4e857bc60e9866e40b71c2f.jpg
    282.3 KB · Views: 2
  • e185478ea3453291daa4a22dd38f4eda.jpg
    e185478ea3453291daa4a22dd38f4eda.jpg
    265.7 KB · Views: 2
  • 9e7067327d07b2239d2873a99b39dc6d.jpg
    9e7067327d07b2239d2873a99b39dc6d.jpg
    189.5 KB · Views: 2
  • b2ef3c6cbf0b03d70a0384c537b4daec.jpg
    b2ef3c6cbf0b03d70a0384c537b4daec.jpg
    222.2 KB · Views: 2
  • 5f4fe6b9e24620d2adba8d136ff3fa08.jpg
    5f4fe6b9e24620d2adba8d136ff3fa08.jpg
    287.4 KB · Views: 2

Bears Fan

Well-known member
Joined
Jan 26, 2012
Messages
3,437
Location
Indiana
38872579635_70fd611bc6_b.jpg


attachment.php


5f4fe6b9e24620d2adba8d136ff3fa08.jpg


attachment.php


1d39fbb2e955158fb294a6113ba04e2e.jpg


attachment.php


18cb07fb23a35123ec56b397f094668f.jpg


This is quickly becoming a thread favorite!!! Awesome work guys :beer:
 

Attachments

  • 18cb07fb23a35123ec56b397f094668f.jpg
    18cb07fb23a35123ec56b397f094668f.jpg
    56 KB · Views: 2
  • 1d39fbb2e955158fb294a6113ba04e2e.jpg
    1d39fbb2e955158fb294a6113ba04e2e.jpg
    139.8 KB · Views: 2
  • 5f4fe6b9e24620d2adba8d136ff3fa08.jpg
    5f4fe6b9e24620d2adba8d136ff3fa08.jpg
    287.4 KB · Views: 7
Last edited:
OP
J

JMLangford

Well-known member
Joined
Jun 25, 2014
Messages
1,119
Location
Upstate SC
Sometimes you just have to clean off the nastiness and leaves the scars.....

BEFORE:
NABC1.jpg NABC2.jpg NABC3.jpg NABC4.jpg NABC5.jpg NABC6.jpg NABC7.jpg


.
 
Last edited:

eric.holmslice

Well-known member
Joined
May 28, 2015
Messages
99
Man I want a Wilton bullet vise so bad. They are so dang expensive.


Out of curiosity, how is everyone protecting polished cast metal or polished steel?

Clear coat? Wax? Oil?


Sent from my iPhone using Tapatalk
 

Swingpress

Well-known member
Joined
Mar 16, 2017
Messages
537
Man I want a Wilton bullet vise so bad. They are so dang expensive.


Out of curiosity, how is everyone protecting polished cast metal or polished steel?

Clear coat? Wax? Oil?


Sent from my iPhone using Tapatalk


I normally use gun oil for blades, but if you look earlier in this thread, someone pointed out a method that show real promise.
 

don long

Well-known member
Joined
Mar 31, 2012
Messages
8,841
Location
southern california
When I have a few spare minutes I work on cleaning up a few old tools for a vintage tool display that I want to hang in the party garage.

Here is a shot of some of those tools that I'm working on.

It's just a start

IMG_2501 by don long, on Flickr
 

csp

Well-known member
Joined
Mar 23, 2010
Messages
5,719
Location
Franktown, CO
Before and after of a Beverly Shear I picked up for $35 at an auction years ago.
 

Attachments

  • DSC_0028.jpg
    DSC_0028.jpg
    126.8 KB · Views: 299
  • DSC_0029.jpg
    DSC_0029.jpg
    136.5 KB · Views: 271
  • DSC_0031.jpg
    DSC_0031.jpg
    112 KB · Views: 322
  • DSC_0030.jpg
    DSC_0030.jpg
    115.1 KB · Views: 290

Catfishdan

Well-known member
Joined
Aug 15, 2017
Messages
1,040
Location
Central coast, California
Not a huge project, but I polished and re handled this old hammer I got at a garage sale today. I think it's an old Hart or a Deluge.
81b3420372b129dc7dc767911a24f888.jpg
bb6a1eebf3ec3123bd8ba382412bfeac.jpg


Sent from my iPhone using Tapatalk
 

Attachments

  • 81b3420372b129dc7dc767911a24f888.jpg
    81b3420372b129dc7dc767911a24f888.jpg
    80.9 KB · Views: 10
  • bb6a1eebf3ec3123bd8ba382412bfeac.jpg
    bb6a1eebf3ec3123bd8ba382412bfeac.jpg
    868.9 KB · Views: 6

Jayman17

Well-known member
Joined
Feb 6, 2017
Messages
3,793
Location
Seattle, Wa
Re: BEFORE & AFTER....A Tool Polisher's Haven

Proud of my old school Atlas restoration. Nearly complete. All bare metal has been polished or being polished. I need to get some better compound for the stainless parts. I even polished bolt heads. I’m learning a lot from this forum. What is a good compound and buff for stainless steel? I’ve sanded all parts, but my wheel polish just isn’t cutting it on the stainless.

e185478ea3453291daa4a22dd38f4eda.jpg

ca2c07cfe4e857bc60e9866e40b71c2f.jpg

ded65335fd516da417fe991fb90e8b22.jpg


47985760e086977a6597b9cab04c1123.jpg


First thing I did was polished all three pulleys prior to the tear down. Basically pretended they were spinning on a lathe.

514ecd0ceb05cd863bdd87756f5c1285.jpg

b2ef3c6cbf0b03d70a0384c537b4daec.jpg

9e7067327d07b2239d2873a99b39dc6d.jpg

5f4fe6b9e24620d2adba8d136ff3fa08.jpg


766b4d0c766f2bf67625b24dd0147d9c.jpg


Sent from my iPhone using Tapatalk

:drool:
That is a beauty!
-Jay
 

Attachments

  • 47985760e086977a6597b9cab04c1123.jpg
    47985760e086977a6597b9cab04c1123.jpg
    259.3 KB · Views: 2
  • 766b4d0c766f2bf67625b24dd0147d9c.jpg
    766b4d0c766f2bf67625b24dd0147d9c.jpg
    226.1 KB · Views: 3
  • 5f4fe6b9e24620d2adba8d136ff3fa08.jpg
    5f4fe6b9e24620d2adba8d136ff3fa08.jpg
    287.4 KB · Views: 2
  • 9e7067327d07b2239d2873a99b39dc6d.jpg
    9e7067327d07b2239d2873a99b39dc6d.jpg
    189.5 KB · Views: 3
  • b2ef3c6cbf0b03d70a0384c537b4daec.jpg
    b2ef3c6cbf0b03d70a0384c537b4daec.jpg
    222.2 KB · Views: 2
  • 514ecd0ceb05cd863bdd87756f5c1285.jpg
    514ecd0ceb05cd863bdd87756f5c1285.jpg
    213.7 KB · Views: 4
  • ded65335fd516da417fe991fb90e8b22.jpg
    ded65335fd516da417fe991fb90e8b22.jpg
    237.6 KB · Views: 2
  • ca2c07cfe4e857bc60e9866e40b71c2f.jpg
    ca2c07cfe4e857bc60e9866e40b71c2f.jpg
    282.3 KB · Views: 3
  • e185478ea3453291daa4a22dd38f4eda.jpg
    e185478ea3453291daa4a22dd38f4eda.jpg
    265.7 KB · Views: 3

FJ 432

Well-known member
Joined
Aug 2, 2010
Messages
3,723
Location
Littleton Colorado
I hope this isn't out of place for this thread, but perhaps I can ask for assistance/tips on how to clean up an old vice. So far I've hit it with the power washer and a wire cup wheel. Doesn't seem to make a real difference. It's my grandfathers old vice and as such has sat in piles of mouse droppings and spider webs for fifty years. In an ideal world, I'd like to get it clean enough to paint. Couple pics of where it sits today, thanks in advance.

Start with this thread. It will help you big time:

https://www.garagejournal.com/forum/showthread.php?t=252830
 

ilovevocs

Well-known member
Joined
Jun 26, 2009
Messages
1,966
Location
Toledo, Ohio
Re: BEFORE & AFTER....A Tool Polisher's Haven

I’ve sanded all parts, but my wheel polish just isn’t cutting it on the stainless.


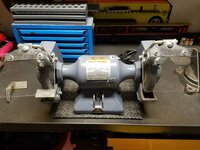
What kind of buffer are you using? Stainless takes either 1. allot more prep prior to polishing, or 2. A powerful buffer, aggressive wheels, and starting with an aggressive compound. Its difficult to get sufficient heat buildup in a stainless part for proper polishing with a an average bench grinder. I also use a higher RPM buffer ( 3600 vs 1800 rpm.)

Have had some parts that i use my curing lamps for auto paint to preheat the part if the size is two great. if the part is cold all of your compound will stay on the part and not in your wheel.

My supplier offered burlap sisal wheels that i used with their black emery that i would start with. I polished allot of stainless hydraulic hard-line for low riders in the late 90's. The fittings and the line were in good enough shape to just compound and buff without sanding or the use of setup wheels.

My supplier went out of business when Detroit stopped putting chrome steel bumpers on almost everything and stopped polishing as a side line. I will still polish my own things, and have been working off a huge supply of old inventory for supplies.

My plater was the plant manager for a small company that chromed all the bumpers for the ford superduty. His boss would allow him to chrome custom parts on the side for cash. Those were the days.

After i did the polishing and he plated an entire banshee frame for me for $80.00. Best part was he would run parts the day i dropped them off and have them back to me the next day.

In the late 90's when the custom auto world was booming and chrome was cool most shops here were three to four months for plating. I could turn parts around in a a few days.
 
Last edited:

drivesitfar

Well-known member
Joined
Oct 23, 2013
Messages
35,988
Location
Pacific Northwest
38872579635_70fd611bc6_b.jpg


attachment.php


5f4fe6b9e24620d2adba8d136ff3fa08.jpg


attachment.php


1d39fbb2e955158fb294a6113ba04e2e.jpg


attachment.php


18cb07fb23a35123ec56b397f094668f.jpg


This is quickly becoming a thread favorite!!! Awesome work guys :beer:

BEARSFAN: it was easier quoting your post of a lot of the cool stuff that's been posted and also giving all those members and everybody else a HUGE THUMBS UP.

ALL: GREAT JOB EVERBODY and thanks for posting all the cool stuff and especially letting us know what tools and methods you used to do all this spiffing up.
 

Attachments

  • 5f4fe6b9e24620d2adba8d136ff3fa08.jpg
    5f4fe6b9e24620d2adba8d136ff3fa08.jpg
    287.4 KB · Views: 3
  • 18cb07fb23a35123ec56b397f094668f.jpg
    18cb07fb23a35123ec56b397f094668f.jpg
    56 KB · Views: 3
  • 1d39fbb2e955158fb294a6113ba04e2e.jpg
    1d39fbb2e955158fb294a6113ba04e2e.jpg
    139.8 KB · Views: 17
OP
J

JMLangford

Well-known member
Joined
Jun 25, 2014
Messages
1,119
Location
Upstate SC
TOOL POLISHER"S TIP #317.....
Whenever you're cleaning the rust from small letters or logos....
20180202_140313.jpg

Take a #2 lead pencil and rub it all over the letters/logos....
20180202_140512.jpg

Work it in all the nooks and crannies....rub it til it runs into wood...re-sharpen and keep going....
20180202_140930.jpg

Take and brush the lead (graphite) off with a wire brush or wheel.....then you're ready to clean the rest of the tool.....
20180202_140721.jpg

Lookin' Good.....:thumbup:
20180202_141512.jpg 20180202_141519.jpg 20180202_141539.jpg

BONUS TIP: If you still have signs of dirt or rust (like inside letters "R" "O" "A" etc...) take a straight pick or dental pick and scratch it around on the stubborn letters , then repeat the pencil trick.....


Happy Polishing.....:beer:


.
 
To avoid these ads, REGISTER NOW!
Top Bottom