To avoid these ads, REGISTER NOW!

CBacres ex horse barn shop

Chrisb62

Well-known member
Joined
Jul 30, 2019
Messages
1,093
Location
southwest fl
Heres Shorty making a very important point to Chris!
4A04ECB3-8A07-4110-8C24-74F7336A729D.jpeg
The vendor in the background had a bunch of boxes, totes etc with random stuff. I lucked out and found a 3/4” Wright wrench in the same style of a set I have. I the 3/4” a while back. Nice to have the set complete again.
If I remember correctly he was saying that he was about this close to not getting hurt......... :spit:
 
To avoid these ads, REGISTER NOW!
OP
C

cbacres

Well-known member
Joined
May 28, 2010
Messages
5,998
Location
SW Florida
Well been doing this and that, trading stuff that’s not being used for stuff that I’ll use.

On the last trip to Flywheelers, I dug out some military surplus chain tensioners I bought a while back to tie down the cart on the trailer. My thoughts were to have a dedicated set of chains and tensioners so no messing around with adjusting each time I used.

Loaded cart and tried one out, chain kept coming out of tension, so grabbed a different type, more of a lever type binder. Once I had tension adjusted, the lever pulled it tight.

2EC3D7BA-8B19-4069-8AC6-9A9F0CE0EE8D.jpeg
76CFDEFF-2AAF-4D61-A741-544D0FD55603.jpeg
This is the first one I was trying.
7B987485-FED8-4A3D-AF22-9C6BA88B1C8C.jpeg
one of the uses in the military.
5EE20FC7-5E55-4838-B9E1-79C209C43FA4.jpeg
End where chain connects.
41EC6F40-EC81-4140-9A0F-E68AFF562F53.jpeg
Pretty neat set up. I thought I had the wrong chain the night I was trying to hook up, but after messing around today with it, I think I didn’t have the piece that chain seats in pushed all the way in. It’s a little tricky getting the chain link in at first. I like this tensioner, easy to tighten and you can disconnect quickly by pulling the paddle out.

So, you know how it goes, start messing with something, get online reading up on it and next thing i know there’s 3 eBay orders on the way.

I bought another of the lever type tensioner cause I wasn’t sure at the time knob one was going to work for me. This one had the 1/4” chain with it.
3DA1C7DC-492F-43DB-A851-412AE8928D3C.jpeg

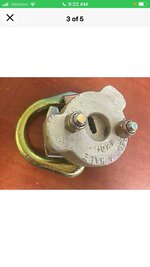
I bought some D-rings in a recessed mount at Flywheelers. These had galvanized d rings, but the recessed part was plain steel. Wasn’t sure how to get this protected from corrosion. Here I go reading again on d- rings.

Here is what I bought.2967BB4C-567B-41DE-9C4E-5C15E0D788D6.jpeg
0E1A77B5-4225-4EE0-AED9-7ED9E691BD0B.jpeg11485401-89A4-4F9C-8089-5D7EB68FD725.jpeg
These are a twist lock d-ring base. I have not been able to find out about a corresponding socket that would be on a deck For these drinks to be seated in. I spoke to the manufacture, he just said they build to the specs the military sends them.

Have any of you guys seen them in use or what these d-rings are used on?

I made a mock up out of 5/8” plywood.
5376C706-83A3-40C4-A962-61CEDE566874.jpeg
Anyway, this is one of the things I’ve been up to.
 
OP
C

cbacres

Well-known member
Joined
May 28, 2010
Messages
5,998
Location
SW Florida
Picked up another shipper damaged cabinet.
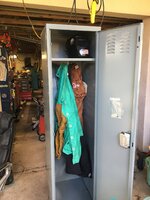
This is a tall locker, it’ll be used for my welding leathers, aprons and other miscellaneous long stuff.
Might keep the in-laws transportation in there too.
Here it is.
C99E8F24-39AE-4D13-8225-6AF1D61C64D5.jpeg
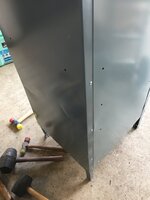
The worst damaged area.

0B2187E0-877C-4121-A823-4A530FA05213.jpeg
I think one or two of these hammers will get it done.
6D84F316-377E-4B20-91B4-9FC345128935.jpeg
I found that screwing a block of wood in the corner really sped things up. The panels gave way to the gang of hammers right away, but a little tool much. The block being Ridgid in place stabilized the movement of the sheet metal.
07F76D2F-5E48-4993-B575-AA76F1304E7D.jpeg
After-
5F06C655-4E33-4B7A-B61E-254AD12F6966.jpeg
Test loading .
F0B90014-160B-4075-9748-7DC7C4176E68.jpeg
I drilled out the pop rivets holding the shelf and lowered shelf to make putting welding shield in easier.
62394B70-F073-48DC-855A-0C5EB19F708B.jpegNext the legs get cut off and a caster frame built.
I’ll make the frame a little wider than locker to help with stability, I’ll make the extra width a storage area to get some more stuff off the floor.
Now I need to get a poster to hang inside door!
 
OP
C

cbacres

Well-known member
Joined
May 28, 2010
Messages
5,998
Location
SW Florida
I had a caster frame from some card file style cabs I sold a while back. The back casters are fixed, I’ll give it a try, but I usually like all swivels.
7ADC09EA-F35B-42AF-8907-645D88BA957B.jpeg
Just needed to take a section out to match the depth of the locker.
DBE07003-F124-4CAC-A17E-C9F4E7F4211D.jpeg
Clamped and ready to weld.
DCE2CF12-7779-4D05-A897-CCE2D968072F.jpeg
Welding complete and back on the ground.
7B27273E-CCB7-4A55-83E3-7ED3D5DD5F35.jpeg
I hate the movement with the fixed casters. The width will make it cumbersome to move around, so off with these casters.
 
OP
C

cbacres

Well-known member
Joined
May 28, 2010
Messages
5,998
Location
SW Florida
Laying there waiting to be cut on.
42A26143-F770-40BC-AB1F-46BEC889055E.jpeg
The grinder and cutoff wheel makes quick work.
EF03407A-6522-4D68-9A89-81D8A6B5FC5C.jpegMy nice assortment of chisels also helps insure I’ll have the right tool for the job.🤔
B361206E-9743-40C4-9CF5-3940D5565EE7.jpeg
The replacement casters mounting plate looks like they were taken off by a gorilla, a little adjustment was needed to flatten out.
270610F3-1874-4EE7-ABB0-38FE63AD2627.jpegBack to my trusty “collection” of chisels and punches drawer, yep, found a suitable long punch that allowed to me tap on the mounting plate, as the swivel prevented direct hammering.
I’ll have to admit some time may go by without touching some of my tools, gotta dig through the pile, but usually find something that fits the task at hand.😁
25721758-7ABD-4EAE-B63F-89B9DF487E5F.jpegFlattened and ready to install.3B6E868B-6D9D-4373-936D-66068B2A0389.jpeg
I don’t usually weld the casters on, but this will likely not be the permanent frame for the locker. The locker buy was a opportunity purchase and I wanted to get on wheels and in operation right away.

All painted and lubing the bearings.
391D6347-FDFB-496B-B45D-263810BCA2D7.jpeg
I left the frame wider as I’m going to set a Kennendy side box next to it and get it back to use instead of sitting on a shelf. The is a temporary holding spot in shop while I’m doing my purge.
 

Attachments

  • 0F2A6F47-6F58-43BF-AD1B-51C8BD10499F.jpeg
    0F2A6F47-6F58-43BF-AD1B-51C8BD10499F.jpeg
    554.9 KB · Views: 14
OP
C

cbacres

Well-known member
Joined
May 28, 2010
Messages
5,998
Location
SW Florida
Been a while, time flys.
Heres a quick and dirty project I had to throw together Saturday night.
My son finally started on the slab and footer for his house and detached garage. At the end of the day Saturday, my buddy noticed the bucket on the rented mini excavator didn’t have a grading bucket and we had a lot of footers to dig.

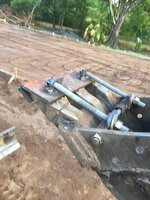
I took lots of pictures and measurement, had a hour drive to design it and dug through the steel pile when I got home. It needed to be bolt on and some means to tighten against the bucket teeth.

Heres my creation.
88A5B568-7027-4DA8-92AE-BDA9743D110D.jpeg
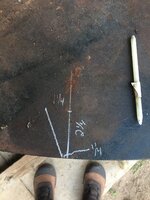
I layer out the approximate shape of the tooth.
90E1EFF3-FAA5-4B42-A40B-A5AE60BC08EB.jpeg
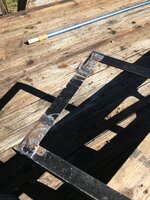
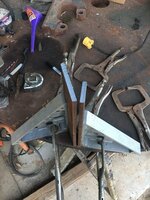
I wanted to leave a open area so the bucket teeth would slide into the attachment as tight as possible. I welded the two flat bars in the spaces between the teeth. Love to be able to shoot the gaps with my mig. The fireball angle hold everything in place .56CECE7D-80DD-4496-A194-8FC86D200BCC.jpeg
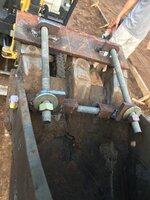
Used a couple of pieces of round stock to brace up the other side.
6E421A4A-8860-49E2-B6A0-1C52E0B6CB62.jpeg

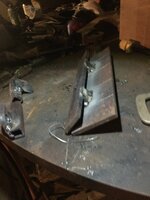
Cut some eye pads off misc shapes I had. These will be for the 5/8” allthread to mount to.
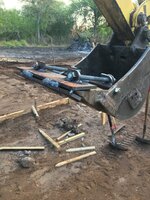
D2F14B53-0F1A-42F9-A211-7FCBC4CA388C.jpegUsed square tube for the other end on the mounting system. These will slide over a 13” long 5/8” allthread that will go through existing holes in the bucket. I used larger holes than needed as I wanted slop in with the all thread as I know the plates and upper mounts would be out of alignment.

I was rushing to get done and didn’t take many pictures.

Here it is mounted to bucket.
C45BB941-3751-4F08-A650-DED1F094F491.jpeg4D62B404-68BC-4583-B925-6B051D9CAE8B.jpeg
63C7D841-D548-4A8C-B616-85F4FE0C0484.jpeg
It went right on as designed and was solid. They dug quite a bit of footer with it and it worked perfect to scrape the bottom of the footer with the blade.
I used flux core wire and didn’t even take the time to chip the slag, figured the dirt wouldn’t care!

All in all, took about 1-1/2 hours to fab up, would of been quicker if I had know exactly how the mounting part was going to be when I started.
 
OP
C

cbacres

Well-known member
Joined
May 28, 2010
Messages
5,998
Location
SW Florida
Nice job Craig.
It's always interesting to see what is made when the material available in the scrap bin dictates the design.
Thanks

Scrap bin? That’s my shop stock!

Yes, you’re right. I didn’t show the other pieces I pulled out first and abandoned after I simplified the final.

My son told me it didn’t fall right off when unbolted yesterday, had to convince it with a hammer.
 
To avoid these ads, REGISTER NOW!
OP
C

cbacres

Well-known member
Joined
May 28, 2010
Messages
5,998
Location
SW Florida
Here’s a ****** job I had to do at home.

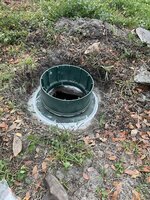
I have a filter on the effluent side of my septic tank, needs a cleaning about once a year. So, a while back I decide to make some access covers to make this simple. Last year my wife asked if they could be bought so I didn’t have to spend time making them. I found some composite risers and covers, ordered a set so I could knock this off my list. Ordered last May, installed today. 🤣🤣🤣.

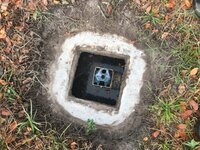
The concrete tank is made with concrete plugs with bevel edges to fit in the top. I’ve always cemented these in place to seal from water intrusion.744B1BCB-92DF-4AC8-AA02-23169DD541C1.jpeg
Ground the top of the tank to clean for sealant.
B8EC172D-88CE-4ABB-A261-1406DE7E8B32.jpeg
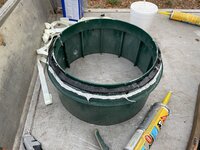
Base ring in place. Used a strip of butyl caulk and a bead Sika Flex polyurethane sealant. There's 1/4” stainless wedge anchors anchoring it down.
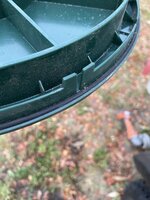
4F8A61D8-D4B8-4BBC-B7BC-D64423F91FD0.jpeg

Added sealant to bottom of riser, it sets right into the base ring, 4 stainless screws holds it down.
24138C24-6323-4F0C-8E65-62389033B3F1.jpeg
3B8D30CD-F6E1-4508-B37C-1A1E77E99666.jpeg
It’s a lot sturdier than I expected. I’ll probably will bed in some sand mix just to add some mass to it.

The lid didn’t come with any sort of gasket, but has a groove that 1/8” oring stock fits into, too bad they didn’t make the riser and lid a little tighter tolerance so the oring would seal against top of riser! I ordered some flat gaskets that will seal it up.
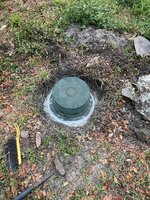
49643F54-064E-435C-91E3-02E4F6787FE4.jpeg
Lid in place.
4EC77426-3F9B-4307-9183-F93BAA78FA78.jpeg
 

Bob Heine

ALLIANCE MEMBER
Joined
Oct 24, 2009
Messages
10,708
Location
Boca Raton, Florida
Lid in place.
4EC77426-3F9B-4307-9183-F93BAA78FA78.jpeg
Craig, was Shorty giving you advice? I see a sledge and holes missing their screws. I would ignore Shorty and use one of these things instead:
Chest 1 Drawer 1.jpg
 
OP
C

cbacres

Well-known member
Joined
May 28, 2010
Messages
5,998
Location
SW Florida
Craig, was Shorty giving you advice? I see a sledge and holes missing their screws. I would ignore Shorty and use one of these things instead:
Chest 1 Drawer 1.jpg
About the only thing Shorty is allowed to hold in his hand while here is a beer!
Theres stainless screws for the lid, I’m expecting my gaskets anytime, will screw down then.
Thought I’d need to small sledge to remove some of the cement used over the years to seal the plug, but it all popped right off.
 
OP
C

cbacres

Well-known member
Joined
May 28, 2010
Messages
5,998
Location
SW Florida
As if I needed add another semi project to the shop.
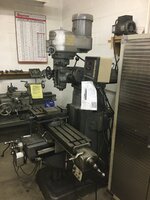
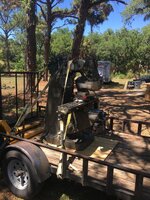
A auction notification found me and this Bridgeport was in it.
72437DF8-2DC3-4D23-B38C-F9DB34F4240D.jpeg

Been keeping a semi eye out for one of these.
The auction was small and not heavily advertised, only 17 bidders. The mill was last on the list and I was lucky to get it, and at a great price.

Chris B takes the award for enabling me on this buy.

Auction was last Sunday, picked up today. The PO rented a forklift to load out all the machinery in his shop. I ran the lift when moving my mill as it was probably one of the heavier items there.

Rigging up.
2A5E8109-70BA-404D-B335-8D05F959D081.jpeg
Another load going home.
3F69FD4B-649C-4FA3-8FE0-CEA07ABA8049.jpeg
The hoist I put in last year sure was worth it.
D86FFF6C-831F-4DE8-B8E9-2743E65D7127.jpegEB8BCFCC-8D91-4CEA-9355-A11E4CA55AC9.jpeg
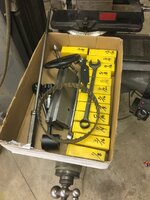
He handed this box of extras to me!
02EDFC3E-17DE-4579-AE0B-07DE96409FE8.jpeg
I need to build a mobile base for it and buy a VFD converter as it’s a 3 phase motor.

Thats is for now.
 
OP
C

cbacres

Well-known member
Joined
May 28, 2010
Messages
5,998
Location
SW Florida
As if I needed to add another semi project to the shop.
A auction notification found me and this Bridgeport was in it.
72437DF8-2DC3-4D23-B38C-F9DB34F4240D.jpeg

Been keeping a semi eye out for one of these.
The auction was small and not heavily advertised, only 17 bidders. The mill was last on the list and I was lucky to get it, and at a great price.

Chris B takes the award for enabling me on this buy.

Auction was last Sunday, picked up today. The PO rented a forklift to load out all the machinery in his shop. I ran the lift when moving my mill as it was probably one of the heavier items there.

Rigging up.
2A5E8109-70BA-404D-B335-8D05F959D081.jpeg
Another load going home.
3F69FD4B-649C-4FA3-8FE0-CEA07ABA8049.jpeg
The hoist I put in last year sure was worth it.
D86FFF6C-831F-4DE8-B8E9-2743E65D7127.jpegEB8BCFCC-8D91-4CEA-9355-A11E4CA55AC9.jpeg
 
OP
C

cbacres

Well-known member
Joined
May 28, 2010
Messages
5,998
Location
SW Florida
Been busy thinking about stuff in shop🤣. Between some working on weekends, helping son get his house slab done, family visits, I’ve had a serious time erosion.

Was out of town for work and the wife worked today, so we thought it’d be nice to meet for breakfast when she was off this morning.

So my daily scan of MP had a post for a industrial cabinet.
8B80BD54-222F-4CF0-83D0-5CFC5CDEC9AE.jpeg
The faded Lista label jumped out at me, the ad was only 20 mins old and I messaged that I’d take it. Well, $hit, got to meet wife in 20 minutes, the seller is 20 minutes away, the other direction, and I still haven’t put my boots on.
Messaged the guy, offered to send PayPa, as I would be able to get there for a hour or so, he said he’d hold for two hours.
It turned out to be a moving sale and he was happier to sell it for $20 than I was to pay $20.
I also picked up a pack and play playpen for when our grandson visits.

This cab is smaller than the typical Lista, but it’ll be perfect for some heavier stuff and not take up as much concrete.
 
To avoid these ads, REGISTER NOW!
Top Bottom