To avoid these ads, REGISTER NOW!

E-tek Restorations: PROJECT THREAD

tcianci

Well-known member
Joined
Feb 7, 2009
Messages
4,242
Location
Walpole, Ma
Re: E-tek Resto's 56 Chevy Truck

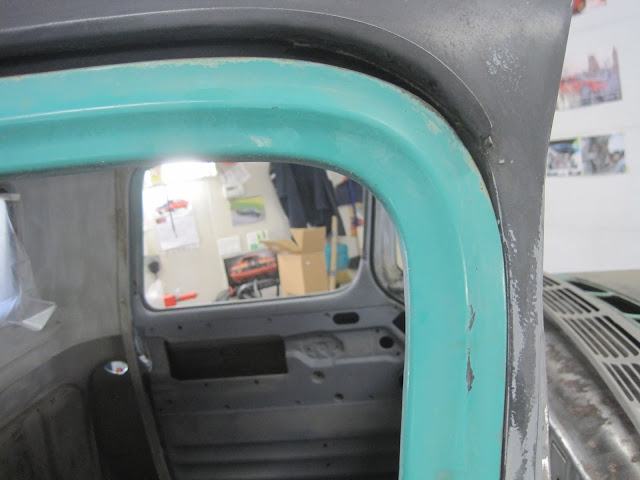
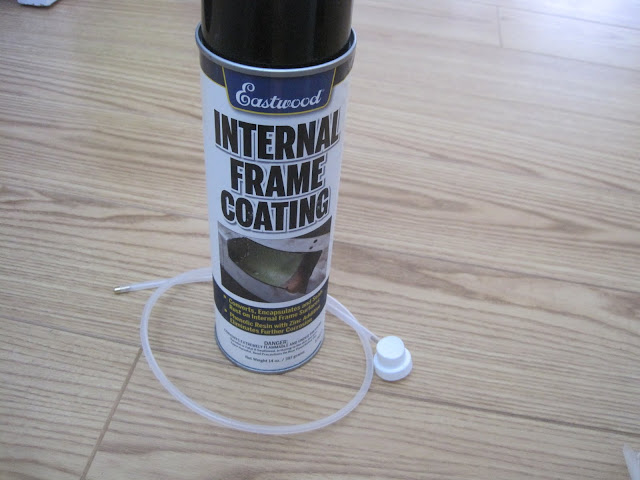
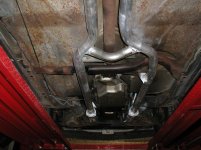
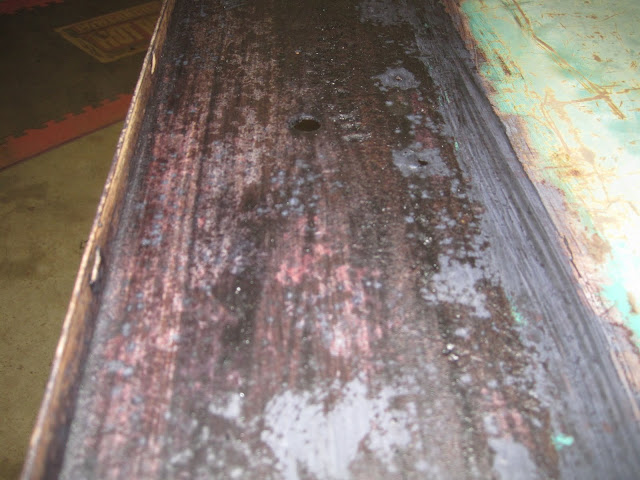
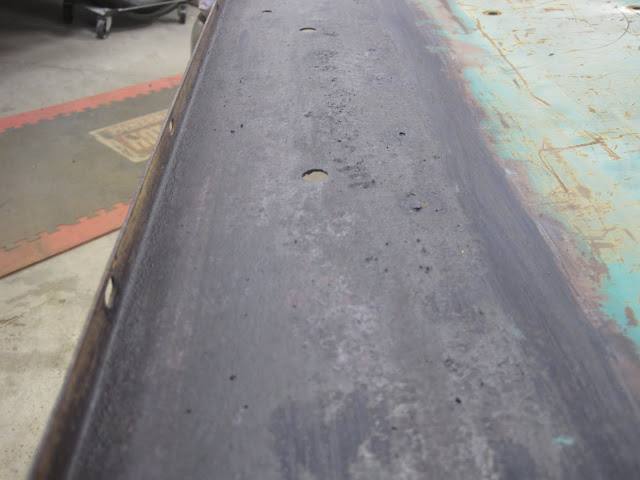
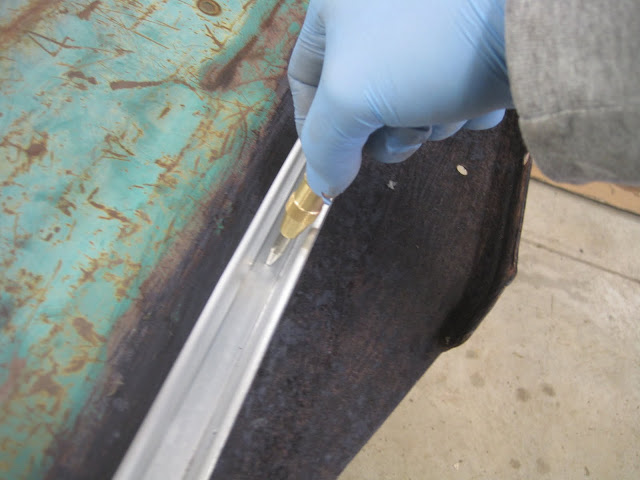
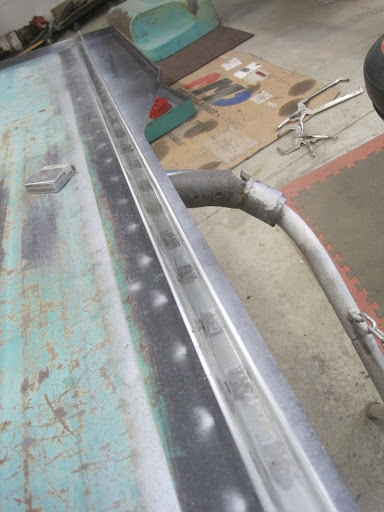
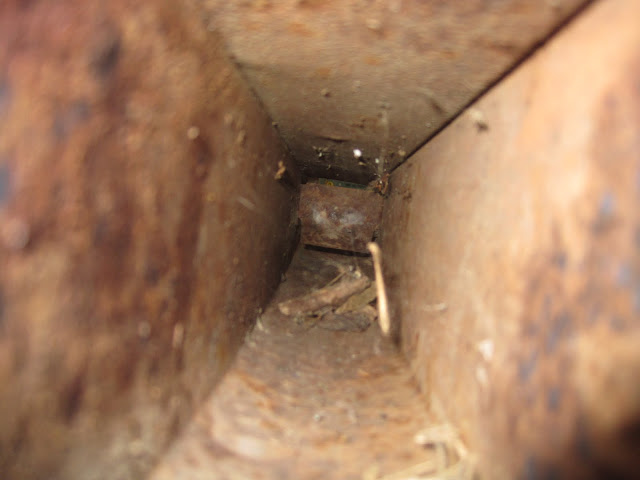
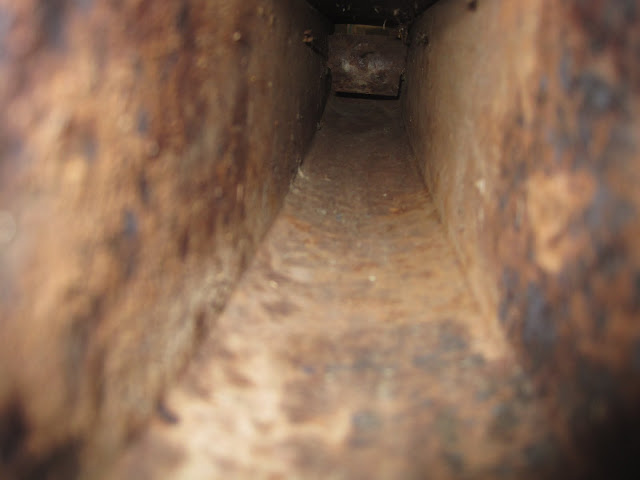
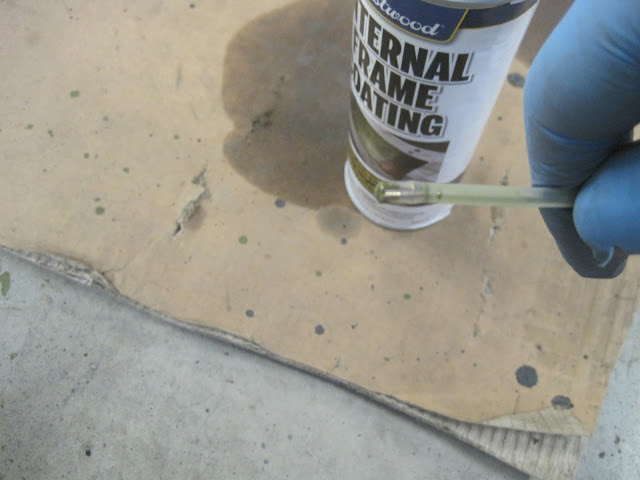
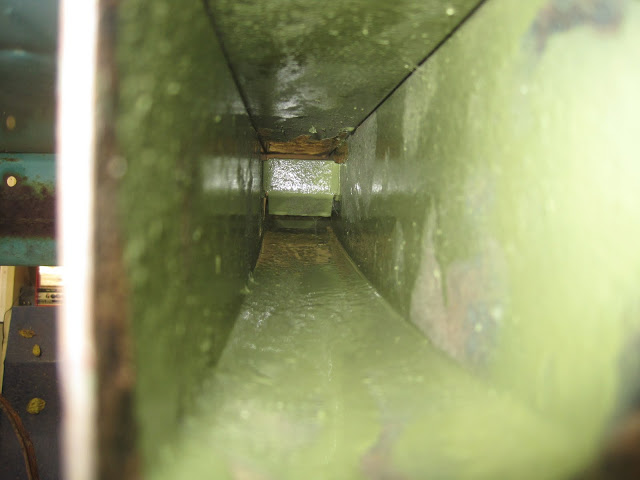
I just wanted to add that POR 15 does make what they call a dauber. It is a cotton type head on a long wire handle and the purpose is to be able to slobber POR 15 on the inside surfaces of stuff that you can't directly see like the roof pillars and door posts. I'm a big fan of the stuff and have used it for years. You really do need to follow all the instructions though which is a small price to pay for the performance of the product. There are always many references to the fact that the stuff fades in UV exposure but according to their web site, it does not affect the rust stopping capabilities of the product. Also it needs a fair amount of sunlight to make it happen. If you use it on the inside of anything or on the under side of a vehicle, you will have no issues.
 
To avoid these ads, REGISTER NOW!

Motown 454

Well-known member
Joined
Sep 25, 2008
Messages
1,359
Re: E-tek Resto's 56 Chevy Truck

It looks great. nice job on the repairs. I like the door install helper.
 
OP
E

e-tek

Well-known member
Joined
Dec 19, 2007
Messages
10,690
Location
Saskatoon, SK
Re: E-tek Resto's 56 Chevy Truck

OK, so after a few days of issues with photo-downloads I have a bunch of stuff to post up here. As welll, I "have" to be in Vegas on the weekend to entertain customers, so I wanted to get a bunch done of the 56 prior to that.

Quite a few guys have mentioned the "E-tek Exclusive Door Handler" (Patent Pending) ;).

IMG_3383.JPG


IMG_3384.JPG


IMG_3385.JPG


Here's a quick vid of it in action:

<table style="width:auto;"><tr><td><a href="http://picasaweb.google.com/lh/photo/PevbKbEMt52S9FWfOywq9FlZW-ZyZBoKW5nxMTP0o8Y?feat=embedwebsite"><img src="http://lh5.ggpht.com/_aqOnCVYCxbQ/TOviQ4OiQGI/AAAAAAAAFrQ/k0zjxMy6oPY/s144/MVI_3434.jpg" height="108" width="144" /></a></td></tr><tr><td style="font-family:arial,sans-serif; font-size:11px; text-align:right">From <a href="http://picasaweb.google.com/edanneberg/56ChevyTruck?authkey=Gv1sRgCIjCgqCRhtegnwE&feat=embedwebsite">56ChevyTruck</a></td></tr></table>

Upon installing the door hinges, I found I was short a couple captive nuts like this one:

IMG_3400.JPG


I've searched for these before in town with no luck and a regular nut doesn't work the same (imagine that!), so I threw a few together like this:

IMG_3401.JPG


IMG_3402.JPG


I welded the nut and washer together, plus added some mig wire material to get the thickness I needed (it gets HOT!)

IMG_3403.JPG


Then I cut it into a rectangle like the original and finished it out on the grinder.

IMG_3405.JPG


This is the first cut. Another round of mig-fill and grinding and it was pretty much a match. Total time to make 2 was about 15 minutes.

IMG_3406.JPG


Next, I bent up a piece to "cature" the captive nut:

IMG_3408.JPG


IMG_3408.JPG


IMG_3414.JPG


IMG_3416.JPG


IMG_3417.JPG


This was then welded in place on the door. With the doors now fully secured, I went on to aligning the doors and their gaps.....which is often a painfully slow and labourious process.:thumbup:
 
OP
E

e-tek

Well-known member
Joined
Dec 19, 2007
Messages
10,690
Location
Saskatoon, SK
Re: E-tek Resto's 56 Chevy Truck

In camera shots, the gaps look fairly decent, but in person, the Right door gaps are wide and the Left door is tight. In the photo below, one can see how the gap widens to the bottom:

IMG_3440.JPG


IMG_3445.JPG


The hood to fender gaps are fairly good, signifying the hood and fenders are where they should be:

IMG_3442.JPG


Close-ups show inconsistencies in the panel corners. Wouldn't pass muster in todays vehicles!

IMG_3444.JPG


Here's a spot that would seem to suggest the door was hanging low/tipped forward on the hinges. But there is only so much that could be corrected. Perhaps the roof pillar shifted when the roof panel was replaced (at a bodyshop in 2008 I think).... let's see what we can do.

IMG_3450.JPG


The left door edge touched the fender upon opening. I tweaked it a bit with a crescent wrench, then ground the edge straight.

IMG_3456.JPG


The old paint was stripped with 40, then 80 grit on the DA, then a skiff of filler was put where required.

IMG_3458.JPG


Of course before filler is applied to most areas, metal work is performed. I like to use the old, pick and dolly method where possible - and on these panels, thick and accessable, there's little reason not to:

IMG_3461.JPG


My trusty contour tool is used a lot on panels like these:

IMG_3463.JPG


My favourite dolly is still this lead dolly. It was made for me by an old metalworker in my Dad's shop, some 30 years ago. He melted a few lead filler rods into a tin can, then popped it out once it cooled. The duct tape was added to protect me from long-term lead exposure, but it also helps dull the effects of the pick hammer.

IMG_3464.JPG


This area had a silver-dollar sized dent in it. After picking, filing and then the DA, it's good enough to be finished in primer only.

IMG_3465.JPG


Tools of the trade....

IMG_3387.JPG
 

larry_g

Well-known member
Joined
Apr 28, 2007
Messages
16,867
Location
oregon
Re: E-tek Resto's 56 Chevy Truck

Next, I bent up a piece to "cature" the captive nut:

IMG_3408.JPG


IMG_3408.JPG


IMG_3414.JPG


IMG_3416.JPG


IMG_3417.JPG


This was then welded in place on the door. With the doors now fully secured, I went on to aligning the doors and their gaps.....which is often a painfully slow and labourious process.:thumbup:

http://www.mcmaster.com/#weld-nuts/=9upgz5

Look near the bottom of the above linked page. I used a bunch of these on the old ford.

lg
no neat sig line
 
OP
E

e-tek

Well-known member
Joined
Dec 19, 2007
Messages
10,690
Location
Saskatoon, SK
Re: E-tek Resto's 56 Chevy Truck

Got the box pieces delivered from one of the owners (Thanks Trent!). Rust-wise they are really decent and the rails are pretty much perfect - not sure if they had them pritected all their life, or if they just never threw anything in the bed! The real work will be the rails that hold the bed wood, which I'll remove and fabricate from new.

IMG_3470.JPG


IMG_3480.JPG


IMG_3483.JPG


IMG_3485.JPG


IMG_3486.JPG


IMG_3487.JPG


This is the worst looking spot and it's not even rusted-through:

IMG_3476.JPG


I just recieved a shipment from Eastwood and will be putting their rust products through some testing. One item mentioned earlier is their Internal Frame Coating spray, which comes with an applicator that can get the product into spaces that other products can't reach. I'll use this in some of the areas on this truck, like the WS pillars. Stay tuned for that process.

IMG_3494.JPG
 

Toolhorder

Well-known member
Joined
Nov 9, 2009
Messages
5,711
Location
Montana
Re: E-tek Resto's 56 Chevy Truck

Man I just got my 56 Chev truck running again. Took it to the shop and didn't have brakes!
Inspection reveals I need wheel cylinders all the way around. It maybe a good time to swap out the drop axle I got a couple years ago and install a disc brake kit up front.

My driver's door on the bottom hinge is gone. I think the door is rotted though not the cab. How does it attach e-tek?
 
OP
E

e-tek

Well-known member
Joined
Dec 19, 2007
Messages
10,690
Location
Saskatoon, SK
Re: E-tek Resto's 56 Chevy Truck

Man I just got my 56 Chev truck running again. Took it to the shop and didn't have brakes!
Inspection reveals I need wheel cylinders all the way around. It maybe a good time to swap out the drop axle I got a couple years ago and install a disc brake kit up front.

My driver's door on the bottom hinge is gone. I think the door is rotted though not the cab. How does it attach e-tek?

You likely have the same issue - just worse. The lower door hinge pocket may be rusted or broken away from the door. When you pop off the covers you should be able to tell. You could remove the door and either weld it up or replace the pocket entirely.
 

Toolhorder

Well-known member
Joined
Nov 9, 2009
Messages
5,711
Location
Montana
Re: E-tek Resto's 56 Chevy Truck

You likely have the same issue - just worse. The lower door hinge pocket may be rusted or broken away from the door. When you pop off the covers you should be able to tell. You could remove the door and either weld it up or replace the pocket entirely.

Yeah if you grab the door and lift up/down on it the bottom hinge looks like it's not connected at the door side. My door isn't very good the bottoms are rusty. I'm hoping she's not too bad. I'll be learning a lot when I start really working on it.
 

LSVLance

Well-known member
Joined
Jul 17, 2010
Messages
298
Location
Peoria, AZ
Re: E-tek Resto's 56 Chevy Truck

I just sat down and read the whole thread...FANTASTIC work e-tek.

I recently restored the bottom side of my 1985 Monte Carlo which was basically covered with surface rust everywhere the factory undercoating didn't seal up. I tried every rust dissolver I could get my hands on and had similar results as it appears you have had. Our bead blaster became my best friend during the job.

I used almost exclusively all Eastwood products re-coating everything and was very impressed with the results. I believe you'll be happy with them as well. Their Rust Encapsulator topped with their chassis black can turn even the worst looking metal beautiful again.

I'll post some before and after pics of my car, then wait patiently for more updates on your '56 project. The last picture was taken after three summers of driving, and it all still looks great underneath.
 

Attachments

  • PC040129.jpg
    PC040129.jpg
    139.1 KB · Views: 236
  • PC040131.jpg
    PC040131.jpg
    145.5 KB · Views: 246
  • P5220084.jpg
    P5220084.jpg
    133.8 KB · Views: 251
  • P5220088.jpg
    P5220088.jpg
    142.9 KB · Views: 235
  • P5060879.jpg
    P5060879.jpg
    128.5 KB · Views: 227

caper150

Well-known member
Joined
Nov 20, 2007
Messages
1,106
Location
Mantorville MN
Re: E-tek Resto's 56 Chevy Truck

e-tek;1183939I just recieved a shipment from Eastwood and will be putting their rust products through some testing. One item mentioned earlier is their Internal Frame Coating spray said:
http://lh6.ggpht.com/_aqOnCVYCxbQ/TO3JuMWQVsI/AAAAAAAAGGU/Vh7A8I584Pw/s640/IMG_3494.JPG[/IMG]

Everything is looking great, I am very interested in how this internal frame coating is going to work. I can't seem to find it on their site though.
 
OP
E

e-tek

Well-known member
Joined
Dec 19, 2007
Messages
10,690
Location
Saskatoon, SK
Re: E-tek Resto's 56 Chevy Truck

OK boys, LOT's to report.....hope I don't put anyone to SLEEP here!

Above, I removed the bed rail edges from the bed-sides:

IMG_3470.JPG


Once removed, I prepped the rusted area under and below the rails, then applied two coats of Eastwoods Rust Converter. As can be seen, the Rust Converter appears to soak into rust as the first coat partially disappears after a few hours, but then a supsequent coat fills those areas.

IMG_3501.JPG


IMG_3502.JPG


While the converter dried, I prepped the rails by drilling holes ever 3 inches, then transferring these measurements to the bed side and grinding the area clean for the spot welds to adhere to. To ensure everything remained protected, I went over both the rail and the ground spots with a high-Zinc "weld-Through" primer.

IMG_3509.JPG


IMG_3511.JPG


IMG_3520.JPG


IMG_3523.JPG


Prior to applying the Weld-Through primer, I cleaned the rails and the bed side with a wax& Grease Remover:

IMG_3522.JPG


IMG_3521.JPG


Spot-welding with a MIG welder can be really easy - if you prep it right, use the correct technique - and make yourself one of these tips:

IMG_3526.JPG


What this does is let the MIG gas out as you hold the tip close to the surface to be welded:

IMG_3534.JPG


IMG_3533.JPG


A little grinding and another application of the Zinc Weld-Through Primer and wala! (OK, the wala was about 2 hours per side total!)

IMG_3530.JPG


IMG_3531.JPG


IMG_3535.JPG


One more tip: the settings suggested for 16 gauge steel on the welder where too cold for spot-welding. I turned up both the heat AND the wire speed to get the wire to flow right.

IMG_3537.JPG
 
OP
E

e-tek

Well-known member
Joined
Dec 19, 2007
Messages
10,690
Location
Saskatoon, SK
Re: E-tek Resto's 56 Chevy Truck

Earlier I mentioned getting Eastwood's Internal Frame Coating with it's special conical applicator. Although specifically developed for coating the insides of enclosed frames, I am sure it will be shown to be much more versatile.

At one end of the box sides there's this enclosed area. As can be seen, it's already rusted and there's no really good (standard!) way to apply a rust converter or encapulator. This is one of several situations where I would try Eastwoods new product and applicator.

IMG_3499.JPG


First thing I did was clean it out with a blow gun and welding rod, making sure to remove any spider webs, rust, leaves and really loose rust and scale:

IMG_3500.JPG


I then applied the product, running the special applicator up and down the enclosed area until all sides where well-coated. The conical applicator sprays the product into four directions at once, coating much more area than would otherwise be possible.

IMG_3517.JPG


The product is of a consistency that allows it to both sty where sprayed, as well as move into crevasses and pinch-welds.

IMG_3519.JPG


For more information on this product and to check out MORE ways we can use this and other products to arrest rust to help our projects survive many more years, go to: www.e-tekrestorations.com
 

MP&C

Well-known member
Joined
Oct 21, 2009
Messages
4,396
Location
Leonardtown, MD
Re: E-tek Resto's 56 Chevy Truck

One more tip: the settings suggested for 16 gauge steel on the welder where too cold for spot-welding. I turned up both the heat AND the wire speed to get the wire to flow right.


Been wondering when you were going to open that welder up a bit... sure helped the welds flow out more, not standing so tall now.
 
To avoid these ads, REGISTER NOW!
OP
E

e-tek

Well-known member
Joined
Dec 19, 2007
Messages
10,690
Location
Saskatoon, SK
Re: E-tek Resto's 56 Chevy Truck

After cleaning up and welding the rails on the other side of the box-sides, I cleaned up this side and treated the rust spots with Metal Ready, letting them sit while I went onto the end piece.

IMG_3539.JPG


IMG_3540.JPG


This end piece is in decent shape, save for the heavily rusted area that lies near the bottom part. Luckily, I can again use two of the new Eastwood products that just came in: Rust Converter and Rust Encapsulator. The Encapsulator can be top-coated as needed, so I'll apply high-build primer to it in order to smooth out the pitting.

IMG_3542.JPG


IMG_3543.JPG


IMG_3544.JPG


Before I can use the new Eastwood products however, I have to let the MetalReady (Phosporic Acid) work overnight. While that's happening, I've got some metal to work and filler to knock down.

After a bunch of pick and dolly work as shown earlier, I applied a skiff of lightweight filler and began sanding it down with my In-line sander with 80g paper:

IMG_3547.JPG


After knocking down the rough stuff with the pneumatic, I always switch to hand-sanding with a long-block:

IMG_3548.JPG


The most importnant part of sanding filler is knowing when to stop and when to do something other than sand and fill, fill and sand....you can see in the next pic a bit of metal showing through. This is a high spot and to keep sanding would just knock down the filler around it, making the matter worse. The thing to do now is to tap it down with an "off-dolly" technique, so as to pick up the low spot next to the high spot, at the same time.

IMG_3551.JPG


Another place you can see, this time a low spot, that needs to be worked is shown below, at the right edge of the filler. At the top portion, the filler is "feathering", meaning it's sanding back due to being at the same height as the surrounding metal. Just below that part though, the filler has a straight edge to it - showing that the board is not touching the filler here as the board rides aling the metal next to it. Again, this needs to be bumped from the underside, to bring the area closer to even with the surrounding metal. If done correctly, next time over with the board, the filler should sand away from the edge.

Although there's areas of rust that can be properly treated with various products, the wheel wells have a heavy coating of surface rust best treated by sand blasting. This will also bestclean the areas between the double-walled areas to which I can then apply a couple coats of POR15.

IMG_3545.JPG
 

stricht8

Well-known member
Joined
Apr 20, 2008
Messages
1,714
Re: E-tek Resto's 56 Chevy Truck

Does this product completely dry or does it bear some similarities to wax coatings?

Earlier I mentioned getting Eastwood's Internal Frame Coating with it's special conical applicator. Although specifically developed for coating the insides of enclosed frames, I am sure it will be shown to be much more versatile.

At one end of the box sides there's this enclosed area. As can be seen, it's already rusted and there's no really good (standard!) way to apply a rust converter or encapulator. This is one of several situations where I would try Eastwoods new product and applicator.

IMG_3499.JPG


First thing I did was clean it out with a blow gun and welding rod, making sure to remove any spider webs, rust, leaves and really loose rust and scale:

IMG_3500.JPG


I then applied the product, running the special applicator up and down the enclosed area until all sides where well-coated. The conical applicator sprays the product into four directions at once, coating much more area than would otherwise be possible.

IMG_3517.JPG


The product is of a consistency that allows it to both sty where sprayed, as well as move into crevasses and pinch-welds.

IMG_3519.JPG


For more information on this product and to check out MORE ways we can use this and other products to arrest rust to help our projects survive many more years, go to: www.e-tekrestorations.com
 
OP
E

e-tek

Well-known member
Joined
Dec 19, 2007
Messages
10,690
Location
Saskatoon, SK
Re: E-tek Resto's 56 Chevy Truck

The owners came by a few days back to check progress. I really enjoy doing restorations - and one of the main reasons are the owners. While some shops hate it when the customer comes in, I'd hate it if they didn't! Their interest and enthusiasm is contagious and makes me want to do it right and to give them back the nicest vehicle I'm capable of building. Sometimes, when I'm feeling lazy, or distracted, I think about getting it back to them so they can enjoy it. Keeps me on track.:metal:


Got to use my new Hydraulic Ram kit. My last one never returned from a "borrower".... Whie it isn't used all that often, when you need it, it's the best tool you have!

IMG_3561.JPG


If you look closely at the bottom edge of the fender pic, the lower corner of the is rolled in and under. I used the ram to hold it openand square and then hammer&dollied the convex area to hold it.

IMG_3563.JPG


IMG_3564.JPG


IMG_3568.JPG


After working the fender straight, then metal-finishing the edge, I shot some guide coat onto the areas I've been working on to help see the highs and lows. Lots of hard work to come getting it straight enough for paint!

IMG_3569.JPG
 
OP
E

e-tek

Well-known member
Joined
Dec 19, 2007
Messages
10,690
Location
Saskatoon, SK
Re: E-tek Resto's 56 Chevy Truck

Is the metal prep you use before the por15 just phophoric acid or does it have something else in it?

Thanks, Joe

The active ingedients in Metal Ready (now called Prep n' Ready) are Phosphoric Acid and Zinc Phosphate. PA converts Iron Oxide (red rust) into Ferric Oxite, a black inert substance. MetalReady also leaves a Zinc coating that stops further rusting and is a great for welding on and for conditioning aluminum and smooth new steel for coating with any other paints, including their POR15.

Does this product completely dry or does it bear some similarities to wax coatings?

Eastwoods Frame Coating stays tacky like the wax coatings, but I beleive it's more ofan oil-based solution.

Cheers!
 
OP
E

e-tek

Well-known member
Joined
Dec 19, 2007
Messages
10,690
Location
Saskatoon, SK
Re: E-tek Resto's 56 Chevy Truck

Got the fenders back from the blaster today - which clearly showed the rust and damage that need attention.....lots of attention...

BEFORE:

IMG_3545.JPG


IMG_3475.JPG


AFTER:

IMG_3583.JPG


IMG_3582.JPG


The BEAUTY of sandblasting...

IMG_3589.JPG


Work ahead!!

IMG_3585.JPG


IMG_3586.JPG


IMG_3590.JPG


Lots of dents and dings too:

IMG_3594.JPG


Also some WAVES:

IMG_3619.JPG


The photo above was gone over with a body file to show the high and low spots. I guess this would be considered an old-school technique. It was common during the days of all-metal finishing and leading, both to show and knock down high spots and to shape lead filler.

IMG_3616.JPG


After you find the highs and lows, it's all about bumbing and picking up the lows, while tapping and shrinking down the highs.

IMG_3606.JPG


As discussed earlier, this is where I like to use my slap file, which helps shrink and show any high spots.

IMG_3608.JPG


When I need to weld where I want to do metal-finishing work, or if there's a possibility of getting it real close without having to use filler, I weld with the Oxy-A set up. Reason being is the softeness of the metal filler rod and the control you have in getting both the heat and the filler where you want.

IMG_3611.JPG


IMG_3612.JPG


A quick once over with an 80 Grit disc shows the highs and lows:

IMG_3613.JPG


Tap tap, file file, tap tap tap, file file file, bump....

IMG_3605.JPG


Another once over with the grinder...

IMG_3614.JPG


Rinse and repeat - no filler required! (Though the high-build primer will be blocked to make it perfect).

IMG_3615.JPG


Then the rusted areas where all cut out, the areas between two layers treated with MetalReady (Phosphic Acid/Zinc Phosphate) and patches made:

IMG_3595.JPG


IMG_3595.JPG


IMG_3596.JPG


IMG_3597.JPG


IMG_3600.JPG


IMG_3621.JPG


Tomorrow I'll shape and weld them in, then finish the metal work until they're ready to install. I'll finish everything once it's bolted onto the truck.

Thanks for looking!
 

Motown 454

Well-known member
Joined
Sep 25, 2008
Messages
1,359
Re: E-tek Resto's 56 Chevy Truck

It looks great. I have a friend that can do the pick and file. You guys amaze me with that .
 

MalibuLX3

Well-known member
Joined
Jun 2, 2009
Messages
319
Location
Rochester, MI
Re: E-tek Resto's 56 Chevy Truck

Amazing work! I always get excited to see what you've been up to whenever I see you post an update
 
OP
E

e-tek

Well-known member
Joined
Dec 19, 2007
Messages
10,690
Location
Saskatoon, SK
Re: E-tek Resto's 56 Chevy Truck

Amazing work! I always get excited to see what you've been up to whenever I see you post an update

That's damn nice to hear....sometimes one wonders if anyone cares! But I do know I enjoy watching others (Boyd Who being the latest!) and the trucks owner wants a record of the build.
 
OP
E

e-tek

Well-known member
Joined
Dec 19, 2007
Messages
10,690
Location
Saskatoon, SK
Re: E-tek Resto's 56 Chevy Truck

Tonights episode: Out with the Old, in with the New....

Remember this...

IMG_3600.JPG


These need some shaping first:

IMG_3622.JPG


IMG_3627.JPG


IMG_3625.JPG


This is the tool you rarely hear autobody guys talk about: Copper (Aluminum works too) to back-up your welds. Makes burn-through much less likely because it heat sinks. Also lets you fill holes easily by welding against it, filling the hole, then removing the copper. You can make this for nothing, or buy them for 10-40bucks...

IMG_3629.JPG


The weld at the top wasn't quite hot enough....so I turned up the amperage a bit and could see the second one lay flatter (penetrate more).

IMG_3630.JPG


IMG_3640.JPG


IMG_3633.JPG


I'll get all the other bits welded on, then metal finish everything best I can, then bolt them up to finish the bodywork.:beer:
 
Last edited:
OP
E

e-tek

Well-known member
Joined
Dec 19, 2007
Messages
10,690
Location
Saskatoon, SK
Re: E-tek Resto's 56 Chevy Truck

Today I only had an hour, due to also welding up an engine stand from some scrap metal I had lying around. It for my Merc's flathead, which I'm getting ready to rebuild. I'll put a thread for the stand in Fabrication...

IMG_3677.JPG


So, I continued with patching the inner seams of the rear fenders. Though no-one will ever see this part, I'll still finish to the same level of detail - but no filler back here as it could attract mositure.

The welds look like SH!T on this piece - but I was trying not to burn through the delicate fender edge...(ya - that's my story!! ;))

IMG_3686.JPG


IMG_3681.JPG


IMG_3682.JPG


Over the next two weeks I have some time set aside to move this baby through to primer - we should see a whole "new" truck" shortly - stay tuned!
:smoke:
 
OP
E

e-tek

Well-known member
Joined
Dec 19, 2007
Messages
10,690
Location
Saskatoon, SK
Re: E-tek Resto's 56 Chevy Truck

I did get something done after that little eye-opener...including finishing up the box pieces, welding in the last of the structural flanges on the box fenders, some more metal-work and applying POR15 to the inners and the worst rust spots on the other pieces.

There where a few spots that where easily enough metal-finished. Again, I used the metal file to show high and low spots, then either bump or pic the spots until they are even enough to file them flat:

IMG00173.jpg


Be sure to find the appropriately shaped dolly's and hammers when working the metal:

IMG00170.jpg


IMG00168.jpg


When the file-marks hit all the metal surfaces at the same time, the surface is very close to even. A quick going-over with 80G on the DA, then high-build primer should do it here.

IMG00174.jpg


After the metal work and grinding down the last of the flange welds, I put a coat of PO15 on the inners.

IMG00178.jpg


Getting closer to primer. Next week I have several days set aside to get'er there!:metal:
 
OP
E

e-tek

Well-known member
Joined
Dec 19, 2007
Messages
10,690
Location
Saskatoon, SK
Re: E-tek Resto's 56 Chevy Truck

Here's a situation some of you may be very interested in! A few weeks ago I did some panel alignment, then took a break from it to work on the box pieces and get everything caught up. Today after finishing those pieces, I went back to the doors. After a while of bustin' *** trying to even-up the gaps, I decided to break out the tape measure (better late than never!).... well if one side isn't 1/2 a-friggin-inch larger than the other....which explains a lot - except for what the FRIG the shop was thinking that replaced the roof panel...

IMG00187.jpg


Everyone knows the gaps on these old trucks weren't perfect from the get-go and this could have been factory, but I highly doubt it!. I'd bet it happened when the shop they had it at replaced the roof panel. While a 1/2inch may not seem like much when replacing an entire roof - and the doors still open and closed - and the W/S fit....kinda....but now we see why things don't work out if you don't triple-check everything, perferably against factory specs - or at least make sure everything "gaps-out" when your done! Yet you'll often see guys adding or removing metal (or filler!) to door and hood and fender edges to get perfect gaps. While that may be "OK" in certain circumstances, had I done that here, the gaps would never have been right - and the W/S may have always been lose, perhaps leak, or even popping out when flexed!

Looking back, this is likley why the W/S popped out so easily earlier. As I had said, I've learned to sublet glass to the pro's (more skill, better tools, fresh urethane, clip inventory) but then it popped out, practically on it's own! As well, even though the doors opened and closed, the gaps where not even and could not be evened out without something major happending (like grinding here and adding there!). But the corrrect action here is tweaking the openings until they meet the measurements in the Factory Assembly Manual we bought earlier....yippee
 
Last edited:

MN4x4

Well-known member
Joined
Sep 5, 2010
Messages
1,443
Location
Minnesnowta
Re: E-tek Resto's 56 Chevy Truck

Even though I don't comment often I am fascinated with your build and pour over it every time you post. Please keep the pictures and comments coming for those of us who live vicariously through your work!

P.S. - why doesn't Mrs. E-tek ever help you out and get in a photo? ;-)
 
OP
E

e-tek

Well-known member
Joined
Dec 19, 2007
Messages
10,690
Location
Saskatoon, SK
Re: E-tek Resto's 56 Chevy Truck

Even though I don't comment often I am fascinated with your build and pour over it every time you post. Please keep the pictures and comments coming for those of us who live vicariously through your work!

P.S. - why doesn't Mrs. E-tek ever help you out and get in a photo? ;-)

These comments mean a lot and I appreciate the time you took to post it.

Although Mrs E-tek does come into my lair once in a while - and even takes photo's for me sometimes - she really hasn't "helped me" on a resto since she got involved in the race car. Having said that, she really wants that Mini-Cooper and I'll bet I can talk her into taking a few shots with it when spring rolls around! You'll just hafta keep watching my site to find out!:bounce:
 

MP&C

Well-known member
Joined
Oct 21, 2009
Messages
4,396
Location
Leonardtown, MD
Re: E-tek Resto's 56 Chevy Truck

...... While a 1/2inch may not seem like much when replacing an entire roof - and the doors still open and closed - and the W/S fit....kinda....but now we see why things don't work out if you don't triple-check everything, perferably against factory specs ......


Part of what you'll find, especially if you could park a few identical survivor vehicles together to verify dimensions, is that the factories in the 50's had so much inconsistency even against the factory spec that many restorations look at the fit details more stringently than when it passed across the assembly line. Sometimes "modifications" to gapped edges are required to meet the discriminating eye of todays standards of consistency-especially when customer driven.
 
Last edited:

HeyNow^

Well-known member
Joined
Jun 9, 2010
Messages
147
Location
Wv
Re: E-tek Resto's 56 Chevy Truck

All I need is some popcorn. I'm amazed at your talent and build. Look forward to it each time I sign on.

Thanks for taking the time to document this....for us!
 
To avoid these ads, REGISTER NOW!
Top Bottom